Galvanized Metal Star Garland | Pretty Handy Girl

Galvanized Metal Star Garland | Pretty Handy Girl

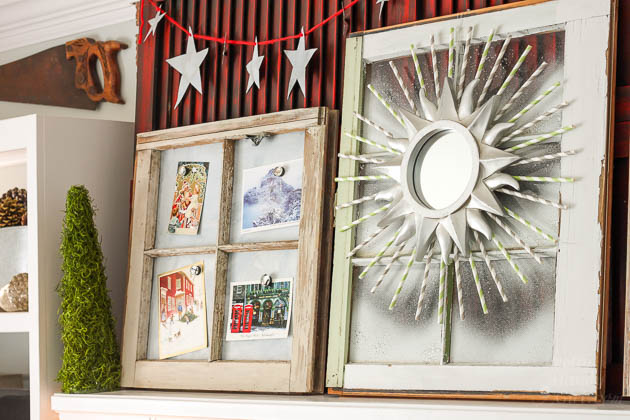
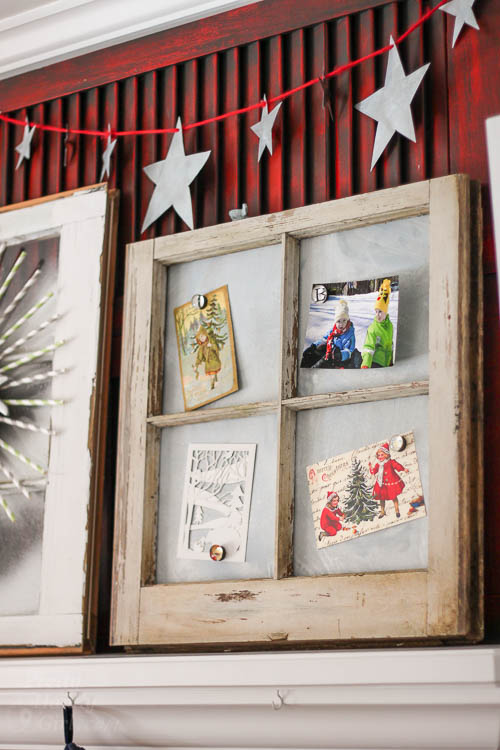
Remember when I told you I’ve been on a galvanized metal kick? Yes, you may have noticed my Rustic Metal Magnetic Window Frame on Monday. When I put the windows over our fireplace mantel, I knew there was something missing. I tried a few different garlands in the space, but nothing felt quite right. When I gazed upon the leftover galvanized metal, the idea to create a Galvanized Metal Star Garland was born.

Galvanized Metal Magnetic Windows | Pretty Handy Girl

Today’s post is part of the Deck the Halls DIY-Style tour hosted by Jen Woodhouse, If you are just hopping over today from Sawdust and Embryos, amazing vignette, right?! My favorite is the monogrammed scroll snowflake. Welcome to my little slice of DIY Blog heaven. I can’t wait to show you how I made several elements over our fireplace mantel.

Deck the Halls DIY Style | Pretty Handy Girl

The Galvanized Metal Star Garland is so incredibly easy to make. You’ll be looking for more places to decorate with a garland of stars.

Ready to get started? Grab these things and let’s make something stellar!

Materials:
(contains affiliate links)

Instructions:

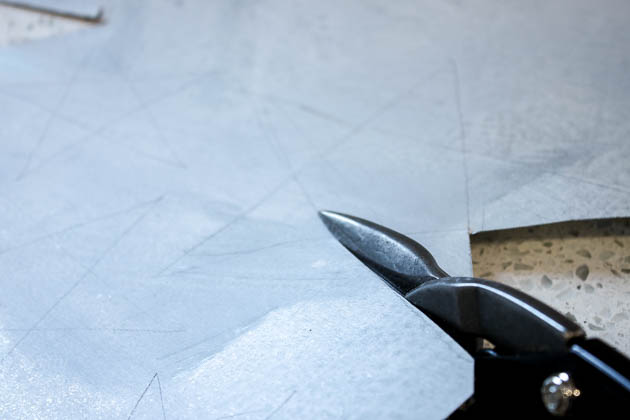
Draw stars on your galvanized sheet of metal. If you prefer a beautifully aged metal patina, you can follow this tutorial to make your metal age quickly.

Galvanized Metal Star Garland | Pretty Handy Girl

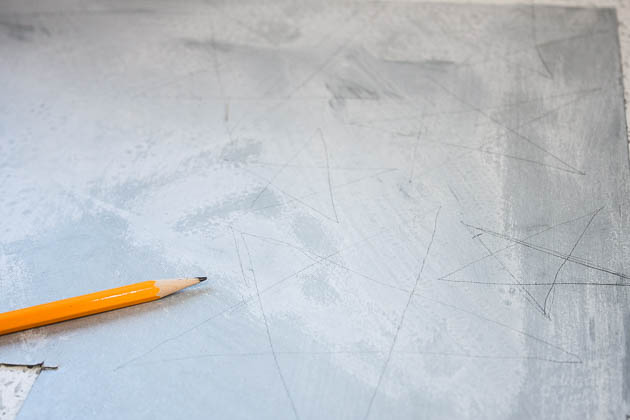
Cut out the star shapes with tin snips.

Galvanized Metal Star Garland | Pretty Handy Girl

Rub the pencil marks off the stars with a gloved hand. Read more

Rustic Metal Magnetic Window Frame | Pretty Handy Girl

Galvanized Metal Magnetic Windows | Pretty Handy Girl

I was really inspired by Laura Putnam’s new book: DIY Rustic Modern Metal Crafts. I love the look of aged galvanized metal and knew that our home needed more of it. Today I’ll share with you a tutorial to create your own Rustic Metal Magnetic Window Frame, inspired by Laura’s Vintage Window Memo Board. But, you’ll definitely want to get a copy of Laura’s book to learn how to make 34 more storage and decor items using galvanized metal!

Materials:
(contains affiliate links)

Galvanized Metal Magnetic Windows | Pretty Handy Girl

Optional: Silicone Caulk (for more secure metal)

Instructions:

Ready to make your own Rustic Metal Magnetic Window Frame? If you have newer galvanized metal, you can easily add an aged patina to metal following this tutorial. Prepare ahead of time, because it might take up to 8 hours to get the look you want. The sheet you see below was left overnight in the solution to get a nice white patina.

aged-galvanized-sheet-metal

Remove the glass panes from your old window.

old-window-pane

Measure the size of each pane.

measure-window-panes

Transfer your measurements onto the galvanized metal sheet. Read more

5 Steps for Beautiful Holiday Wreaths

5 Steps for Beautiful Holiday Wreaths

Hello friends, it’s Jessica from Decor Adventures. December is the most wonderful month of the year and these early days are perfect for holiday decorating. I’m sure you are decking your halls and getting ready to have a festive season.

One of my favorite ways to decorate for the holidays is to hang wreaths. I admit, I’m a wreath addict.  I have them in many sizes and many colors. They are the perfect holiday decor item and one of the easiest to use. Today I want to show you 5 steps for beautiful holiday wreaths, come see!

Materials:

5 Steps to Beautiful Holiday Wreaths

  • A wreath
  • Holiday lights or fairy lights
  • Ribbon
  • Ornaments
  • Holiday decor accessories
  • Scissors
  • Green twine
  • Batteries

The type of wreath you use for this project is up to you. The most common wreaths are evergreen and can be found at many retailers including grocery and home improvement stores. They also come in different types such as boxwood, fir, pine, cypress, and more. Real or fake wreaths will both work for decorating. Grab a wreath (or three!) and let’s get started.

5 Steps for Beautiful Holiday Wreaths:

1. The fluffing. Wreaths often get smushed during shipping. Pull out the branches and shape them in a nice circle. The before and after will be dramatic and can make the wreath even bigger. Real wreaths may have some dry spots or unshapely branches, which you can easily trim off.

5 Steps to Beautiful Holiday Wreaths

Read more

DIY Snowflake Christmas Trivets

Hey there, everyone!  It’s Katie again from Addicted 2 DIY.  I’m back with a Christmas tutorial that can pull double-duty as both Christmas decor and a useful accessory for your big family gatherings.  I don’t know about you, but in my family finding a spare trivet during Thanksgiving or Christmas meals is about as hard to find as an extra serving spoon.  We often find ourselves short one or two and holding hot dishes of food, while trying to decide if it’s cool enough to set on the bare table.  I decided that making my own simple and pretty trivets would solve some problems.  The fun thing is that you don’t have to just use these pretty snowflakes as trivets.  You can hang them as Christmas decor if you like!

snowflake trivet

To make these, purchase plywood (a 1 – 2′ square piece is all you need) or you can use scrap wood.  I used 3/4″ plywood. However, you can easily use 1/2″ or even 1/4″ if that’s what you have on hand.  It’s all about saving money this time of year, right?

Materials:
(contains affiliate links)

Instructions:

STEP 1:  Size your snowflake templates however you would like and cut them out of cardstock.

snowflake trivet step 1

STEP 2:  Trace the snowflakes with a pencil onto your plywood. Read more

Fall Home Tour 2015 | Pretty Handy Girl

Fall Home Tour 2015 | Pretty Handy Girl

When I got back from my extended stay in Houston (after my sinus surgery), I was so anxious to decorate for fall. All those magazines I’d been perusing and all the beautiful Instagram photos had me craving some beautiful autumn decor. It took me a few days to get my energy back after I got home. In fact, I was still feeling a little worn out when I spotted this post on Facebook about a local multi-family yard sale that ran Monday – Saturday.

Rustic Yard Sale

I thought it was a joke or a dream. But, something told me (more like fifty of my fans on Facebook) that I should get off the couch and high tail it to this sale. My sweet friend Candace from Rusted Roots Blog was easily persuaded to meet me there, so I wouldn’t be the only fool who fell for a yard sale mid-week.

We both filled our cars with some great finds! I got home and quickly put together a little pumpkin and rustic relics display by our side door.

Fall Home Tour 2015 | Pretty Handy Girl

Fall Home Tour 2015 | Pretty Handy Girl

Fall Home Tour 2015 | Pretty Handy Girl Read more