Beautiful Fall Tablescapes - Decorating Your Table for Fall

21 Beautiful Fall Tablescapes - Decorating Your Table for Fall
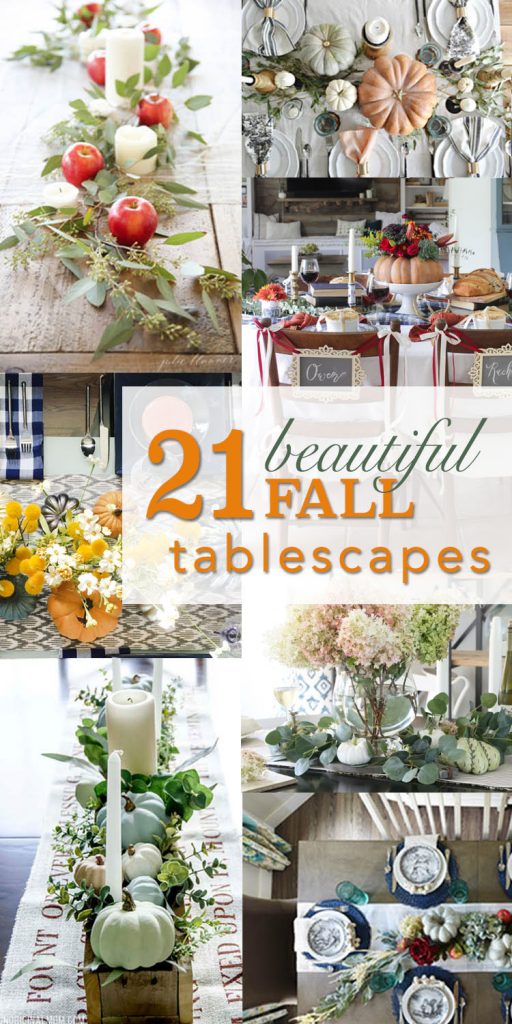
Beautiful Fall Table Decorations

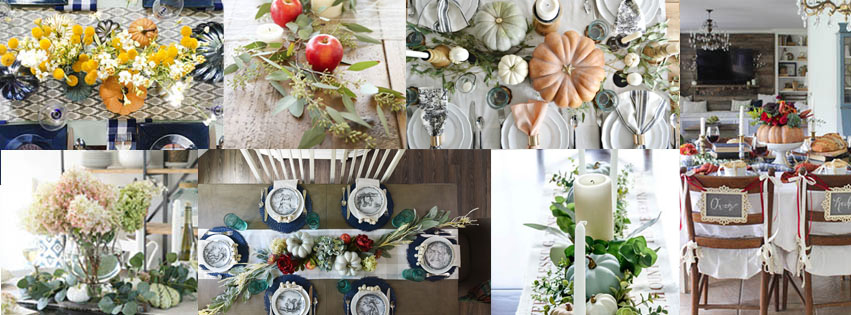
Fall is approaching fast! Are you looking for some inspiration for your fall table decorations this year? This collection of beautiful fall tablescapes is full of creative ideas to motivate and inspire you to create a gorgeous fall setting in your dining room.

Inspiration:

This fresh Fall Apple Tablescape by Julie Blanner is simple, inexpensive, and gorgeous! easy-centerpiece-for-beginners-julie-blanner

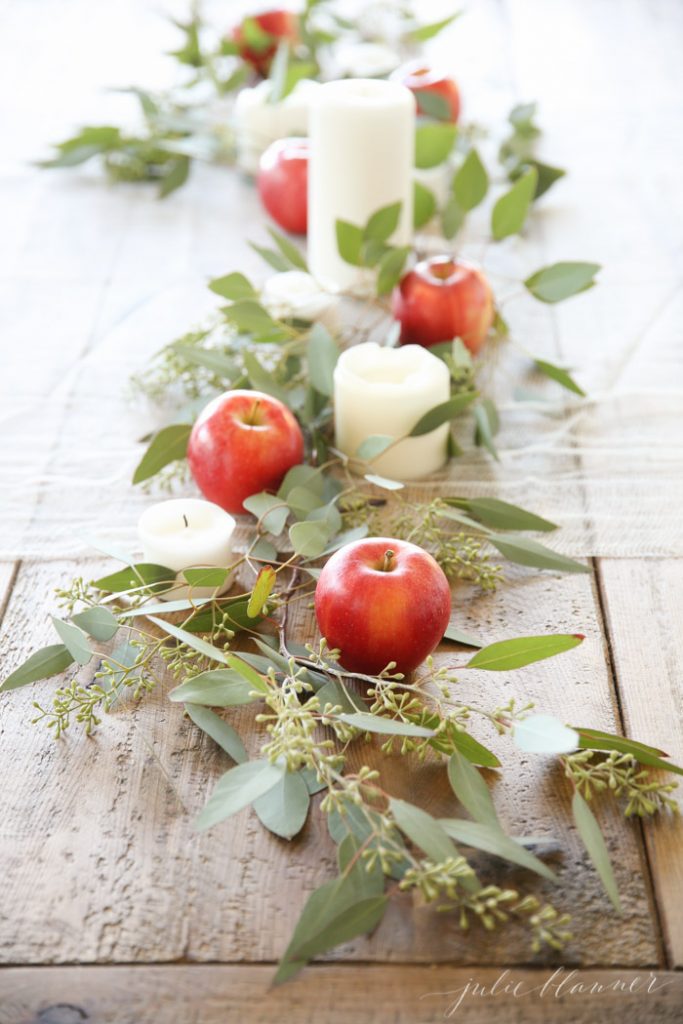
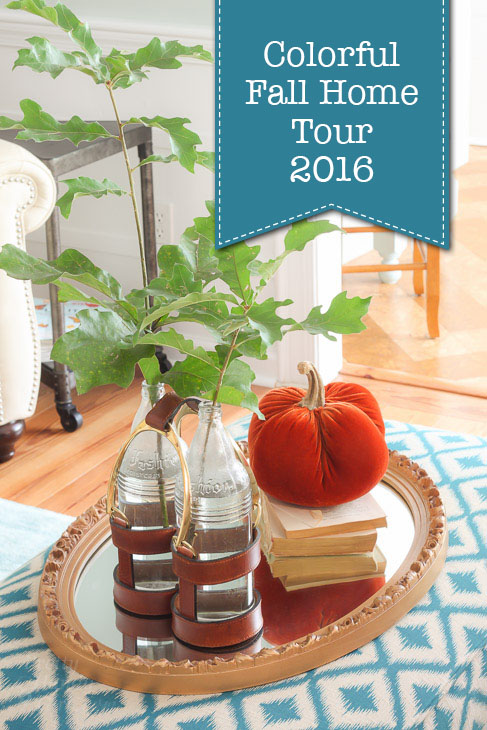
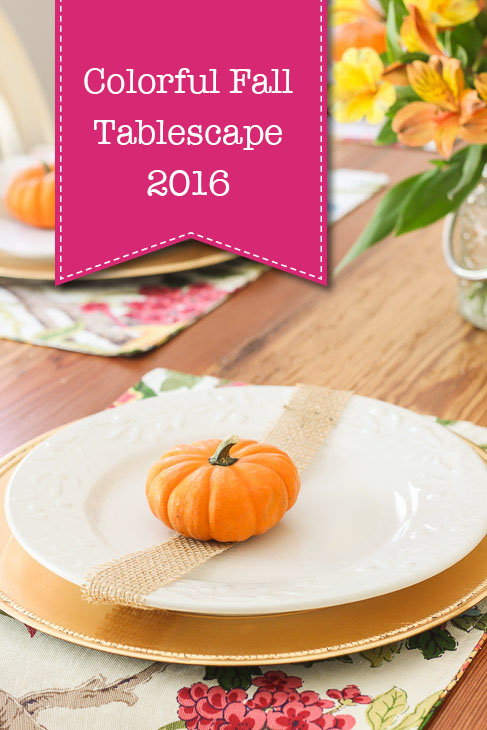
A beautiful floral and pumpkin Colorful Fall Tablescape with small little pumpkins on each plate is the perfect way to decorate your table this Autumn.fall-tablescape-orange-pumpkins-pretty-handy-girl

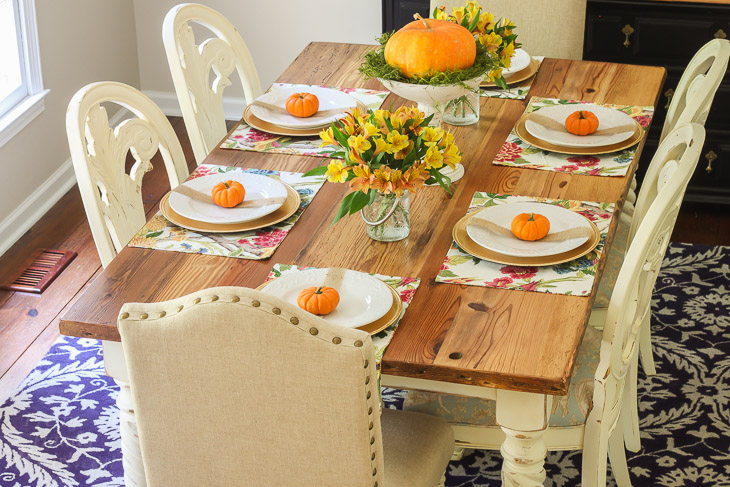
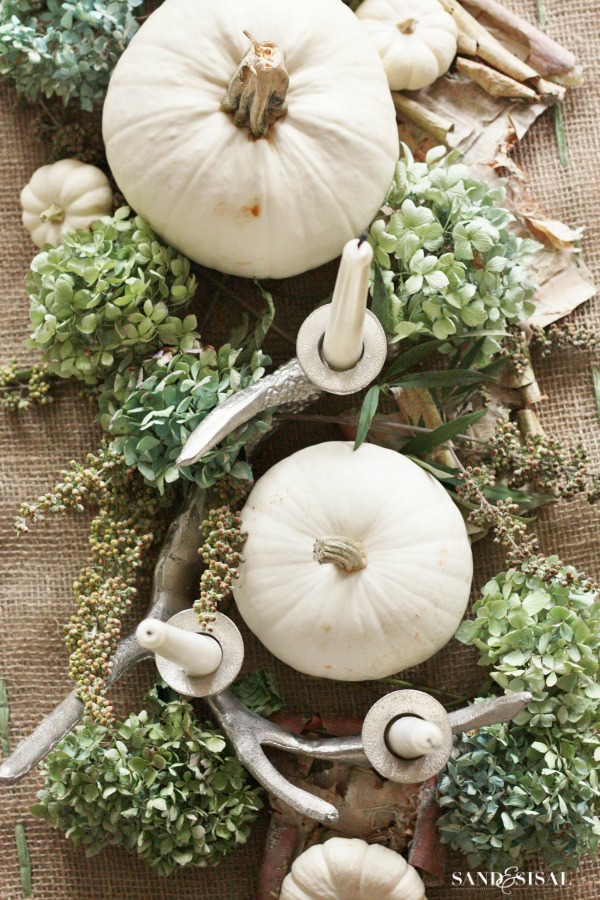
This elegant, clean and festive White Pumpkin Centerpiece by Sand & Sisal is sure to brighten up your dining room.
White-Pumpkin-Centerpiece-Sand-and-Sisal

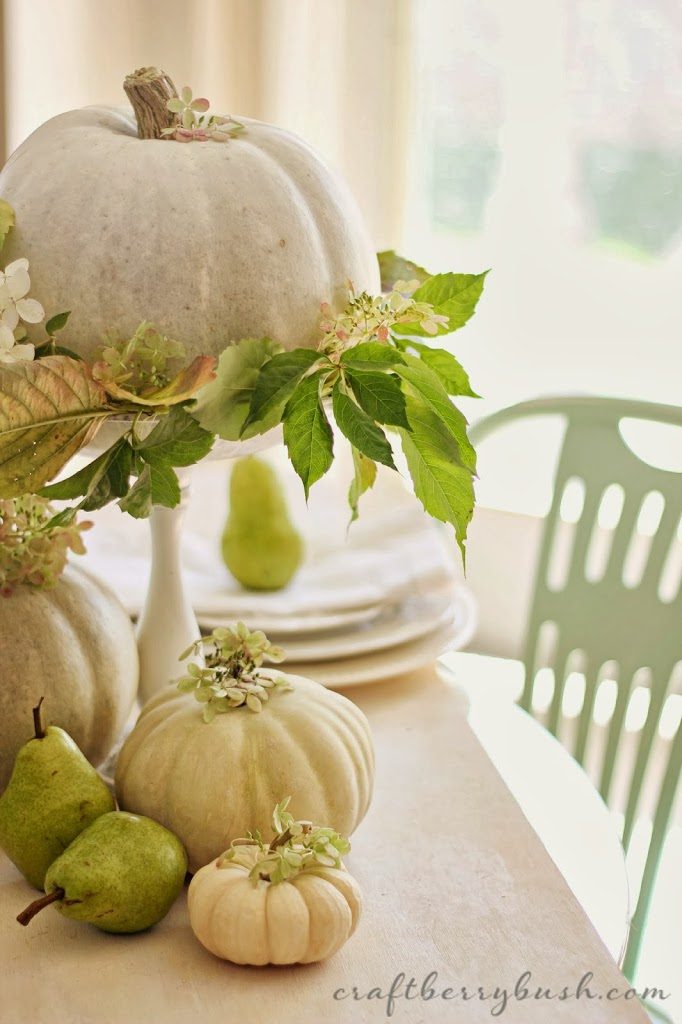
Feast your eyes on this softer Green and White Table Setting by Craftberry Bush.
neutral-fall-table-setting-craftberrybush

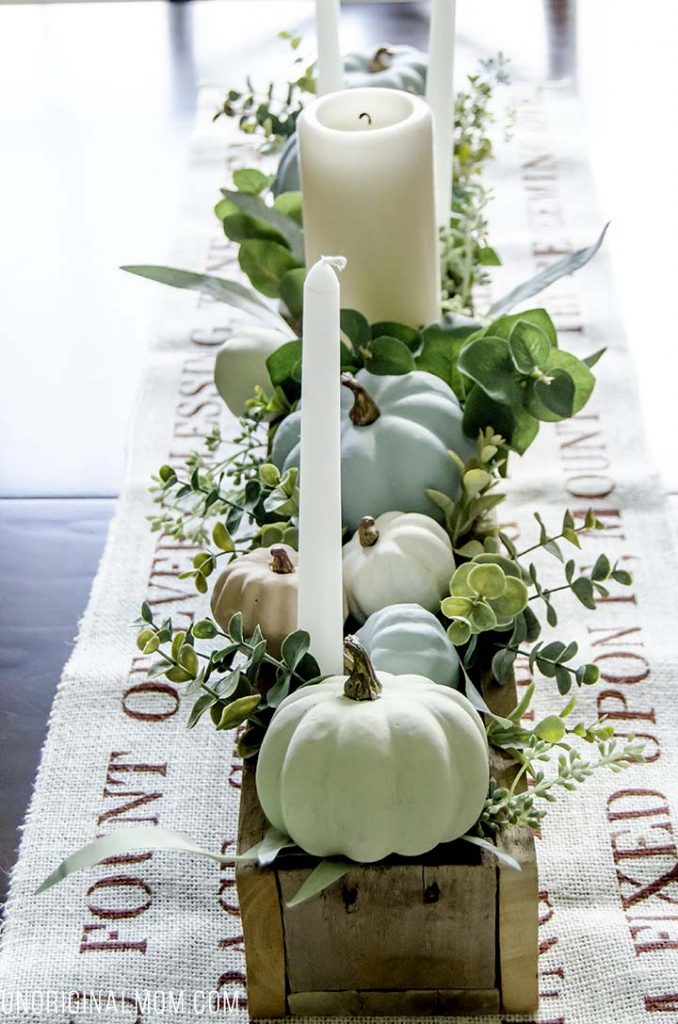
Fall Centerpieces with pastel Chalk Painted Pumpkins by Unoriginal Mom is so clever!
fall-centerpiece-with-chalk-paint-pumpkins-unoriginal-mom

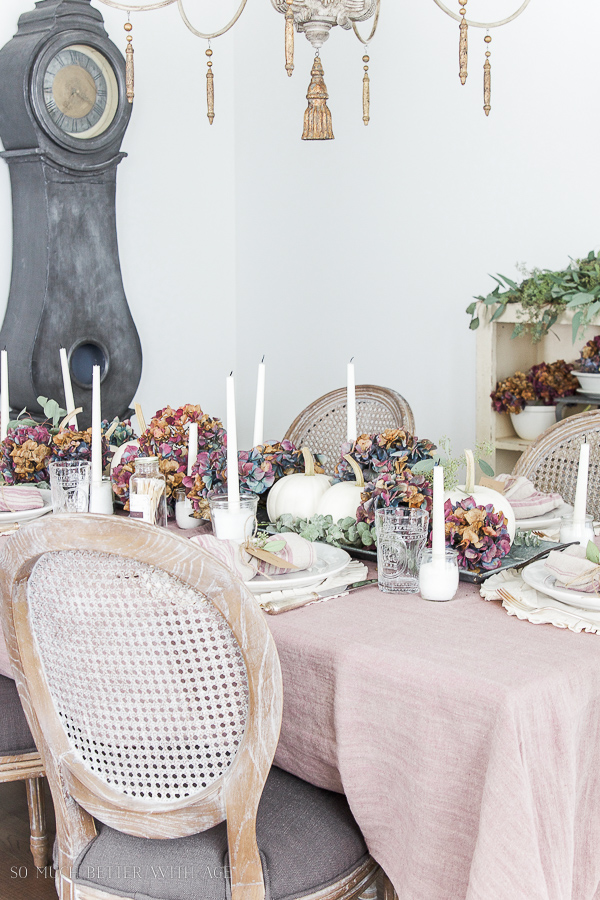
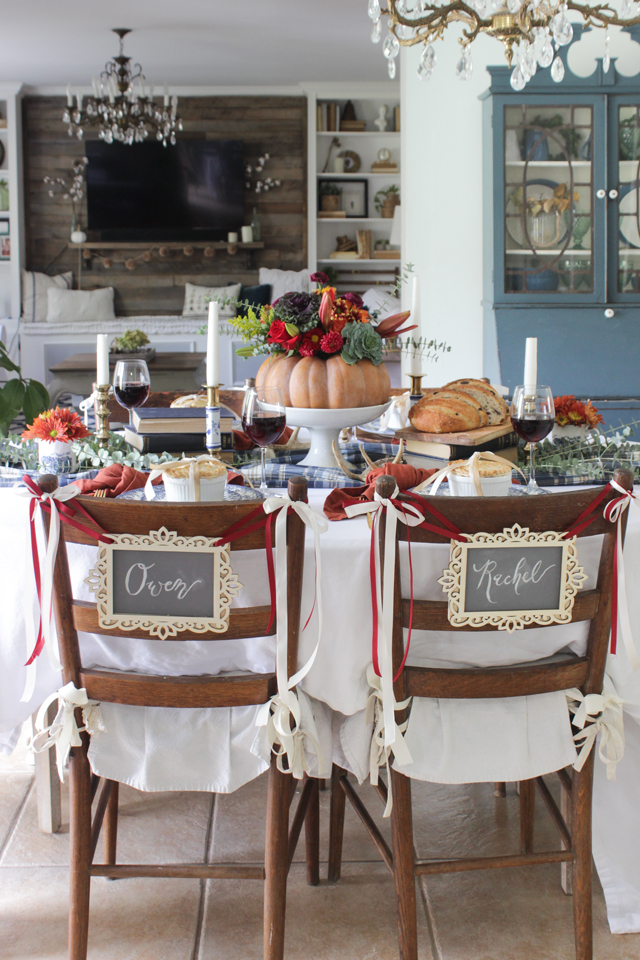
This french country inspired Fall Dining Room by So Much Better with Age is festive and elegant.
french-chandelier-mora-clock-dining-room-So-Much-Better-With-Age

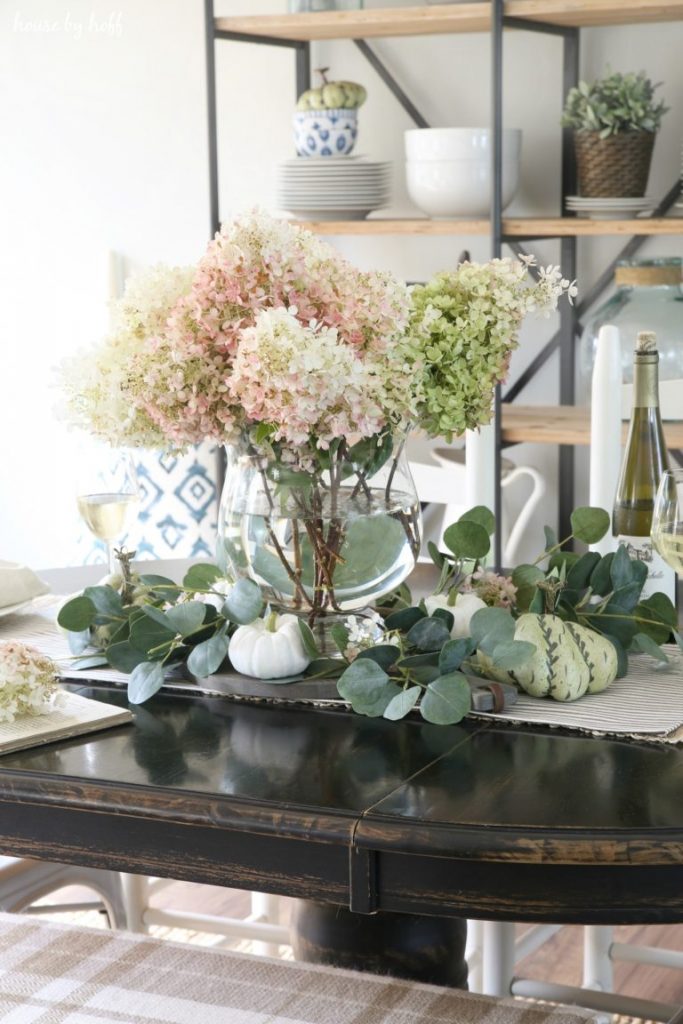
House by Hoff created this Gorgeous Fall Dining Room and Tablescape with a large glass bowl centerpiece that would look good on any table.
Early-Fall-Table-House-By-Hoff

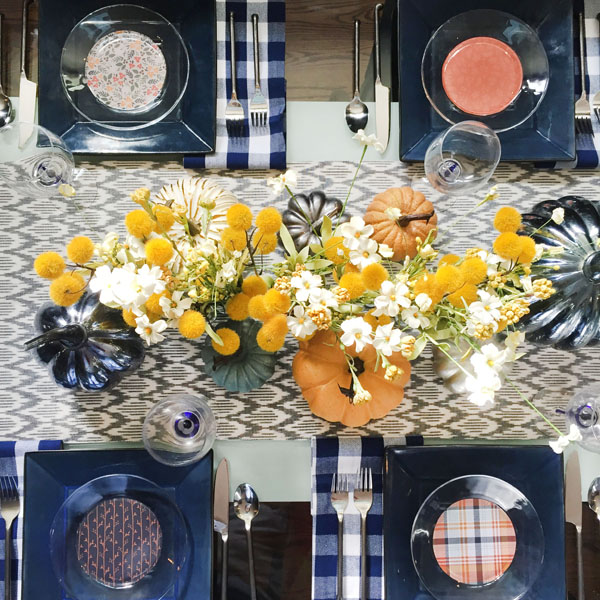
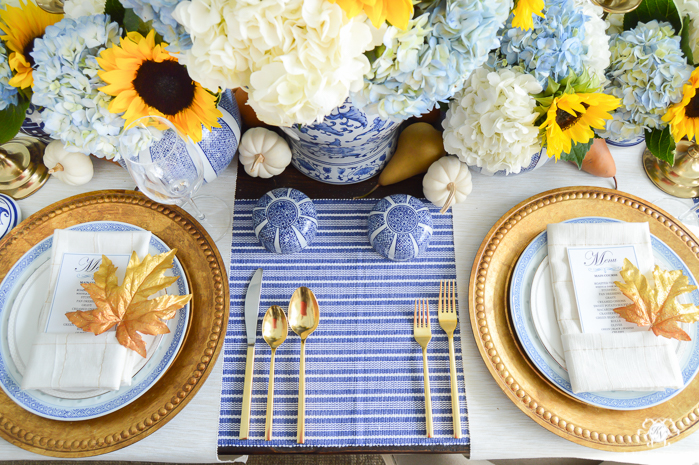
This amazing Blue and Yellow Seasonal Fall Tablescape by Blue I Style Blog emits pure happiness.
Blue i Style - ThanksgivingTableSquare

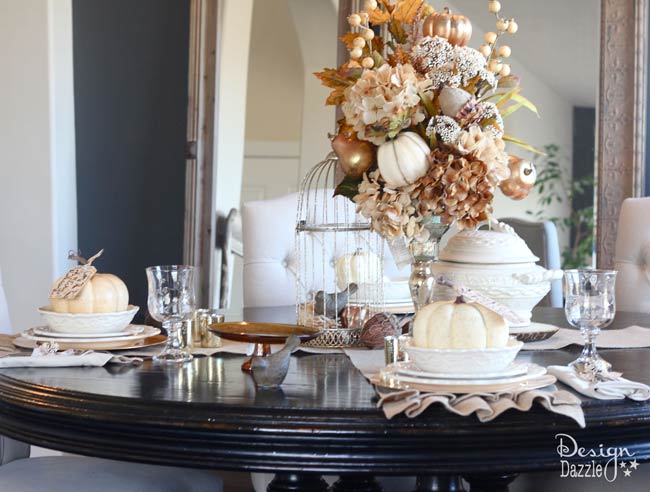
Gorgeous and tall, this Neutral Fall Tablescape by Design Dazzle has beautiful flowers. Don’t miss the clever addition of a birdcage.
Neutral-fall-tablescape-Design-Dazzle

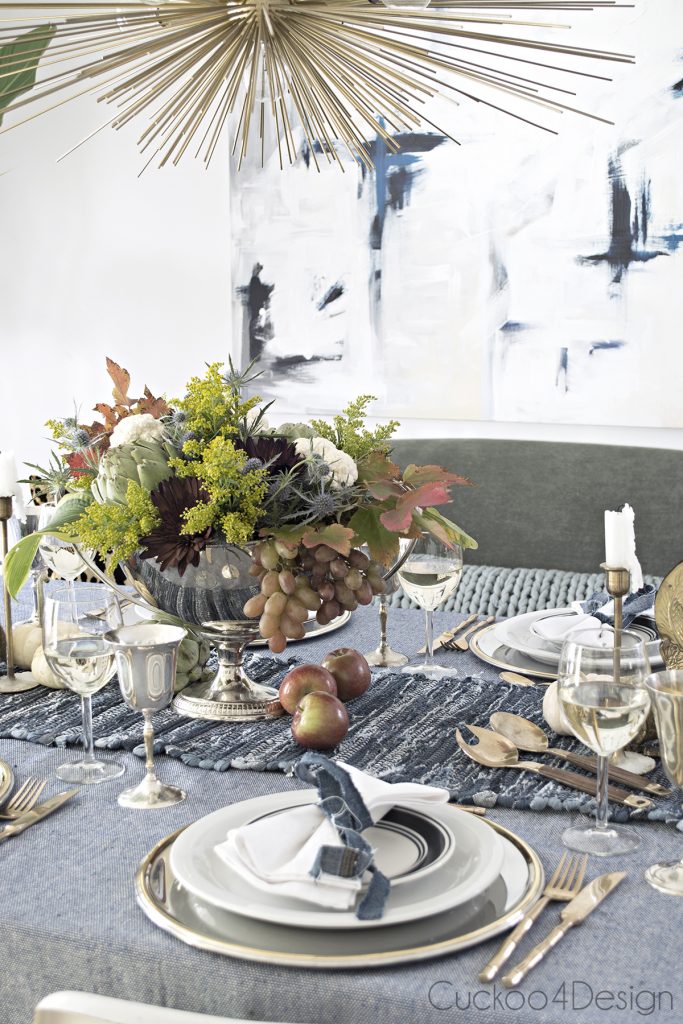
Unique, casual and elegant, this Blue Jeans Fall Tablescape by Cuckoo 4 Design is simply lovely.
Thanksgiving_or_fall_tablesetting_in_jeans_blues_Cuckoo-4-Design

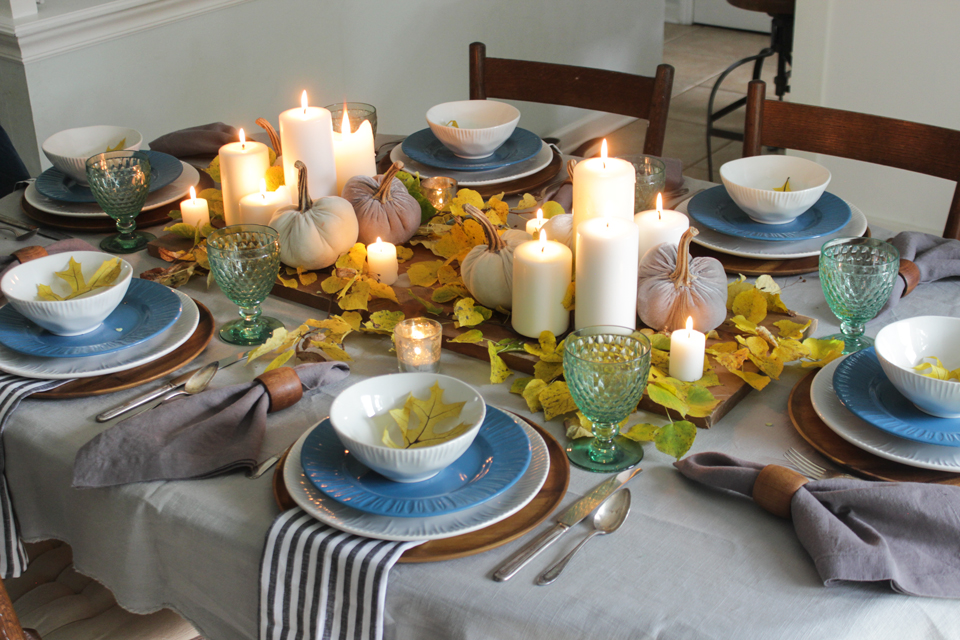
This yellow leaf and pumpkin Cozy Fall Tablescape by Shades of Blue Interiors is charming for those who want to keep things a little more casual.
Fall-cozy-tablescape-Shades-of-Blue-Interiors

This beautiful and homey Colorful Thanksgiving Tablescape also by Shades of Blue Interiors covers the pumpkin in flowers; so pretty!
Colorful-Thanksgiving-Table-Shades-of-Blue-Interiors

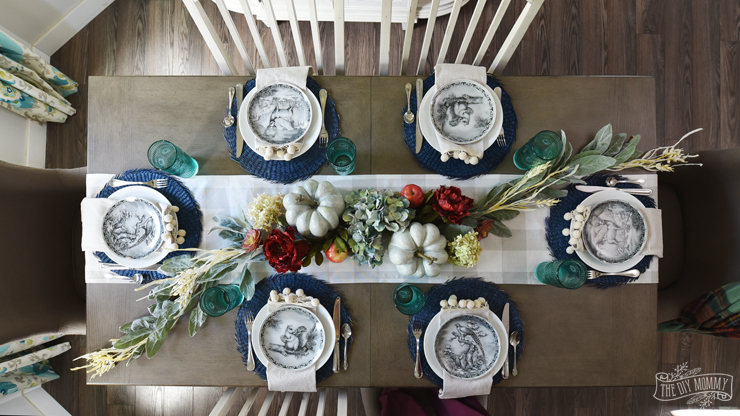
A fall tablescape created by The DIY Mommy with a Faux Floral Garland stretching across the table achieves a soothing and beautiful palette.
DIY-Faux-Floral-Fall-Garland-The-DIY-Mommy

Check out this Classic Blue, Gold and White Table by Kelley Nan for a formal and stunning fall display.
Blue-and-White-Thanksgiving-Table-Idea-with-Sunflowers-and-Hydrangeas-15-Kelley-Nan

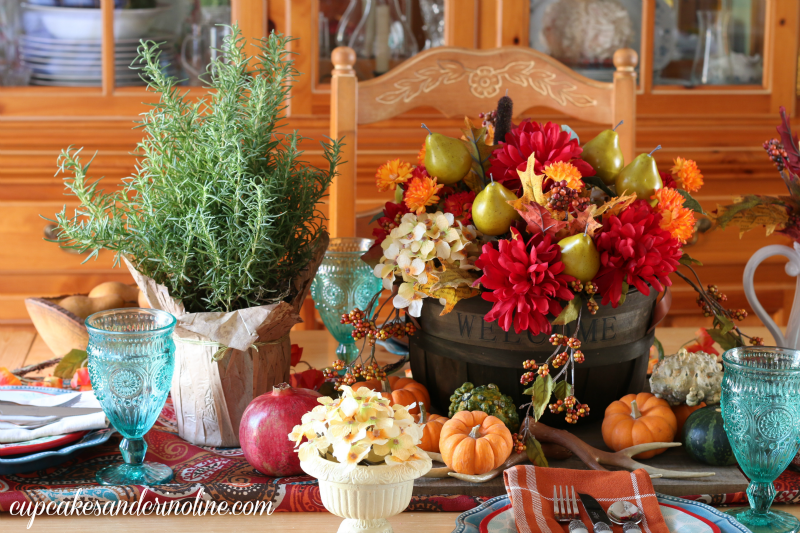
A bright, beautiful and delightfully Colorful Easy Thanksgiving Tablescape and Centerpiece by Cupcakes and Crinoline.
Thanksgiving-tablescape-and-centerpiece-cupcakesandcrinoline.com_

A Simple Thanksgiving Table by My Fabuless Life uses light colors to make any table welcoming.Easy-Inexpensive-Thanksgiving-Table-Setting-MyFabulessLife.com_

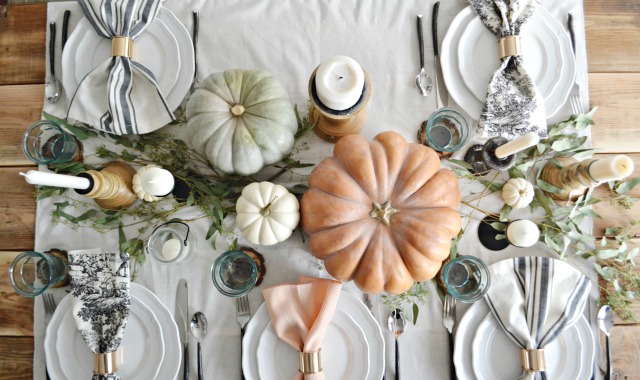
This creative and casual Natural Rustic Tablescape by Postcards from the Ridge gives a sense of warmth and comfort, just beautiful.
Natural Rustic Thanksgiving Tablescape-PostcardsFromTheRidge

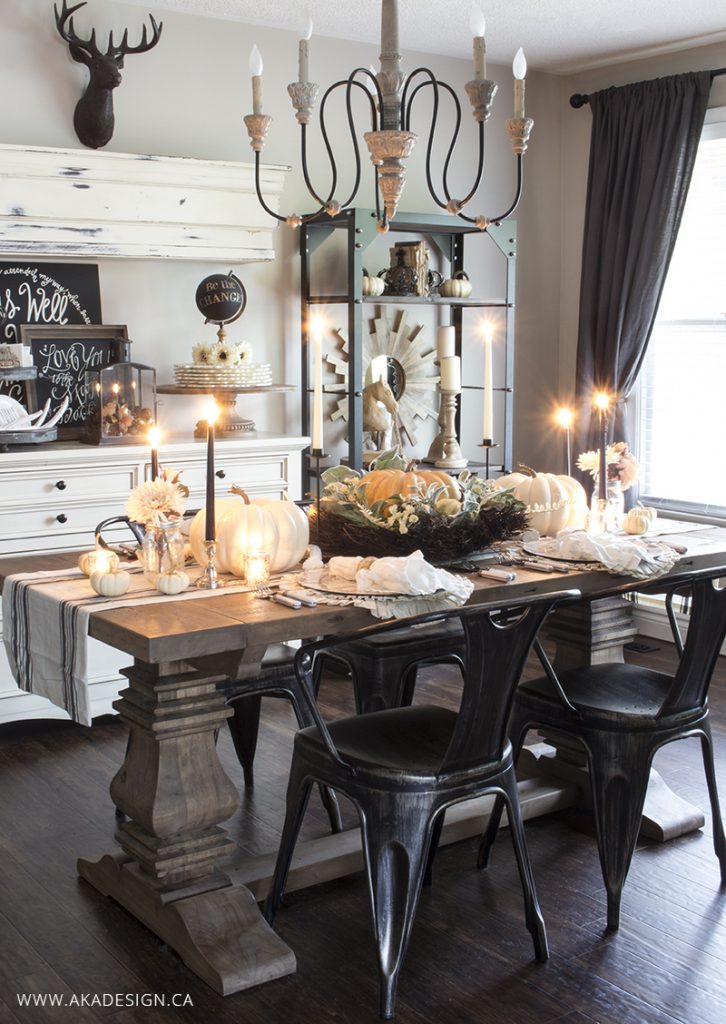
A rustic creamy and white Farmhouse and Industrial Thanksgiving Table from AKA Design has the perfect farmhouse ambience.
Industrial-Thanksgiving-Fall-Table-akadesign.ca

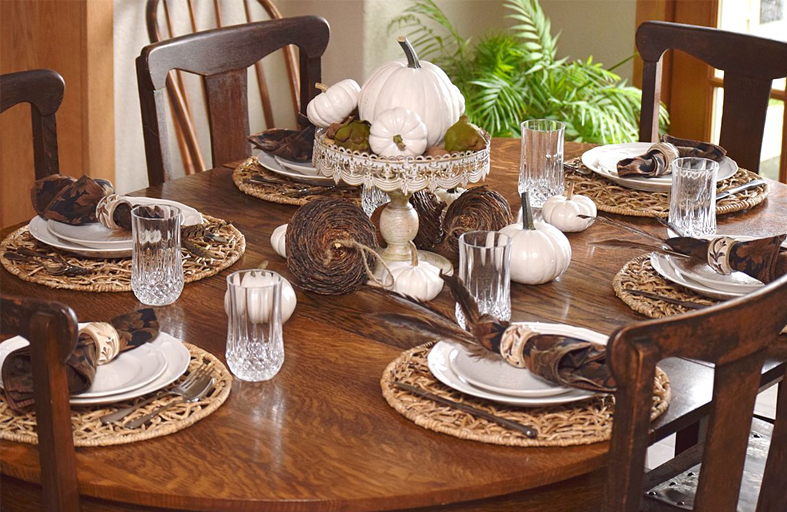
A Fall Tablescape using White and Wood elements by Timeless Creations brings a natural atmosphere straight to the dinner table.
White Wood Fall Tablescape TimelessCreationsMN

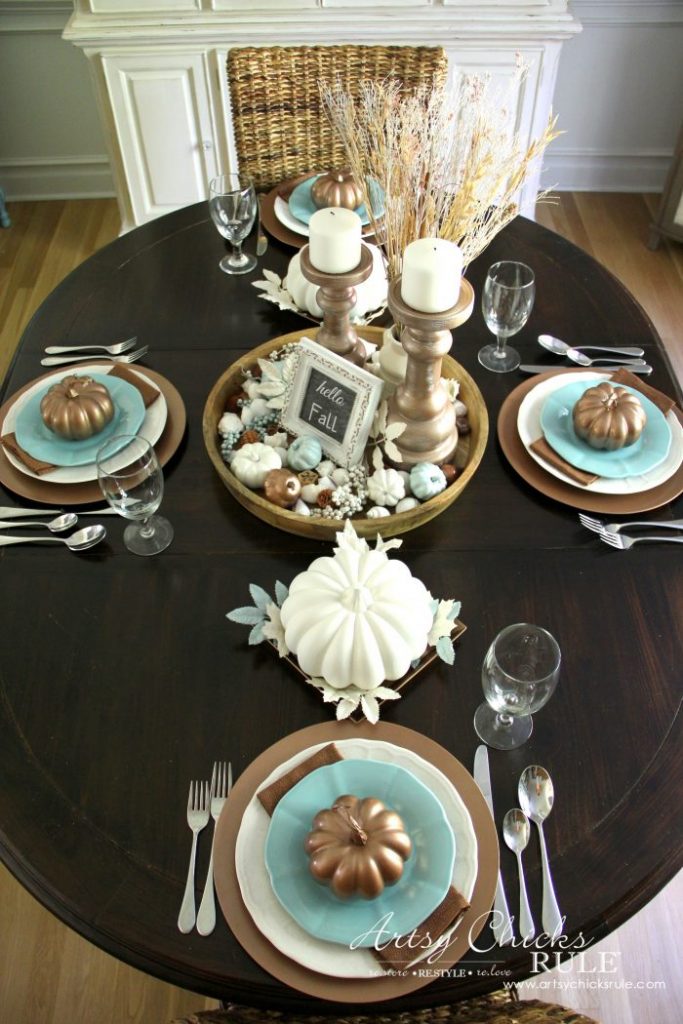
Metallic and pretty, this Coastal and Casual Fall Tablescape by Artsy Chics Rule adds a little glamour to dining.
Coastal Casual Fall Tablescape Artsy Chicks Rule

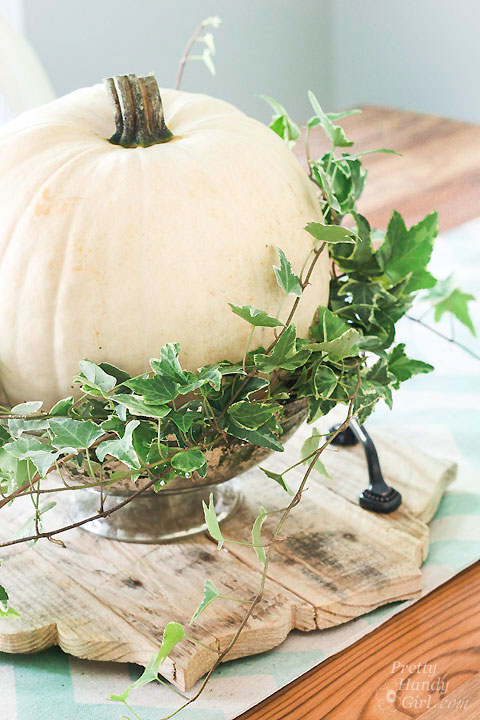
Last, but certainly not least, this White Pumpkin Fall Tablescape with the wooden tray is simple, yet rustic and pretty.
white-pumpkin-centerpiece-pretty-handy-girl

I hope you like this roundup and found some inspiration for your Fall Table Decorations this season! Please share and help inspire others.

Other posts you’ll love:

Pretty Handy Girl Fall Tablescape 2016

Holiday Tablescape Tour 2016


24 Creative Fall Wreaths | Pretty Handy Girl

24 Fabulously Creative Fall Wreaths


Pretty Handy Girl's Colorful Fall Home Tour

Colorful Fall Home Tour 2016: Part 1

How to Make a Vintage Rustic Sleigh Ride Sign | Pretty Handy Girl How cool! You can use this technique to make or transfer any sign graphic.

Holiday Home Tour 2016 | Pretty Handy Girl

I’m so happy to see you again this year! This is my annual holiday home tour and each year I can’t wait to invite you in to see the decorations. (These are my home tours from 2010, 2011, 2013, 2014, 2015.) This year I tried to keep it simple, but I did take two days to make a really fun vintage sign. I hope you’ll come on in and see it (and the rest of my holiday decorating efforts.)

Before I start decorating, I like to choose a theme. This year I wanted to create a nature or woodland inspired theme. I pulled the storage bins out of the attic and assessed what I had to work with. Then, I made a list of some items I could use to fill out the room. Next stop was my local At Home store. This home tour has been sponsored by At Home. This year I’ve been thrilled to be an At Home brand ambassador. (You can see a photo tour of the At Home store in this post.

At Home Store Tour | Pretty Handy Girl

Or come take a tour of my patio decorated for a garden party using several At Home finds (feel free to stay a while if you need to shake off that winter chill by looking at summer photos.)

Outdoor Garden Patio Party Decorating Ideas | Pretty Handy Girl

Finally, you won’t want to miss this drab to fab screen porch makeover that I accomplished with help from At Home.

Installing the Most Beautiful Ceiling Fan | Haiku Copper Luxe Ceiling Fan | Pretty Handy Girl

Have you warmed up yet? Well come on inside and get cozy. I made you some hot chocolate and salted caramel chocolate chip cookies for the tour.

hot-cocoa-side-table-boots-background

Did you notice the little silver twig tree? That was an At Home find, I couldn’t resist it. The little white lights make the tree glow at night. I also picked up some faux poinsettias from At Home and popped them in my 3 Step Little Red Wagon Planter.

Holiday Home Tour 2016 | Pretty Handy Girl

green-side-door

May I take your jacket? You can kick off your shoes if you want to get more comfortable. The shoe storage bench and coat rack were early DIY projects. This mudroom spot is my sanity saver because it holds our daily assortment of coats, backpacks, shoes and socks!

side-view-mudroom-bench-shoe-storage-coat-rack

These topiaries from At Home have seen a lot of use. I bought the unlit versions to save money and added my own lights for the holidays. But, honestly the lit versions are only $10 more, so splurge if you buy some for your home.

mudroom-bench-full-view

I decorated the shelf with some reindeer and two DIY cone trees (hot glue and moss or leaves). I also used some wall decal stars from my friend Leen the Graphics Queen (affiliate link.)

deer-mantle-view-faux-snow

The “Post” box keeps all our epi-pens close at hand but not in sight. Anyone else have a collection of epi-pens? 😉

epi-pen-storage-in-post-box

Come on in the living room and sit down. I just finished decorating the tree.

living-room-rustic-sleigh-ride-mantle-horizontal

I brightened the tree with lots of feather boas and red ornaments. Plus, I added several of the kids’ ornaments they made in preschool. Those ornaments may not be pretty, but they are precious to us.

feather-boa-christmas-tree

Want to make your own decorative bird house topper? It’s a fun little project that will satisfy your doodling desires.

birdhouse-tree-topper

I have to share with you these beautiful pillows I bought at At Home!

moose-drawing-pillow

They look a lot like some higher end store pillows, but for much less. I especially like the faux fur pillows. They might stay on the couch year round.

living-room-sofa-tree-view

Speaking of pillows, I had to buy Bandit a cozy bed from At Home. They have the best prices and selection I’ve ever seen for dog bedding. Good dog, Bandit. It’s about time you fell asleep. This dog is non-stop energy most of the time.

sleeping-dog-athome-dog-bed
The other find I couldn’t resist at At Home was this pretty shell tray. They have an amazing assortment of trays in all colors, shapes and sizes.

seeded-eucalyptus-candles-at-home-tray
I love using this easy to make shutter screen to display our Christmas cards each year.

shutters-christmas-card-display-old-runner-sled

This year I added a strand of lights and the vintage sled.

shutters-display-christmas-cards

living-room-rustic-sleigh-ride-mantle-vertical

Did you spot my new vintage inspired sign?

reindeer-sleigh-rides-rustic-wood-sign

close-up-rusted-sleigh-bells
I made it this week using all scraps from my workshop. Here’s the tutorial to make your own Vintage Rustic Sleigh Ride Sign!

stockings-hung-rustic-wood-fireplace

I know I’ve probably overstated this, but At Home has everything for your home decorating! For instance, birch logs can be purchased in the wedding section of At Home. (I’m not sure why they are in that section, but they are.) They were 6 feet tall, but I cut each log into three for display by the fireplace.

boots-birch-logs-by-fireplace

I bought the white lantern from At Home to round out my collection. You may not realize it, but that little black lantern was actually transformed from a $5 dated light fixture.

trio-lanterns-on-hearth

la-z-boy-cosmopolitan-wingback-chair-by-fireplace

A note about that metallic dot pillow—yup, you guessed it—another At Home favorite find!

wingback-yellow-chair-metallic-lumbar-pillow-metallic

angel-bottles-holiday-decor

Let’s head into the kitchen.

open-wood-shelves-holiday-decor
open-wood-shelves-kitchen-holiday-decorated

bay-window-seating-gold-white-pillows

Every year, I like to make a little something I think the kids will enjoy. This year, I created a little snow scene in a cloche.

glass-skier-cloche-snow-globe

The cloche is actually the globe from a hanging light. I ditched the light and used the globe to make a fun little snow globe scene.

glass-skier-cloche-snow-globe-close-up

I used more wall decal stars from my friend Leen the Graphics Queen (affiliate link) to decorate the windows. These little stars add a festive feel in minutes.

gold-white-holiday-pillows

On the other side of the kitchen is a desk aka our family command center. The raised desk was a DIY project I built using more ReStore cast offs. And the hutch was built using an old table top. . . seriously!

kitchen-desk-hutch-holiday-decor

kitchen-desk-hutch-holiday-decor-closer

The little galvanized village scene was created using a variety of At Home accessories. The lighted pine cones came in a set of three and have a timer switch so they’ll shut off at night. That’s one less thing I have to turn off before bed.

galvanized-village-christmas-decor

small-boxwood-wreath-oven-range-hood

I usually let my boys decorate a small tree. This year they added blue lights to this little faux ivy tree. I actually like the soft blue glow at night. My boys. . . they love to go against the grain. 😉

advent-calendars-holly-tree

Thank you so much for coming over. I enjoyed your company.

double-wood-front-doors-storm-doors-lime-green

Stop by sometime next week. I’ll be sharing my frugal holiday tablescape with you.

PHGFancySign

Disclosure: This is a sponsored post for At Home. I was compensated for my time writing this post. At Home also provided me with a gift card to purchase items to use in this post. All ideas and words are my own. I was not told what to write.


Pin for later!

Check out Pretty Handy Girl's Holiday Home Tour for holiday home decor ideas and inspiration! | Holiday decor for the home #prettyhandygirl #holidayhome #holidaydecor

DIY Copper Pipe Centerpiece | Pretty Handy Girl

DIY Copper Pipe Centerpiece | Pretty Handy Girl

I’m super excited to be back with another fun copper pipe tutorial for you to make for the holidays! Today let’s make this unique DIY Copper Pipe Centerpiece that acts as a candelabra . . .

copper-pipe-centerpiece-side-view

. . . or a floral centerpiece.

copper-centerpiece-flowers

This is such a versatile project that can be used for your dinner table, a wedding centerpiece or a vase to hold flowers. If you wanted to alter the design, you could shorten the center pipe and use for a pencil holder. Regardless of how you use it, this DIY Copper Pipe Centerpiece is sure to be a conversation starter!

copper-pipe-centerpiece-on-holiday-table

If you had fun getting used to using a Bernzomatic torch last week while making DIY Copper Ring Jewelry, then you’re going to love using a bigger torch to make this DIY Copper Centerpiece.

DIY Copper Ring Jewelry | Pretty Handy Girl

Not only that, you’ll be honing your soldering skills should you need to use them for a plumbing repair. I’m honored to be part of the Bernzomatic Torch Bearers program. Bernzomatic has sponsored this post to help you with some holiday decorating ideas.

Materials:

copper-centerpiece-materials

Materials:

(I’ve included affiliate links for your convenience. I earn a small percentage from a purchase using these links. There is no additional cost to you. You can read more about affiliate links here.)

Optional: Florist tubes

Cut List:

copper-pieces-cut-list-centerpiece

  • 2 – 2 3/8″ pipes
  • 4 – 2″ pipes
  • 1 – 7″ pipes
  • 2 – 5″ pipes
  • 1 – 4″ pipe

Instructions:

Cut your pipes to size. If you’ve never cut with a pipe cutter, you can watch this video to learn how.

Dry fit your pieces together as shown:

DIY Copper Pipe Centerpiece | Pretty Handy Girl

Then piece the centerpiece together completely as shown below. (The 4″ section with elbows connects the base pieces.)

dry-assemble-copper-centerpiece

The two 5″ pipes will not sit completely inside the “T” fittings. This will provide wiggle room to line up and assemble the top parts with the base. Feel free to adjust the 4″ base pipe until you fit everything together.

Sand all pipe ends with sandpaper.

Half Round Copper & Wood Side Table | Pretty Handy Girl

Pull apart the top and bottom of your centerpiece and place the base on your fireproof work surface to start. (I bought two paver blocks from Lowe’s to use for larger torch projects.)

copper-pipe-work-spot

Use the speed square to make sure all the pipes and fittings are plumb.

square-vertical-pipes

Apply a liberal amount of flux to all the connections.

flux-all-connections-copper-pipe

Start your Bernzomatic TS4000 Trigger Start Torch with the easy trigger start button. Heat each connection until the flux melts. Then hold the solder at the connection until the solder begins to flow. (You may need to solder one spot at a time or re-heat the solder and tilt the piece to help it flow around the connection.)

solder-vertical-pipe-pieces

Lift the base with gloves on or pliers and drop in the bucket of water to cool. Alternatively you can cool the pieces with a cold wet rag.

wipe-pipe-cold-rag-steam

Set the base aside and join the top assembly (1- 7″ pipe, 2 – 5″ pipes and 1 – 90˚ T connector.) Repeat the process of applying flux, heating and spreading the solder.

solder-t-piece-copper-pipe

At this point your parts should be assembled like this:

half-assembled-pieces

Slide the two “T” connectors onto your soldered top assembly. Slide the “T” connectors onto the base. Center the 7″ pipe and make sure it is plumb.

level-vertical-pipe-candle-holder

Solder the connections around the two side “T” connectors. Your soldering is now done. Cool off the centerpiece with a cold wet rag or in the bucket of water.

soldered-copper-pipe-centerpiece

Don’t stress if your soldering joints aren’t beautiful, I’ll show you how to cover them. Sand the entire centerpiece to remove any heat marks.

sand-copper-pipes

File any bumpy solder until smooth.

DIY Copper Pipe Centerpiece | Pretty Handy Girl

Wipe off the centerpiece with a wet rag to remove any metal shavings and dust. Paint Modern Masters Metal Effects Primer on all the soldered joints. Let the primer dry and add a second coat.

paint-metal-effects-primer-onto-solder-joints

After the primer has dried, paint Modern Masters Metal Effects Copper Paint onto the primed solder joints. Feather the paint onto the copper pipes and cover any imperfections. Let dry and apply a second coat.

paint-metal-effects-copper

You are done! Time to show off your new DIY Copper Pipe Centerpiece! Add hand-dipped candles to the open fittings. For the center pipe, you’ll need to trim your candle and gently twist the candle into the pipe.

copper-pipe-centerpiece-on-holiday-table-2

If you want to use the centerpiece for a floral display, fill floral tubes with water and drop them into the openings. (Note: I slipped two 2″ copper pipe pieces into the shortest openings to hide the floral tubes. But, you could just add water to the centerpiece and put your flowers in directly.)

add-water-tubes

Add your flowers and enjoy!

copper-centerpiece-flowers

How fun is this DIY Copper Centerpiece? It would look great as a centerpiece for a rustic or industrial themed wedding or party! You could change the configuration of the pipes and fittings if you like.

copper-centerpiece-flowers-bernzomatic-3

Add four more extensions and fitting openings to create a beautiful menorah for Hanukkah!

Don’t walk, run to the plumbing section at your local hardware store and get creative!

copper-pipe-centerpiece-candleabra-lit-2

Until next time…

PHGFancySign

Disclosure: This is a sponsored post for Bernzomatic. As a Bernzomatic Torch Bearer, I was provided complimentary torches and was compensated for my time and efforts. I was not told what to write. All opinions are my own. I am particular about the brands I represent and will always let you know when you are reading a sponsored post.


Pin for later!

bunny place cards

Spring is in the air so let’s make some bunny place cards for the table.  Jaime here from That’s My Letter sharing this easy scrap project that adds a touch of cuteness and color to your Easter or spring table.

I used spring colored spray paints on the front side of the bunnies and then decoupaged fun fabrics onto the back side:

bunny place cards 1

You can imagine once the table is all set just how festive and fresh all these bright colored bunnies will look against the place settings!  I added the little clothespin to hold the name card:

bunny place cards 4

Supplies:

  • 1/2″ MDF scraps
  • Bunny template (search google for lots of options)
  • Scroll saw or jig saw
  • Spray primer
  • Spray paint
  • Cotton fabric scraps
  • Decoupage for fabric & brush
  • Scissors
  • 1×2 wood scraps
  • Wood glue
  • Nail gun & 1 1/4″ finish nails
  • Mini clothespins
  • Super glue

Instructions:

Read through all steps before beginning.

bunny place cards step 1

Step 1: Trace bunny template onto MDF and cut out.  Sand edges smooth.  Spray with primer then colored spray paint (one side only). Read more

Build a Snowman and Win a Getaway for 4 on a Disney Cruise! | Pretty Handy Girl

Build a Snowman and Win a Getaway for 4 on a Disney Cruise! | Pretty Handy Girl

Do you wanna build a snowman? Come on let’s go and play! Ha, my apologies if you have that popular Frozen song in your head now. Do you have snow where you are? We are on the tip of an “epic” winter storm that is rolling into North Carolina right now. I hope we’ll get some pretty white stuff. Unfortunately, we usually get a heaping dose of slick ice and sleet, and not the fluffy white powder.


How to Build a Snowman without Snow:

Build a Snowman and Win a Getaway for 4 on a Disney Cruise! | Pretty Handy Girl

Do you have snow? If not, want some help making your snowman without snow? No worries, I got your back. You’ll need a few tools and supplies to build a snowman without snow. Keep in mind you can substitute any of the materials for something you already have on hand.

Materials:

Read more