Love thrifting? Check out these clever DIY thrift store ideas that turn cheap finds into chic treasures for your home.
Thrift Store DIY Ideas
If you love DIY projects, your local thrift store is a great place to discover affordable thrifted finds. With treasures waiting at every yard sale and flea markets, all you need is an open mind to turn secondhand items into something fresh and stylish.
Thrift Store DIY Ideas
This collection of 35 thrift store DIY ideas shows how thrift store finds can be transformed into fresh, stylish home decor. These budget-friendly tips are a great way to give old items new life while decorating your home beautifully and affordably.
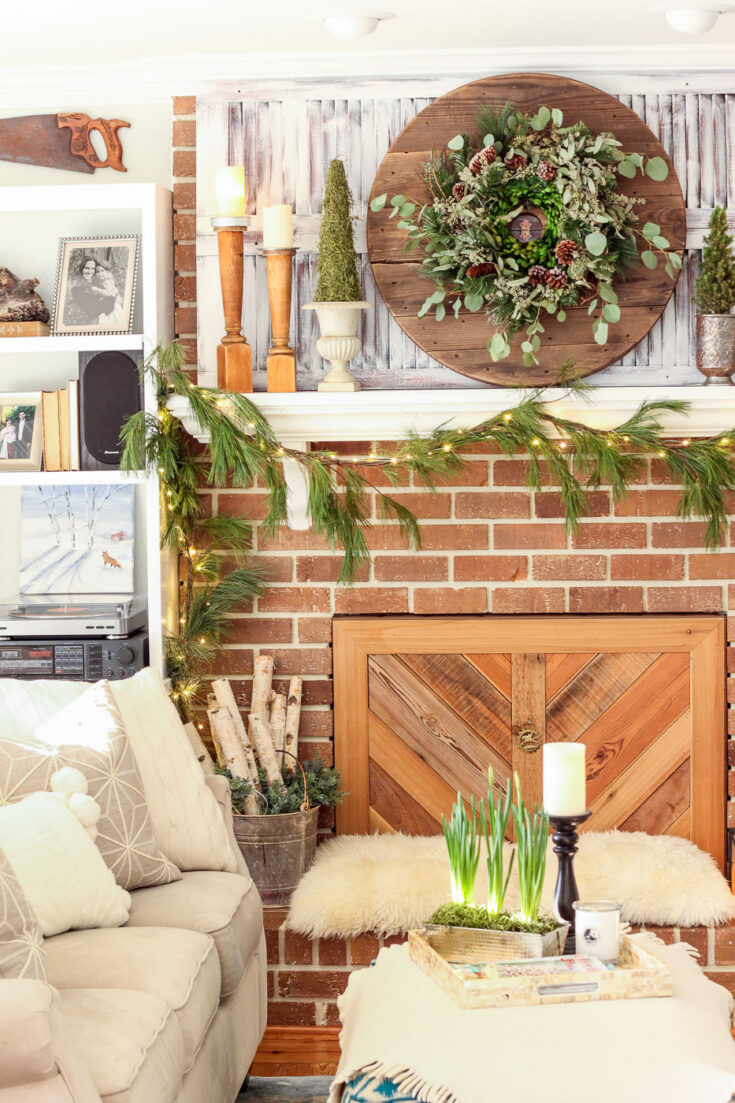
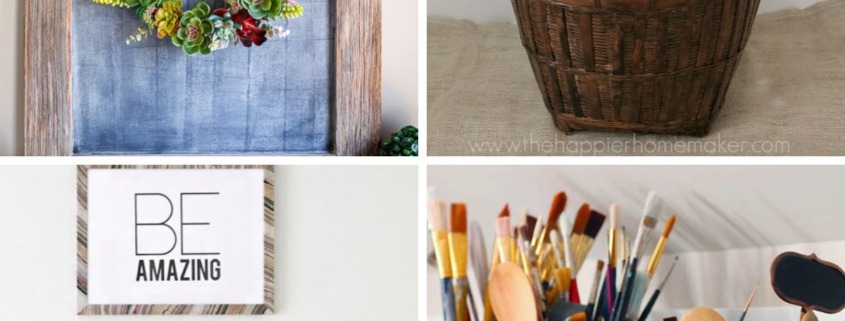
Thrift Store Christmas Wreath Makeover
I’ll show you how to take a plain, inexpensive wreath and give it a beautiful makeover that looks like it came from a high-end boutique. You won’t believe the transformation! I love how this DIY Christmas decor looks in my living room.

Make Piping Out of Thrift Store Finds
I used to spend way too much money on piping from the fabric store until I discovered an easy way to make my own! Once I realized how easy and affordable custom piping can be, I never went back. I'll show you how to make your own.

Fall Makeover for a Thrift Store Purse
This little thrift store find only cost me three dollars, but I saw the possibilities right away. Some orange fabric scraps, a few handmade rosettes, and a hot glue gun were all it needed to shine again!
How to Reupholster This End Up Chairs
This DIY reupholster chair tutorial features a This End Up chair. You can follow the same basic steps to recover and renew similar chairs.

Hand-Lettered Mini Chalkboard Planters
Looking for a simple way to add some greenery to your space? These mini chalkboard planters with hand-lettered labels are the perfect DIY! They’re adorable with any plant, but I especially love them with succulents or cacti.
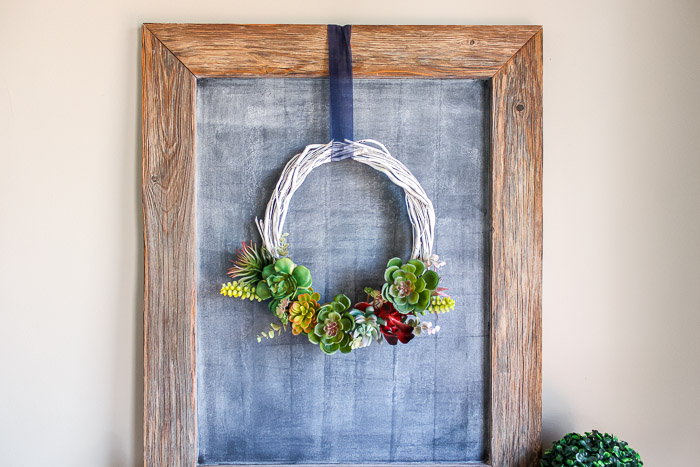
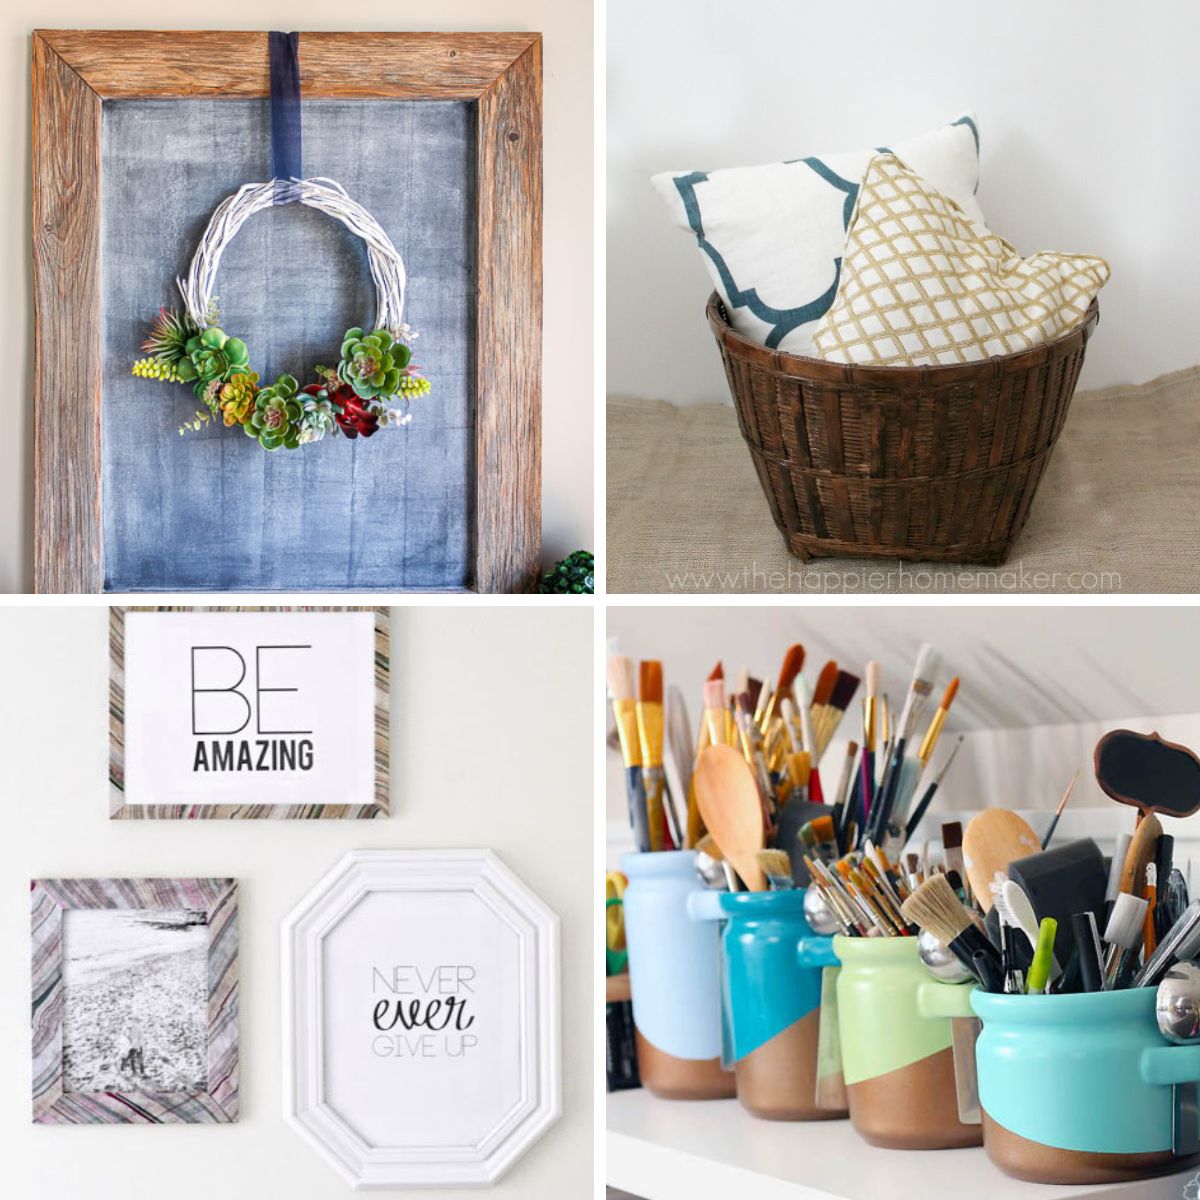
DIY Faux Succulent Wreath
Add some fresh, natural vibes to your space with this easy DIY faux succulent wreath! Grab a few supplies from the dollar store and follow this quick tutorial to make your own beautiful greenery decor.
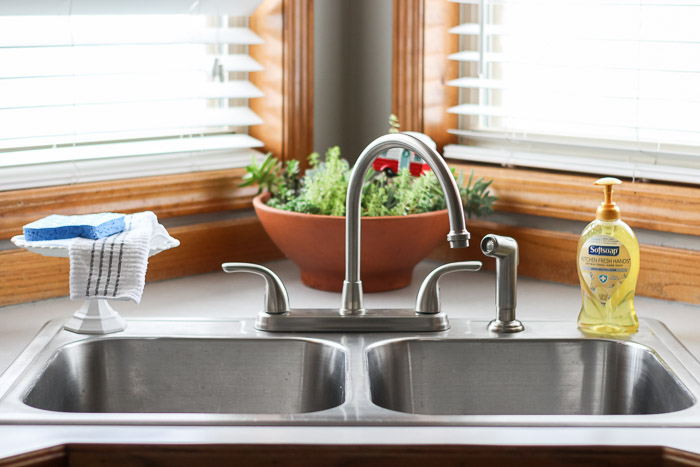
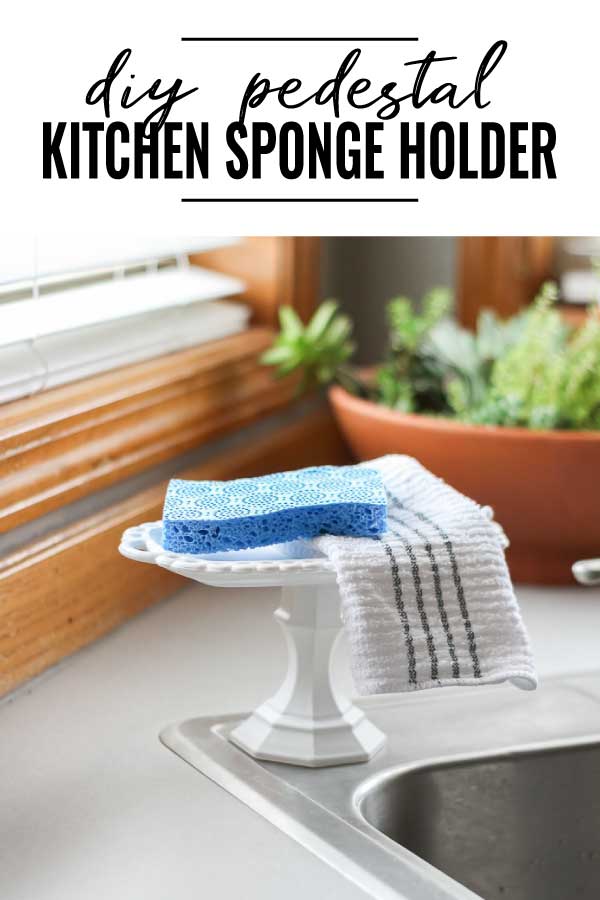
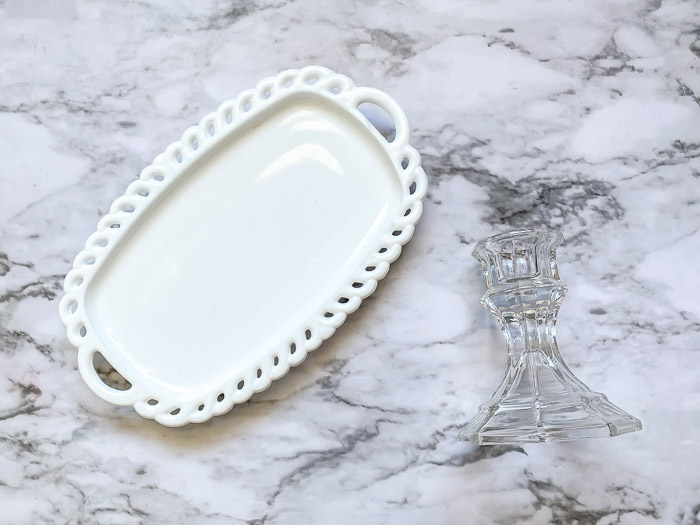
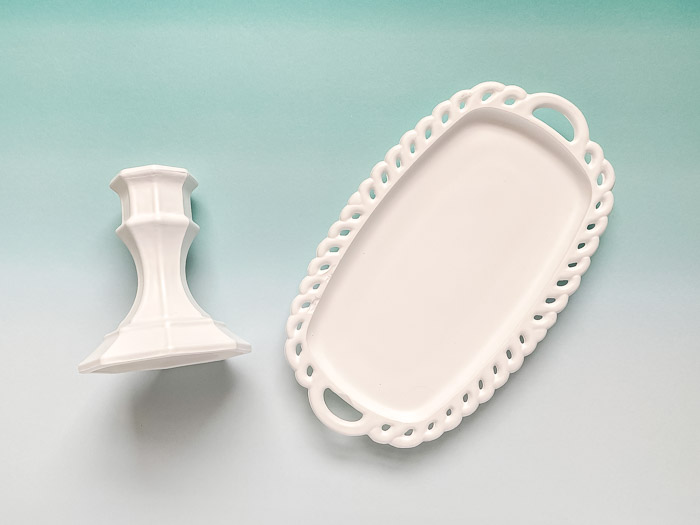
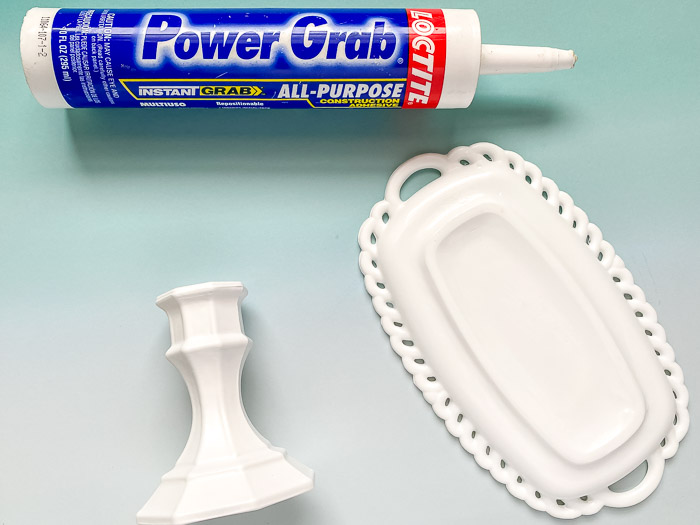
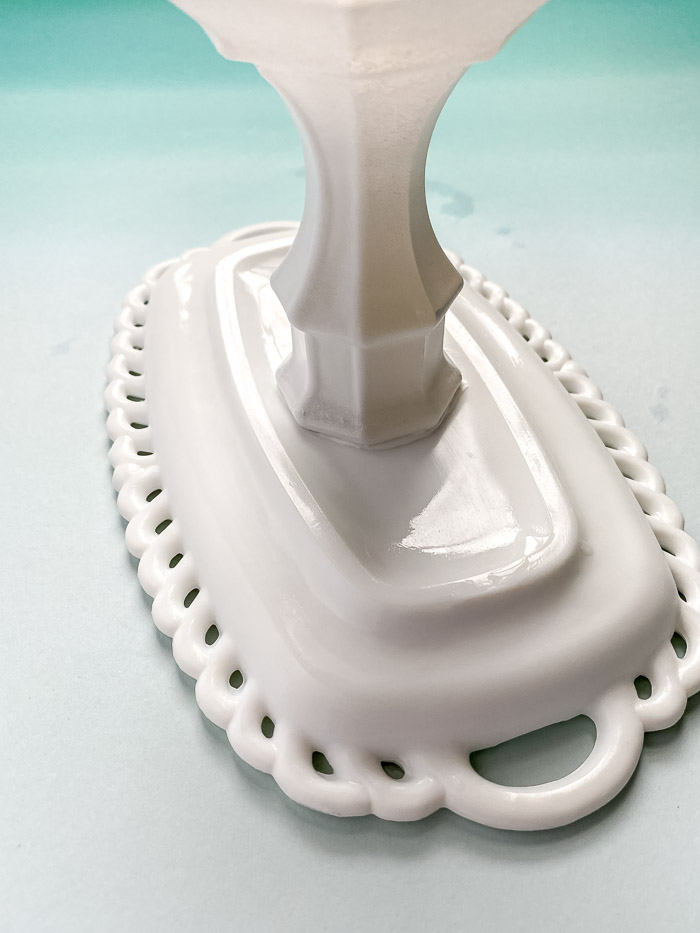
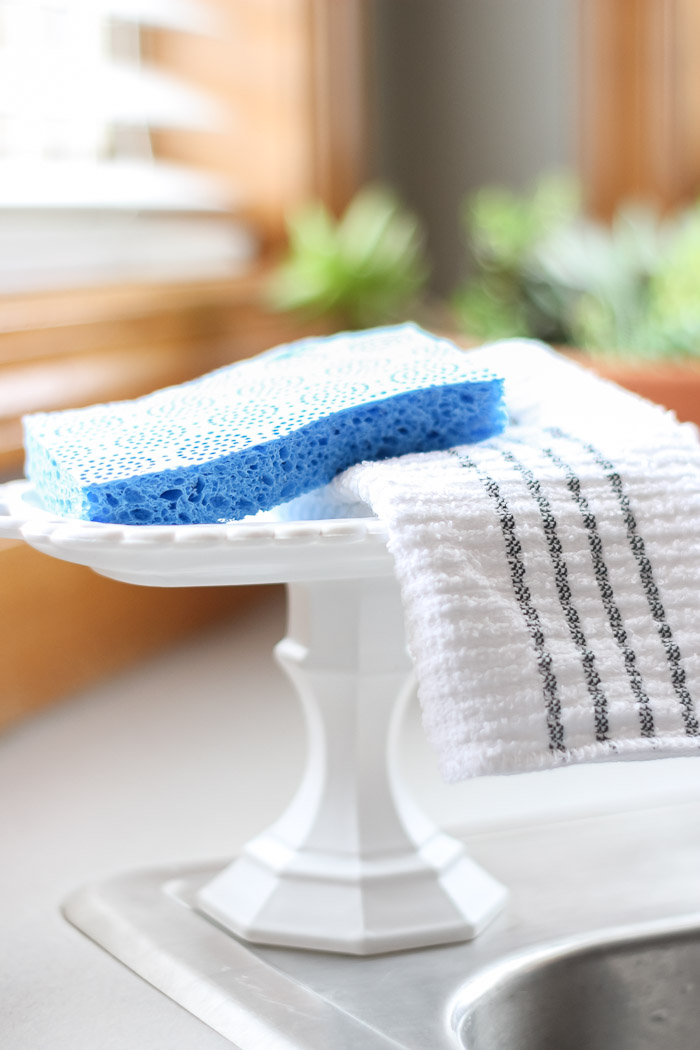
DIY Pedestal Kitchen Sponge Holder
If your sponge or soap keeps taking over your sink space, here’s a clever fix! Turn old pieces of glassware into a beautiful DIY pedestal holder that keeps things tidy and adds charm to your kitchen.
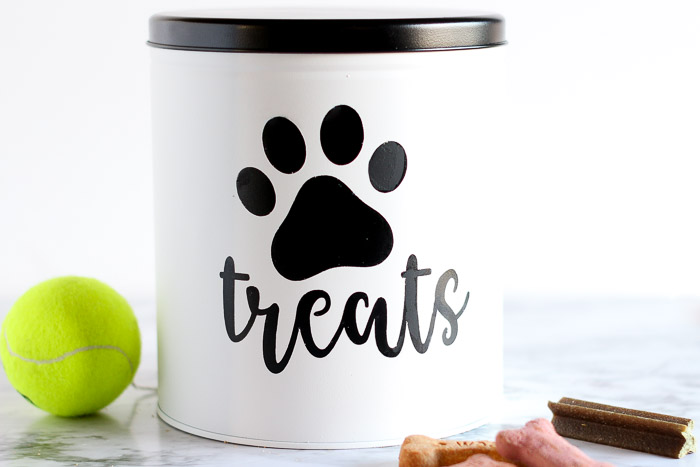
Dog Treat Container from a Popcorn Tin
Don’t toss those old holiday tins! With a quick and easy makeover, you can upcycle a popcorn or cookie tin into a chic DIY dog treat container your furry friend will adore.
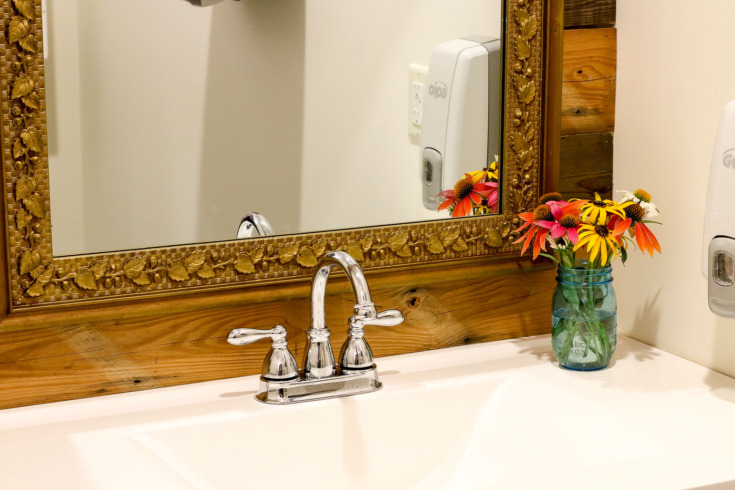
Habitat for Humanity Bathroom Renovations in a Weekend
See how two dated bathrooms got a stunning new look with budget-friendly updates and clever thrift store finds!
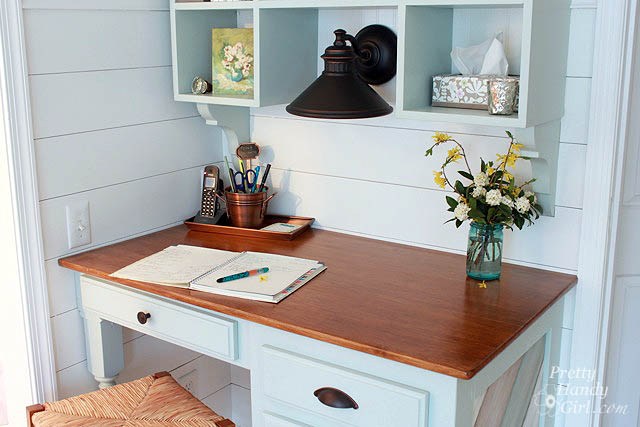
Building a Kitchen Counter Height Desk
I wanted to keep our new kitchen countertops clutter-free, so I decided to make a dedicated drop zone. A counter-height kitchen desk turned out to be the perfect solution for standing while writing notes, filing papers, or putting away mail.
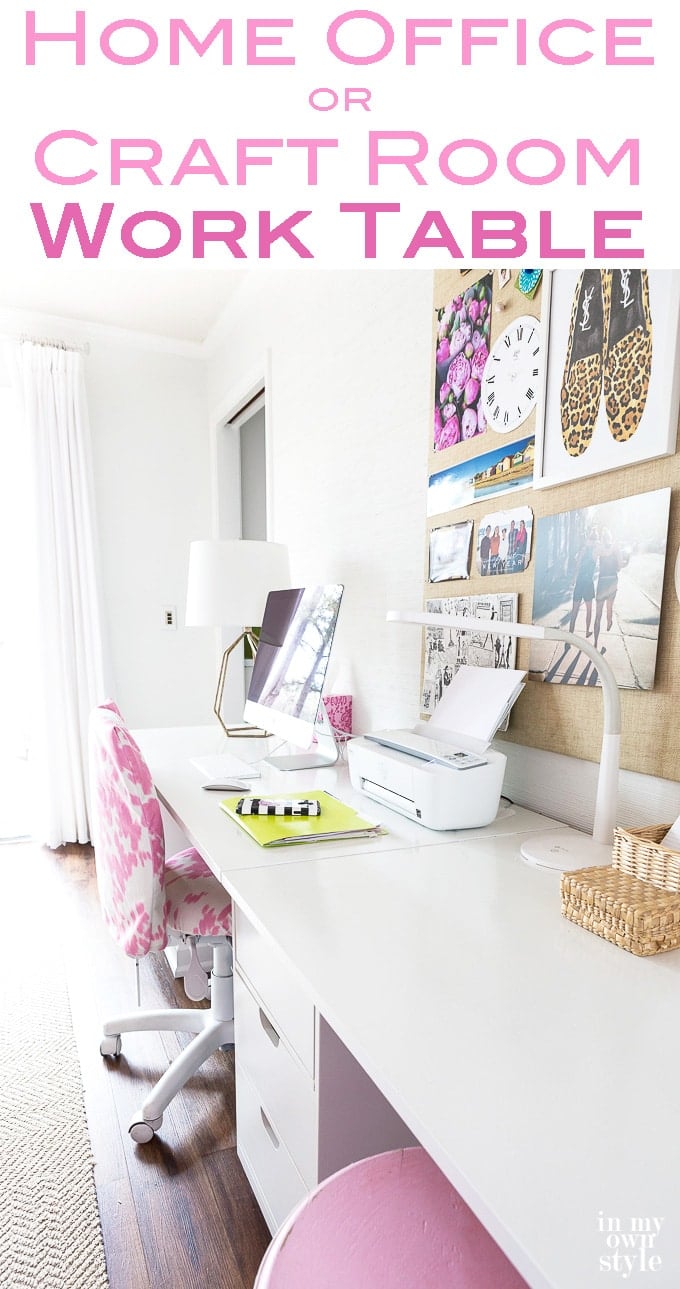
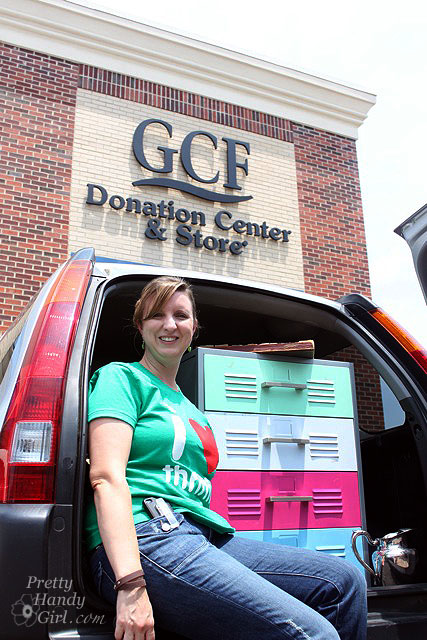
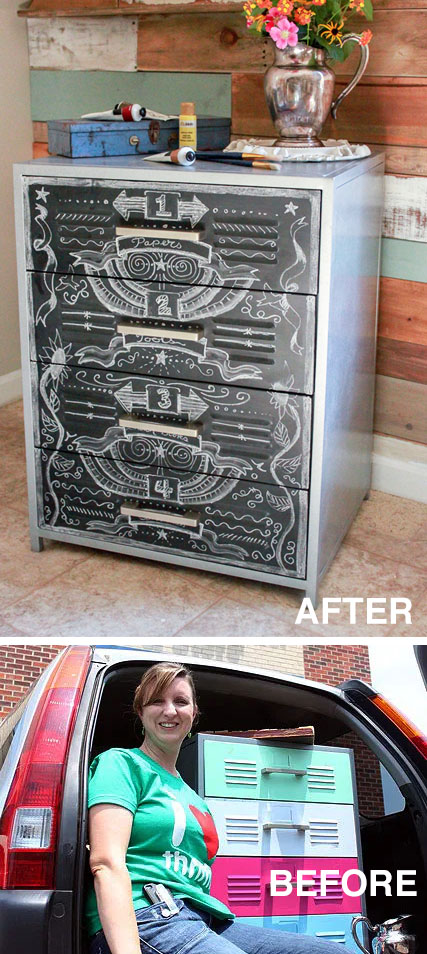
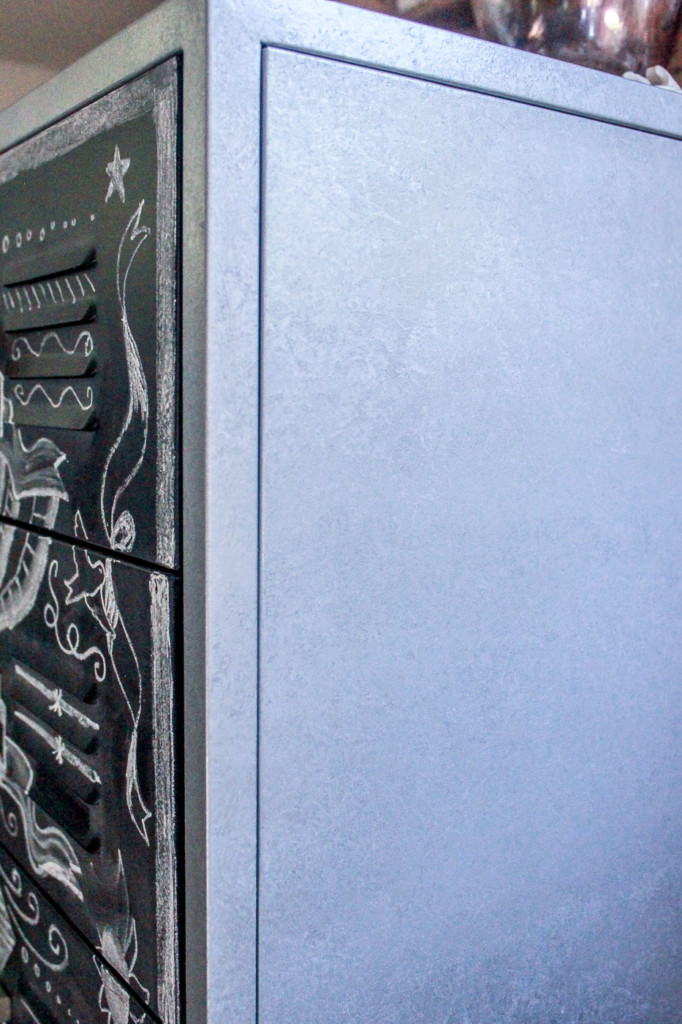
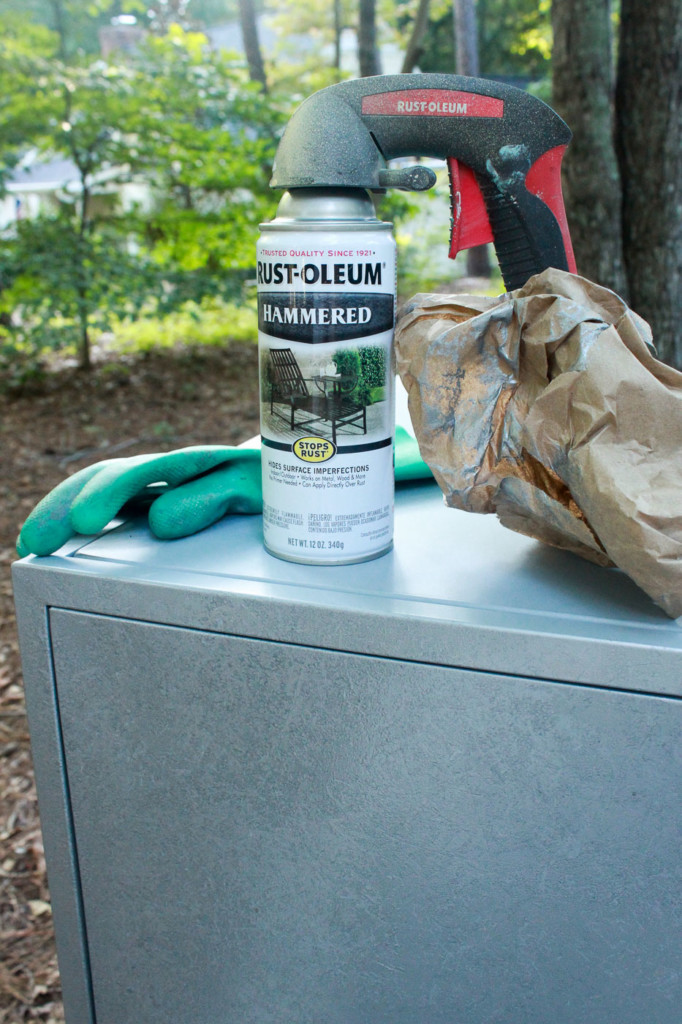
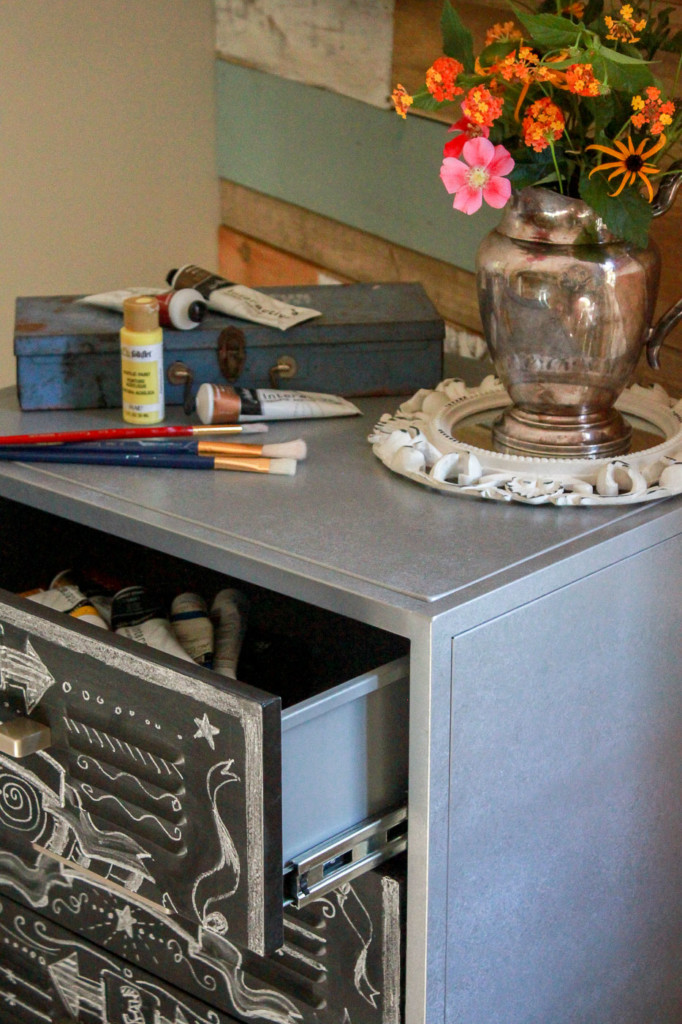
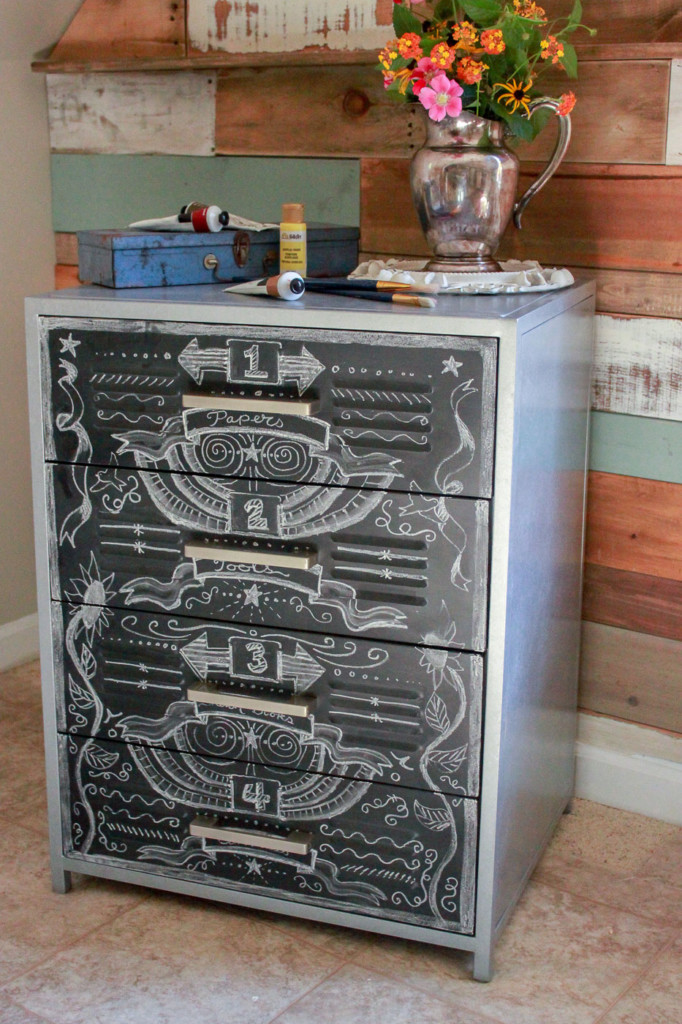
Craft Room Work Table Using File Cabinets
Learn how to build a functional craft room work table using simple file cabinets! This budget-friendly DIY gives you plenty of workspace and storage for all your supplies.
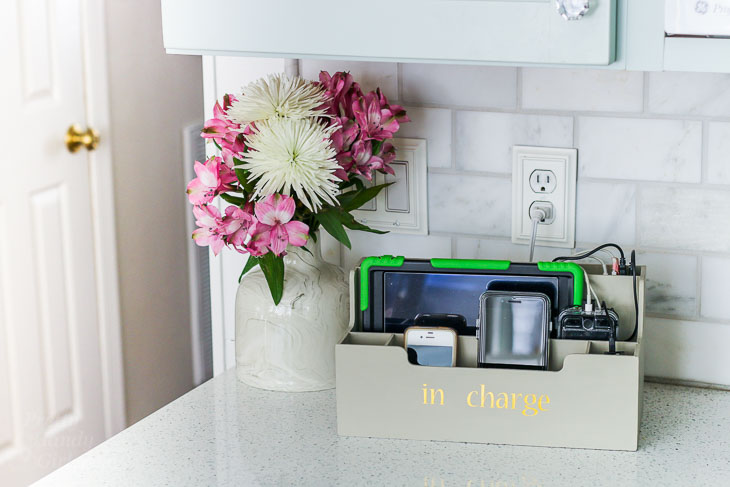
How to Turn a Desk Organizer into a Charging Station
Tired of multiple devices cluttering your counters while charging? This simple desk organizer is the perfect solution to keep everything neat and accessible.

Turn a Soap Dispenser into a Vase
Turn an old soap dispenser into a charming vase with this super easy upcycle! A quick DIY project that adds a touch of creativity and greenery to any space.

Vintage Map Lampshade
Creating a Vintage Map Lampshade is simple if your shade is nearly cylindrical. But what about a cone-shaped shade? The process is a bit trickier, and I’ll guide you step by step through it.
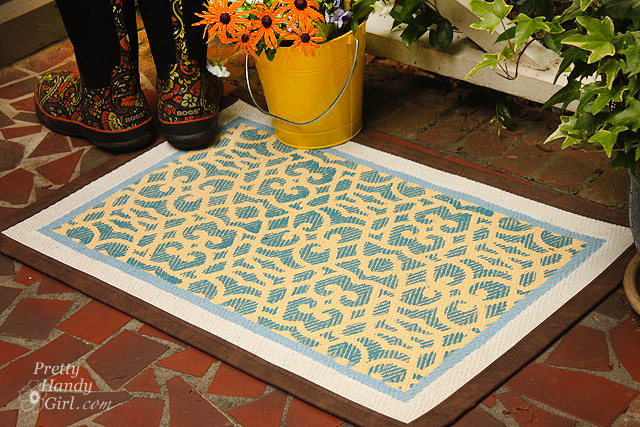
Stencil Myself a New Door Mat
I grabbed this plain door mat from a thrift store a while back, knowing it had the potential to become something spectacular with just a stencil and a little creativity!
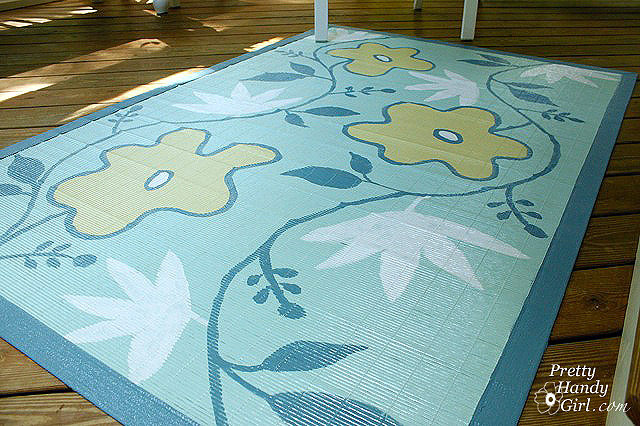
Painting a Bamboo Rug
I scored this Pier One bamboo rug for just $25 while thrifting! Using my Photoshop skills, I updated the color palette and design to create a custom sketch for my painted rug makeover.

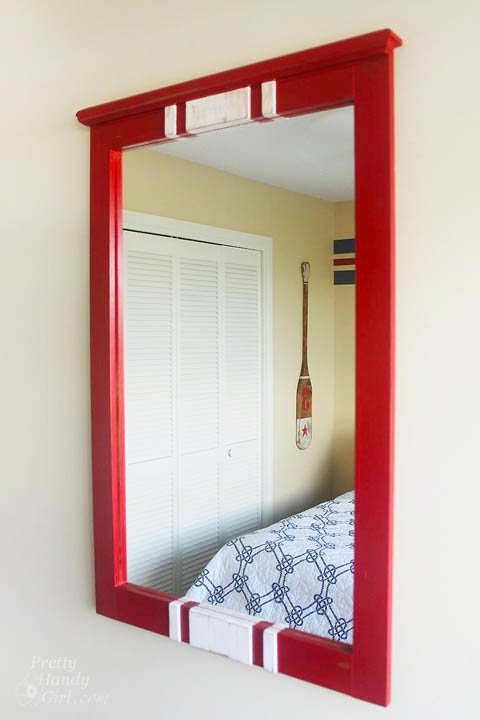
How to Frame a Dated Mirror
Wish you could trade that dated, unattractive mirror for a beautiful, updated one? Learn how to give any old mirror a stunning new frame!
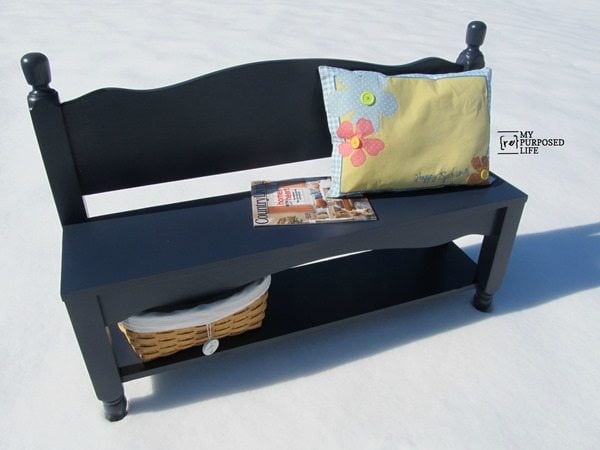
How to Make a Headboard Bench
See how an old headboard gets a second life as a charming entryway bench! This DIY project is the perfect mix of creativity and function.
DIY Metallic Color Blocked Canisters
When I got tired of my cobalt blue canisters, I decided to give them a fresh new look with a metallic color-block design. A few coats of spray paint turned these thrift store finds into chic, modern home decor pieces! You can follow this same tutorial to update mason jars.
Racing Stripe Mirror Makeover
Give an old mirror a fresh, sporty look with this red and white racing stripe makeover! It’s an easy DIY wall art project that adds instant character and style.
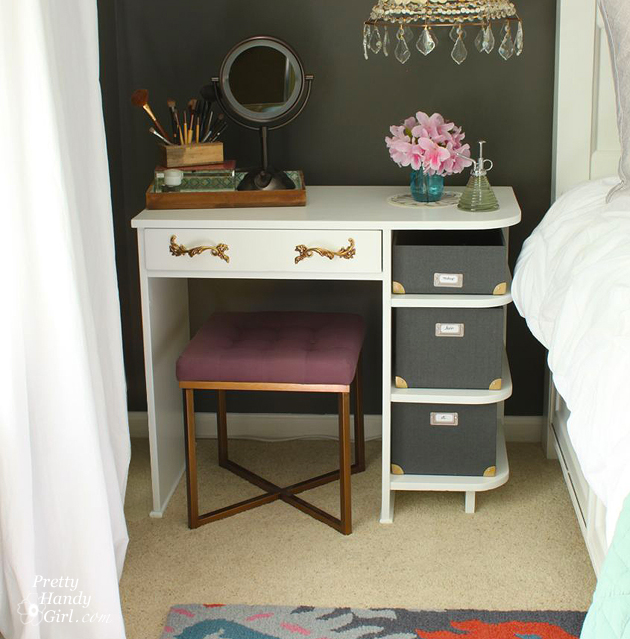
Painted Vanity Nightstand
This small painted desk got new life as a charming nightstand. This is proof that a fresh coat of paint can go a long way!
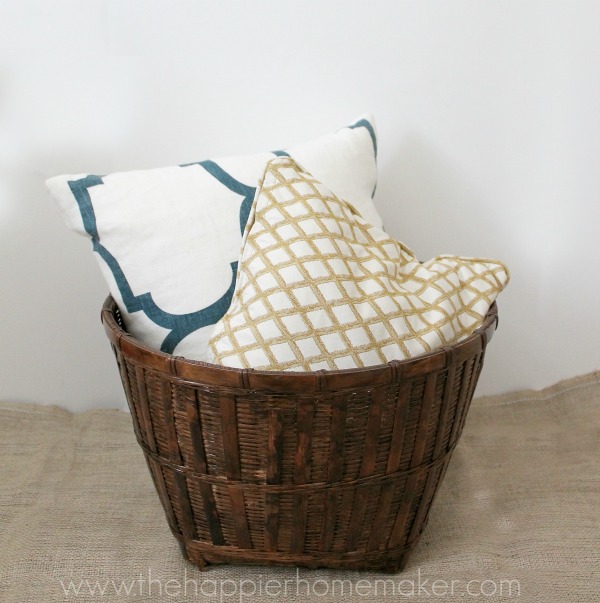
How to Stain a Basket
See how easy it is to upcycle thrift store baskets into beautiful home decor accents that look anything but secondhand.

DIY Unique Wine Rack
This isn’t your average furniture makeover! With a little elbow grease you can take an old dresser and transform it into the perfect wine rack for storing your favorite reds and whites.
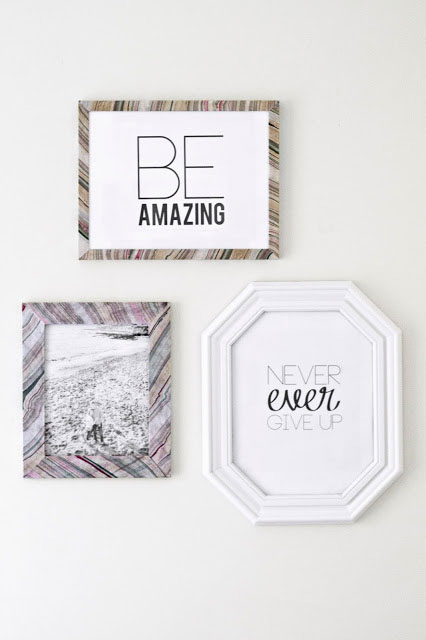
Marbled Picture Frames
Make gorgeous marbled picture frames for just a few bucks! A quick and easy DIY that adds personal style to any space.
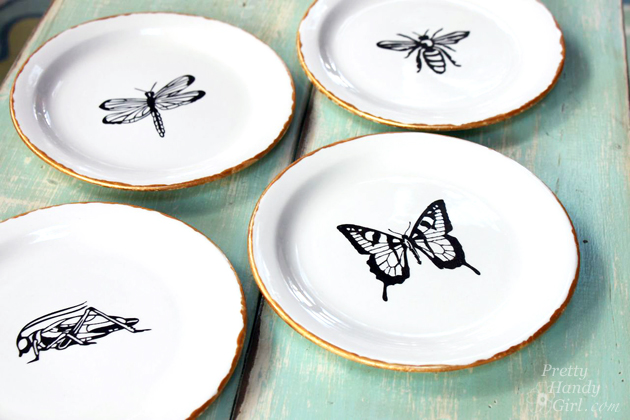
Pen & Ink Sketch Decorative Plates
My pen and ink sketch decorative dessert plates came out even more beautiful than I expected. Such a fun and creative project made with thrift finds.
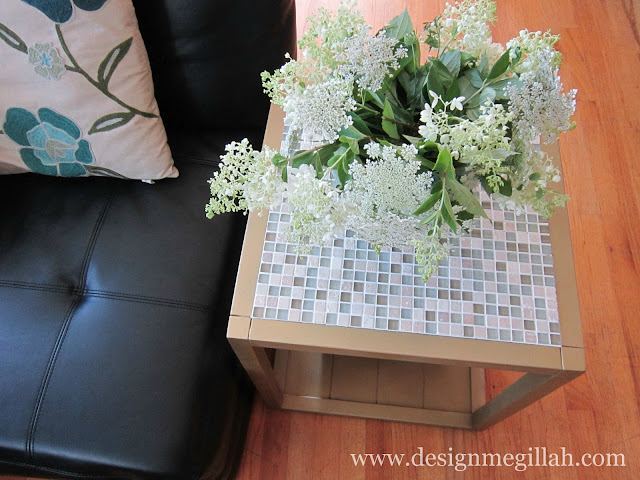
Tiled End Table Makeover
I found this small end table on clearance at Target for just $20. It was simple and functional, but a bit boring, until I gave it a glamorous makeover with gold paint and pretty mosaic tiles!

Book Page Rose Wreath
Create a stunning wreath using an ornate ceiling medallion and a handmade book page rose for a touch of vintage charm.
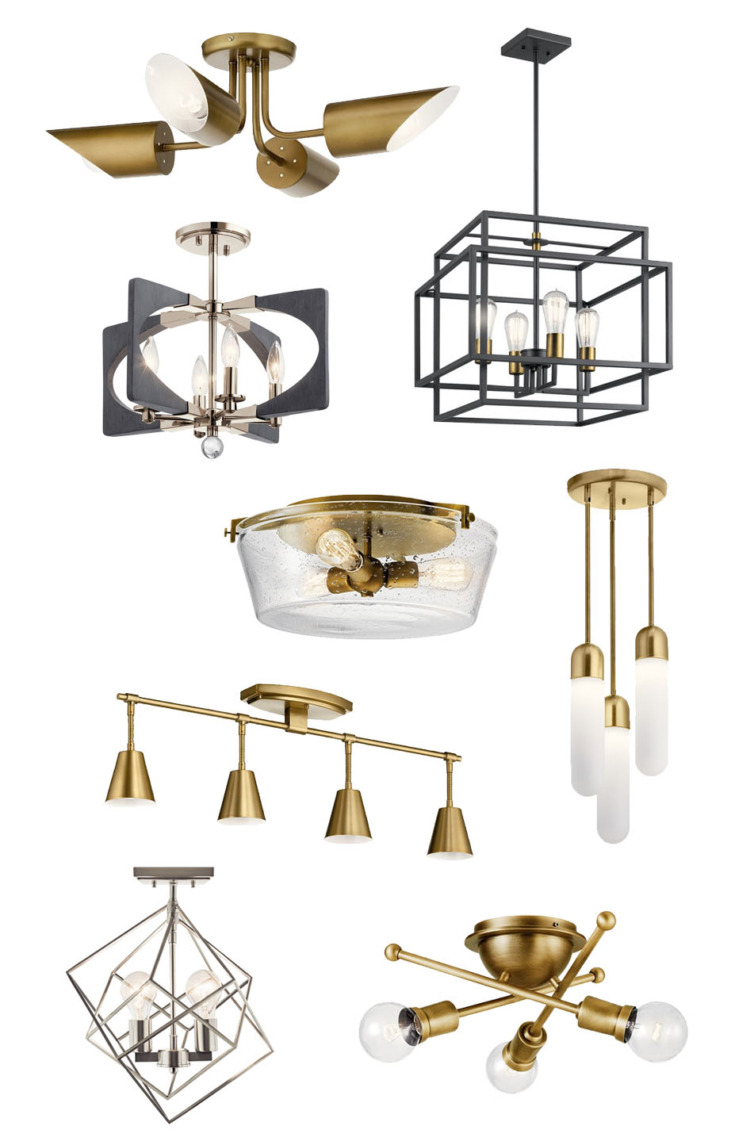
New Light Fixtures to Light Up Your House
Updating light fixtures doesn’t have to be expensive. Discover these creative ways on how to score stylish, budget-friendly pieces from Craigslist, Habitat ReStore, Overstock, eBay, and more!
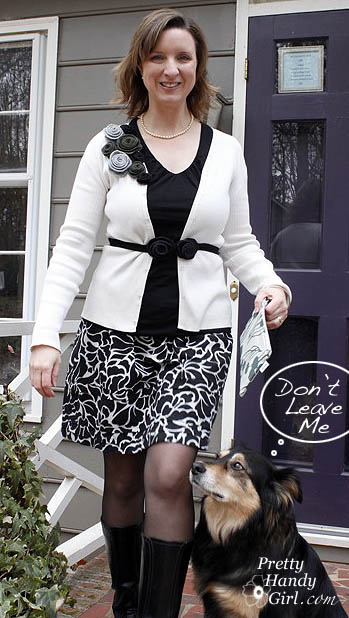
Re-Sizing and Dressing Up a Goodwill Sweater
Here is an easy tutorial on how to re-size a Goodwill sweater and add pretty handmade felt roses. This takes a plain sweater to the next level.

Aged Painted Pail Tutorial
I spotted a bucket priced at just $1 and immediately knew it had potential. With a little paint, I transformed it into a charming, aged pail!

Painted Trays with Scrapbook Lining
Grab an old or unpainted tray from around the house or a thrift shop and give it new life! This quick project turns it into a beautiful, scrapbook-lined tray perfect for a coffee table display or organization.

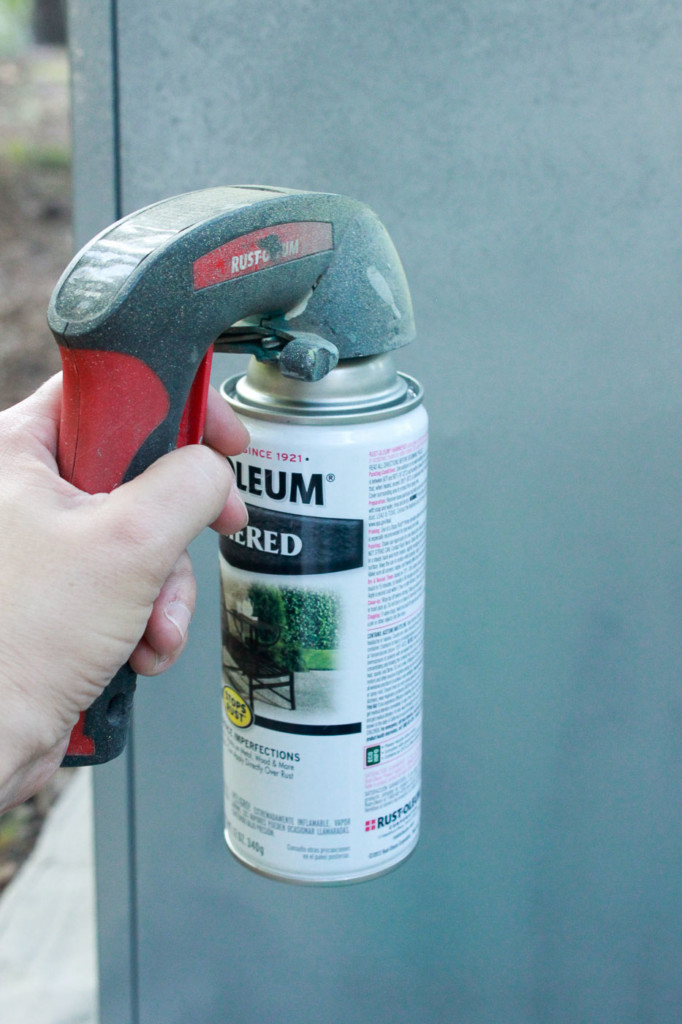
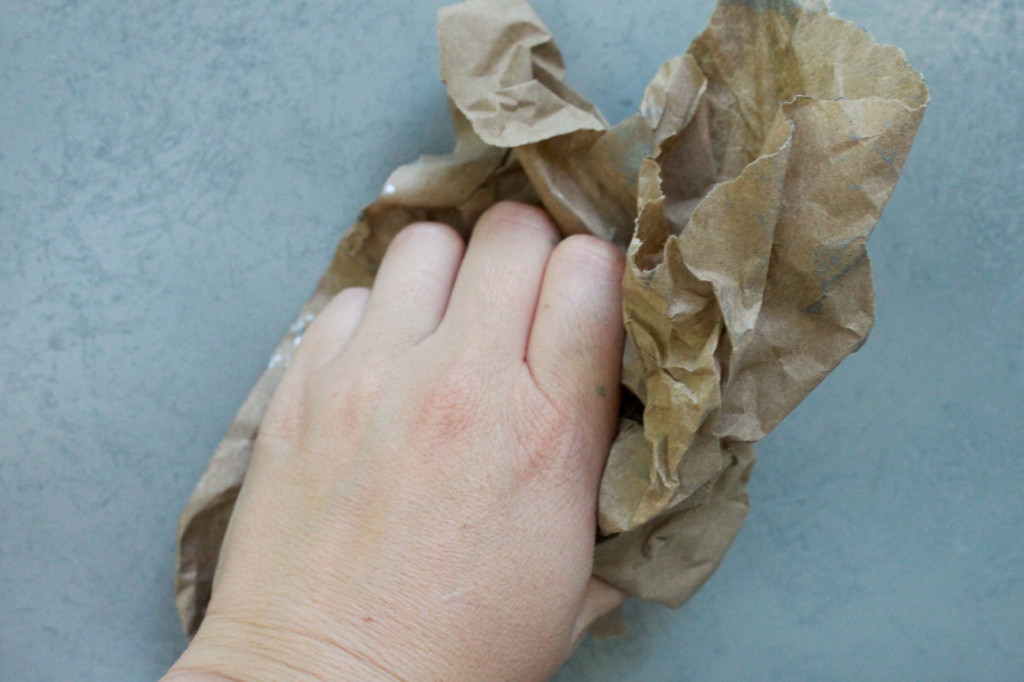
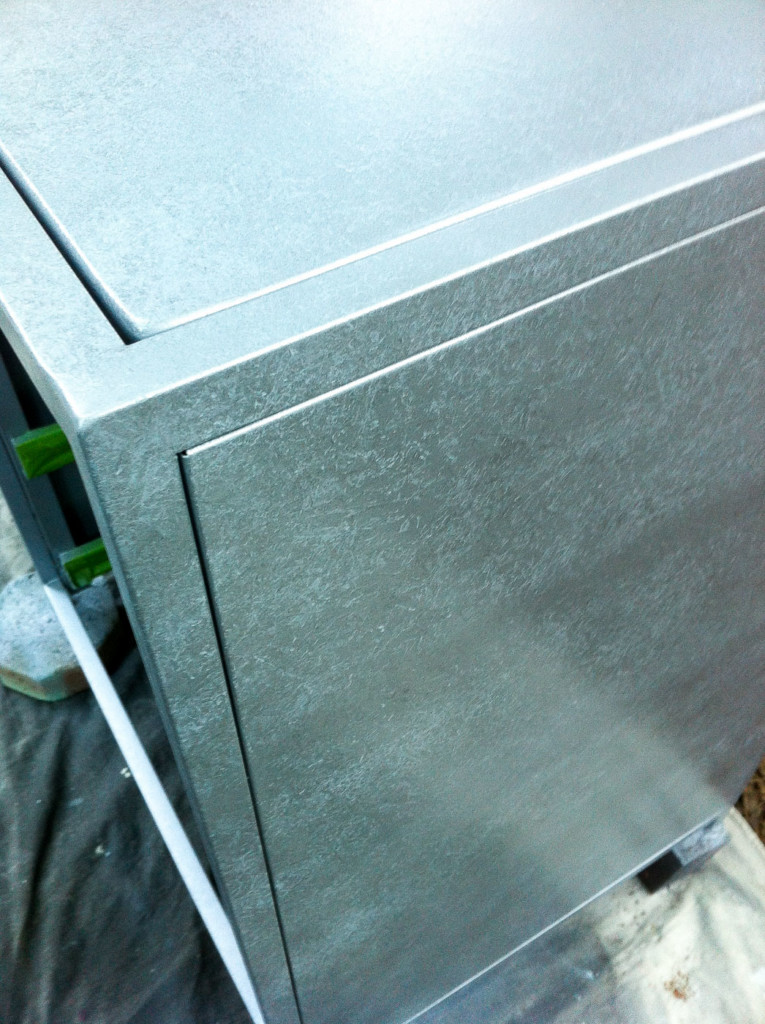
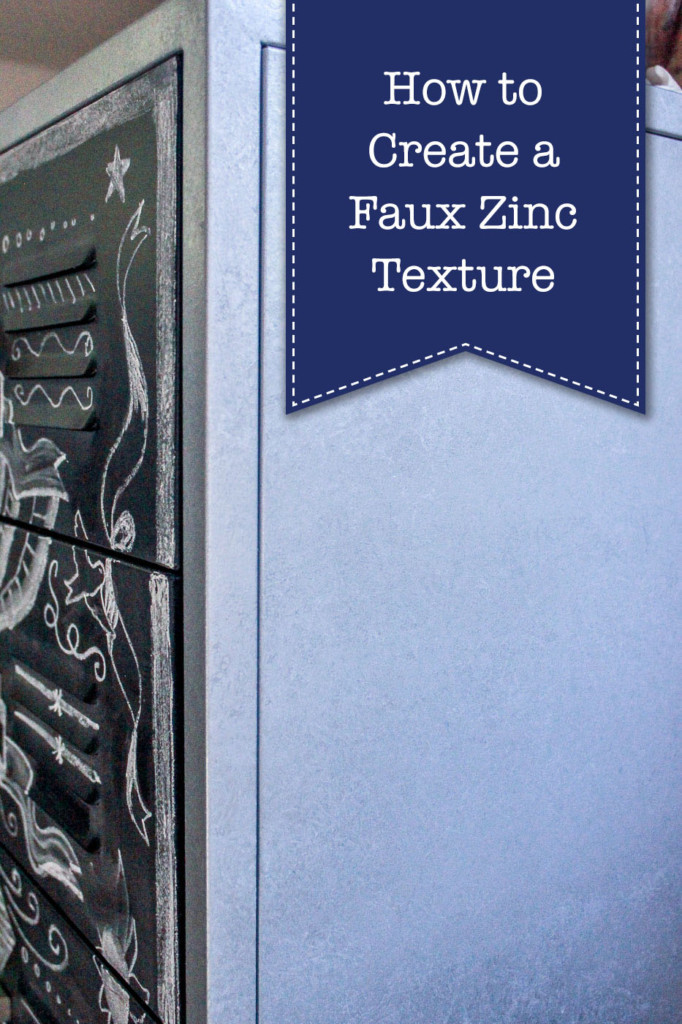
How to Create a Faux Zinc Texture
Want the look of zinc metal without the high cost? You can easily achieve it with spray paint. The best part is, it's a simple technique!
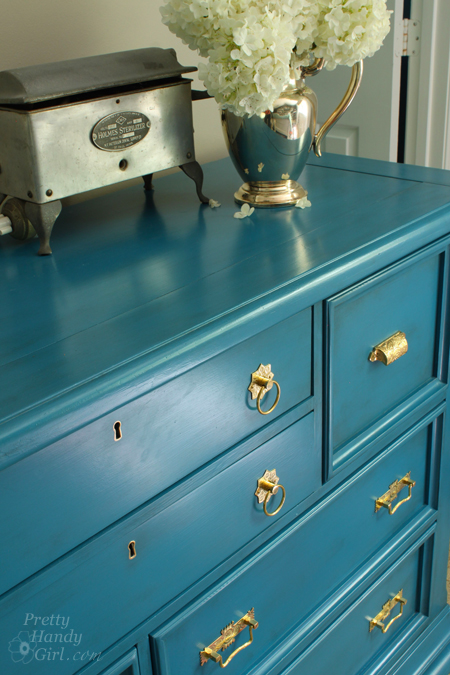
Aqua Dresser Makeover
A little paint and a few brass knobs are all it takes to transform this knotty pine dresser. The flaws and knots vanish in no time!
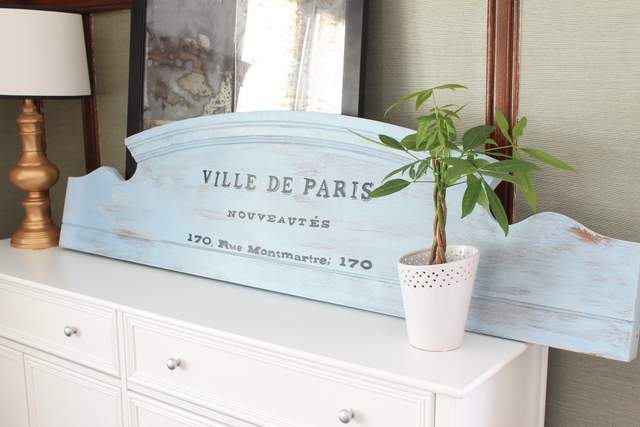
How to Make an Old Sign from a Foot Board
Learn how to transform an old footboard into a charming vintage-style sign with this easy DIY.
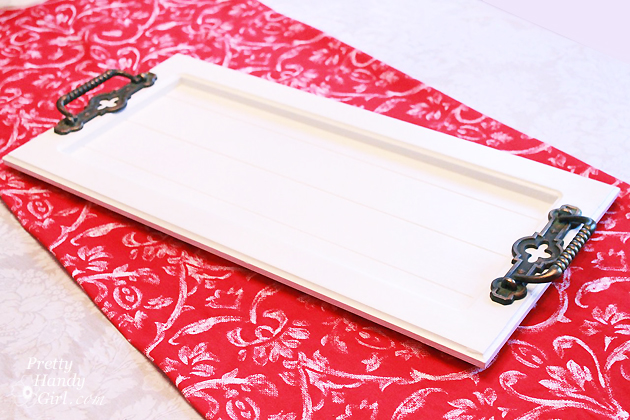
Make a Tray from a Cabinet Door
I scored a $2 cabinet door at Habitat ReStore and transformed it into a unique, budget-friendly serving tray.
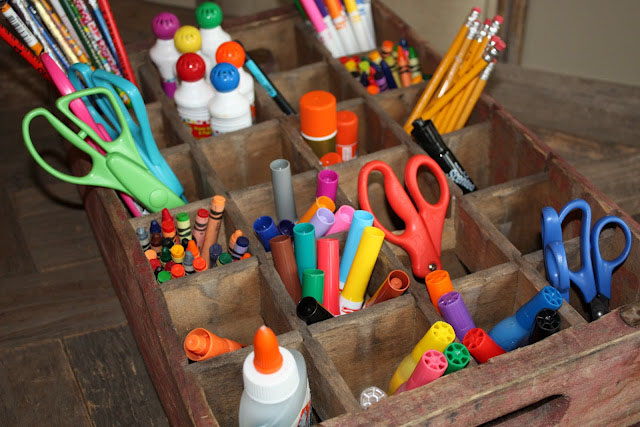
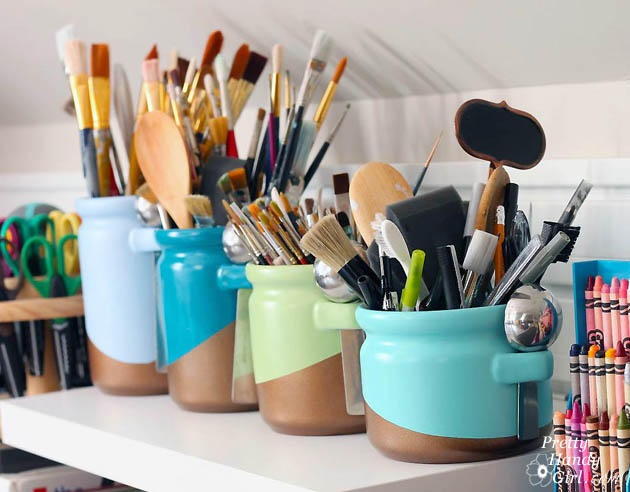
Creative Art Supply Storage
Looking for clever ways to store and show off your art supplies? Check out these fresh and creative ideas! This is a great idea to store acrylic paint and other supplies.
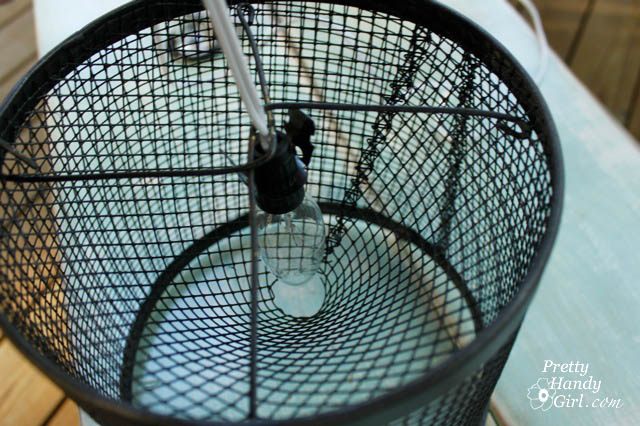
Creating Minnow Trap Light Pendants
Check out this unique DIY project that started out as minnow traps. I turned them into pendant lamps for my screened porch. This is such a fun way to turn thrift store treasures into one of a kind pieces.
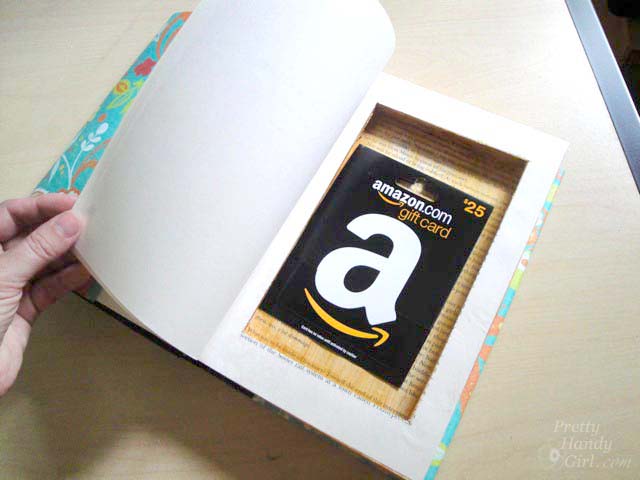
Decorative Book with Hidden Potential
Learn how to create a beautiful decorative book with a hidden secret compartment for stashing small treasures! Keep it on your bedside table to keep essentials out of view.
PIN FOR LATER


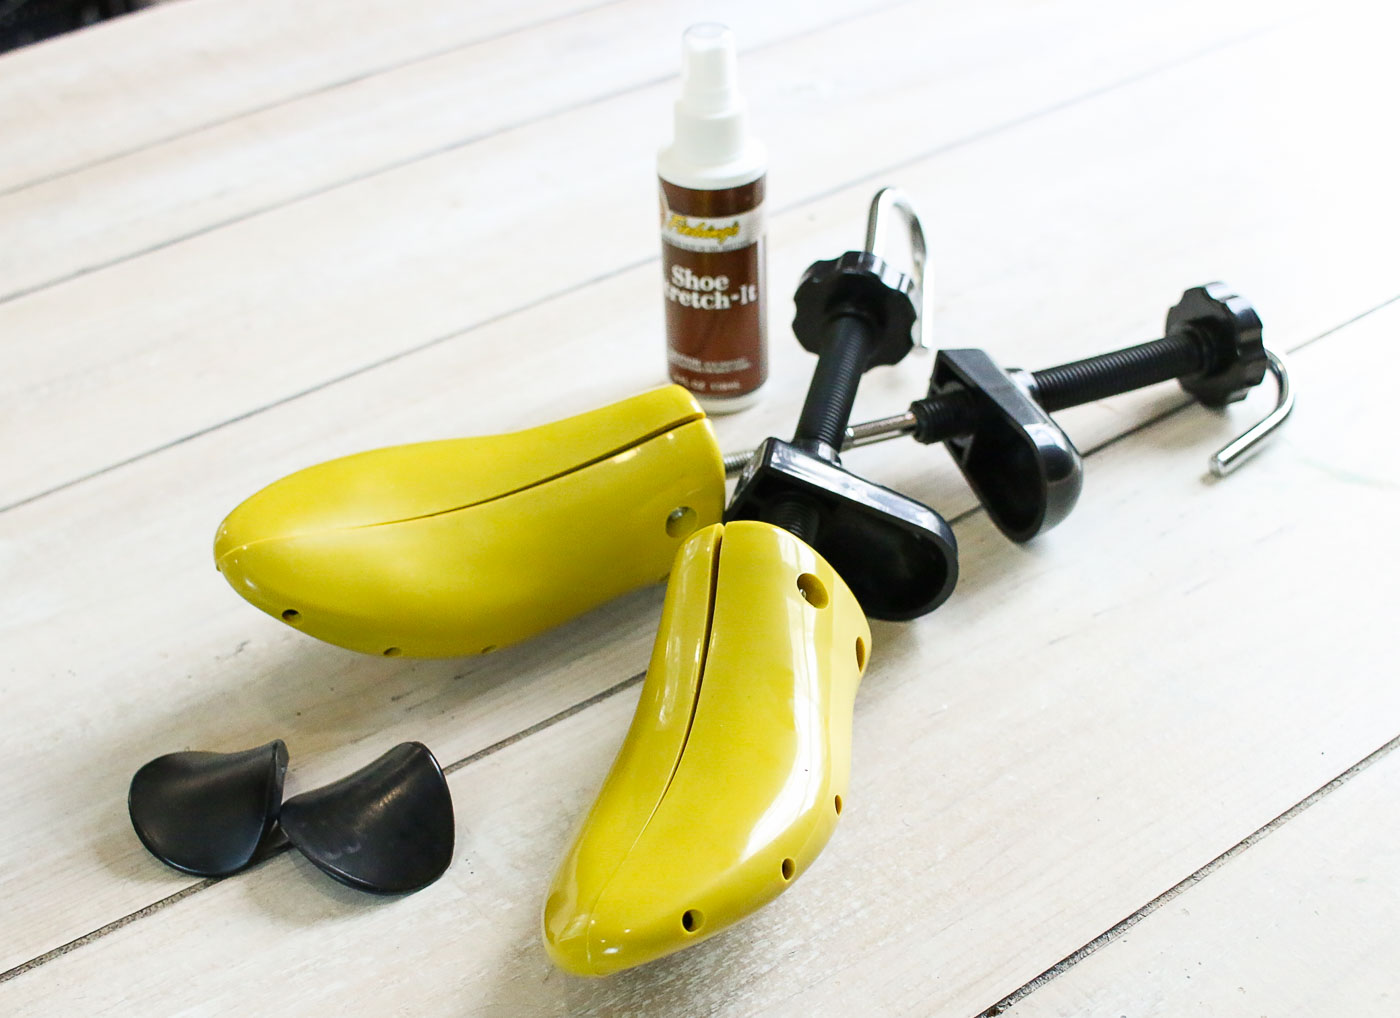
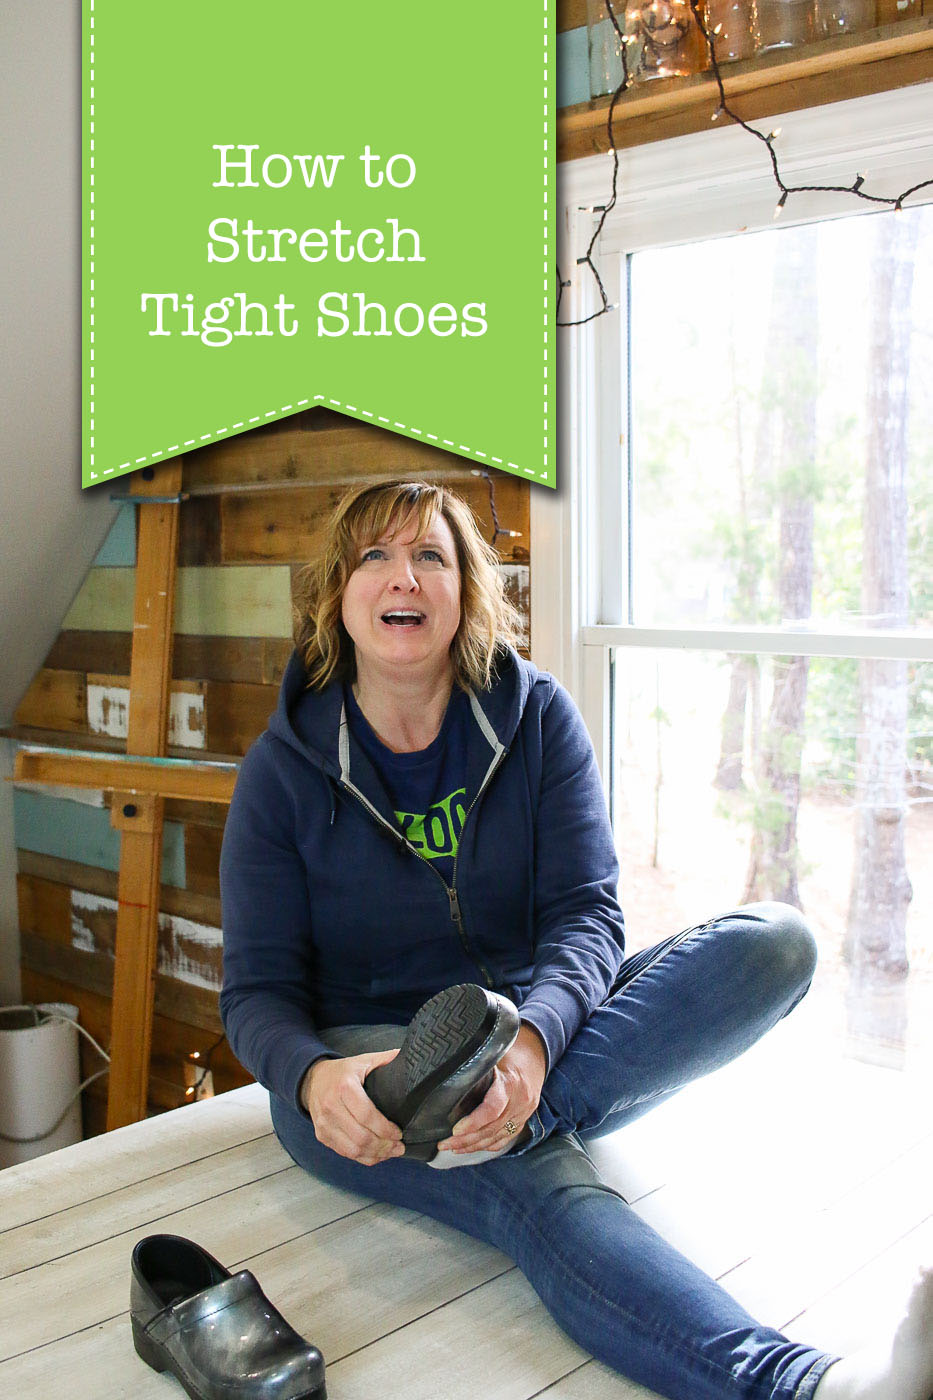 How to Stretch Tight Shoes
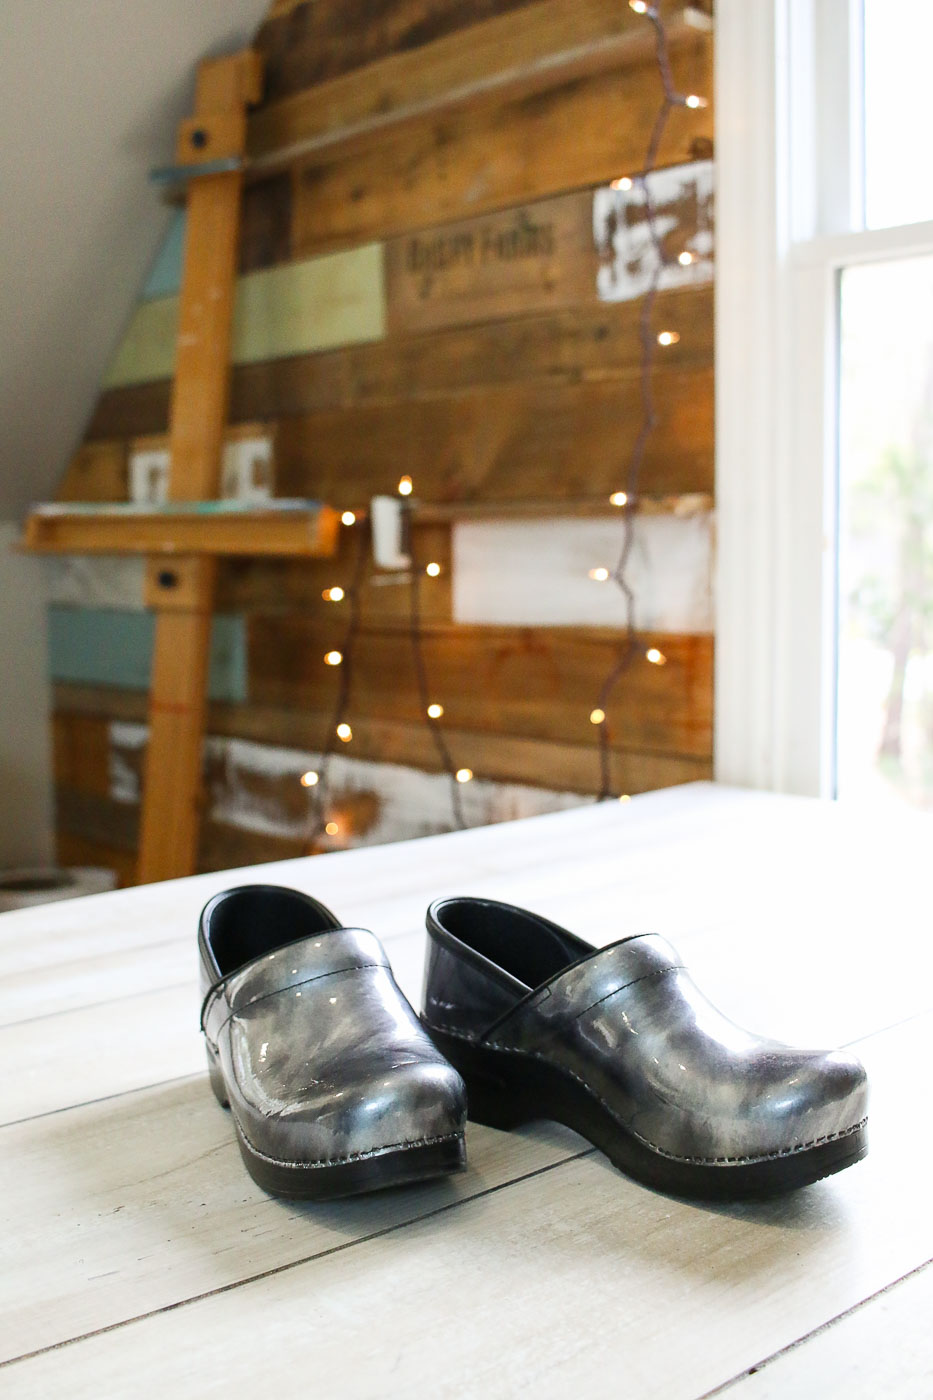


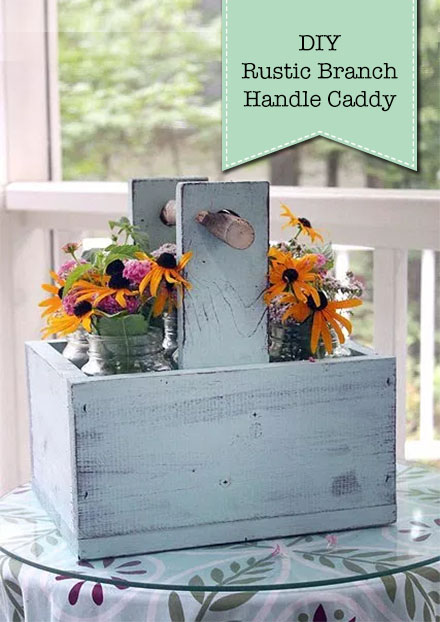 Rustic Wooden Caddy with a Branch Handle


