26 brilliant DIY Coaster Ideas square image

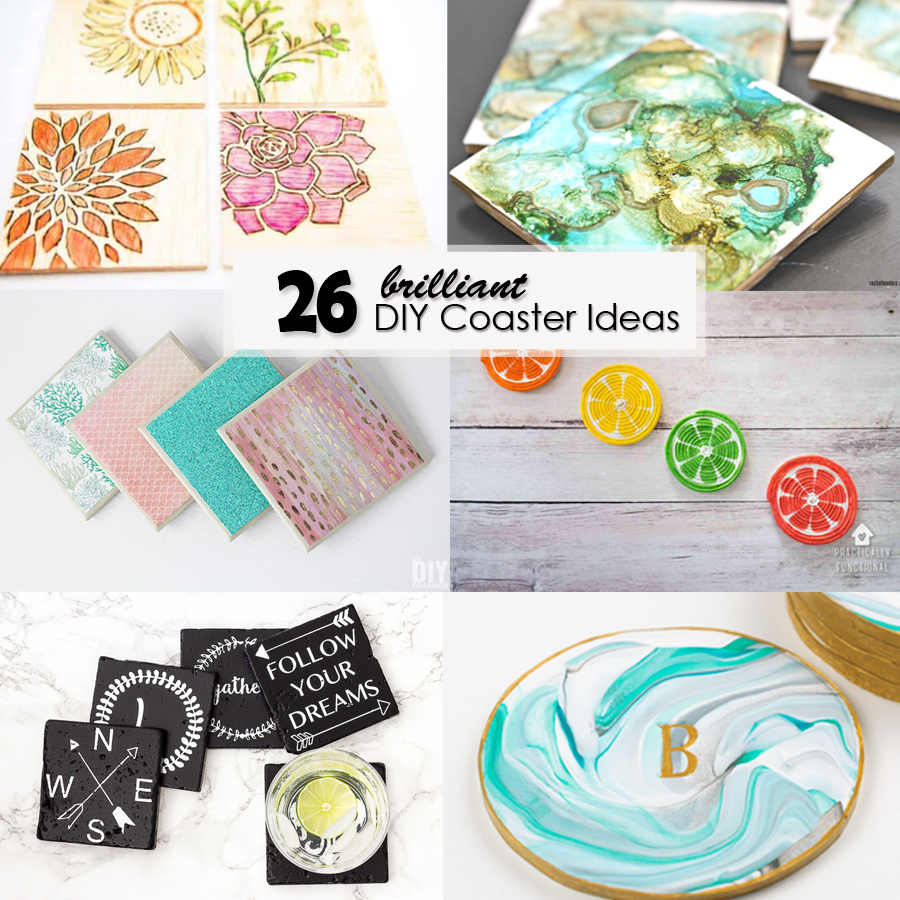
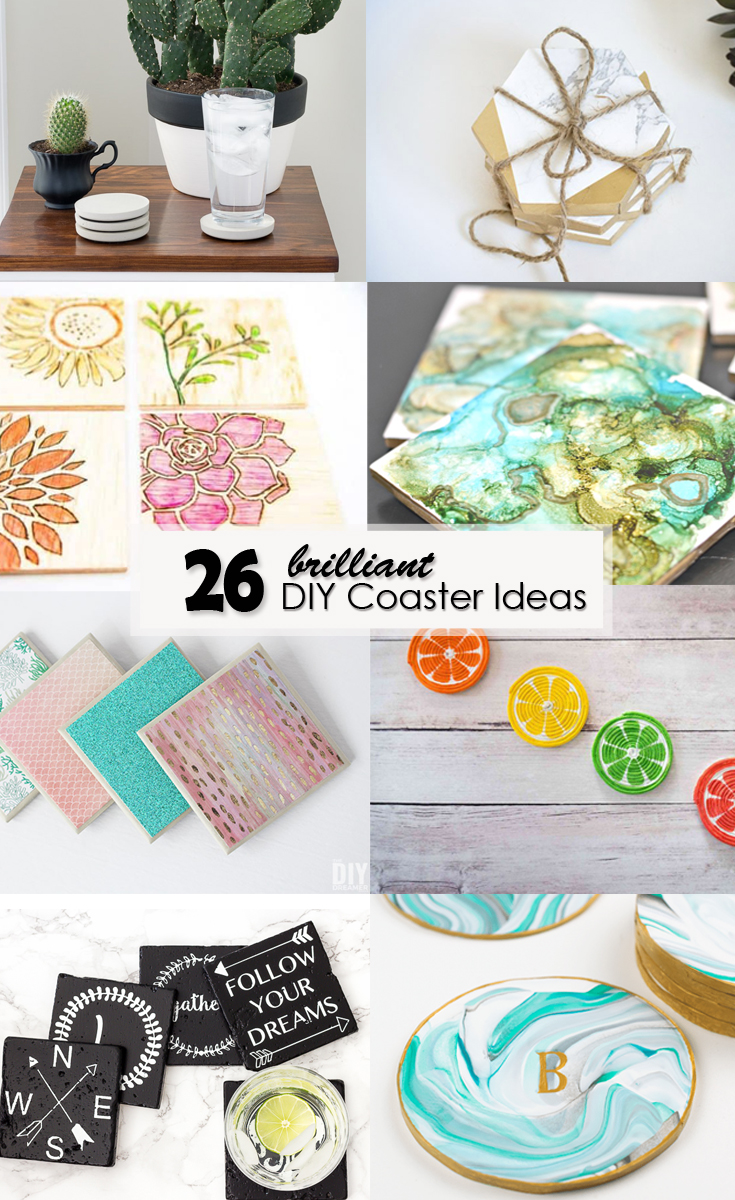
26 brilliant DIY Coaster Ideas square imageAdd some personality to your home and prevent those awful rings on your tabletops by making some coasters to place under every drink! Here are 26 brilliant DIY coaster ideas to inspire you and show how you can use a variety of materials to create some really cool coasters in any decor style.

26 DIY Coaster Ideas

diy oilcloth drink coasters by pretty handy girlLearn how to make these DIY Oilcloth Drink Coasters that you can use both indoors and outdoors.


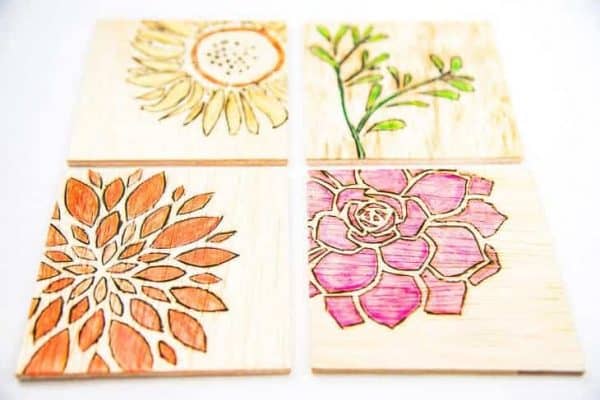
diy woodburned trivets and coasters by pretty handy girlUse cork and stencils to create these awesome Woodburned Coasters for your table.

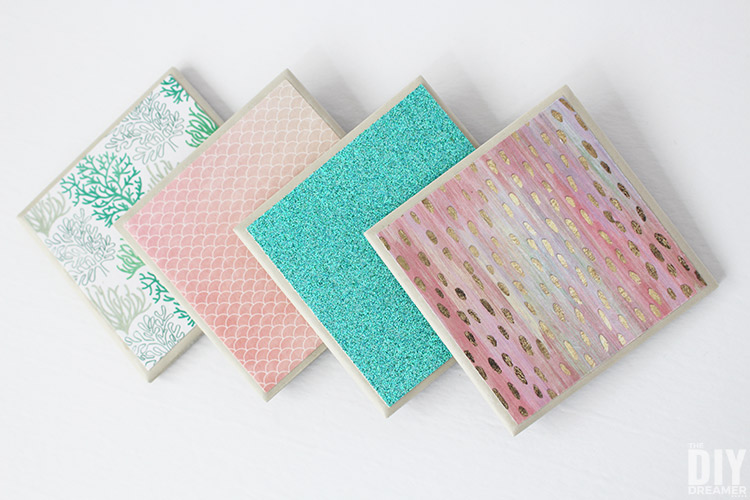
diy mermaid tile coastersIf you love beach or mermaid themed decor, make these magical DIY Mermaid Tile Coasters.

diy watercolor wooden coasters from the handymans daughterLearn how to make these DIY Watercolor Wooden coasters to add some beautiful color to your room.

fabric wood coasters by pretty handy girlAdd some patterns to your room with these fun DIY Fabric Coasters.

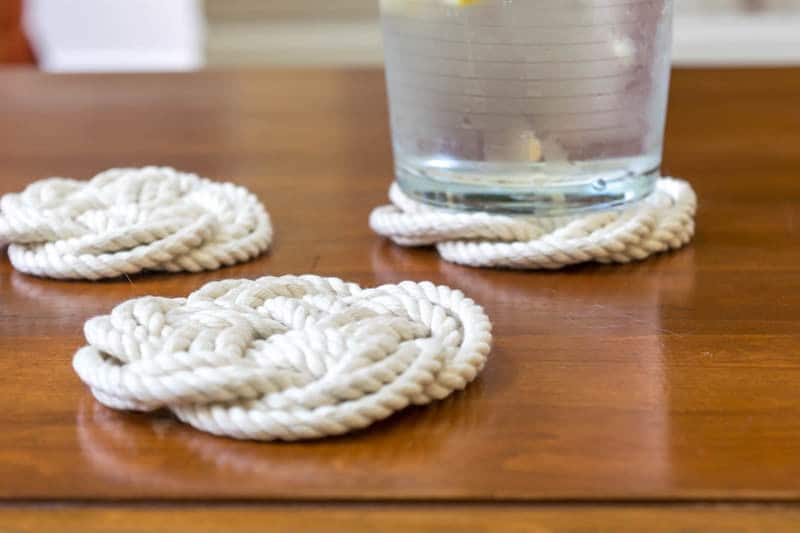
turk head knot coasters by nourish and nestleUse some cotton rope to make these amazing Turks Head Knot Coasters.

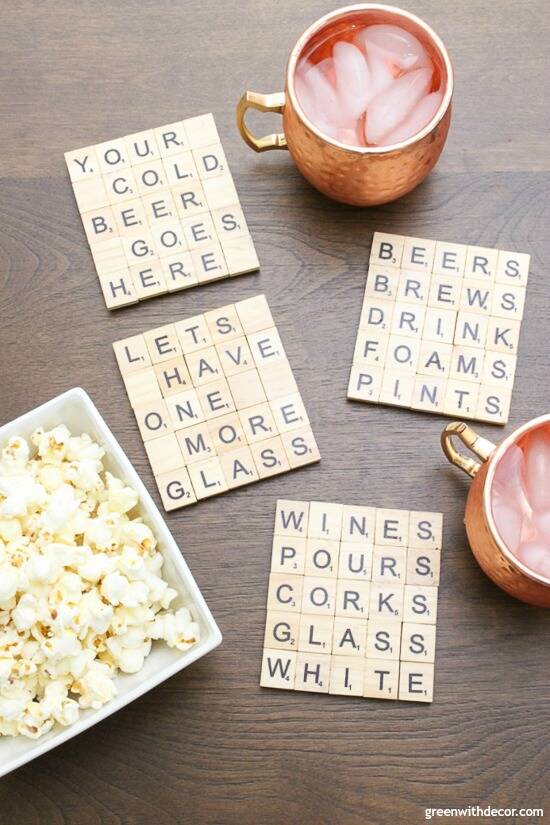
scrabble diy tile coasters by green with decorDo you love words? Create these Scrabble Tile DIY Coasters for your next gathering.

mosaic glass coasterUse small glass tile mosaics to create these modern easy-to-make Mosaic Tile Coasters.

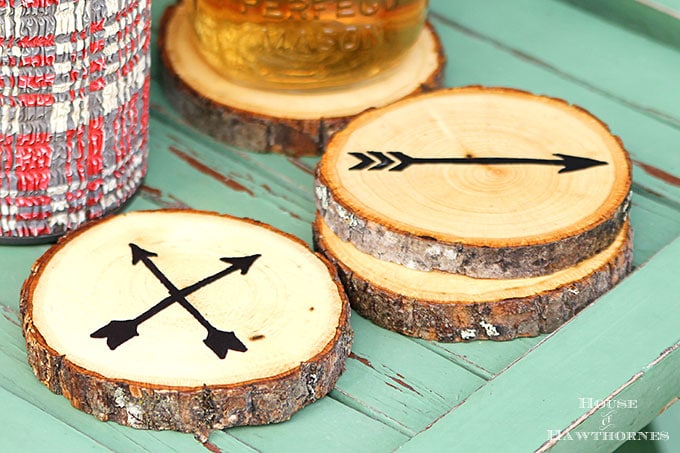
diy arrow wood slice coasters by house of hawthornesPersonalized Rustic Wood Slice Coasters would be so fun for your next dinner party.

map tile coasters by hazel and gold designsMake note of places that you’ve lived or loved with these Geographic Map Tile and Resin Coasters.

gold and marble coasters by pretty handy girlGold and Marble Coasters would make a gorgeous addition to your modern space.

diy arrow wood slice coasters by house of hawthornesA fun rustic option would be these DIY Arrow Wood Slice Coasters.

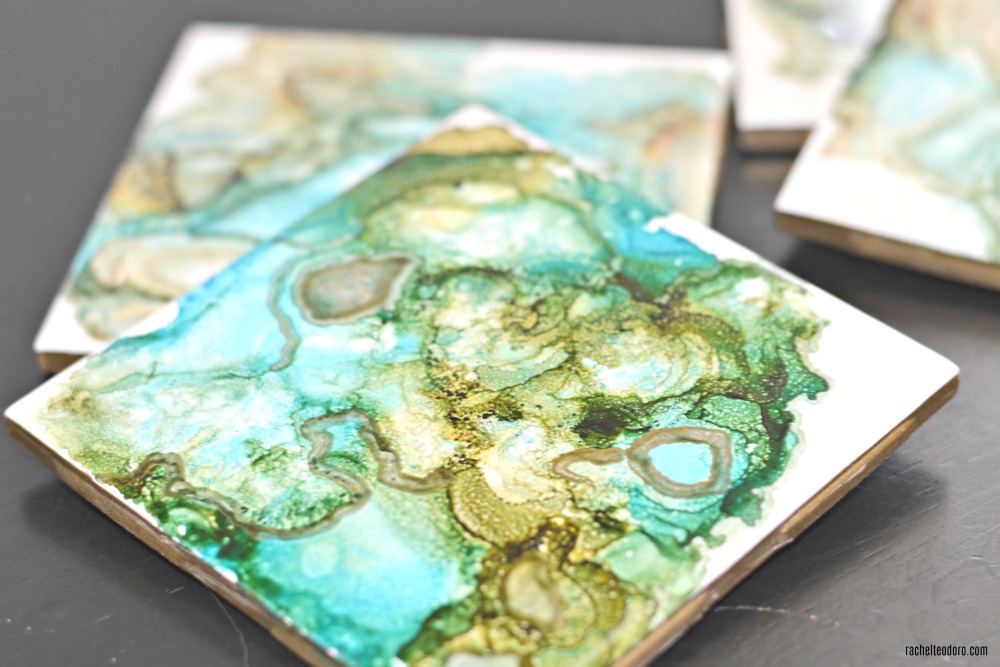
diy agate look ceramic tile coasters by rachelteodoroMake these natural looking Faux Agate Tile Coasters with alcohol inks.

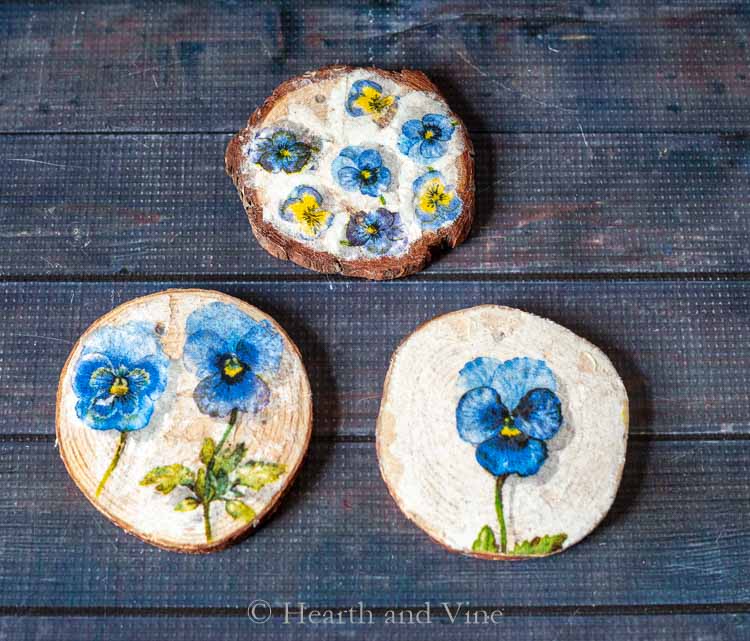
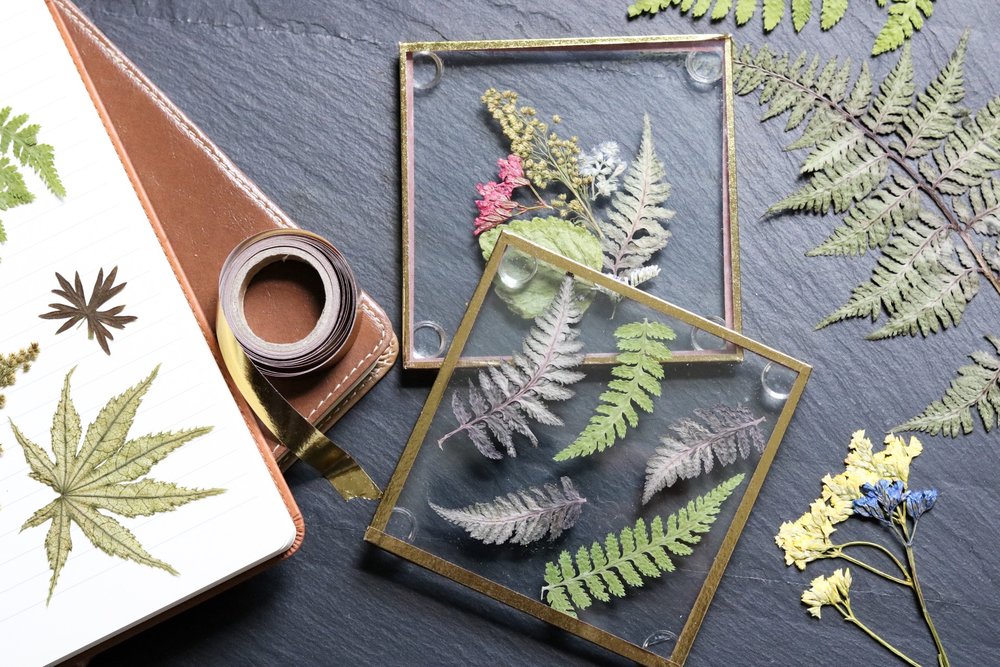
decoupage coasters by hearth and vineUse some old paper or napkins to make these beautiful Decoupage Coasters.

diy scented coastesr by lemons lavendar and laundryMake some clever DIY Scented Coasters using essential oils.

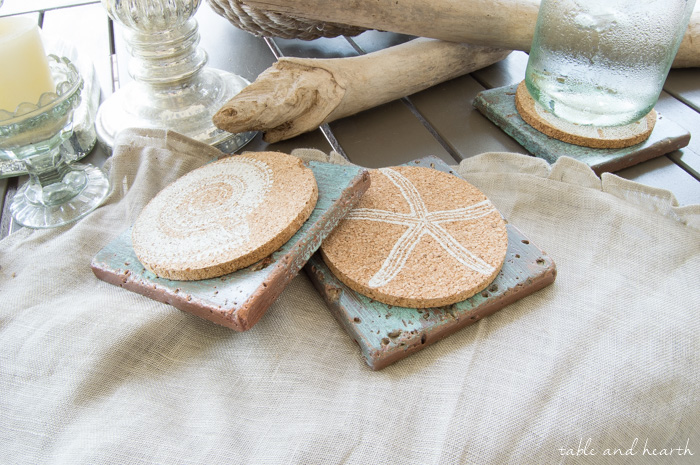
coastal tile coasters copper patina by table and hearthIf you love coastal style, these Copper Patina Tile Coasters would be perfect for your space.

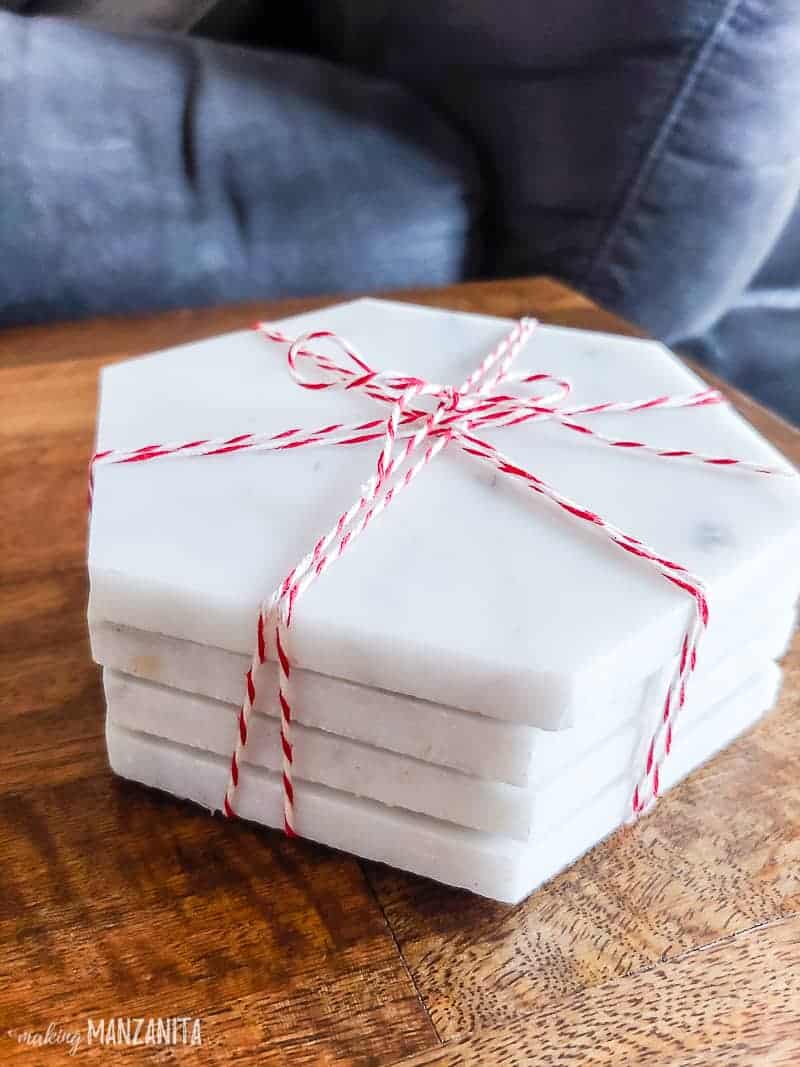
marble coastersIf you have extra tiles lying around, make something like these DIY Marble Coasters.

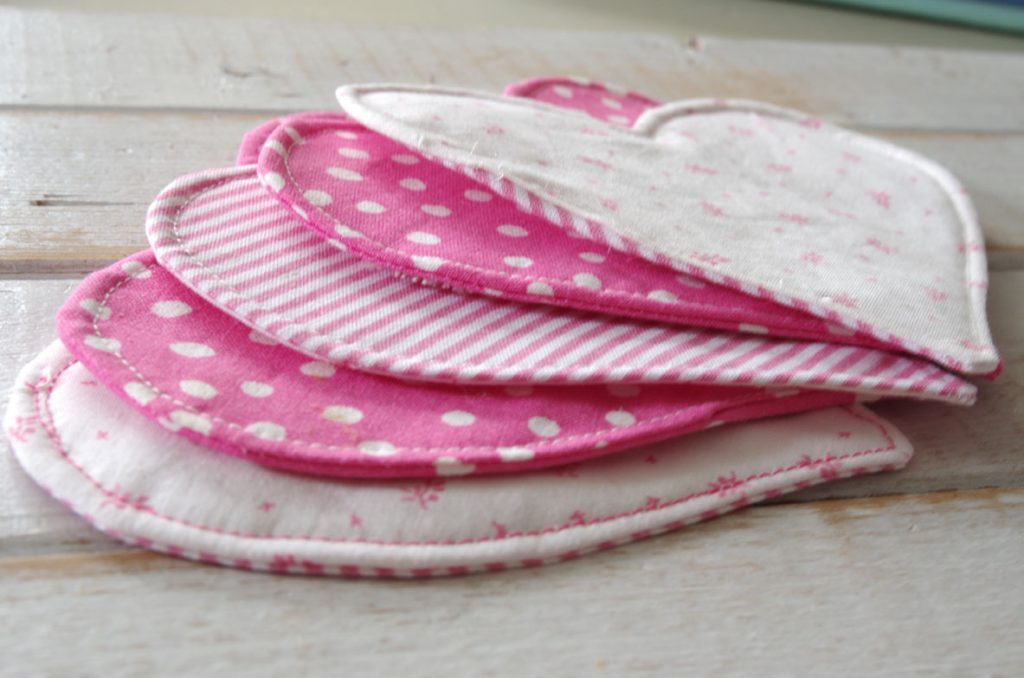
heart shaped fabric coasters by create and babbleThese Easy to Make Fabric Heart Coasters are a perfect way to use up some small fabric panels.

Dollar store flower coasters by crafty lumberjacksCreate these elegant glass Dollar Store Flower Coasters.

make metal washer coasters by smart fun diyCreate something unique by making these Metal Washer Coasters.

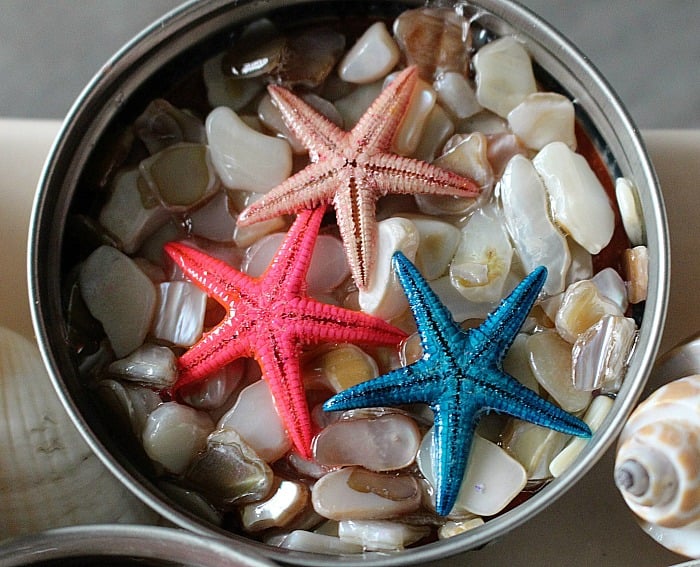
beach themed coasters with mason jar lidsUse some gloss glaze to adhere these awesome pieces and create a Beach Themed Mason Jar Lid Coaster.

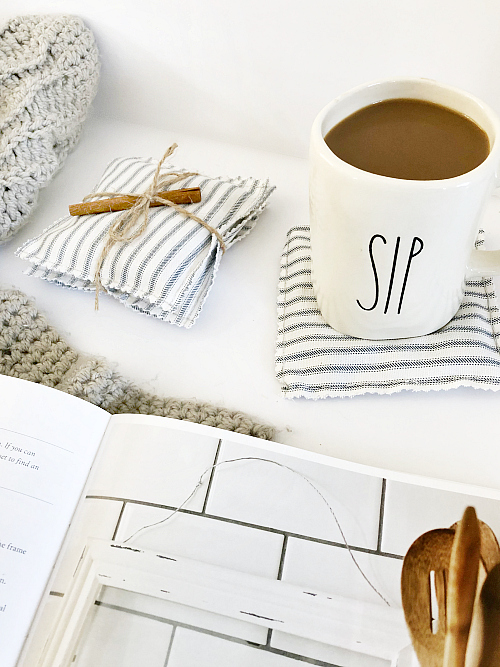
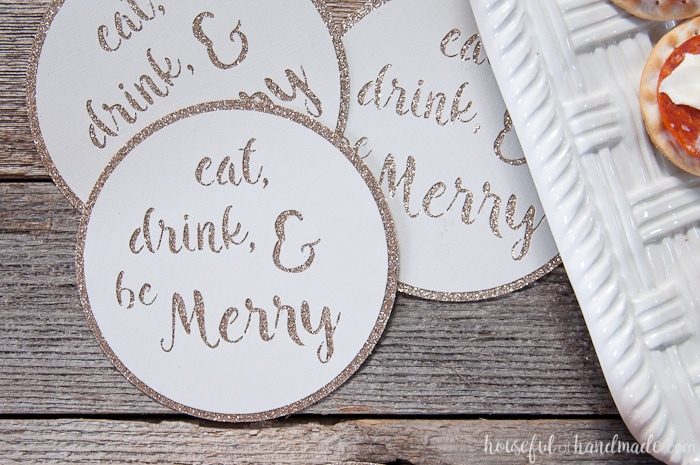
quick and easy diy drink coasters Make these quick and easy DIY Drink Coasters for your next cocktail party.

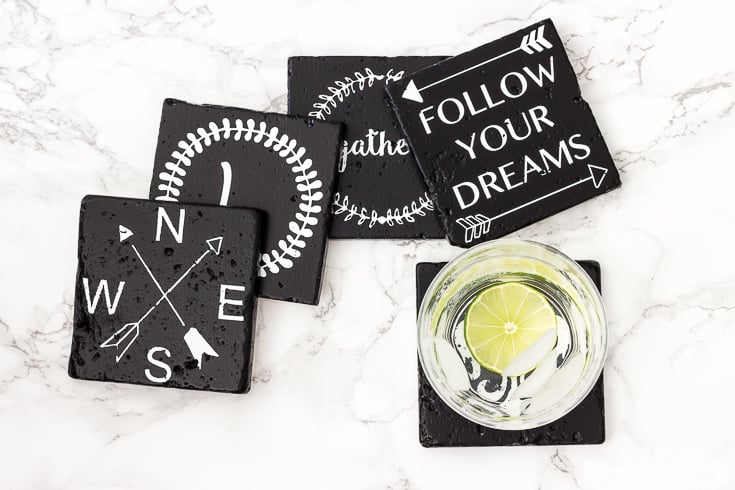
diy farmhouse style coasters by a home to grow old in Tiles and black paint make the perfect canvas to make these DIY Farmhouse Style Coasters.

diy marbled clay coasters by craving some creativityMake these DIY Marbled Clay Coasters with any color combination you want.

concrete coasters by Brittany GoldwynYou will not believe how simple it is to make these chic Concrete Coasters.

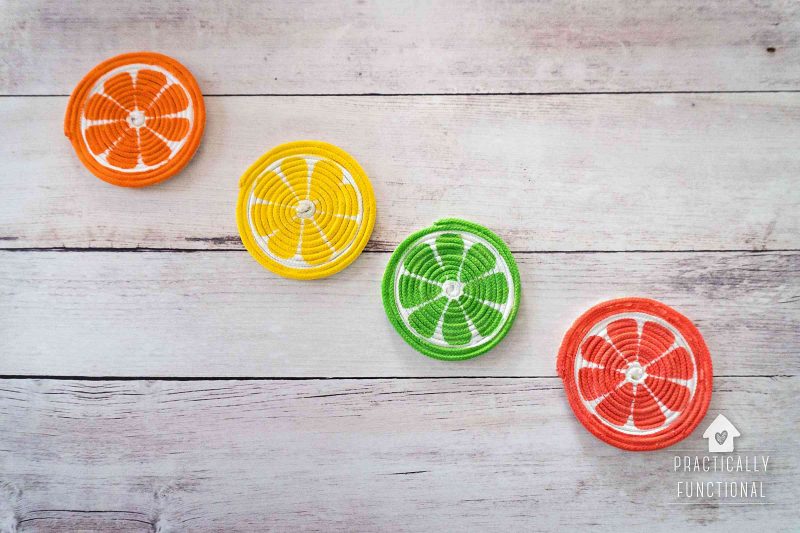
diy painted rope coasters by practically functionalUse some rope to make these fun DIY Painted Rope Coasters for your summer parties.


I hope you found some helpful ideas in this roundup of DIY Coaster Ideas to help add some functional beauty to your room or next party. Remember to click over to each site for the full tutorial. Please pin this image on Pinterest to share with your friends!

26 brilliant DIY Coaster Ideas Pinterest image

Hi, I’m Sheri from Hazel + Gold Designs. Here are a few fun stats about me: I like love chocolate and peanut butter (together of course.) If you like stats, I have been crocheting for about 16 years, crafting for 20, and woodworking for about 4 years. I found a passion in making and being creative and began documenting my projects online at Hazel + Gold Designs.

When not working on projects, I enjoy spending time with my husband, four children, perfect dog, and ornery cat. You can find me on Facebook, Pinterest, Instagram and Twitter.

Read all of Sheri’s tutorials.

~Find more of Sheri’s projects here ~


30 plus creative projects using chalkboard paint pinterest image

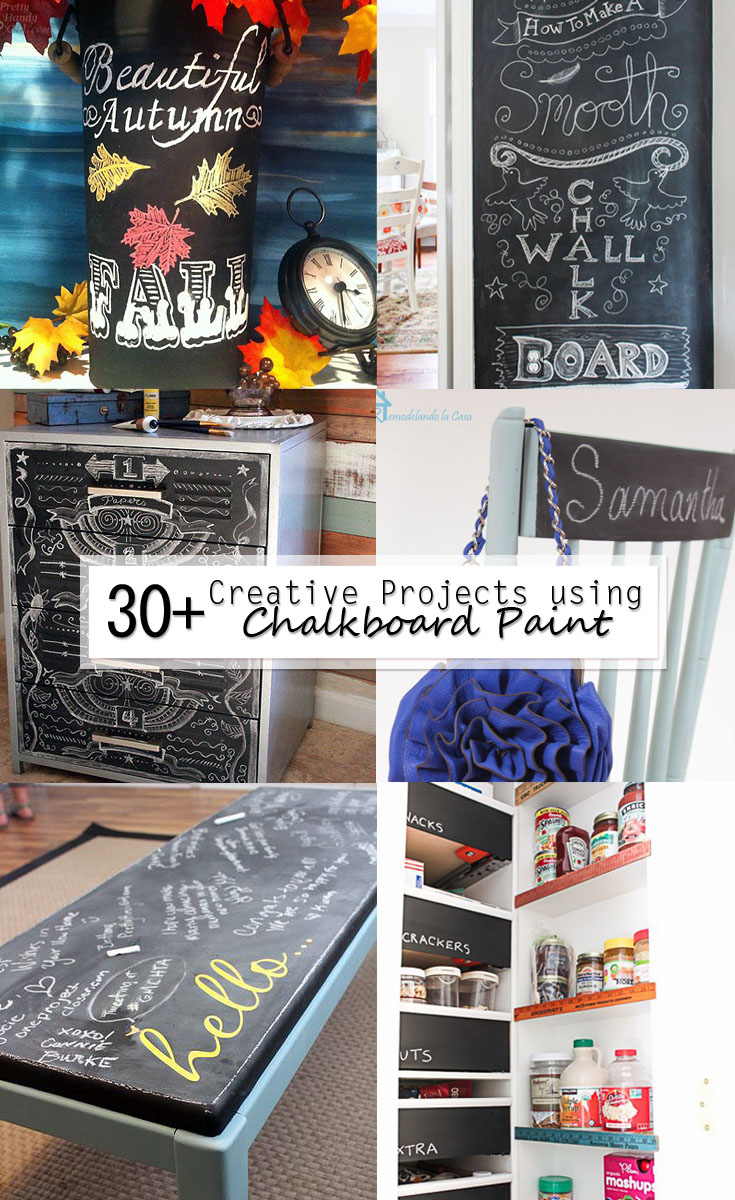
Chalkboard paint is such a fun addition to many different types of projects. You can turn anything into an ever-changeable work of art, or use it to label different items throughout your home. Here is a collection of 32 Creative Projects using Chalkboard Paint that you could create for your home or as a fun and personalized gift! Check them out and let me know what you think in the comments below.

Check out this Message Board for the Mudroom! It’s a great place to drop things on your way in or leave letters to go out to the mailbox.


Chalkboard Paint Projects - Spice Jar RackPaint a Dated Thrift Store Spice Rack to make your spices easy to find.


chalkboard painted projects - candy jar lidsLabel your cookie or candy jars with chalkboard paint to keep them cute and modern.


chalkboard paint projects - gift tagsCreate these amazing Gift Wrap chalkboard paint tags to customize your gift-giving.


chalkboard paint projects - customizable bin tags Make Customizable chalkboard paint tags for whatever you need to organize.


chalkboard paint projects - chalkboard coffee table

How fun if you painted your coffee table with chalkboard paint. Then you can write personalized messages on your coffee table.


chalkboard paint projects diy painted chair personalizedPlanning a chair makeover? Add some chalkboard paint to the back for personalization.


chalkboard paint bucketPaint a simple bucket and change the message to match any seasonal decor.


chalkboard paint with doodle curl white paint penChristmas ornaments coated in chalkboard paint can be decorated with chalk pens.


chalkboard paint buckets for gift givingCreate amazing hostess gifts by adding chalkboard paint to metal buckets.


chalkboard paint projects create a smooth wallLearn how to make a Smooth Chalkboard Wall anywhere in your house with this tutorial.


chalkboard paint vertical wall mounted deskCover a desk with chalkboard paint for a great note-taking surface.


chalkboard paint projects - create a fireplace draft stopperMake a fireplace draft stopper with insulation and chalkboard paint.


chalkboard paint projects - diy marble toss with keeping scoreMake a Marble Toss Game with a Chalkboard Paint Scoreboard.


chalkboard paint projects - chalkboard mugsCreate Chalkboard Painted Mugs for a favor at your next party.


chalkboard projects - diy rustic chalkboardAdd a huge DIY Chalkboard for your home and decorate it for all seasons.


chalkboard paint projects - diy clock signThis DIY Clock Sign is a fun way to use some chalkboard paint.


chalkboard paint projects for christmas signUse green chalkboard paint to make a count down sign.


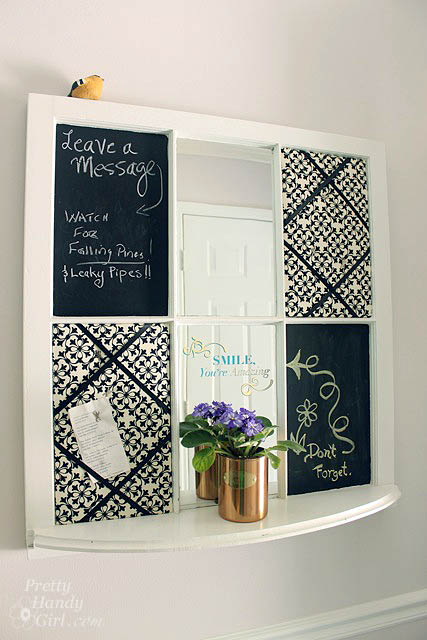
chalkboard paint projects - upcycle frame into magnetic chalkboard artMake a magnetic chalkboard frame from an upcycled wooden frame.


chalkboard paint project - upcycled cabinet door to chalkboard artUpcycle a cabinet door into quote art by following this tutorial.


chalkboard paint projects - decorated chalkboard washi clipboardCreate Decorated Chalkboard Clipboards using chalkboard paint and washi tape.


Chalkboard Paint Projects - Mini Makeover for a book display shelf

Makeover a bookshelf so kids can leave each other book reviews.


chalkboard paint projects - pantry drawer labelsBuild pull out drawers for your pantry and use chalkboard paint to label them.


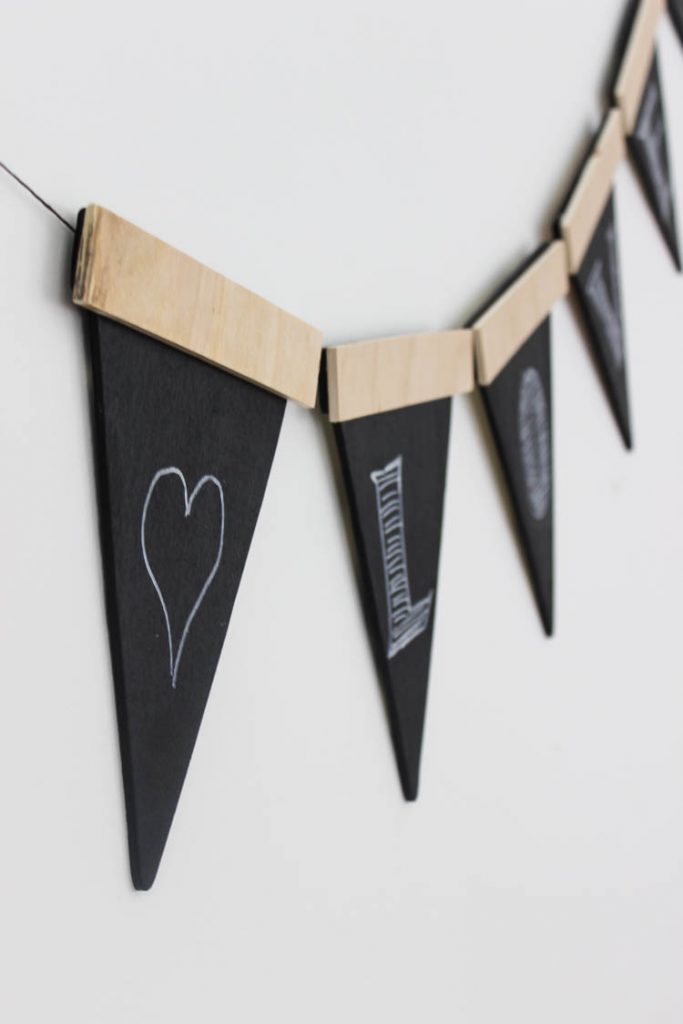
chalkboard paint project Wooden party banner Create this amazing Wooden Party Banner with wood and chalkboard paint for your next party.


chalkboard paint project - chalkboard seasonal artAdd some seasonal Chalkboard Art to decorate your home this fall.


chalkboard paint projects - how to make colored chalkboard paintLearn how to make Colored Chalkboard Paint.


chalkboard paint projects - chalkboard calendar for refrigeratorCreate a Chalkboard Calendar for your refrigerator and stay super organized all year.


chalkboard paint project chalkboard zinc cabinet beauty shotTurn a metal chest into a Faux Zinc Chalkboard File Cabinet and customize with chalk art.


chalkboard paint project - ikea cutting board makeover
Make a quick Cutting Board Makeover with blue chalkboard paint.


chalkboard paint project - rustic wall organization box Build an awesome Rustic Chalkboard Wall Organizer.


chalkboard paint project - chalkboard with ledgeBuild a Wall Chalkboard with a chalk ledge for the whole family to use.


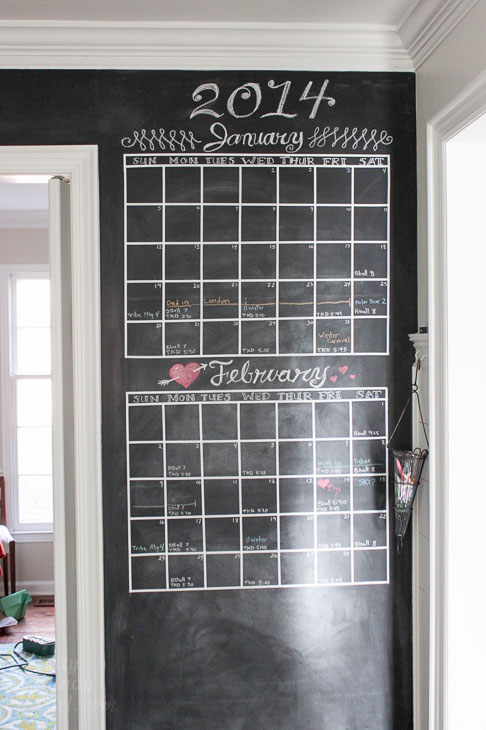
chalkboard paint project - diy chalkboard wall calendar Create a DIY Wall Calendar with chalkboard paint and stay on task daily.


Thanks for reading! If you like this collection of ideas, please Pin this image on Pinterest to share with your friends and save for later!

30 plus creative projects using chalkboard paint pinterest image

Hi, I’m Sheri from Hazel + Gold Designs. Here are a few fun stats about me: I like love chocolate and peanut butter (together of course.) If you like stats, I have been crocheting for about 16 years, crafting for 20, and woodworking for about 4 years. I found a passion in making and being creative and began documenting my projects online at Hazel + Gold Designs.

When not working on projects, I enjoy spending time with my husband, four children, perfect dog, and ornery cat. You can find me on Facebook, Pinterest, Instagram and Twitter.

Read all of Sheri’s tutorials.

~Find more of Sheri’s projects here ~


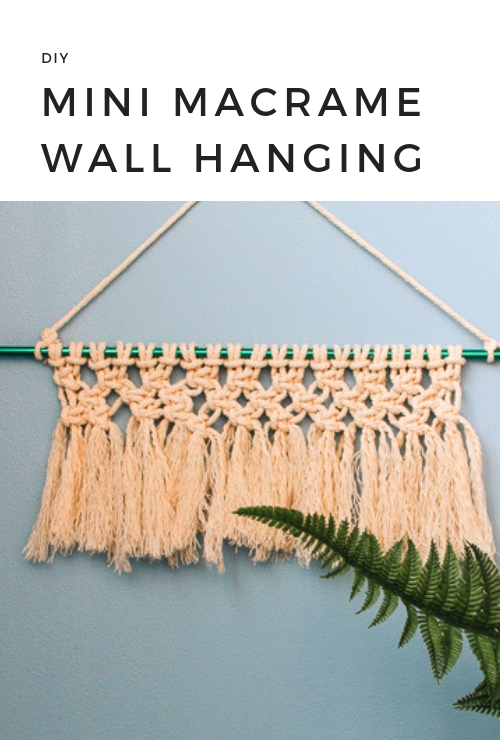
Hang up your Mini Macrame Wall Hanging

Learn how to make a mini macrame wall hanging - you can hang this anywhere and it only takes 20 minutes to make!

How to Make a Mini Macrame Wall Hanging

If there’s one hobby that has become quite the obsession for me – it’s macrame! It’s really fun to create and the projects are inexpensive to complete.  Right now macrame wall hangings are all the rage, and add an eclectic look to your decor.  Today I’m showing you how to make a mini macrame wall hanging.  So chic!

If you’ve been wanting to start macrame—but are intimidated—you’re in luck! This project is small, simple, and can be completed in about 30 minutes!

This mini macrame wall hanging is a subtle nod to bohemian decor and it will look great pretty much anywhere in your home! Hang in your bathroom on in your office. Or, include it with a grouping of gallery wall prints for a more collected feel.

Here’s how to make it …

Materials:

(I’ve included affiliate links for your convenience. I earn a small percentage from a purchase using these links. There is no additional cost to you. You can read more about affiliate links here.)

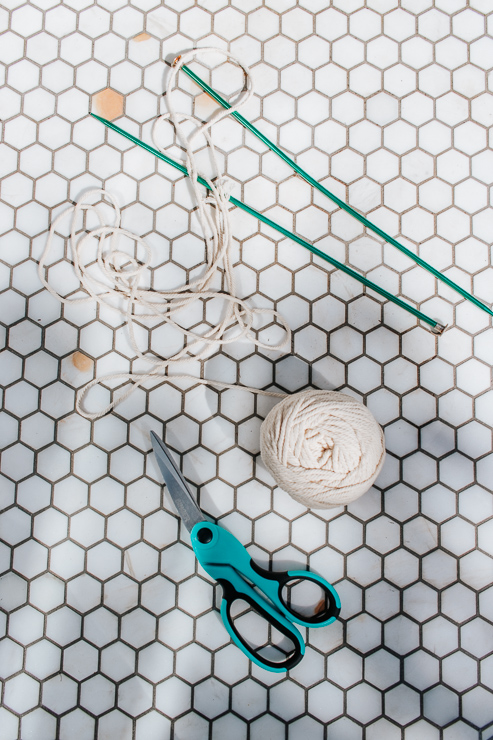
Materials Needed for Mini Macrame Wall Hanging

Instructions:

Step One – Cut your Cords

Measure and Cut Macrame Cording to Size

Start by cutting your macrame cording. You will need 20-20 inch cords for this project. (20″ will make a mini wall hanging. After you get the hang of this, you can make your macrame art skinnier or longer. Whatever your heart desires.)

Step Two – Attach with Lark’s Head Knots


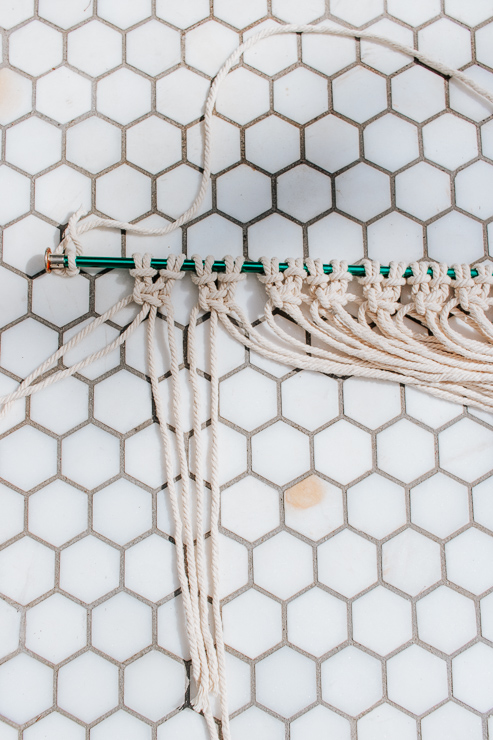
Once you have your cords cut, you want to attach the cords by creating 20 lark’s head knots. Here’s a quick video to show you how to make a lark’s head knot:

Take your cord and fold it in half. Take the loop part and fish it under your rod. Loop the ends of the cords through the cord – and pull tight! Now repeat this 19 more times with the rest of your cords.

Step Three – Make a Row of Square knots

Now that your cords are all attached, we are going to make Square Knots and Alternating Square Knots. Here’s how to make a square knot:

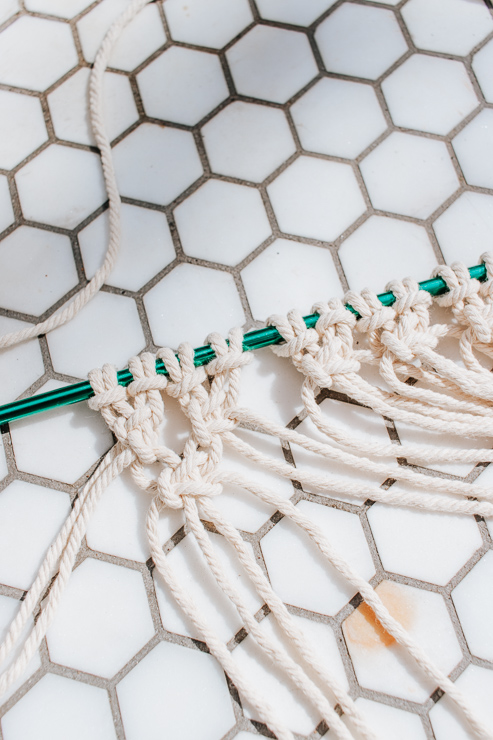
To make a square knot – take the first four adjacent cords and do the following:

  1. We are going to take the outer left cord and cross it over the two middle cords. Now take the outer right cord and place it on top of the left cord and UNDER the two middle cords.
  2. Loop it through the hole on the left side.
  3. Now pull to tighten the knot.
  4. Now take the outer RIGHT cord and cross it over the two middle cords.
  5. Take the outer left cord and place it on top of the left cord and UNDER the two middle cords.
  6. Loop it through the hole on the right side.
  7. Now pull your cords tight.

You have completed the full square knot.

You want to keep working the next four adjacent cords to make a row all the way across of square knots.

Step Four – Make a Row of Alternating Square Knots.

Our next row is going to be alternating square knots.

To make these knots – follow the same steps as above, however skip the first two adjacent cords – start with the third cord and work the adjacent 3 cords.  Continue all the way across the row!

Step Five – Make a Row of Square Knots Again

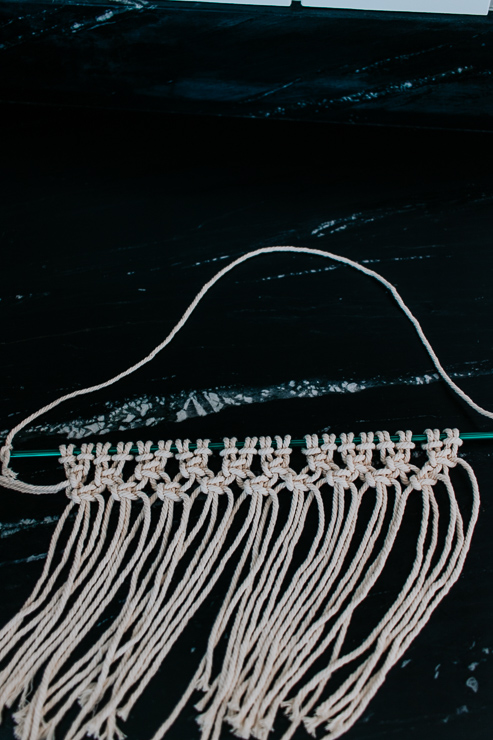
To complete our mini macrame wall hanging, our last row will be a row of square knots – so follow Step 3 again.

You should have something that looks like the photo below.

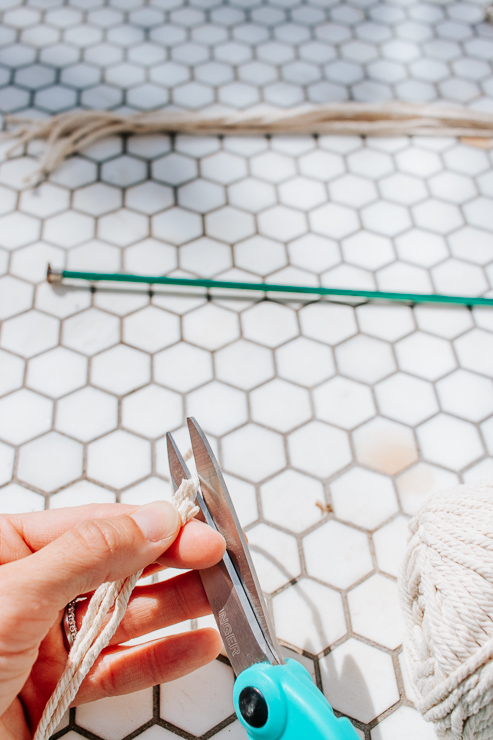
Trim the bottom of the wall hanging to even it up

Step 6 – Cut and Fray the Ends of your Wall Hanging

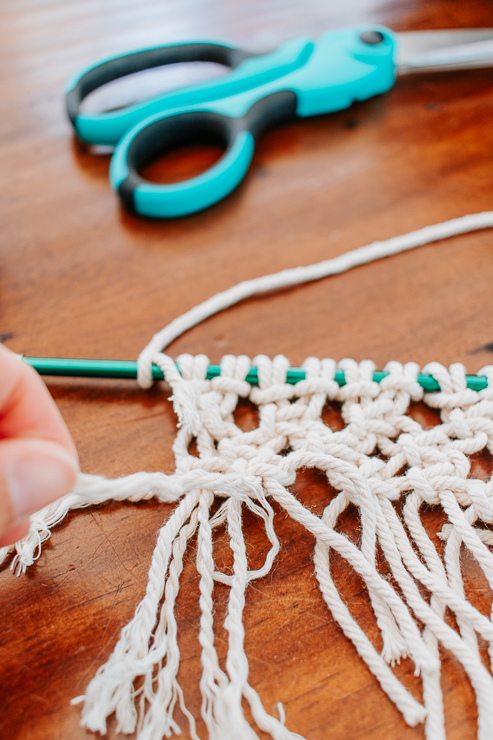
Take your scissors and cut straight across to create an even line of fringe. Take each cord and unravel it with your fingers.

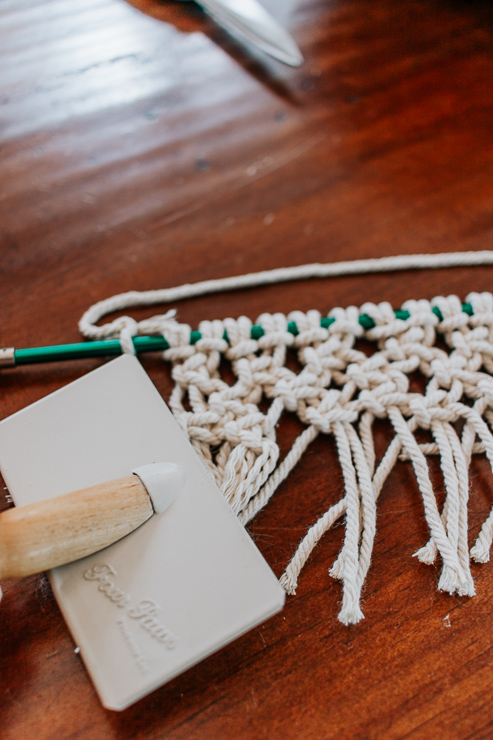
Now, take a wire brush and carefully brush through the unraveled cords to fray them.

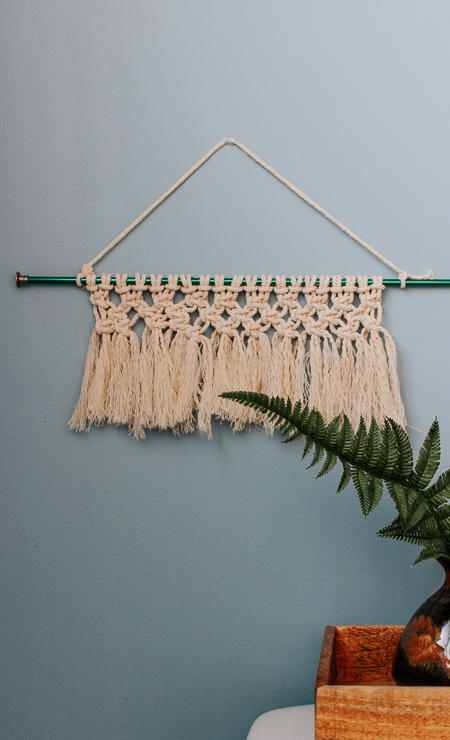
All done!

Hang up your Mini Macrame Wall Hanging

Now all you have to do is hang it up and enjoy your beautiful work.  Can you imagine how pretty these would be if you made a trio of mini macrame wall hangings for a cohesive collage.  I really love that idea.

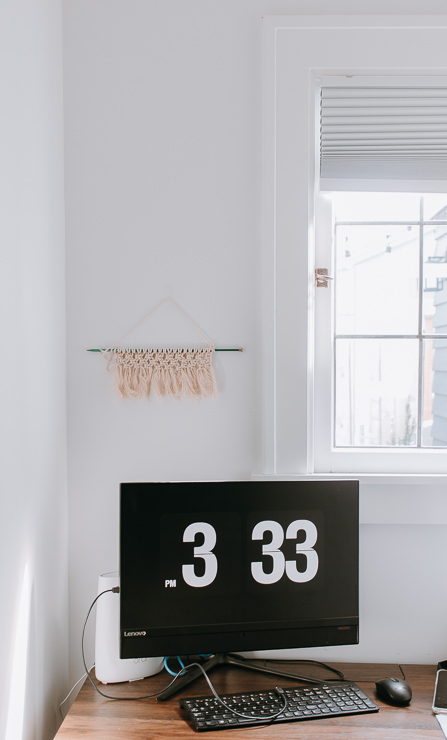
I hung my mini macrame over the computer for some style and texture in this little corner.

Mini Macrame Wall Hanging in an Office

If you want some additional help and projects – go to my blog and check out my Step by Step Basic Macrame Knots Guide.  And check out the cool macrame planter hanger here on Pretty Handy Girl for another cool project!

DIY Macrame Plant Hanger

Once you learn how to make the most basic knots – you can create all kinds of cool projects for your home. Such as Macrame Pillows, Mason Jar Covers, Jar Candle Hangers, Macrame Feathers – I could go on and on!

Feel free to leave me any questions or comments below – I hope this inspired you try Macrame if you haven’t yet.

I’ll see you right here next month with another awesome project for you.

karen signature

~ See More of Karen’s Tutorials ~


karen from decor hintHello!  I’m Karen, the creator of the Home Decor and DIY Blog: Decor Hint . I’m a Native of the East Coast, but I currently live in beautiful Seattle with my hubby, our two wonderful children and our spunky wheaten terrier.

You can usually find me with some sort of craft in one hand and a coffee in the other. And I’m always rearranging furniture or moving lamps from room to room. I have a passion (read: obsession) for decorating, DIY, and gardening. In short, I love making my house into a home.

Like many, I’m inspired by what I see in home decor magazines, but I’m not so inspired by the price tags.  Consequently, I love finding and creating beautiful budget-friendly home decor items. In a head to head competition, I bet you’d never know the difference between the designer items and my DIY creations!  Many of my DIY projects focus on sewing, crafting, upcycling and organizing. Some of my favorite projects have been making pretty wreaths , sewing my own tassel hand towels, and crafting these trendy wood bead garlands . I can’t wait to inspire you and spark your creativity through my DIY projects.

You can always connect with me on Pinterest , Twitter or Instagram.

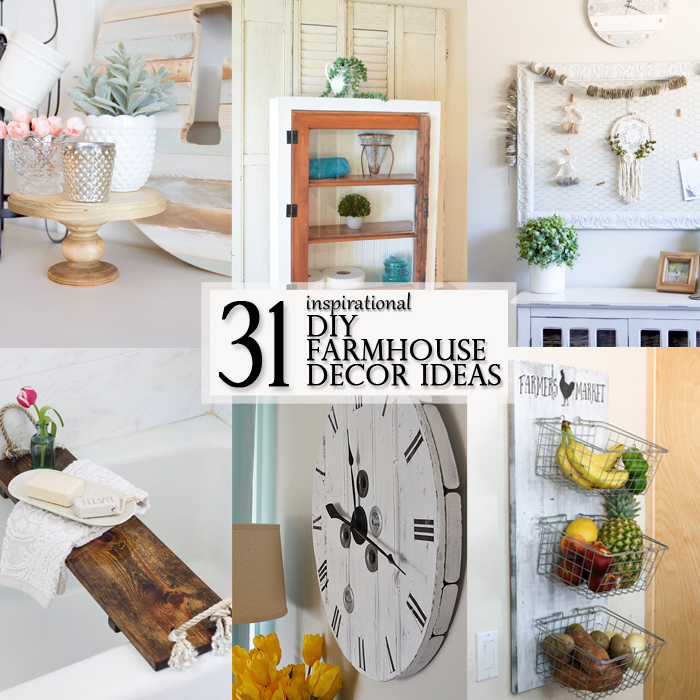
DIY inspirational Farmhouse Decor Ideas - Featured Image square

DIY inspirational Farmhouse Decor Ideas - Featured Image squareInspirational DIY Farmhouse Decor

Many of us are still in love with the farmhouse style of decorating. It’s warm, relaxing and full of character. Farmhouse style is a mixture of old and new pieces, bringing in a rustic and vintage feel, but not excluding shiny and new. Here are 31 Inspirational DIY Farmhouse Decor Ideas that you can make for your home. You will love these beautiful and affordable ideas!

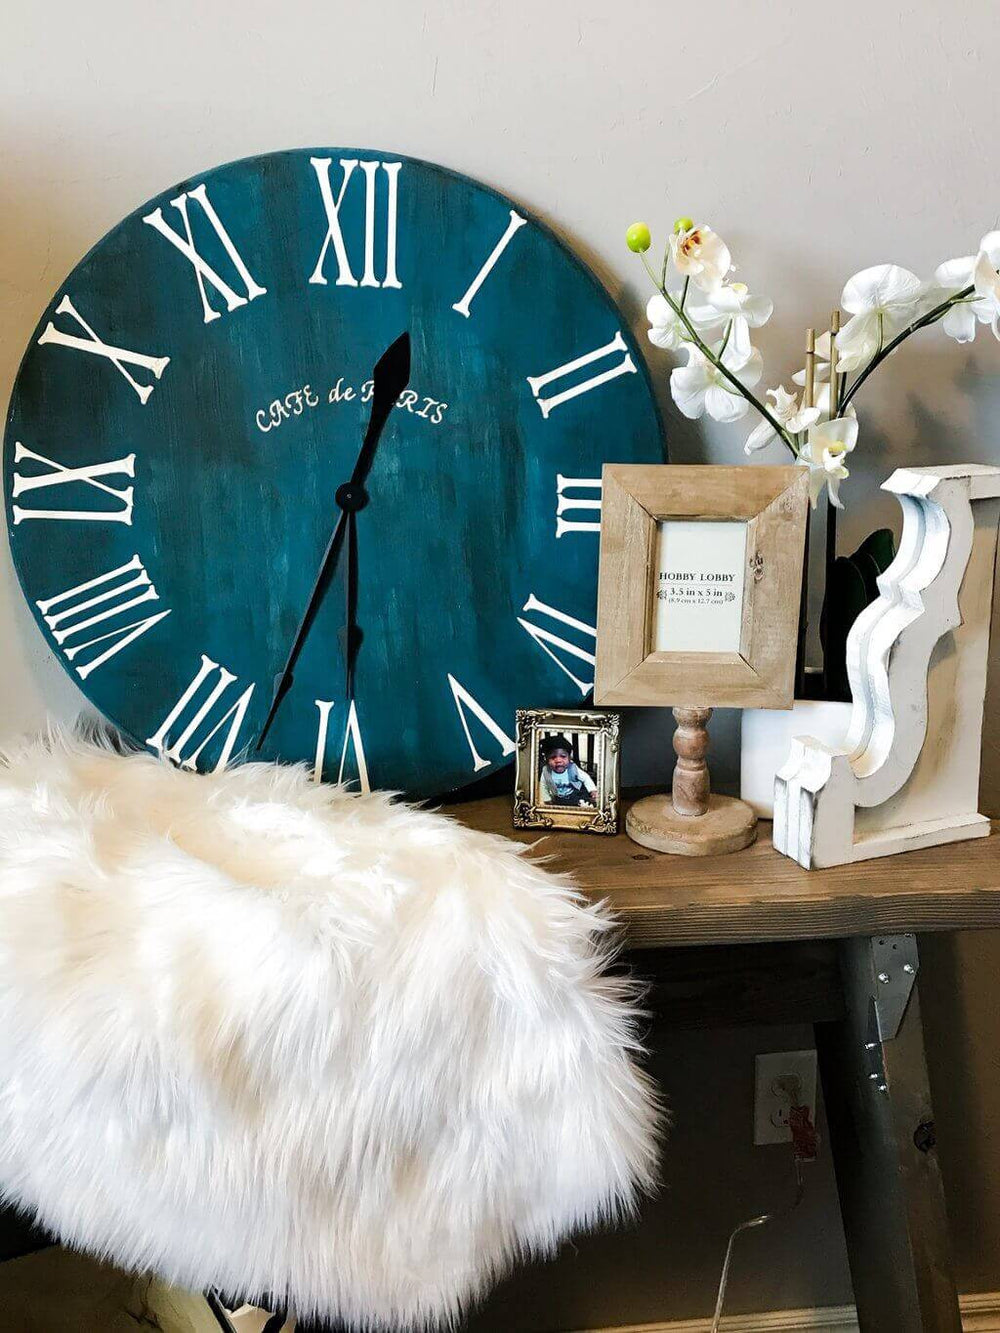
rustic roman numeral DIY ClockMake this DIY Rustic Roman Numeral Clock using a wooden round and clock stencil.


how to build a modern farmhouse bench Build a Modern Farmhouse bench to go with your table or on your front porch.


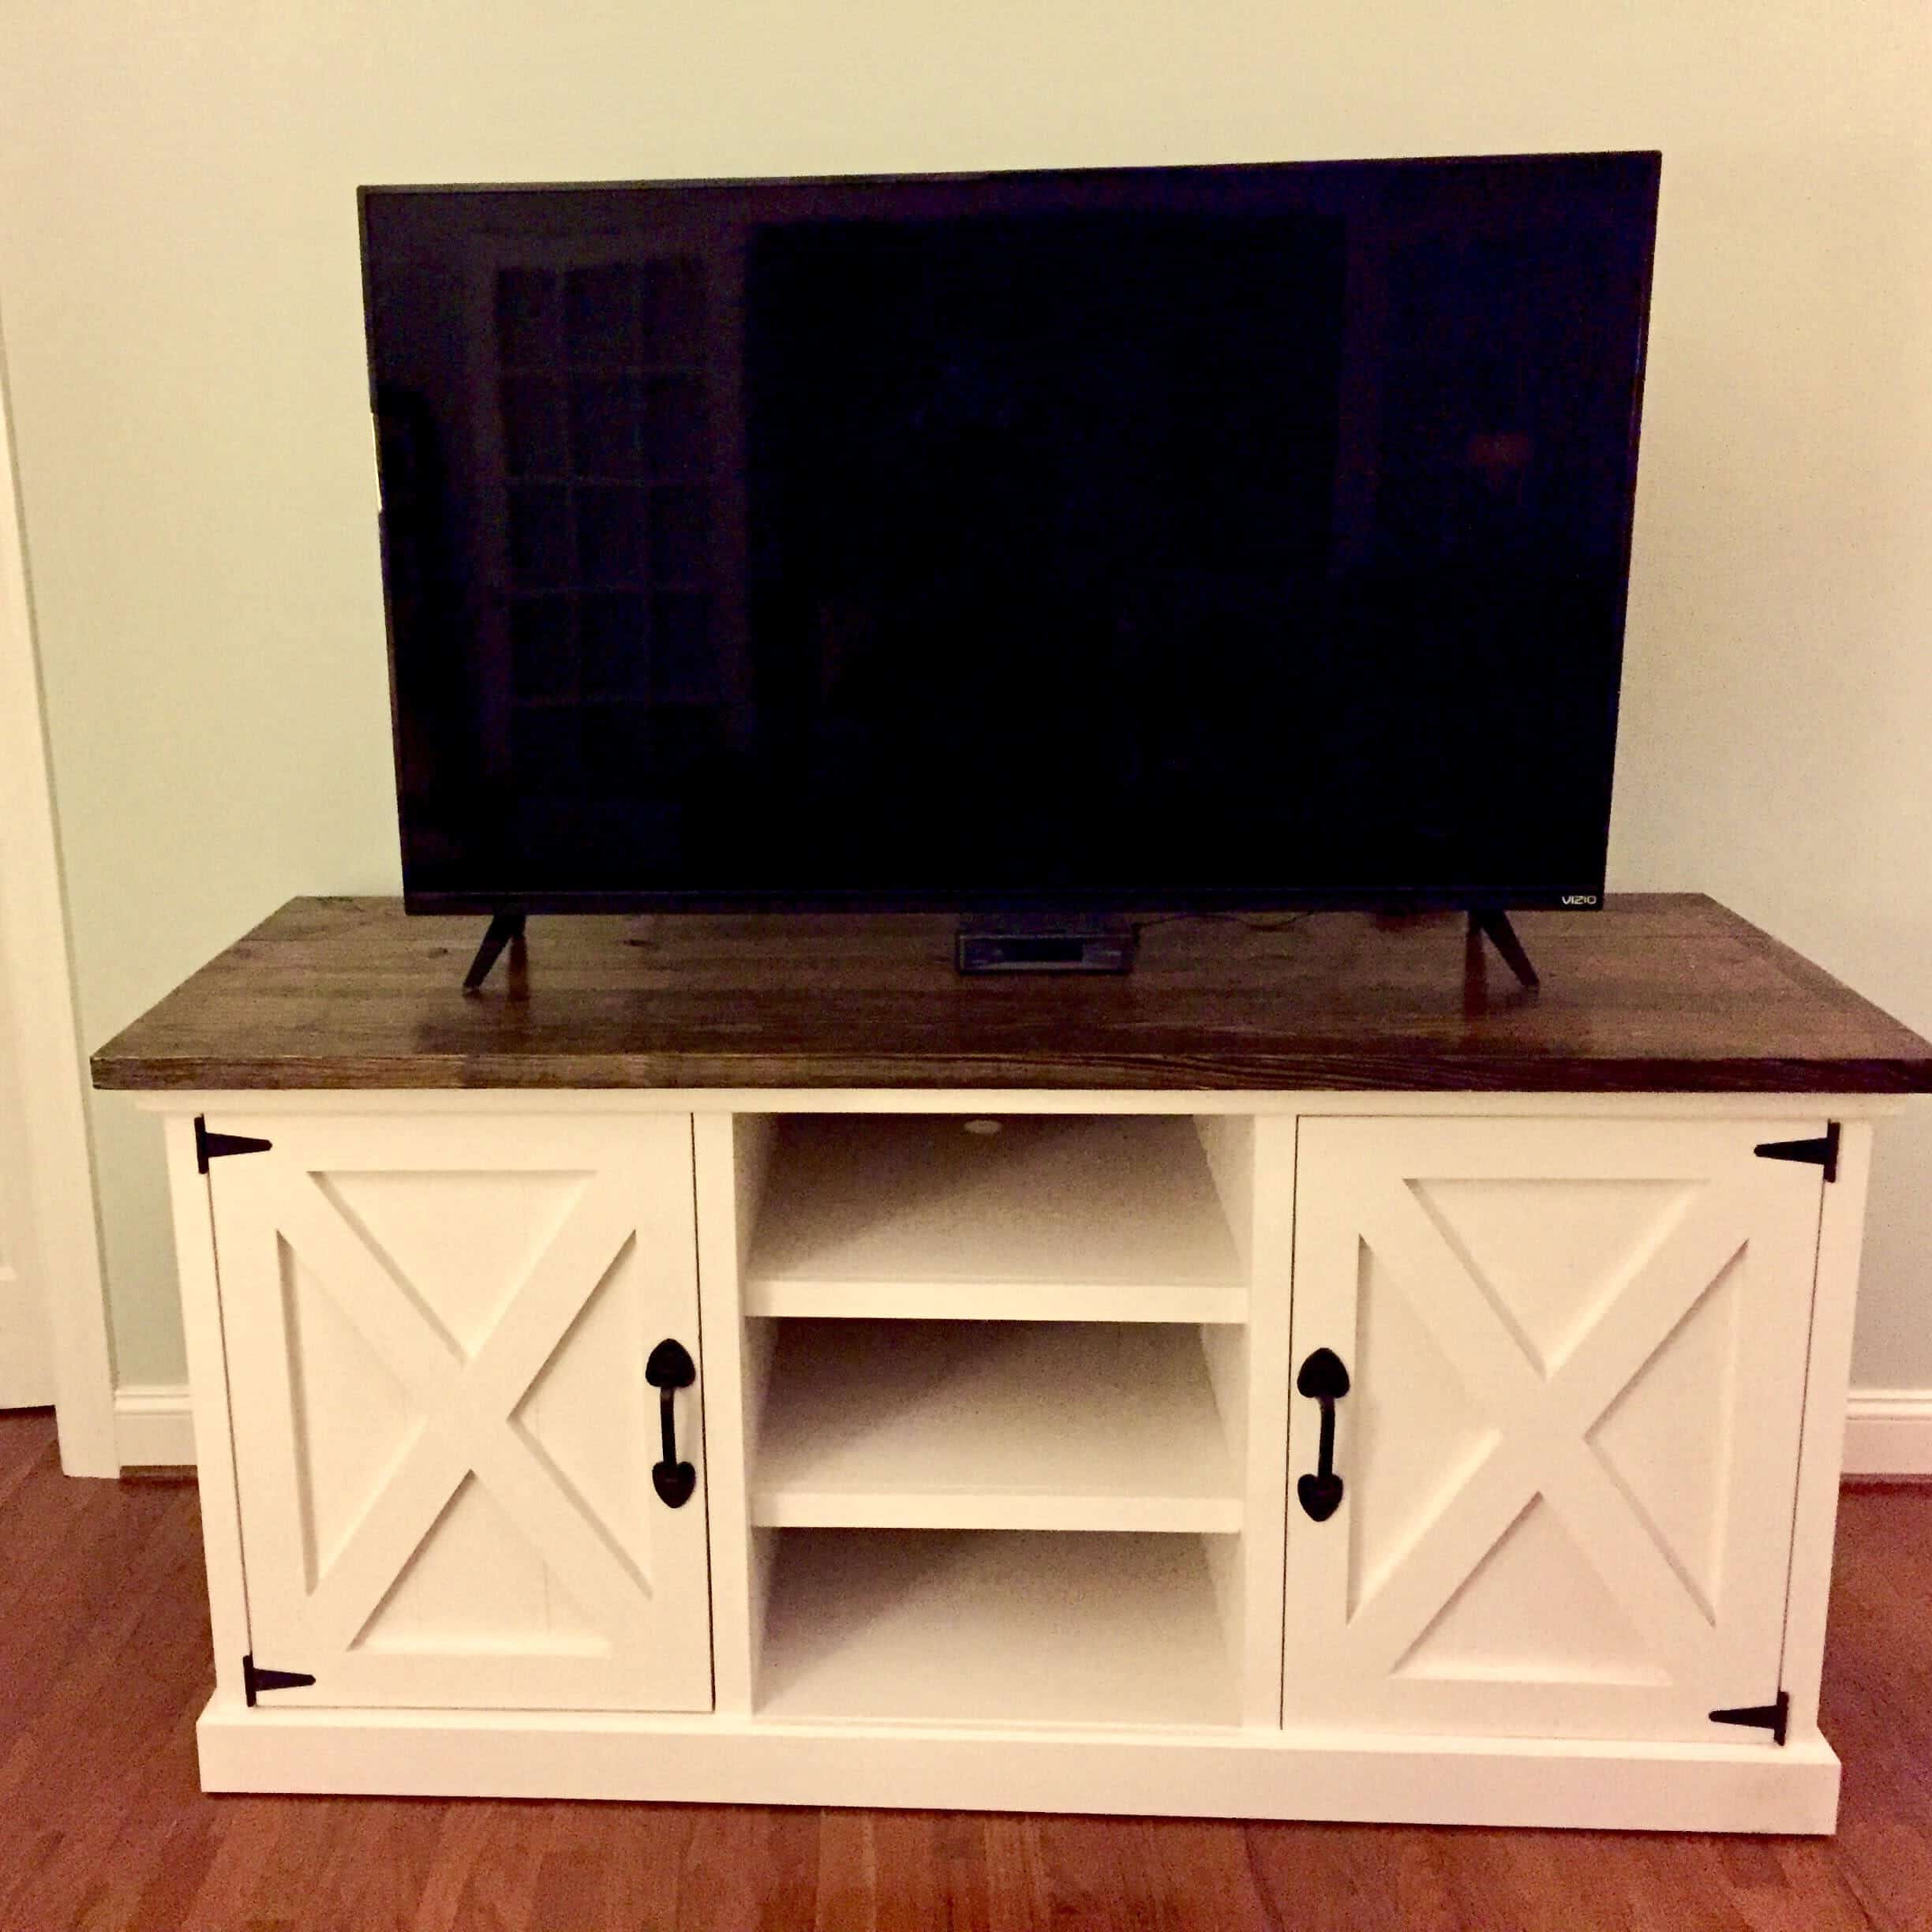
leanord media console by lazy guy diyNeed a space for your TV? Build this Leonard Media Console for extra storage.


diy rustic caddy with branch handleCreate this Rustic Caddy with a Branch Handle to hold a pretty flower display.


farmhouse family birthday sign by where the smiles have beenCreate this Farmhouse Family Birthday Sign and never forget a birthday again.


diy side tableBuild a DIY Side Table using gray stain to give it a weathered farmhouse look.


farmhouse style plant holder by jenna kate at homeAdd some beautiful greenery to any room with this Farmhouse Style Vertical Plant Holder.


easy diy farm animal cutting board by spain hill farmCreate these cute animal shaped cutting boards to decorate your farmhouse kitchen.


diy produce rackCute and functional, this DIY Produce Rack is perfect for a farmhouse kitchen.


Farmhouse Cake Stand by Making it in the MountainsMake a gorgeous cake stand to display in your farmhouse dining room.


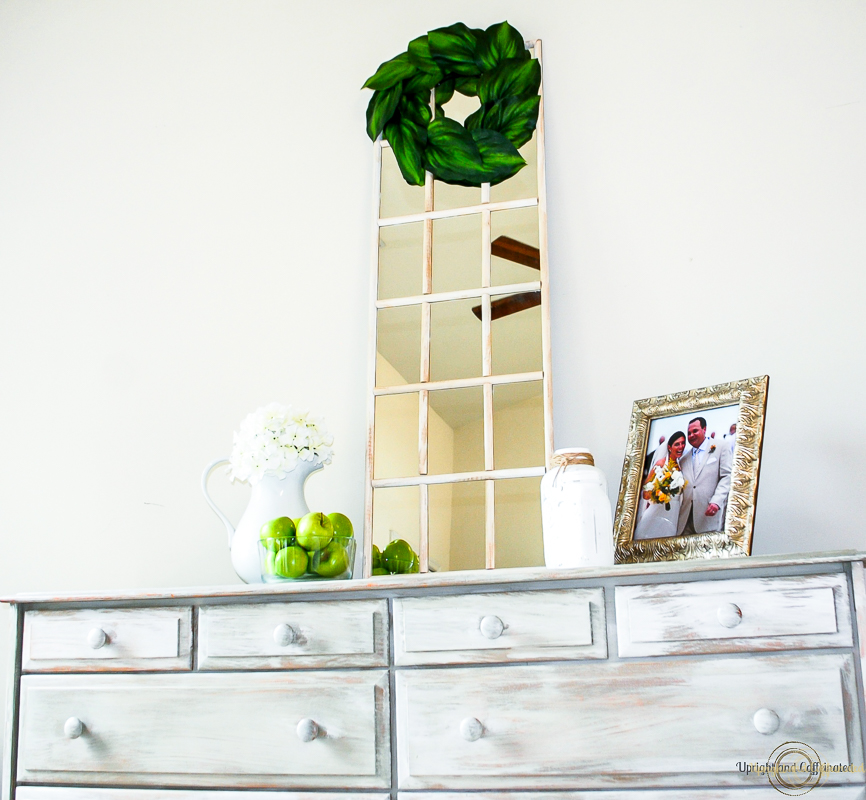
IKEA Hack farmhouse window mirrorTurn a plain IKEA mirror into this beautiful Farmhouse Window Mirror.


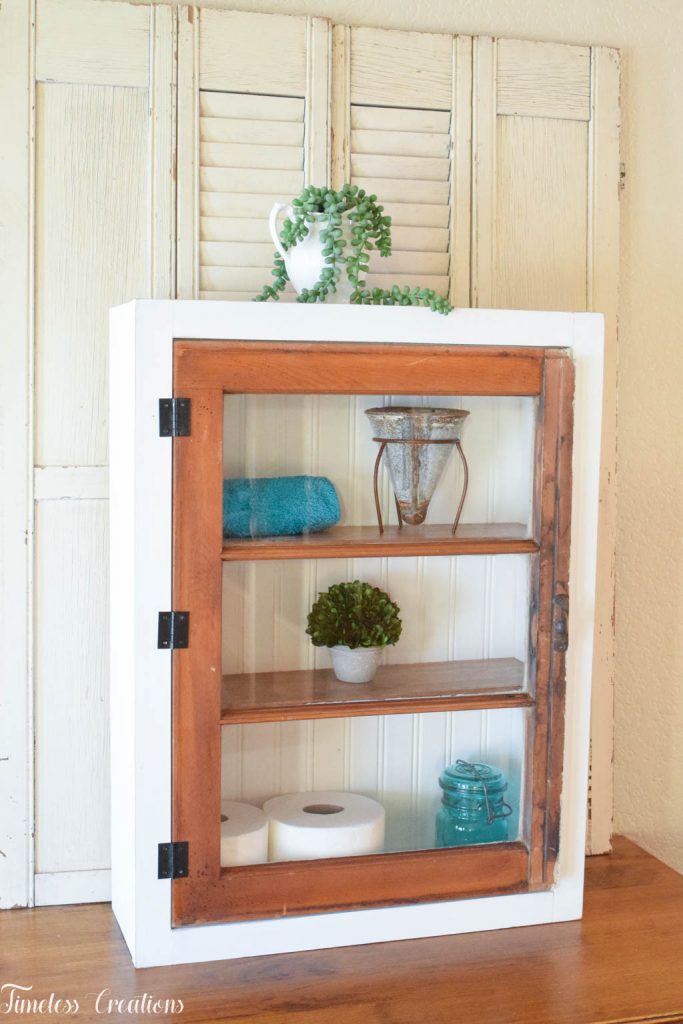
diy window wall cabinet by timeless creationsBuild this DIY Window Wall Cabinet using an old farmhouse window frame.


king size headboard Create a Rustic Wood Headboard for your farmhouse styled bedroom.


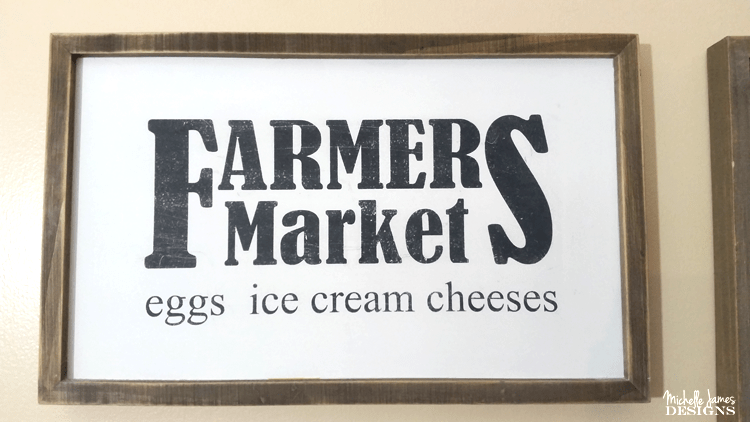
farmhouse kitchen sign by michelle j designsAdd a DIY Farmhouse style Farmers Market Wooden Sign to your kitchen wall.


diy flowerbox centerpiece by hazel and gold designsAdd a Farmhouse Style DIY Flowerbox Centerpiece
 to your dining table and add flowers for greenery.


rustic bathtub trayBring the farmhouse look into your bathroom with this DIY Rustic Bathtub Tray.


DIY wood shutter shelf by Salvage Sister and MisterRepurpose an old shutter into this amazing DIY Wood Shutter Shelf that just screams farmhouse.


modern farmhouse picture frameTurn an old picture frame into this Modern Farmhouse Picture Frame design.


DIY Rustic media center by pinspired to diyBuild this DIY Rustic Media Center to decorate beneath your wall mounted TV.


farmhouse clock by vanderveen houseLearn how to make this DIY Rustic Clock from an electrical cable spool.


farmhouse style corbel shelf by hazel and gold designsMake a Farmhouse Style Corbel Shelf as a beautiful and functional addition to your wall.


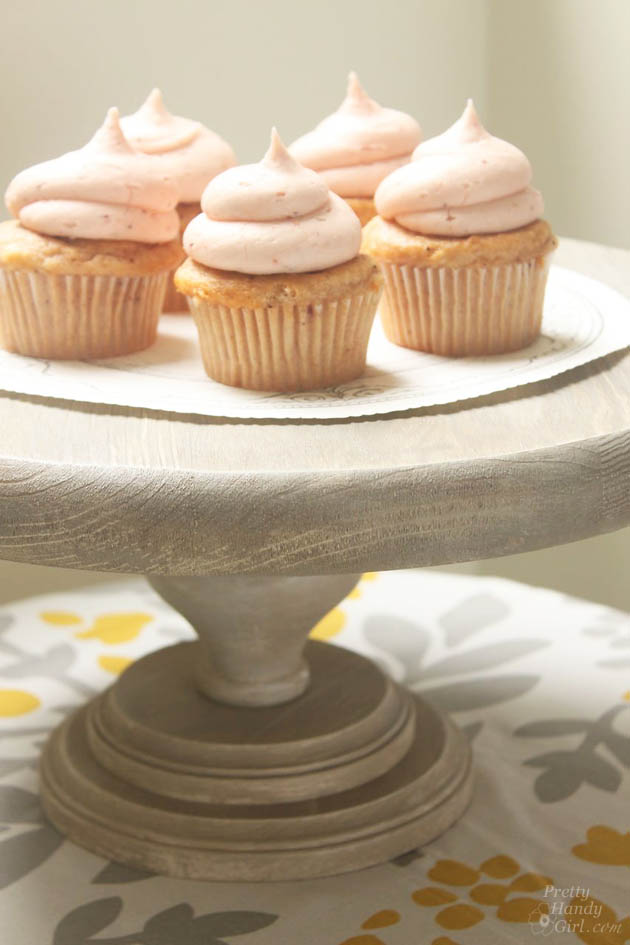
Rustic Wood Cake Stand | Pretty Handy GirlDecorate your kitchen or dining with this beautiful Rustic Gray Cake Stand.


wire memo board by making it in the mountainsCreate this beautiful DIY Chicken Wire Memo Board for decorating or organizing!


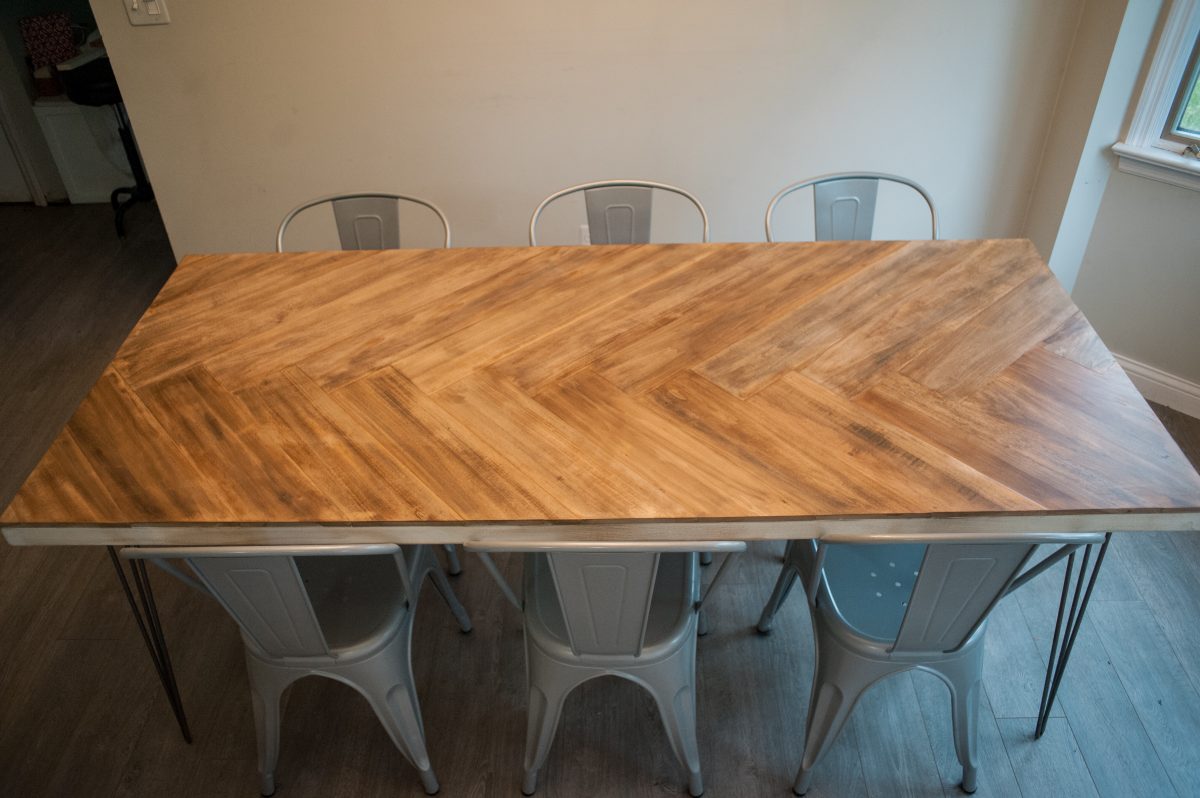
diy herringbone table by our bright roadA gorgeous DIY Herringbone Table is perfect for your farmhouse dining.


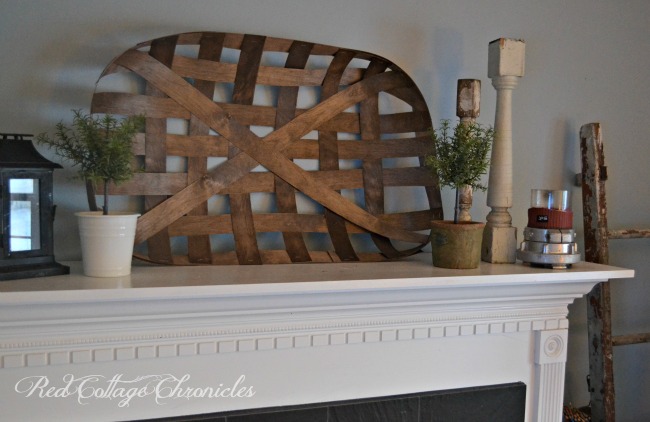
diy tobacco basket by red cottage chroniclesLove tobacco baskets but don’t love the price? Make this DIY Tobacco Basket for your mantel or shelf.


farmers market box for cookbooksWhite wash an old wooden box to create this DIY Farmers Market Wooden Box for visible storage.


DIY Farmhouse wreath with wood backingThis DIY Farmhouse Wreath with Wooden Backing is beautiful decor for any room.


Weathered Wood Plank Wall by Pinspired to DIYThe perfect farmhouse addition is a DIY Weathered Wood Plank Wall.


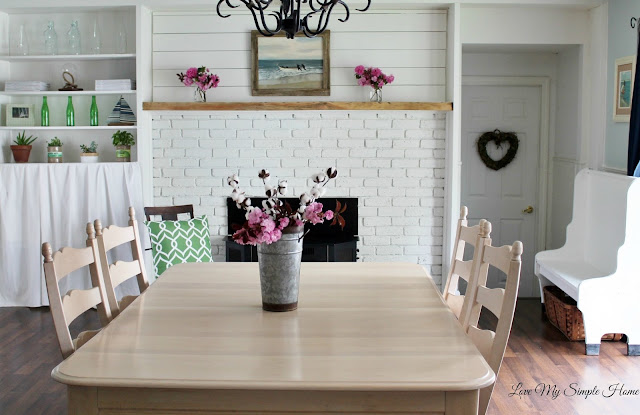
farmhouse fireplace makeover by lovemysimplehomeBring farmhouse into your home by creating a Fireplace and Wooden Mantel Makeover.


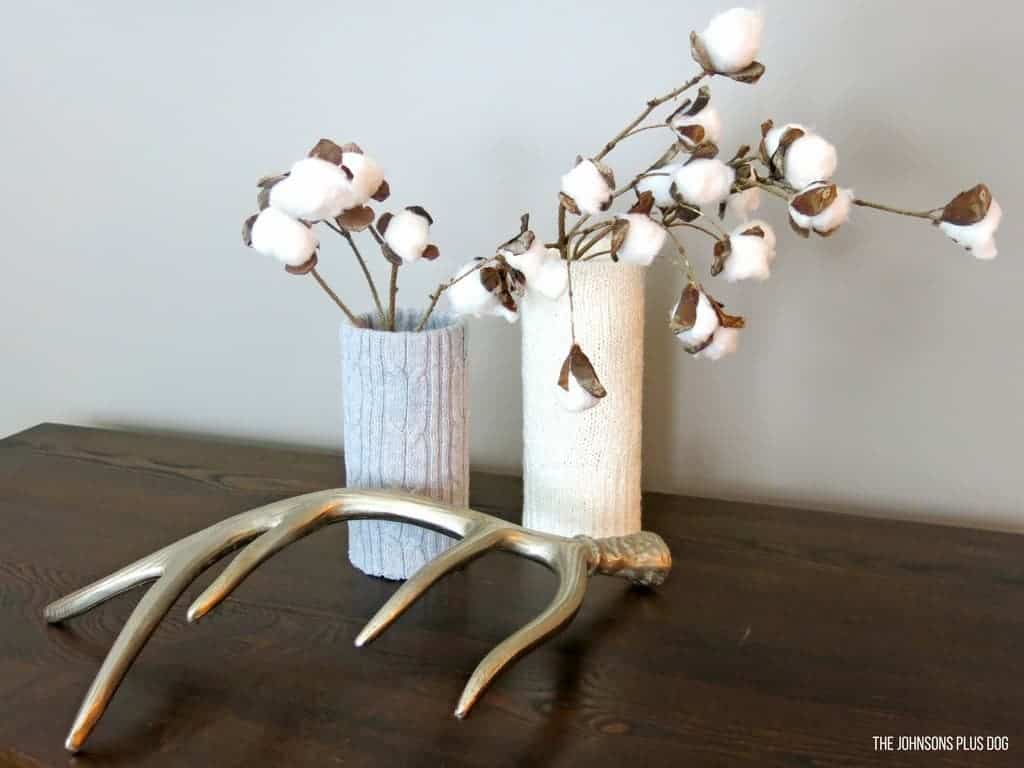
diy farmhouse cotton stems by making manzanitaCotton stems are on trend! Make your own DIY Cotton Stems for a fraction of the new price.


diy wood lantern farmhouse by hazel and gold designsDIY Wooden Lanterns give a great farmhouse feel to your indoor or outdoor spaces.

I hope you liked this collection of inspirational DIY farmhouse home decor. The greatest thing about DIY projects is being able to customize them for your space, so I hope these ideas sparked some creativity and helped you discover some ways you can bring the farmhouse style into your home. Let me know what you think!

Also, if you like these ideas, please pin this image to Pinterest to share!

Inspirational DIY Farmhouse Decor Ideas - pinterest image

Hi, I’m Sheri from Hazel + Gold Designs. Here are a few fun stats about me: I like love chocolate and peanut butter (together of course.) If you like stats, I have been crocheting for about 16 years, crafting for 20, and woodworking for about 4 years. I found a passion in making and being creative and began documenting my projects online at Hazel + Gold Designs.

When not working on projects, I enjoy spending time with my husband, four children, perfect dog, and ornery cat. You can find me on Facebook, Pinterest, Instagram and Twitter.

Read all of Sheri’s tutorials.

~Find more of Sheri’s projects here ~

DIY Modern Hoop Wreath for Spring with Florals

DIY Modern Hoop Wreath for Spring

DIY Modern Hoop Wreath for Spring

Hello! I’m so excited to be here to show you how to bring a little Spring into your home. I’m betting we all need a little Spring at this point in the year. After two back-to-back snowstorms and weeks of frigid temps here in Seattle — I’m so ready for it!  A great way to bring beautiful spring vibes into your home is with this DIY modern hoop wreath.

I love creating modern hoop wreaths because they are so fun to create and one of my favorite DIY projects ever!  Not only do they look beautiful – they are easy on your wallet since you don’t need much to assemble one.  Hoop wreaths can be made for any season or holiday, so let your imagination run wild with ideas!

DIY Modern Spring Floral Hoop Wreath

Today I’m going to show you how to make a floral version of a modern hoop wreath —perfect for Spring. Let’s get started!

Materials :

(I’ve included affiliate links for your convenience. I earn a small percentage from a purchase using these links. There is no additional cost to you. You can read more about affiliate links here.)
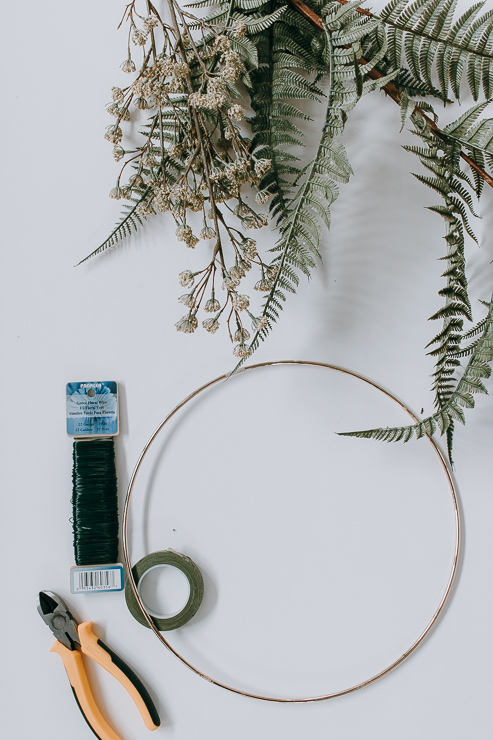
Materials Needed to Make a DIY Modern Hoop Wreath

How to Choose Your Faux Greens and Flowers:

Before we begin, here are a few tips for choosing greens and flowers for the wreath.  Hoop wreaths are particularly beautiful if either one main floral/greenery is used or when a collection of three different flowers are used together.

For this wreath, I used the rule of threes.

Assembling Hoop Wreaths:

First add greenery as a base on the hoop. Then add a secondary green or floral. Finally add your main florals on top for the true showstoppers. For example, this is the order we’ll assemble the Modern Spring Hoop Wreath:

  1. A base of greenery – ferns
  2. Secondary accent of greens or flowers:  Queen Anne’s Lace
  3. Main Florals – Pink and White Tulips

I find Michael’s and Afloral.com have the best selection and most realistic looking faux flowers and greenery.  However, Target is also stepping up their game lately.  These faux ferns and Queen Anne’s Lace were from Target’s Hearth and Hand collection and are very pretty and semi-realistic looking. (I tend to be super picky about my faux flowers!)

Instructions :

Step 1:  Cut the leaves and flowers from your faux plants (if needed).
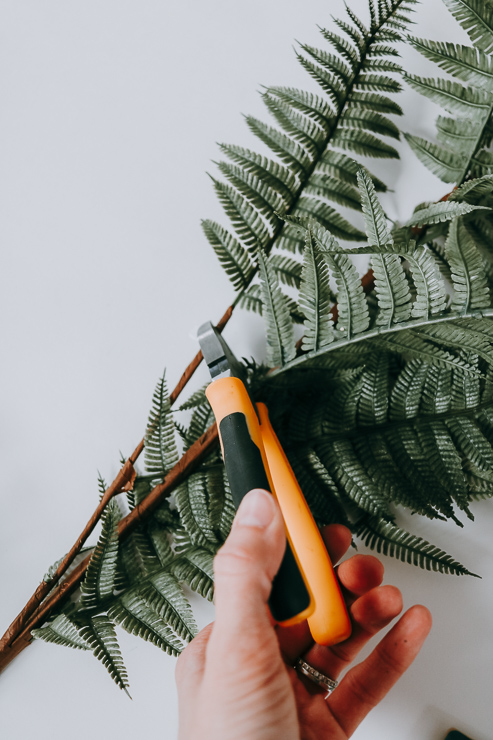
Snip off individual greens and leaves before attaching to your wreath

Snip off a few pieces of fern while leaving a little stem to attach to your hoop.  It’s usually easier to snip off the individual leaves which will give you the most flexibility when designing your wreath.

Step 2:  Arrange your greens on the hoop until you like the layout.  
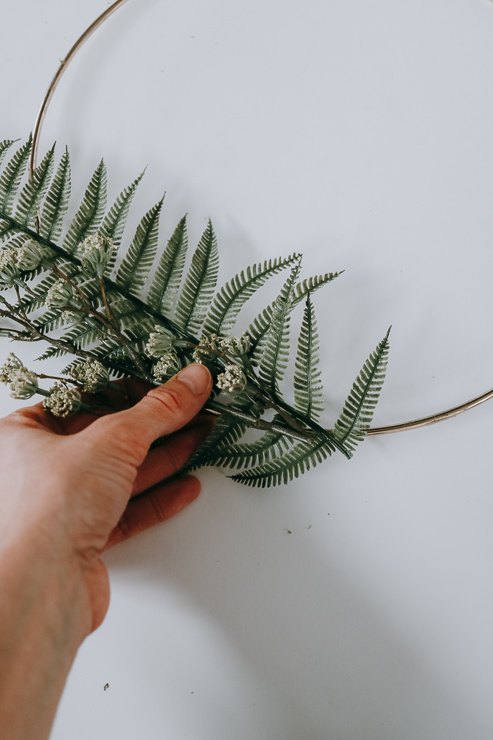
Arrange your Greenery and Florals on your Hoop Prior to Attaching

Step 3:  Snip off a piece of wire and use floral wire to attach your fern/greenery to the hoop.
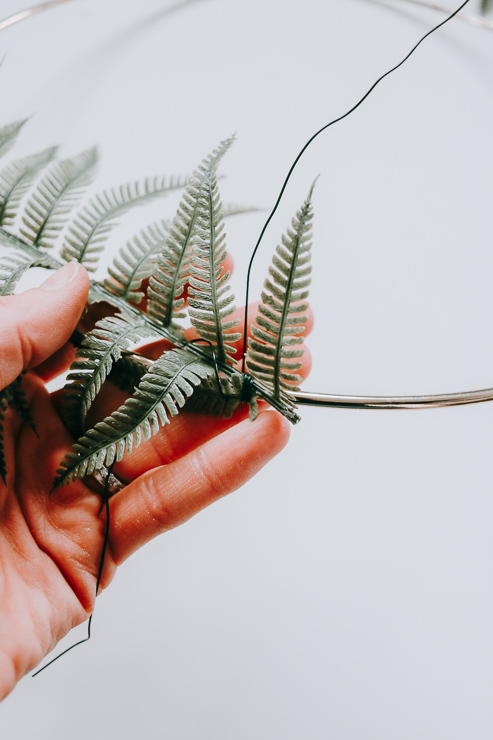
Snip off a piece of Floral Wire and Use this to Wrap your greenery around Hoop

Bend and train the greenery as you wrap it with wire. Luckily the wire is thin and can be easily hidden with the greens and/or flowers.  But, you will need to wrap it fairly tight to keep the greenery from moving when the wreath is hung up.

Step 4:  Repeat Steps 2-3 again, using the secondary flowers or greenery. 
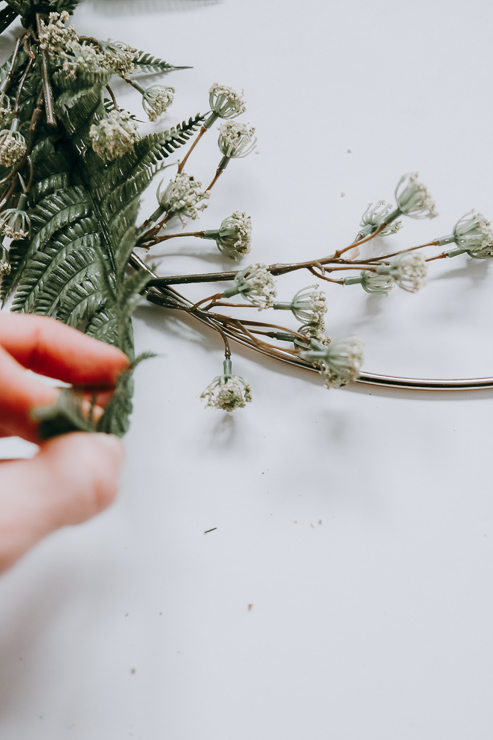
Use greenery to help hide the floral wire on your hoop wreath

Tuck the Queen Anne’s lace around and on top of the ferns. It’s really coming together now!

Step 5:  Add the main florals – these beautiful spring tulips!

Faux Tulips add a nice touch to your hoop wreath

Use your floral wire to attach the stems to the hoop wreath, and then use the greenery you attached earlier to hide the wires.  It works perfectly every time. You may have to play with it a bit until the wires are hidden, but no one will notice once you do.
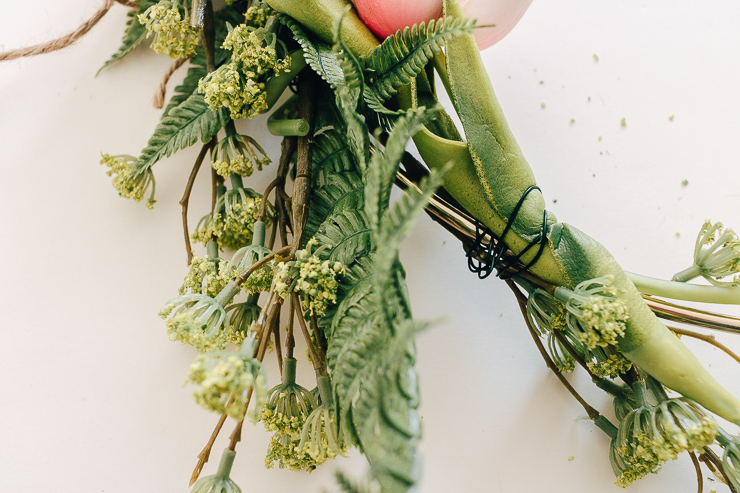
Attach your greenery and accent florals using green floral wire.

Step 6:  Tie a little bow of jute twine around the center for a sweet rustic finishing touch. 

DIY Modern Spring Floral Hoop Wreath

The jute bow helped hide more of the floral wire and gives the wreath some extra holding power.

That’s all there is to it!

Tips for Hanging and Displaying your New Wreath :
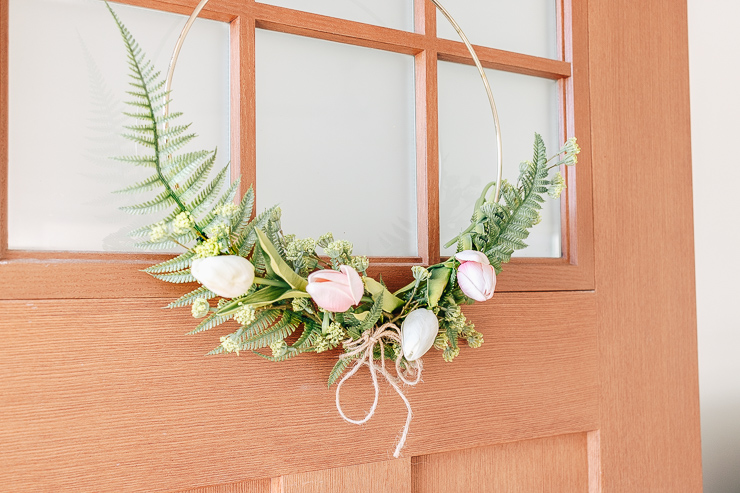
DIY Modern Hoop Wreath for Spring with Florals!

Modern hoop wreaths can be hung with the flowers on the side or at the bottom.  You can use a wreath hanger or a Command light clip. The light clips hold these hoops perfectly and are clear, so you can’t see them. You can also use a suction cup hook or a magnetic hook if you have a metal door. Or tie a pretty ribbon to these wreaths and hang them from the ribbon. I purchased a clear wreath hanger from Amazon that hooks over the door.  These wreaths look beautiful not only on your front door but also on your interior walls, closet doors, hutches, over mirrors etc.

Feel free to get creative with placement and add some spring to all parts of your home!

When you are ready for a change, simply snip off the wire and reuse your greenery and florals for another project.  These modern hook wreaths end up being a very cost effective decor project.
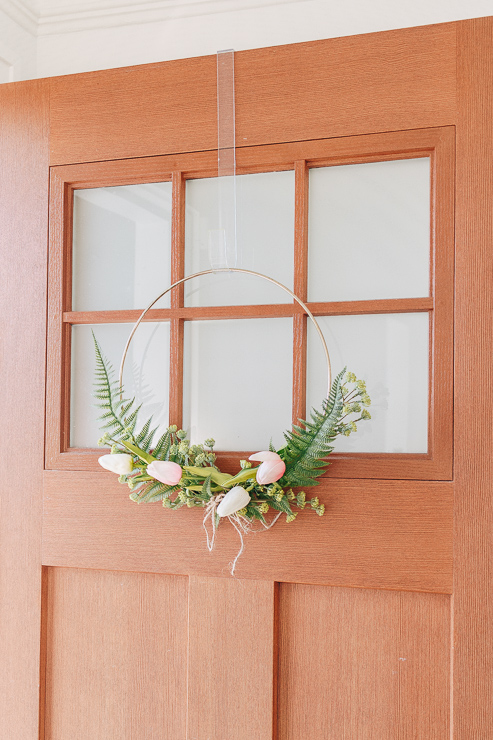
DIY Modern Hoop Wreath for Spring with Florals

I hope you all enjoyed this tutorial.  I’m looking forward to connecting with you again next month!

In the meantime, check out these beautiful spring decor projects on Pretty Handy Girl.
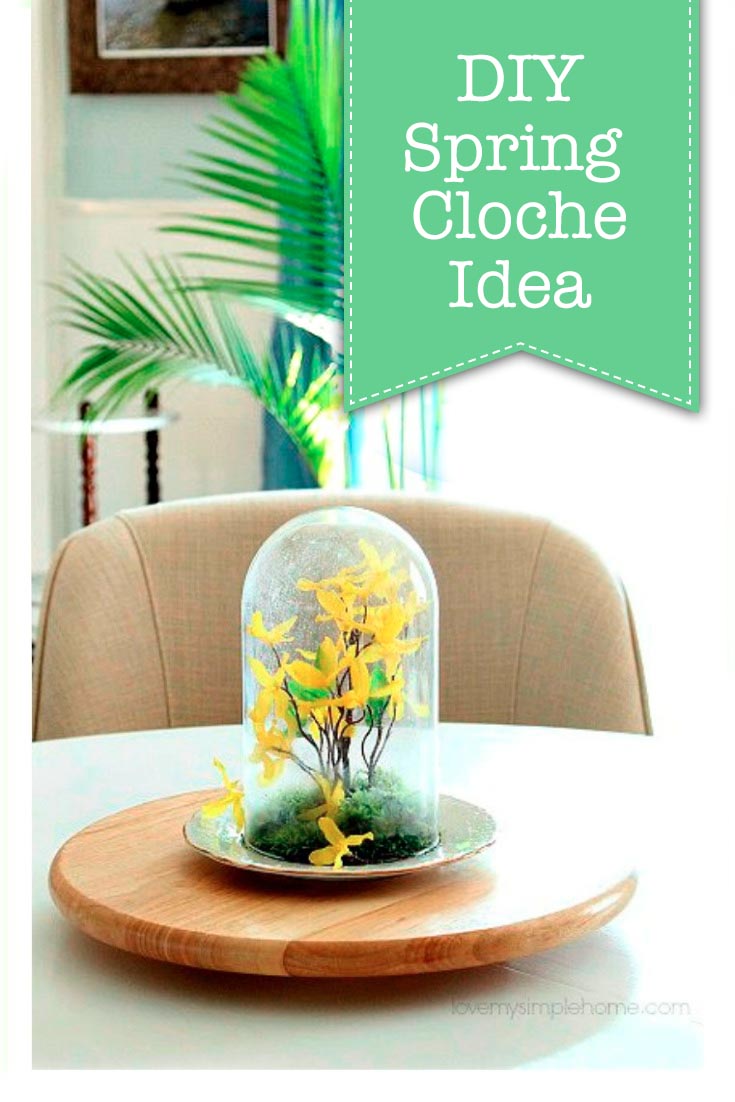
How to Make Spring Cloche Centerpiecekaren signature

~ See More of Karen’s Tutorials ~


karen from decor hintHello!  I’m Karen, the creator of the Home Decor and DIY Blog: Decor Hint . I’m a Native of the East Coast, but I currently live in beautiful Seattle with my hubby, our two wonderful children and our spunky wheaten terrier.

You can usually find me with some sort of craft in one hand and a coffee in the other. And I’m always rearranging furniture or moving lamps from room to room. I have a passion (read: obsession) for decorating, DIY, and gardening. In short, I love making my house into a home.

Like many, I’m inspired by what I see in home decor magazines, but I’m not so inspired by the price tags.  Consequently, I love finding and creating beautiful budget-friendly home decor items. In a head to head competition, I bet you’d never know the difference between the designer items and my DIY creations!  Many of my DIY projects focus on sewing, crafting, upcycling and organizing. Some of my favorite projects have been making pretty wreaths , sewing my own tassel hand towels, and crafting these trendy wood bead garlands . I can’t wait to inspire you and spark your creativity through my DIY projects.

You can always connect with me on Pinterest , Twitter or Instagram.