Easy Added Color to a Dresser | Pretty Handy Girl

Easy Added Color to a Dresser | Pretty Handy Girl

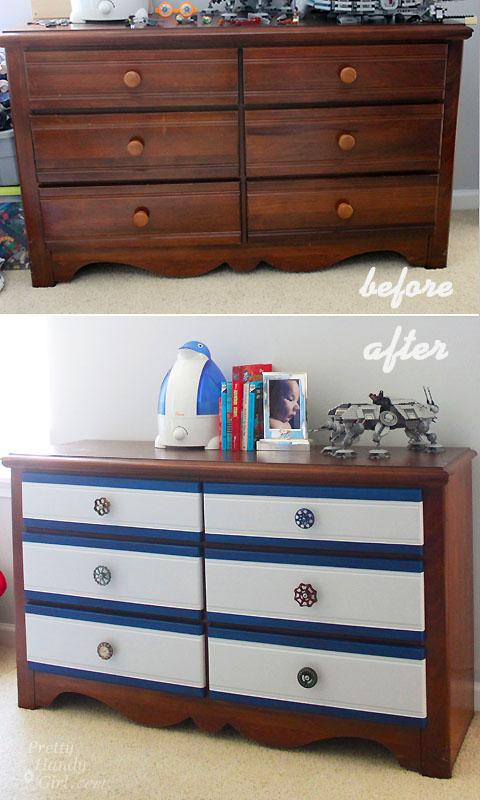
Adding color to dresser drawers is definitely an easy way to add a pop of color to an otherwise boring piece of furniture. Add some new knobs and your dresser will look like a new piece of furniture! (Tutorial for creating custom knobs coming soon.)

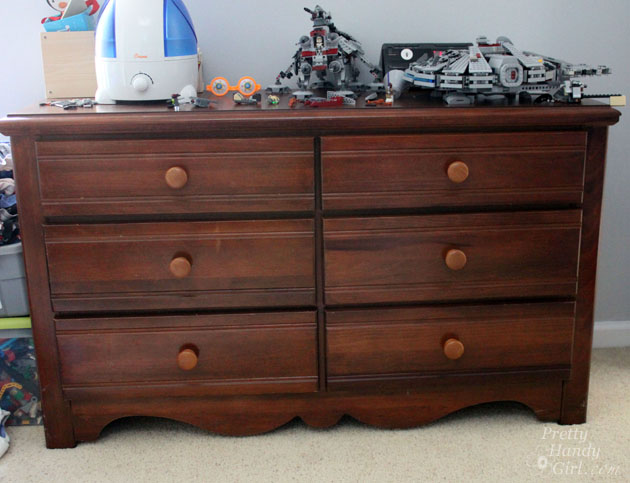
You could say that I finally got that Kick in the Pants I needed to start working on my son’s room. One makeover I had in mind was giving his dresser a pop of color.  The top and sides of the dresser were in great shape and it has a tough laminate top. Instead of painting the entire dresser, I decided to paint only the drawers because — knowing my little guy — he would have it scratched up in no time.
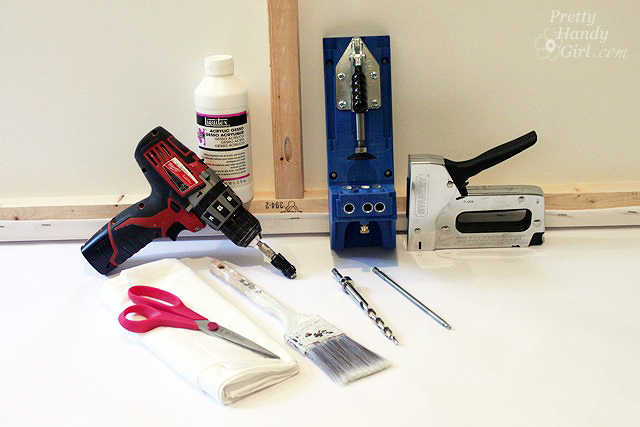
Easy Added Color to a Dresser | Pretty Handy Girl

Materials:

Instructions:

Start by removing clothing from the drawers. Then firmly pull the drawers all the way out. Some drawers have a clip at the end, just pull straight toward you. Others may require you to lift up on the front to release the drawers from the track. Mark the inside of the drawer so you know which slot to return it to.

Read more

How to DIY a GIANT artist canvas | Pretty Handy Girl

Have you ever yearned to own a giant piece of artwork but the cost was prohibitive? Or you knew you could create some awesome abstract paintings, but buying large canvases would cost too much. Well, for those hesitant artists, I have this quick tutorial for building your own GIANT canvas!

Materials:

How to DIY a GIANT Artist Canvas

  • 2×2″ boards for frame supports (two sides, top, bottom and center support)
  • Kreg Jig and pocket hole screws
  • Drill
  • White fabric (canvas material would be best, but use what you have)
  • Staple gun and staples
  • Paint brush
  • Gesso (if you don’t have gesso, primer would probably work fine)

Instructions:

Cut your 2×2″ lumber down to size. Cut your top and bottom the full widths. Cut the two sides and the center support 3″ shorter to accommodate the height of the added top and bottom pieces. Note, if your canvas is portrait (instead of landscape), your support will be a center horizontal brace instead of vertical as shown. Read more

Enjoy Your Newly Painted Patio Chairs

Painting Metal Patio Chairs

What’s worse than a rusted, faded, and drab looking patio chair?

Not being able to enjoy your outdoor space because of them!!

We all want to be proud of our homes and be able to have friends or family over. Don’t let a little paint get in the way of having fun with your loved ones. I’ve made the mistake of thinking that repainting a metal chair will take forever and isn’t worth the time or effort. But I’m here to tell you that if my wife thinks the chairs in this post look good then you will, too.

By the end of this short tutorial you’ll transform your chairs from looking worn out to AWESOME in 5 easy steps. I did make a few blunders though, so please read on so you don’t fall victim to the same mistakes.

Here are the supplies you’ll need: Read more

Garden Gnome-After Makeover

Garden Gnome-How to Fix

Garden gnomes are the cute little guardian angels that watch over our homes. And sometimes they get a bit neglected.

In our case the poor fella was beaten up a bit by string trimming and the sun.

So today I’m going to share how you can fix any small holes or cracks and repaint your gnome so that it looks like new. These tips will also work with other garden decor that you’d like to repair.

Here are the supplies you need

  • Hydraulic cement
  • Bucket
  • Margin trowel
  • Gloves
  • Great stuff
  • Old towel
  • Rust-Oleum Primer (spray)
  • Hobby paint brushes
  • Valspar paint samples
  • Rust-Oleum Clear Coat (spray)

This is a pretty fun project and the kids can participate, too.

Let’s get to it 🙂

Read more

Dear Beautiful Table, your scandinavian antique beauty has us mesmerized. What’s your story? Did a family of four sit around you and talk about the day’s adventures on the farm? Or were you an antique table brought over from Europe and passed down for generations?  Or were you simply an ugly table left by the dumpster of an apartment complex in Raleigh, NC? {insert record scratch sound bite here} Yup, would you believe that a few short weeks ago, this beauty was sprawled in pieces by a dumpster? All the pieces (including the leg bolts) were neatly in a plastic baggy and secured to the table. This is one of the best pieces of furniture I’ve ever found in the trash (well next to it to be exact.) I didn’t have to do any structural repairs, just reattached the legs. But, it looked like the below photo when I picked it up:

Read more