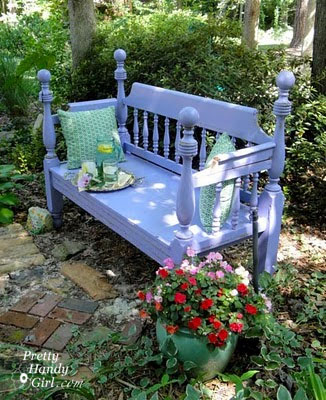
Recently I decided my garden bench that used to be a Craig’s List bed frame, needed to be refinished. I repaired, sanded and repainted the bench before setting it onto our porch where it would get less exposure to the rain.

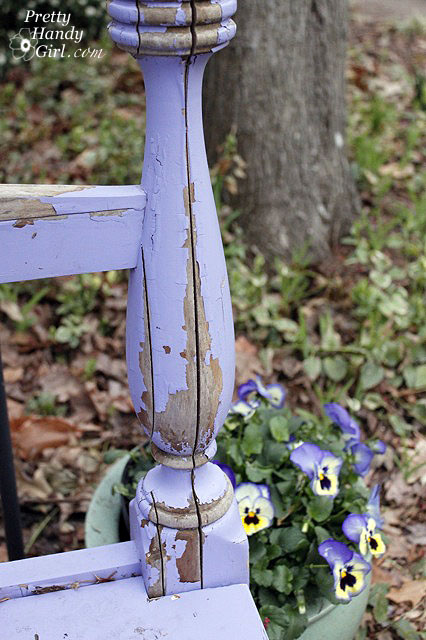
Well, it wasn’t weathering the elements too nicely. Or maybe I should say it was weathering them poorly. Regardless, I really liked the bench and decided to strip it and start over again. I believe the main problem was that the bed frame was not solid wood, it was glued pieces. Then, if you factor in that I used spray primer and spray paint, the rain and moisture got in easily and caused the wood to swell and some of the glued joints to come undone.

But, the bench was still structurally sound, so we moved it onto the screen porch and I got ready to refinish it.

Refinishing a Weathered Garden Bench

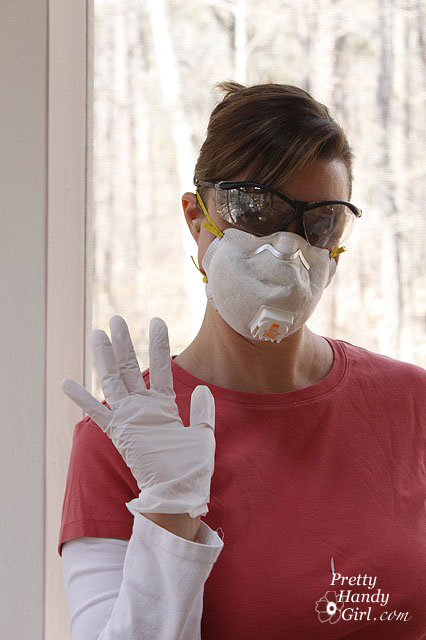
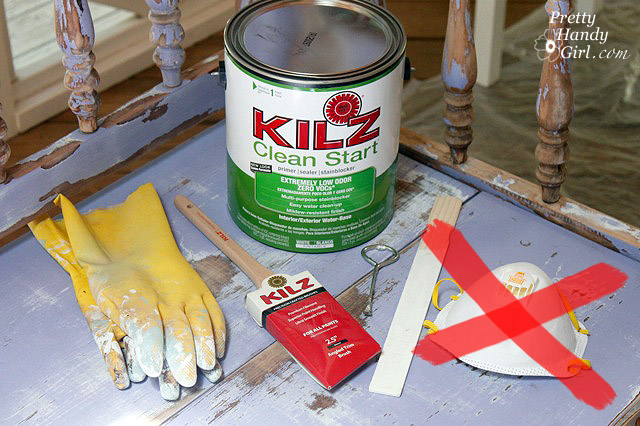
Safey First, (as Meri-K will tell you.) Because I was sanding and scraping the old paint I had to wear eye protection and a dust mask. I also wore ear plugs while sanding and gloves to keep my hands from getting rough.

Materials:
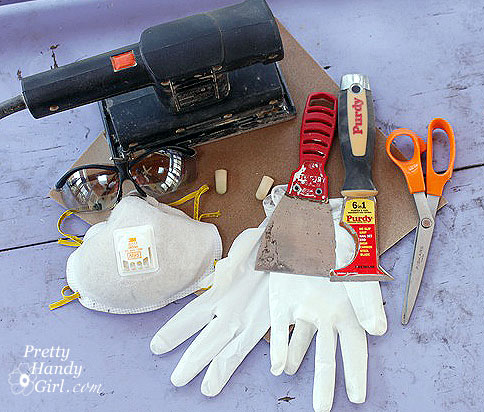
(I’ve included affiliate links for your convenience. I earn a small percentage from a purchase using these links. There is no additional cost to you. You can read more about affiliate links here.)

Instructions:

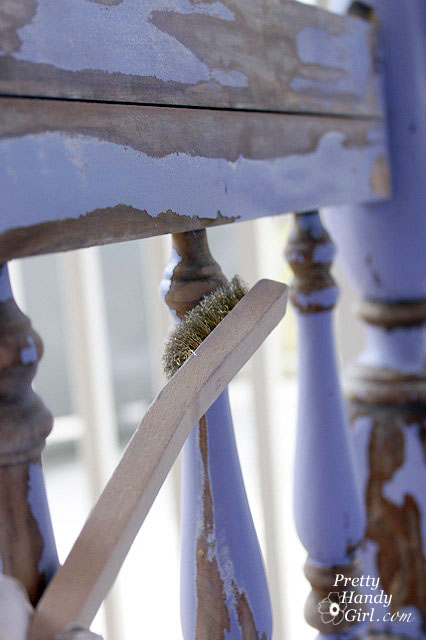
Begin by using the wire brush to remove any flaking paint and to get into the grooves of the spindles (and other hard to reach places.)

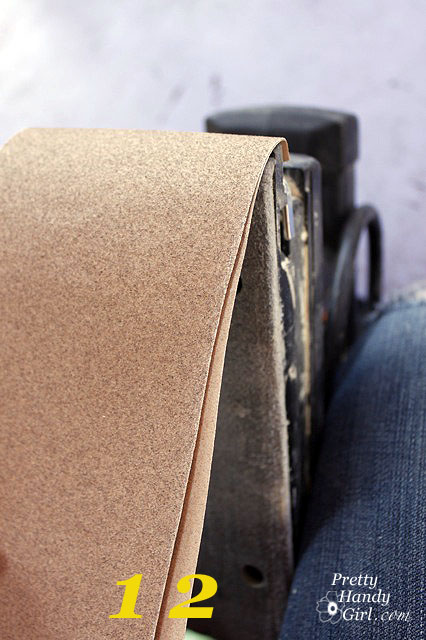
Tip from a Handy Girl: I am about to share with you a helpful time saving trick, so pay attention. If you have a power sander that holds the sandpaper with a clip. You can stack your sandpaper. I put the 220 grit on the bottom, then put the 1oo grit on top of that. After sanding my bench with the 100 grit, I simply tear off the top sheet and expose the finer 220 grit.

Sand down the bench with a rough 100 grit paper first, then follow up with a finer 220 grit sand paper.

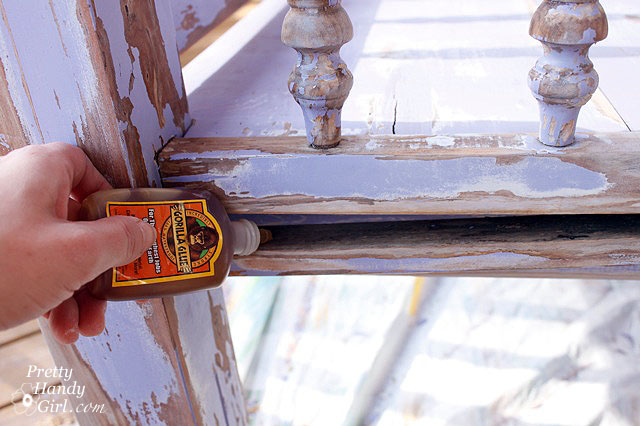
Secure any loose pieces of the bench. To use Gorilla Glue, you need to moisten the two pieces that you will secure.

Then put a small amount of Gorilla glue onto one of the pieces.

Clamp the joined pieces and allow to dry overnight. (By the way, don’t waist your money on cheap clamps. That little black & orange number below just bit the dust last weekend. My Irwin clamp is a CHAMP!) Check back after 30 minutes to wipe off any Gorilla glue that has spread out of the seam.

Because the posts on my bench were really falling apart, I decided to remove the ball finials.

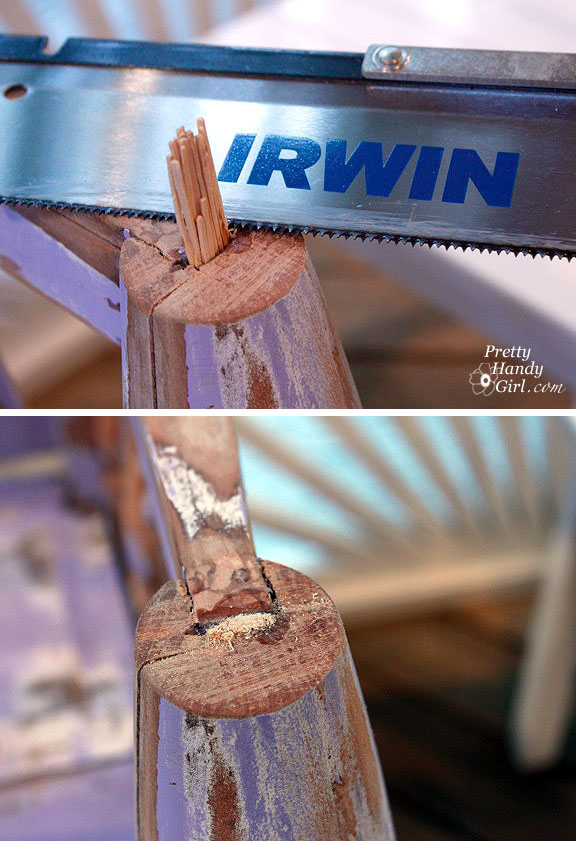
Use a saw to cut both finials off.

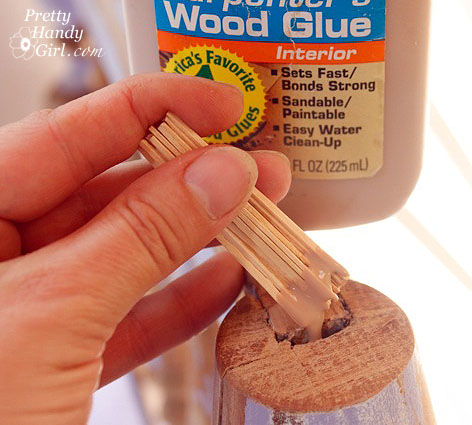
Patch the hole using toothpicks and wood glue.

After the glue has completely dried, saw off the toothpicks.

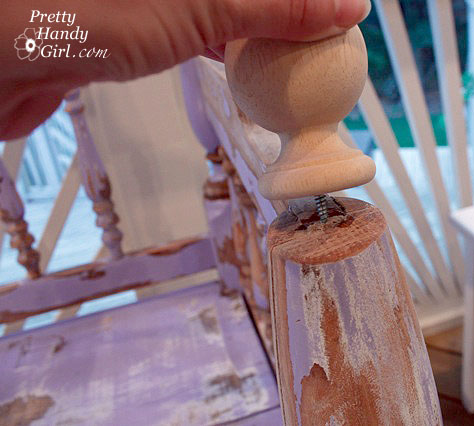
Add a curtain rod finial on top of the sawed off posts.

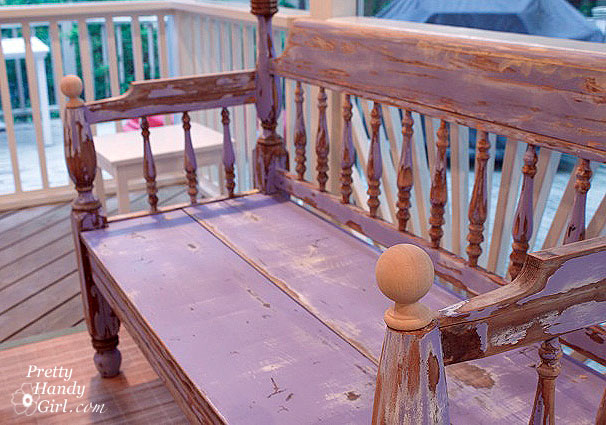
It looks like those finials were there all along!

Clean your bench off with a damp rag to remove any sawdust.

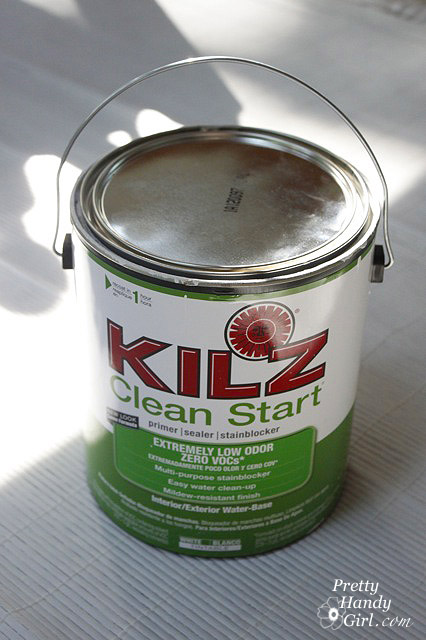
Cover the entire bench with one coat of KILZ Clean Start Primer. Want to know why I use KILZ Clean Start primer for all my projects now? Read how much I love it in this post where I used the same primer for painting a bamboo rug. I’m never buying any other primers (unless I’m priming a tricky surface, then I’ll use BIN 1-2-3 oil based primer. But, I won’t be happy about using that stinky stuff.)

After the primer has dried, use a piece of fine grit sand paper to gently remove any burrs or imperfections.

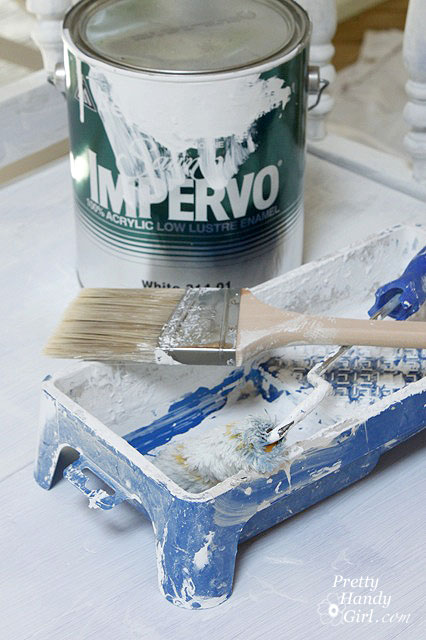
Then wipe off the bench with another damp wipe. I used Benjamin Moore Impervo Semi Gloss paint for the top coat on my bench. It leaves a really tough coating and will hold up to wear and tear.

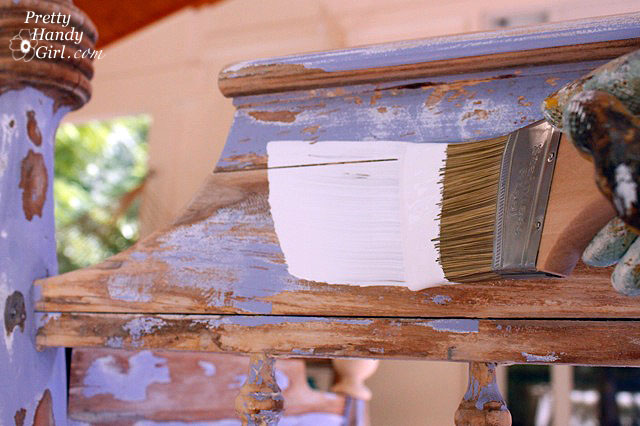
Roll on the paint in one area. Then follow up with a brush to even out the paint. Remember to run your brush in the same direction as the grain of the wood.

Lightly sand after the first coat has dried and finish up with a second coat of Benjamin Moore Impervo paint. I didn’t add polyurethane, but if you are really concerned about a piece of furniture that will be exposed to the elements, go ahead and add two or more coats of polyurethane.

My bench should successfully last outside now for three reasons:

  1. I moved it inside the porch and out of the direct sun and rain.
  2. I primed the bench with a good quality brush-on primer (instead of a spray paint type.)
  3. I brushed on two coats of paint making sure I got into all the cracks and crevices of the bench.

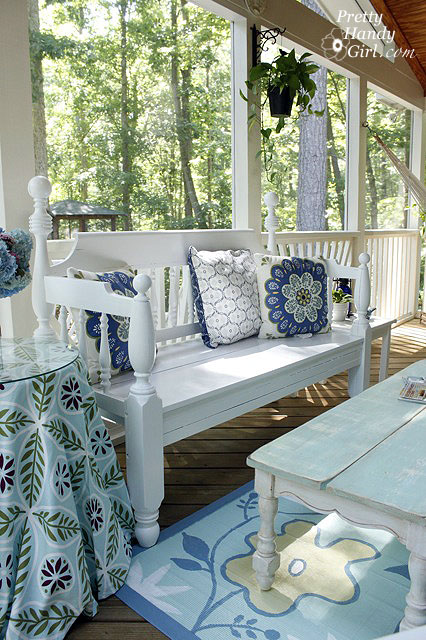
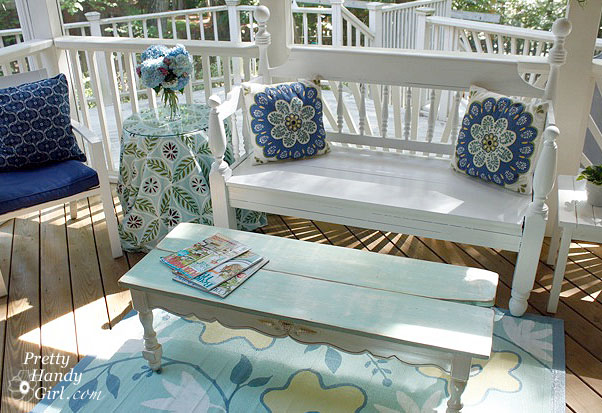
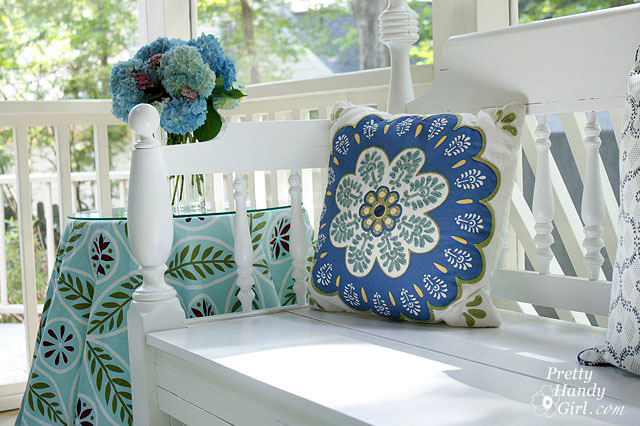
Here she is in her newfound home, our screen porch:


With zero VOCs and the quality that is standard in all the KILZ products, this primer is a must have for the DIY painter!


Disclaimer: The products mentioned in this post are products that I use and stand behind. The opinions expressed in this post are authentically mine. I was sent a gallon of KILZ Clean Start Primer and the Irwin Quick Grip clamp to try out, but I was not paid or swayed to write favorable things about the products. If I don’t like a product, I won’t write about it. And I certainly won’t pass it off on my valued readers.



Painted Bamboo Rug


Back story and my ramblings:

Sleeping outside on the screen porch was nice until I woke up with a sore neck. So, I won’t be doing that again for a while. But, I won’t complain because we are lucky to have a screened porch and I am really loving it after the recent makeover.

The makeover was spurred on by this Pier One bamboo rug that I scored for $25 while thrifting!

It’s nice isn’t it? Especially with the splashed paint on it. Yes, I was the sloppy culprit who dripped paint while repainting my garden bench. But, no big deal, I had bigger plans for that rug.

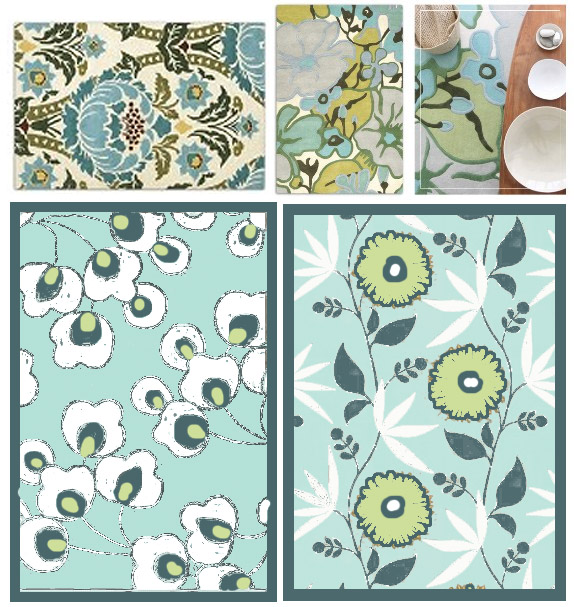
So I sat down at my computer and spent a few minutes hours on Pinterest to research some patterns for my rug – seriously addictive site! But, it is also proving to be a huge organizational tool for my blog. I can pin ideas I want to create. Or I pin other bloggers projects that I want to make sure I give credit to when I steal borrow their ideas.

Once I narrowed down the designs I liked, I used my photoshop skills to change color palettes and design to create a sketch for my painted rug.

Then I ran over to Ace Hardware to purchase some paint. I ran into my good buddy, Mr. Paint Dept Guru – and guess what he did! He told me he had just finished going through the mistinted cans and hadn’t even priced them so he let me have my pick of some cans for….FREE! That is why I love my Ace Hardware. They are a small neighborhood store and all the employees know my face. The cashier and I even have a running joke. She couldn’t remember my name once (how can she, there are only 300 customers in there a day), so I told her that I’d give her a hint. I told her that I share the same name with a famous pop singer. She laughed and said, well, I keep thinking Beyoncé but I know that isn’t your name. So, now she calls me Beyoncé everytime I walk in.

Tutorial:

If you just came here to find out how I painted the rug, I’m sorry about my story-telling. Anyway, here is the tutorial, you found it!

Materials:

  • Kilz Clean Start Primer
  • Stir stick
  • Drop cloth
  • ScotchBlue Painter’s Tape
  • Gloves
  • Paint brushes (thin and thick)
  • Paint roller
  • Butcher paper
  • Chalk
  • Scissors
  • Latex paint colors
  • Minwax Polyurethane
  • Mask Yeah! No need to wear a mask with the new KILZ clean start primer!

The good people over at KILZ recently sent me a gallon of their new eco-friendly primer* (yeah, I thought that was an oximoron too.) I’ve used KILZ 2 latex primer for years and have been very happy with the product, so I had serious doubts that some “green” primer could perform the same. Well, I stand corrected! Love this stuff!!! No face mask necessary, no need to worry about off gassing. The primer had no smell that I could determine.

And it sticks like glue to the surface that needs to be primed. It worked just as well as the regular “stinky” primer. I even scouted out my local Home Depot to see if they stock it (for when I run out) and they do! (My local Lowe’s hasn’t received a shipment yet.)

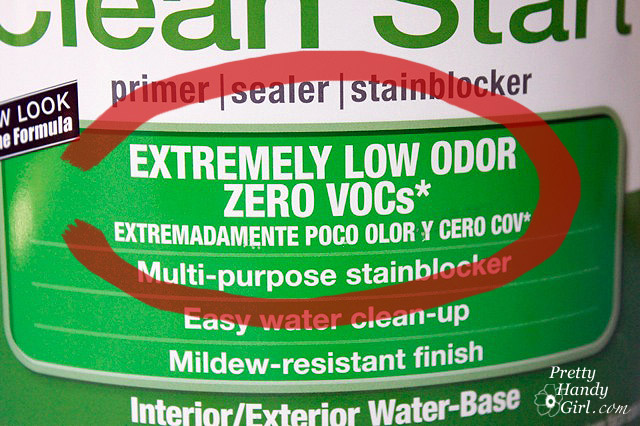
Just in case you didn’t see this: Zero VOCs!!! I like that!

Sorry, I get side tracked easily.

Start by laying down a drop cloth and putting on rubber gloves.

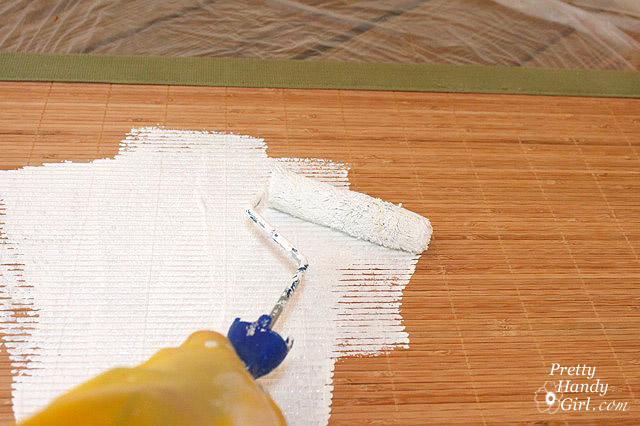
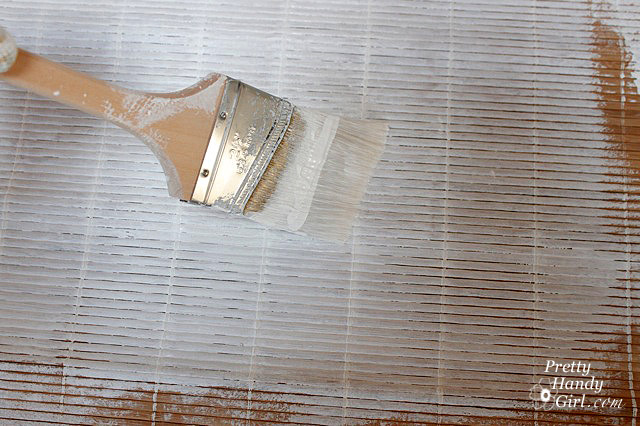
Stir your primer well. Roll on the primer onto the bamboo rug.

Then smooth the primer in the direction of the slats with a brush.

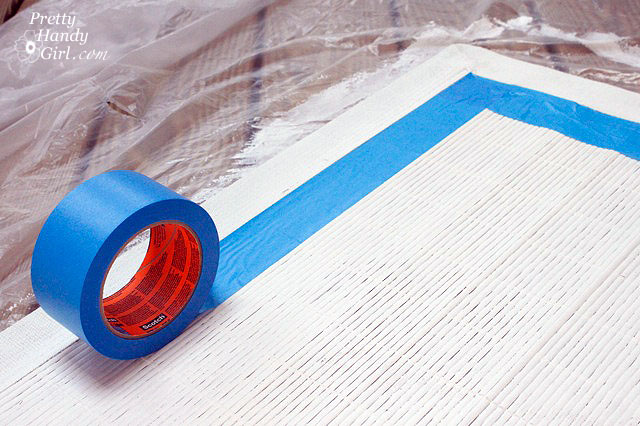
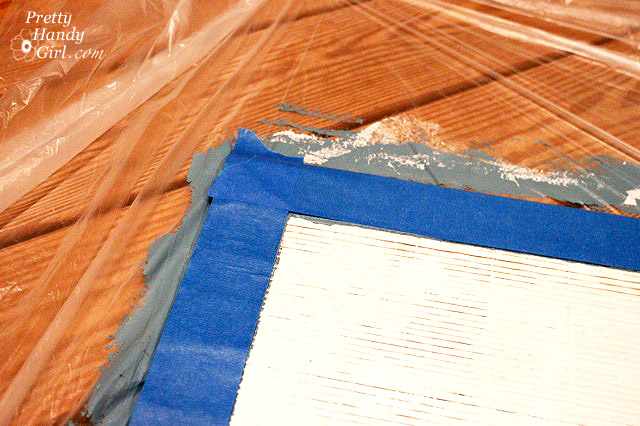
Tape off the inside edge of the canvas border using your painter’s tape.

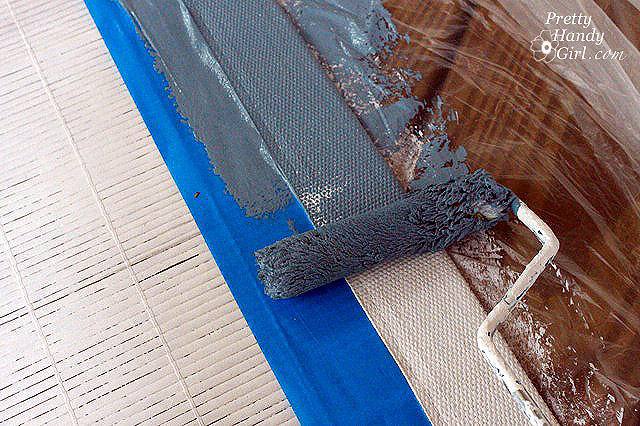
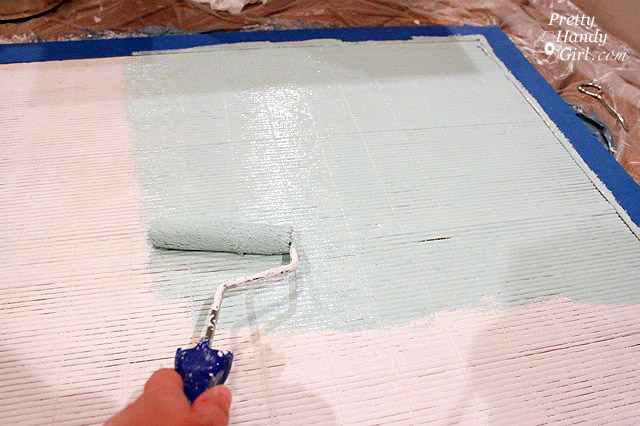
Roll on the border color. Yup, that pretty blue gray paint was a mistint and therefore FREE!

After the border color dries, remove the painter’s tape and then put tape on top of the border.

Roll on the base color for your rug. Then use a brush to drag the paint between the slats. You may need to apply a second coat of paint.

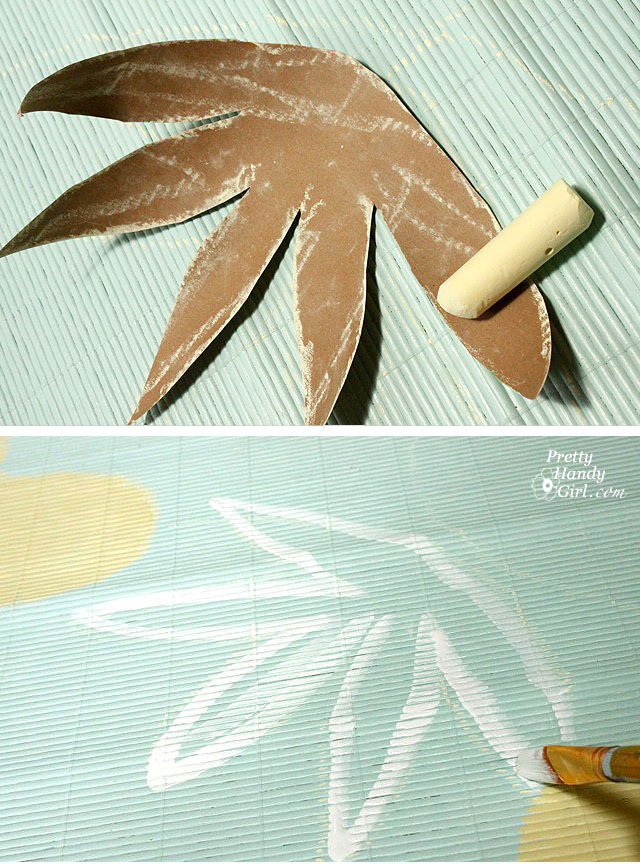
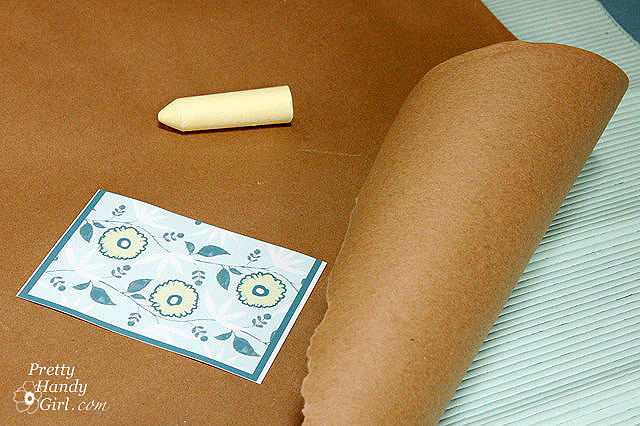
Using the chalk and butcher block paper, draw out your rug design.

And lay the design on top of the rug.

Cut out the largest shapes first. And trace inside the cut outs onto the rug.

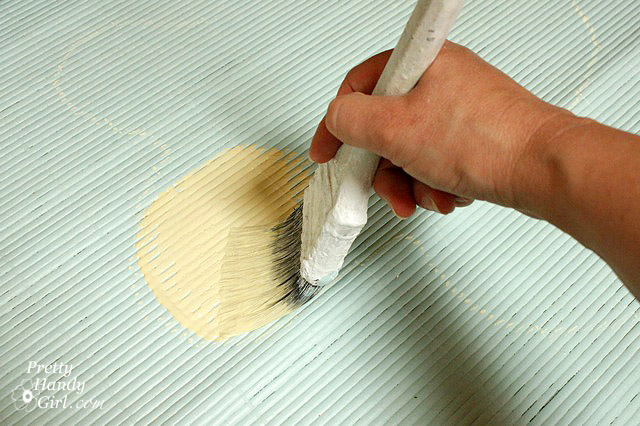
Paint inside the chalk lines with the flower color.

Next draw the vines and branches onto the rug using chalk. Chalk can easily be wiped off if you wish to work with the design a little bit.

Continue tracing flowers, vines and leaves and fill them in with paint.

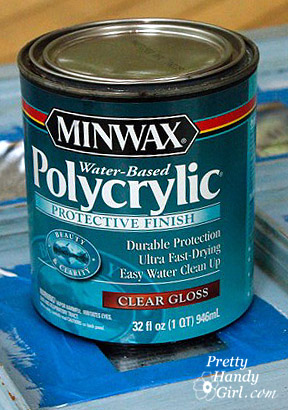
When your rug is completely painted and dry, wipe it off with a damp rag. Then roll on at least 2 coats of water based polyurethane. I prefer Minwax, but use what works for you.

One word of advice when painting on bamboo slats. Don’t try to be a perfectionist. Just relax and have fun. The inconsistencies will make your rug look more authentically hand-painted!

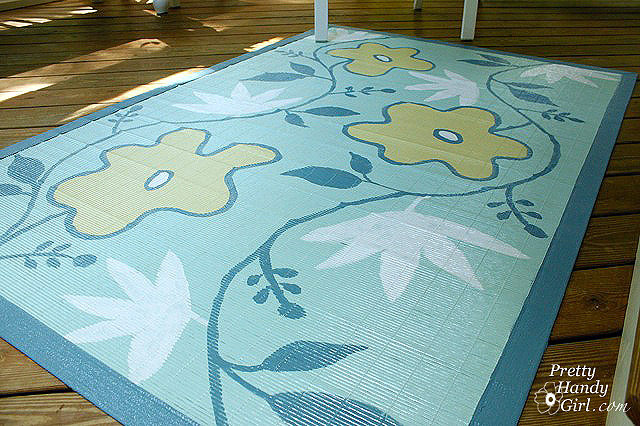
I love my new porch rug! Even better, I love the price!

It looks fabulous with my beachy coffee table I made last year.


I promise – a photo tour of our screen porch will be coming soon.


* Disclaimer: I was sent a gallon of Kilz Clean Start Primer for my honest review. I was not paid or compensated for the review other than with a gallon of primer. My thoughts and opinions are authentic and my own. In other words, I respect you and will not lead you astray with false product information.

Sharing this project with:

Visit thecsiproject.com

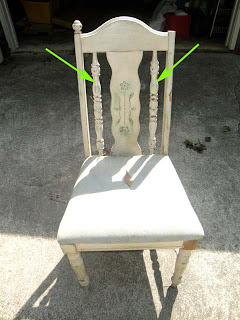
I have a serious problem. I can’t bear to see a piece of furniture being thrown away. It could be the ugliest, most broken down chair and I still feel the need to save it from Mt. Trashmore. That was the case with “Daisy” this poor ugly chair that I found on the curb awaiting the trash trucks a few weeks ago. I threw her in the back of my car and brought it home.

Two missing parts

Only when I got home did I assess her condition. Moldy seat, chipping and peeling paint, structurally falling apart, cobwebs, missing parts…

GROSS! Stained and moldy seat.

…and then a dead roach dropped out! Ewwww! I must be insane.  But, I still saw potential through all the disrepair.

This chair had some serious structural issues. I knew it was a case of tear her down and rebuild. This intro kept playing in my head the during the whole process:

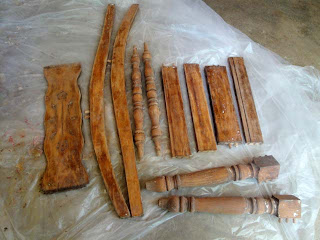
I pulled apart the chair (mostly with my bare hands and then with some assistance from a hammer.)

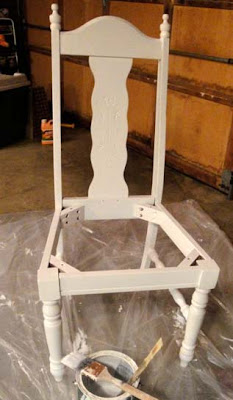
Until I was left with a skeleton of a chair.

I stripped the paint layers off the chair using the same technique as I did for this chair (see details here.) Unfortunately this chair had 5 layers of paint, therefore it took several hours and several re-applications of Citri-strip to get down to the wood.

If you remember, there were several missing parts on this chair. I had a lightbulb moment when I realized that I could used the spindles from the chair back for the missing parts to connect the legs.

I removed the back spindles.
Almost a perfect size and I had two of them!

I cut down the spindles on the miter saw (but these could easily be cut with a hand saw).

And then notched the ends so they would fit into the holes on the legs. (I did have to enlarge the holes on the legs slightly using my drill and a 3/4″ spade bit.)

Notching the spindles. Cut around the diameter, then cut from the end in towards the first cut. Repeat on all sides.

After dry fitting all the pieces back together, I used Gorilla glue to glue the chair back together.

I clamped the chair tight by using rope to wrap around the chair.

Daisy had also lost one of her decorative corner finials. So, I bought two new finials at Home Depot for $5.

In order to screw on the new finials in, I had to plug the hole with wood. (As promised: a tutorial on filling holes in wood.)

I also filled the holes where the spindles used to be with wood putty.

Next, I primed Daisy. Just a side note here, one reason the original five coats of paint on Daisy were peeling and flaking is that the proper prep work wasn’t done. No sanding to scuff up the glossy polyurethane and no primer. It is so important to sand (rough up your surface) and use a primer. If you cut corners here, you might as well kiss your beautiful finish goodbye in a few years. Especially if the chair is exposed to the elements.)

Finally, I added two coats of white paint (sanding lightly between coats.)

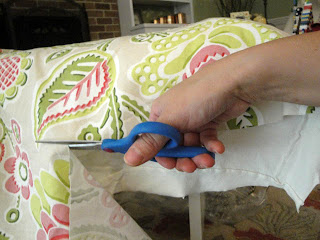
The chair seat was in really bad shape. Therefore I decided to cut a new one out of plywood using my jigsaw.

Trace old seat on plywood, use ruler to make straight lines, cut out seat using jigsaw.

I checked my fit and then re-upholstered my chair. Check out this post to see how to re-upholster a chair seat.

Then for the finishing touches or the frosting on the cake. You can definitely do this step! The inset carving controls your brush for you. Kind of like bowling with bumpers.
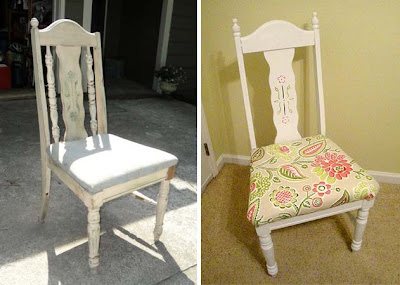
And my chair is finished. Isn’t she beautiful!

Hard to believe that 48 hours ago this chair was definitely worthy of Mt. Trashmore.

The chair is super solid now, and doesn’t move at all thanks to the Gorilla Glue.

How about one last look at the before and after pictures?

Want to see more furniture in my guest room? Take the tour here!

If you stuck through my ugly post yesterday. I have some pretty pictures for you today!

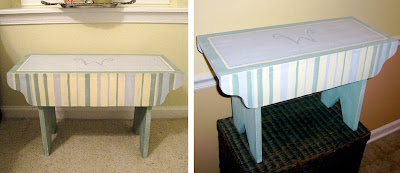
Two years ago I happened upon a cute little bench being thrown out with a neighbor’s trash. (I am addicted to trashed furniture. In fact, I have a NASTY chair in my garage that needs a lot of help structurally and asthetically.)

The roadside bench was painted a very blah beige color. I brought her home and gave her some decorative lines and a monogram. At the time we didn’t have anywhere to sit in our mudroom, so this little bench served the purpose well. Later I built a big mudroom hallway bench with built in shoe storage (I promise to create a tutorial for that at a later date.) So, this little bench was moved to the guest room where she sat by the window until this week.

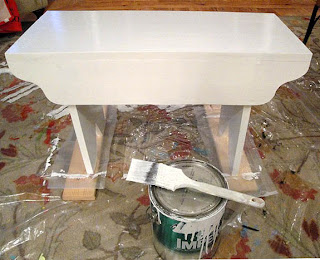
The first thing I did was give her a little rub down with some sand paper. Then I laid down 3 coats of fresh shiny white paint (leftover from trim and moulding painting).

I used some old foam I saved from our move (only 3+ years ago). This foam was the packing material used to ship ice cream cones! I received it from a nice woman off of FreeCycle.org and thought it could be used for a cushion at some point.

I cut some batting to fit over and wrap around the foam (so as to hide all the seams in the foam).

Then cut the arms off of an old t-shirt of Pretty Handsome Guys (don’t worry, he had already said goodbye to it.) And cut up the sides so I could use just the back of the shirt.

And finished off with the decorative fabric cut slightly larger than all the other layers.
I carefully folded my decorative fabric under being sure that I had the old t-shirt hidden in the fold. And put in two staples with the staple gun to hold the fabric on the one side.

Moving over to the other side, I cut the t-shirt, batting, and decorative fabric down to size being sure to leave about an inch excess on the decorative fabric.

Then I repeated the same fold under and put in two staples.
Now for the bling! I had plenty of leftover nailhead trim from this project (check that link out if you need a better tutorial on adding nailhead trim.) I began at the corner of the front of my bench and added the starter nail.

At this point my 6 yr. old had come over to my side telling me how bored he was and, “What can I do now?” I asked if he wanted to help me hammer. Once I started each nail, he was able to hammer it into the nailhead trim for me. (I did have to finish a few off myself.) We worked together adding the nailhead trim to the front and back of the bench.

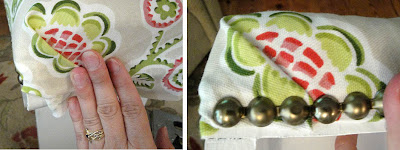
Before adding the trim to the sides I neatly folded and tucked under all the layers (cutting excess off when necessary.) Until it looked like this. Then I added the trim on top to hold the fabric in place.

And there she was, my beautiful cushioned bench for our guest room. I’ve been busy trying to finish a few projects (rebuilding a curbside chair and making a night stand from a door and picket fence) in this room before my best friend from high school comes to visit. Nothing like a visitor to get your DIY butt in gear!

 Sittin’ pretty
Sweet smelling soaps in a coordinating bowl
My trash to treasure bench is now a sweet spot to land

Today I’ll show you the painting technique I used on the chair I stripped yesterday.

Here is a list of suggested materials:
Tarp or drop cloth
Brush
Primer
Rubber gloves
Sandpaper (Fine & Medium grits)
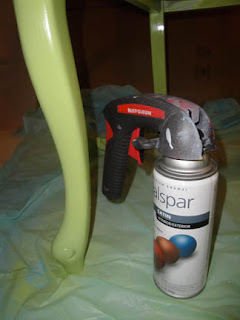
Spray paint (optional handle adapter to prevent hand cramps and spray on your fingers)
Dust mask
White paint
Brown acrylic paint or craft paint
Rag
Polyurethane
Floor protectors (chair glides)

Because I stripped and sanded the chair down to bare wood, I needed to prime the wood so it would accept the paint. If you don’t prime bare wood, then the paint will be absorbed into the wood and won’t leave a clean all over finished look. The primer is also a base that makes the paint stick to it easier. Primer is very good at adhering to lots of surfaces, including your skin. So, be sure to wear gloves or you may look like a reverse dalmatian for a few days.

I’ve used many different primers. Sometimes I use a spray primer and sometimes a liquid primer. Did you know that primer comes in different colors? And it can be tinted? Be sure to ask the paint department next time you are drastically changing the color of a room. They might be able to tint your primer close to the color you are painting so it cuts down on the number of coats you have to use.

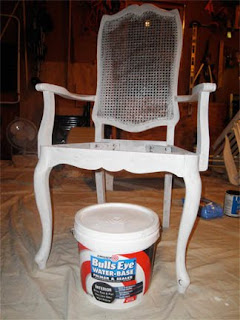
For this project I used Bulls Eye water based primer that you paint on. You do not need much, we only had a big bucket left over from painting some rooms in our home.

Primer dries quickly, so work fast. It isn’t necessary to make it look perfect, just get a thin coating on all the wood surfaces and be careful to wipe off any drips.

After the primer dries (I used my box fan to speed the process,) you should lightly sand the chair to remove any burrs or drips. This also gives the primer a little scuffing so that the paint has something to grip to. Don’t sand so much that you go through the primer coat.

At this point you will need to “tent” off an area where you will be working. Spray paint will get everywhere if you let it. The good news is that usually the particles will dry in the air, but they will coat everything in the vicinity and will need to be wiped off. If you can spray outside, it will be better for your lungs, but be sure your drop cloth extends at least 4 feet out in all directions from the piece you are spraying.

Now comes the fun part! Grab your paint can in the color you have painstakingly chosen. I used Valspar Pistachio Satin finish in a spray can. I used to use Rustoleum, but it seems that my local Lowe’s has eliminated most of the Rustoleum brand spray paints and replaced them with Valspar. My suspicions tell me that it might still be the same paint but branded for Lowe’s.

I use light coats of spray paint about 8-10 inches away from the surface. The trick with spray paint is to use several light coats instead of trying to cover all at once. This will insure an even finish. You also don’t want to end or stop on the piece you are spraying. I use a smooth consistent sweep across the chair and then release the trigger after my spray has left the chair. If you stop on the chair, you will either get a shiny spot or drips where the extra paint has collected. Here is a graphic to show you how to spray your paint:

I used three light coats to cover this chair. I did sand VERY lightly between coats (using a fine grit 200 grit or higher) to make sure there were no rough spots and to add something for the next coat to adhere to. I also wipe off the chair after sanding with a damp rag. Just be sure to take your time to work up to your final color. This is the point where you may stop and say that you like the final results of your painting job. If you stop now, be sure to finish your painting job off with two coats of polyurethane.
I choose to add some more interest to my chair.
Milk Painting – Adding Depth and Interest
 
After the green spray paint layer has completely dried, I took the fine grit sandpaper (200 or higher) and gently roughed up the surface. Then I wiped off the whole chair with a damp rag and let the chair dry.
For this step I used some left over white latex trim paint we had lying around. I used a semi-gloss finish because that is what we had, but you can use any white paint you have left over. I dipped the edge of my brush into the paint and then wiped most of it off on the can. Then I lightly ran the brush over the chair in the direction that the wood grain would go. The green paint should show through your strokes. Only go over the area once, unless you really ran out of paint on your brush. If you put too much on the chair, or have areas with too much (see the left edge of the picture on the right below),  you can take a wet rag or baby wipe to clean it off and try it again.

Once the whole chair has the milk paint technique, I let her dry. Once again, this may be the point where you stop painting. But, I really had more distressing in mind for this girl.

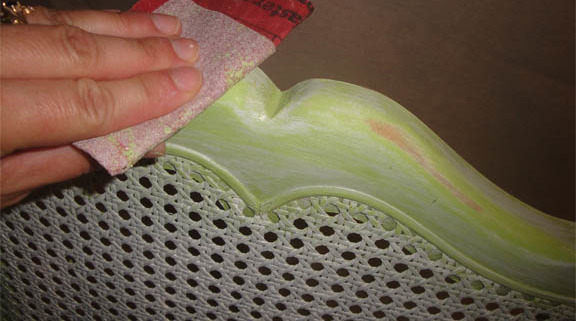
I wanted to let some of her age show through, so I grabbed some medium grit sandpaper (100 – 150 grit) and sanded some edges down to the bare wood. Think about any place on the chair that sticks out and might be rubbed and worn on an antique.

Unfortunately for me, the bare wood on my chair was a little too peachy colored next to the pistachio color paint, and I really liked the look of this leg that was sanded and had a darker brown area showing through. So, I decided to fake the darker brown wood look.

I wiped off the chair again with a damp rag and then ran up to grab some acrylic paint out of my art supplies. I chose the Raw Umber brown and squeezed a quarter size dollop onto my palette. Then I grabbed a clean rag and wrapped it around my finger. I dabbed my rag into the paint and made sure I didn’t have any globs on the cloth. Then I lightly ran the edge of my clothed finger over the edges of the chair where I had sanded.

Uh oh, don’t peek at the fabric on my chair! That is the next step we will go over tomorrow. Plus, it wasn’t a good idea to paint with the fabric on my chair. Too many opportunities to drip or rub paint onto the seat.
Once I was done adding the brown paint, I let the chair dry. Next I took my fine grit sandpaper and sanded the whole chair lightly being careful not to sand off any paint. Wiped the chair down and let it dry.
I really liked the aged beautiful look that my chair had achieved, so I was ready to seal her with 2 coats of polyurethane. I used a water based poly and lightly sanded between coats. At this point you are probably sick of the sanding, but I am a sucker for smooth finishes. I love to caress finished wood and feel the baby softness under my fingers. Plus, this is the chair that I will spend many hours sitting in and working.
After the poly has dried, I do add floor protective legs to my chair. It protects our wood floors from damage. I’m really into protecting our wood (as you can probably guess.) Furniture glides or floor protectors are super easy to add. They go on just like nailing a nail. Be sure you have your glide centered on the leg and that you aren’t nailing it into any metal. Then gently tap it into the leg of your chair.