How to Make a DIY Half Lap Joint using Miter Saw

Want to add another joint to your woodworking skillset? Today I’ll show you how to create a simple DIY half-lap joint with your miter saw.
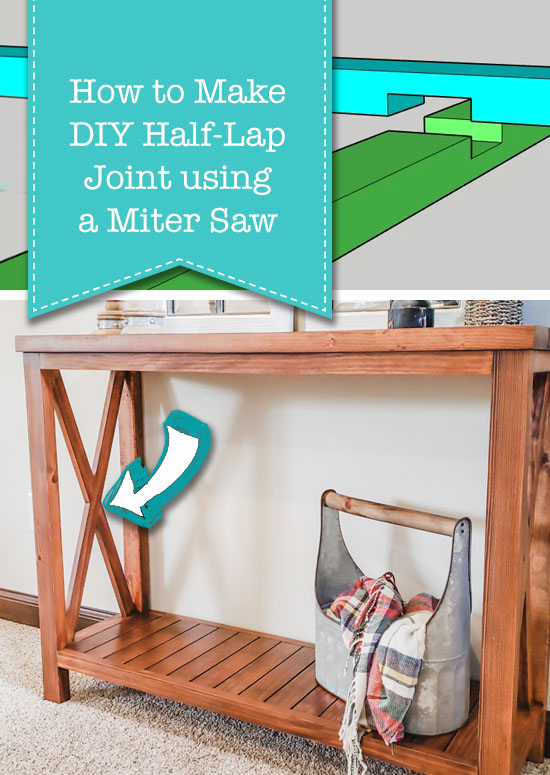
Half-Lap Joint with your Miter Saw

Hi! It’s Kristen from In Her Garage and I am going to teach you an easy way to create a half-lap joint to add to your DIY skill set. The half-lap joint is versatile and super strong.

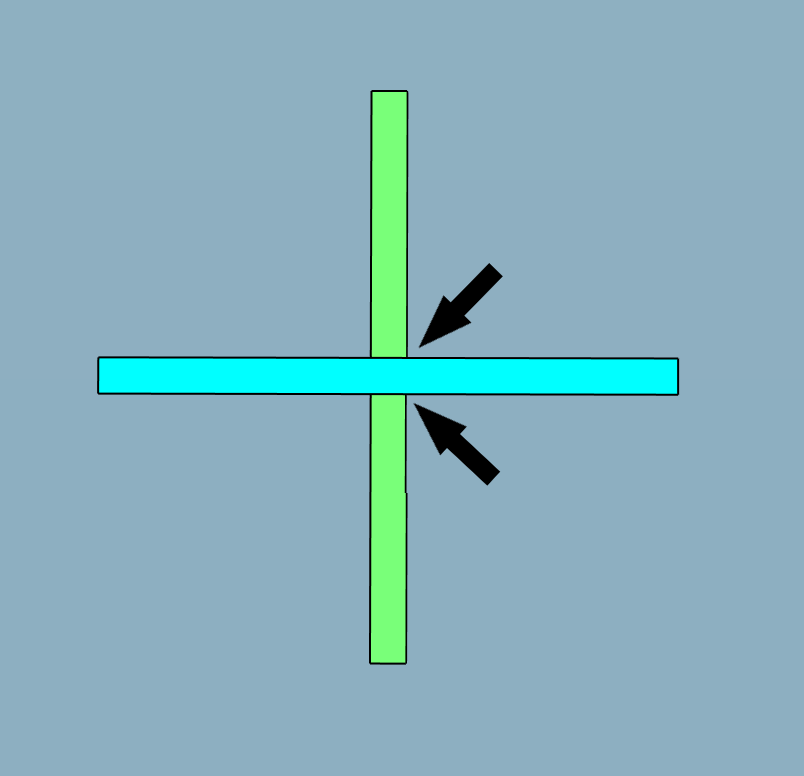
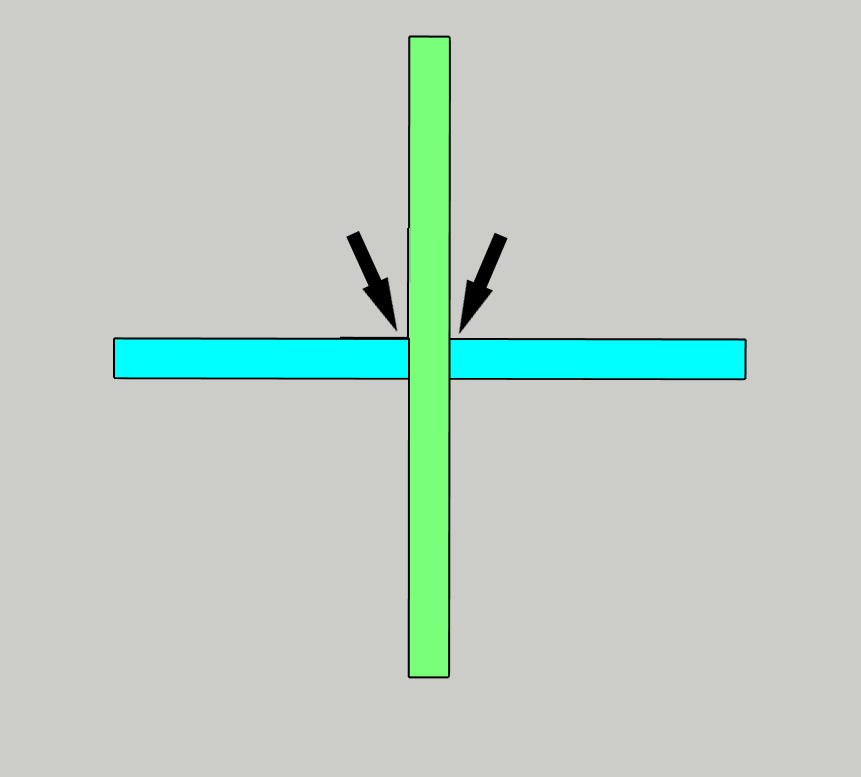
Wondering what a half-lap joint even is? Put simply, a half-lap joint is a joint between two boards that are halved together so that a flush surface results. Check out the pictures below for two popular ways half-lap joints are used. Best of all this joint only requires wood glue to hold it together.


I have used this style of joint when a butt joint or pocket-hole joint isn’t possible. It’s helpful to use when working with thinner material or in tight spaces. Let’s learn how to make a half-lap joint!

Materials:

(I’ve included affiliate links for your convenience. I earn a small percentage from a purchase using these links. There is no additional cost to you. You can read more about affiliate links here.)

Tools:

Instructions:

Step 1: Mark your boards

  • Place your boards over one another in the orientation they will be joined.
  • Mark out the width of the overlap on each board.


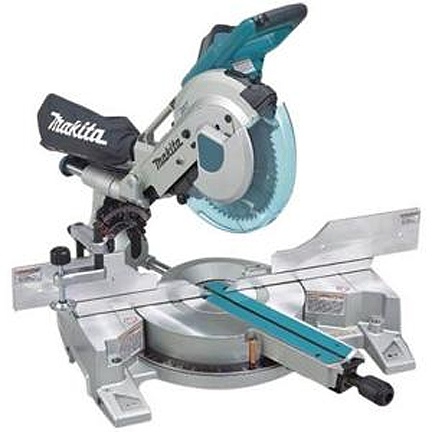
Step 2: Set up your miter saw

  • Place a sacrificial board against the miter saw fence, with the face flat (as seen in the video below).  This board should be flat and square. You will need this because you are not cutting through the board to be used in your project and thus the miter saw will not cut the back portion of the board you are cutting. The scrap piece will push your board out so that the miter saw will cut halfway down from the front to the back. If you do a test cut without the scrap board you’ll see what I mean.
  • Next, use your saw’s depth stop control and adjust the depth to cut approximately halfway down into the first board to be cut. Use a scrap piece of wood for this step to make sure you have the depth you want before using the board that will be used in your project.
  • Adjust the miter angle at this time as well if you are not planning to cut at 90 degrees.

Step 3: Cut the first board

  • With your depth set and scrap board in place make your first cut into your board. Make sure you are minding which side of the marked lines your blade needs to cut!
  • After the first cut move the board slightly (about 1/8”) and create another cut right next to the first.
  • Continue moving and cutting until you have created all the cuts needed between the two width lines you marked out previously.
  • Dry fit the second board into the first to make sure the width is correct and make any necessary adjustments.
  • Use sandpaper to smooth out any ridges left from the saw.

Step 4: Cut the second board

  • If you cut exactly halfway through the first board then you will not have to do any adjustments for this step and you can cut the second board exactly as you cut the first.
  • But, if you are like me you didn’t cut the first board perfectly and the depth will need to be adjusted slightly for the second board. This is simple.
  • The cut for the second board will need to be the depth of what you DIDN’T cut from the first board. Use a piece of scrap to fine-tune this depth before cutting the board you will use.
  • Now that the depth has been set for the second board you can cut the half-lap into the board just like you did for the first. Again, being mindful of which side of the lines your blade is cutting.
  • Dry fit the two boards together to be sure you have a snug fit and the boards create a flat surface.

Step 5: Glue together

  • Apply glue to both lap joints in each board and fit them together.
  • Apply downward pressure to the joint and allow the glue to dry.

There you have it!! You have expanded your talents and created a very strong half-lap joint for your next project. Nice work!

Pin this graphic for future reference:
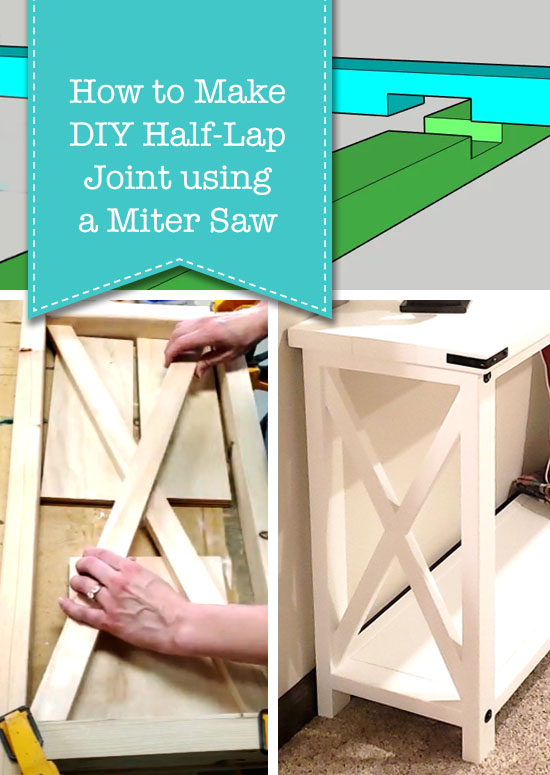
How to Make a DIY Half Lap Joint using Miter Saw

New to using the miter saw or need a refresher? Check out the Pretty Handy Girl’s How to Use a Miter Saw tutorial to get you all caught up!

Hi! I’m Kristen, from In Her Garage, and I am a self-taught woodworker and DIY fanatic from Minnesota where I live with my husband and our two daughters. Between being a wife, mom, and registered nurse, I try to make as much time for DIY as possible. My love for building came after our family built our current home in 2015. After we moved in, we needed furniture, and instead of spending massive amounts of money to order the items we wanted I decided that I would build them myself. I started with a buffet table plan from the fabulous Ana-white and quickly set out to remodel my entire home office.

Since then I have started a side business building furniture for the people in my community. I love hearing my clients talk about the pieces they wish they had whether it be a rustic buffet table, a one drawer side table, or a toy box and then making it a reality for them. While starting my small business it made perfect sense that I would document my building journey so I simultaneously launched the In Her Garage blog and I love sharing my plans, tips, and tricks.

I am so glad that you found me here and please feel free to connect with me on PinterestInstagram, and Facebook to see what I am working on right now.

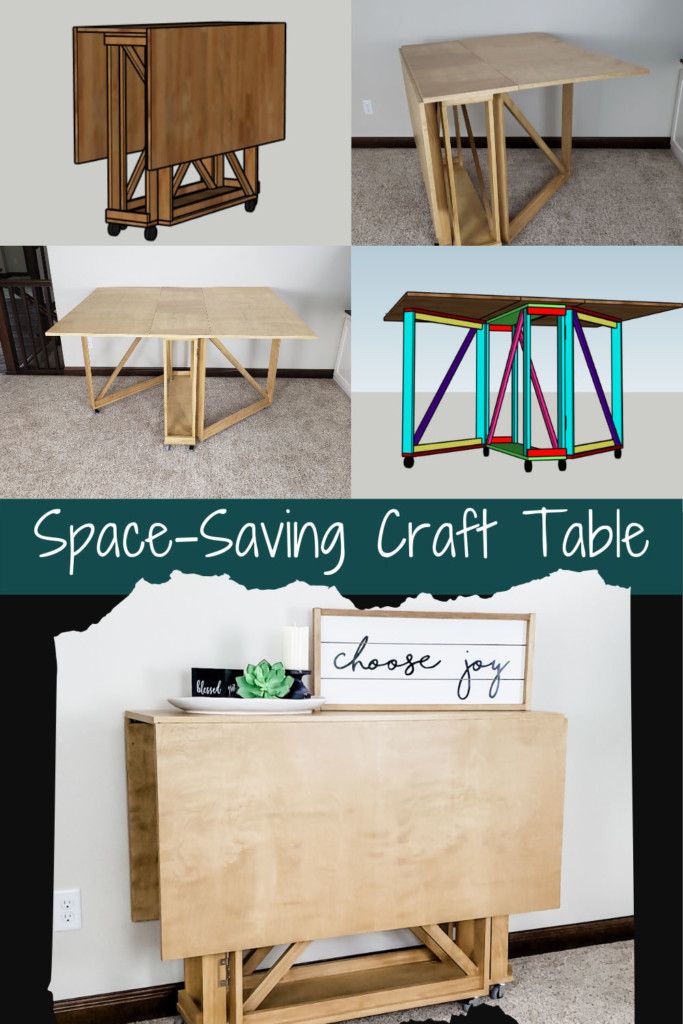
Check out my latest blog post about building a DIY Folding Craft/Sewing Table! This table is large enough for any craft project but folds down when you don’t need it. Perfect for anyone with a small space but large crafting ambitions!

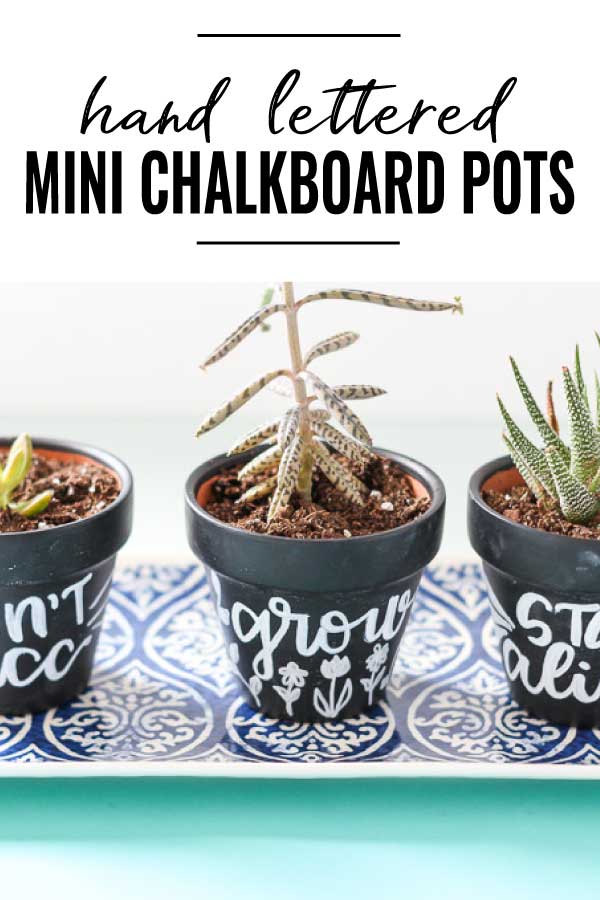
Today I’m showing you how to add some greenery to your home in the form of these cute hand-lettered mini chalkboard planters. You can plant any type of plant you wish, but cacti and succulents would be my choice!

Hand lettered mini chalkboard planters

Hand-Lettered Mini Chalkboard Planters

Hey there, It’s Amanda from Domestically Creative back again with another simple DIY project. Today we’re making these adorable hand-lettered mini chalkboard pots! I’m including two different methods for making these planters. This project is intended for indoor use, but I’ll include steps to use (and materials) for outdoor use as well. It may seem like a silly thing to state, but chalkboard paint and chalk marker will fade, crack, and peel when exposed to the elements. You may be thinking to yourself, why even use chalkboard paint and marker, to begin with? Well, the whole point of a chalkboard is that you can change it! Let me show you how to make your own hand-lettered mini chalkboard planters.

3 hand lettered chalkboard planters with various succulents and cacti

Materials:

(I’ve included affiliate links for your convenience. I earn a small percentage from a purchase using these links. There is no additional cost to you. You can read more about affiliate links here.)

Instructions:

Step 1. Cleaning terracotta pots

Before painting each terracotta pot, it’s essential to clean them well. Just use soap and water and rinse. Let the clay pots dry completely before moving on to the next step.

freshly washed terracotta pots ready for paint

Step 2. Painting terracotta pots

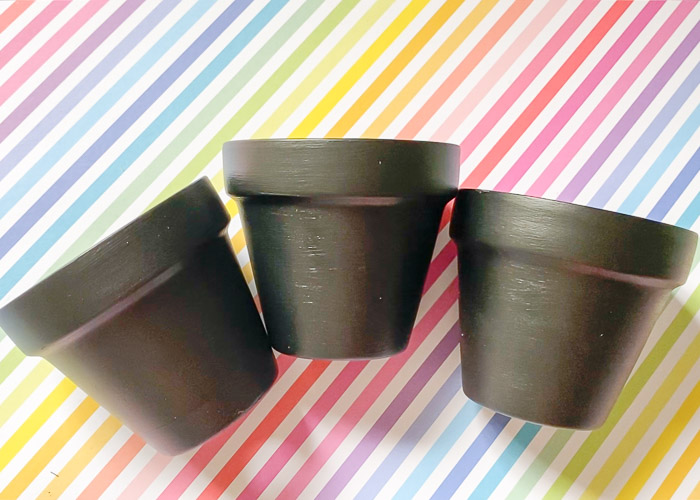
Give the outside of each pot 2-3 coats of chalkboard paint, letting it dry in between coats. If the surface feels rough to the touch, lightly sand with 320 grit sandpaper in between coats. Don’t paint the inside of the pot.

chalkboard paint clay pots

Step 3. Prep the chalkboard surface

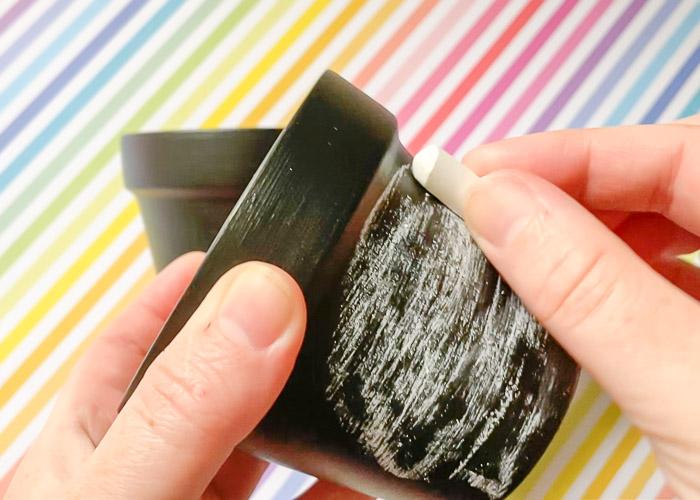
This step may not seem important, but it is! If you ever want to change up your chalkboard designs or lettering then you always want to season a new chalkboard surface before use. To do this, take a piece of chalk (using the side of the chalk), cover the entire surface in chalk.

prepping chalkboard pot surface with chalk

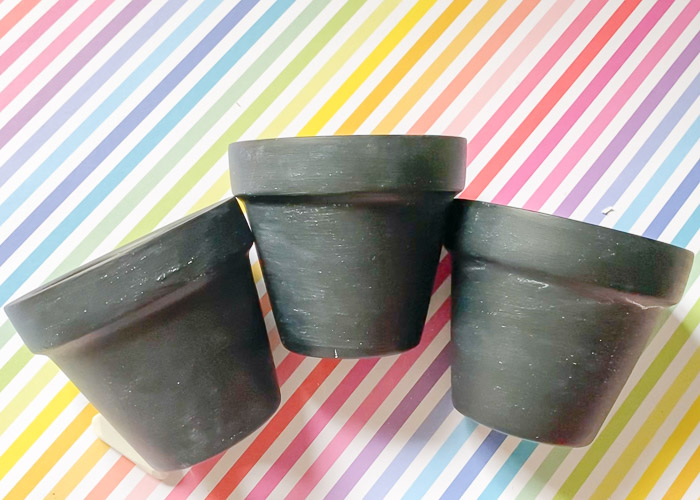
Wipe the chalk off with an eraser or a dry cloth. You’ll be left with a surface that looks like it’s been used! This helps prevent ghosting, which is what happens when you erase chalk or chalk marker and are left with an outline of what was there.

prepped chalkboard surface of pots

Step 4. Personalize with chalk marker

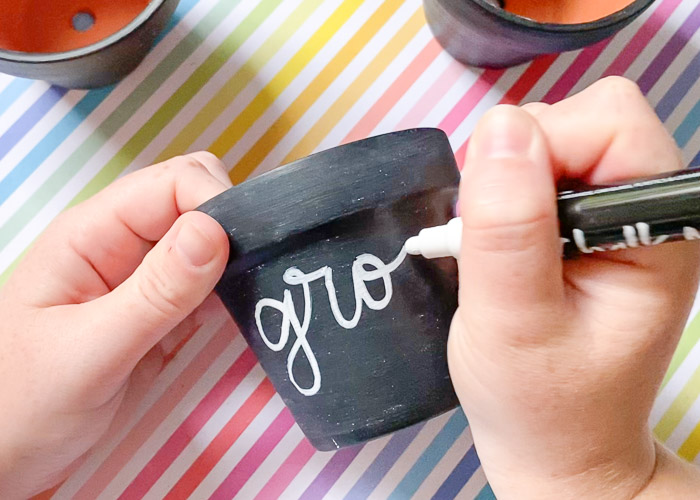
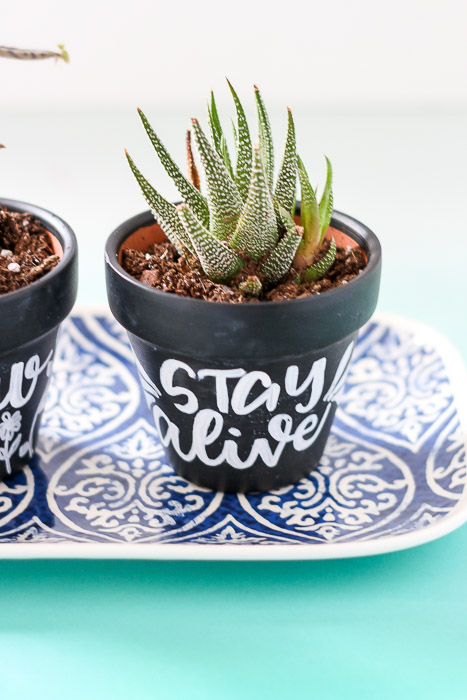
Now it’s time to have some fun! Practice your hand-lettering skills with a chalk marker and personalize the pots however you wish! These pots feature the words “grow”, “stay alive”, and “don’t succ” since I knew I’d be planting cacti and succulents.

lettering "grow" on chalkboard planter

Tips for hand lettering:

Practice on a piece of paper first to get the size and layout just right. Pick the marker up after each stroke of the letter, which is a different concept than what you learn with cursive. If desired, go back in and thicken up the downstrokes to create a brush lettered look!

If you are interested in learning more about hand-lettering, check out my blog Designs by Amanda Kay for free practice sheets and tutorials!

hand lettered pots finished

Step 5. Plant!

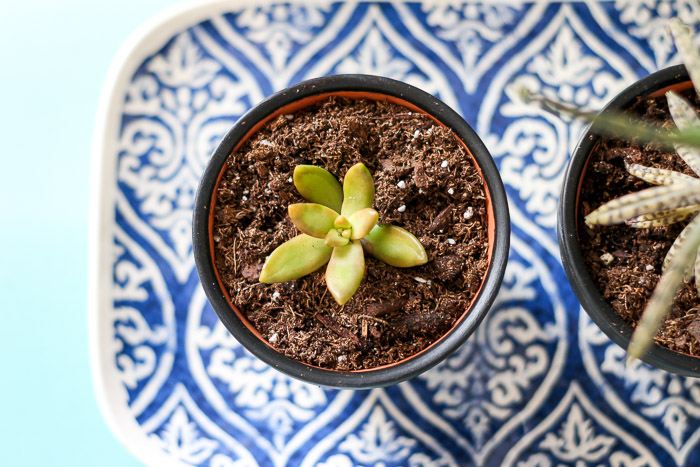
If you are going to be planting succulents or cacti in your mini chalkboard pots, be sure to use an appropriate potting soil! Fill about 3/4 of the way up with soil, tuck in each plant, and then fill in with soil around the roots. Water lightly and place them in a sunny area in your home.

top down view of succulent in planter on decorative plate

Using These Chalkboard Pots Outdoors?

The steps will be similar, but the products used will vary. First, you’ll want to choose an outdoor acrylic paint instead of chalkboard paint. Outdoor acrylic will hold up to weather better, and won’t fade when sealed. There will be no need to prep the surface with chalk, so just skip that step! Use an oil-based paint marker for lettering (water-based markers or chalk markers will fade in the sun or run in the rain).

One important extra step is applying a sealant. Using a polycrylic top coat will protect the paint from cracking, chipping, and fading in the sun. Keep in mind that the terracotta pots will lose their moisture-wicking capabilities when painted and sealed.

close up of stay alive planter with cactus

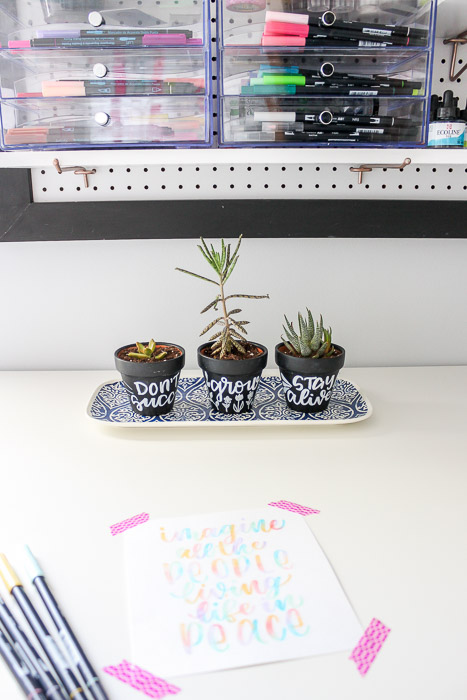
My mini chalkboard planters live in my office where the plants get plenty of light throughout the day! Plus they add a nice touch of greenery to my creative space.

mini chalkboard pots in craft room

What part of your home could use a set of these hand-lettered chalkboard planters?

Love this tutorial? Don’t forget to pin for later!

I’m Amanda, and I am the creator and voice behind the food and DIY blog, Domestically Creative. What started as a place to share updates with friends and family after we moved from Illinois to Tennessee and then to Texas, turned into a passion for finding creative and frugal ways to feed us and decorate our homes.

I have always had the “make it myself” attitude and I’m not afraid to bust out the power tools or get creative when it comes to decorating our home on a budget. You can usually find me scouring the local thrift stores, garage sales and estate sales looking for my next makeover (like this litter box cabinet), or dreaming up ways to make our new house feel more like home. My most recent project was giving my home office a much needed facelift. Some of the plans included creating a fun inspirational accent wall and adding pegboard to store my craft hoards.

I currently call Missouri home, where I live with my husband, dog, and 2 cats in a pretty dull, late 90’s split level. My husband and I both love to travel the U.S and recently purchased a small travel trailer to tag along in our journeys. In our free time together we can usually be found working together on a home project, exploring a new place, or just lounging with our pup, Delilah.

I’d love for you to connect with me on social media via Facebook, Instagram, Pinterest and Twitter!

See all of Amanda’s tutorials HERE.

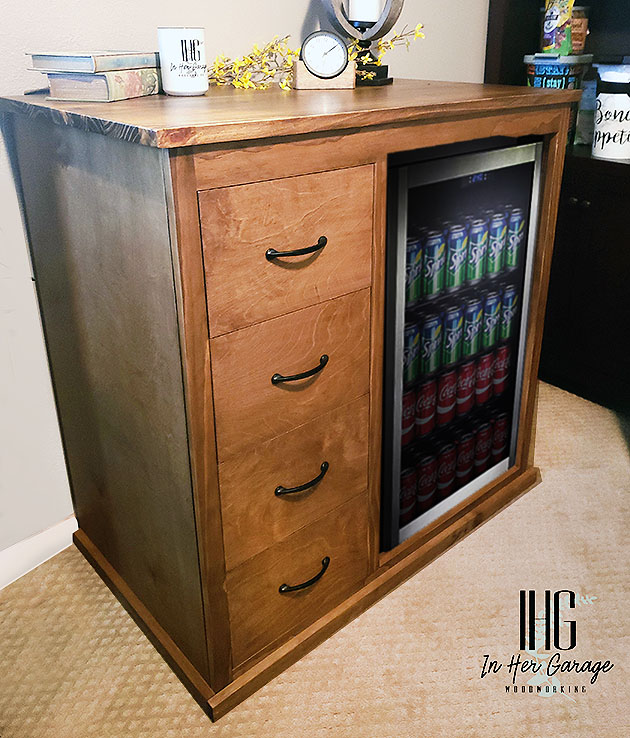
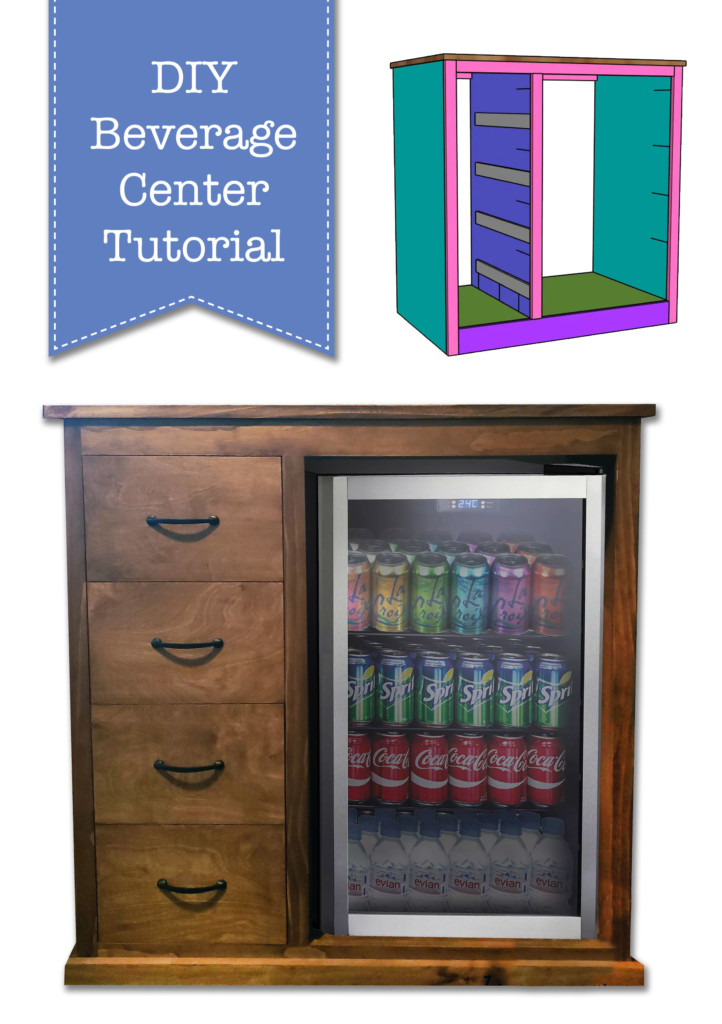
diy beverage center housing mini fridge

It’s 5 o’clock somewhere! Whether it’s 5 am or 5 pm this DIY Beverage Center will hold whatever it is that gets you going in the morning and winds you down in the evening.

DIY Beverage Center

DIY Beverage Center

Hi there! This is Kristen from In Her Garage and I am going to teach you how to build a DIY beverage center for your home. I have built a couple of these and each client who received this beverage center loves to tell me how appreciative they are to have a separate space to hold their coffee supplies and adult beverages. Plus, a beverage center freed up space needed in their kitchen refrigerator.

This beverage center measures approximately 40”h x 38 ½”w x 24 ½”d and I built it to house the Whirlpool JC 103EZY Mini-fridge that a client had purchased. Feel free to modify the dimensions for the mini-fridge of your choice, just keep in mind there should be an allowance on the sides and top for proper airflow around the fridge (usually specified in the owner’s manual). This particular mini-fridge requires 2” on both sides and top.

Materials:

(I’ve included affiliate links for your convenience. I earn a small percentage from a purchase using these links. There is no additional cost to you. You can read more about affiliate links here.)

Tools:

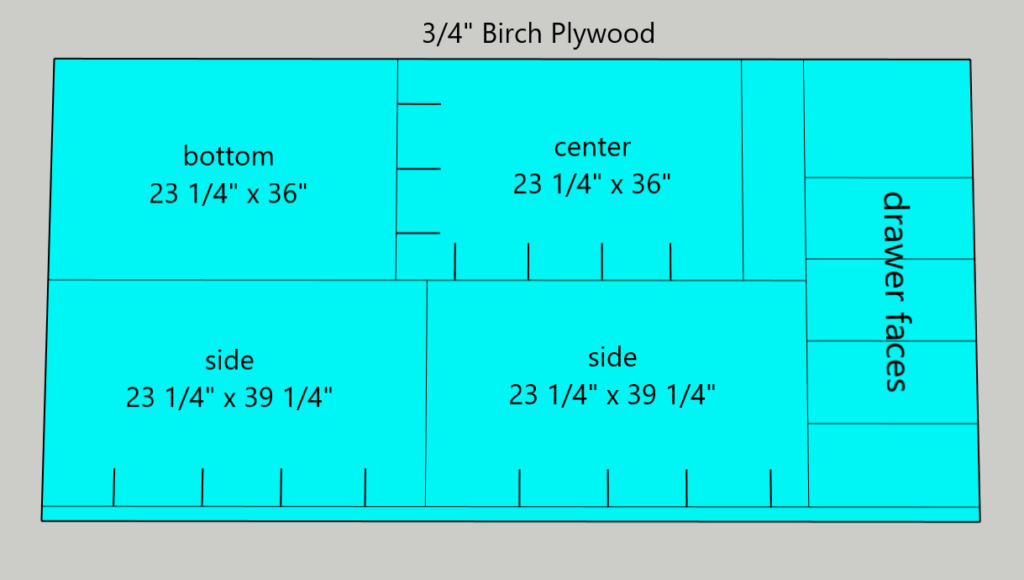
Board Cuts:

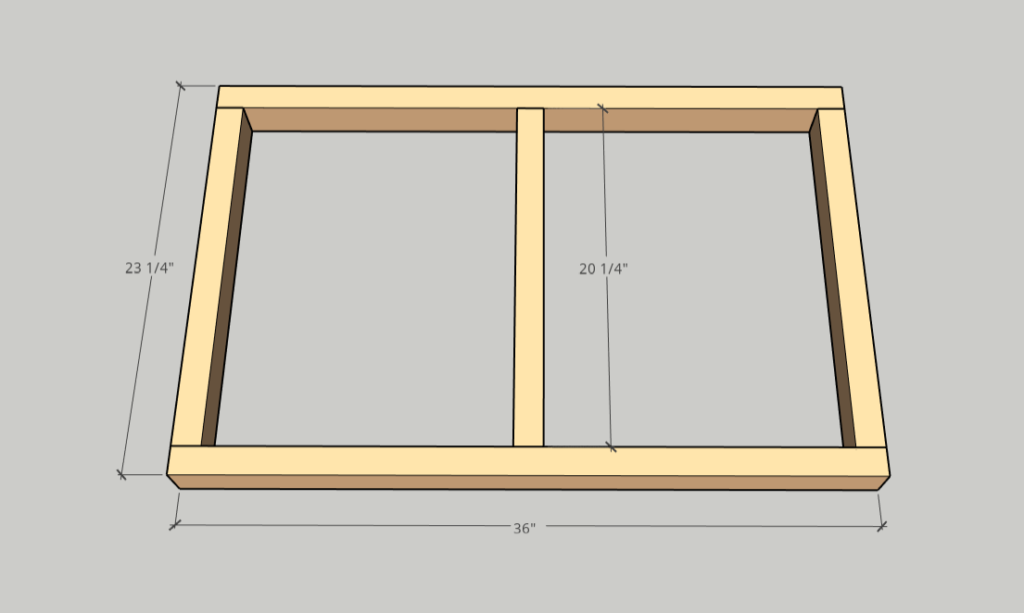
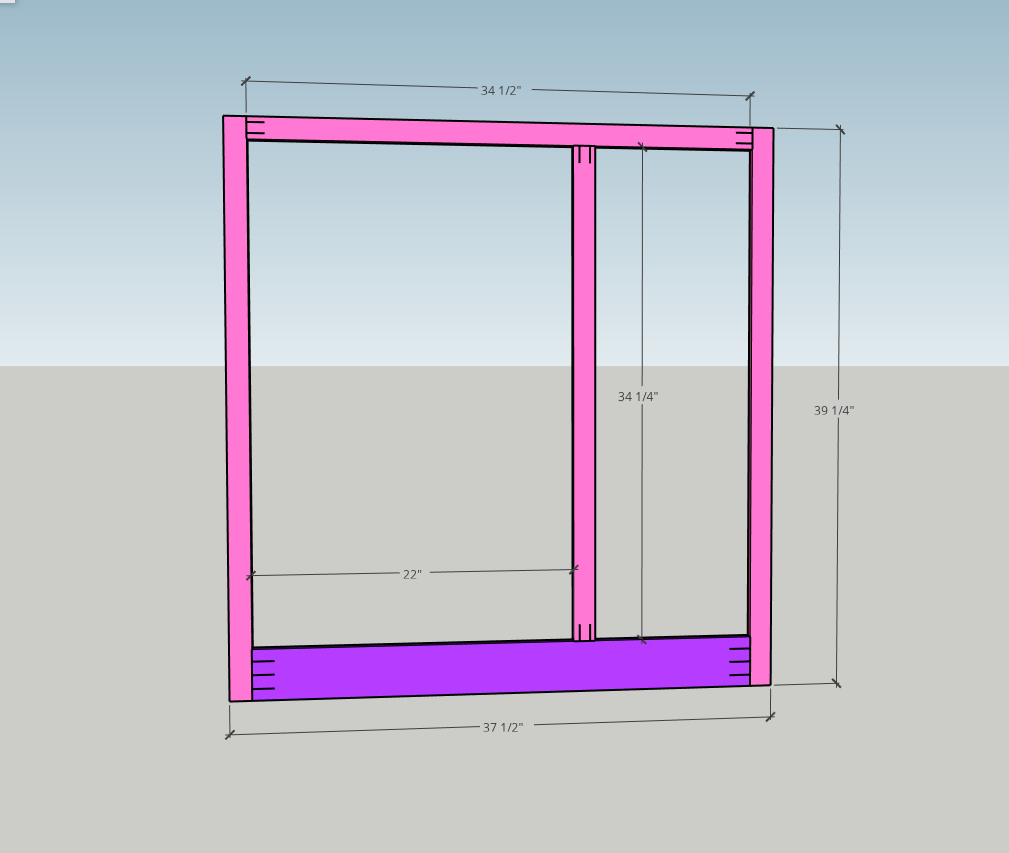
  • 2- 2×3 @ 36″
  • 3- 2×3 @ 20¼”
  • 2- 1×2 @ 39 ¼”
  • 1- 1×2 @ 34 ¼”
  • 1- 1×2 @ 34 ½”
  • 1- 1×4 @ 34 ½”
  • 2- 1×2 @ 23″ – drill two pocket hole’s in both ends
  • 2- 1×2 @ 12 ¼” – drill two pocket hole’s in both ends

Cut list and corresponding pocket-hole placement:

To make plywood cuts easier while using a circular saw please check out my tutorial for creating your own DIY Track Saw Jig for your circular saw. It will make cutting plywood simple and foolproof!

Instructions:

Step 1: Create the beverage center base

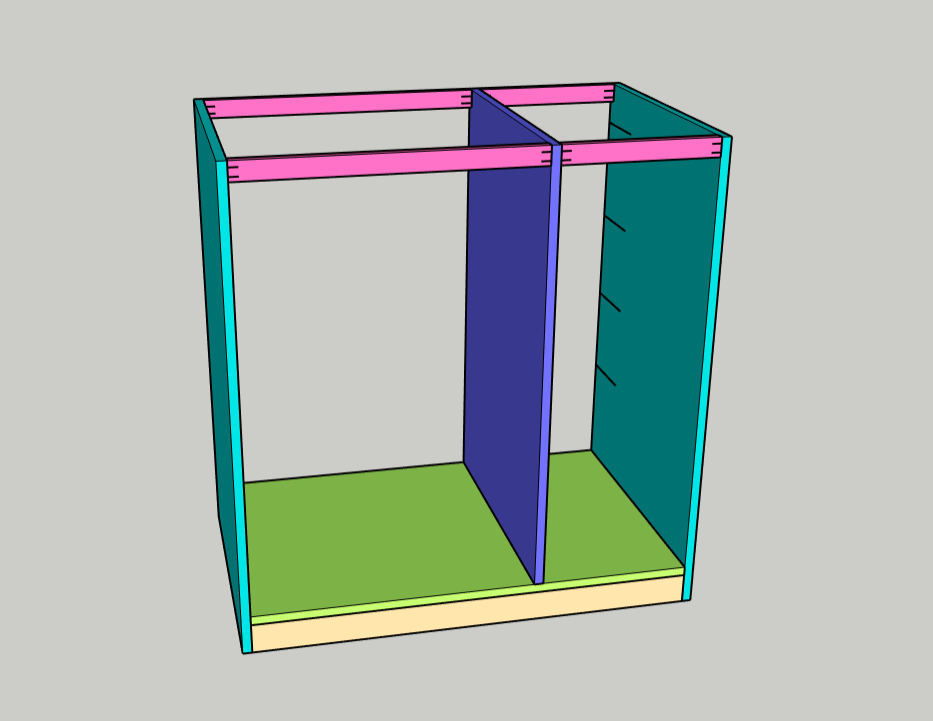
  • First, build a base frame using the cut 2×3 studs, wood glue, and 2 ½” wood screws. Pre-drill your holes to prevent splitting.

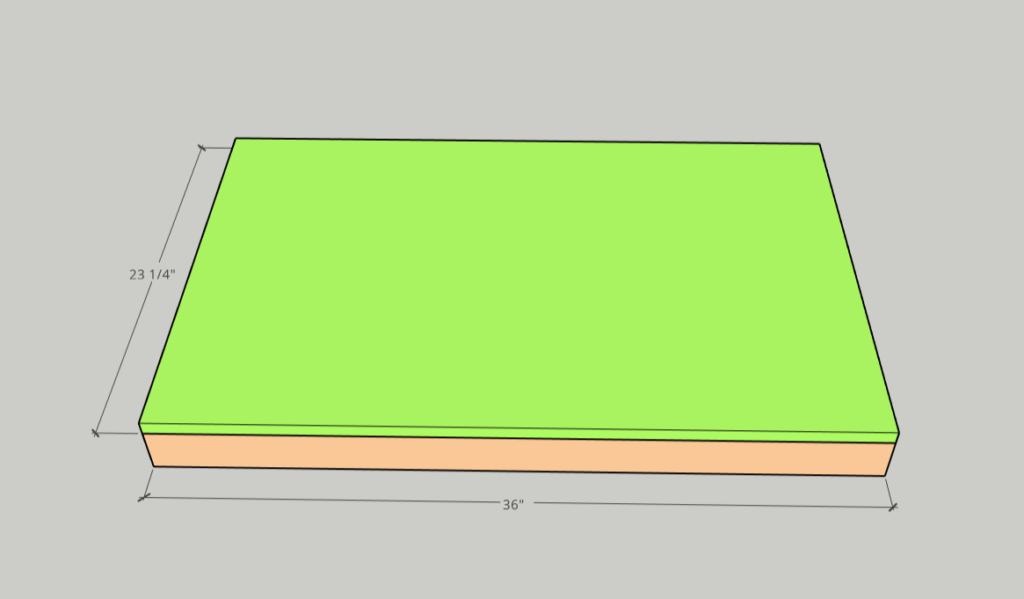
  • Next, Secure the bottom plywood panel on top of the base frame and secure it with wood glue and brad nails

Step 2: Attach beverage center sides

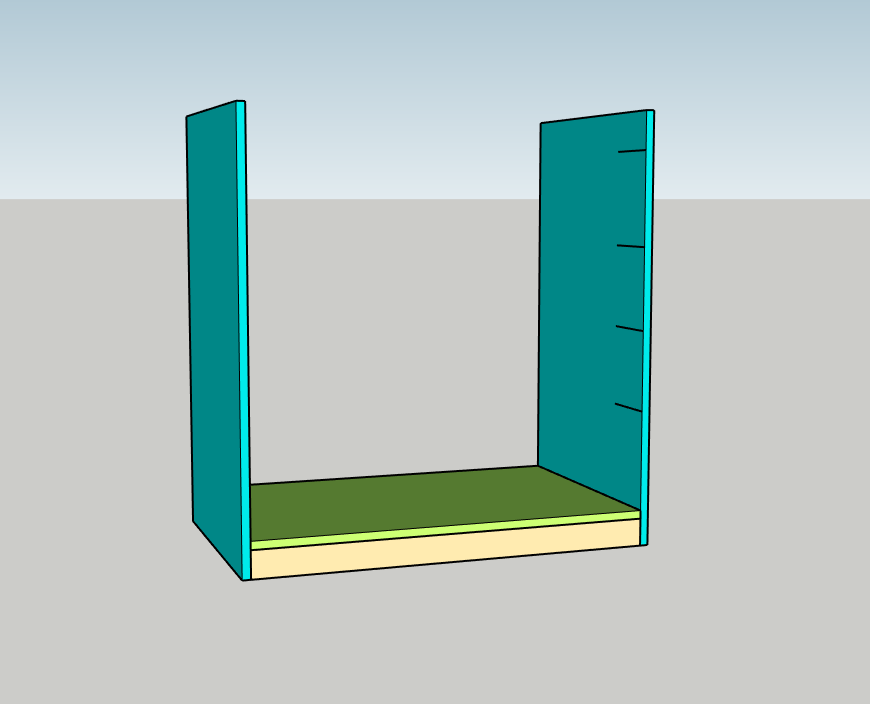
  • On a flat surface, stand both sides on their backs with the pocket-holes pointing to the ceiling.
  • Apply glue to the sides of the beverage center base and stand it on its back.
  • Sandwich the base between the two sides aligning the bottoms and fronts of the sides and base.  If you have clamps use them to squeeze the sides to the base or have someone help hold them in place until they are secured.
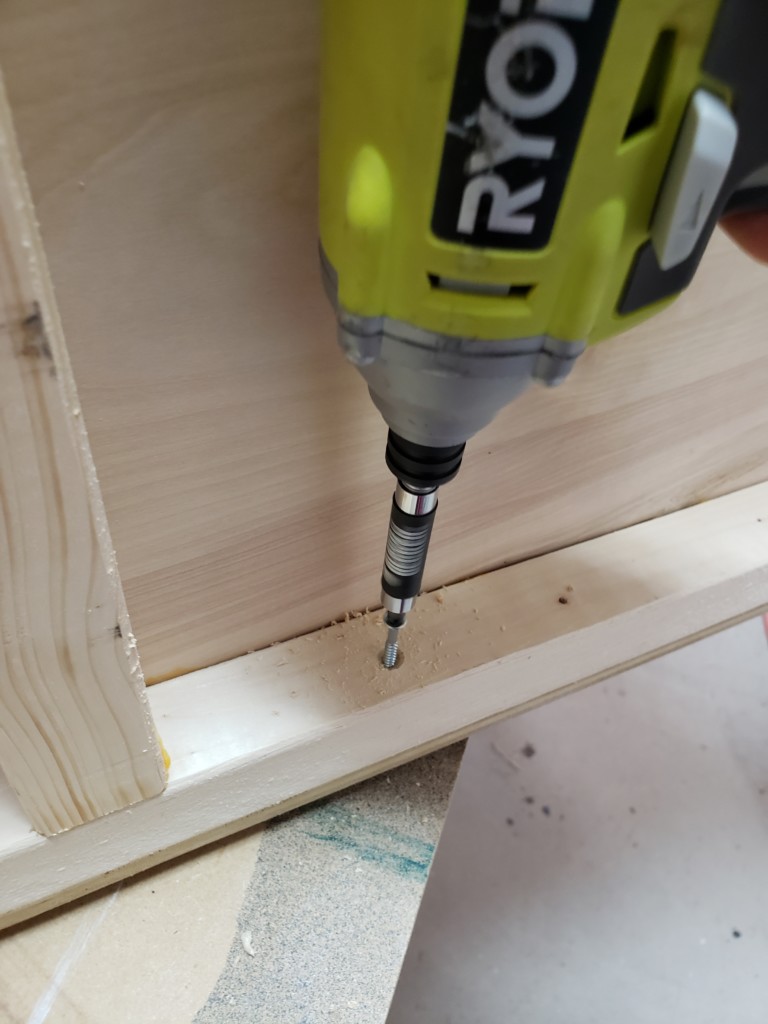
  • Now pre-drill three holes in each side, drilling from the inside of the base frame 2×3 out into the sides, and attach using 2″ screws.
  • Stand the piece up

Step 3: Attach center divider

  • Grab both 1 x 2 x 23″ support boards and use those as spacers for the center divider.
  • Place a small bead of glue along the bottom of the center divider panel (the short edge with pocket-holes) and place it over the base spaced by the 1×2 boards. Be sure that the long edge with the pocket-holes is facing the front just like the pocket-holes on the sides.
  • Attach the center divider with 1 ¼” Kreg pocket screws

Step 4: Attach the top spacer supports

  • Using the same two 1 x 2 x 23″ support boards you used to space the center divider and 1 ¼” pocket screws, attach the boards to the front and back of the side and center divider at the top of the panels to create even spacing.
  • Repeat with the 1 x 2 x 12 ¼” boards spacing between the center divider and the opposite side.

Step 5: Build the Face Frame

  • If you haven’t cut the boards for the face frame yet do that now according to the cut list or the diagram below.
  • Refer to the diagram below for pocket-hole placement.
  • Use wood glue and 1 ¼” pocket screws to attach the face frame pieces as depicted.

Step 6: Attach the face frame to the beverage center box and plug pocket-holes

  • Attach using wood glue and 1 ¼” pocket screws aligning the sides, top, and bottom. You can either lay the carcass on its back or clamp the face frame to the carcass while it is standing up.
  • If you choose to plug the pocket-holes do that now. You will only need to plug the pocket-holes in the refrigerator compartment of the beverage center because the other pocket-holes won’t be visible within the drawer compartment.

Step 7: Attach drawer slides

  • I used eight 1 x 2 x 23” strips of plywood to create runners to attach the drawer slides to.  To evenly space each runner vertically I use a couple of pieces of scrap cut to the same height. When the runner is spaced and level, attach it using glue and brad nails.
  • Now attach your drawer slides to these runners keeping the front of the drawer slide just behind the face frame.
  • This step can be done in a couple of ways and most people have their preference for installing drawers and drawer slides but this is my method.

Step 8: Build the drawer boxes and apply drawer slides

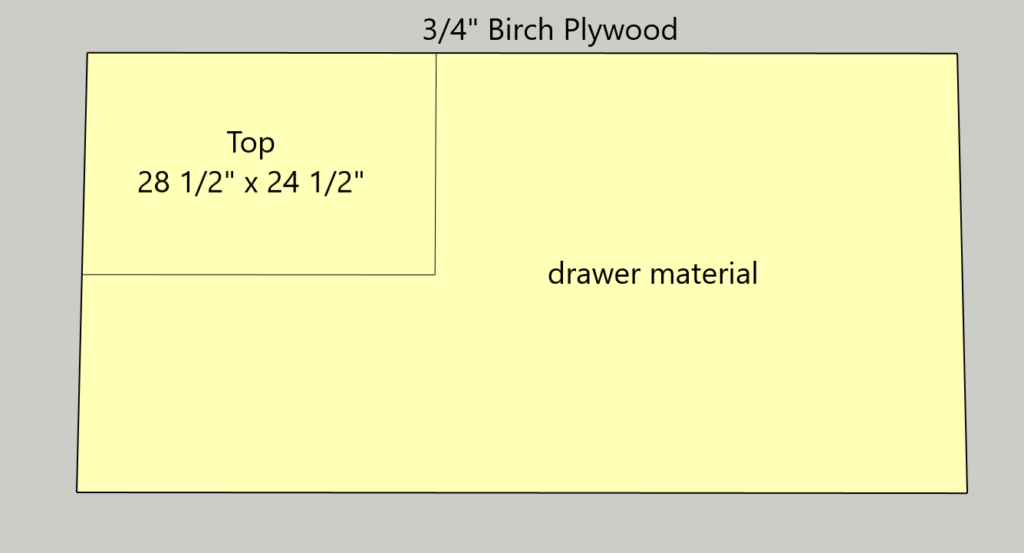
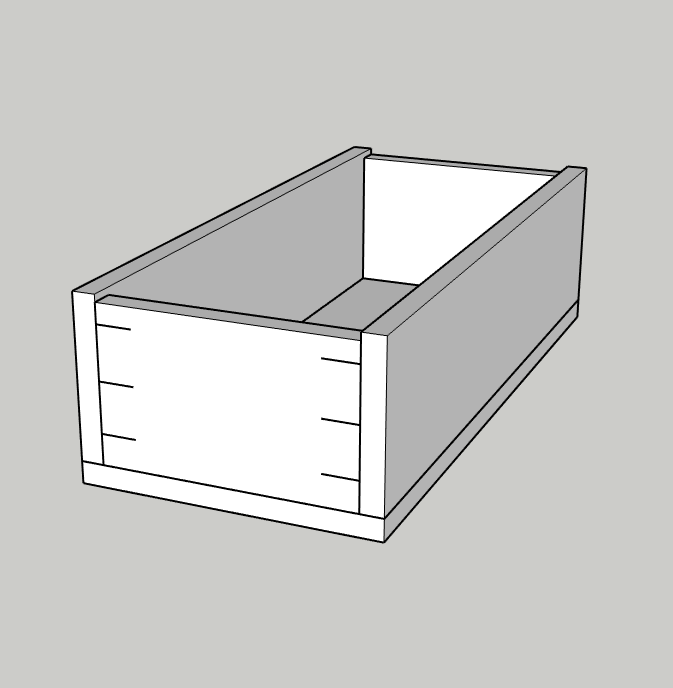
  • There are several different ways to build drawer boxes and you will need to decide on dimensions based on the drawer slides that you’ve chosen to use. I have provided a diagram for a simple method of building drawer boxes. (Or you can follow this tutorial for building drawers.)

  • If you choose to add edge banding to the top edge of your drawer boxes I recommend doing this after the box components are cut but before assembly to make the process easier.  New to edge banding? Pop over to see a tutorial on finishing raw plywood edges.
  • After the drawer boxes are built apply the drawer slides to the boxes and slide into place to check for fit. Make any necessary adjustments to make sure the drawer boxes are level and flush to the back of the face frame. You’ll want to make those adjustments now because it can be very difficult to do after the drawer faces are attached.  I have learned this the hard way.
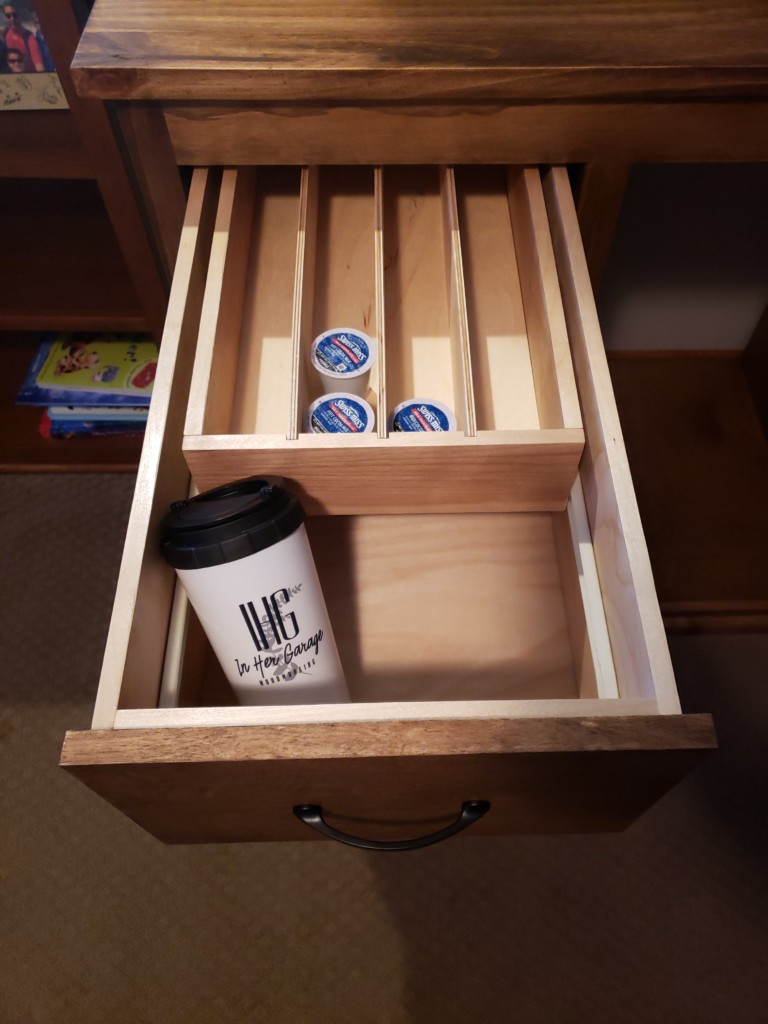
  • EXTRA! One great addition to the beverage center is to add a DIY Drawer in a Drawer to keep small items such as corkscrews, bottle openers, K-cups, and wine corks organized.  Check out my tutorial for how to build this because now would be the perfect time to incorporate it into the beverage center.

Step 9: Cut the drawer faces and beverage center top

  • Using the remaining plywood cut out the beverage center top,  and drawer faces. You WILL need to edge band these pieces to hide the unsightly edge!
  • Cut the top to overhang the base by 1/2″ on either side and the front.
  • The drawer faces should be cut to fit within the face frame and cover each drawer box with a 1/16″ gap around each drawer face. A tip is to use playing cards or nickels to get even spacing.

Step 10: Finishing

  • You’ve gotten as far as you possibly can without putting it all together which means it’s time to sand everything smooth and apply the finish you’ve chosen.
  • Remember, if you are staining then you should be using a pre-stain wood conditioner which will help the plywood absorb the stain evenly and prevent blotchy discolorations.
  • Apply a protective topcoat. A wipe-on polyurethane (over oil-base stain) or polycrylic (over water-based paint) is a great choice for this build.

Step 11: Attach drawer faces and drawer hardware

  • Start by removing all drawer boxes except the bottom and then work your way up.
  • Use your playing cards or nickels to help you evenly space the drawer face with the face frame, then pre-drill 2 holes from the inside of the drawer box out into the drawer face.
  • Next, use two 1 ¼” screws to attach each drawer face to the drawer box.
  • Once all drawer faces are attached, you can install your drawer pulls according to the manufacturer’s directions.
  • Finally, cut the 1/8″ backer board to size to cover the back of the drawer compartment and attach it with brad nails.

Step 12: Attach the top

  • Using the figure-eight fasteners and matching size Forstner bit attach two figure-eight fasteners to each side and the center divider. If you’re unsure how to attach figure-eight fasteners here is a quick video to help you out:

Note: This is a very heavy piece of furniture and should not be moved by lifting from the top. Always lift from the sides or bottom.

Step 13: Install the mini-fridge!

  • Once the beverage center has been carried to where it will be placed in your home slide the mini-refrigerator into place and fill it with your favorite beverages.  I already know what mine would be! 😉

diy beverage center housing mini fridge

Great job!! This is going to be such a cool piece to have in your home and you’ll enjoy the extra space in your kitchen refrigerator.

Check out my latest blog post about building a DIY Folding Craft/Sewing Table! This table is large enough for any craft project but folds down when you don’t need it. Perfect for anyone with a small space but large crafting ambitions!

Hi! I’m Kristen, from In Her Garage, and I am a self-taught woodworker and DIY fanatic from Minnesota where I live with my husband and our two daughters. Between being a wife, mom, and registered nurse, I try to make as much time for DIY as possible. My love for building came after our family built our current home in 2015. After we moved in, we needed furniture, and instead of spending massive amounts of money to order the items we wanted I decided that I would build them myself. I started with a buffet table plan from the fabulous Ana-white and quickly set out to remodel my entire home office.

Since then I have started a side business building furniture for the people in my community. I love hearing my clients talk about the pieces they wish they had whether it be a rustic buffet table, a one drawer side table, or a toy box and then making it a reality for them. While starting my small business it made perfect sense that I would document my building journey so I simultaneously launched the In Her Garage blog and I love sharing my plans, tips, and tricks.


I am so glad that you found me here and please feel free to connect with me on PinterestInstagram, and Facebook to see what I am working on right now.


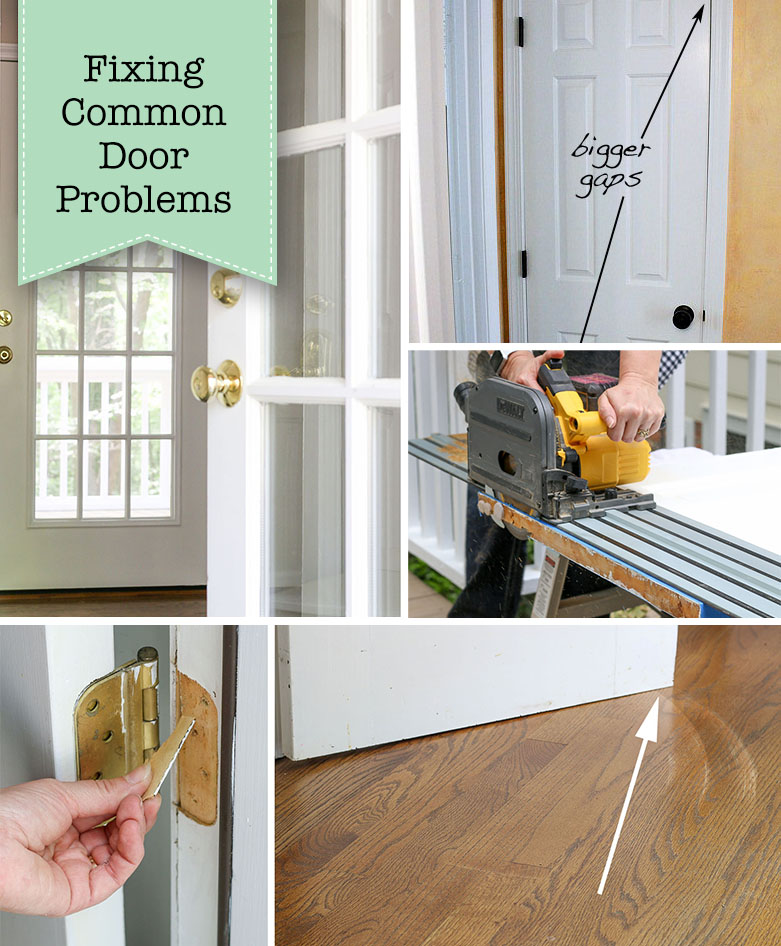
Fixing Common Door Problems

Do you have a door that sticks or doesn’t close properly? You are not alone. Many factors can contribute to this problem. Let’s learn how fixing common door problems can be easy.

Fixing common door problems pin this image

Fixing Common Door Problems

Do you have a door that sticks or doesn’t close properly? Or maybe your door rubs, squeaks, or is drafty. Regardless of the problem, I’m going to show you how to fix your most common door problems! But first, a big thank you to Schlage, the 100-year-old leading door hardware company, for sponsoring this article.

If you have common door problems, you are not alone. Many factors can contribute to them: house movement, humidity, dry air, improper installation, slamming doors, or kids swinging on them (true story). Without being able to control many of these factors, it’s important to know how to fix your door problems – as your door is often a main focal point of the room and/or entryway.

(I’ve included affiliate links for your convenience. I earn a small percentage from a purchase using these links. There is no additional cost to you. You can read more about affiliate links here.)

Door Not Latching:

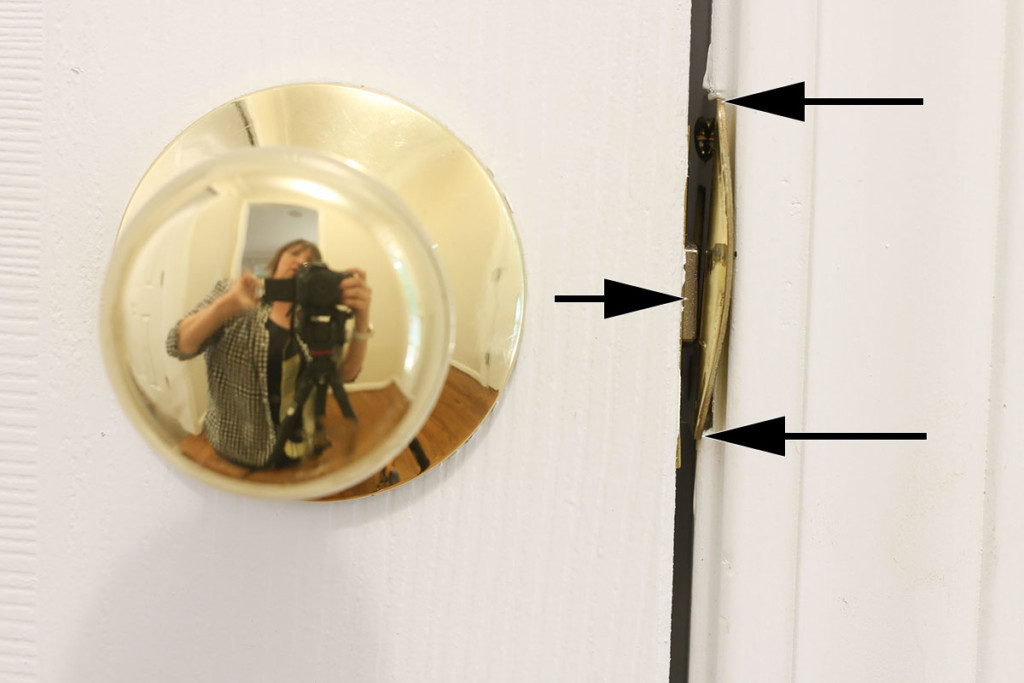
A door that doesn’t latch properly is usually a simple fix. Lean down until you are at eye-level with your doorknob. Look at the gap between the door and the door frame. Is the latch centered on the strike plate?

latch too low on strike plate

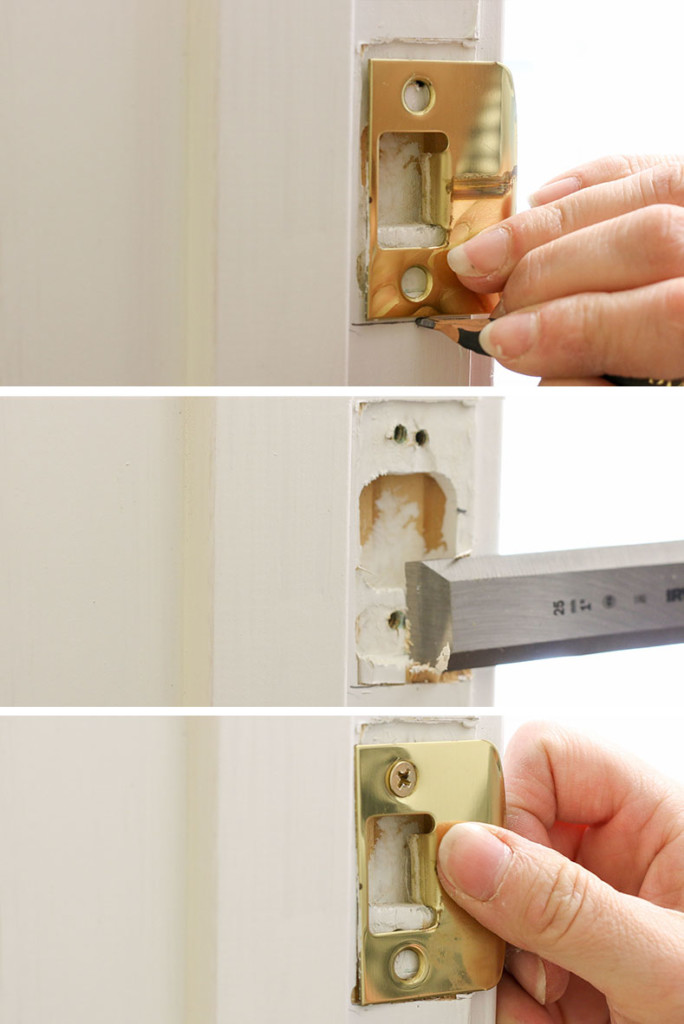
If not, that’s why your door doesn’t latch. Here’s how to fix it. Determine the center of the latch. Remove the strike plate and move it to center on the latch.  Mark the new location of the strike plate. Chisel the door frame as needed.

chisel strike plate area out

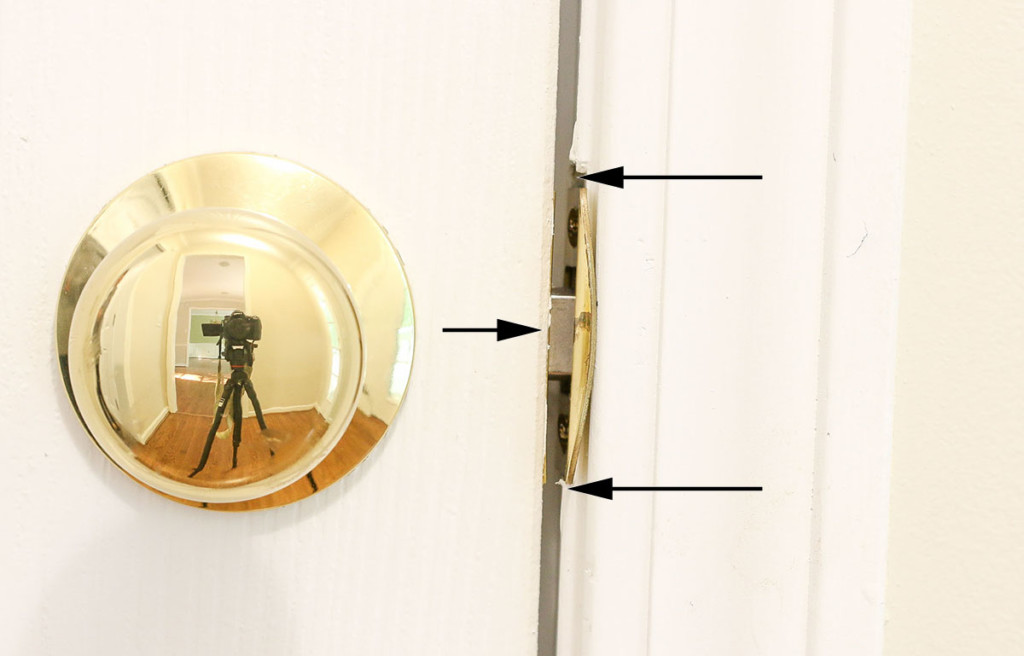
Reattach the strike plate and test the door. You can see in the photo below the latch is now centered with the strike plate and the latch can now slide into the strike plate properly.

Latch and strike plate lined up

(Like the knob above? It’s a Schlage Plymouth in Bright Brass, but comes in a variety of finishes.)

Door Not Closing Tight Against Stop:

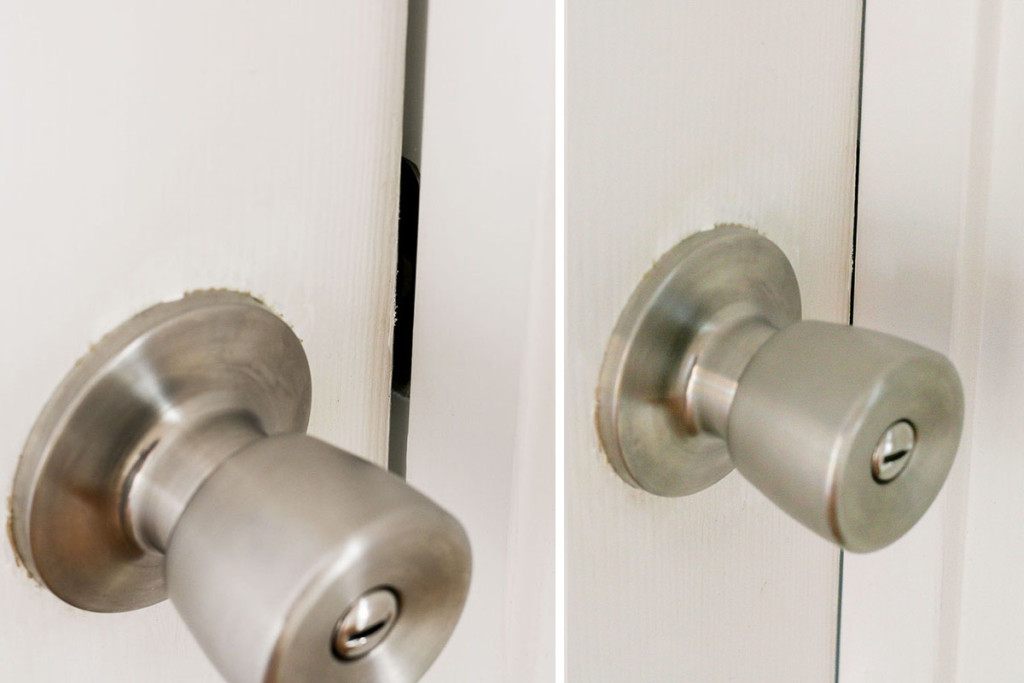
If your door rattles loose in the frame and doesn’t close properly against the stop, it can be as simple as moving the strike plate closer to the stop.

Important: If this problem happens on a door between the garage and the house, it could be a potential safety issue! The door between the garage and the house must protect the residents from carbon monoxide gases potentially leaking in from a car’s exhaust. With this in mind, it’s important to fix this problem immediately!

Luckily, fixing a door that doesn’t close tightly is a simple one to remedy. But, there are two solutions depending on your type of strike plate. (Is your strike plate adjustable or non-adjustable?)

door won't shut tight vs. door closes against stop

If You Have an Adjustable Strike Plate:

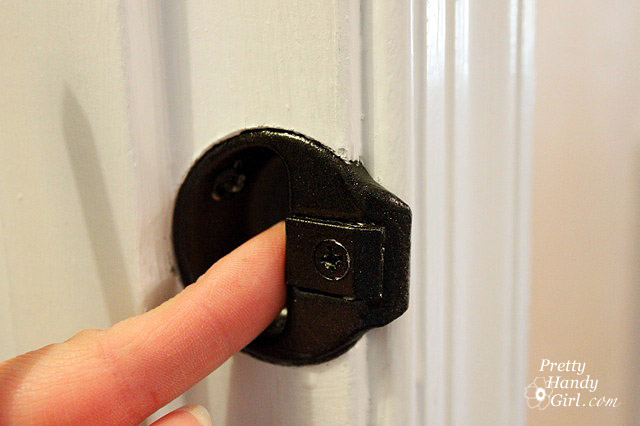
Look closely, does your door strike plate have a small screw holding a sliding tab to the strike plate? If this looks like your strike plate, the solution is simple.

common door problems strike plate

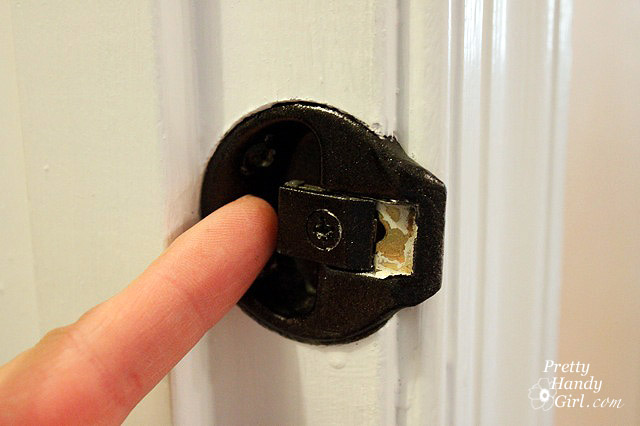
Loosen this screw and adjust the tab closer to the door stop.

door problems adjust latch

Tighten the screw and try closing your door again. Continue to adjust the tab until your door shuts properly and stays closed.

If You Have a Non-Adjustable Strike Plate:

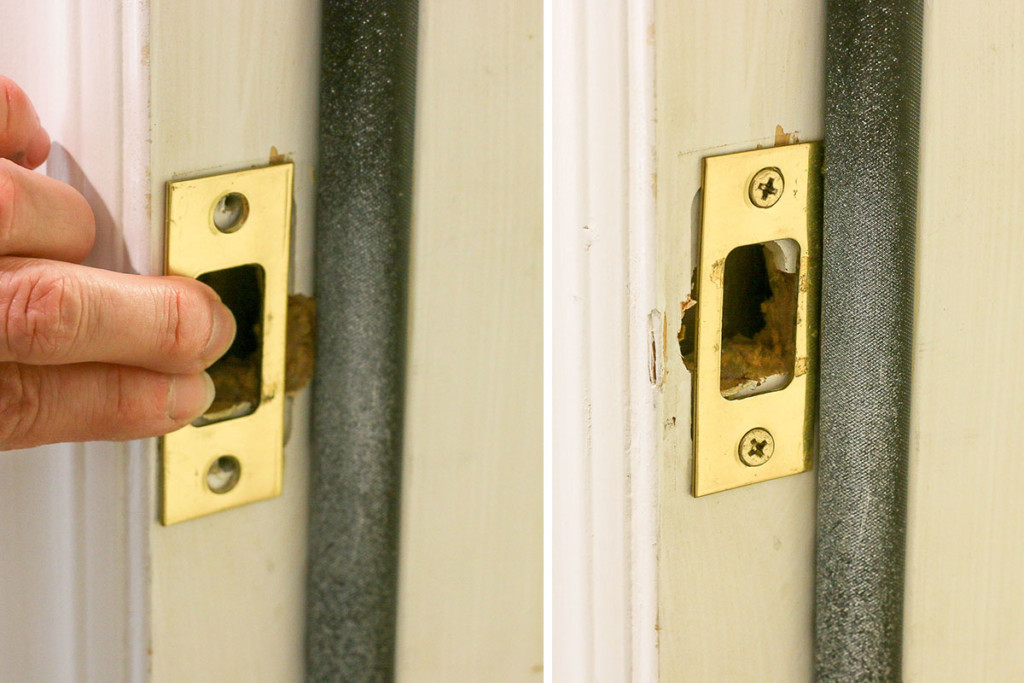
Non-adjustable strike plates don’t have an adjustable tab, but your fix is still easy. Remove the strike plate and reposition it closer to the stop.

moved strike plate

Sticking Doors or Doors that Won’t Close

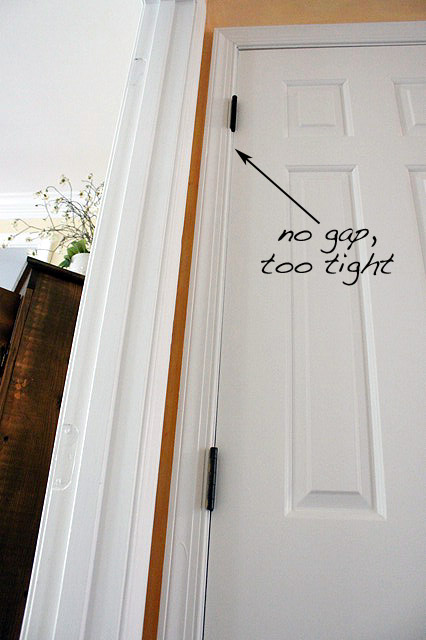
Look at the space around the door. Is there a gap at the top or bottom? Normally, the door will stick at the top corner opposite of the hinges because over time the weight of the door will pull away from top hinges.

To fix a door that sticks or rubs in the frame, you can try one of these fixes:

  • Tighten screws
  • Add longer screws
  • Add a shim behind a lower hinge

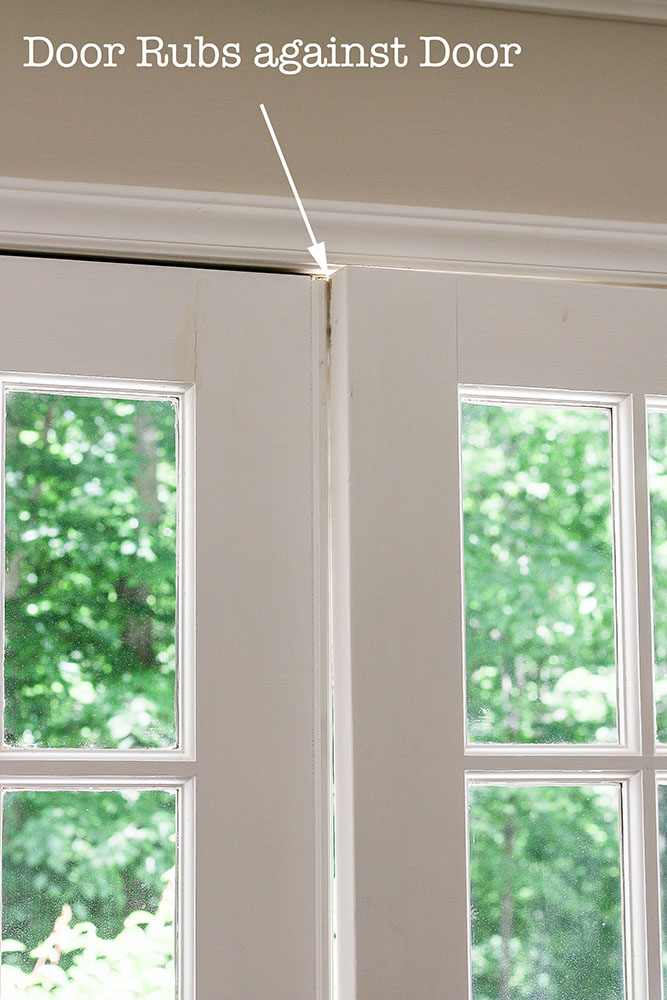
Let’s take a look at this french door. The door rubs at the top when trying to close it.

french doors rubbing at top

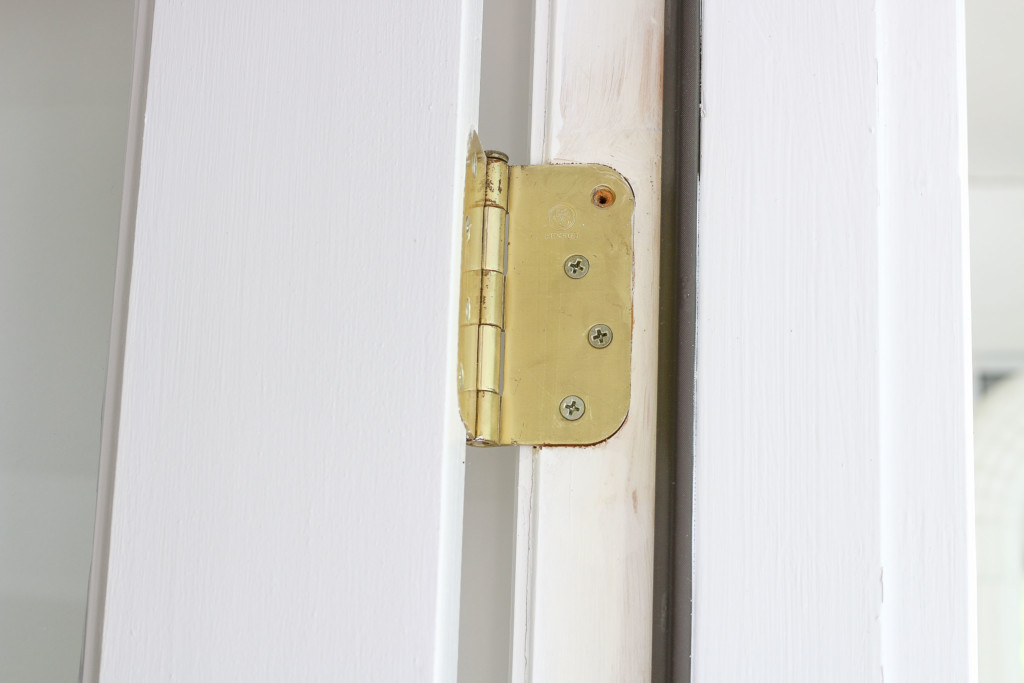
Open the door and look at the hinges. Do any of them need to be tightened? Well look at that! This door is missing a screw.

missing screw in hinge

Try to tighten the screws. If they just spin, the wood has been stripped. You can either add longer screws or fill in the holes with toothpicks.

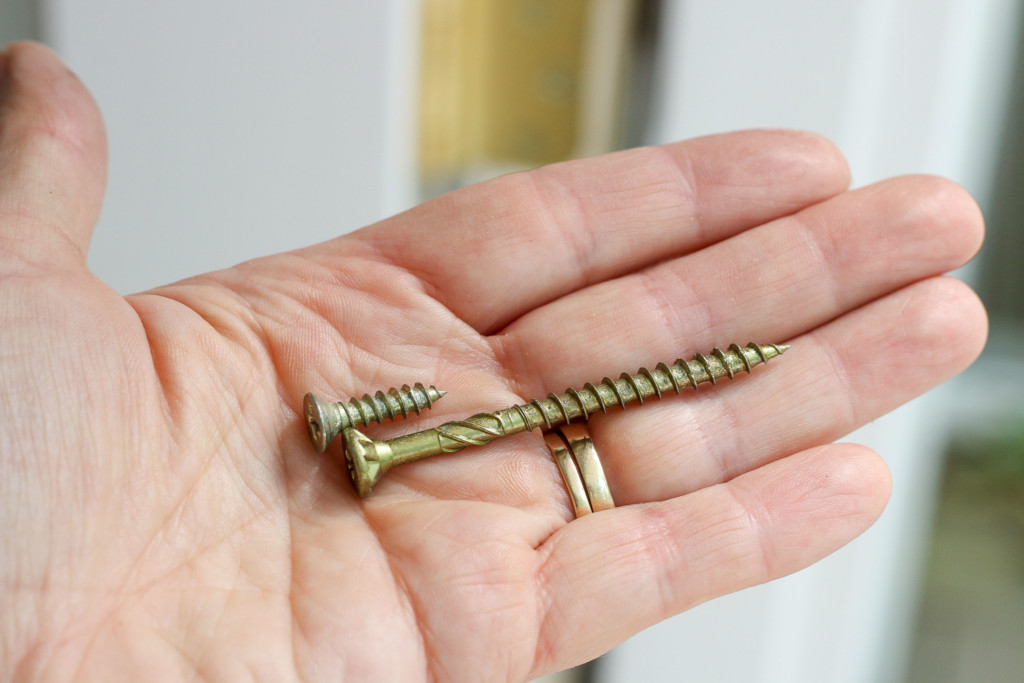
Replace with Longer Screws

Remove the hinge screws and use longer screws that drive through the door jamb and into the framing.

long and short screw in hand

How to Fix Stripped Screw Holes:

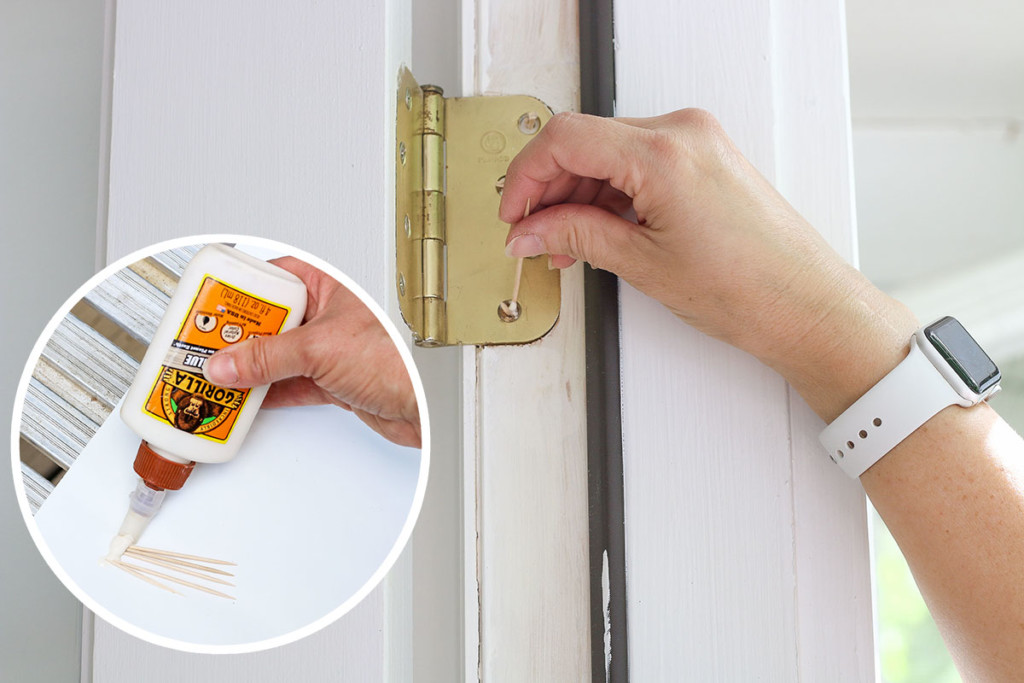
Remove the screws from one hinge at a time. Squeeze some wood glue onto several toothpicks. Pack the hole with toothpicks.

insert toothpicks into stripped screw holes

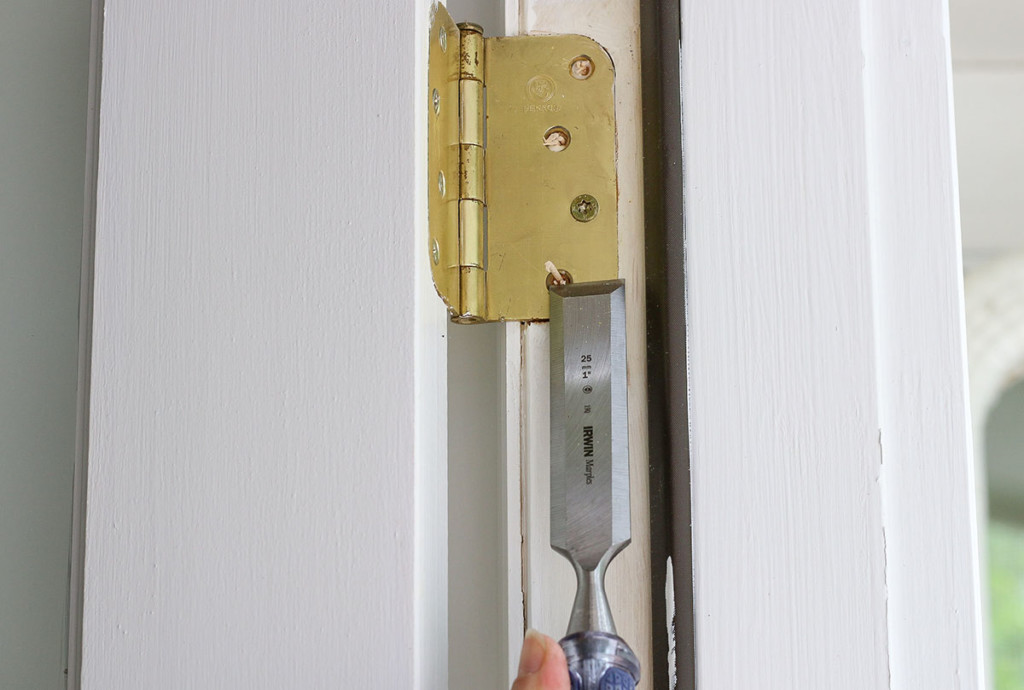
Let the glue dry. Cut off the excess toothpick with a utility knife (or use a chisel if you don’t have your knife with you.)

chisel off extra toothpick

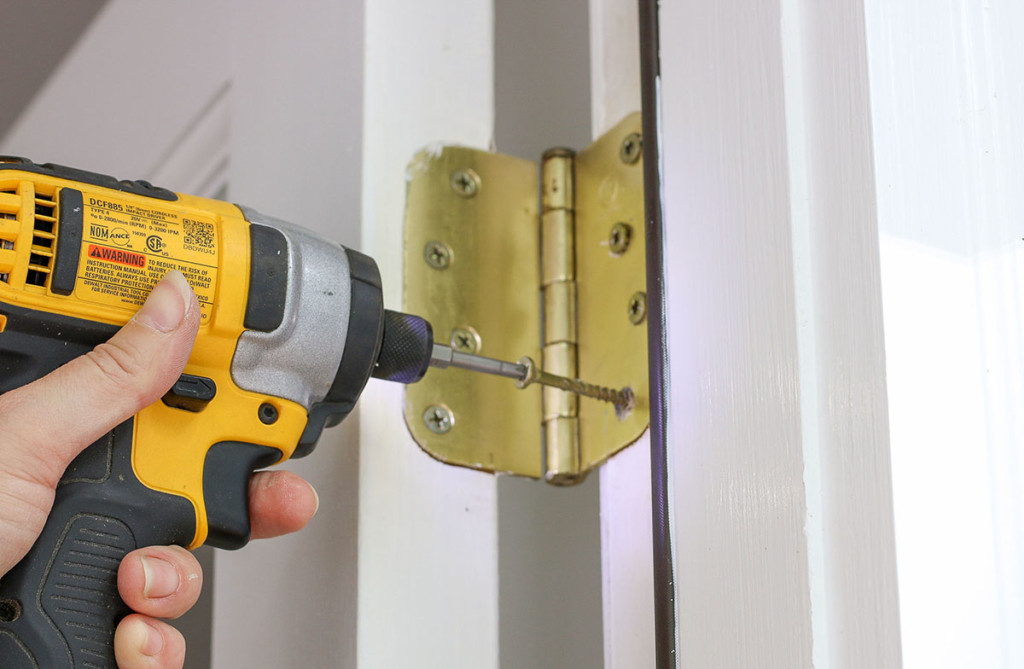
Drive screws back into the hinges.

drive longer screws into door hinge

Better yet, replace the screws with longer ones that will grip into the framing behind the door jamb.

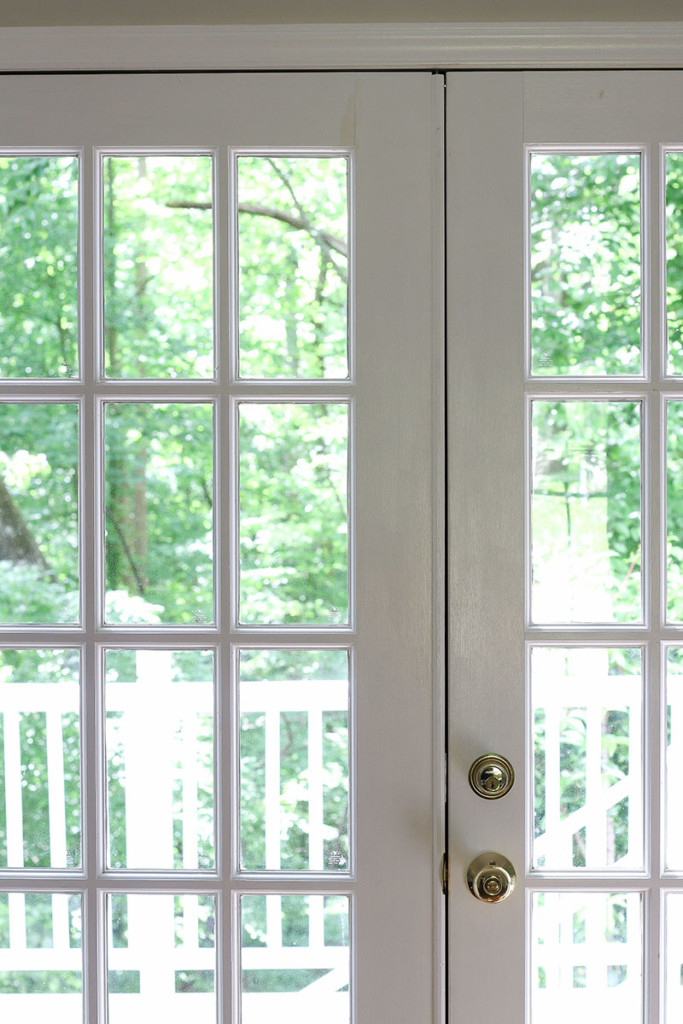
Hopefully this will fix your door. You can see below the door shuts and the spacing is even between the french doors.

Is Your Door Out of Alignment?

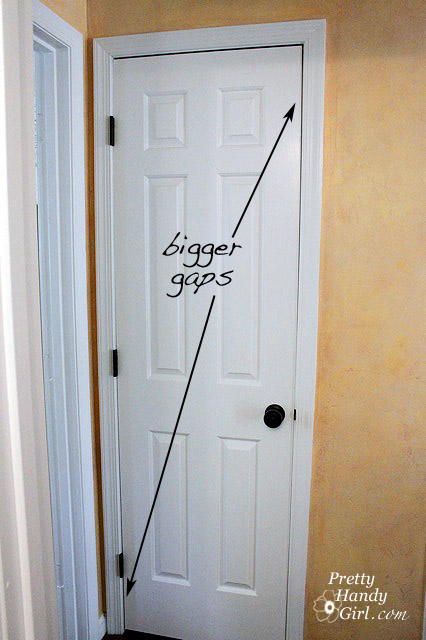
Door still rubbing? Occasionally a door will get out of alignment. To fix this, first, look at the door and determine where the gaps are bigger.

For the door above, try simply loosening the screws from the top hinge 1/4 turn or more. If this doesn’t work, try tightening the screws into the hinges at the bottom. If it’s still not fixed, you’ll need to try shimming the door hinge.

Shimming Door Hinges:

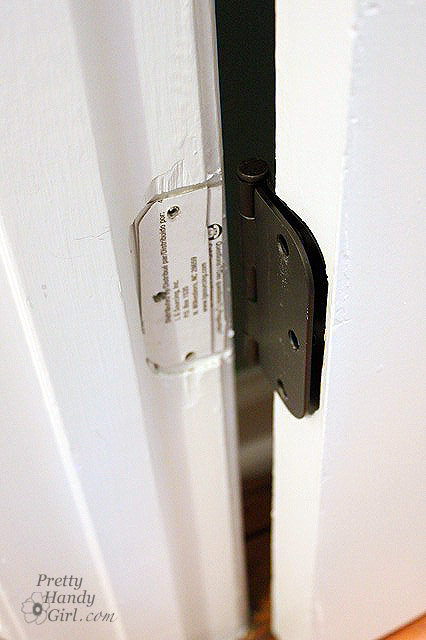
Sometimes a door hinge needs to be shimmed to adjust the door in the frame. If the spacing is tight behind one hinge, you can adjust it slightly to correct uneven spacing around the door.

common door problem fixes

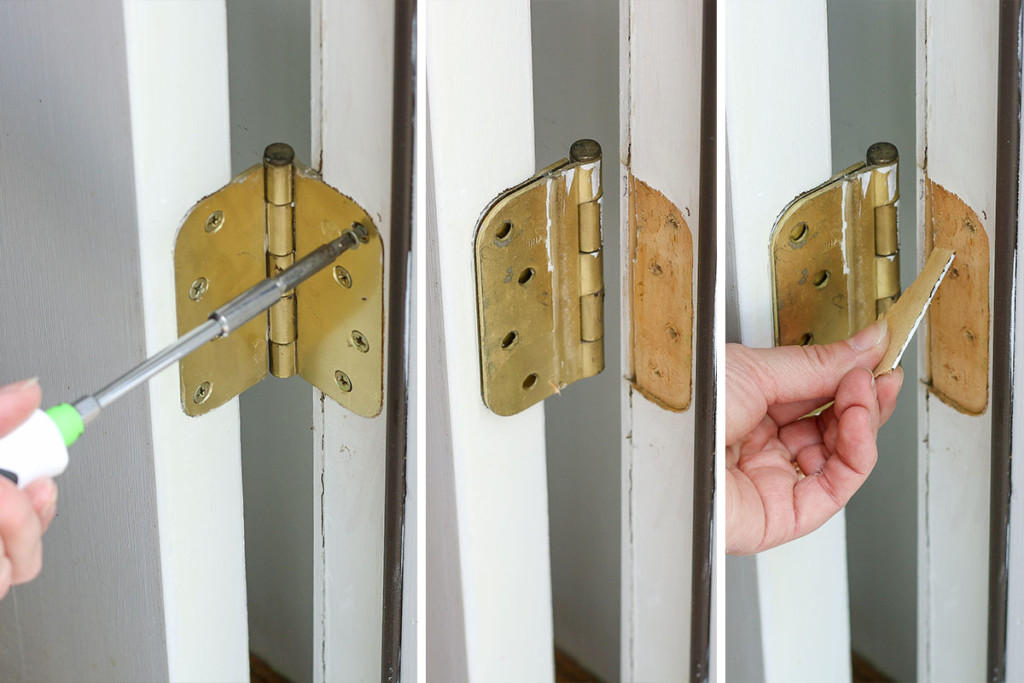
The door above still shows a tight spot near the top right hinge. To shim it slightly, add a piece of chipboard (cereal box cardboard) behind the hinge.

door problems shim hinges

If you need a thicker shim, you can use the end of a wood shim.

add shim behind hinge

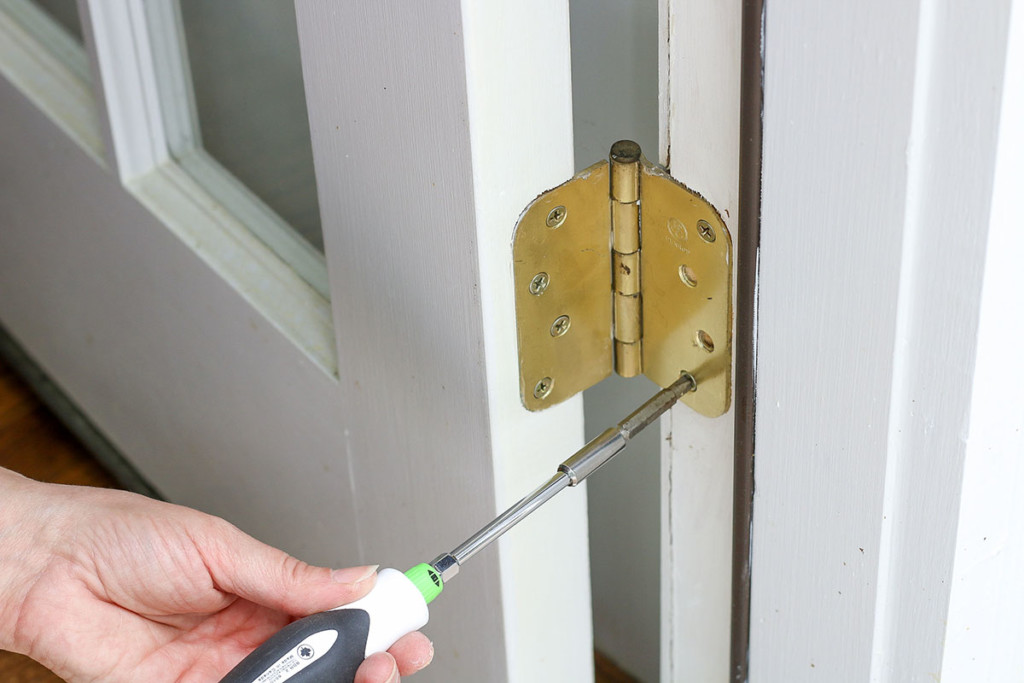
Replace the screws in the hinge and test your door. Is it still rubbing?

replace door hinge screws

Recessing a Hinge:

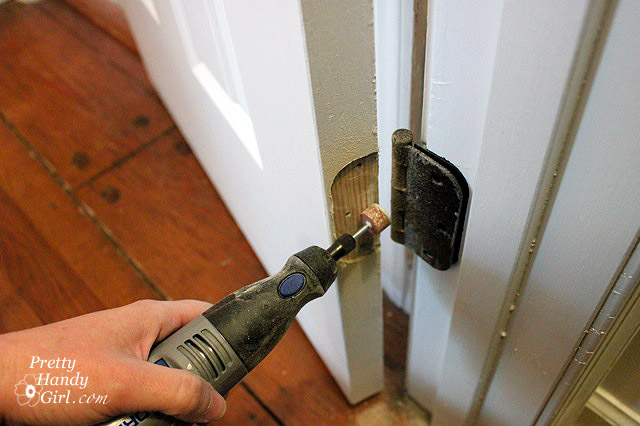
Occasionally, you might need to set a hinge deeper into the door or the frame. You can use a chisel to remove a small amount of material from the jamb or the door. If you don’t have a chisel or are worried about taking out too much, use the small sanding bit on a Dremel.

dremel door hinges

Door Rubbing on Top:

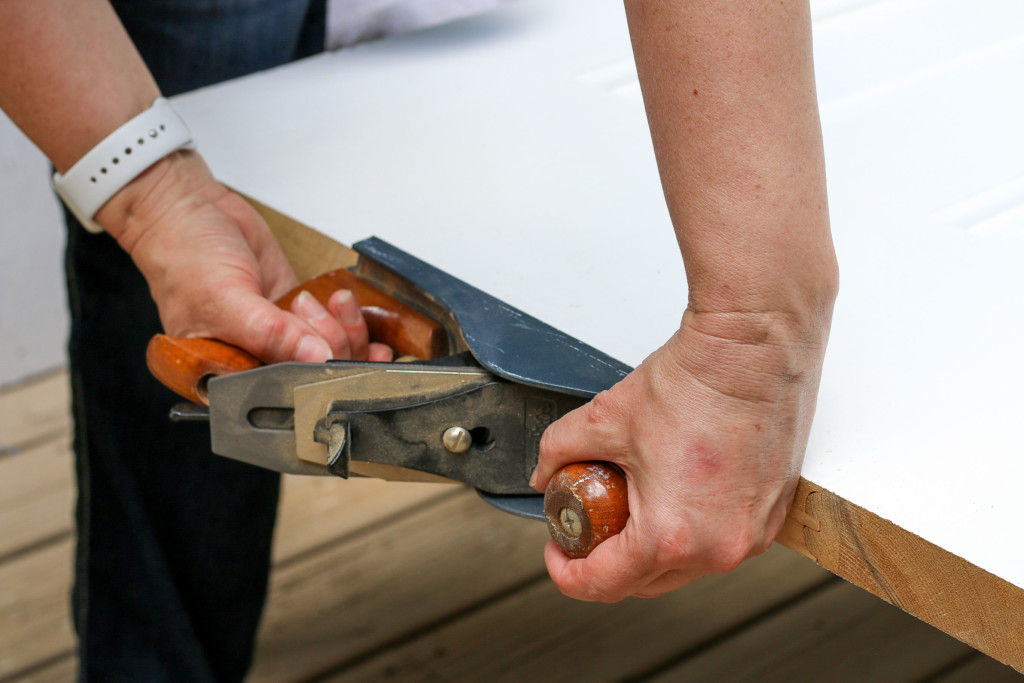
Have a door that swells when the temperature or humidity changes? To fix a door that rubs along the top in different seasons, you’ll want to sand or plane the top. This doesn’t involve buying a ticket or boarding an airplane. Planing is removing material from the edge of wood. You can try using sandpaper with a coarse grit to sand it down, but if that doesn’t work, reach for a hand planer.

plane top of door

As you run the planer across the top of the door it literally shaves off some of the wood. Simple design, but very effective.

Door Scraping on the Floor:

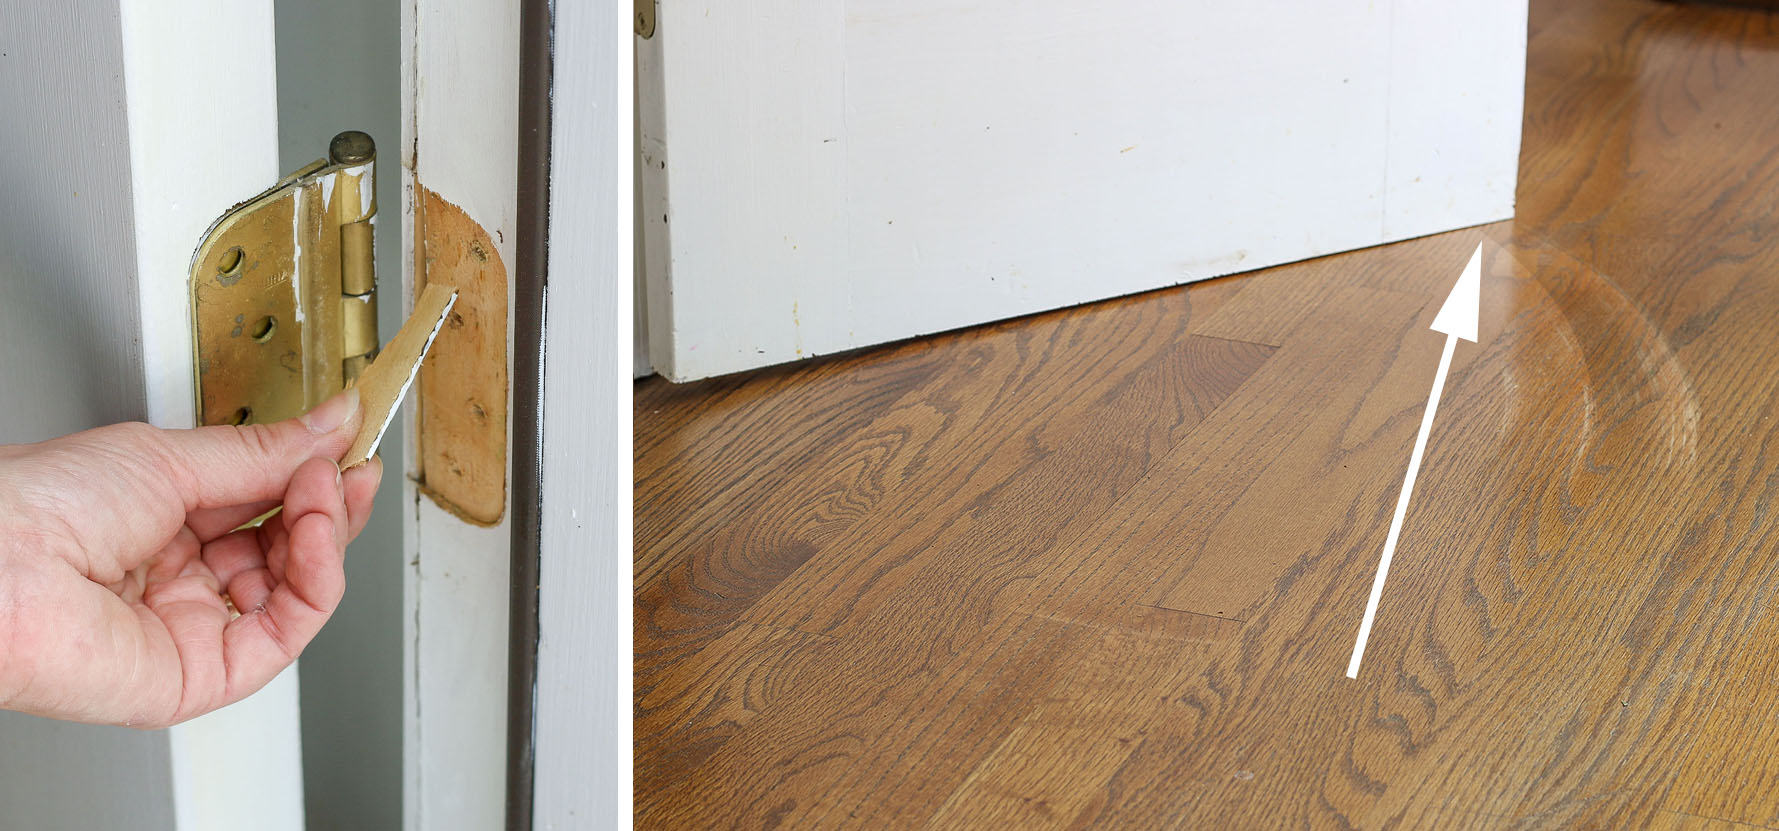
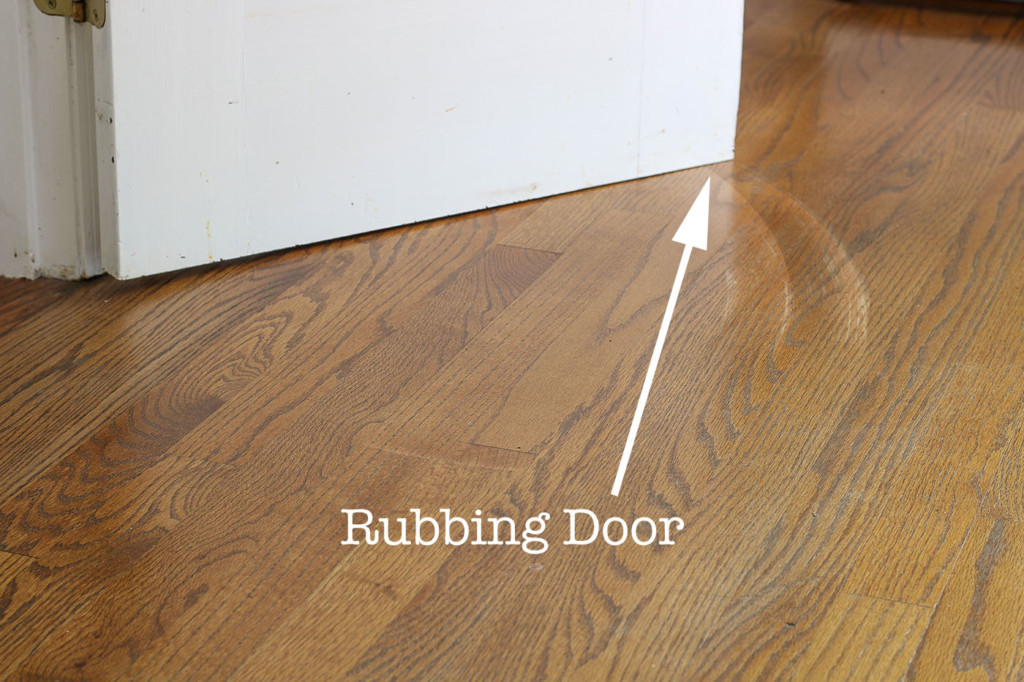
door scraping floor

A door that rubs on the floor or carpet is not only annoying, but it can scratch your floors. Time to fix this problem!

Get a helper to assist with removing the door. Close the door completely.

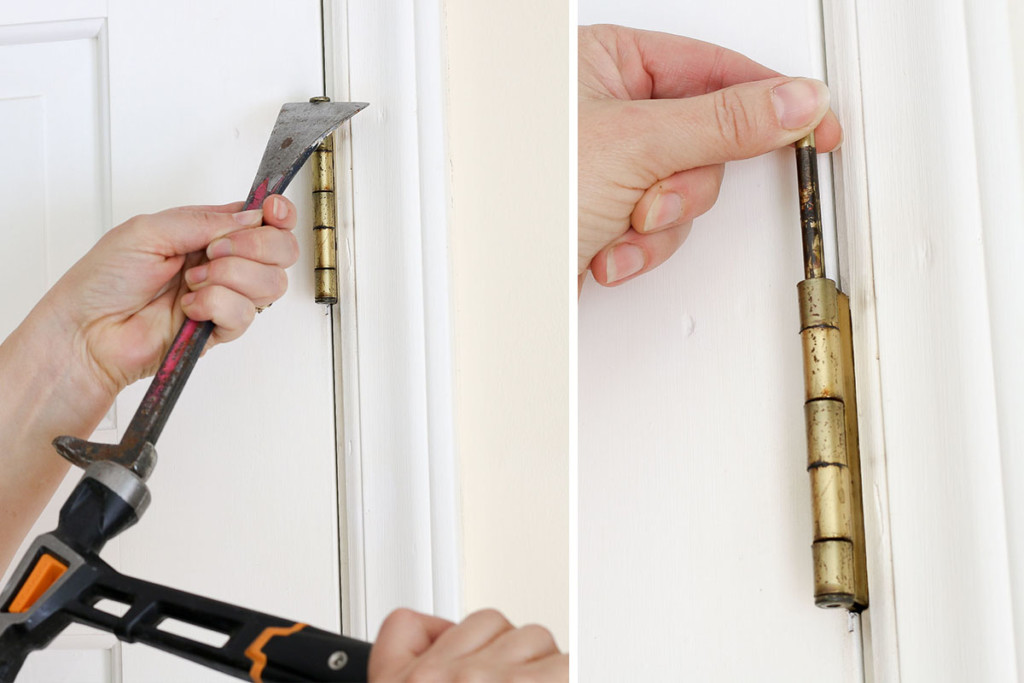
Position a scraper or flat pry bar just under the hinge pin head. Gently tap the end of the pry bar with a hammer to raise the hinge pin. Remove the hinge pin from the top and bottom hinges first.

remove hinge pin

Remove the middle hinge pin last but have your assistant nearby to hold the door in the frame. As the assistant opens the door, be ready to lift it off the hinges.

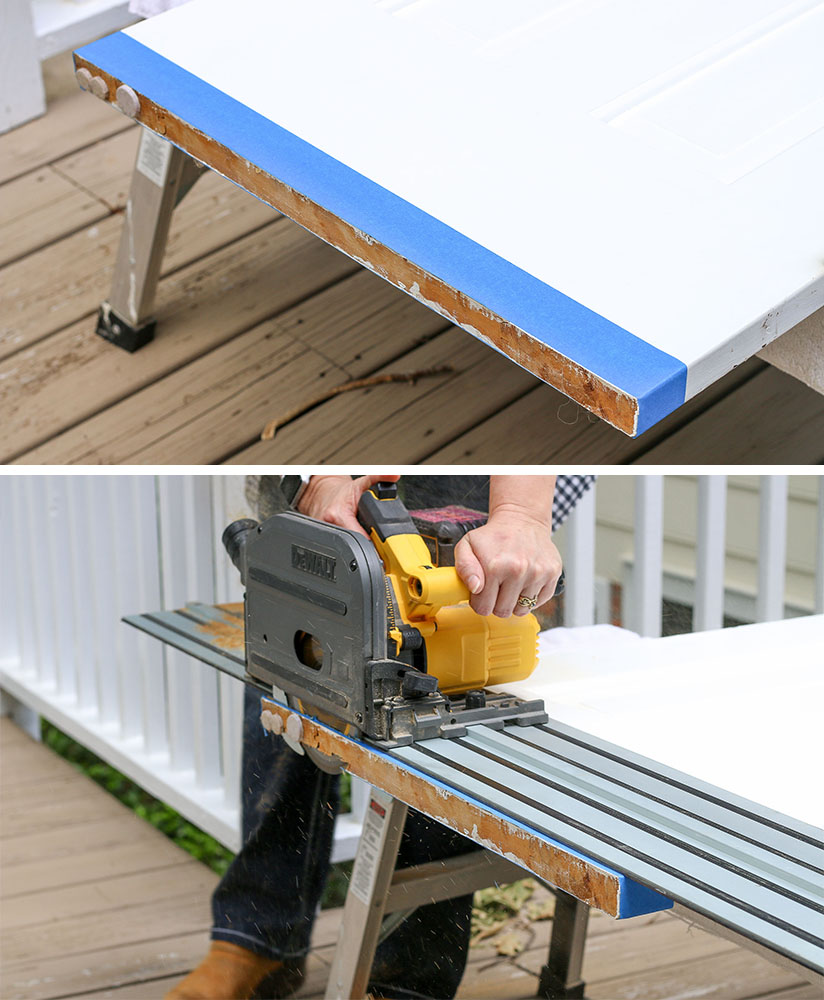
Lay the door on sawhorses. Tape the button of the door with painter’s tape to protect from chipping.

cut off bottom of door

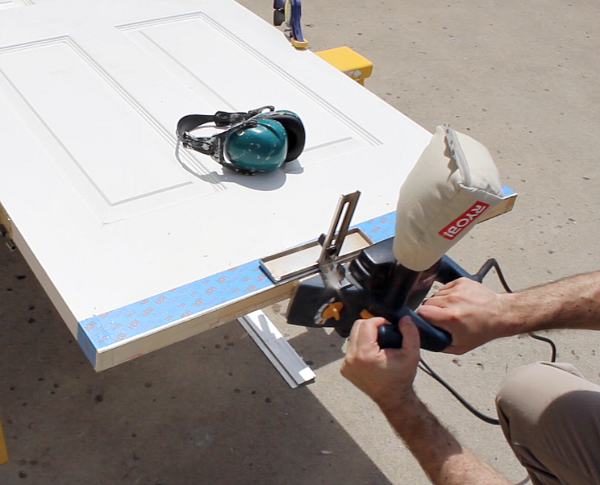
Use a circular saw, track saw, or power planer to remove a portion of the bottom of the door.

Plane doors from the edge to center

Replace the door and check to see if it still rubs.

Exterior Door is Hard to Open:

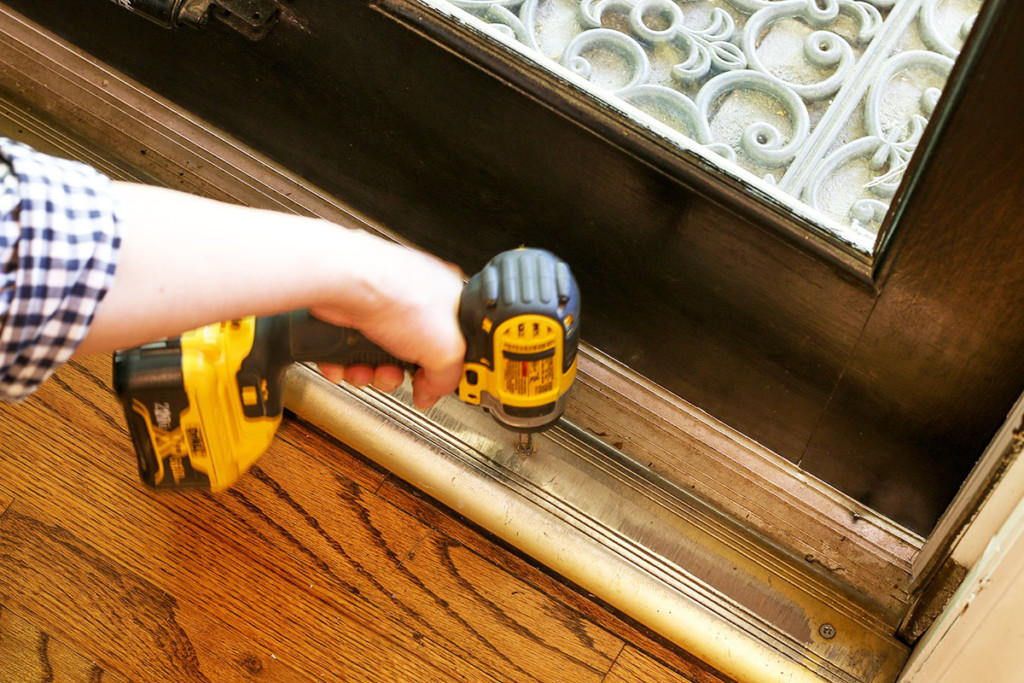
If your exterior door is hard to open, it might be from a loosened threshold piece. You can try to tighten the threshold screws or replace the threshold and sweep at the same time.

driving screws into door threshold

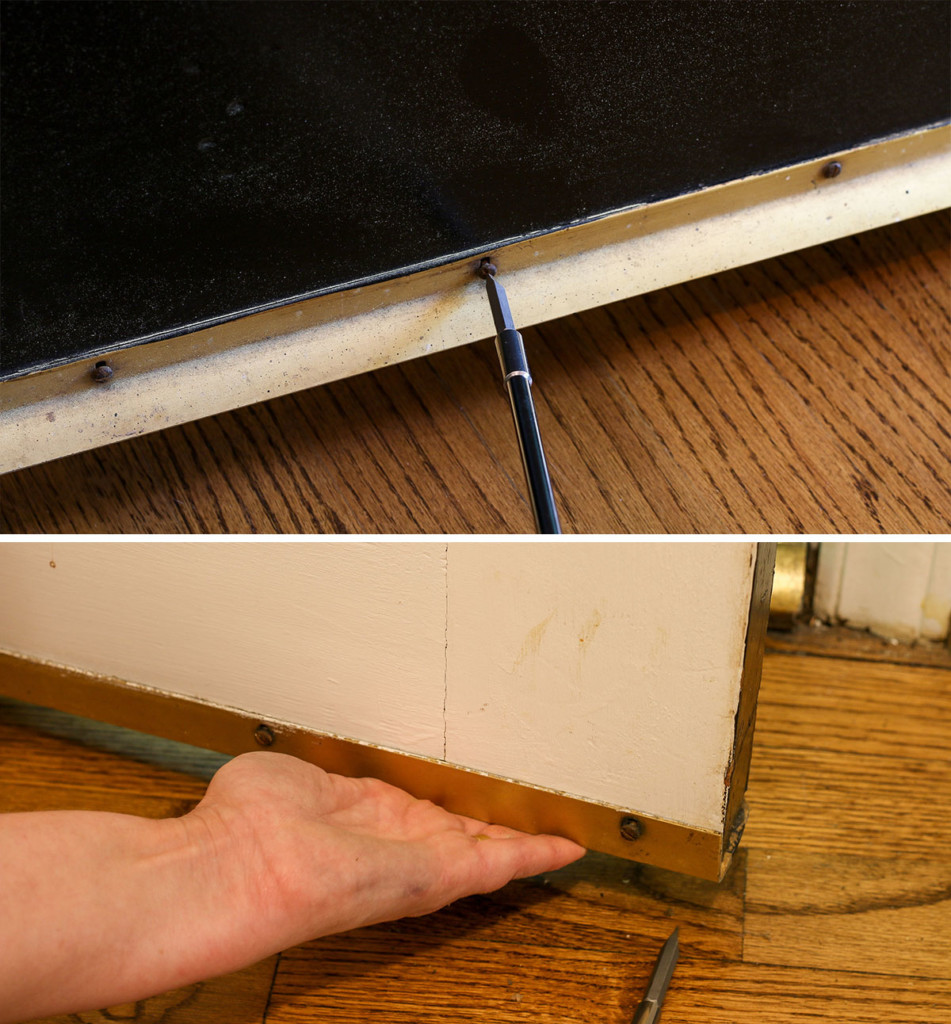
Also check to see if the door sweep has lowered. Unscrew the sweep and raise it on the door. Tighten the screws.

raise door sweep

Door Latch Sticks in the Door

If the latch is sticking in the door, you can try one of three fixes:

  • Loosen the screws on the doorknob. (Tightening the screws on your doorknob too much can cause the knobs to bind.)
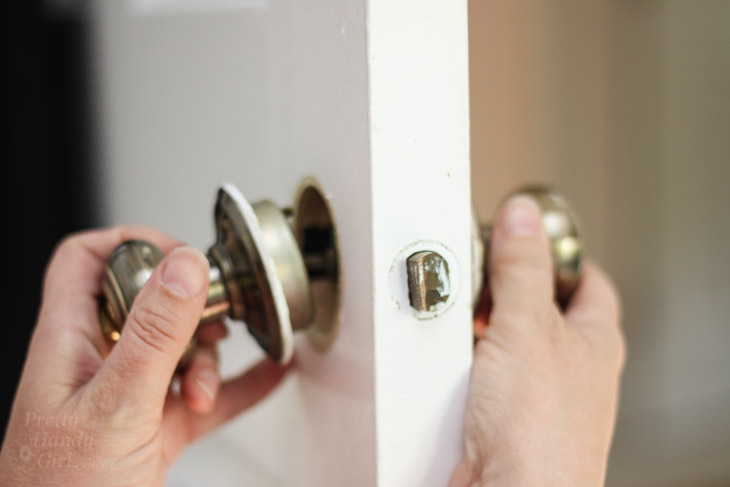
  • Remove the knobs, spray a little lubricant onto the latch inside the door. Replace the knobs and turn them to distribute the lubricant.
  • Finally if all else fails, it might be time to replace the doorknobs. Believe it or not this is a quick fix and can be done in five minutes.

Save yourself the headache of doorknobs that stop working smoothly and purchase Schlage brand door hardware from the start. Schlage has been producing high-quality door hardware in a variety of types, looks, and finishes for more than a century and will continue to do so in the years to come. Whether traditional, modern, or technology, Schlage products offer a limited lifetime mechanical and finish warranty and a three-year limited electronics warranty.

How to Replace Door Knobs | Pretty Handy Girl

Squeaking Doors

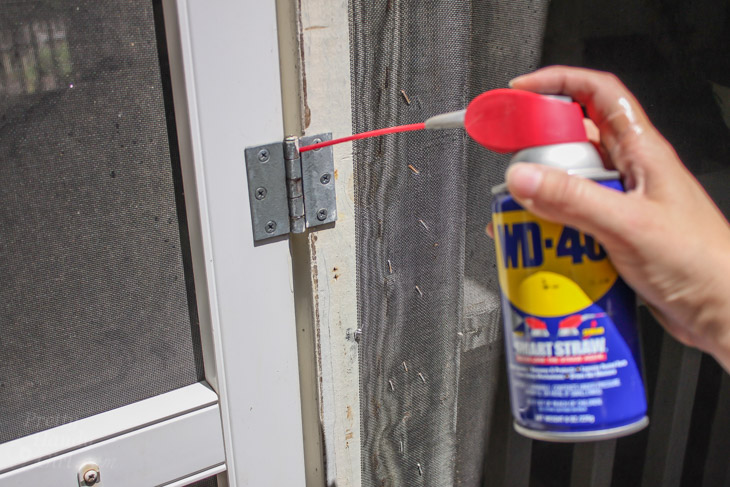
Doors that squeak mean the hinges need lubrication. Simply spray a lubricant like WD-40 just under the top of the hinge pin. Be sure to have a rag handy to catch any drips.

Fixing Common Screen Door Problems | Pretty Handy Girl

Open and close the door several times to help the lubricant work its way down the hinge. Your door should be squeak free now.

Door Knob Hits the Wall

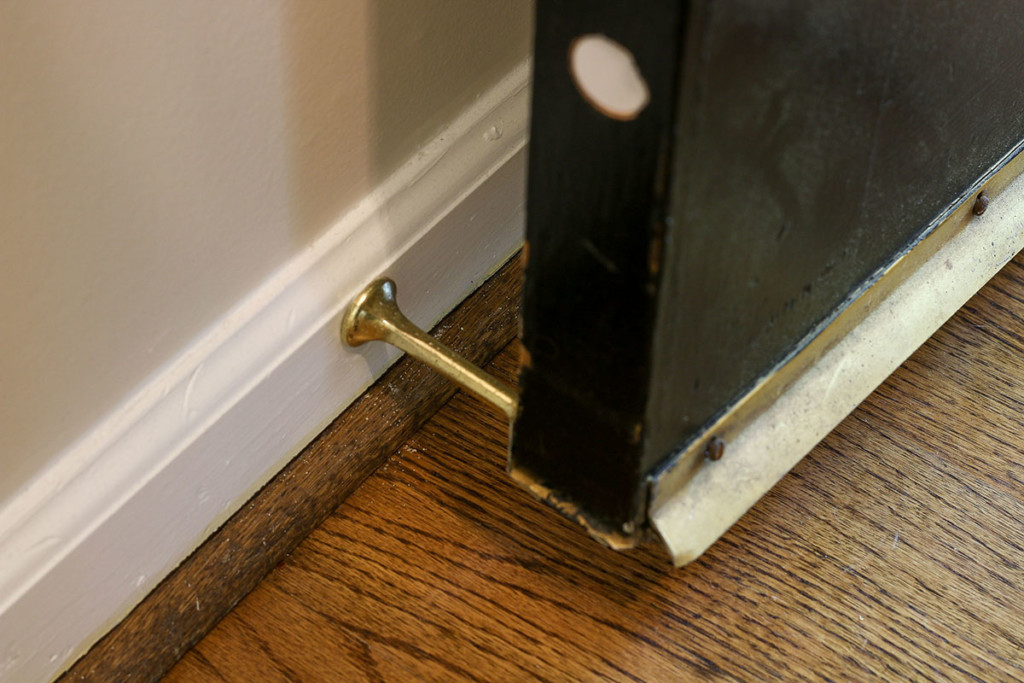
Door knobs that hit a wall can put dents or holes in the wall if left alone. The solution is quick. Either add a door stop behind the door at the baseboard…

door stop behind door at baseboard

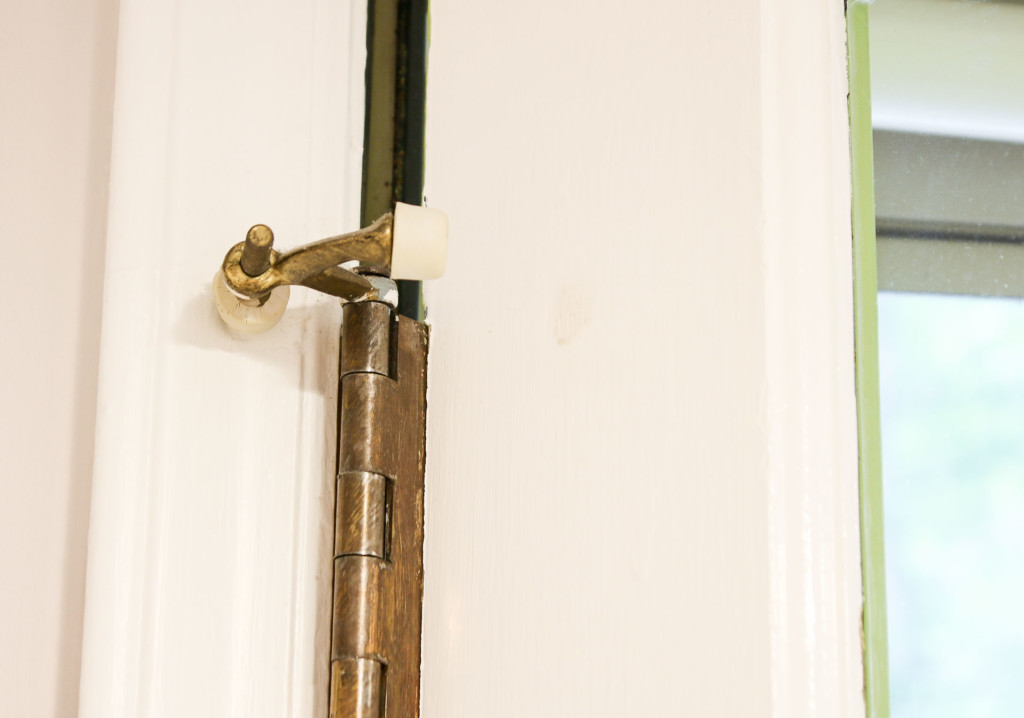
…or add a hinge pin adjustable door stopper to the top door hinge.

hinge pin adjustable door stopper

Drafty Doors

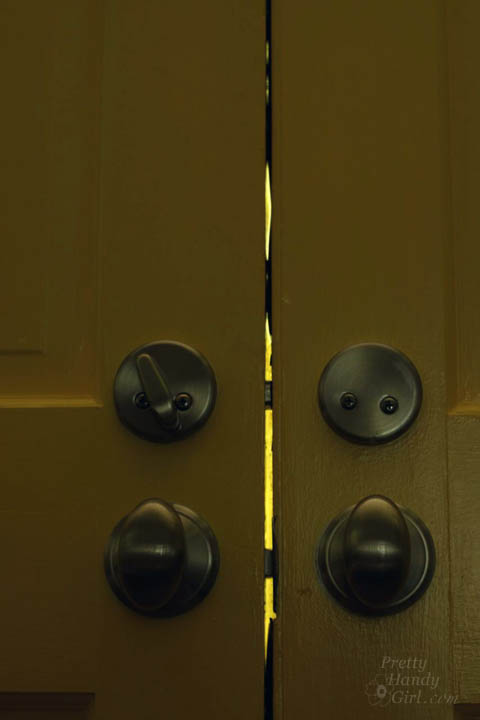
Cold drafts wafting in around your door? The solution is as simple as installing (or adjusting) the weatherstripping. If you can see light coming in around your door, it’s guaranteed to let drafts in too!

Adding Foam Weatherstripping | Pretty Handy Girl

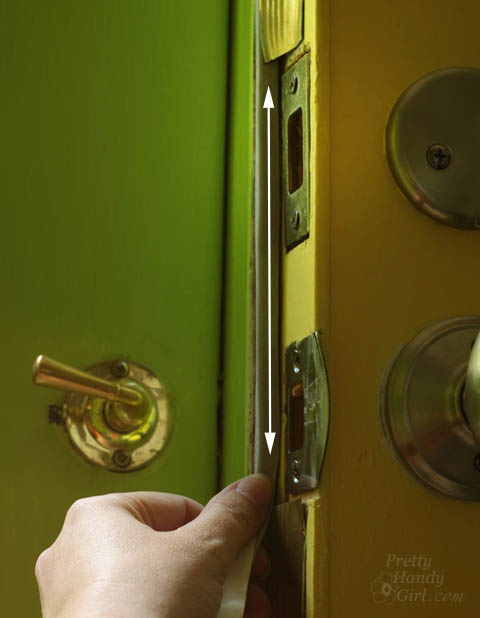
Simply adding adhesive-backed foam weatherstripping around the door will stop those drafts in their tracks.

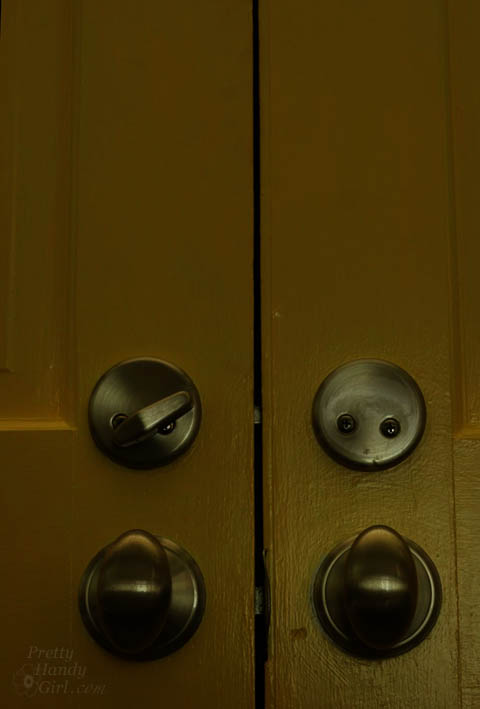
Look Ma, no more light, no more drafts!

Adding Foam Weatherstripping | Pretty Handy Girl

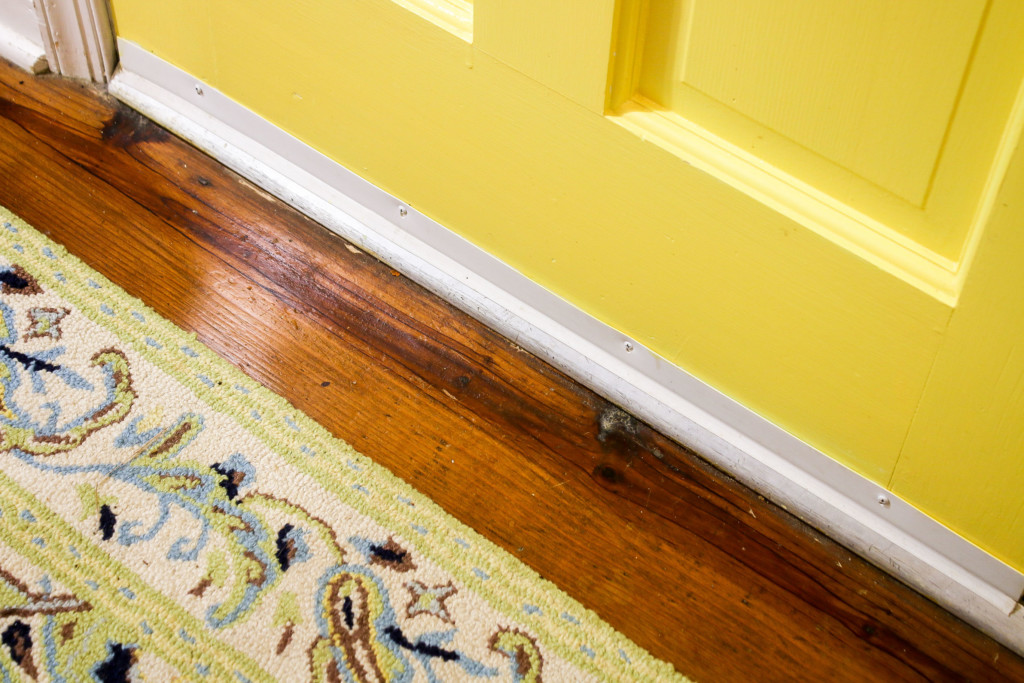
Adding a door sweep to the bottom of the door will keep out drafts from the bottom of the door. In addition, a well-fitted sweep will also keep insects and spiders from making an entrance under your door.

white door sweep on yellow door

That pretty much sums up fixing common door problems. Next time you have an issue with your door, you can fix it yourself!

PHGFancySign

Disclosure: This article has been sponsored by Schlage. If you’ve been around here for a while, you know I’m very particular about the brands I work with. I only recommend products and brands that I use myself. I was compensated for my time, but I was not told what to write. All opinions are my own.

Pin for later!

How to Fix common Door Problems

How to Make Pinch Pots from Air Dry Clay

Looking for a simple craft to make and help you decompress? Make these cute clay pinch pots and use them around your house.

How to Make Clay Pinch Pots

How to Make Pinch Pots from Clay

I hope you are ready to get your hands a little messy!  Today’s tutorial is all about making some easy pinch pots out of inexpensive clay.  Right now, it feels like the days are long, and life is still so uncertain. I find that immersing myself in an enjoyable activity really helps to pass the time.  Working with the hands can be good for the soul!

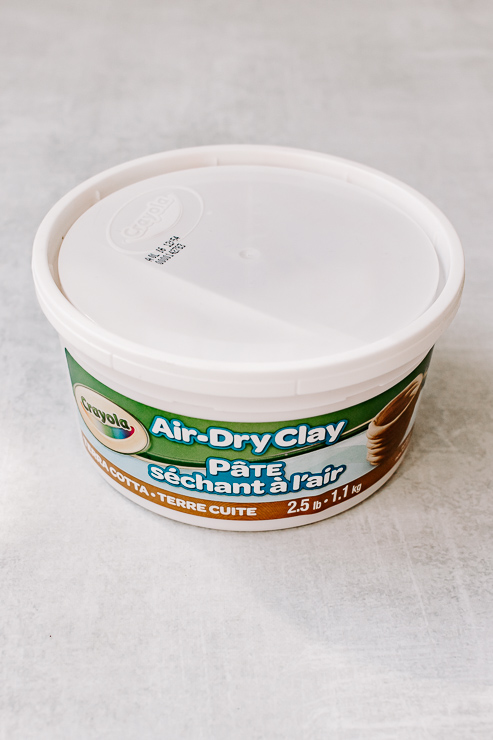
The good news is, you don’t really need anything special other than air dry clay and your hands.  Plus, you don’t have to leave your house to create this project.  The terracotta clay I purchased is from Amazon and was shipped right to my door.

Crayola Air Dry Clay

This is a great craft for the kiddos too, so be sure to involve them with learning how to make pinch pots if they are looking for something to do.

Let’s dive right in!

Materials:

(I’ve included affiliate links for your convenience. I earn a small percentage from a purchase using these links. There is no additional cost to you. You can read more about affiliate links here.)

Instructions:

This project is easy, inexpensive, and very therapeutic! Let your mind focus on shaping the clay and put your worries aside for a little bit.

Step 1: Shape your clay into round balls

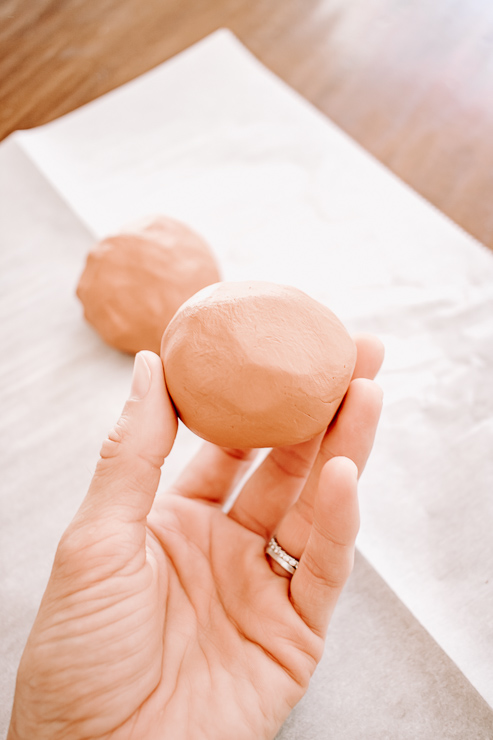
Shape Clay into a Round Ball

Layout a piece of parchment paper.  Grab a hunk of clay and shape/roll it into a nice ball. My clay balls are about the size of the palm of my hand. You can go bigger or smaller, it’s up to you!

Step 2: Form your Pots

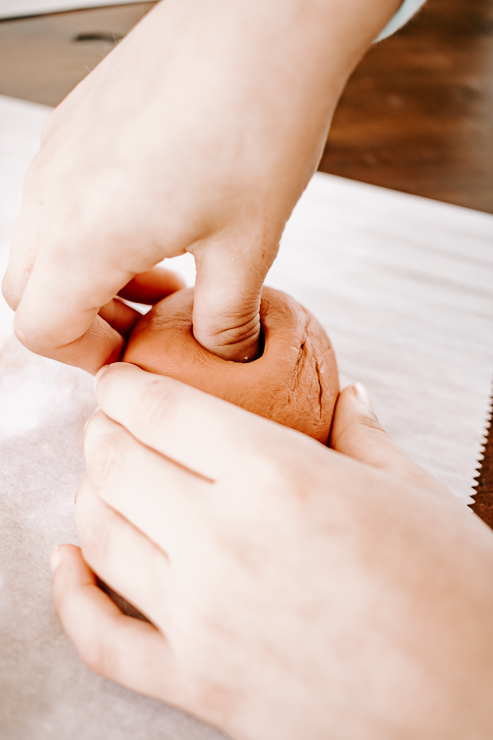
Push thumb into center of clay

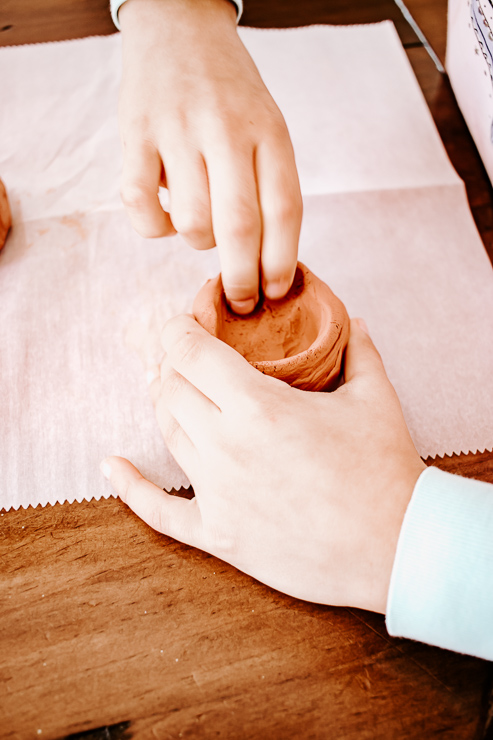
Now that you have your clay ball formed, take your thumb or finger and stick it into the center of the ball. Use your fingers to “pinch” the clay outward, slowly creating a bigger hole in the center. Keep going around and around until you are satisfied with the shape and size of your pinch pot.

Use fingers to pinch out sides of pot

Clay is forgiving, you add more if you pinched it too thin. Add a little water to your clay to avoid cracking. The thicker the sides (or bottom), the longer it will take to dry. Keep that in mind when shaping your pinch pot.

Step 3: Dry your Pinch Pots for Several Days

Let pots dry for several days

We left our clay pinch pots to dry on the parchment paper for several days. When they are fully dry, the pots will turn a lighter color and be hard to the touch.  Once dry, you can paint them with acrylic paint or just leave them plain.  Being the simplistic girl that I am, I just left mine plain.  But kids might enjoy a painting project.

That’s it!  As I said, this is a simple, inexpensive project.  Luckily, you should have plenty of clay leftover for next time.

Crayola Pinch Pots How to Tutorial

You might be wondering what in the heck to do with pinch pots?

Aside from the fact that it’s just a fun craft, there are tons of ways to use your new pots! A quick google search will bring up some ideas for you. But I’ll give you a few here to get you started.

  • Plant faux succulents
  • Use as a ring tray on your nightstand
  • A decor dish to decorate with

Since you can’t get the clay wet, planting a real plant in them is not going to work. But that’s ok because those faux succulents have to go somewhere and they look great in these little pinch pots.

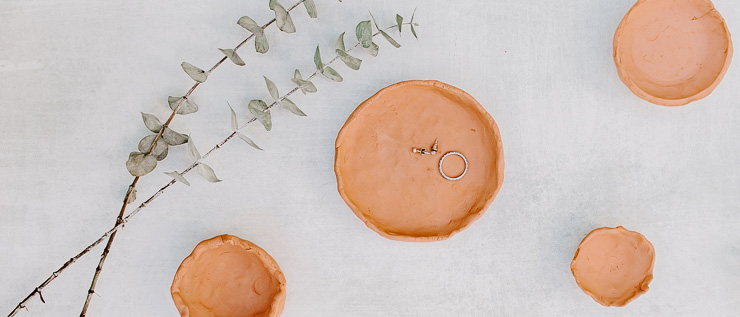
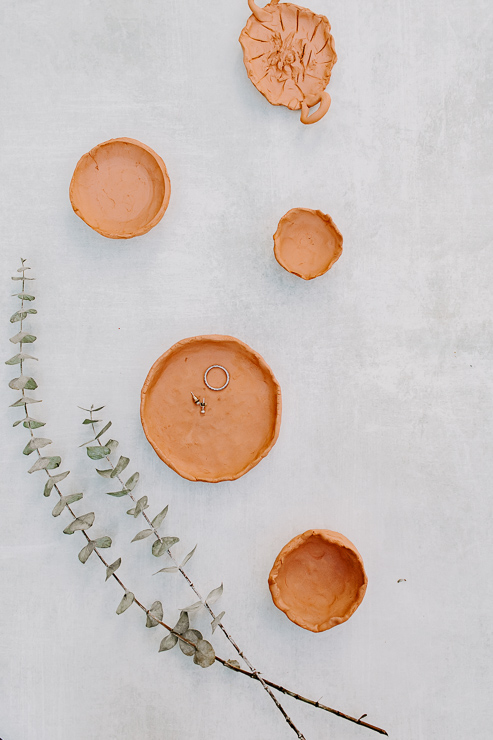
You could also use them as a small catch-all dish on your nightstand or console table. In fact, that’s how I’m using my pinch pots! I have one sitting on my nightstand because I somehow always forget to take off my earrings at night – so this has become the perfect little spot to put them before I go to sleep.

Pinch pots from clay - use as a jewelry dish!

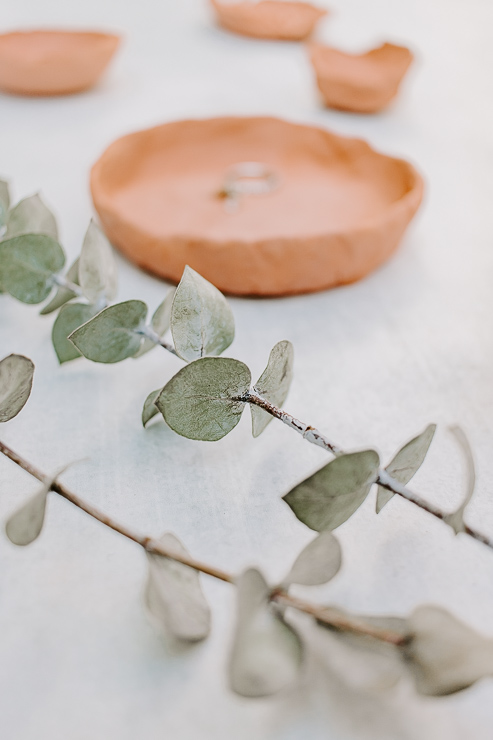
Finally, you can just use them as decor pieces to decorate shelves and bookcases or tables. They look very earthy, so depending on your decor style, they add a nice collected feel to your rooms. Plus – you made them! Take a little pride in your handiwork.

If you like this clay project, be sure to check out my tutorial for a heart-shaped jewelry dish.

Stay safe, stay healthy!

karen signature

~ See More of Karen’s Tutorials ~


karen from decor hintHello!  I’m Karen, the creator of the Home Decor and DIY Blog: Decor Hint. I’m a Native of the East Coast, but I currently live in beautiful Seattle with my hubby, our two wonderful children, and our spunky wheaten terrier.

You can usually find me with some sort of craft in one hand and a coffee in the other. And I’m always rearranging furniture or moving lamps from room to room. I have a passion (read: obsession) for decorating, DIY, and gardening. In short, I love making my house into a home.

Like many, I’m inspired by what I see in home decor magazines, but I’m not so inspired by the price tags.  Consequently, I love finding and creating beautiful budget-friendly home decor items. In a head to head competition, I bet you’d never know the difference between the designer items and my DIY creations!  Many of my DIY projects focus on sewing, crafting, upcycling and organizing. Some of my favorite projects have been making pretty wreaths, sewing my own tassel hand towels, and crafting these trendy wood bead garlands. I can’t wait to inspire you and spark your creativity through my DIY projects.
You can always connect with me on Pinterest, Twitter or Instagram.