How to Make a Vintage Rustic Sleigh Ride Sign | Pretty Handy Girl How cool! You can use this technique to make or transfer any sign graphic.

How to Make a Vintage Rustic Sleigh Ride Sign | Pretty Handy Girl How cool! You can use this technique to make or transfer any sign graphic.

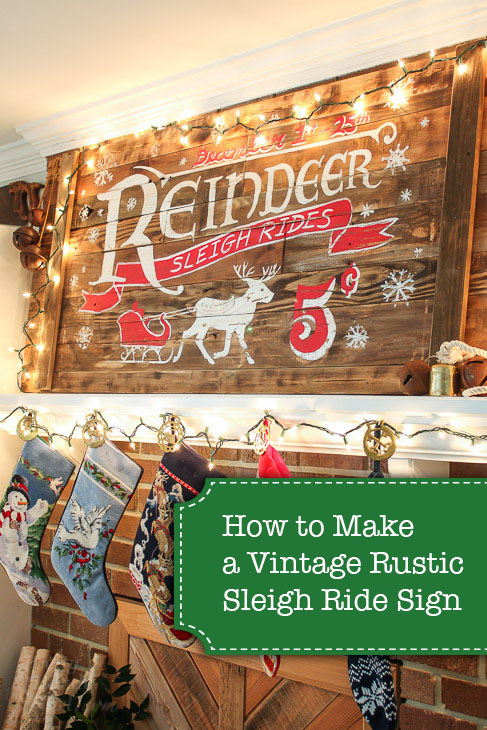
How to Make a Vintage Rustic Sleigh Ride Sign:

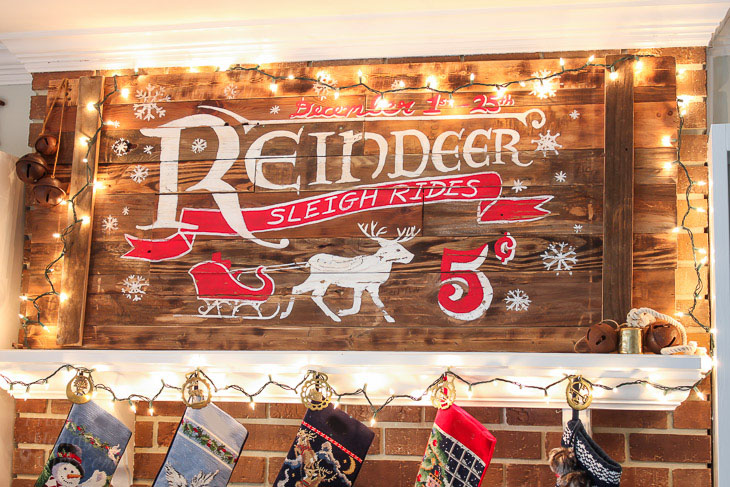
You guys, I’m super excited about this Vintage Rustic Sleigh Ride Sign I made using scraps from my workshop. This sign turned out 200 times better than I imagined in my head. I knew I had to share the tutorial with you so you can make your own vintage signs for any holiday! Let’s get this party started.

Sign:

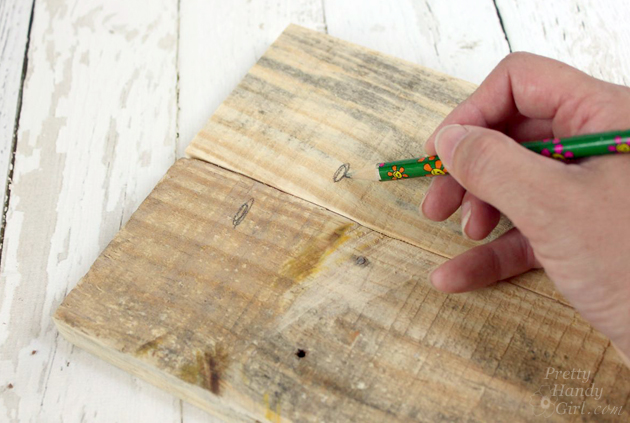
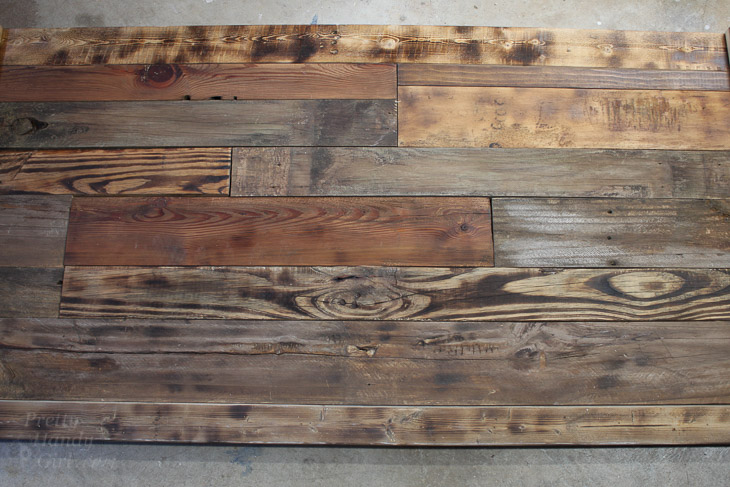
First I suggest measuring the space where you want to hang your sign (it would suck to build it too large or too small.) Begin laying out your scrap wood. It’s best to line up the same width boards along each row. If you need to, you can rip down scraps on a table saw.

scrap-layouts

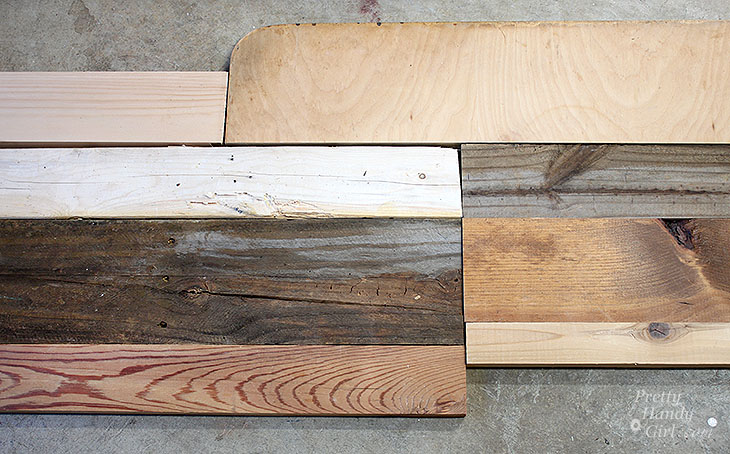
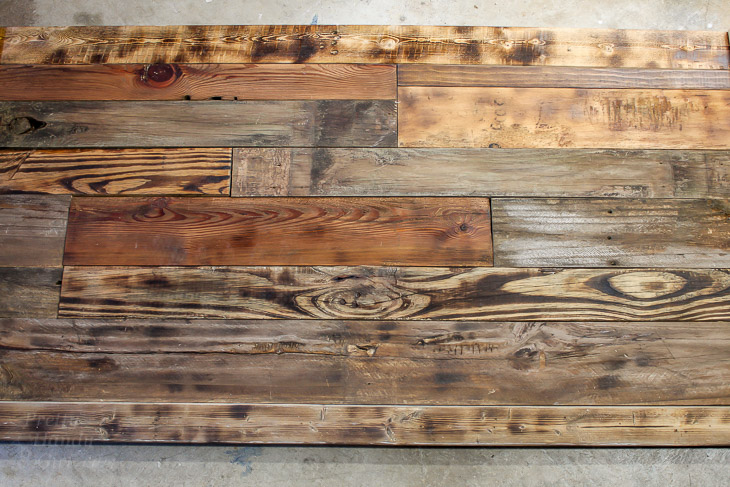
Once you have the scraps laid out, add any stain or paint if you desire. I added a combination of glaze, stain and burned some boards to give them a similar color value but still let them look unique.

scrap-wood-assembled-2

Supports:

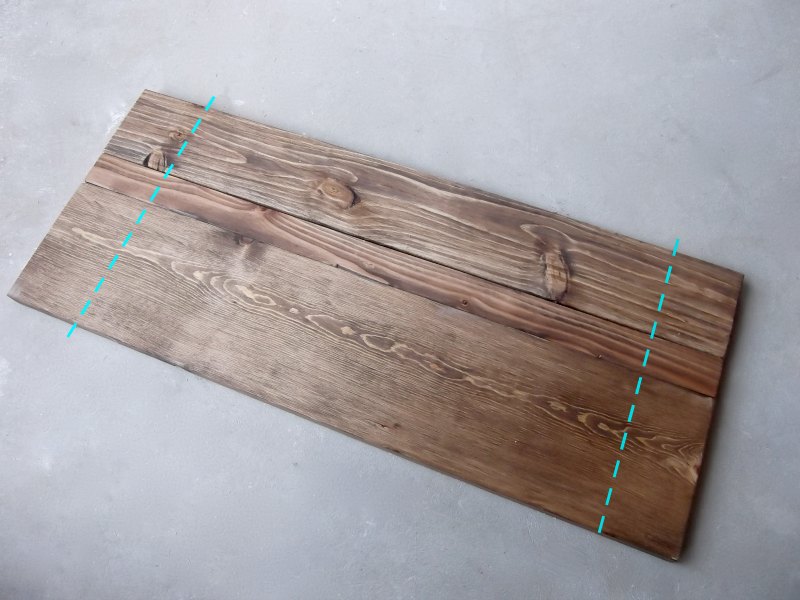
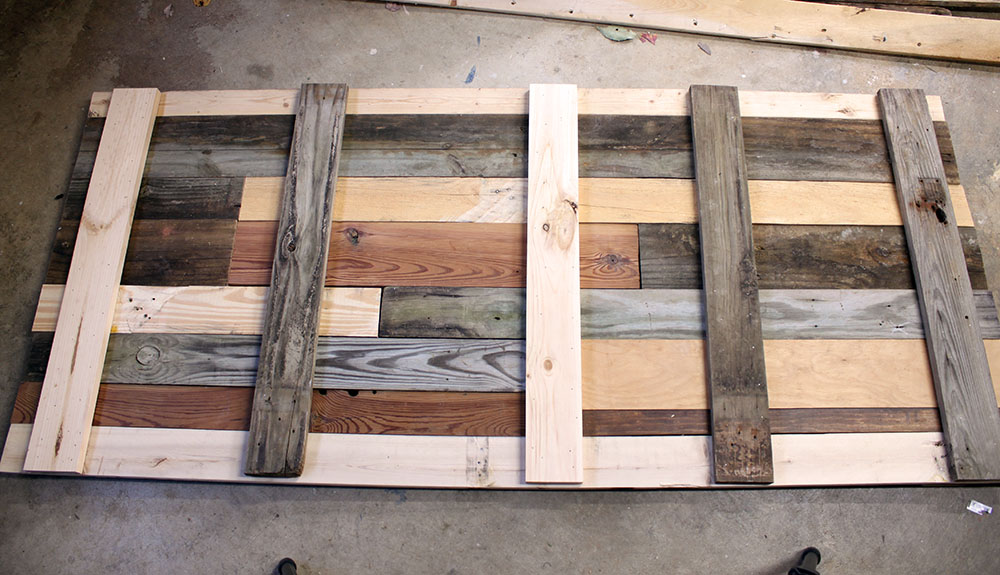
The key to building a sign with lots of scrap wood is to space your supports well. Each board should have two vertical support pieces on the back, unless the board is really short. You might be able to get away with just one support for those shorties.

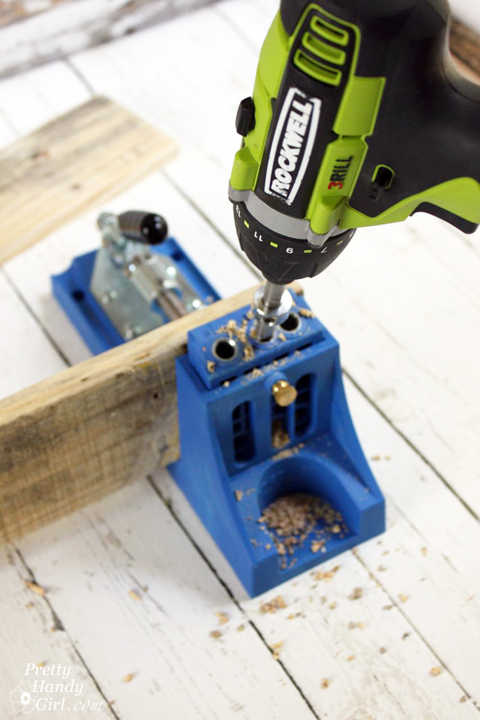
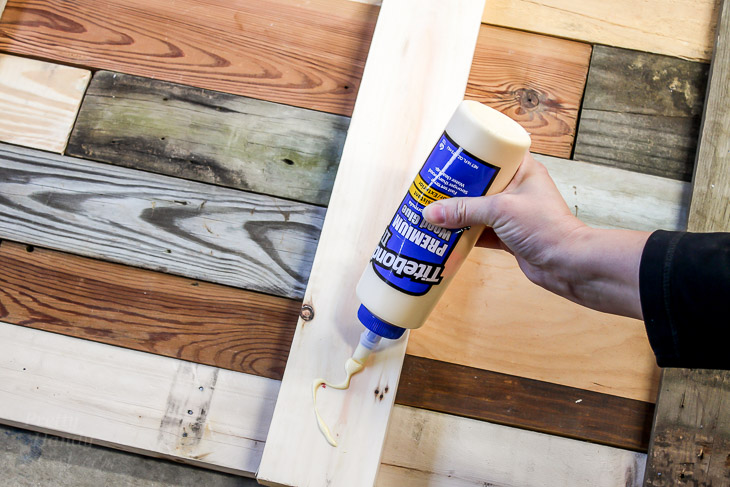
Cut 1″ x 4″ boards to the height of your sign. Flip the scraps over and glue each support board.

add-back-support-boards-wood-glue-4

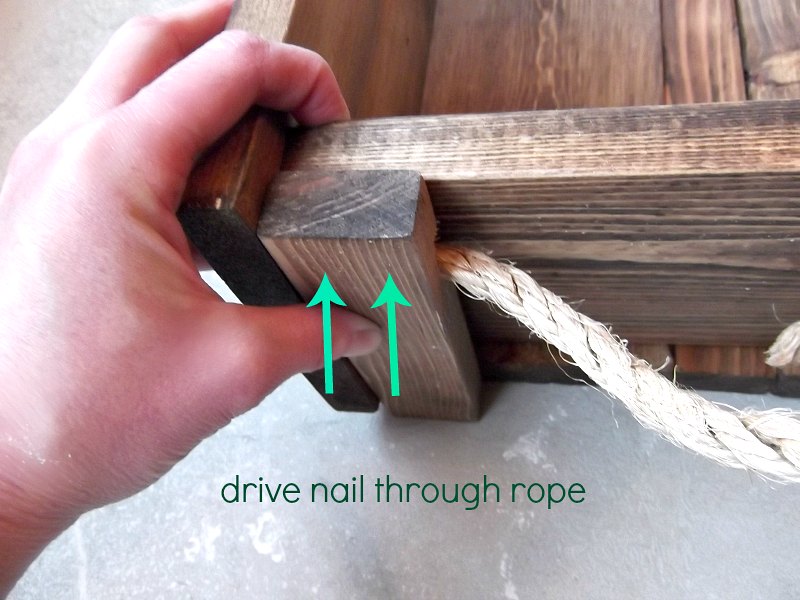
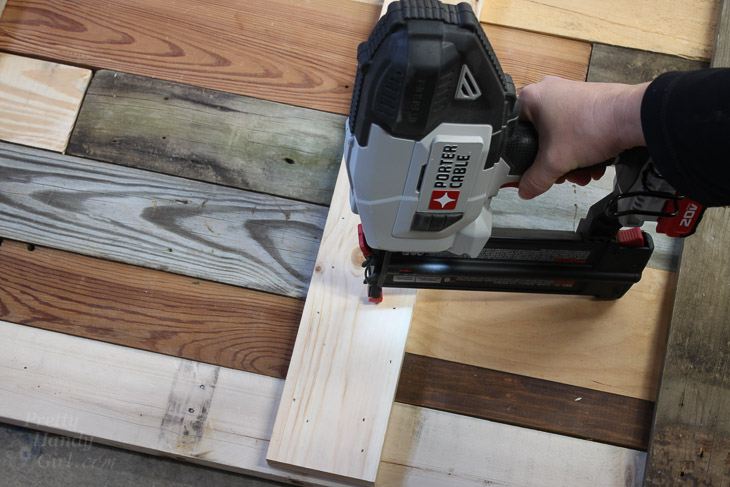
Nail each support board 3-4 times to each scrap.

secure-supports-finish-supports-6

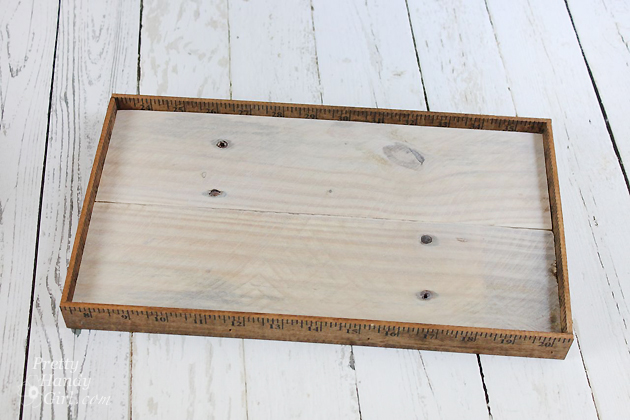
I ended up using 5 supports for my sign.

scrap-wood-sign-support

Allow the glue to dry. Flip your sign over and make sure the scrap boards are well secured.

scrap-woods-layout-2

Transferring the Image:

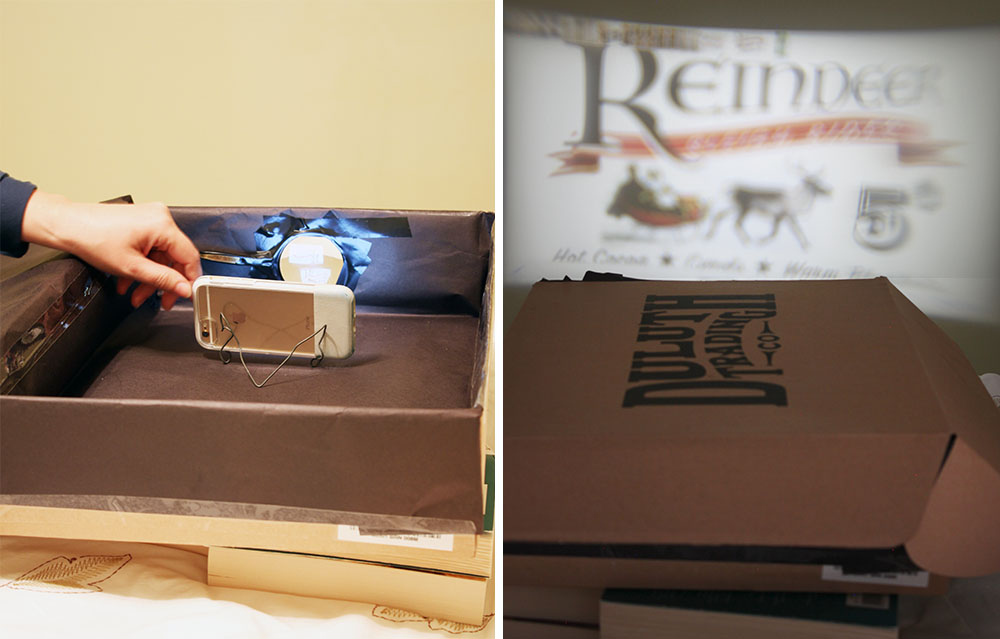
Now it’s time to have some fun. I made a shoebox projector by following the directions in this video:

I created a basic sketch for the sign. (You are welcome to use this image, but please use for personal use only. Do not resell products with this image on it. And please be sure to credit and link back to this post if you use my image and blog about it.)

How to Make a Vintage Rustic Sleigh Ride Sign | Pretty Handy Girl How cool! You can use this technique to make or transfer any sign graphic.

For your convenience, this image has already been flipped and reversed for projecting it in the shoebox projector.How to Make a Vintage Rustic Sleigh Ride Sign | Pretty Handy Girl How cool! You can use this technique to make or transfer any sign graphic.

Send the image to your phone. Insert the phone into the shoebox. (The brightness has to be turned all the way up and you might want to change the display setting to stay lit longer.) Turn the lights out. Move the shoe box back and forth until you have the image sized as large as you want. Then move your phone forward and back to focus.

shoebox-projector

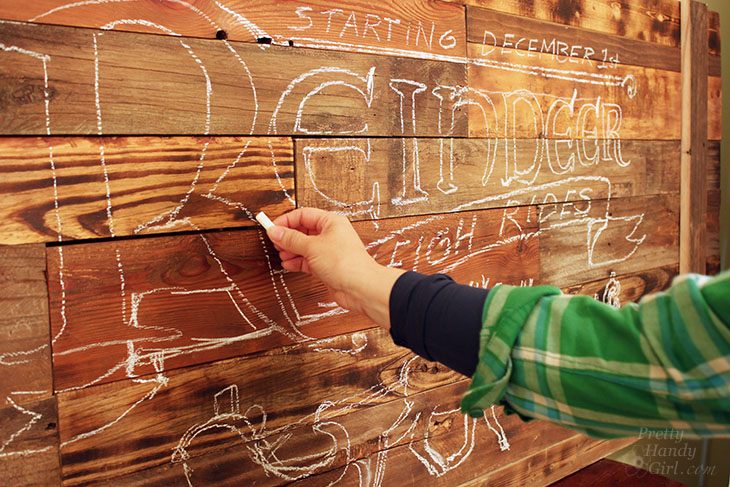
I will say that my image isn’t as clear as I expected, but my magnifying glass is old and scratched up. However, it gave me enough information to trace my image. Use chalk to trace around the design.

chalk-outline-sign-image

Painting Your Sign:

Now you’re ready to paint your sign. It’s not hard at all, think of it like coloring in the lines of a coloring book. Here’s my video tutorial to help you learn all my tips and tricks while painting signs:

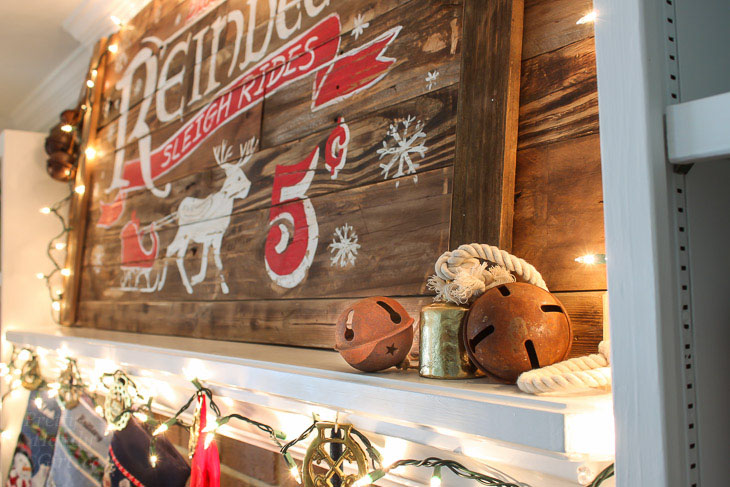
All done? Great! Hang your “new” Vintage Rustic Sleigh Ride Sign with pride.

Holiday Home Tour 2016 | Pretty Handy Girl

I won’t let on that you just made it. Let’s let everyone think we scored this fun sleigh ride sign at an antique shop. 😉

Holiday Home Tour 2016 | Pretty Handy Girl

Holiday Home Tour 2016 | Pretty Handy Girl

Where are you going to hang your vintage rustic sign? I think I’m going to make another one for our kitchen. Maybe a market sign with a pig silhouette?

Holiday Home Tour 2016 | Pretty Handy Girl

Hope you are enjoying the holidays!

PHGFancySign


Pin for later!

Add vintage charm to your holiday home with this DIY Reindeer Sleigh Sign | Pretty Handy Girl #DIYholiday #holidayhome #holidaysign

Faux Aged Metal Pulley | Pretty Handy Girl

Faux Aged Metal Pulley | Pretty Handy Girl

Do you love rustic metal pulleys, but don’t like the hefty price tag? Wouldn’t you rather have a rustic metal pulley for less than $5? Ah, I have a secret. That beautiful rustic metal pulley above is actually:

Faux Metal Pulley | Pretty Handy Girl

Plastic! Ready to see how I secretly transformed that black plastic pulley into a gorgeous faux aged metal pulley?

Faux Aged Metal Pulley | Pretty Handy Girl

Materials:

(I’ve included affiliate links for your convenience. I earn a small percentage from a purchase using these links. There is no additional cost to you. You can read more about affiliate links here.)

Faux Metal Pulley | Pretty Handy Girl

Instructions:

Paint Metal Primer onto the plastic pulley. Read more

DIY-feather-art

DIY Feather Art | Pretty Handy Girl

When I needed an extra piece of art for our living room gallery wall I created DIY Feather Art. You can create your own, but please purchase craft feathers, use fake feathers or paper feathers. (Per the Migratory Bird Treaty Act, it is illegal to collect feathers, nests and other anatomical parts of certain migratory birds.)

Materials:

DIY Feather Art | Pretty Handy Girl

  • Rustic 1×4″ boards (I used pallet wood)
  • Wood yardstick or lattice boards
  • Watered down white paint
  • Paint brush
  • Clamp
  • Scissors
  • Kreg Jig
  • Pocket hole screws (1.25″)
  • Nylon line
  • Small drill bit
  • Drill
  • Staple gun
  • 1″ finish nails
  • Hammer or nailgun
  • Wood glue
  • Feathers
  • Pencil
  • D-ring picture hangers

Instructions:

Cut your 1×4″ boards to size (or select one board the size you want for your art background.) To connect the two boards, mark the location to drill pocket holes.

DIY Feather Art | Pretty Handy Girl

Use the Kreg Jig to drill pocket holes into the back of both boards.

DIY Feather Art | Pretty Handy Girl

Clamp the boards together and join them with 1 1/4″ pocket hole screws.

DIY Feather Art | Pretty Handy Girl

Flip the board over and paint it with watered down white paint for a white-washed look.

DIY Feather Art | Pretty Handy Girl

Mark the width of the white-washed board onto the yardstick. Cut two pieces the same length. Read more

how to build a wood ammo box

I’m super excited to have Pauline from My Altered State joining us today! It’s been a while since we’ve had a guest on Pretty Handy Girl, and this guest was certainly worth the wait! She’s joining us today to show you How to Build a DIY Decorative Ammo Box! This gorgeous crate may be for decorative purposes, but Pauline studied the construction of real ammo boxes to build it the same way the real ones are built. She’s amazing, and I know you’ll understand why in a minute.

I met Pauline at Haven last year, but I’ve been a fan of her blog way before we met. She is an avid upcycler and loves to use salvage materials in her projects.

She has so many fabulous projects, I had a hard time picking a few to show you. Like this fabulous Map Decoupaged Desk/Chair!

DIY Decorative Ammo Box

Map Decoupaged Desk Chair

Or these beautiful Reclaimed Wood Snowflakes!

Reclaimed Wood Snowflakes

But, by far my favorite DIY project Pauline has completed so far is this desk and art installation in her kitchen!

Kitchen Nook Art Installation

And now, Pauline has an easy and unique tutorial for us today! Please clap, cheer and get on your feet for the amazing Pauline from My Altered State!

page_break_2
When I started blogging, I never dreamed that I would one day meet THE Pretty Handy Girl in person, let alone find myself writing a guest post for her.  So having said that, imagine how excited I am right now as I write my first guest post on Pretty Handy Girl!  Now it’s time to get started.  I hope you enjoy my DIY Decorative Ammo Box project.

ammo box diy

Wooden military ammunition boxes have been a staple in the vintage repurposing and upcycling world for a while. They are a versatile storage item with an industrial flavor, but sometimes they are hard to find. That’s when I get the urge to build.

In an effort to keep this tutorial from being too lengthy, you can find info on finishing and aging wood in this post. Now let’s get building.

DIY Decorative Ammo Box Materials:

To create a box with the dimensions of 27″ wide x 7″ tall x 10″ deep, purchase the following:

  • (2) 1″ x 6″ x 6′
  • (2) 1″ x 2″ x 6′
  • (1) 1″ x 4″ x 6′
  • Rope
  • Gorilla tape
  • Wood glue
  • 2 Hinges
  • Drill
  • Drill bit same thickness of rope
  • Clamp
  • Pencil
  • 2″ nails
  • Nailgun (or hammer)
  • Miter saw

DIY Decorative Ammo Box Cut List:

cut list wood ammo box

  • 2 – 1″ x 2″ cut to 10 1/4″ (cut ends at 30 degree bevel as shown above)
  • 4 – 1″ x 2″ cut to 5 3/4″
  • 2 – 1″ x 2″ cut to 25 1/2″
  • 2 – 1″ x 4″ cut to 25 1/2″
  • 2 – 1″ x 6″ cut to 8 3/4″
  • 2 – 1″ x 6″ cut to 25 1/2″
  • 2 – 1″ x 6″ cut to 27 1/4″

DIY Decorative Ammo Box Instructions:

By copying the design of an authentic ammo box, I will show you how to build this DIY Decorative Ammo Box clear down to the way the handles are attached.

Lay out all your pieces for a “dry run” of the design:

  • Bottom of box: (1″ x 6″ x 25 1/2″) + (1″ x 2″ x 25 1/2″) + (1″ x 4″ x 25 1/2″) boards.
  • Front and Back of box: 1″ x 6″ x 27 1/4″ boards
  • Sides of box (with rope handle): 1″ x 6″ x 8 3/4″ boards

Mark the location for your rope handles (approximately 2″ down from the top of the box.)

assemble wood ammo box

During the dry run, notice that the front and back pieces are an inch longer on each side. The stabilizing 1″ x 2″ pieces will rest on the ground, while the four sides of the box rest on the base.

diy ammo box design

After all the ammo box collecting I’ve done over the years, you’d think I would have noticed how the handles were installed on the real thing. Nope. Never paid attention until now. Here’s a close up of the real thing:

military wood ammo box

A notch is hollowed out where the end of the rope goes, and then secured in place with nails. This design actually keeps any rope ends or knots from being visible on the inside of the box. Clever.

To create the notch, clamp two 1″ x 2″ x 5 3/4″ stabilizer pieces together. Use the drill bit to drill a hole directly in between the two pieces of wood. Repeat using two more 1″ x 2″ x 5 3/4″ pieces.

drill holes for rope handles

Use Gorilla Tape (or duct tape) to seal the end of the rope and keep it from unraveling.

rope handle wooden box

Rest the end of the rope into the notch of the stabilizer 1″ x 2″ and add wood glue to the stabilizer and the taped rope end.

wood glue diy ammo box

While holding the handle (stabilizer) pieces in place, drive the first nails through the wood, into the rope end and into the side of the box.

ammo box handles

After driving two nails into the stabilizer pieces to secure the rope, drive two more nails through the front and back of the box, into the sides of the stabilizer pieces (as shown below.) Then go ahead and glue/nail all the sides together, while keeping it rested on top of the bottom boards.  (This will help you keep everything aligned and square.) Once all the sides are nailed together, flip the whole box upside down, and glue and nail the bottom boards into the frame of the ammo box.

diy ammo box secure sides

Assembling the lid:

The three lid boards are identical to the boards on the bottom of the box: (1″ x 6″ x 25 1/2″) + (1″ x 2″ x 25 1/2″) + (1″ x 4″ x 25 1/2″) The lid boards are secured together by the two 1″ x 2″ x 10 1/4″ cross supports (the two pieces with both ends beveled at 30°.)

wooden ammo box lid

Nail on the cross supports about 2″  from outside ends of the lid.

ammo box lid

Attach the lid:

For a long time, if there were hinges involved in a project, I walked away in tears.  That is, until I discovered this little invention: a drill bit for hinges (affiliate link). I can’t say it enough as this little guy has saved my sanity a thousand times over.

Drill holes for the hinges, about 5 1/2″ from the outside edges of the box, and attach the hinges to the box and the lid.

drill bit for installing hinges

And that’s it!

how to build a wood ammo box

You’ve got yourself an ammo box, that has never actually held ammo.  What will you do with yours?

faux ammo box

I can think of a lot of other things that I might hide inside this box, like Wii remotes.  (After I add a lock, of course.)  😉

Visit this tutorial for the “how to” on the stain/distressing techniquefor this ammo box, where you’ll find great tips on aging wood with stain.

open ammo box

Hope you enjoyed!

Did I tell you Pauline is amazing or what?!

PHGFancySign

Aging and Antiquing Furniture | Pretty Handy Girl

Reclaimed Lumber Farmhouse Table | Pretty Handy Girl

Aging and antiquing furniture legs is an easy task if you want to fake age on a table or chairs. With some stain, paint and glaze you can fool most people into believing that your new furniture is an antique.

There are many ways to age and antique furniture. This tutorial will show you my favorite technique for table and chair legs.

If you’re just stumbling upon this post, I shared the tutorial for building a table last week. The table legs I used are the rope twist legs from Osborne Wood Products. I worked with Osborne Wood Products and custom designed the legs, so you won’t find them anywhere else. I do think they should have named them the “Brittany” legs or “Pretty Handy Legs.” LOL. I’m just excited that they provided me with a set for my table at no charge. 😉

This tutorial works best with unfinished wood, but you can skip the staining step if you have pre-finished furniture.

Materials:

(I’ve included affiliate links for your convenience. I earn a small percentage from a purchase using these links. There is no additional cost to you. You can read more about affiliate links here.)

Instructions: 

Stain your furniture leg with the dark stain. Follow up with a second coat if you desire. Allow the stain to dry.

Reclaimed Lumber Farmhouse Table | Pretty Handy Girl

Paint the legs with white chalky paint. Add a second coat if you need more coverage.

Reclaimed Lumber Farmhouse Table | Pretty Handy Girl

Mix up the Miss Mustard Seed Milk Linen colored paint and brush on a layer of milk paint on top of the white paint. (For more variety, you could use a contrasting color instead of linen.) Read more