Easy and Inexpensive Romantic Curtains | Pretty Handy Girl

Easy and Inexpensive Romantic Curtains | Pretty Handy Girl

Are your windows naked? What’s holding you back? Don’t have the funds to buy some? Don’t have the time to sew some? I have the instant cure for your naked windows. Get ready to make your own easy and inexpensive romantic curtains! Best of all, you don’t have to sew a thing!

Materials:

  • 2 Flat twin sheets from Walmart ($4.97 ea.)
  • 10 Curtain ring clips

Instructions:

Fold your bed sheet in half lengthwise at the top edge. Pleat the left corner and clip a ring over the pleats approximately 2-3 inches below the top edge.

Easy & Cheap Curtains | Pretty Handy Girl

Pleat and add another clip at the fold. Gather another pleat halfway between your two clips and add a third clip. Read more

Updating a Knotty Pine Nightstand | Pretty Handy Girl

Updating a Knotty Pine Nightstand | Pretty Handy Girl

The best way to give your room a makeover on a budget is if you can use your existing furniture. Notice that I didn’t say using it “as is”. Heck no! Update your solid furniture by adding moulding, paint and new feet!

Updating a Knotty Pine Nightstand | Pretty Handy Girl
(Pretty Handy Dog is already staking his claim on his preferred spot on the new bed.)

When I decided to build our new bed, I wanted to use our existing nightstand and vanity to save money. But, the nightstand was a little too short for the new bed height. By adding new feet and painting it the same color as our new bed, I was able to give the knotty pine nightstand a second life.

(I’ve included affiliate links for your convenience. I earn a small percentage from a purchase using these links. There is no additional cost to you. You can read more about affiliate links here.)

Materials:

Optional:

Instructions:

Start with a solid night stand. She may have some dated curves, but that’s nothing a little baseboard moulding can’t fix!

Updating a Knotty Pine Nightstand | Pretty Handy Girl

Remove the drawers. Clean out any dust bunnies and lost love letters out of the back.

Updating a Knotty Pine Nightstand | Pretty Handy Girl

Cut an interior facing 45 degree angle into one end of the baseboard moulding. Line up the bevel against one end of the front of the nightstand. Mark the opposite corner of the base where you need to cut. Read more

Master Bedroom Reveal | Pretty Handy Girl

Master Bedroom Reveal | Pretty Handy Girl

When I mentioned to Pretty Handsome Guy that I was going to give our master bedroom a makeover, he thought I was nuts. I did paint this room when we first moved into our home seven years ago. And I gave it a mini-makeover in 2011.

master_bedroom_photo

But, it was exciting to be able to repaint and give the room a fresh new look with an ombré wall technique.

Master Bedroom Reveal | Pretty Handy Girl

I saved a lot of cash by repainting the nightstand (and adding feet to it),

Master Bedroom Reveal | Pretty Handy Girl

the vanityRead more

Painted Vanity Nightstand | Pretty Handy Girl

Painted Bedside Vanity | Pretty Handy Girl

In the quest to makeover our master bedroom and save money, I’ve been painting several pieces of furniture to coordinate with the new bed I built.

One of the pieces I painted was this small desk that doubles as a nightstand. Our bedroom isn’t very large and our master bathroom is even smaller than what can be described as a “master” anything! Doing my hair and makeup in our bathroom isn’t a viable option, especially when both Pretty Handsome Guy and I wake up at the same time. When I saw this little desk at a local thrift store, I grabbed it. Especially because she was only $20!

Painted Bedside Vanity | Pretty Handy Girl

She had lots of age, but not much character.

top-of-wood-vanity

However, she was the perfect size and had just enough storage for a makeup vanity.

With a light sanding, primer and a coat of Benjamin Moore Advance paint, she is now showing her more glamorous side. Read more

Modified King Size Farmhouse Bed with Storage Drawers | Pretty Handy Girl

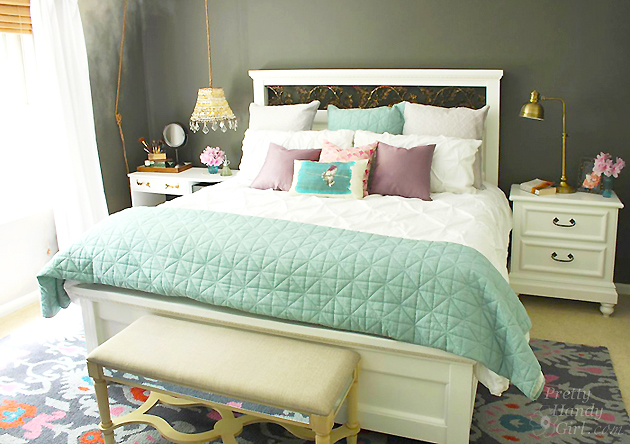
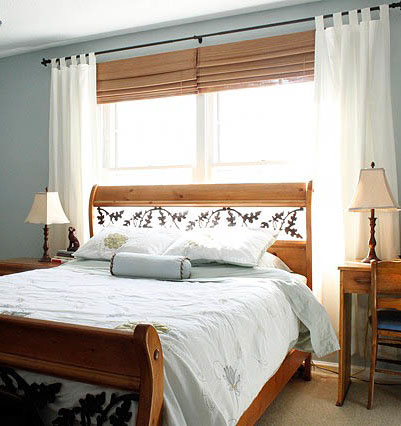
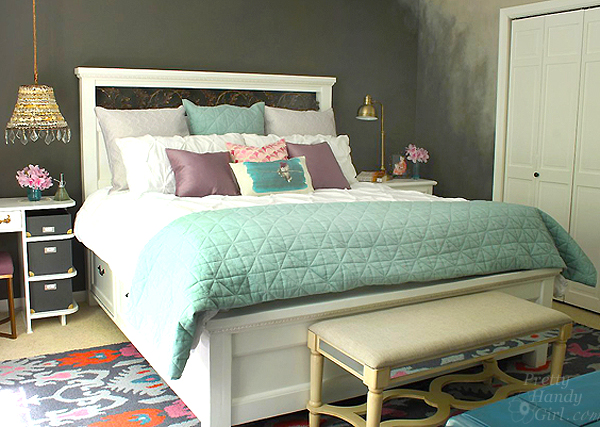
The master bedroom is almost finished. If you’ve been following along, I decided to give our bedroom a makeover when we upgraded our mattress to a king size. That decision has resulted in a few “give a mouse a cookie” decisions. Every time we needed a new mattress, we discussed whether it was time to upgrade to a king. Each time we decided to stick with our queen. Besides the savings, I was attached to our oak leaf sleigh bed. The wrought iron leaves are my favorite part of the bed.

MasterBed1

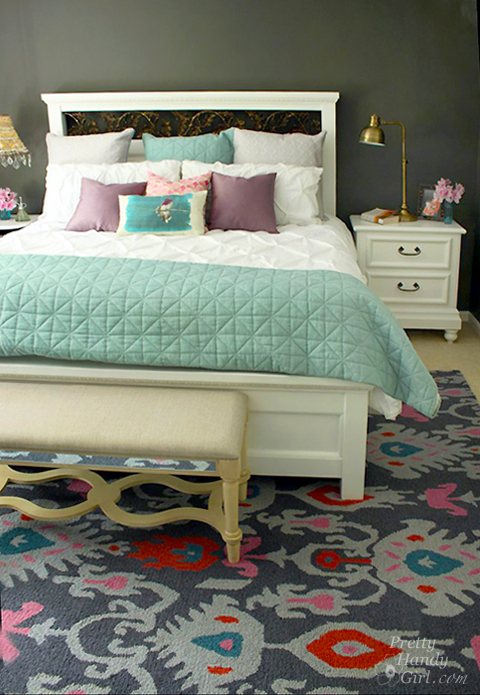
Farmhouse King Size Bed with Storage

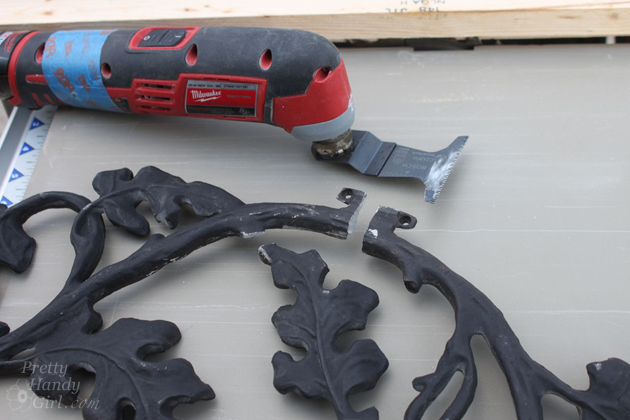
This time as the mattress buying decision loomed, I did extensive research and discovered Savvy Rest’s Serenity latex layered mattress. Who knew that this DIY mattress would last us for decades! (You have to read about this mattress, it will probably be the last mattress you ever buy!) Given the length of time we’d be sleeping on it, we decided it was finally time to make the switch and move up to a king. But, I have to admit, I was sad about saying goodbye to the oak leaves. A few sleepless nights later and I had formulated a brilliant plan of how I could use my beloved oak leaves in the new bed:

Modified King Size Farmhouse Bed with Storage Drawers | Pretty Handy Girl

I ended up altering Ana White’s Queen size farmhouse bed with storage drawers plans by sizing it for a king-sized mattress. Plus, I altered the headboard design to incorporate my beloved oak leaf wrought iron.

Ana’s plans are great, so I’m going to send you to her site to download the basic plans. Then, I’ll give you the details and show you the modifications I made.

Modified King Size Farmhouse Bed with Storage Drawers | Pretty Handy Girl

Building the King Size Farmhouse Storage Bed: Read more