How to Paint an Ombre Wall Technique | Pretty Handy Girl

How to Paint an Ombré Wall Technique

How to Paint an Ombré Wall Gradient | Pretty Handy Girl

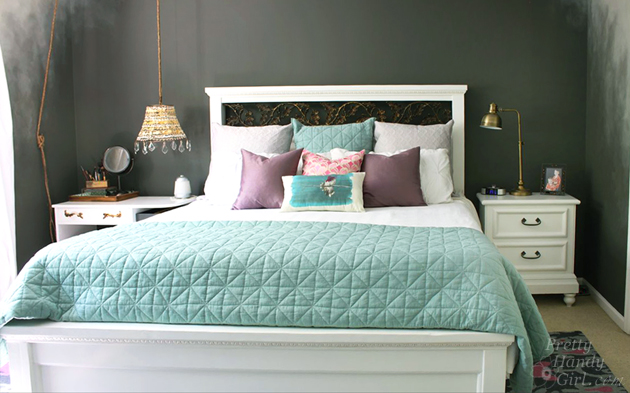
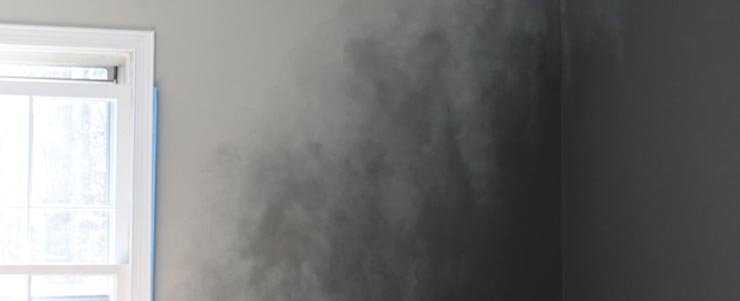
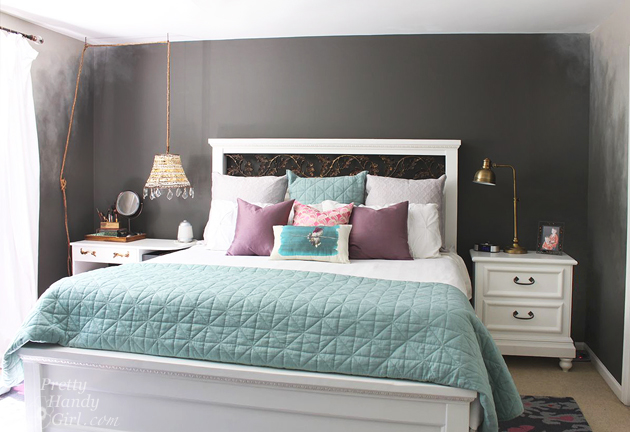
Ombré painting is EVERYWHERE. Clothing, home décor and even wall paint techniques. An ombré wall is the paint technique I chose to create a misty and ethereal look in our master bedroom. It started when I fell in love with Kendall Charcoal by Benjamin Moore but didn’t want to make our entire bedroom too dark (I have a hard enough time waking up in the morning.) I decided a good solution was to use the dark charcoal gray color on a focal wall behind the headboard. But, I didn’t want to stop the color in the corners and create a sharp line.

How to Paint an Ombré Wall Gradient | Pretty Handy Girl

Instead, I wanted a softer edge that would make us feel like we were being hugged by the room.

How to Paint an Ombré Wall Technique

How to Paint an Ombré Wall Gradient | Pretty Handy Girl

I used Revere Pewter by Benjamin Moore to paint the other three walls in the bedroom, but created a random ragged edge where the two colors meet.

How to Paint an Ombré Wall Gradient | Pretty Handy Girl

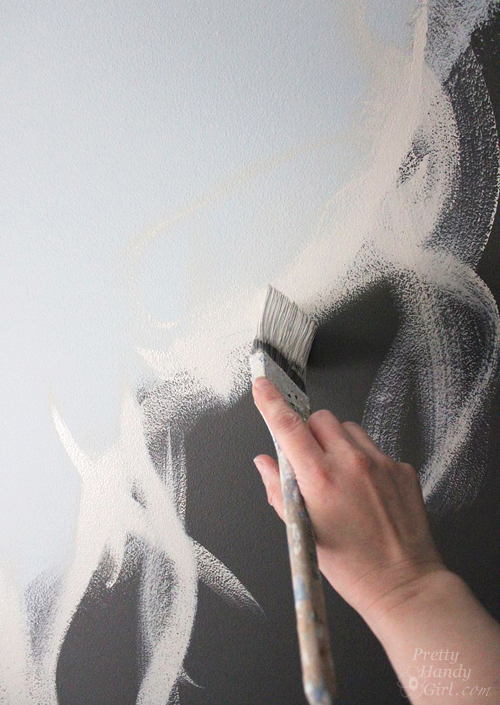
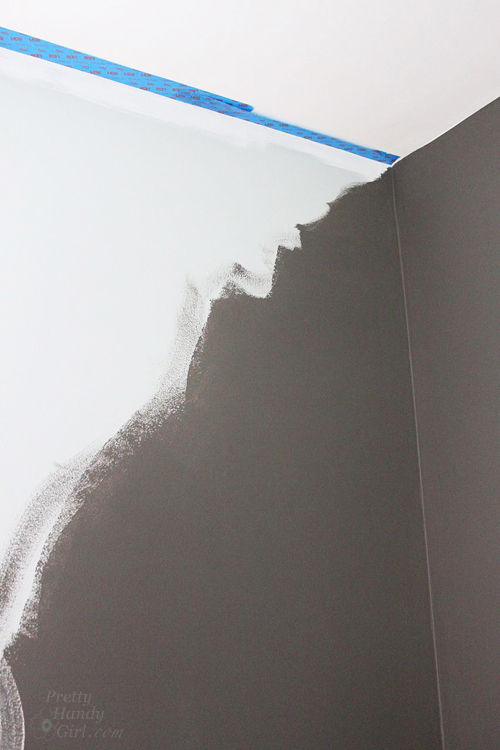
This is how the side walls look in preparation for the ombré wall technique.

How to Paint an Ombré Wall Gradient | Pretty Handy Girl

Materials:

  • Dark latex paint color (Kendall Charcoal by Benjamin Moore)
  • Lighter latex paint color (Revere Pewter by Benjamin Moore)
  • A small container with a mixture of the two colors to create an in between gray
  • Paint brush
  • Dry brush
  • Water-filled spray bottle
  • ScotchBlue Painter’s Tape
  • Damp car wash sponge
  • Rubber gloves
  • Wet wipes or wet rag

Instructions: Read more

32 Colorful Doors

32 Colorful Doors

Hello Pretty Handy readers! I’m Colleen from Just Paint It! Blog and today I have a collection of 32 gorgeous colorful doors to inspire your next curb appeal project. With warmer temps here, most of us are spending more time outside, sprucing up our yards and outdoor spaces. One simple way to make a big impact is to paint the front door (and if you have to strip it first, check out this great tutorial for stripping paint with video tutorial.)

While I don’t see this done too much here in California, Brittany found most of these bright and cheery portals in a local neighborhood in Raleigh! Although a few doors are from her visit to the U.K and Scotland. See if you can guess which ones!

A Sherwin Williams color deck was used to approximate the paint colors of these doors. Keep in mind when painting your own, it may require two or more coats to get some of the rich tones in this collection. It’s always wise to paint a sample board to hold up to your door so you can see how the natural lighting affects that particular hue.

Let’s start out with some sunny yellows.

Lantern_Yellow_SW6687

Lantern Yellow SW6687

Bee_SW6683

Bee SW6683


This next door is close to Chartreuse, a blend between yellow and green. Read more

5 Minute Ceiling Fan upgrade | Pretty Handy Girl

5 Minute Ceiling Fan Update | Pretty Handy Girl

When I was updating my son’s bedroom, I gave the ceiling fan a 5 minute update! You can easily change the look of a ceiling fan by quickly swapped out the light shades. I removed the scalloped edged glass shades and replaced them with square ones for a more “gender neutral” look.

5 Minute Ceiling Fan upgrade | Pretty Handy Girl

New glass shades cost anywhere from $3 – $10 each at Lowe’s or other home improvement stores. The shade size is pretty much universal, but make sure you are buying the smaller shades versus larger ones that are sold for pendant lights. To be sure, bring one of the old shades with you or measure the diameter of the mouth on the existing shades.

Here’s the quick 5 minute how to swap out your ceiling fan light shades: Read more

milk jug side table

Jaime here from That’s My Letter sharing a DIY repurpose project that works great outside or inside.

Take a vintage milk jug, add a pre cut circular wood top and you have a functional and stylish side table.  If you want to get fancy I’ll show you how to add the personalization too!

milk jug side table before after

I started this project with some crusty old milk jugs that really serve no purpose these days and after a little paint and adding a wood top we have a beautiful and useful piece of furniture.

milk jug side tables 1

Together the two milk jugs make a great pair on either side of our diy outdoor sofa but ‘S’ is not my last name, these milk jugs will be going to a friend’s home.

milk jug side table 3

The personalization is icing on the cake, if you have a steady hand you can add any letter in nearly any font you desire. Ready to get started? Read more

Super easy card table makeover
I can only imagine that Matt and I are not the only family in America with a less than stellar card table.  In fact both of ours were hand me downs from grandparents and though they may have been fabulous in the 80’s, now they are really lacking in the attractive decor department.  A few years go I picked up some vinyl table clothes with hopes of breathing new life into our sad card tables and once again life got in the way and I never recovered them.  I recently came across the table clothes and decided it was time to move on with my project but there was a small problem, I no longer liked the table clothes I had previously picked out.  Have no fear, after a quick trip to Target I was back in business and ready for my amazing, fabulous, incredible card table makeover!

Materials:

  • Card Table (old or new)
  • Damp rag for cleaning
  • Ratchet with socket
  • Vinyl Tablecloth
  • Drop Cloth
  • Spray Paint
  • Sand Paper – 180 grit
  • Drop Cloth
  • Hot Glue Gun
  • Hot Glue Sticks
  • Scissors

Instructions: 

Card Table

Give the table a good wipe down with a damp rag to remove any dust or possible cobwebs that may be lingering on the underside of the table.

Table

Remove the top of the table from the frame and legs. (Be sure to store your screws in a safe place because you will need them later.)  Most tables will be attached with a few hex screws that can easily be removed using a ratchet and socket or a socket wrench.

Read more