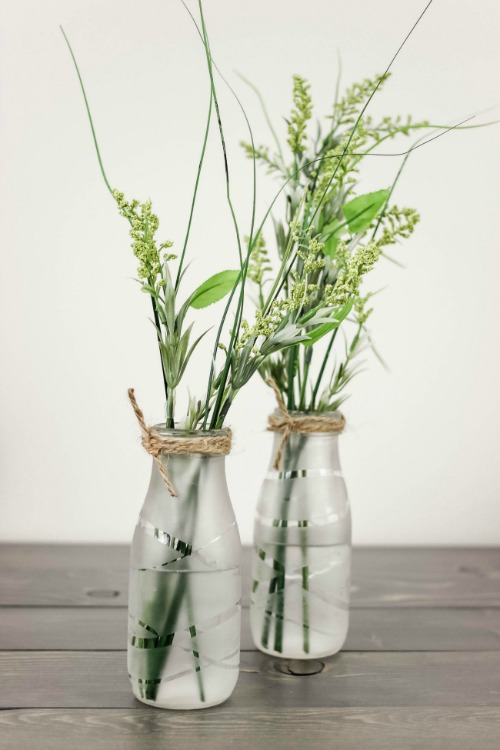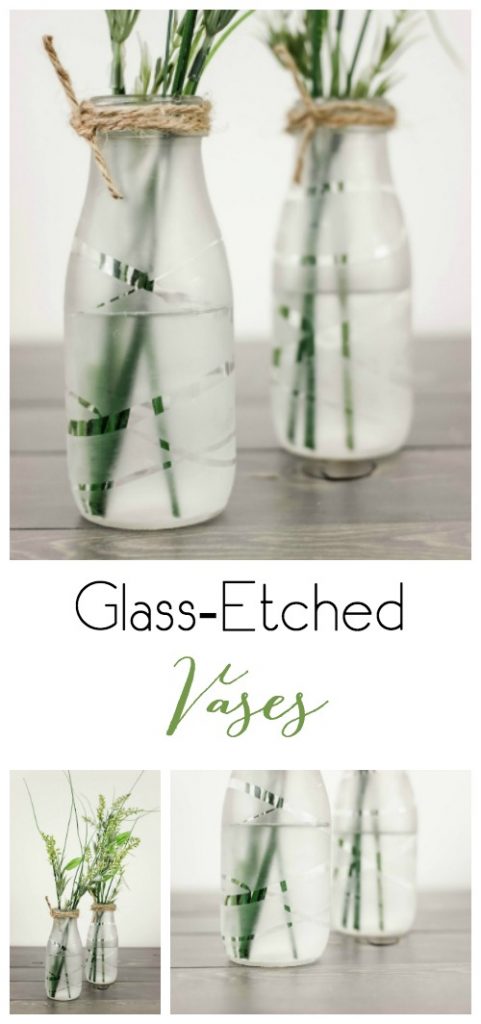
Upcycle some old milk bottles or glass containers into these beautiful and chic Glass Etched Vases!

Happy New Year! This is Lindi, visiting again from Love Create Celebrate. How many of you are deep into cleaning and purging mode?! My husband and I have already cleaned out FIVE closets since the New Year! We’re pretty proud actually! lol. When I was cleaning, I came across these old milk bottles and had the perfect idea to DIY them! I can’t wait to show you how easy it was to make these Glass-Etched Vases.
Upcycle some old milk bottles or glass containers into these beautiful and chic Glass Etched Vases!

I’m ALL about quick and easy DIYs. I try to make things that are easy, functional, and that I will be proud to display in my home. Since I didn’t want to purge these old bottles, I found the perfect solution.

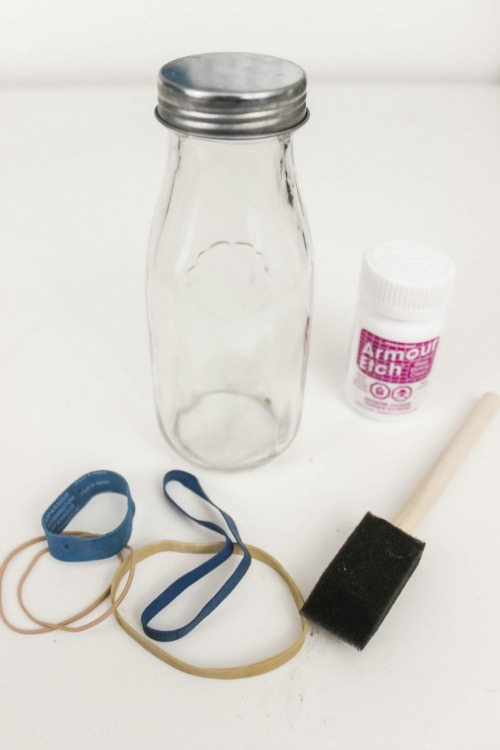
Materials: 

(I’ve included affiliate links for your convenience. I earn a small percentage from a purchase using these links. There is no additional cost to you. You can read more about affiliate links here.)

Instructions: 

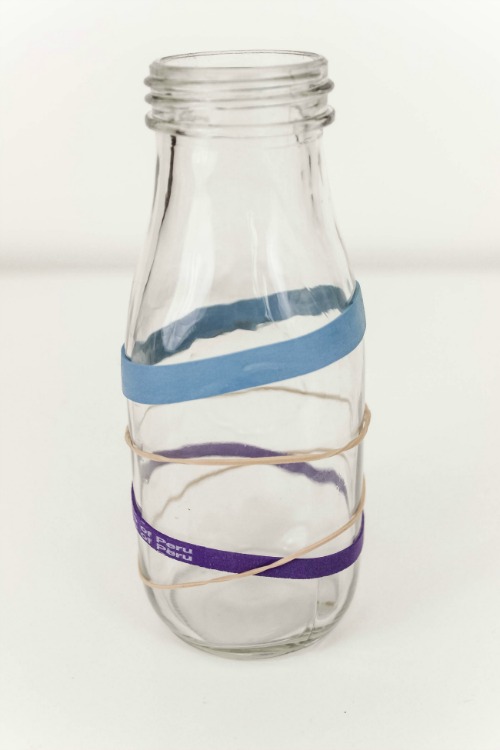
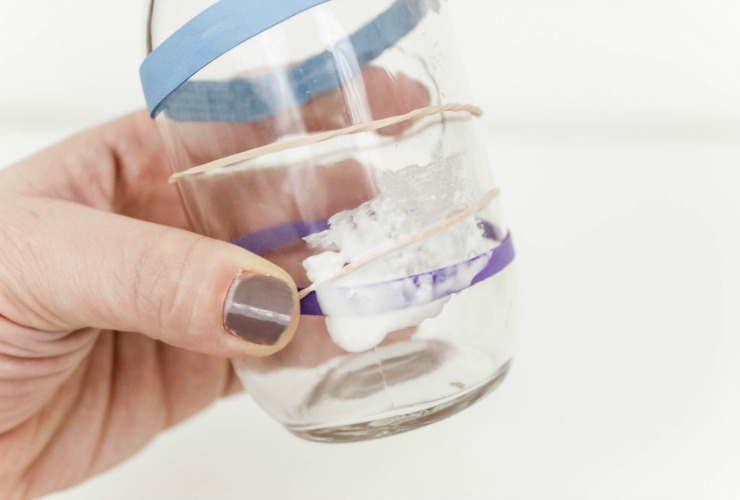
Start by placing your elastic bands at various angles around your bottle or vase. Make sure that the elastics are tight (so they don’t slip) and flat.
Upcycle some old milk bottles or glass containers into these beautiful and chic Glass Etched Vases! Upcycle some old milk bottles or glass containers into these beautiful and chic Glass Etched Vases!

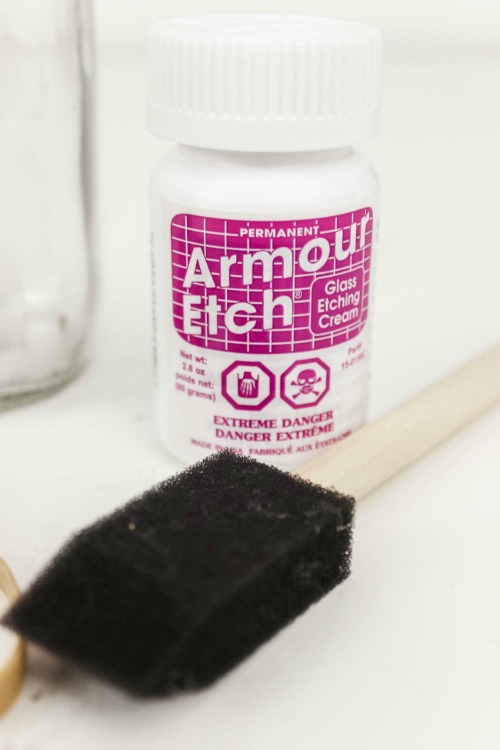
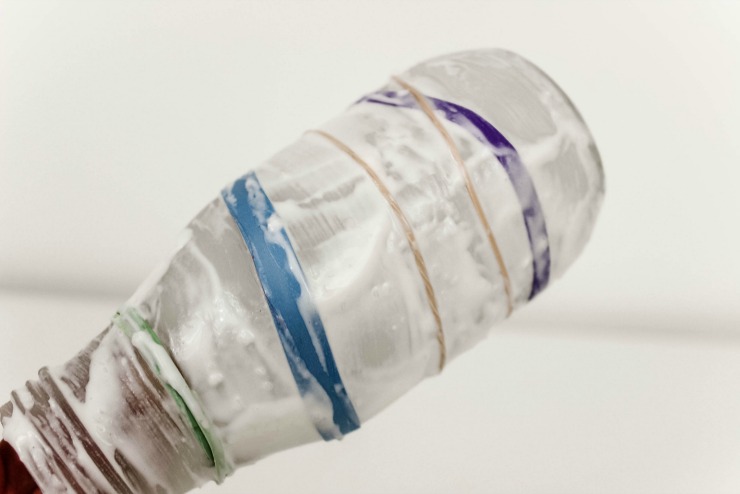
Using your foam brush, dab the glass etching cream onto the bottle in a thick layer, covering all of the outside glass.
Upcycle some old milk bottles or glass containers into these beautiful and chic Glass Etched Vases!

Once the entire glass is covered, let it sit according to the instructions on your bottle of glass-etching cream.
Upcycle some old milk bottles or glass containers into these beautiful and chic Glass Etched Vases!

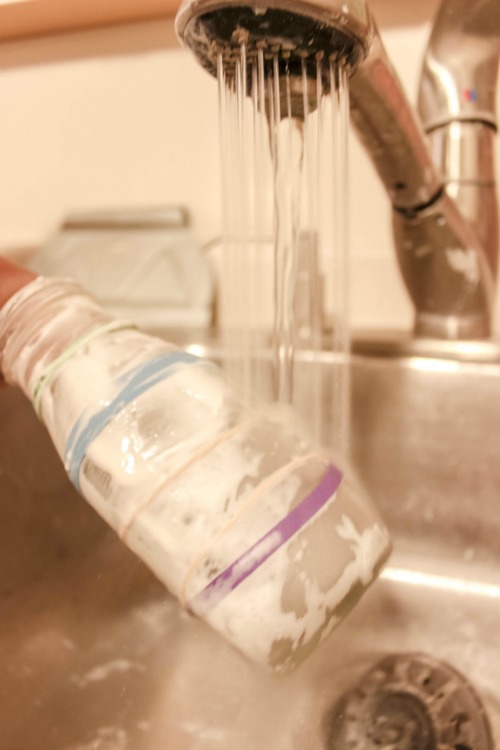
When ready, simple run the bottle under a tap to rinse off all of the cream, and remove the elastics.
Upcycle some old milk bottles or glass containers into these beautiful and chic Glass Etched Vases!

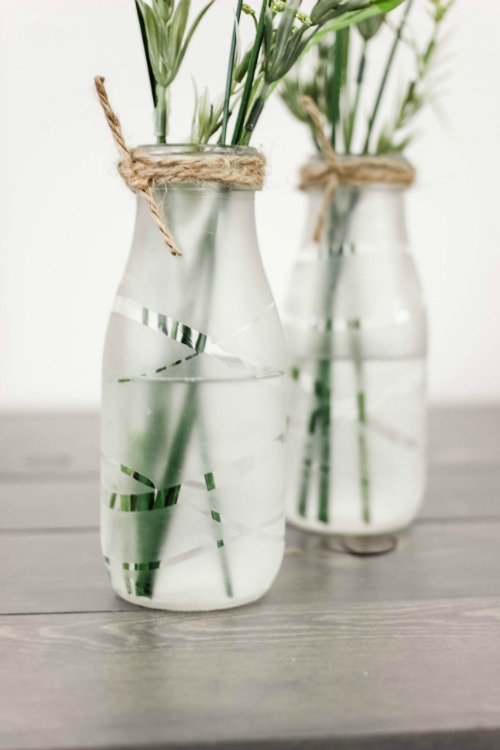
I LOVE how they turned out! A beautiful way to display all of those fresh spring flowers once the seasons change 🙂
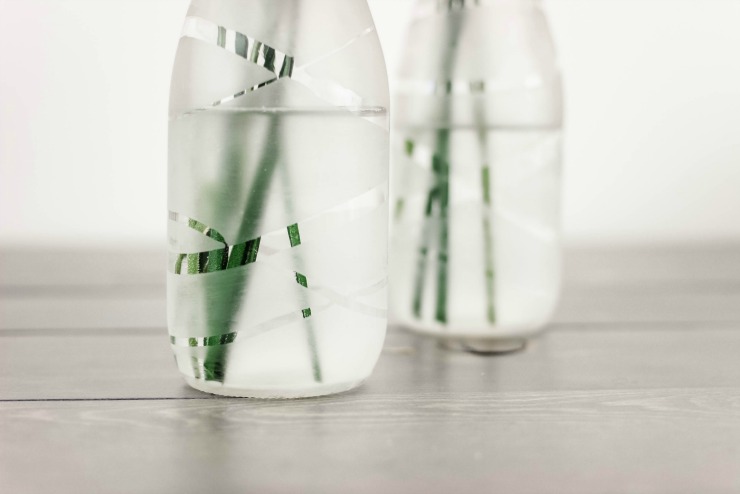
Upcycle some old milk bottles or glass containers into these beautiful and chic Glass Etched Vases! Upcycle some old milk bottles or glass containers into these beautiful and chic Glass Etched Vases! Upcycle some old milk bottles or glass containers into these beautiful and chic Glass Etched Vases!

If you like chic vases, check out these easy Gold-Leafed DIY Vases too!
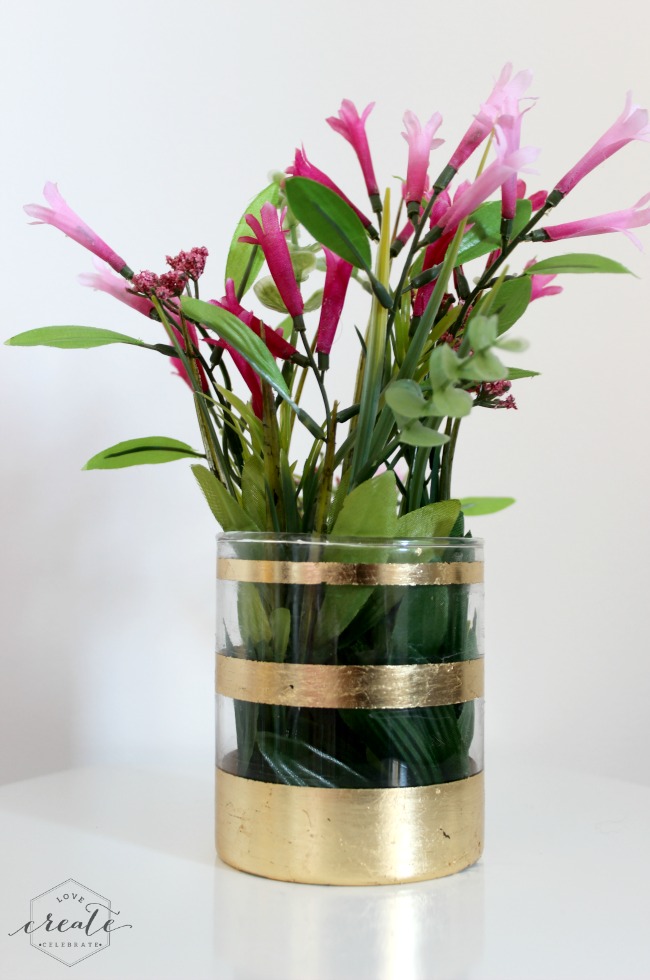
Gold Leaf Vase

For more chic DIY inspiration visit Love Create Celebrate.

Lindi Signature~ view more projects by Lindi ~
Fixing Common Gift Wrap Problems | OMG! So funny, you have to read this. | Pretty Handy Girl

Fixing Common Gift Wrap Problems | OMG! So funny, you have to read this. | Pretty Handy Girl

Hi all, Pretty Handsome Guy here filling in for Brittany. Last night Brittany and I were wrapping presents and I thought I’d share with you some common gift wrap problems and how to deal with them.  Think of this as the polar opposite of her Creative Gift Wrapping series of posts.

The Squish and Tape and Tape and Tape

Fixing Common Gift Wrap Problems | OMG! So funny, you have to read this. | Pretty Handy Girl

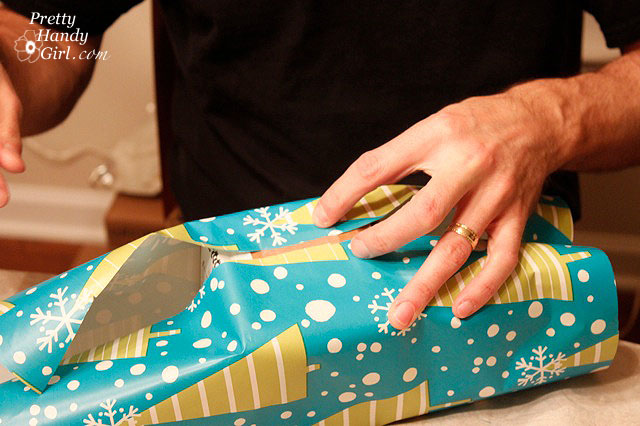
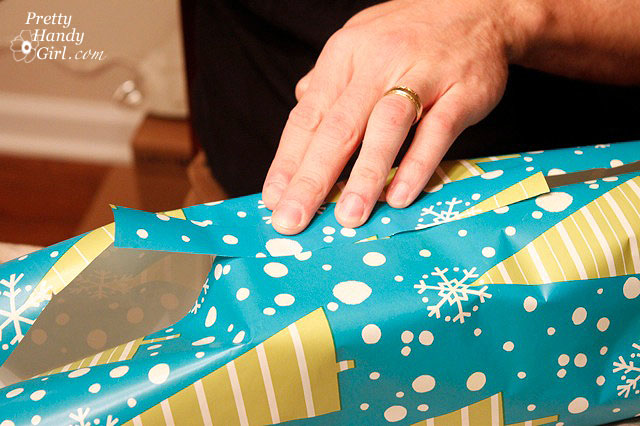
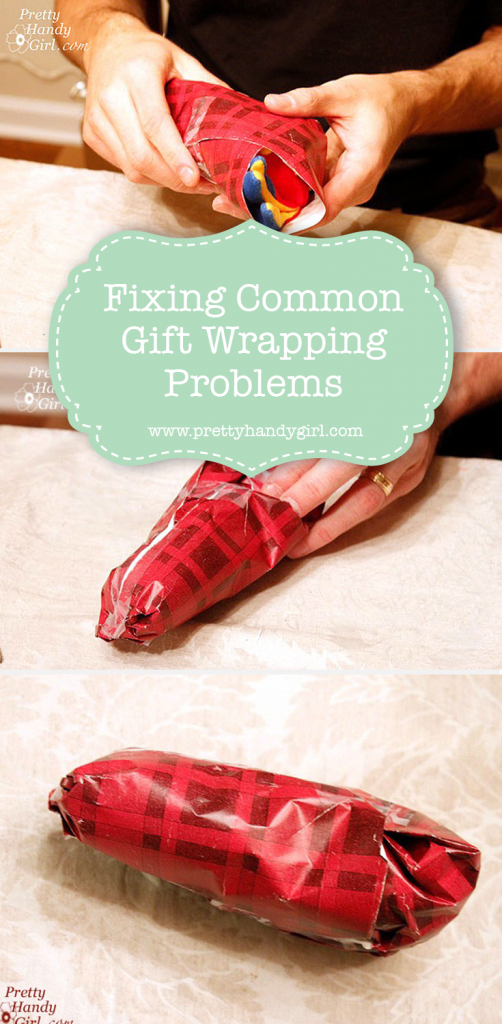
Do you ever end up with a present that hangs out of the wrapping paper?

Fixing Common Gift Wrap Problems | OMG! So funny, you have to read this. | Pretty Handy Girl

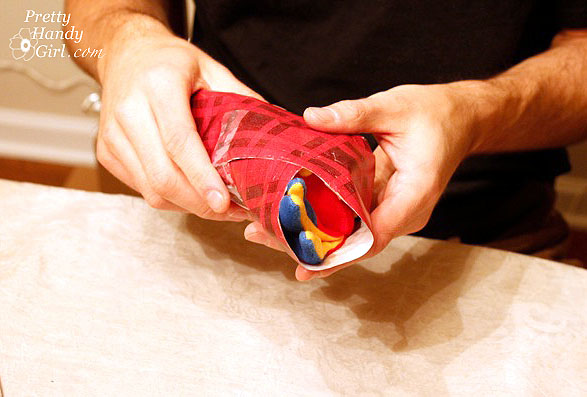
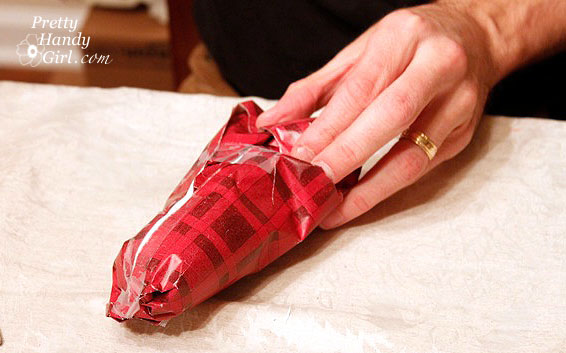
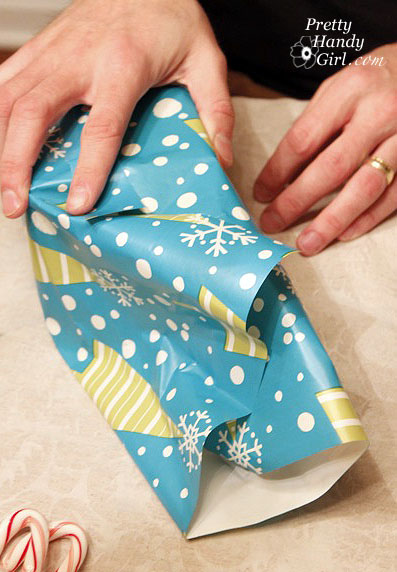
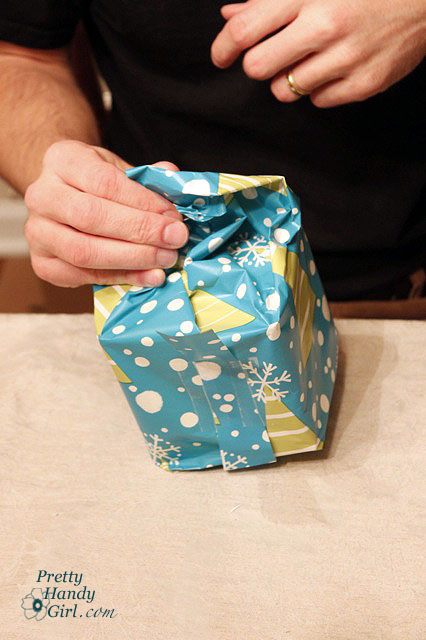
No problem, simply squish the gift inside the packaging as far as you can…

Fixing Common Gift Wrap Problems | OMG! So funny, you have to read this. | Pretty Handy Girl

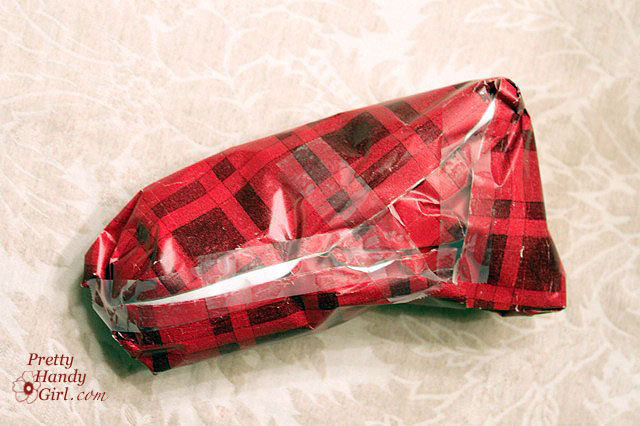
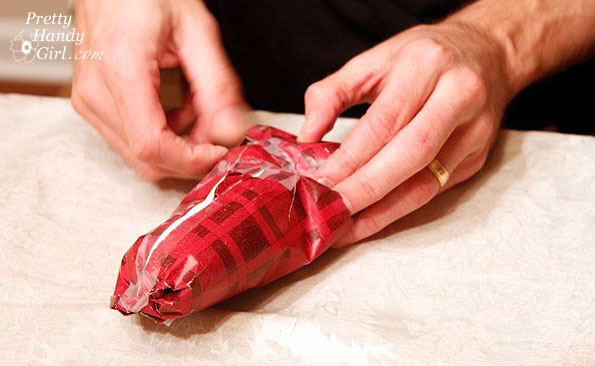
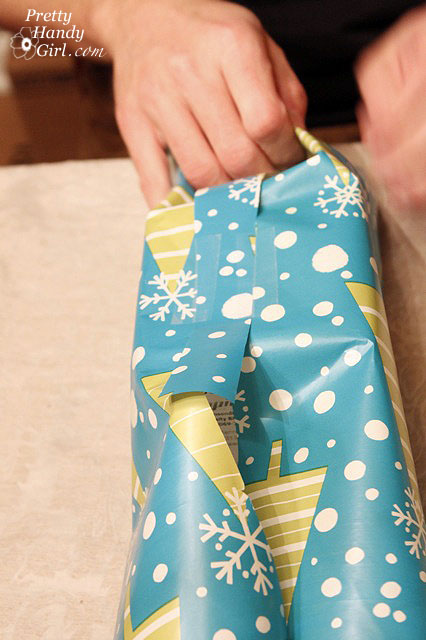
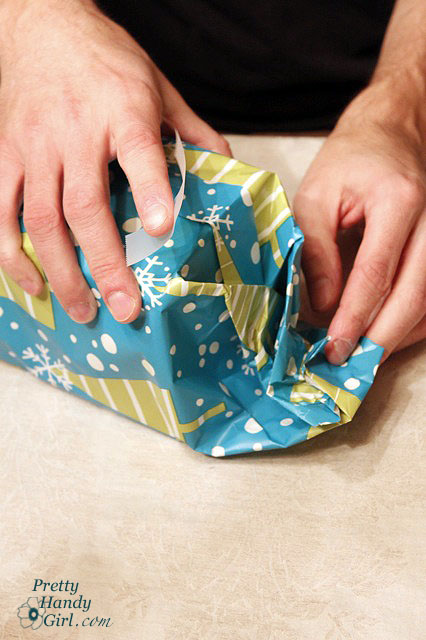
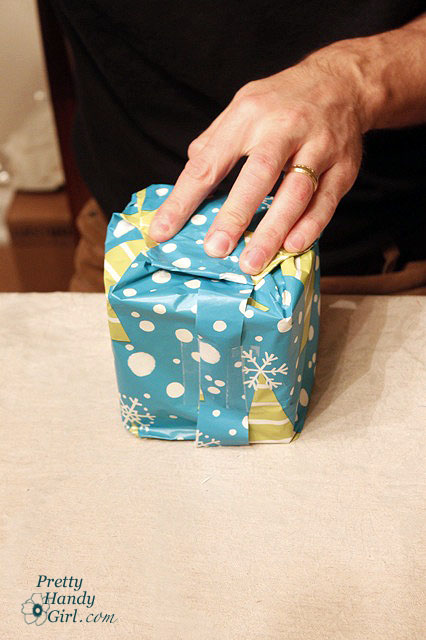
…and quickly fold over the end and slap on some tape. Then use some more tape to close the gaps,

Fixing Common Gift Wrap Problems | OMG! So funny, you have to read this. | Pretty Handy Girl

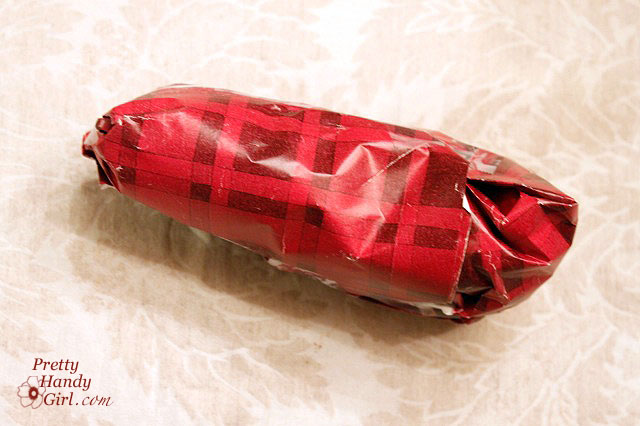
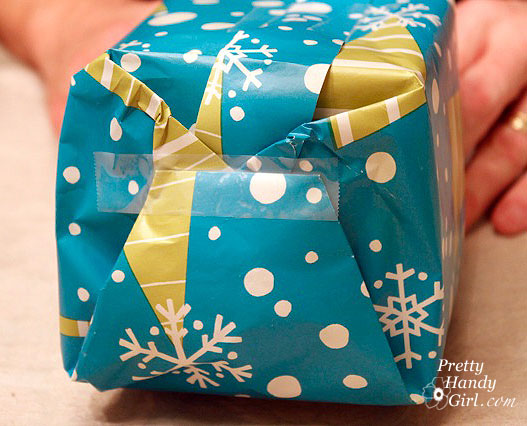
and just for good measure add some more tape. Hey, tape is cheap, no need to be stingy with it!

Fixing Common Gift Wrap Problems | OMG! So funny, you have to read this. | Pretty Handy Girl

All done, and the goal of hiding the present has been achieved!

The Panel (not to be confused with the type of pants pregnant women wear.)

Fixing Common Gift Wrap Problems | OMG! So funny, you have to read this. | Pretty Handy Girl

How many times have you cut your wrapping paper only to realize that it is too short to go around the package? When it comes to wrapping presents I adhere to the adage “measure never, just cut it”.  I mean seriously people we aren’t building a house here, what you are wrapping is meant to be destroyed anyways.

Fixing Common Gift Wrap Problems | OMG! So funny, you have to read this. | Pretty Handy Girl

Here is the solution! It is called the panel. Simply cut another piece of wrapping paper the width of the gap (or maybe a little wider.)

Fixing Common Gift Wrap Problems | OMG! So funny, you have to read this. | Pretty Handy Girl

Tape it on (no need to match up the pattern, no one will see the bottom when it is under the tree.). Bonus points if you can manage to use 2-3 different types of wrapping paper – just tell everyone it is a “holiday medley”.

Fixing Common Gift Wrap Problems | OMG! So funny, you have to read this. | Pretty Handy Girl

Super easy solution and the best part is that you don’t have to go back and cut a whole new piece of wrapping paper.  The environment will thank you for this one.

The Nip, Tuck & Roll

Now we are down to one of the most common wrapping problems. What to do when you have too much wrapping paper on the ends of your package.  And yes I realize most of these “problems” are a function of not measuring in the first place but whatever.

Fixing Common Gift Wrap Problems | OMG! So funny, you have to read this. | Pretty Handy Girl

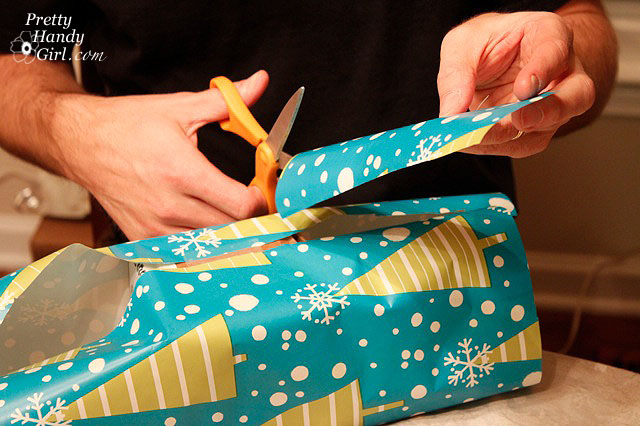
Normally I would simply roll the sides in until they meet the package, but in an effort to neaten things up a bit, you can simply gather the end in your hands and snip off the excess.

Now simply fold in the end towards the box.
Fixing Common Gift Wrap Problems | OMG! So funny, you have to read this. | Pretty Handy Girl
Continue to roll the paper in…

…until you reach the box, then smash the end down with your hand to flatten it.

Fixing Common Gift Wrap Problems | OMG! So funny, you have to read this. | Pretty Handy Girl
And tape your end down.
Fixing Common Gift Wrap Problems | OMG! So funny, you have to read this. | Pretty Handy Girl
Done. Problem solved, any questions?
Adding a Gift Tag (bet you’ve never seen it done this way!)
Fixing Common Gift Wrap Problems | OMG! So funny, you have to read this. | Pretty Handy Girl
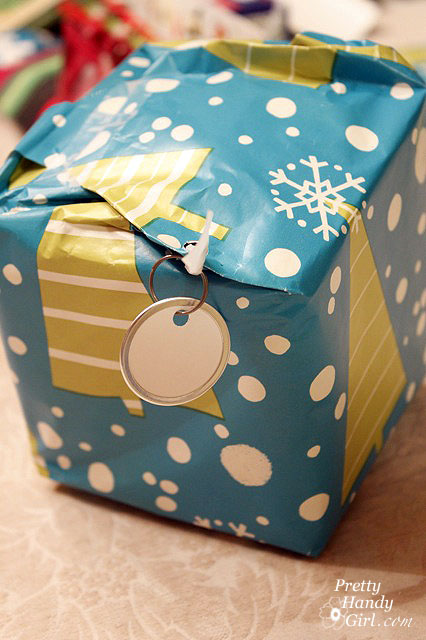
I found the little key tags that Brittany bought for tagging her presents. Creative idea and all but sheesh a lot more work than a stick-on “To/From” tag.  But I devised a new way to attach them to the gift without ribbon.
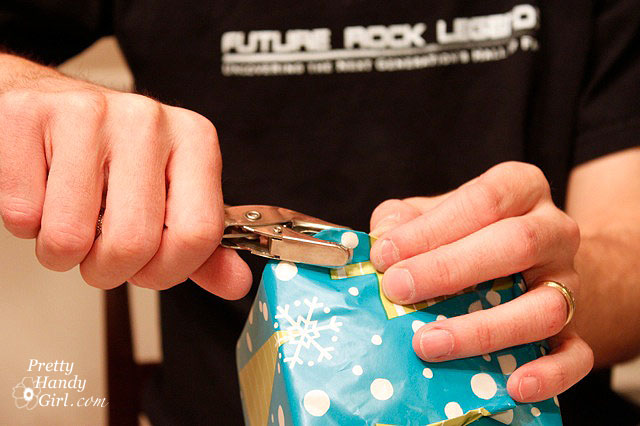
Simply grasp a corner of your package and use a hole punch to make a hole in the gift wrap.
Fixing Common Gift Wrap Problems | OMG! So funny, you have to read this. | Pretty Handy Girl

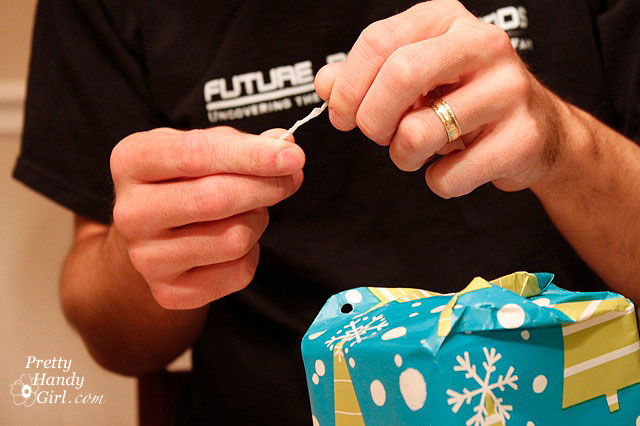
Then take a piece of tape and twist it into what I call a “tapepick” (looks like a toothpick.)

Fixing Common Gift Wrap Problems | OMG! So funny, you have to read this. | Pretty Handy Girl
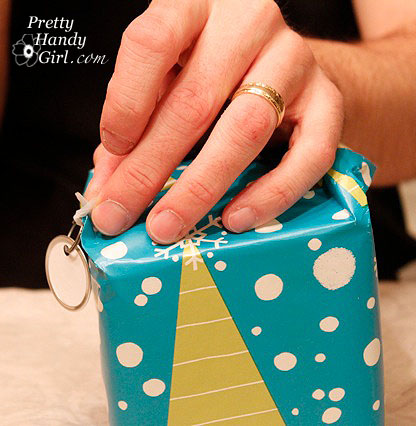
Thread the “tapepick” into the hole you made in your gift wrap.
Fixing Common Gift Wrap Problems | OMG! So funny, you have to read this. | Pretty Handy Girl
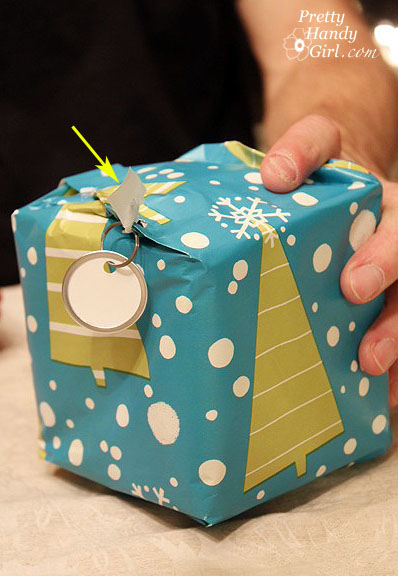
Then grab another piece of tape and fold it over the ends of your tapepick to secure them.
Fixing Common Gift Wrap Problems | OMG! So funny, you have to read this. | Pretty Handy Girl
That’s it. Thanks for reading my post today. Hopefully Brittany will invite me back to show you how I make a bed in less than 10 seconds!
– Pretty Handsome Guy

Pin for later!

how to fix common gift wrapping problems
Easy Peppermint Snowflakes | Pretty Handy Girl

Easy Peppermint Snowflakes | Pretty Handy Girl

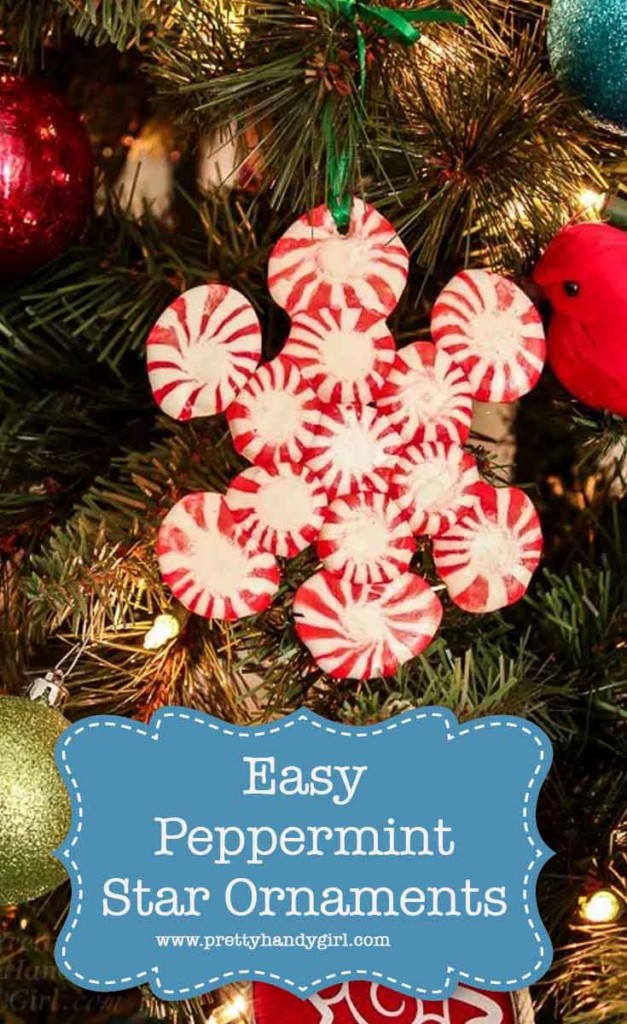
Last year I made these Easy Peppermint Star Ornaments. They were a lot of fun to watch as they melted and fuzed into a snowflake ornament. My son asked if we could make them again this year. Because the kids are officially out of school now, I thought this would be the perfect holiday activity today.

Won’t you join us as we make these Easy Peppermint Star Ornaments?

(I’ve included affiliate links for your convenience. I earn a small percentage from a purchase using these links. There is no additional cost to you. You can read more about affiliate links here.)

Materials:

Directions:

Pre-heat oven to 300ËšF.

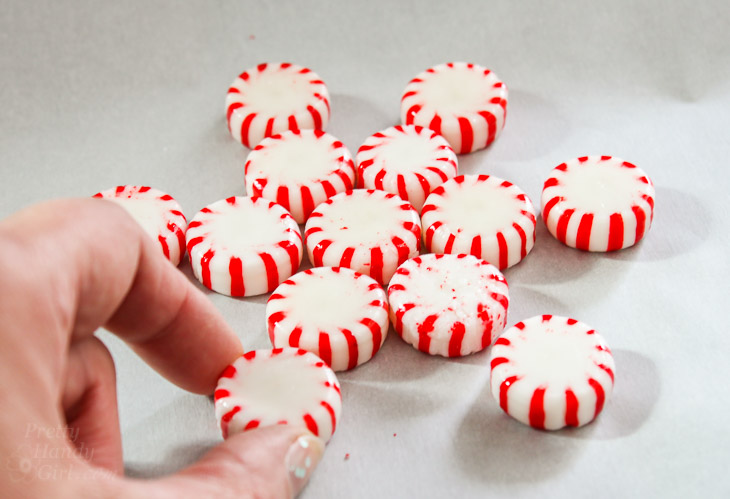
Unwrap the candies. You’ll need 13 candies per star. Lay the peppermints onto a baking sheet covered with parchment paper. Arrange them into a snowflake design:

Easy Peppermint Snowflakes | Pretty Handy Girl

Place the baking sheet into the pre-heated oven. Bake for 8 minutes.

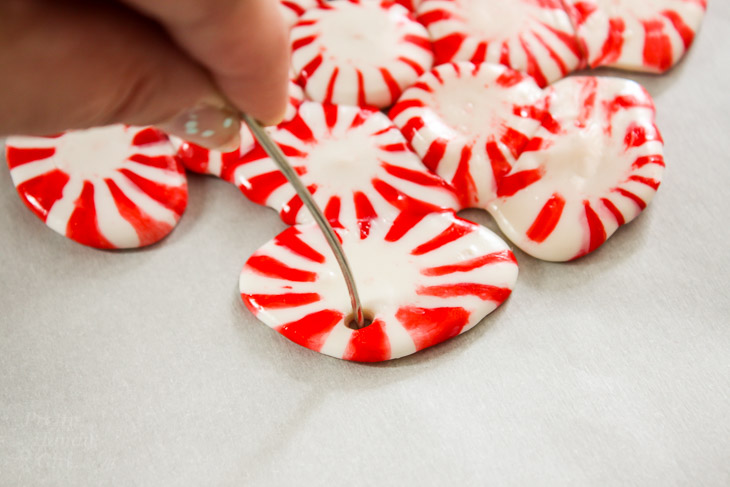
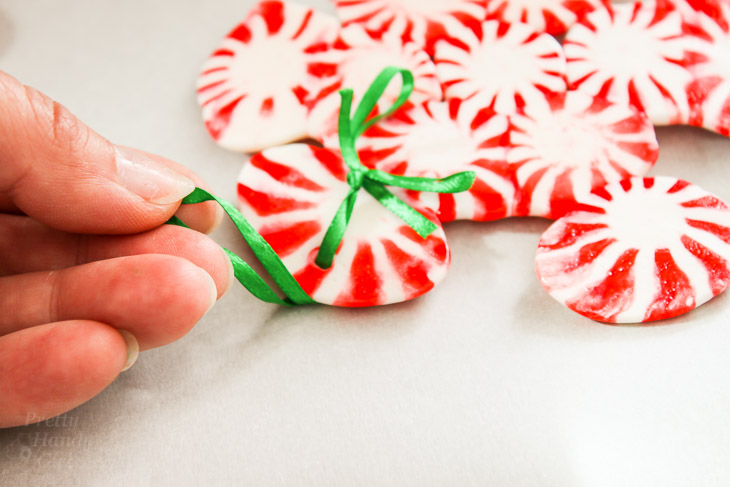
Remove the tray and immediately use a large needle to create a hole in the top of one of the outer points of the snowflake.

Easy Peppermint Snowflakes | Pretty Handy Girl

Allow the peppermints to cool and thread a green ribbon through the hole and tie.

Easy Peppermint Snowflakes | Pretty Handy Girl

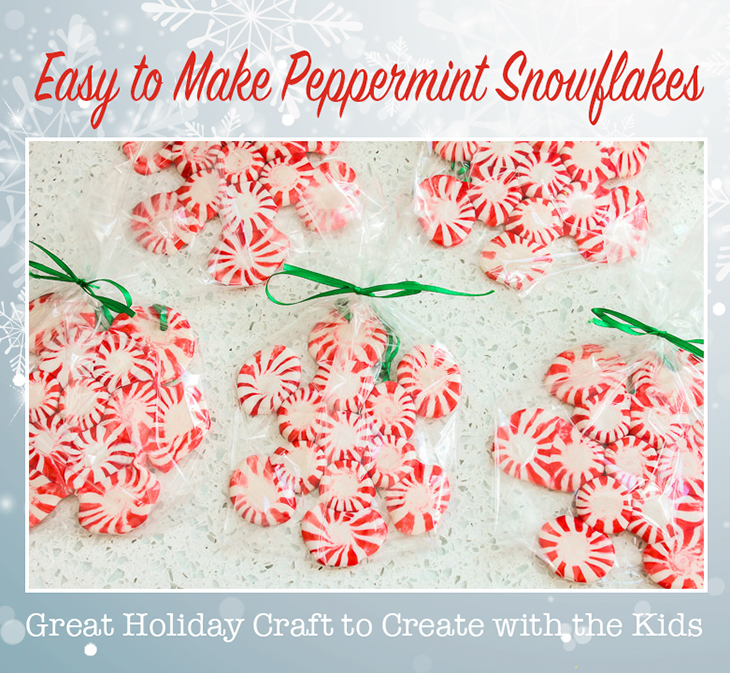
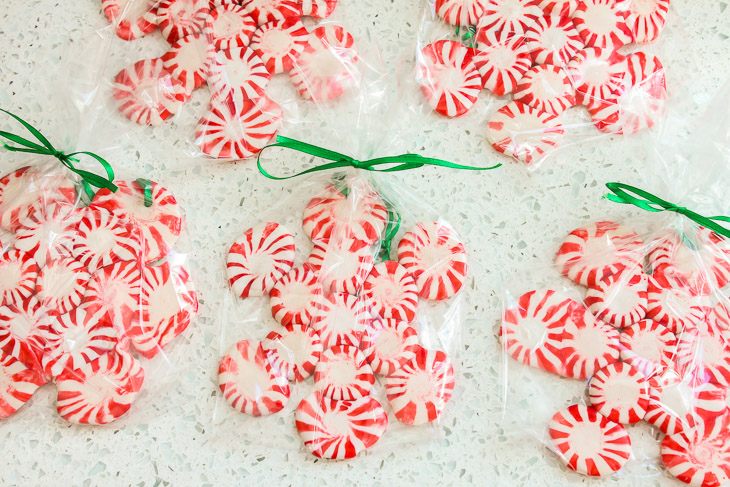
Wrap up the Peppermint Star Ornaments in treat bags and give them to your friends and neighbors!

Easy Peppermint Snowflakes | Pretty Handy Girl

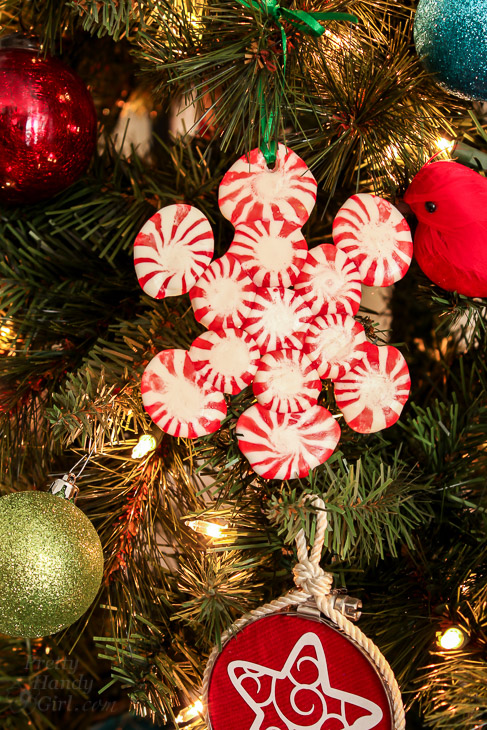
Or hang them on your tree ;-).

Easy Peppermint Snowflakes | Pretty Handy Girl

Here’s the quick video wrap up for how to make Easy Peppermint Star Ornaments:

Be sure to plan on making more than you need. The melting process can create some not so desirable snowflakes, but they still taste good ;-).


Pin for later!

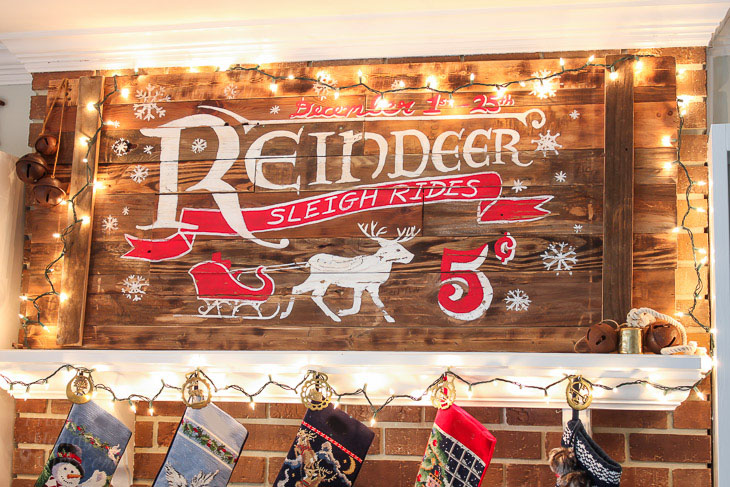
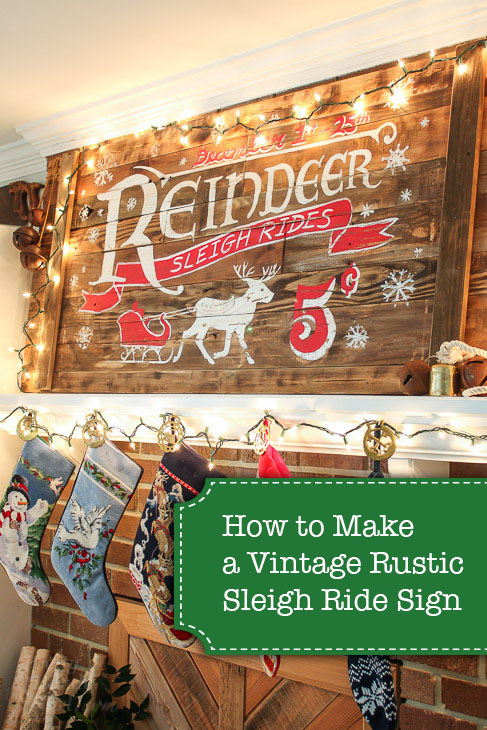
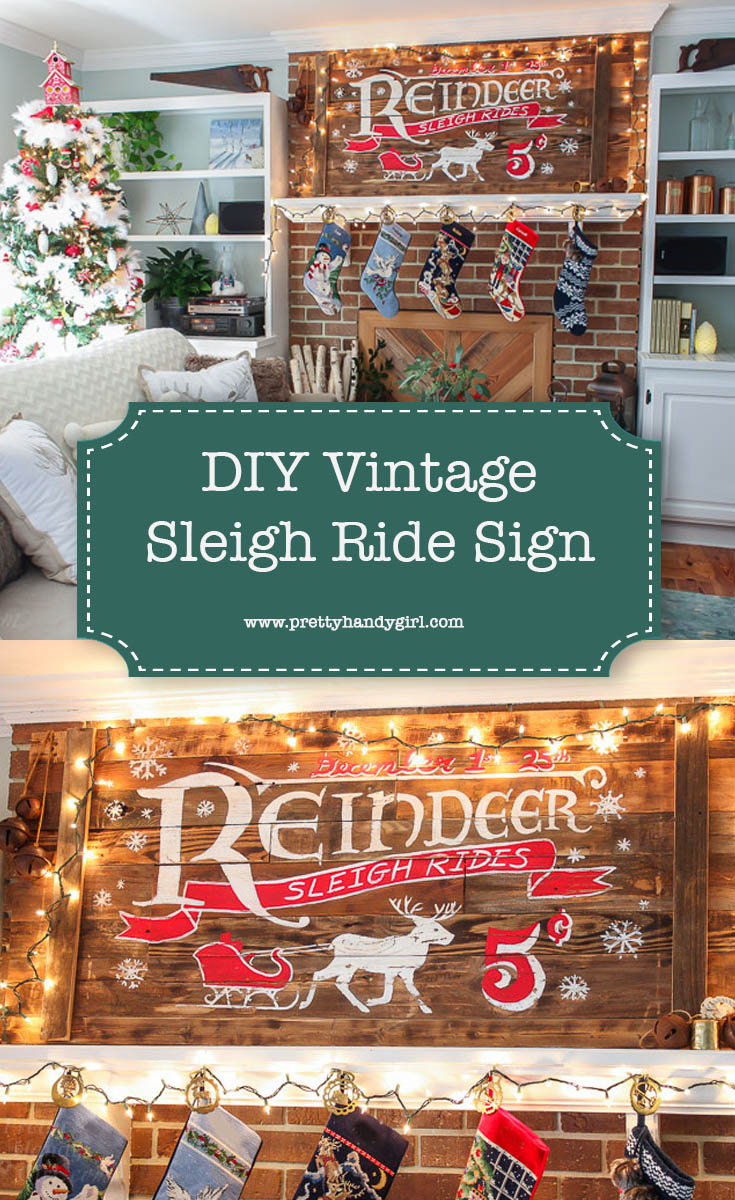
How to Make a Vintage Rustic Sleigh Ride Sign | Pretty Handy Girl How cool! You can use this technique to make or transfer any sign graphic.

How to Make a Vintage Rustic Sleigh Ride Sign | Pretty Handy Girl How cool! You can use this technique to make or transfer any sign graphic.

How to Make a Vintage Rustic Sleigh Ride Sign:

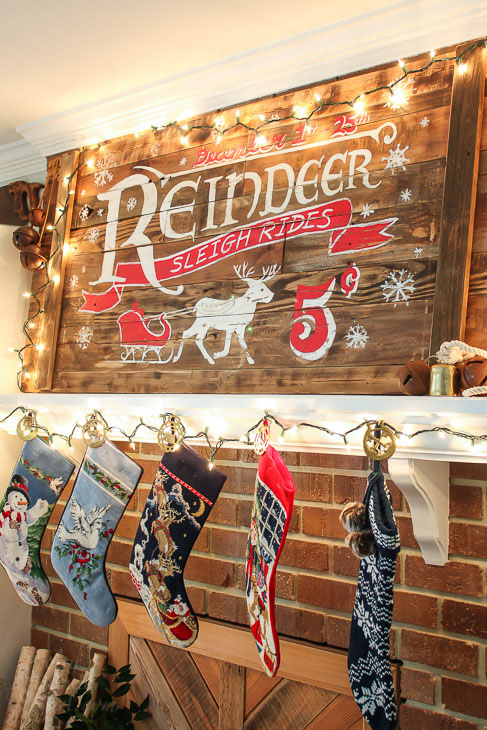
You guys, I’m super excited about this Vintage Rustic Sleigh Ride Sign I made using scraps from my workshop. This sign turned out 200 times better than I imagined in my head. I knew I had to share the tutorial with you so you can make your own vintage signs for any holiday! Let’s get this party started.

Sign:

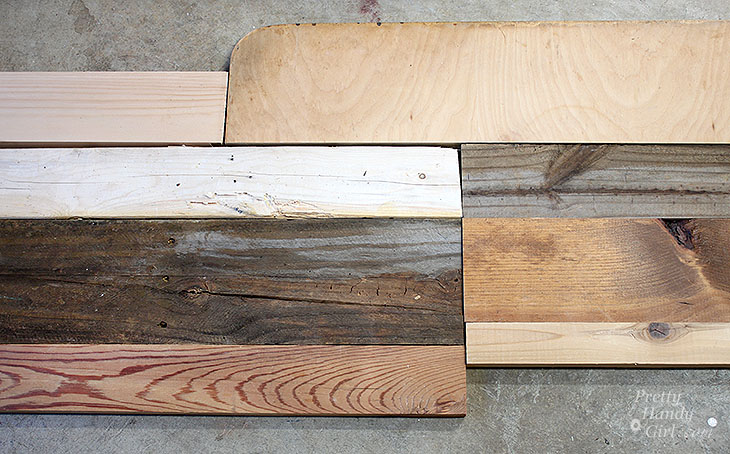
First I suggest measuring the space where you want to hang your sign (it would suck to build it too large or too small.) Begin laying out your scrap wood. It’s best to line up the same width boards along each row. If you need to, you can rip down scraps on a table saw.

scrap-layouts

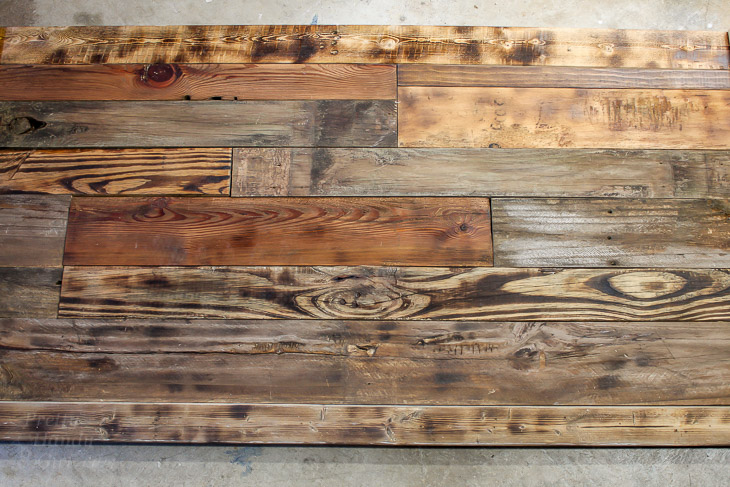
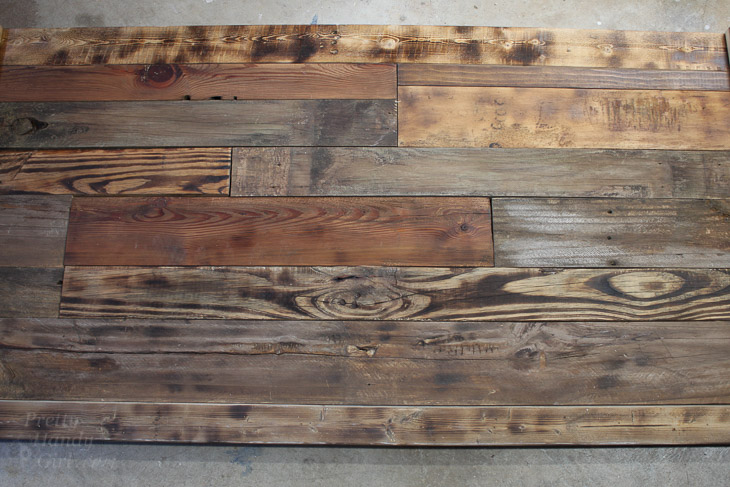
Once you have the scraps laid out, add any stain or paint if you desire. I added a combination of glaze, stain and burned some boards to give them a similar color value but still let them look unique.

scrap-wood-assembled-2

Supports:

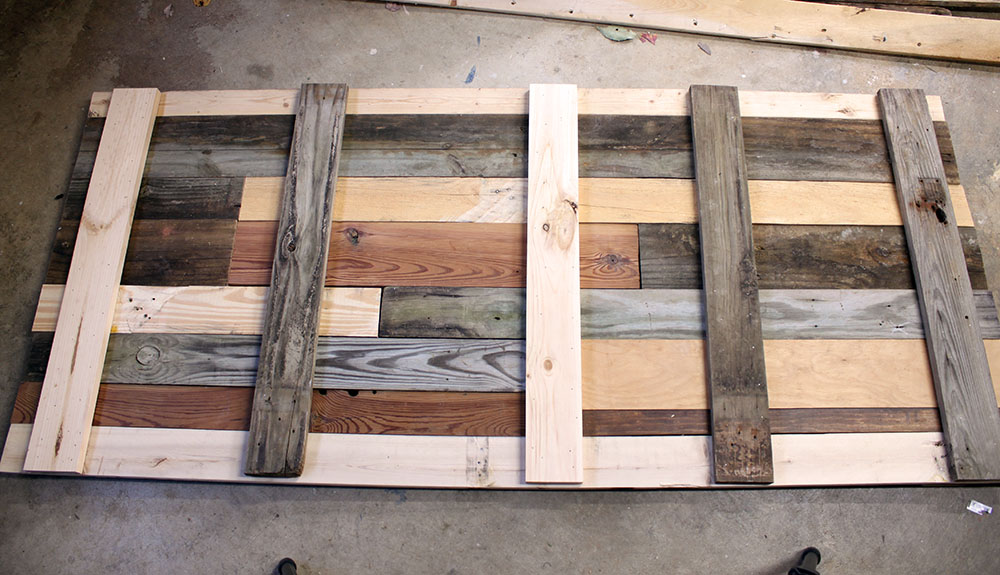
The key to building a sign with lots of scrap wood is to space your supports well. Each board should have two vertical support pieces on the back, unless the board is really short. You might be able to get away with just one support for those shorties.

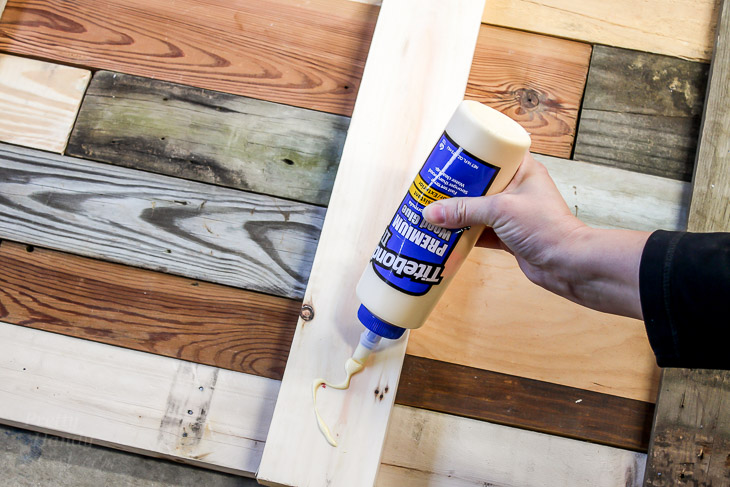
Cut 1″ x 4″ boards to the height of your sign. Flip the scraps over and glue each support board.

add-back-support-boards-wood-glue-4

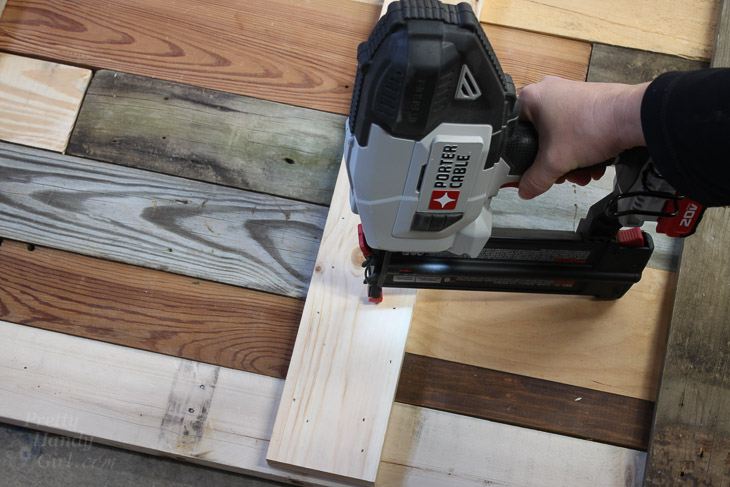
Nail each support board 3-4 times to each scrap.

secure-supports-finish-supports-6

I ended up using 5 supports for my sign.

scrap-wood-sign-support

Allow the glue to dry. Flip your sign over and make sure the scrap boards are well secured.

scrap-woods-layout-2

Transferring the Image:

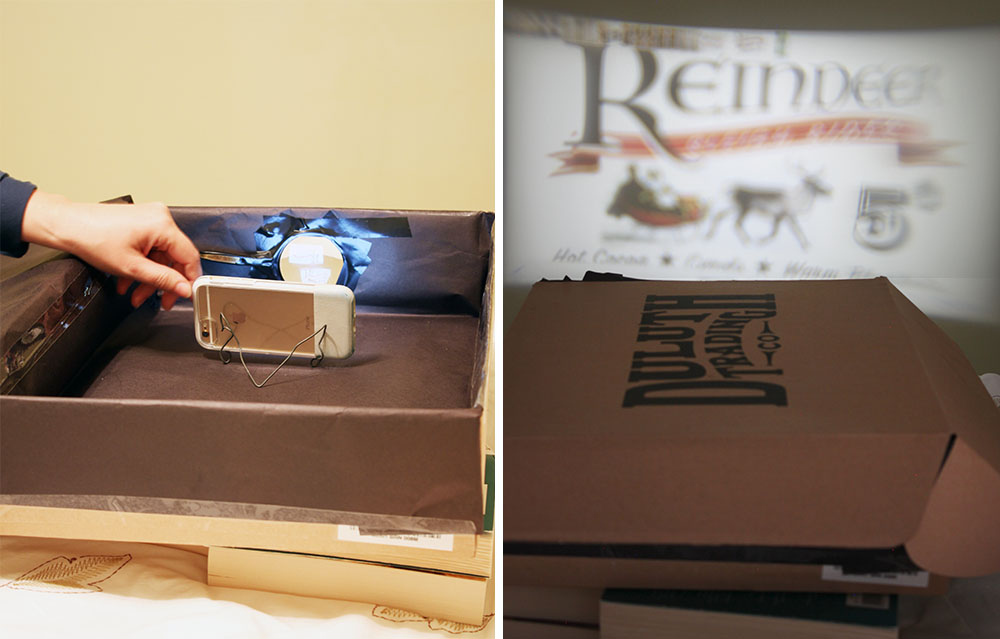
Now it’s time to have some fun. I made a shoebox projector by following the directions in this video:

I created a basic sketch for the sign. (You are welcome to use this image, but please use for personal use only. Do not resell products with this image on it. And please be sure to credit and link back to this post if you use my image and blog about it.)

How to Make a Vintage Rustic Sleigh Ride Sign | Pretty Handy Girl How cool! You can use this technique to make or transfer any sign graphic.

For your convenience, this image has already been flipped and reversed for projecting it in the shoebox projector.How to Make a Vintage Rustic Sleigh Ride Sign | Pretty Handy Girl How cool! You can use this technique to make or transfer any sign graphic.

Send the image to your phone. Insert the phone into the shoebox. (The brightness has to be turned all the way up and you might want to change the display setting to stay lit longer.) Turn the lights out. Move the shoe box back and forth until you have the image sized as large as you want. Then move your phone forward and back to focus.

shoebox-projector

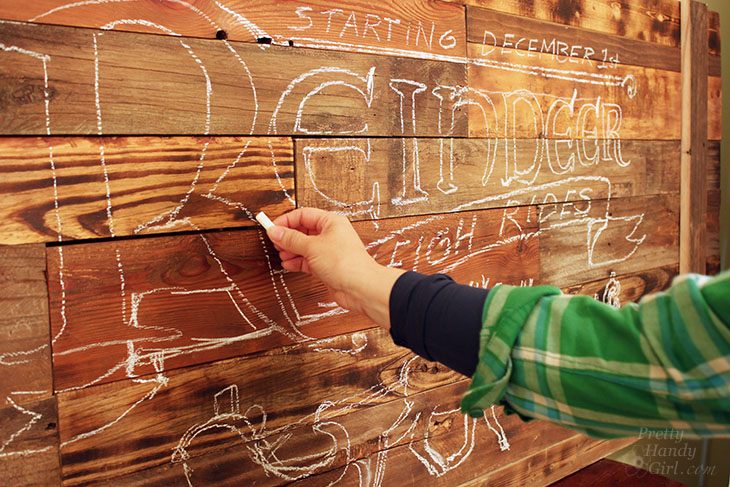
I will say that my image isn’t as clear as I expected, but my magnifying glass is old and scratched up. However, it gave me enough information to trace my image. Use chalk to trace around the design.

chalk-outline-sign-image

Painting Your Sign:

Now you’re ready to paint your sign. It’s not hard at all, think of it like coloring in the lines of a coloring book. Here’s my video tutorial to help you learn all my tips and tricks while painting signs:

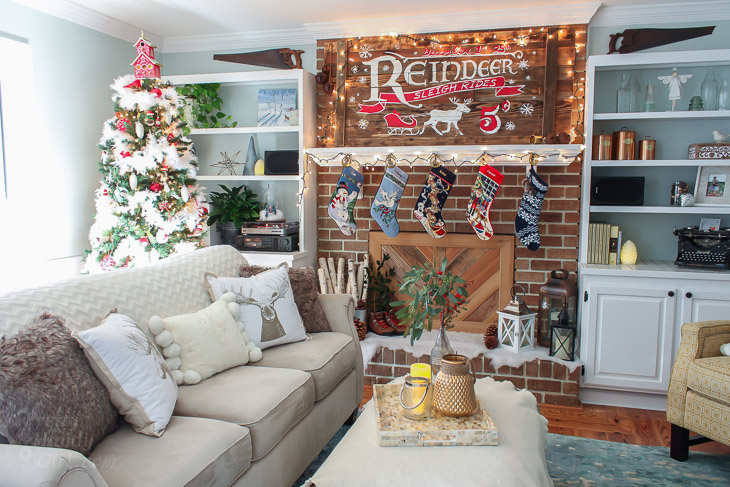
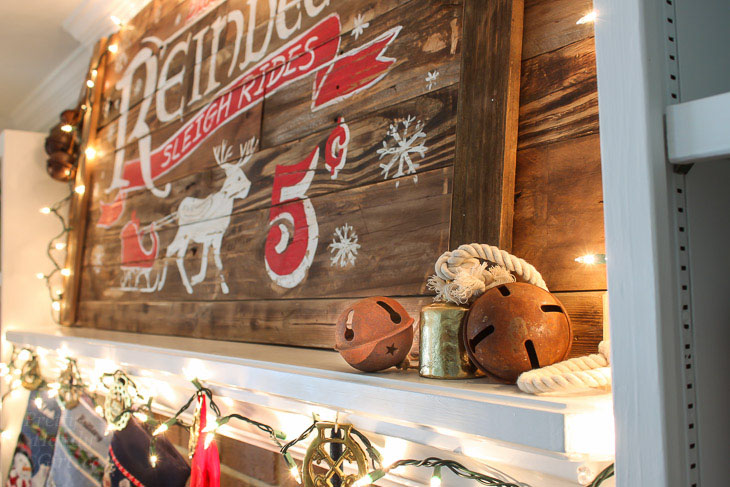
All done? Great! Hang your “new” Vintage Rustic Sleigh Ride Sign with pride.

Holiday Home Tour 2016 | Pretty Handy Girl

I won’t let on that you just made it. Let’s let everyone think we scored this fun sleigh ride sign at an antique shop. 😉

Holiday Home Tour 2016 | Pretty Handy Girl

Holiday Home Tour 2016 | Pretty Handy Girl

Where are you going to hang your vintage rustic sign? I think I’m going to make another one for our kitchen. Maybe a market sign with a pig silhouette?

Holiday Home Tour 2016 | Pretty Handy Girl

Hope you are enjoying the holidays!

PHGFancySign


Pin for later!

Add vintage charm to your holiday home with this DIY Reindeer Sleigh Sign | Pretty Handy Girl #DIYholiday #holidayhome #holidaysign

Galvanized Metal Tree Form | Pretty Handy Girl

Galvanized Metal Cone Tree | Pretty Handy Girl

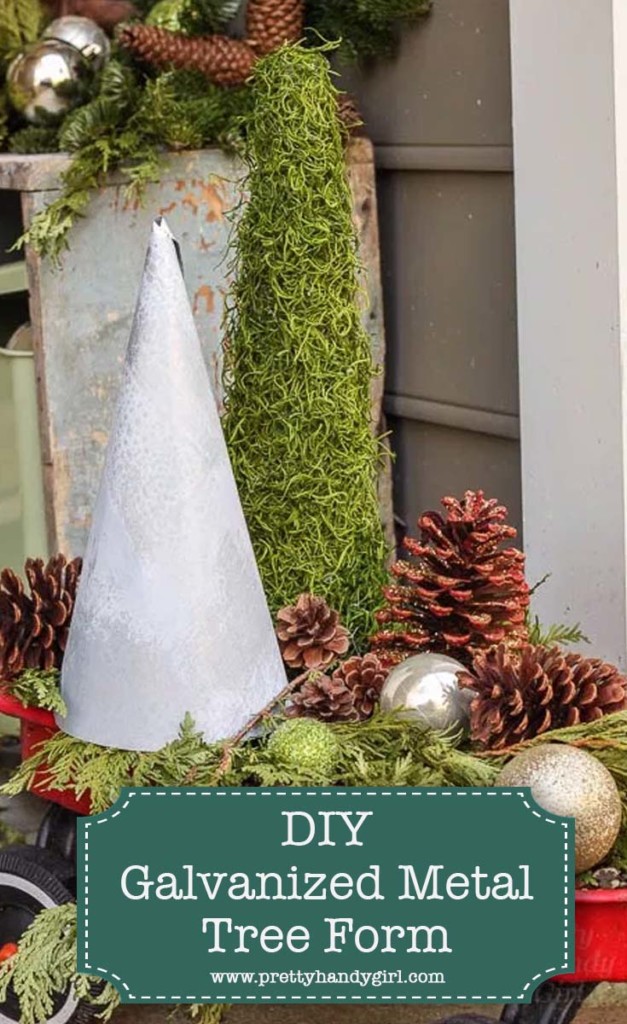
Want to make a super cute and fast galvanized tree form? This little galvanized tree will fit in with some of your holiday vignettes, especially if you like the rustic look.

Rustic Metal Magnetic Window Frame | Pretty Handy Girl

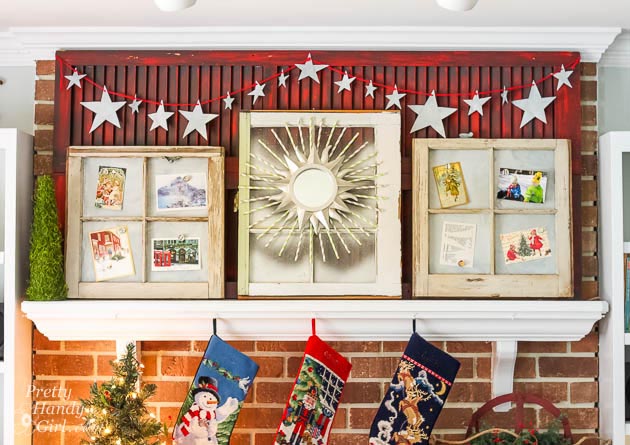
Last year I had fun playing with DIY galvanized metal (otherwise known as aged quickly sheet metal). I made these cute galvanized magnetic windows. . .

Galvanized Metal Star Garland | Pretty Handy Girl

. . . and a galvanized star garland.

Galvanized Metal Star Garland | Pretty Handy Girl

After cutting out the star garland, I had some leftover galvanized metal. I decided to use it to make a galvanized tree form. Ready to learn how to make your own?

Materials:
(contains affiliate links)

Instructions:

Put on gloves when working with sheet metal. It’s a sharp material and can easily cut you.

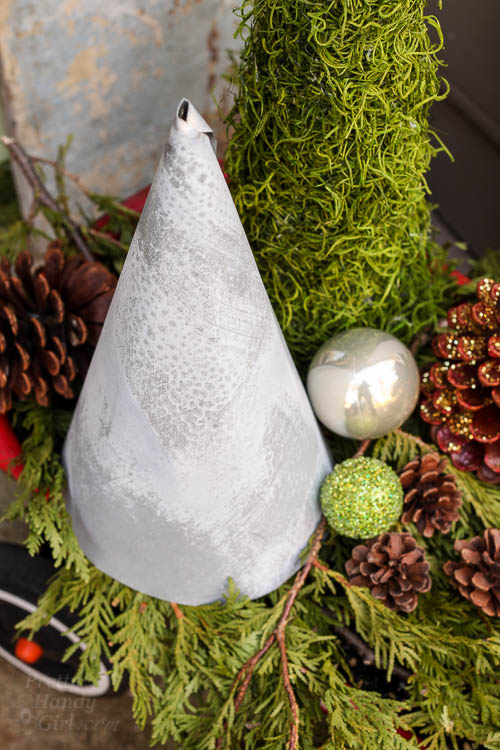
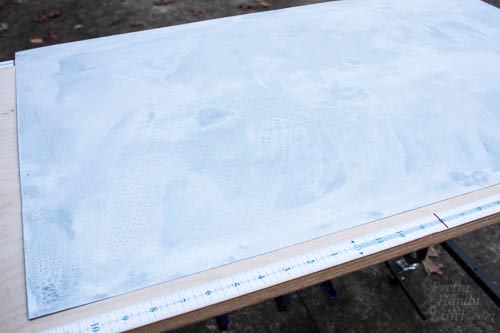
Follow the instructions to age metal quickly in this tutorial. After the metal has aged and dried. Cut off a large corner from the sheet metal material.

Galvanized Metal Cone Tree | Pretty Handy Girl

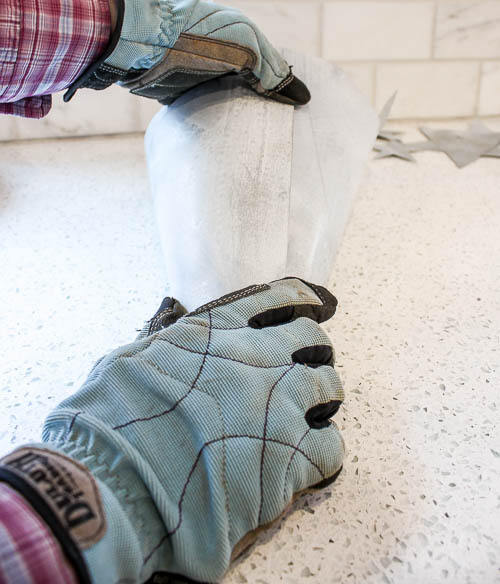
Begin to manipulate the two corner edges rolling in toward each other.

Galvanized Metal Cone Tree | Pretty Handy Girl

Tightly roll the corner into a cone shape. Roll the metal tighter than you want the shape to appear.

Galvanized Metal Cone Tree | Pretty Handy Girl

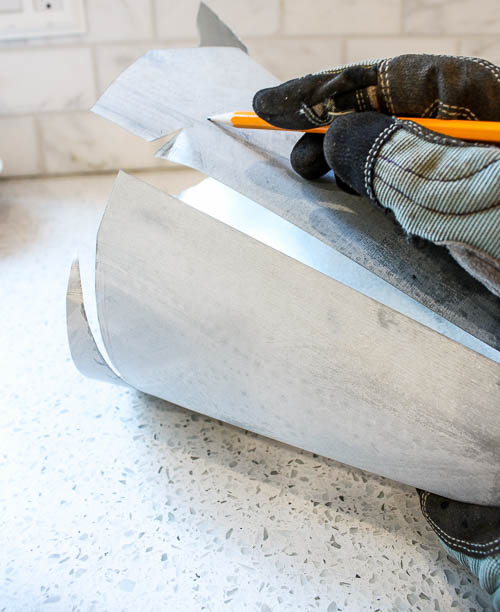
Mark a straight line along the bottom edge of the cone shape to the height you want. Cut along the line with tin snips.

Galvanized Metal Cone Tree | Pretty Handy Girl

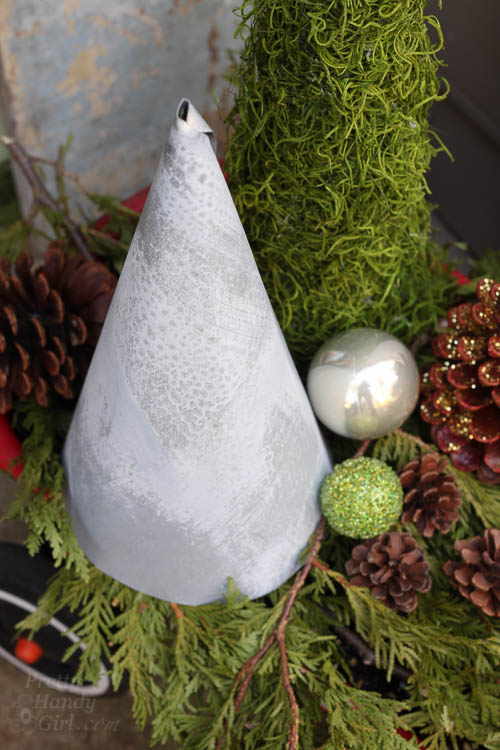
Set your galvanized tree form with a grouping of other tree forms or natural materials and enjoy!

Galvanized Metal Cone Tree | Pretty Handy Girl

Hope you have fun making a whole forest of galvanized trees. 😉

PHGFancySign


Pin for later!