PPG Paint Trends and Demo Event Giveaway | Pretty Handy Girl

PPG Paint Trends and Demo Event Giveaway | Pretty Handy Girl

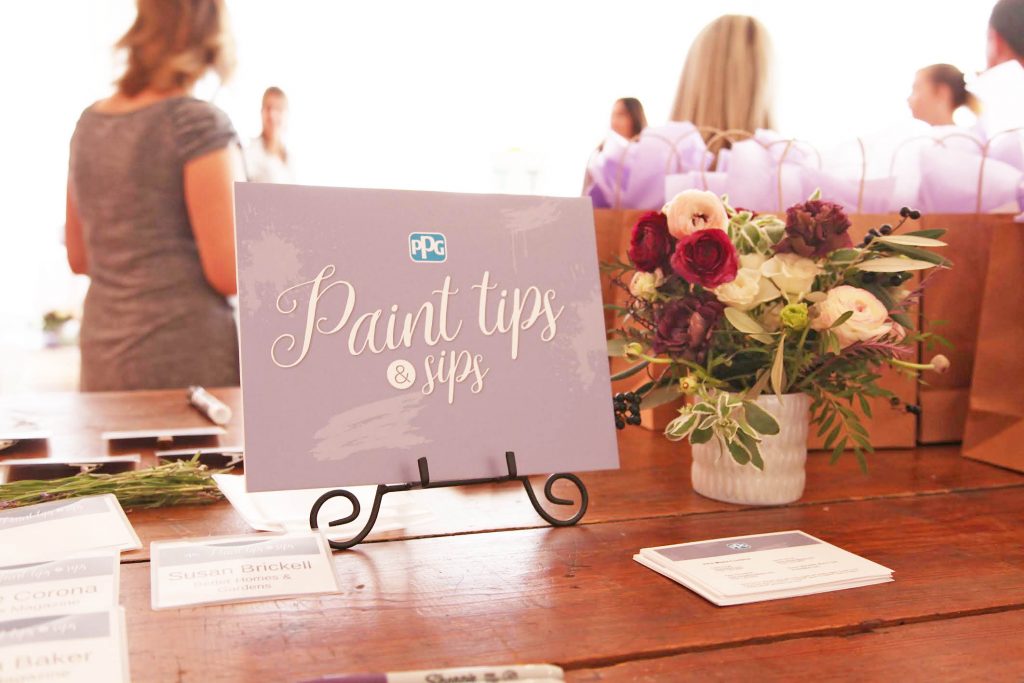
Last month I had the honor to represent PPG, makers of OLYMPIC® Paints & Stains , GLIDDEN® Paint, the LIQUID NAILS® brand and the PPG PAINTS™ brand, at the Paint Tips & Sips media event in New York City. It was an invite-only event for media representatives. This gave me the opportunity to talk one-on-one with several magazine reps. I wish you could have been there, but if you read to the end of this post we have a special giveaway for you!

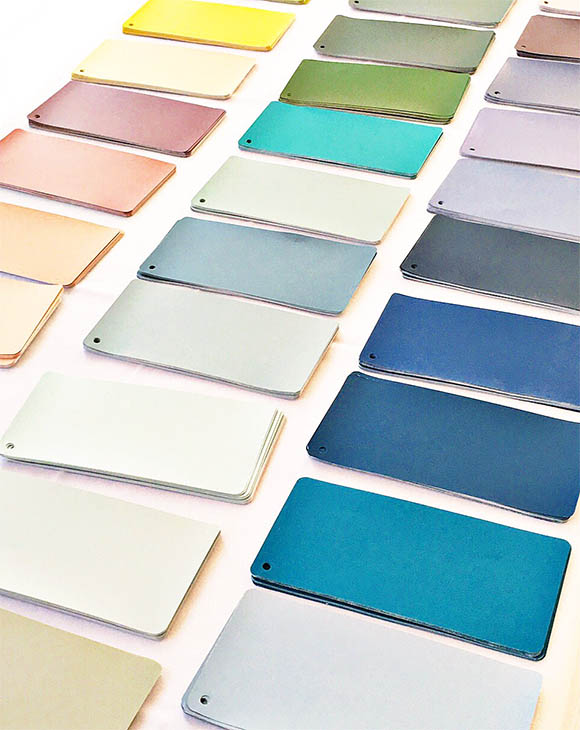
Additional PPG representatives set up tables with information about color trends, including Violet Verbena the color of the year.
PPG Paint Trends and Demo Event Giveaway | Pretty Handy Girl

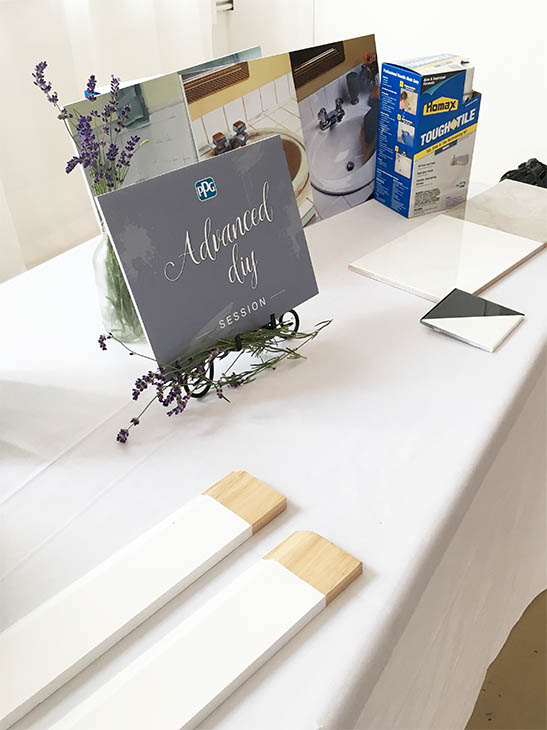
Plus, I was introduced to more PPG products for home renovations and improvements. I discovered some innovative HOMAX® products that will definitely come in handy when I find a flip house:

  • Homax Tough As Tile® Tub & Sink Refinishing Kit Epoxy Finish has a spray tip for easier application, improved whiteness, faster drying time and superior flow and level for a beautiful finished result. 
  • The Homax Brand Pro Grade Wall Texture with Dual Controlâ„¢ technology has adjustable pattern and pressure features. Plus, ultra-fast dry results with an advanced lower odor.

The Homax products are available at The Home Depot, Lowe’s, Walmart, Menards, PPG Paints stores and independent retailers.
PPG Paint Trends and Demo Event Giveaway | Pretty Handy Girl

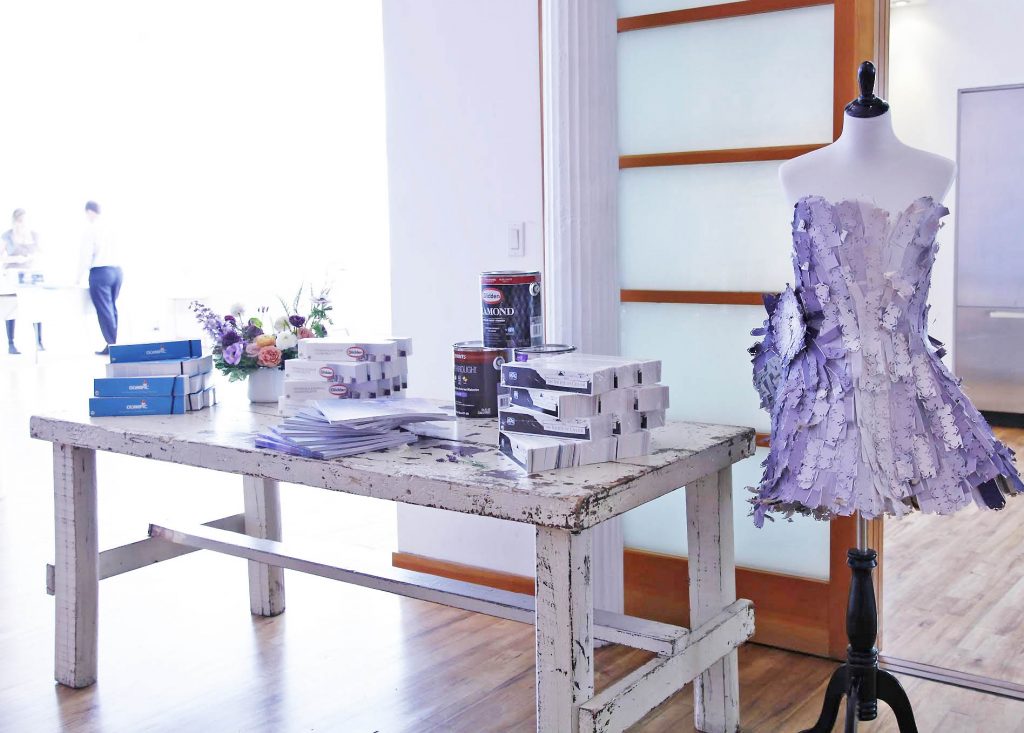
Can I just say how cute this paint chip dress is? If I were back in high school I’d love to make my own prom dress. So fun!
PPG Paint Trends and Demo Event Giveaway | Pretty Handy Girl

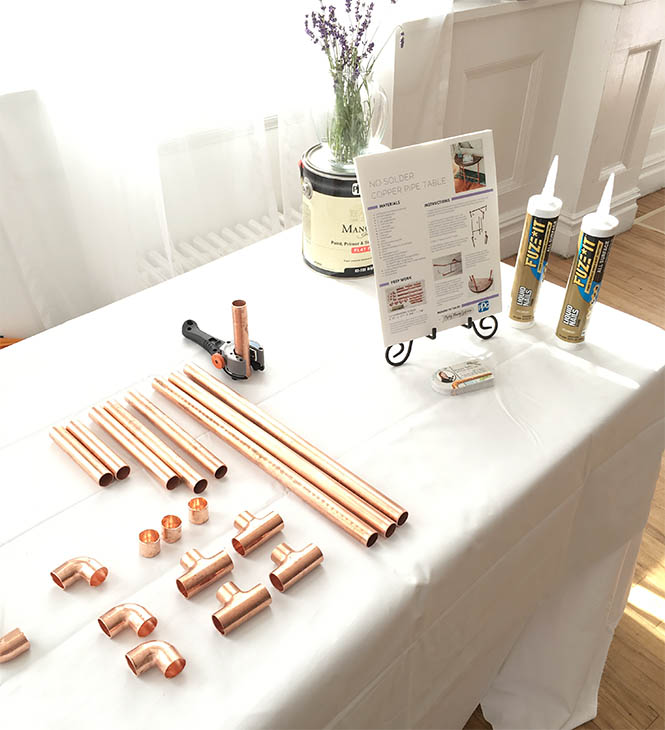
I gave a little demonstration on painting and building a half round wood and copper table using Liquid Nails FUZE*IT®. FUZE*IT® All Surface Construction Adhesive has two times the strength of fasteners alone and bonds nearly all materials in any weather conditions. It’s available at a variety of home improvement retailers
PPG Paint Trends and Demo Event Giveaway | Pretty Handy Girl

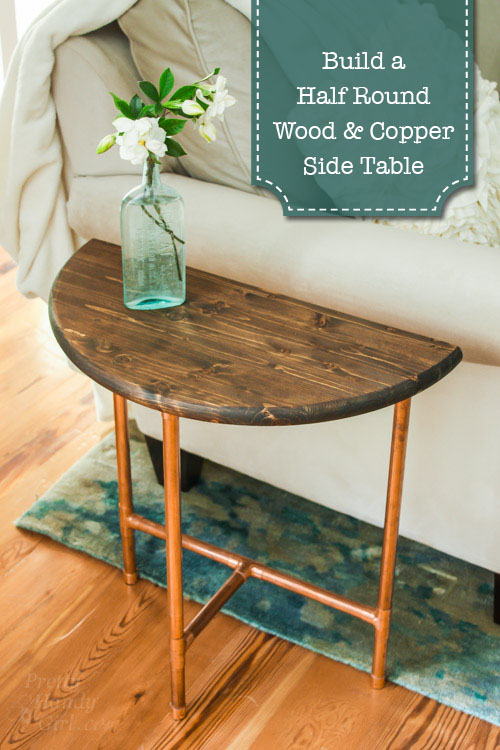
You may recall my tutorial to build the half round wood & copper side table. It was the same table with a twist!
Half Round Copper & Wood Side Table | Pretty Handy Girl

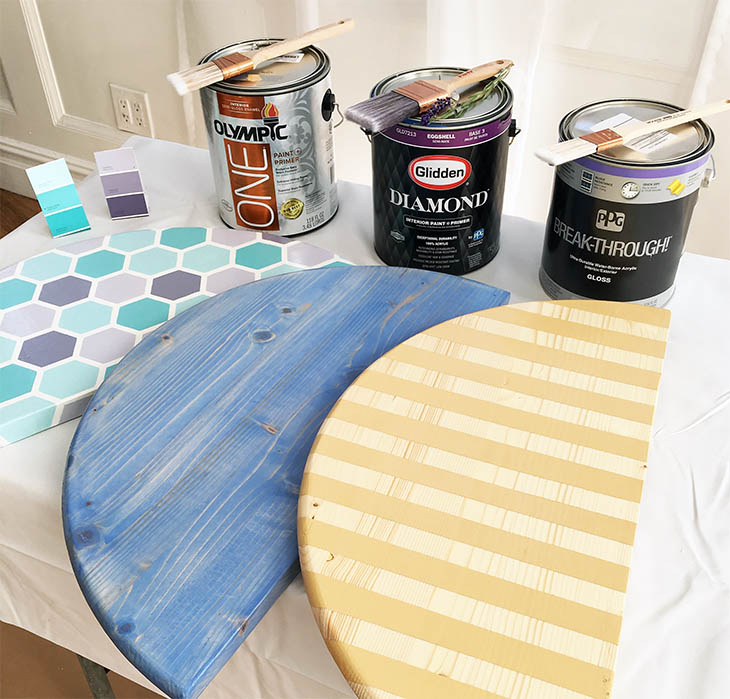
The twist was being able to experiment with different styles for the table top. (More on how I created the tops later.)
PPG Paint Trends and Demo Event Giveaway | Pretty Handy Girl

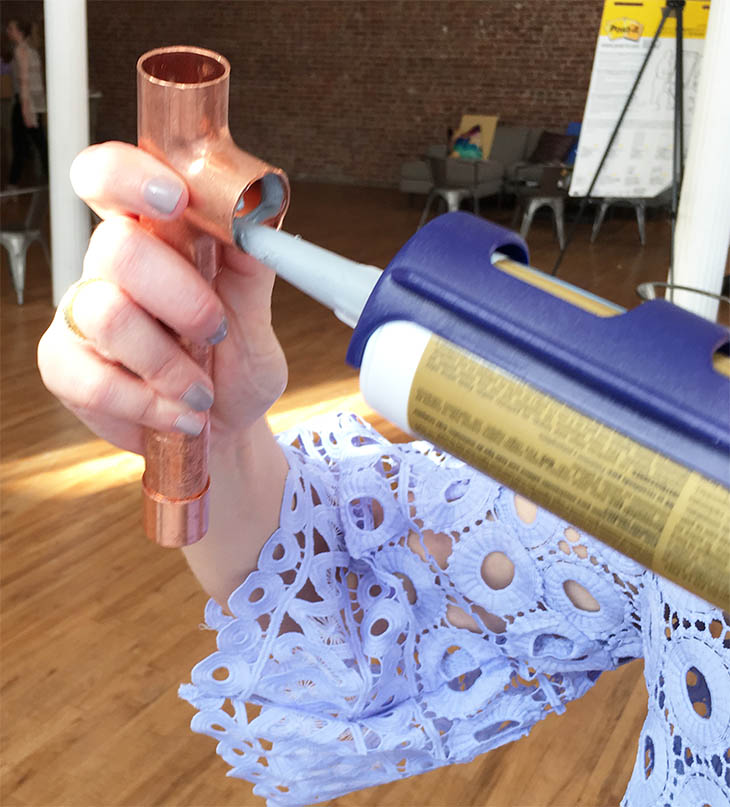
If you’ve ever been present at one of my demonstrations, you probably got your hands dirty. This event was no different. I enjoyed making the ladies use the caulk gun to help assemble the copper pipe legs. Nothing beats hands on learning. 😉
PPG Paint Trends and Demo Event Giveaway | Pretty Handy Girl

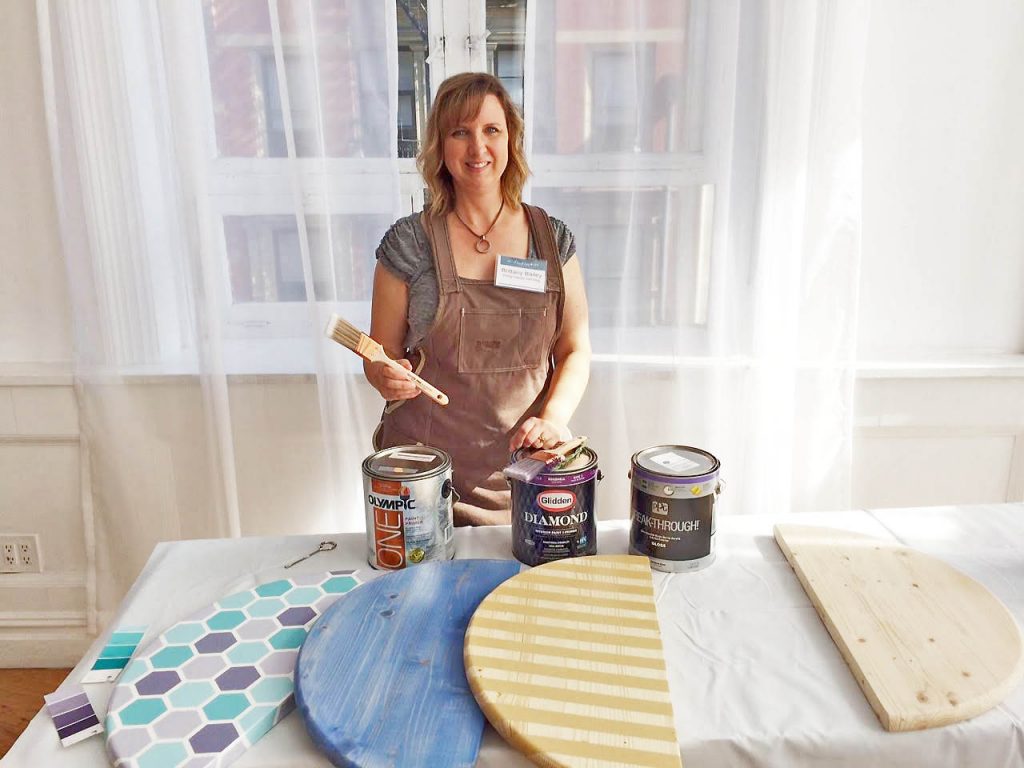
I decided it would be fun to make four different table tops to show how this little copper pipe table can fit with any decorating style. From the urban cowboy to the trendy tween—I found a look for each one. To customize each table, I experimented with paint techniques using PPG paint color trends:PPG paint color trends: Olympic ONE® in Honey Bunny OL654.3,  Glidden DIAMOND™ in Portuguese Blue, and PPG Paints BREAK-THROUGH!® paint in Violet Verbena PPG1169-5.
PPG Paint Trends and Demo Event Giveaway | Pretty Handy Girl

Ready to see the finished tables? You will be amazed by the different styles!

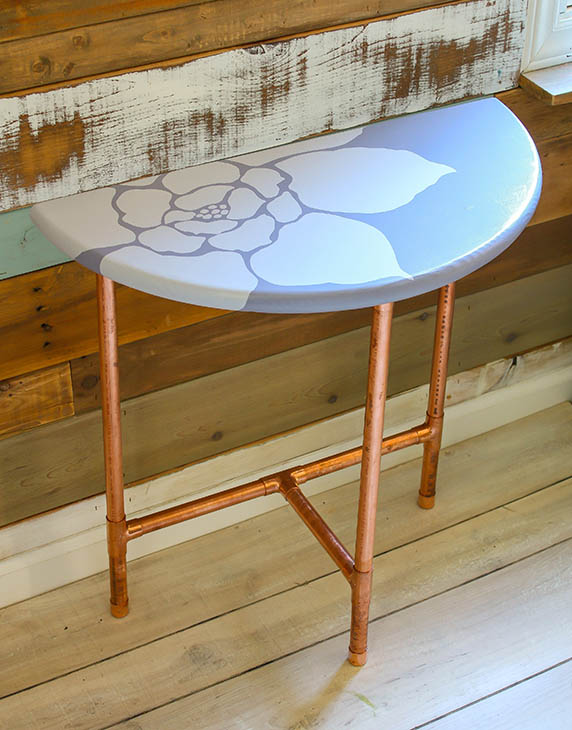
This sophisticated floral table features PPG Paints Break-Through! paint in Violet Verbena PPG1169-5:
Half Round Copper Table Giveaway | Pretty Handy Girl

To re-create the look, you’ll need:

Paint the table top with the Seal Grip Primer. Let dry. Paint two coats of PPG Paint in Violet Verbena. Let dry. This won’t take long because PPG Breakthrough Paint dries to the touch much faster than other latex paints. The Breakthrough paint also has flexibility to resist cracking and peeling.

Draw a floral design with chalk. Paint in the design with the lightened version of Violet Verbena. Let dry and touch up any areas that might need more paint. No need to seal this table top. The Breakthrough paint will resist water and anything life can dish out.

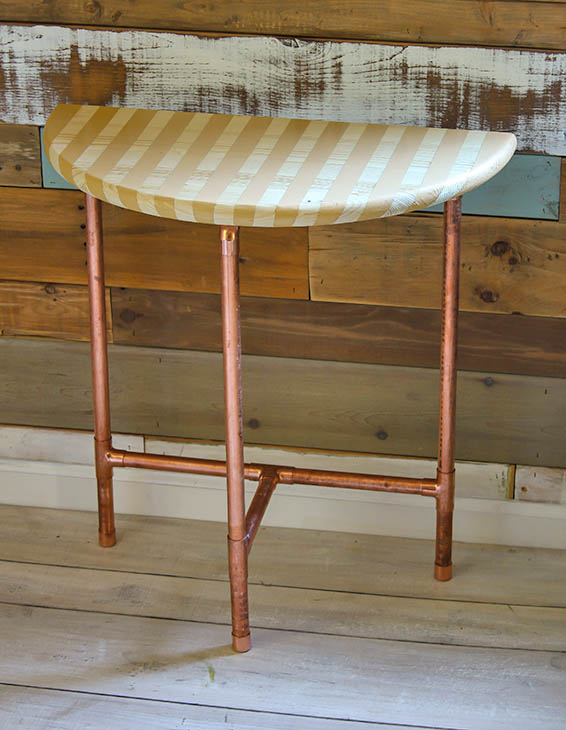
This striped beauty features Olympic ONE in Honey Bunny OL654.3:
Half Round Copper Table Giveaway | Pretty Handy Girl

I love the warm neutral color of Honey Bunny and how it blends nicely with raw wood. To recreate this table you’ll need:

Measure and mark 1 ½” increments along the straight edge of the table top. Tape off every other section using the painter’s tape. To seal the edges of the painter’s tape, press firmly along the edges with your finger. Then dip your paint brush in Olympic One paint and lightly paint along the edge of the tape (use very little paint for this step.) Let the paint dry a few minutes. Fill in the remainder of the stripes with paint.

After the stripes dry, coat the entire table top with Deft Interior Polyurethane Water Based Acrylic. This will seal the raw wood stripes. If you painted the entire top with Olympic One, no Deft Polyurethane is needed.

This is a quick project because you don’t need to use a primer when you paint with Olympic One paint. Also, the primer would show on the edges of the stripes.

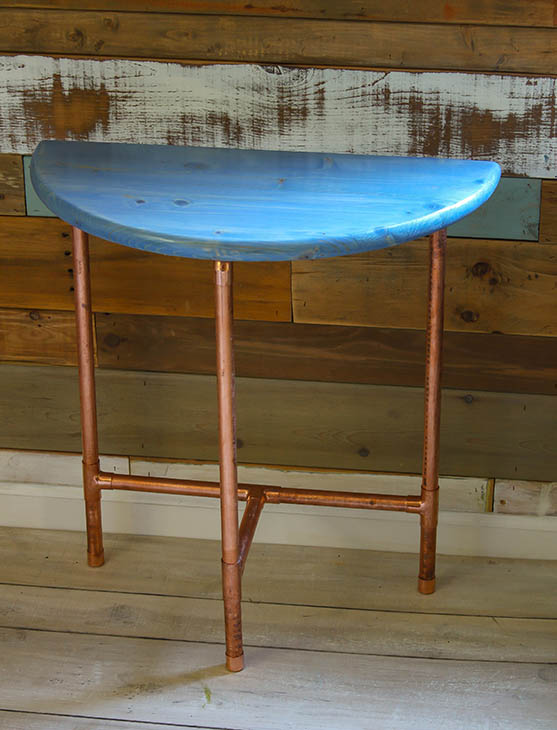
This minimalist blue stained table was created using Glidden Diamond in Portuguese Blue:
Half Round Copper Table Giveaway | Pretty Handy Girl

The blue color-washed table was achieved using a 1:1 watered down version of Glidden Diamond in Portuguese Blue. To re-create this look, you’ll need:

  • Glidden Diamond Paint in Portuguese Blue
  • 2″ Paint Brush
  • Dry Rag
  • Deft Interior Polyurethane Water Based Acrylic

Brush the Glidden Diamond Paint onto the table top (brush strokes should go with the grain.) Immediately wipe the excess off with a dry rag. After the paint dries, seal the table top with Deft Interior Polyurethane Water Based Acrylic. Because the paint was watered down, it’s advisable to use a polyurethane to completely protect the table top. With a full coat of Glidden Diamond, no primer or sealer is needed. The paint sticks perfectly to raw wood.

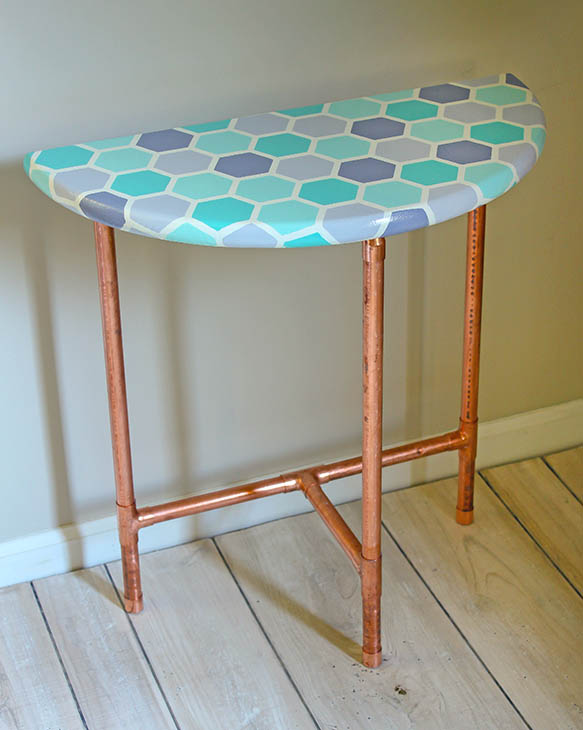
This fun geometric table was created using PPG Paints brand’s Violet Verbena PPG1169-5 and Glidden paint’s Tropical Surf 30BG 72/069:
Half Round Copper Table Giveaway | Pretty Handy Girl

I created the geometric table top by using a hexagon stencil I made on my Cricut vinyl cutter. If you don’t have a vinyl cutter at your disposal, you can purchase a hexagon stencil here.

To re-create this tabletop, you’ll need:

Apply one coat of PPG Seal Grip Acrylic Primer/Sealer.  After the primer dries, paint 1 coat of white paint onto the table top. Let dry. Position the stencil onto the table top. Use a stencil brush (or sponge) to pounce one color randomly into several hexagons. When finished with one color, you should be able to start right away using the next color even if it is next to a painted hexagon. That’s the beauty of the PPG Breakthrough paint. It dries to the touch much faster than other latex paints. Plus, it has a flexible finish that will resist cracking or peeling. Continue filling in hexagons until you’ve filled them all in. Carefully remove the stencil and touch up any mistakes with a small brush. No need to add a protective polyurethane. The PPG Breakthrough paint will resist water, scratches and abusive children.

Here’s a little more information about the paints I used:

PPG PAINTSâ„¢ are available at over 600 PPG Paints stores and thousands of independent retailers

  • The PPG Paints brand introduced the next generation of the <50 grams per liter volatile organic compound (VOC) version of BREAK-THROUGH!® interior and exterior water-borne acrylic paint earlier this year. Break-Through! paint offers a unique and versatile technology that provides excellent adhesion, hardness and block resistance to a variety of residential and commercial surfaces. 

OLYMPIC® Paints & Stains – Available at Lowe’s Home Improvement stores

  • Olympic ONE® Interior and Exterior Paints are engineered for ultimate performance and durability. The high-quality paint and primer in ONE offers easy application, a variety of gorgeous color options and a durable finish that’s easy to keep beautiful.

GLIDDEN® Paint – Available at THE HOME DEPOT®, WALMART® and independent retailers

  • In July 2016, GLIDDEN DIAMONDâ„¢ paint launched exclusively at The Home Depot. A 100 percent acrylic paint + primer, it provides a smooth, beautiful finish with diamond-tough durability that withstands daily wear and tear.

GIVEAWAY TIME!

Do you have a favorite table? Let me know in the comment below because PPG and I decided it would be fun to giveaway these tables to a few of my readers! You have until Monday, December 12th to enter to win one of these fun tables! (See terms and conditions below.)

Good luck!

PHGFancySign

Disclosure: This is a sponsored post for PPG. I was provided with complimentary travel and airfare to attend the event. I was also compensated for my time.  All opinions are my own.

Terms & Conditions: Winners will be selected randomly. Entries must be received by Sunday, December 11th, 2016 at 11:59pm EST. Contest open to Continental US residents only. Must be an adult aged 18 and older. Winner will be notified by Wednesday, December14th via email. Winner must reply to email within 2 days of receiving the notice. Please be sure you have [email protected] as an acceptable email address.
Prizes will be fulfilled by PPG. Pretty Handy Girl cannot be held responsible for prizes that are lost or damaged en route.
DIY Copper Pipe Centerpiece | Pretty Handy Girl

DIY Copper Pipe Centerpiece | Pretty Handy Girl

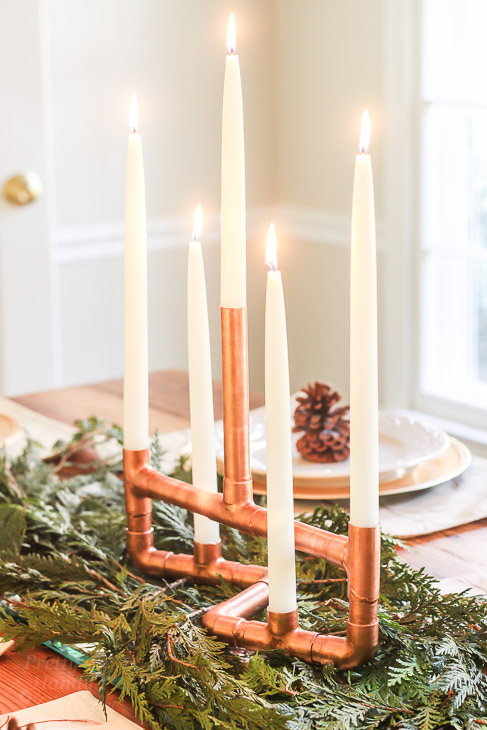
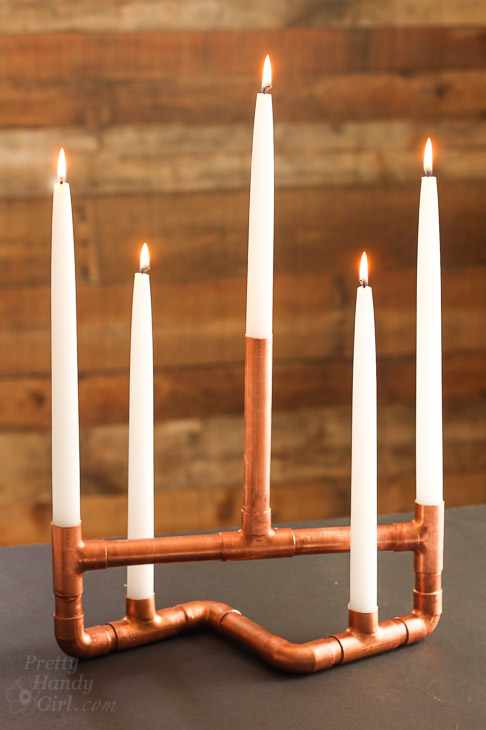
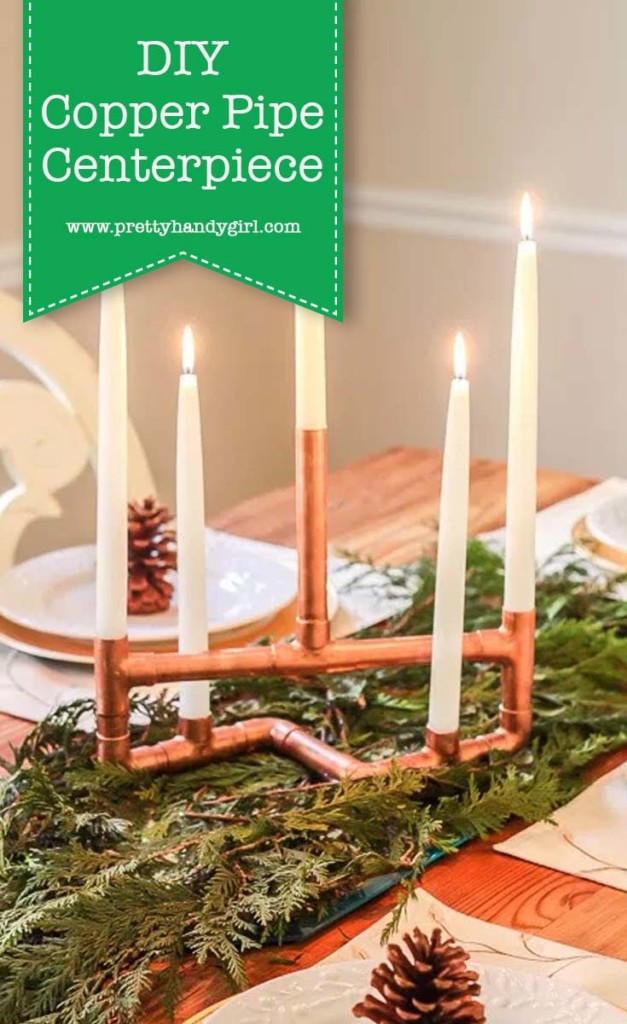
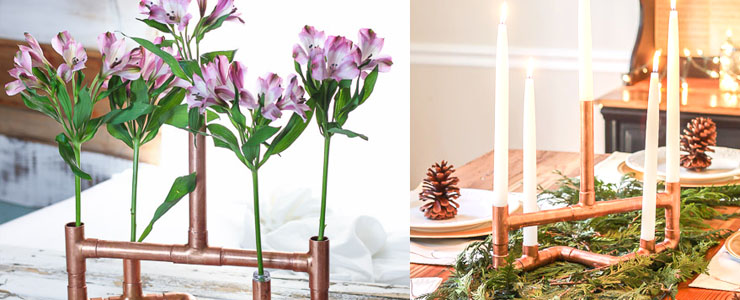
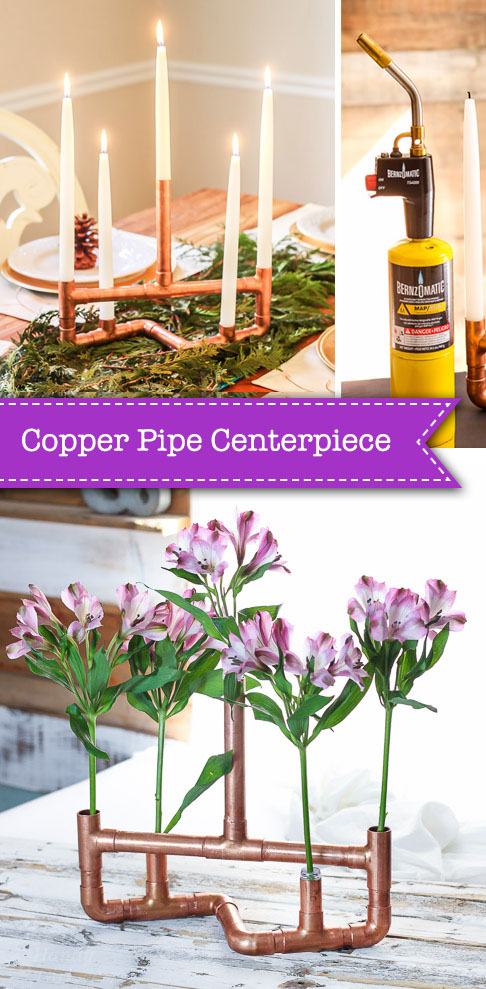
I’m super excited to be back with another fun copper pipe tutorial for you to make for the holidays! Today let’s make this unique DIY Copper Pipe Centerpiece that acts as a candelabra . . .

copper-pipe-centerpiece-side-view

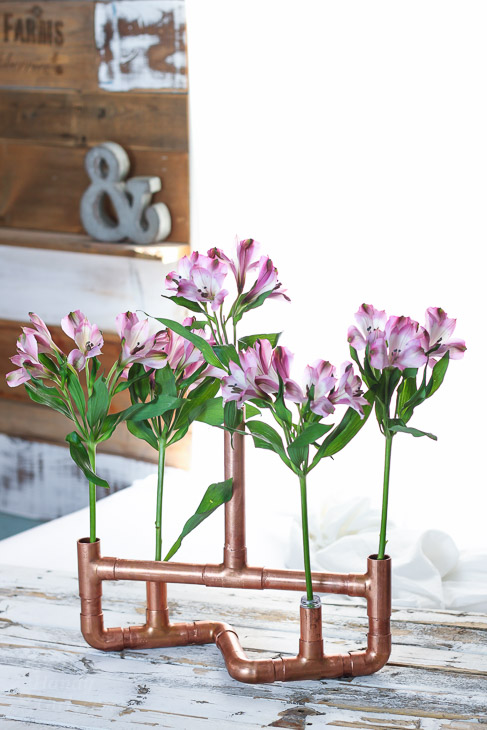
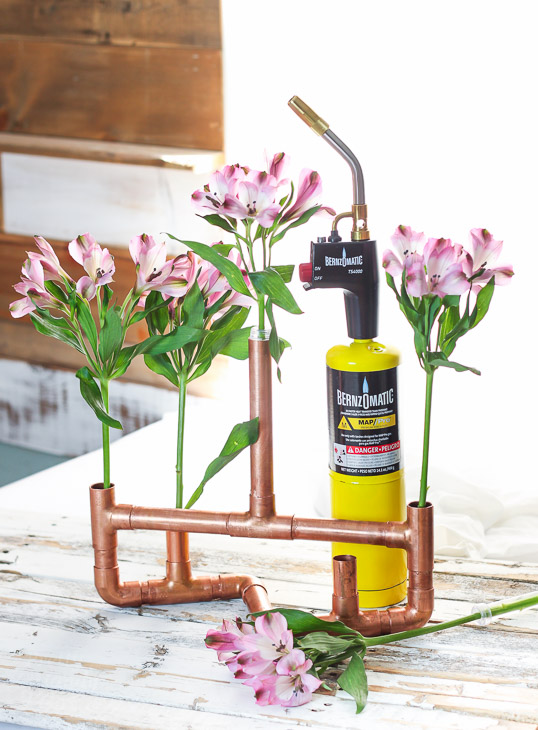
. . . or a floral centerpiece.

copper-centerpiece-flowers

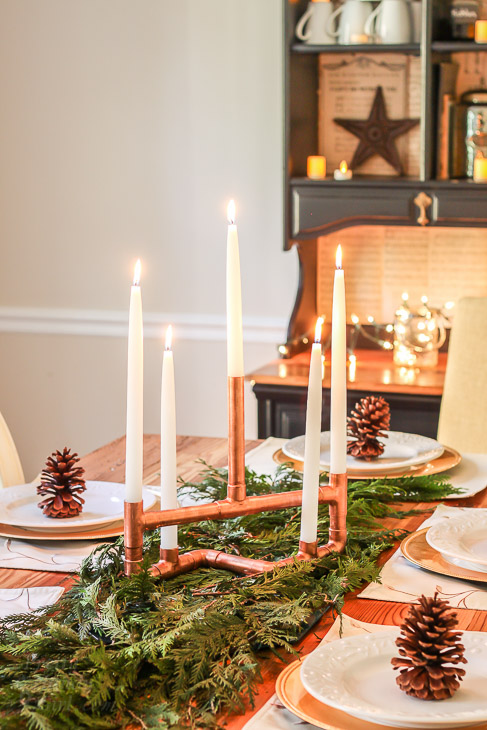
This is such a versatile project that can be used for your dinner table, a wedding centerpiece or a vase to hold flowers. If you wanted to alter the design, you could shorten the center pipe and use for a pencil holder. Regardless of how you use it, this DIY Copper Pipe Centerpiece is sure to be a conversation starter!

copper-pipe-centerpiece-on-holiday-table

If you had fun getting used to using a Bernzomatic torch last week while making DIY Copper Ring Jewelry, then you’re going to love using a bigger torch to make this DIY Copper Centerpiece.

DIY Copper Ring Jewelry | Pretty Handy Girl

Not only that, you’ll be honing your soldering skills should you need to use them for a plumbing repair. I’m honored to be part of the Bernzomatic Torch Bearers program. Bernzomatic has sponsored this post to help you with some holiday decorating ideas.

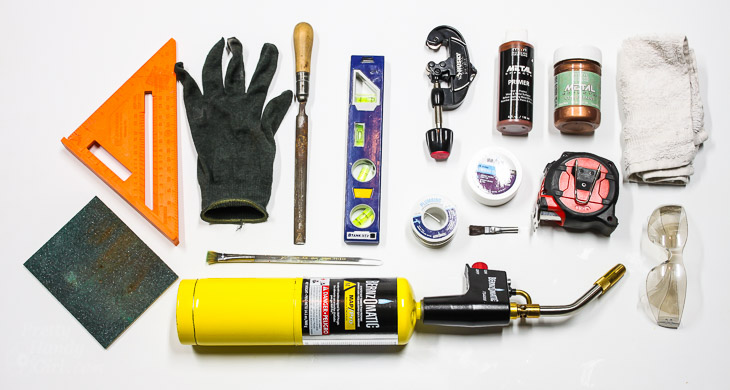
Materials:

copper-centerpiece-materials

Materials:

(I’ve included affiliate links for your convenience. I earn a small percentage from a purchase using these links. There is no additional cost to you. You can read more about affiliate links here.)

Optional: Florist tubes

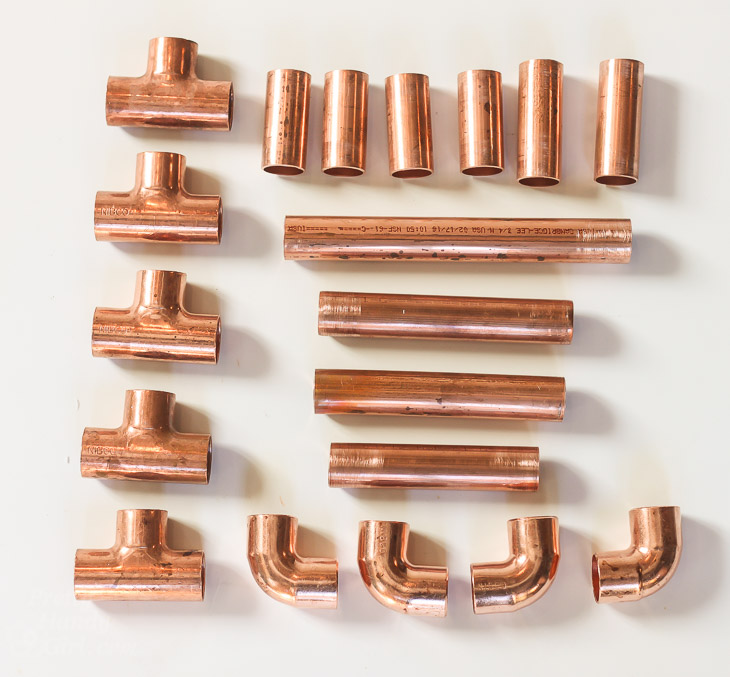
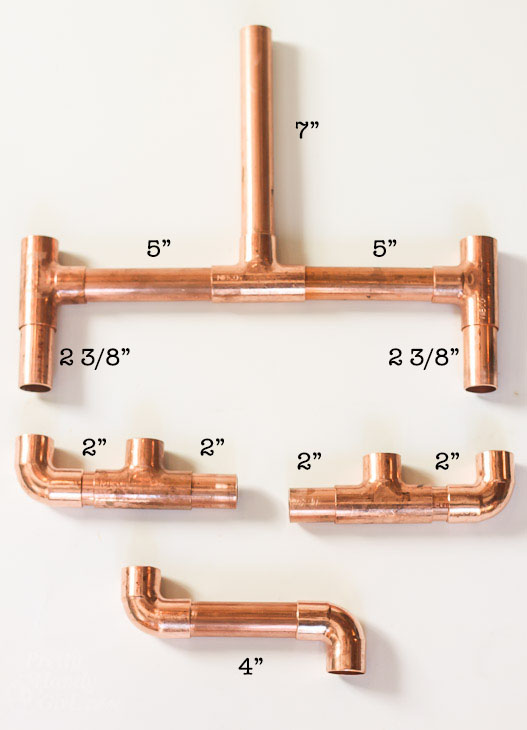
Cut List:

copper-pieces-cut-list-centerpiece

  • 2 – 2 3/8″ pipes
  • 4 – 2″ pipes
  • 1 – 7″ pipes
  • 2 – 5″ pipes
  • 1 – 4″ pipe

Instructions:

Cut your pipes to size. If you’ve never cut with a pipe cutter, you can watch this video to learn how.

Dry fit your pieces together as shown:

DIY Copper Pipe Centerpiece | Pretty Handy Girl

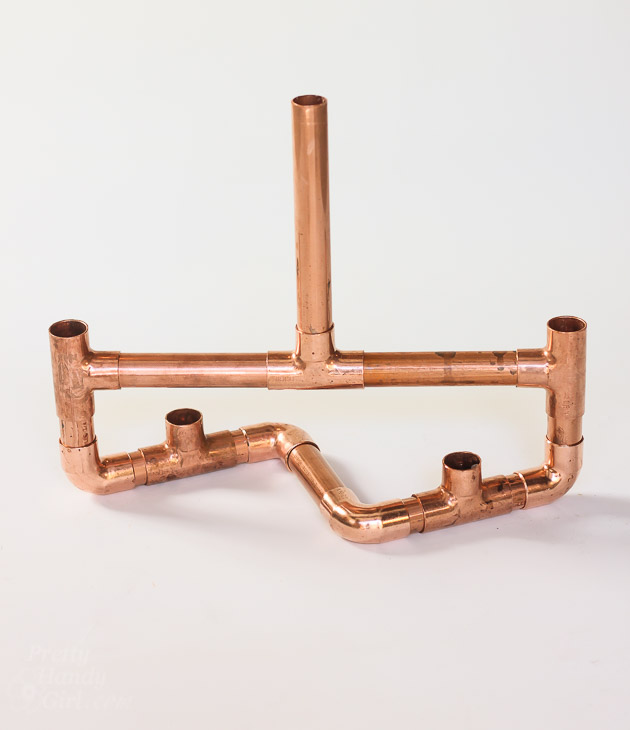
Then piece the centerpiece together completely as shown below. (The 4″ section with elbows connects the base pieces.)

dry-assemble-copper-centerpiece

The two 5″ pipes will not sit completely inside the “T” fittings. This will provide wiggle room to line up and assemble the top parts with the base. Feel free to adjust the 4″ base pipe until you fit everything together.

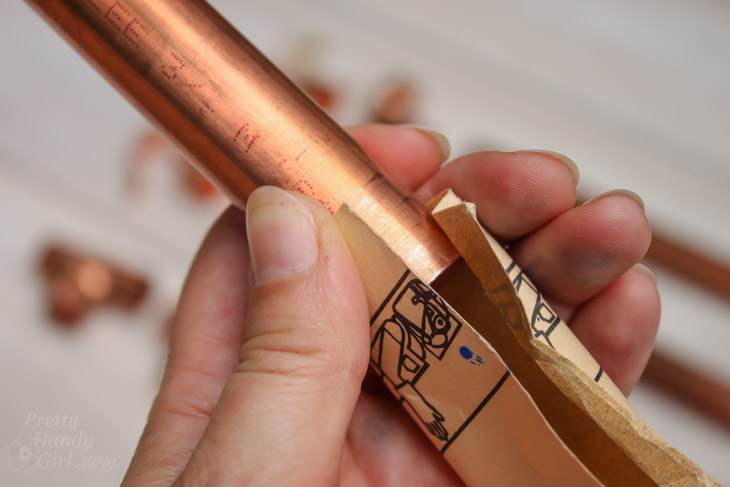
Sand all pipe ends with sandpaper.

Half Round Copper & Wood Side Table | Pretty Handy Girl

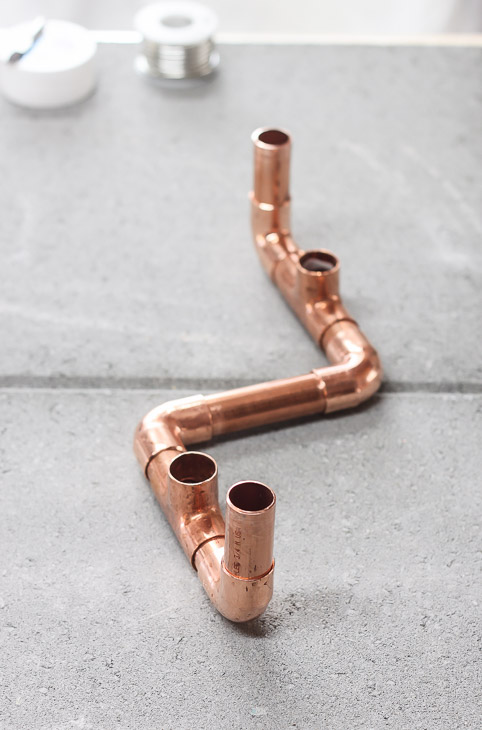
Pull apart the top and bottom of your centerpiece and place the base on your fireproof work surface to start. (I bought two paver blocks from Lowe’s to use for larger torch projects.)

copper-pipe-work-spot

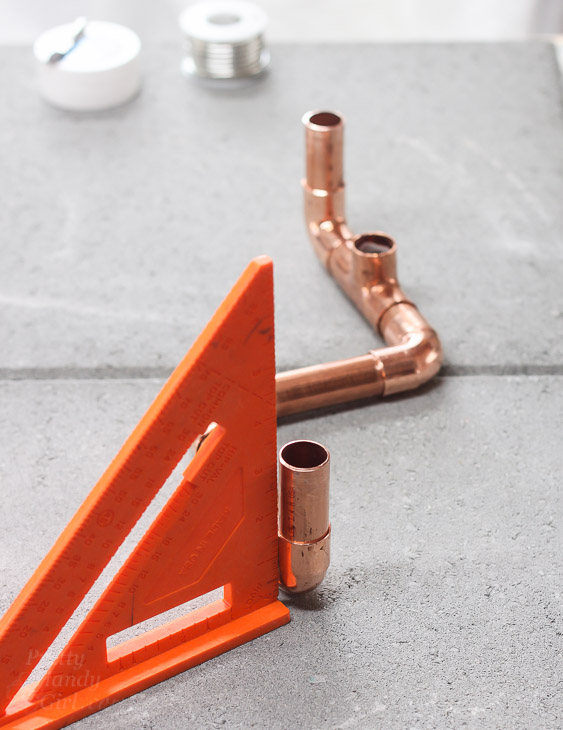
Use the speed square to make sure all the pipes and fittings are plumb.

square-vertical-pipes

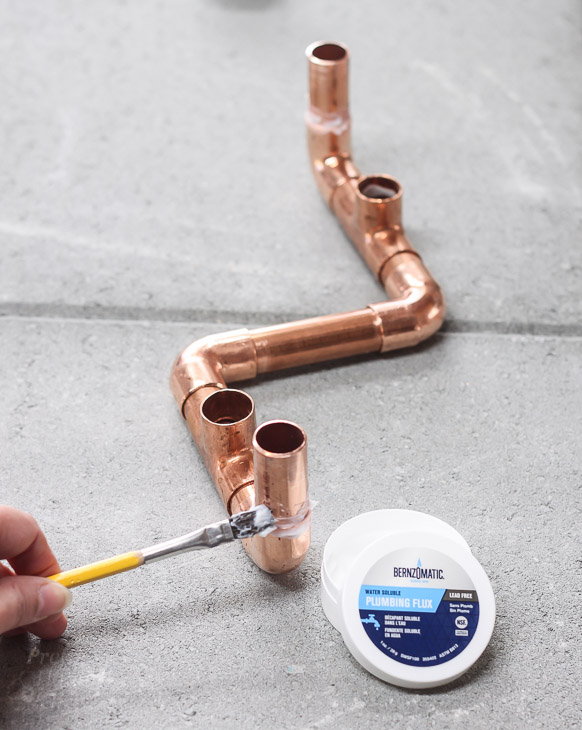
Apply a liberal amount of flux to all the connections.

flux-all-connections-copper-pipe

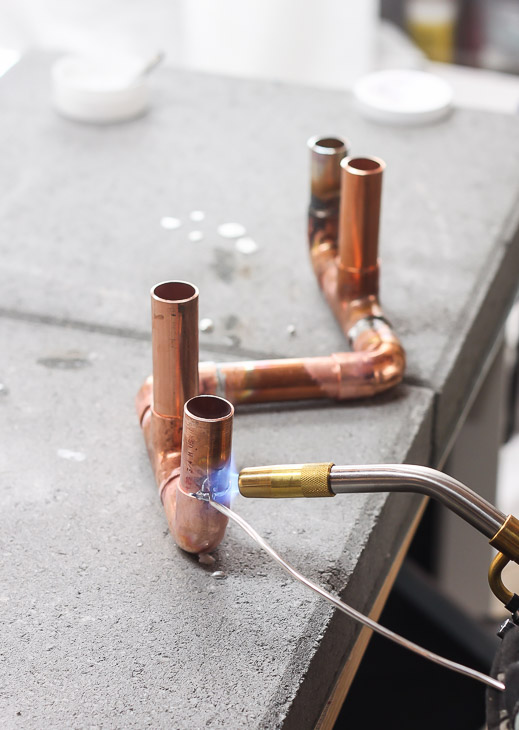
Start your Bernzomatic TS4000 Trigger Start Torch with the easy trigger start button. Heat each connection until the flux melts. Then hold the solder at the connection until the solder begins to flow. (You may need to solder one spot at a time or re-heat the solder and tilt the piece to help it flow around the connection.)

solder-vertical-pipe-pieces

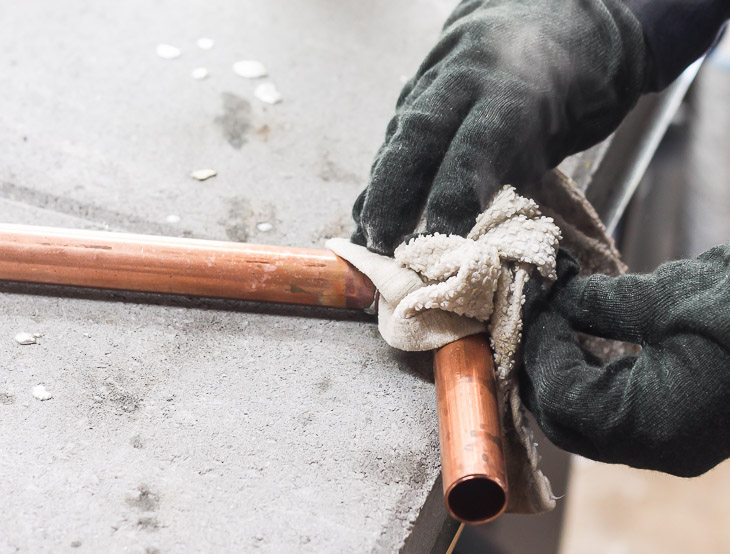
Lift the base with gloves on or pliers and drop in the bucket of water to cool. Alternatively you can cool the pieces with a cold wet rag.

wipe-pipe-cold-rag-steam

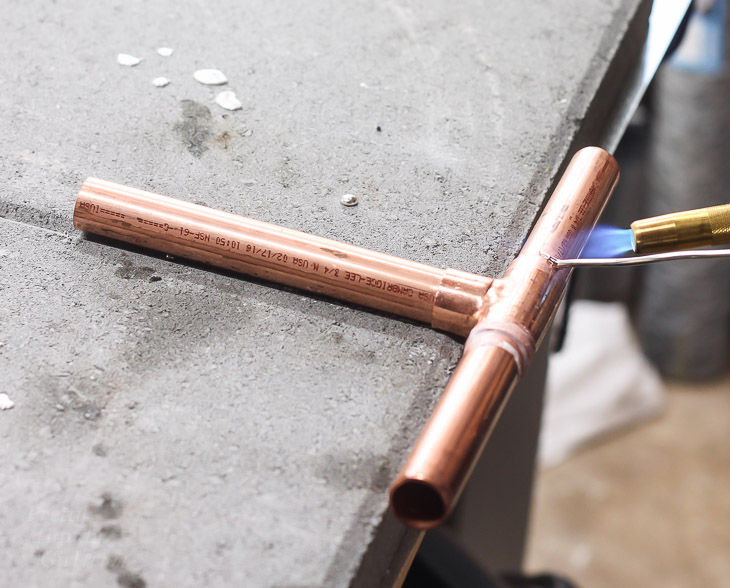
Set the base aside and join the top assembly (1- 7″ pipe, 2 – 5″ pipes and 1 – 90Ëš T connector.) Repeat the process of applying flux, heating and spreading the solder.

solder-t-piece-copper-pipe

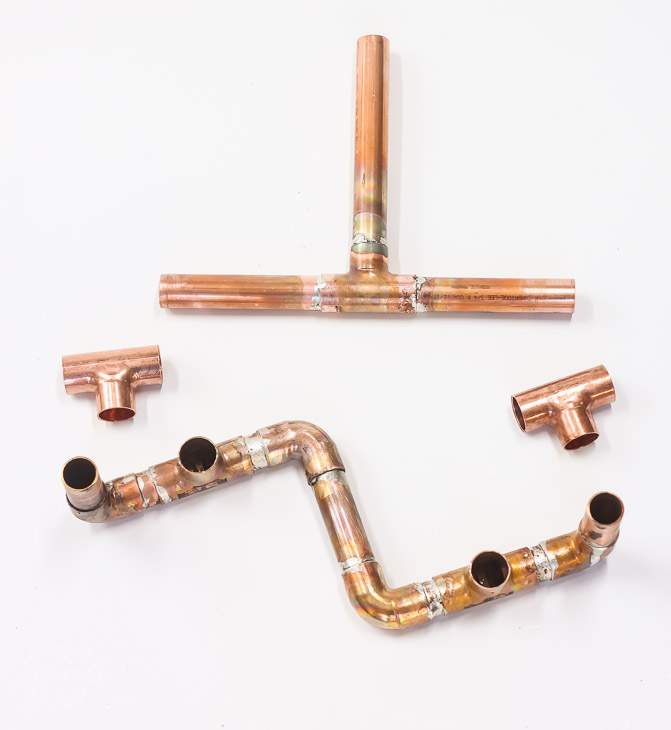
At this point your parts should be assembled like this:

half-assembled-pieces

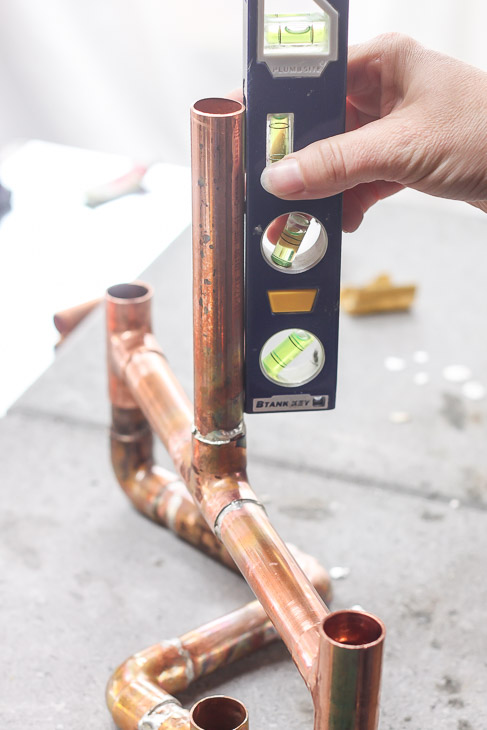
Slide the two “T” connectors onto your soldered top assembly. Slide the “T” connectors onto the base. Center the 7″ pipe and make sure it is plumb.

level-vertical-pipe-candle-holder

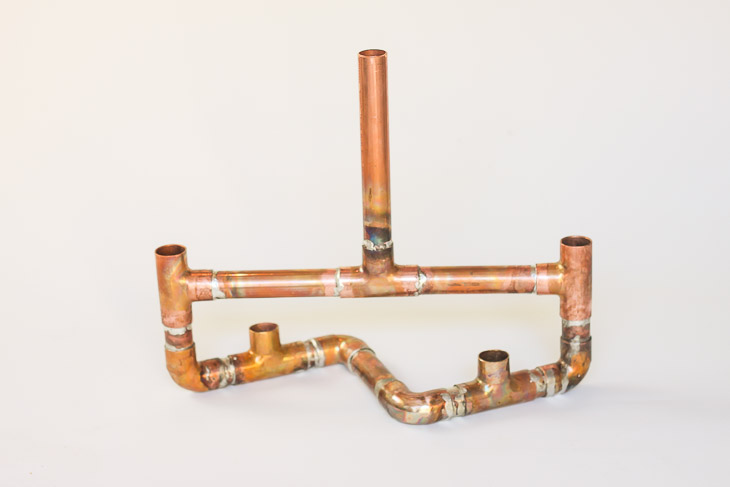
Solder the connections around the two side “T” connectors. Your soldering is now done. Cool off the centerpiece with a cold wet rag or in the bucket of water.

soldered-copper-pipe-centerpiece

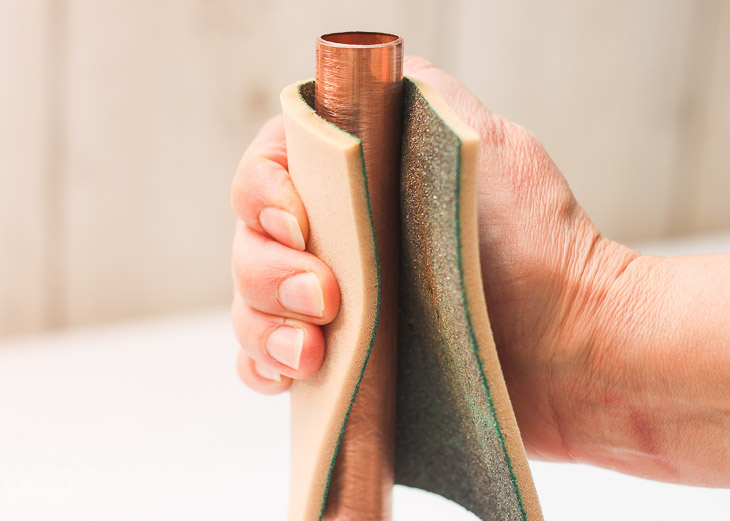
Don’t stress if your soldering joints aren’t beautiful, I’ll show you how to cover them. Sand the entire centerpiece to remove any heat marks.

sand-copper-pipes

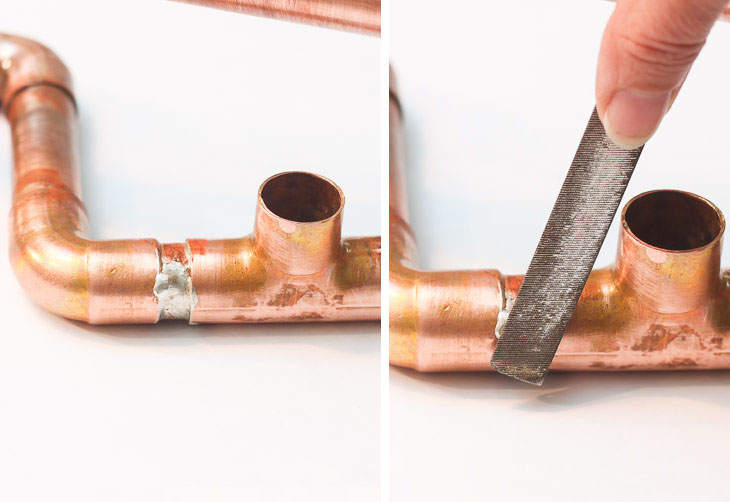
File any bumpy solder until smooth.

DIY Copper Pipe Centerpiece | Pretty Handy Girl

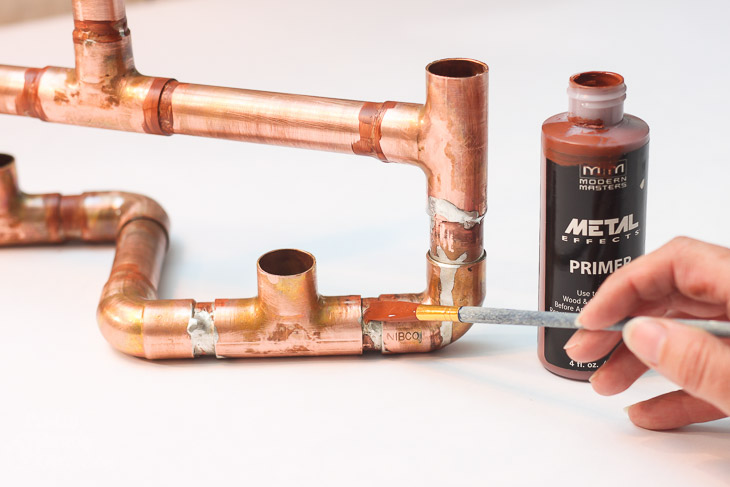
Wipe off the centerpiece with a wet rag to remove any metal shavings and dust. Paint Modern Masters Metal Effects Primer on all the soldered joints. Let the primer dry and add a second coat.

paint-metal-effects-primer-onto-solder-joints

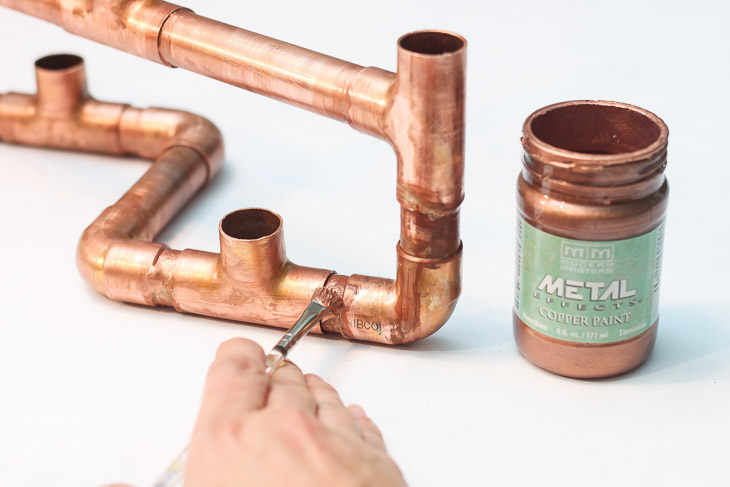
After the primer has dried, paint Modern Masters Metal Effects Copper Paint onto the primed solder joints. Feather the paint onto the copper pipes and cover any imperfections. Let dry and apply a second coat.

paint-metal-effects-copper

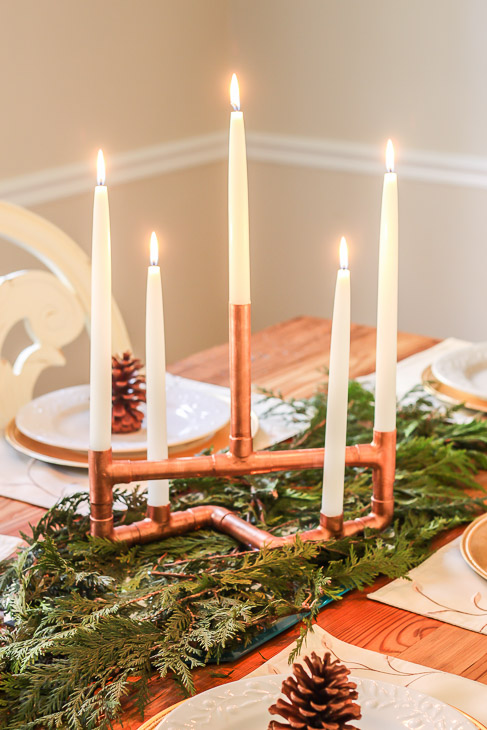
You are done! Time to show off your new DIY Copper Pipe Centerpiece! Add hand-dipped candles to the open fittings. For the center pipe, you’ll need to trim your candle and gently twist the candle into the pipe.

copper-pipe-centerpiece-on-holiday-table-2

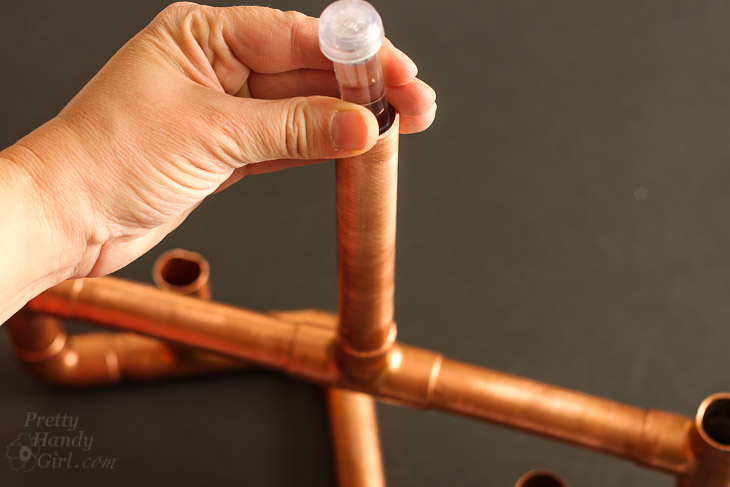
If you want to use the centerpiece for a floral display, fill floral tubes with water and drop them into the openings. (Note: I slipped two 2″ copper pipe pieces into the shortest openings to hide the floral tubes. But, you could just add water to the centerpiece and put your flowers in directly.)

add-water-tubes

Add your flowers and enjoy!

copper-centerpiece-flowers

How fun is this DIY Copper Centerpiece? It would look great as a centerpiece for a rustic or industrial themed wedding or party! You could change the configuration of the pipes and fittings if you like.

copper-centerpiece-flowers-bernzomatic-3

Add four more extensions and fitting openings to create a beautiful menorah for Hanukkah!

Don’t walk, run to the plumbing section at your local hardware store and get creative!

copper-pipe-centerpiece-candleabra-lit-2

Until next time…

PHGFancySign

Disclosure: This is a sponsored post for Bernzomatic. As a Bernzomatic Torch Bearer, I was provided complimentary torches and was compensated for my time and efforts. I was not told what to write. All opinions are my own. I am particular about the brands I represent and will always let you know when you are reading a sponsored post.


Pin for later!

DIY Copper Ring Jewelry | Pretty Handy Girl

DIY Copper Ring Jewelry | Pretty Handy Girl

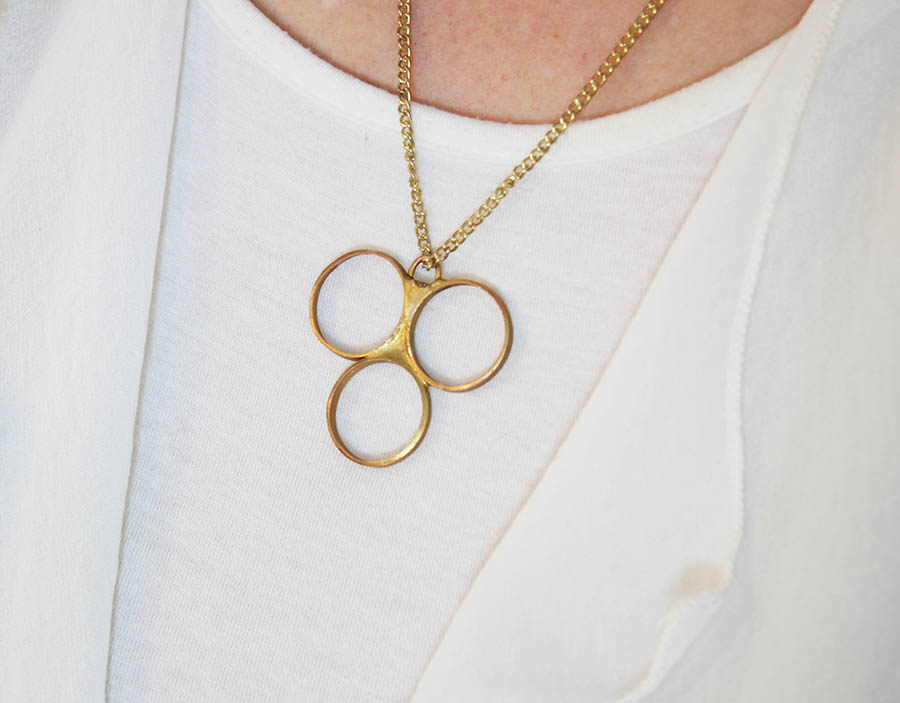
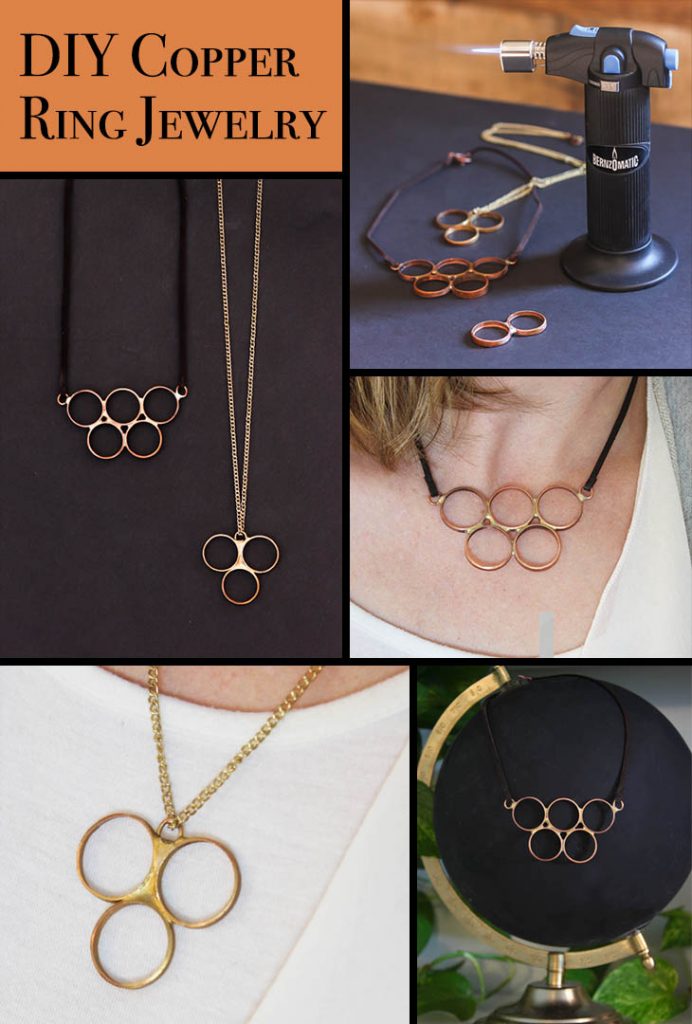
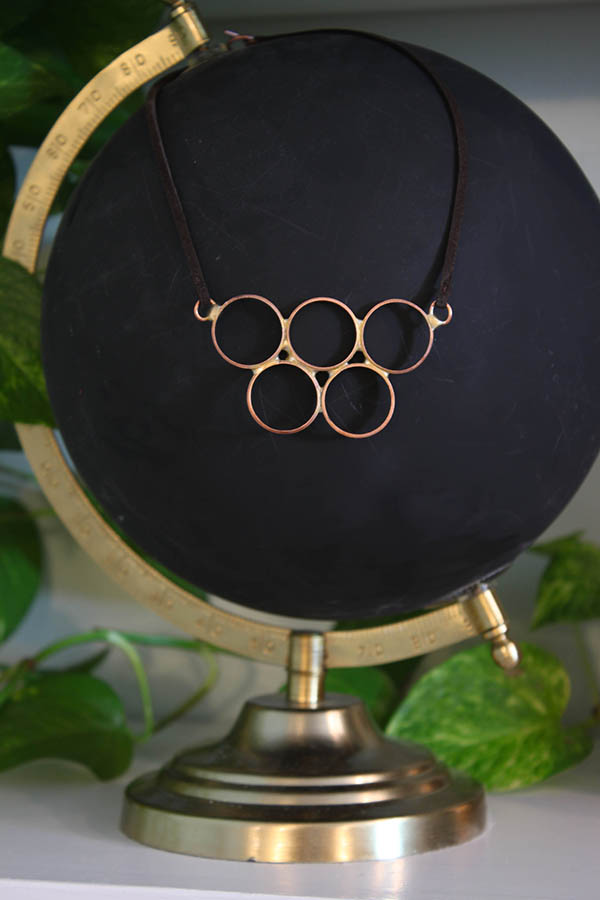
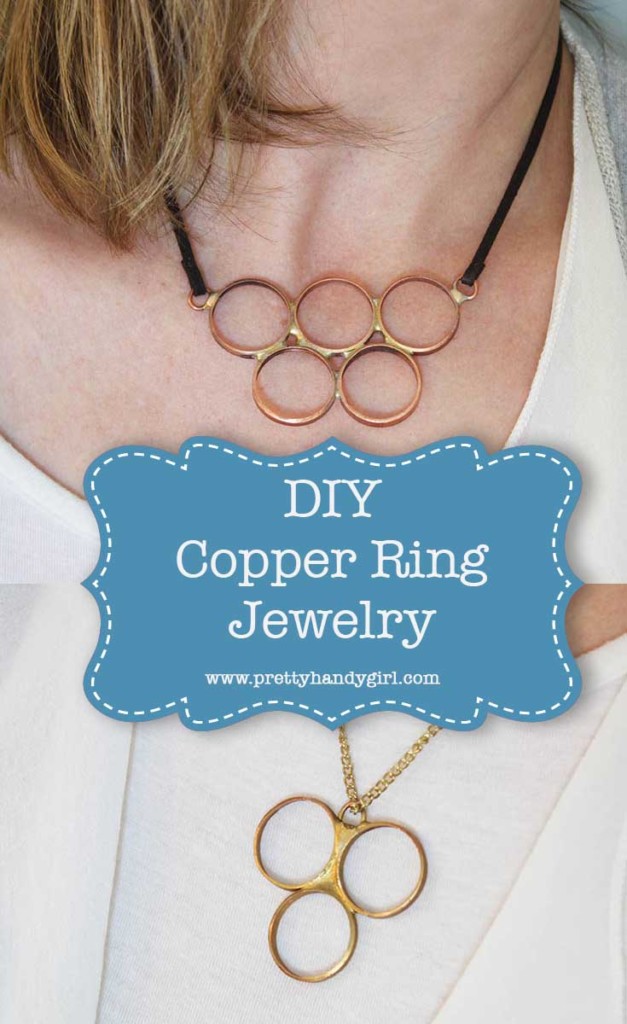
The holidays are here and you know what that means: It’s time to check off items from your gift list. I don’t know about you, but I detest braving the mall traffic and chaos. I’d much prefer to stay indoors and make gifts for the ones I love. Not only is it more peaceful DIYing gifts, but it saves money too! Why not make beautiful DIY Copper Ring Jewelry for the bling lovers on your list. Or you could use a ring or two and make a unique key chain fob.

DIY Copper Ring Jewelry | Pretty Handy Girl

I’m honored to be part of the Bernzomatic Torch Bearers program. Bernzomatic has sponsored this post to help you with your holiday gift ideas.

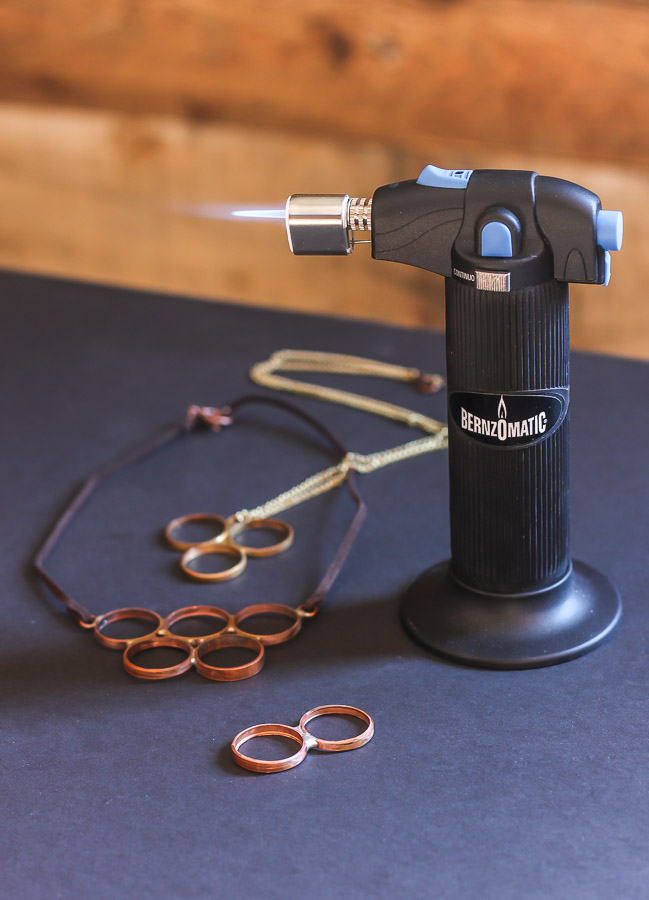
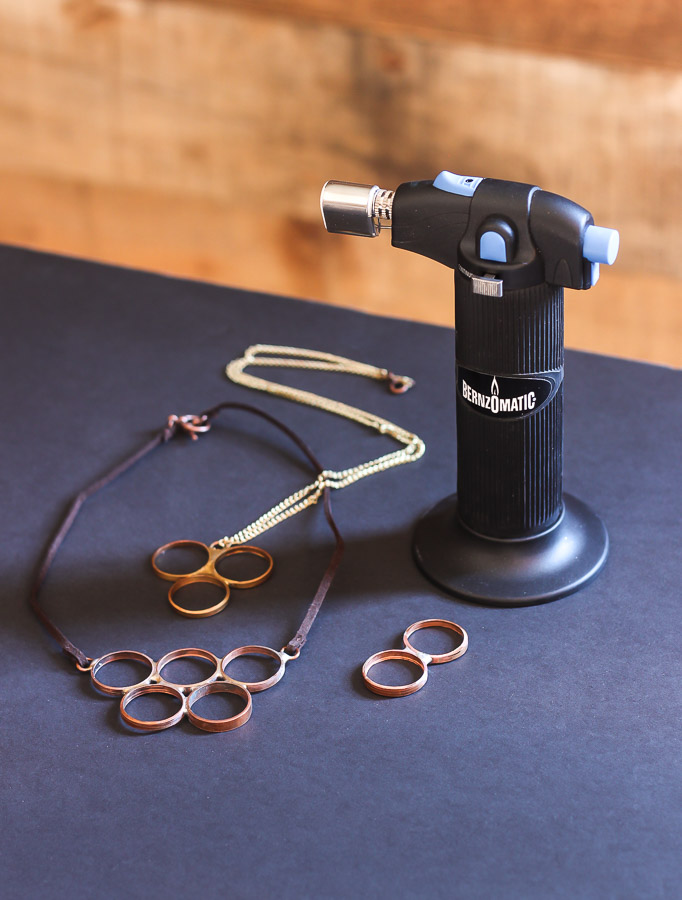
This fun project is sure to keep you warm and cozy with a little fire and heat using a Bernzomatic ST2200T Detail Torch.  The ST2200T is a great torch to start with if you’ve never used one. The small size fits in the palm of your hand and produces a small fine tip flame that’s perfect for jewelry making (among other small projects.)

DIY Copper Ring Jewelry | Pretty Handy Girl

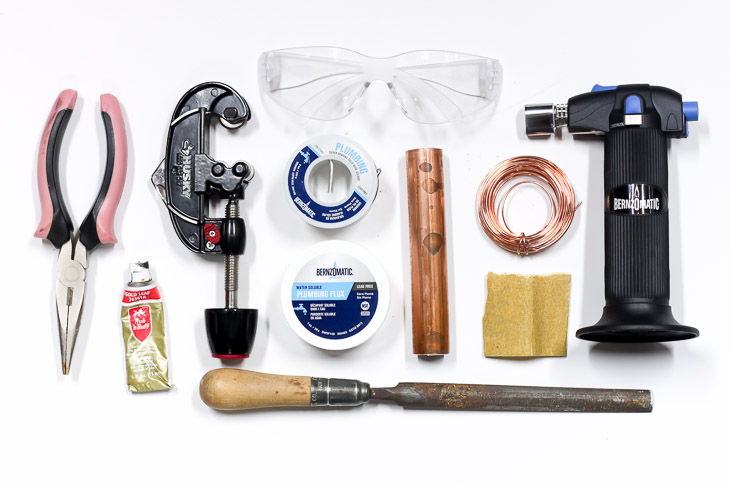
To make the copper ring jewelry, you’ll need a few supplies. You can pick most of them up at your local hardware store or online.

DIY Copper Ring Jewelry | Pretty Handy Girl

Materials:

(I’ve included affiliate links for your convenience. I earn a small percentage from a purchase using these links. There is no additional cost to you. You can read more about affiliate links here.)

Instructions:

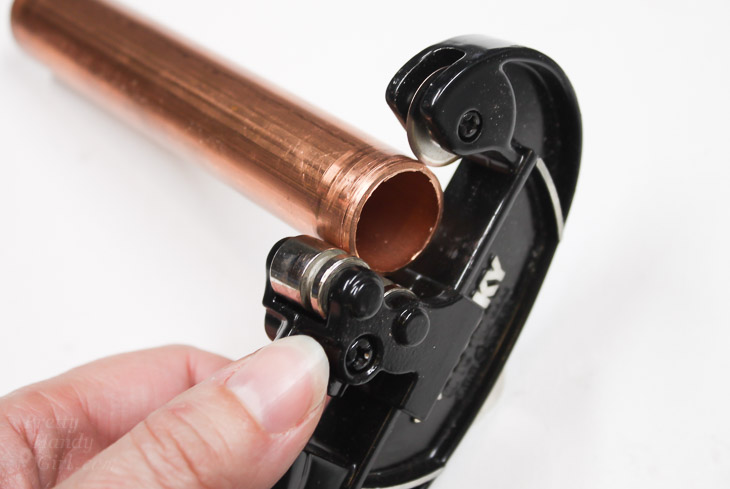
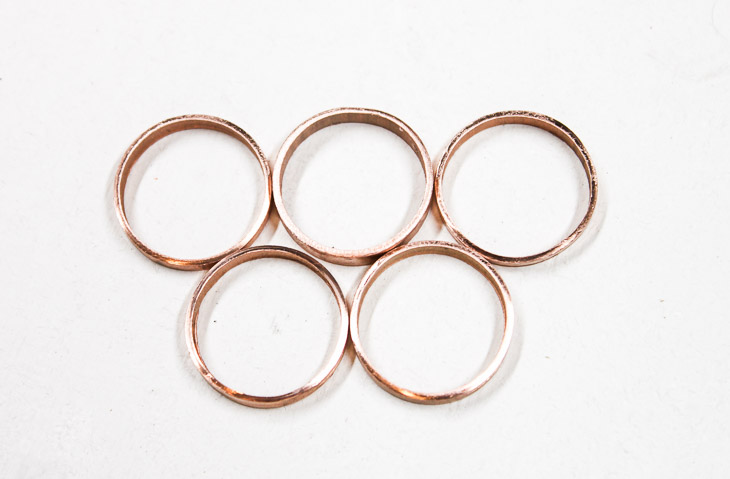
Use the pipe cutter to cut several rings (approximately 1/8″ thick) off the end of your copper pipe. You may need to cut several to get ones the same thickness. (For more details on how to use a pipe cutter, you can watch my video here.

DIY Copper Ring Jewelry | Pretty Handy Girl

Select the rings you wish to use for the necklace.

DIY Copper Ring Jewelry | Pretty Handy Girl

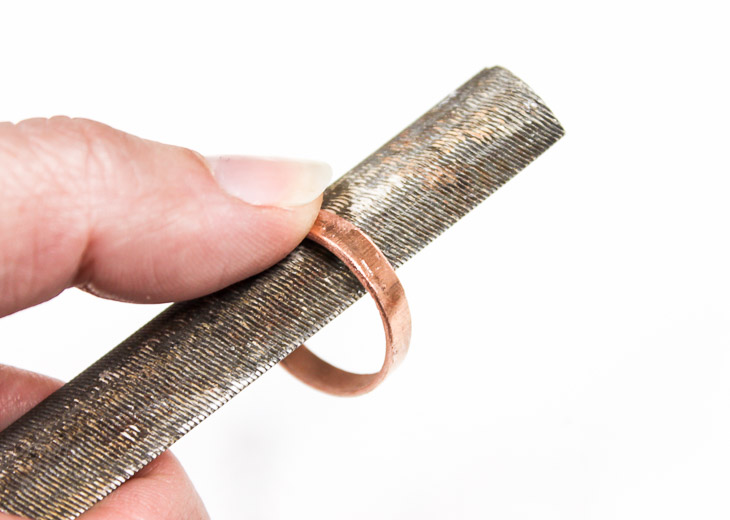
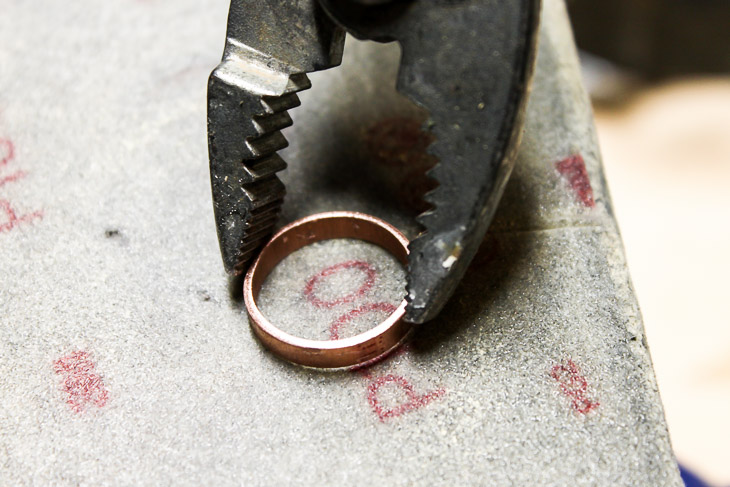
Use the metal file to file off any sharp edges on the copper rings.

DIY Copper Ring Jewelry | Pretty Handy Girl

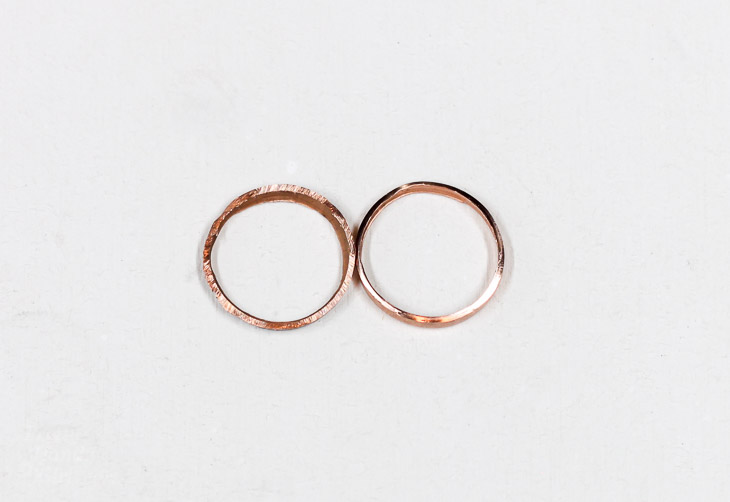
Sand the edges until they are smooth (I turned my power sander upside down in a clamping table and turned it on while holding the rings onto the sandpaper to speed the process of sanding.)

DIY Copper Ring Jewelry | Pretty Handy Girl

Start by laying two rings side-by-side.

DIY Copper Ring Jewelry | Pretty Handy Girl

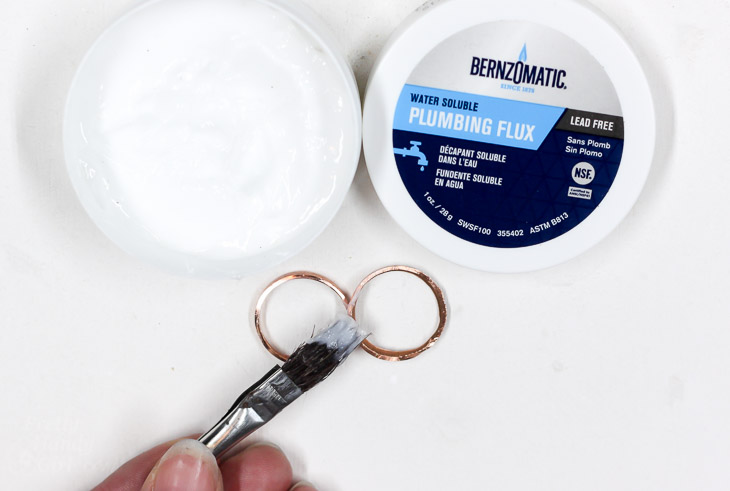
Apply a generous amount of flux to each ring where you wish to join them.

DIY Copper Ring Jewelry | Pretty Handy Girl

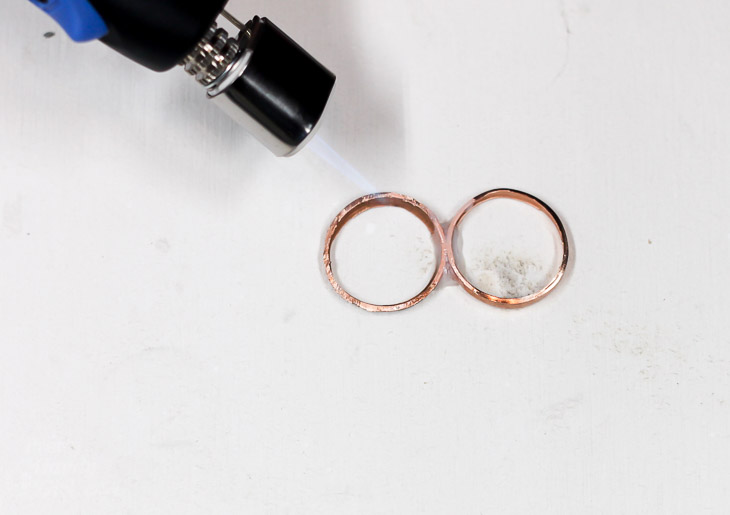
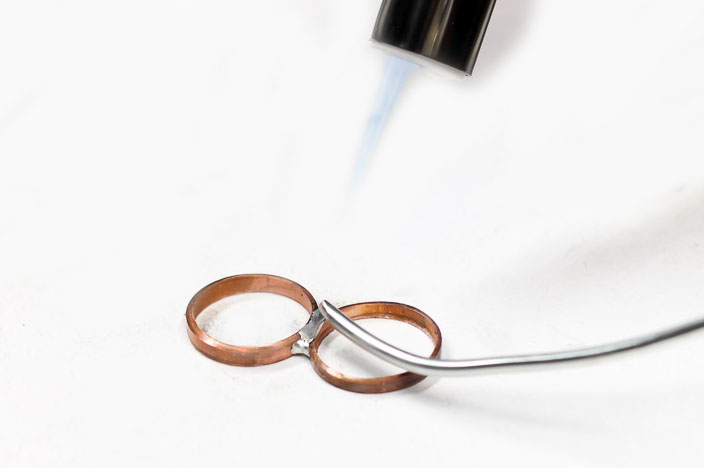
Start your Bernzomatic ST2200T torch and heat the rings where you added the flux.

DIY Copper Ring Jewelry | Pretty Handy Girl

As soon as the flux melts, touch the solder wire onto the spot where the flux was. (Make sure the rings are still touching. If not, nudge them back together with the pliers.) Hold the solder in place until it flows onto the copper rings.

DIY Copper Ring Jewelry | Pretty Handy Girl

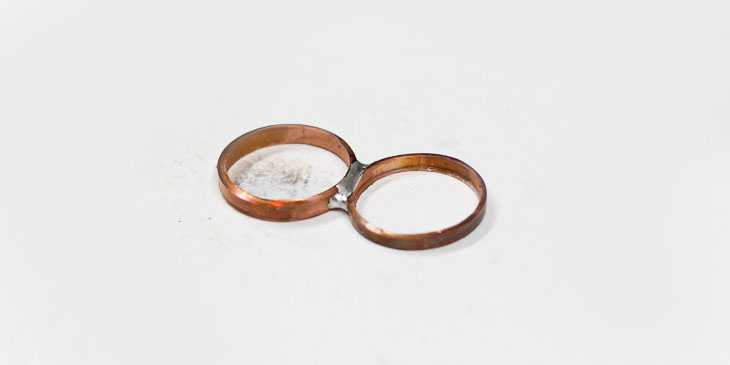
Let the rings cool (or drop them in a container of cold water.)

DIY Copper Ring Jewelry | Pretty Handy Girl

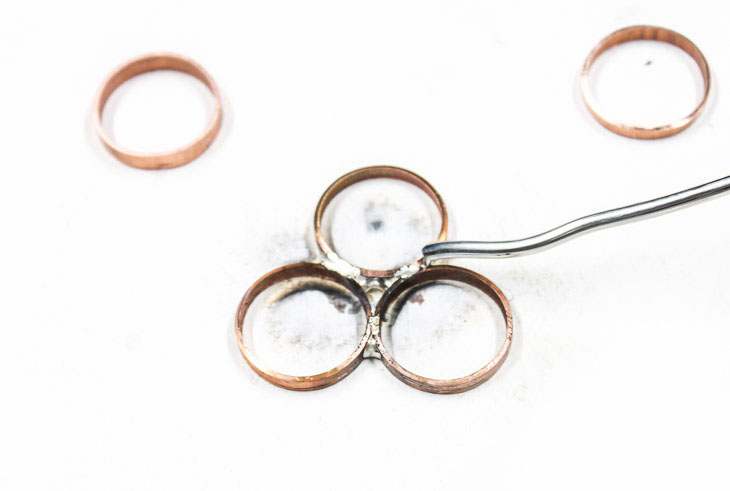
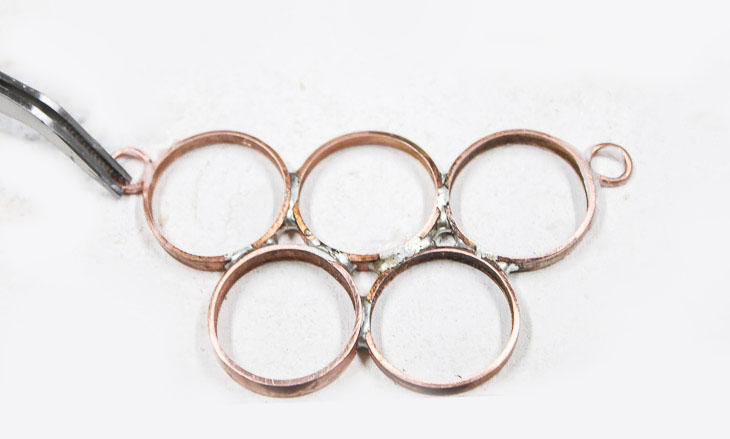
Solder the next ring by following the steps above (add flux, heat, and solder.) If you mess up, you can reheat the solder to remove it and start over.

DIY Copper Ring Jewelry | Pretty Handy Girl

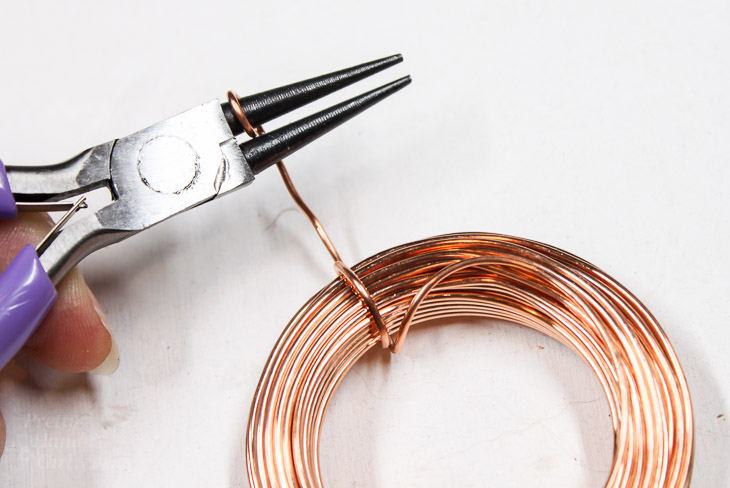
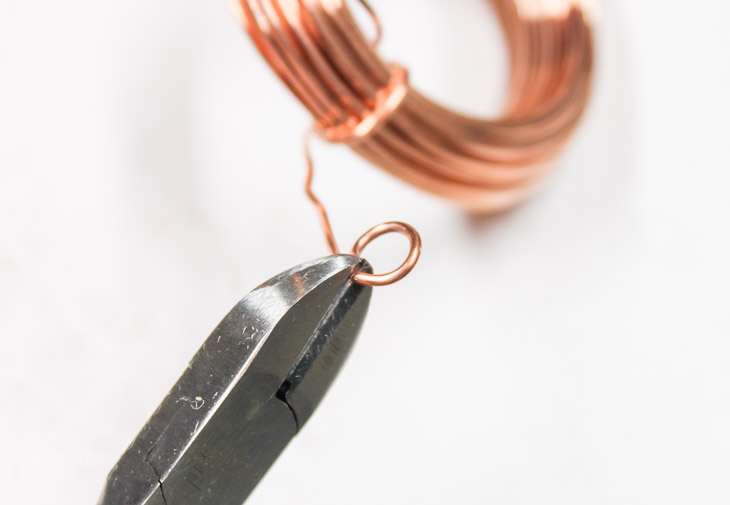
Curl a piece of copper wire to form a circle.

DIY Copper Ring Jewelry | Pretty Handy Girl

Cut off the copper circle.

DIY Copper Ring Jewelry | Pretty Handy Girl

Open the circle slightly. Add flux to the wire ends and the copper ring where you want to join them. Heat the area, let the flux melt and touch the solder to the ends of the copper wire. (This step may prove a little difficult to control the solder. If you are having trouble, try to add the solder to the copper ring, then guide the wire into the molten solder. Hold the wire in place with pliers until the solder hardens.)

DIY Copper Ring Jewelry | Pretty Handy Girl

To hide the shiny silver solder, use copper Rub n’ Buff on the joints. Or coat the entire necklace pendant with gold Rub n’ Buff for gold jewelry.

Feed a chain through the loop . . .

DIY Copper Ring Jewelry | Pretty Handy Girl

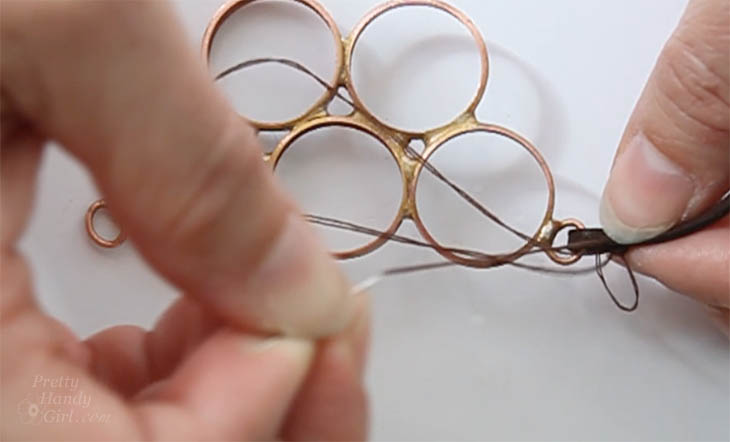
. . . or sew some suede leather cord to the loops.

DIY Copper Ring Jewelry | Pretty Handy Girl

Then sew clasps to the other end.

DIY Copper Ring Jewelry | Pretty Handy Girl

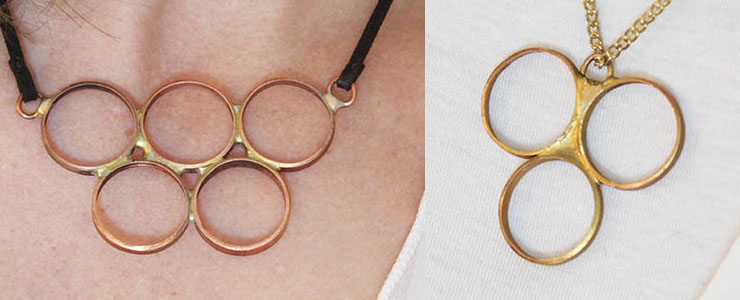
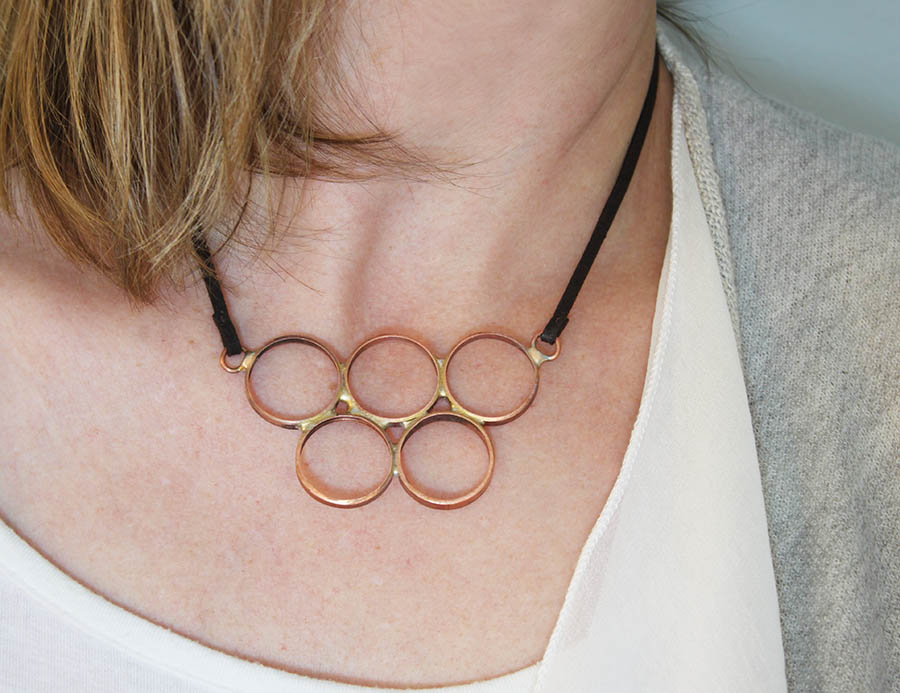
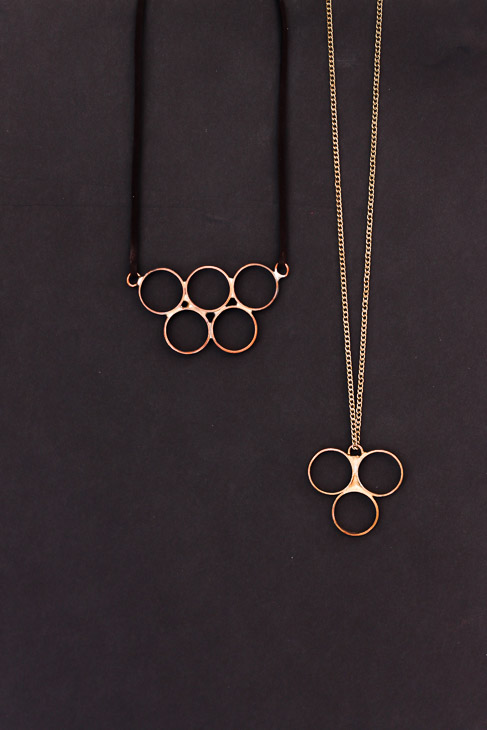
Behold beautiful new necklaces that you made yourself!

DIY Copper Ring Jewelry | Pretty Handy Girl

These necklaces would look great with any bohemian or casual outfits.

DIY Copper Ring Jewelry | Pretty Handy Girl

They are super fun to make and will surely delight anyone who loves jewelry.

DIY Copper Ring Jewelry | Pretty Handy Girl

What could you make with a Bernzomatic Torch and some copper pipe? The possibilities are only limited by your mind.

PHGFancySign

Disclosure: This is a sponsored post for Bernzomatic. As a Bernzomatic Torch Bearer, I was provided complimentary torches and was compensated for my time and efforts. I was not told what to write. All opinions are my own. I am particular about the brands I represent and will always let you know when you are reading a sponsored post.

Want more frugal gift ideas for the holiday season?

Tres-frugal_diy-gifts4


Pin for later!

This DIY copper ring jewelry is the perfect idea for a handmade gift! | Pretty Handy Girl #prettyhandygirl #giftidea #DIYgift #DIYjewelry

Beautiful rustic DIY decor for any room in your home!

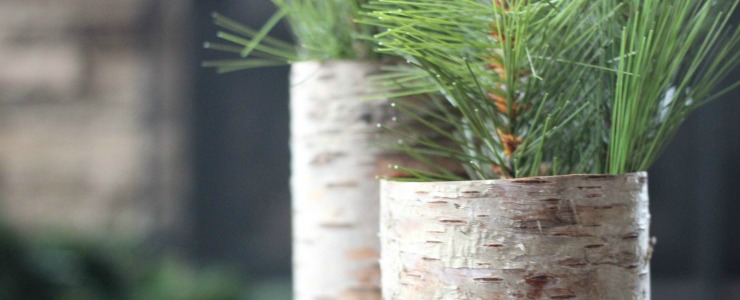
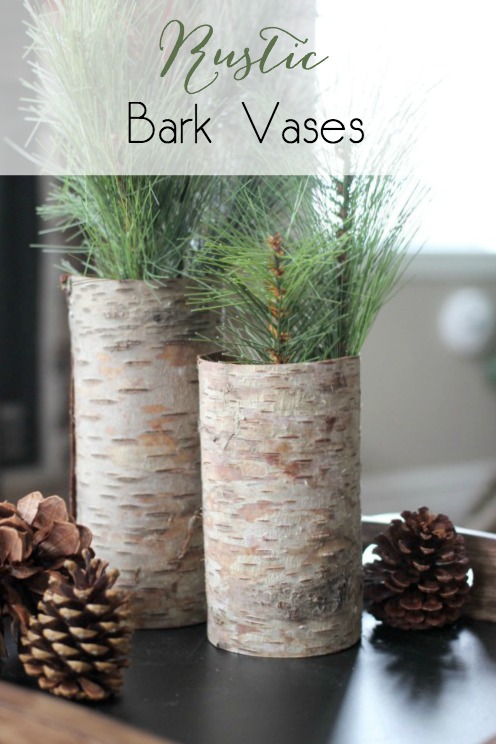
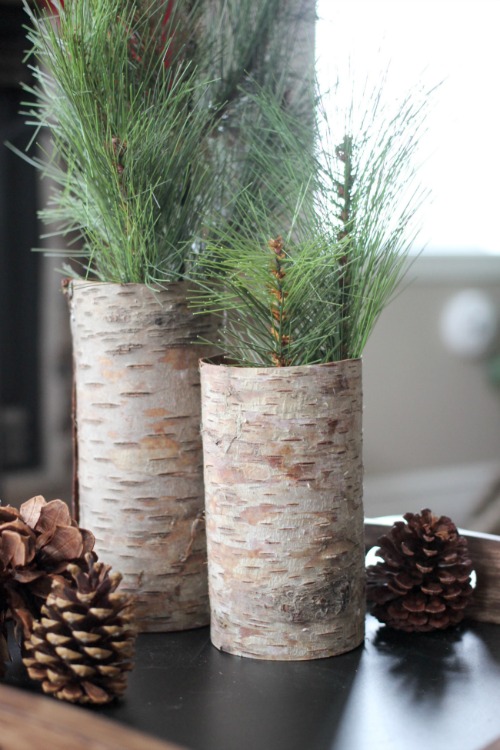
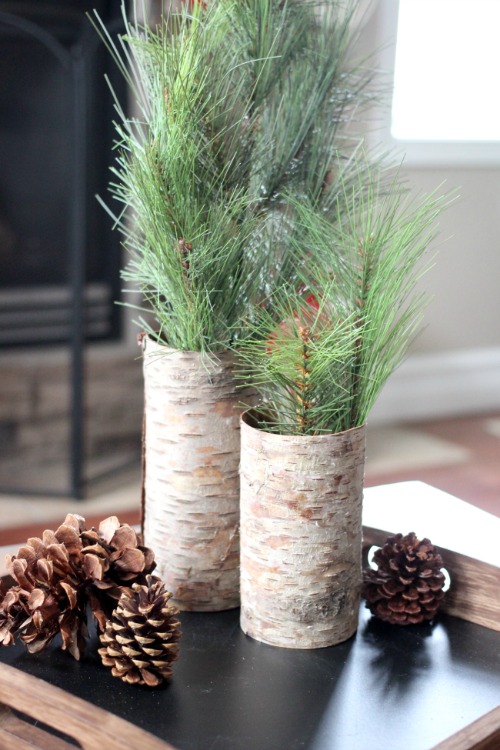
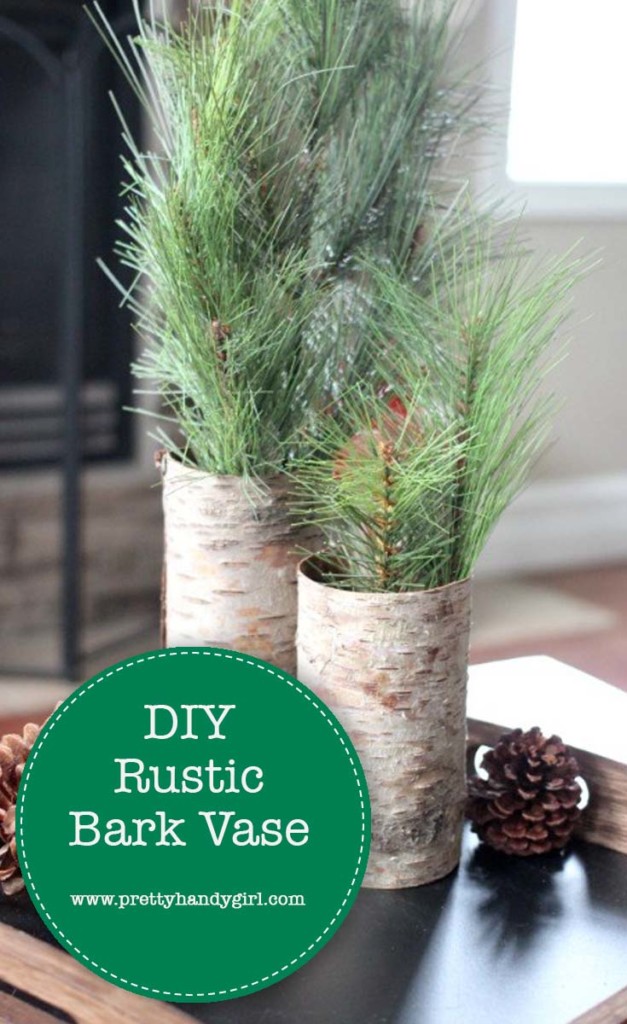
Hi everyone! This is Lindi, visiting again from Love Create Celebrate. We are in the thick of winter here, which means I spend my evening curled up under a blanket reading or dreaming up new DIYs. That’s where the idea for these simple Rustic Bark Vases came from. I love DIY decor that I can use all year long. Wouldn’t these be great with some fresh string flowers in them? I can’t wait to show you how easy they are to make!

Beautiful rustic DIY decor for any room in your home!

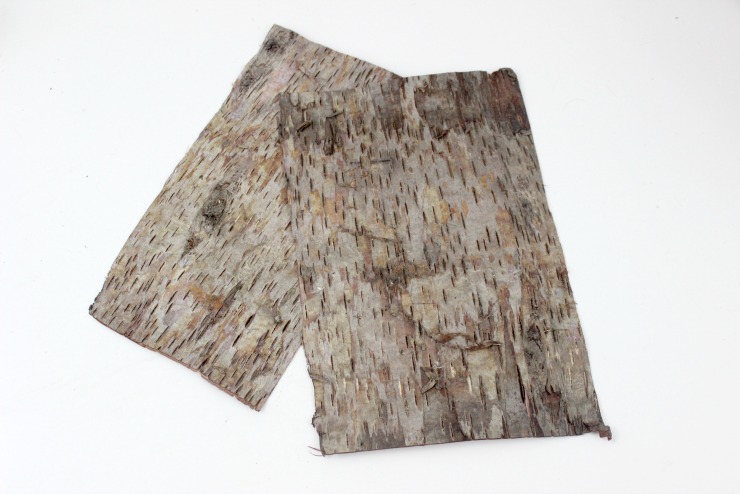
The hardest part of this tutorial is getting the bark. If you are collecting it off of fallen trees or tree branches, you can soak the bark in shallow, luke warm water to make it pliable, and then flatten it between cardboard sheets. Alternatively, you can buy sheets online through sites such as Ebay and Etsy. Soak those sheets for a little while if they are too stiff to bend too. 

Beautiful rustic DIY decor for any room in your home!

Materials: 

(I’ve included affiliate links for your convenience. I earn a small percentage from a purchase using these links. There is no additional cost to you. You can read more about affiliate links here.)

Instructions: 

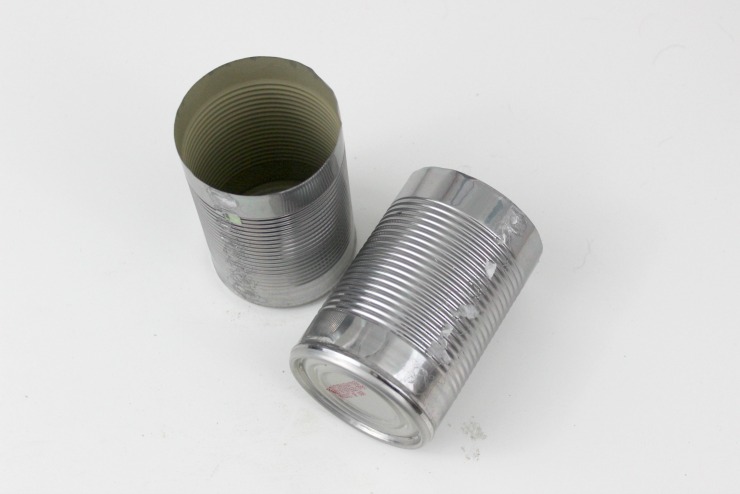
Be gentle when handling the bark at first. You don’t want it to split. I would recommend a tin can being the smallest size vase you use to wrap the bark around – if you try to wrap it around something smaller, the bark may split. You can cut the bark with a good pair of scissors if needed. I wanted mine taller than the tin cans, but you can cut it to any height. The best way to attach your bark to your tin cans or glass vases with this a two-part epoxy. This stuff is like magic! It sets in five minutes and holds forever.

Beautiful rustic DIY decor for any room in your home!

The tutorial is SO easy and since I’m a visual learner, I made a quick DIY video to show you how to do it yourself:

Don’t forget to subscribe to my channel on YouTube!

Beautiful rustic DIY decor for any room in your home!

What do you think of these vase?

Beautiful rustic DIY decor for any room in your home!

Once you collect or buy the bark sheets, you will immediately think of a million DIY uses for them! I hope you like the tutorial. Beautiful rustic DIY decor for any room in your home!

Beautiful rustic DIY decor for any room in your home!

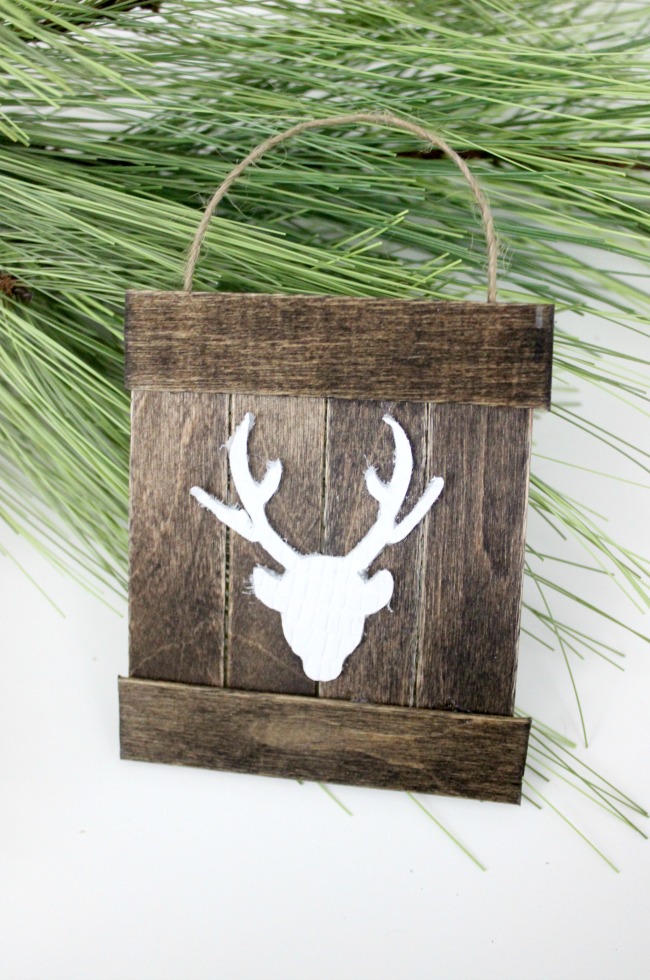
If you love simple Christmas decor, you’ll love making these mini pallet ornaments!

Pretty Handy Girl I Rustic Bark Vases

For more Rustic DIY inspiration visit Love Create Celebrate.

Lindi Signature~ view more projects by Lindi ~


Pin for later!

Easy to Make Hot Air Balloon Decorations | Pretty Handy Girl

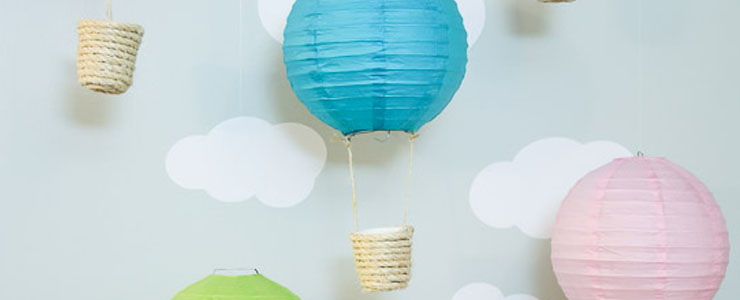
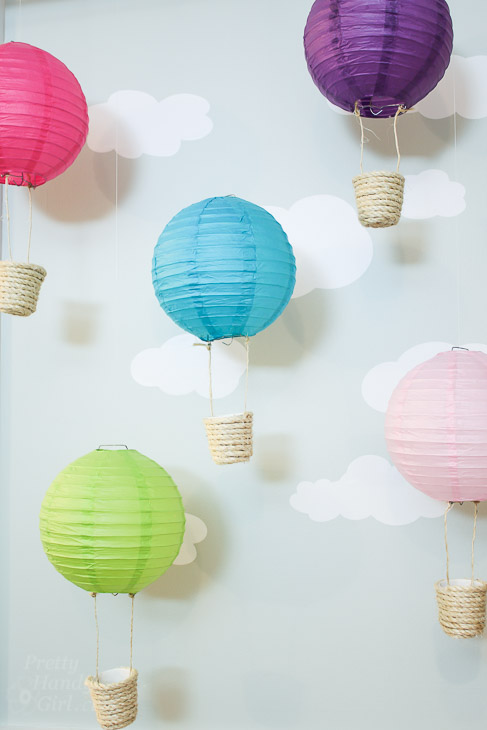
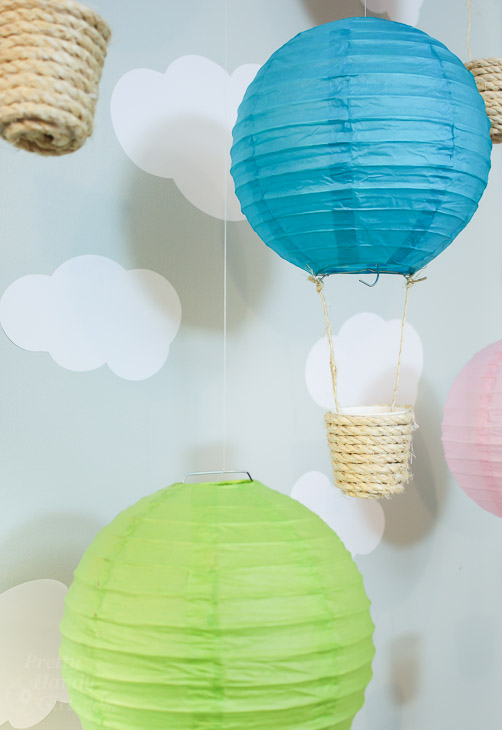
This year I’m helping out with the school book fair decorations again. The theme for our fair was air travel. We made cute hot air balloons, clothespin airplanes, a giant “Welcome” word cloud, and cut out book clouds (tutorial to come soon.) We had the most fun making these adorable hot air balloon decorations using Chinese lanterns and Dixie cups.

Easy to Make Hot Air Balloon Decorations | Pretty Handy Girl

They cost next to nothing to make, but were a big hit with the kids. Ready to make your own hot air balloon decorations?

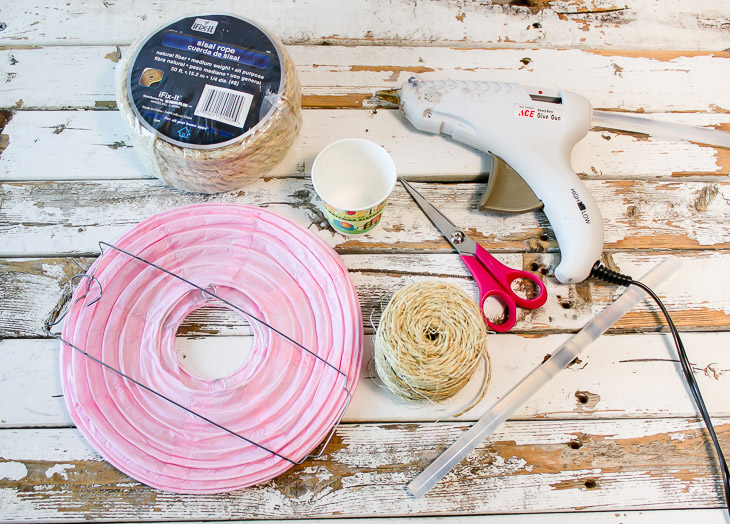
Materials:

(I’ve included affiliate links for your convenience. I earn a small percentage from a purchase using these links. There is no additional cost to you. You can read more about affiliate links here.)

Easy to Make Hot Air Balloon Decorations | Pretty Handy Girl

Instructions:

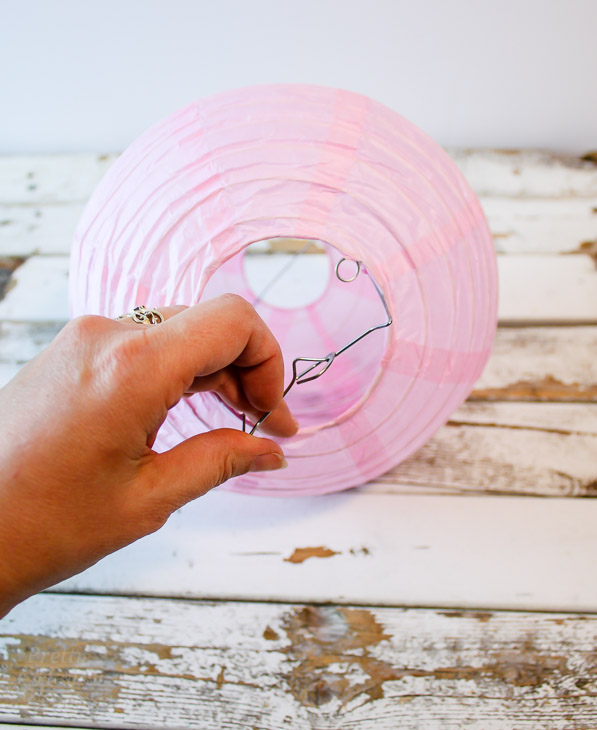
Assemble the Chinese lanterns.

Easy to Make Hot Air Balloon Decorations | Pretty Handy Girl
Pre-heat your hot glue gun. If you’ve never used a hot glue gun before or always get burned, read this article first!

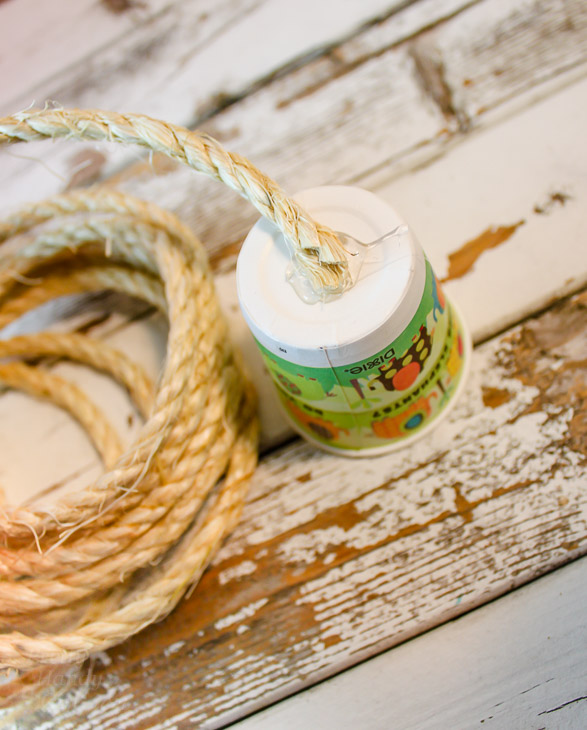
Place one Dixie cup upside down on your working surface. Squeeze a dollop of glue into the center of the bottom of the cup. Place the end of your rope into the glue and wait a minute for the glue to harden.

Easy to Make Hot Air Balloon Decorations | Pretty Handy Girl

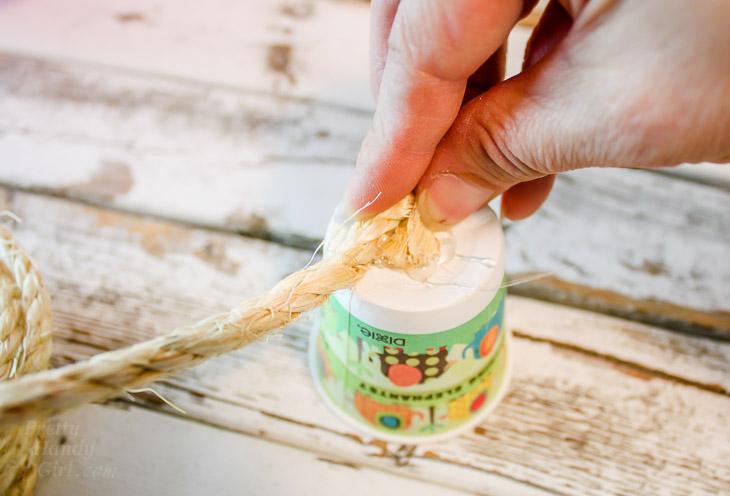
Add a little glue around the end of the rope. Fold the rope back and start to shape it around the center point. (Use a popsicle stick or tweezers to hold the rope as the glue cools. Do I as I say, not as I do.)

Easy to Make Hot Air Balloon Decorations | Pretty Handy Girl

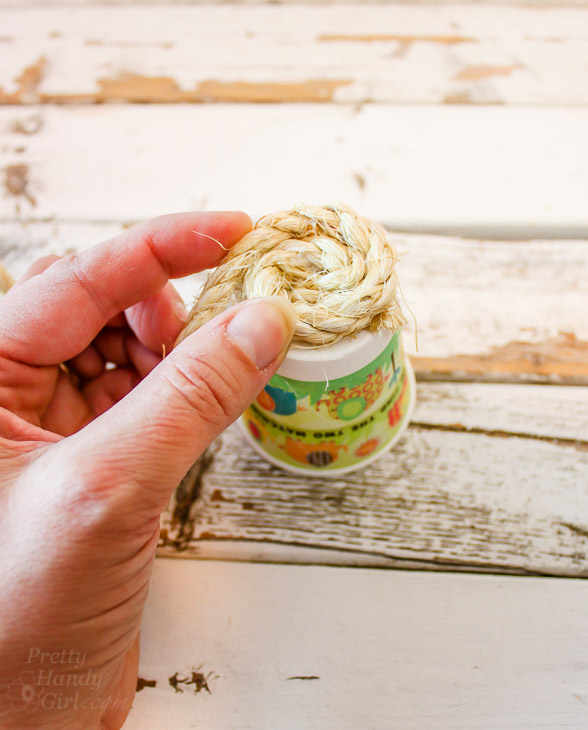
Keep adding glue and wrap the rope around the center until you have covered the bottom of the Dixie cup.

Easy to Make Hot Air Balloon Decorations | Pretty Handy Girl

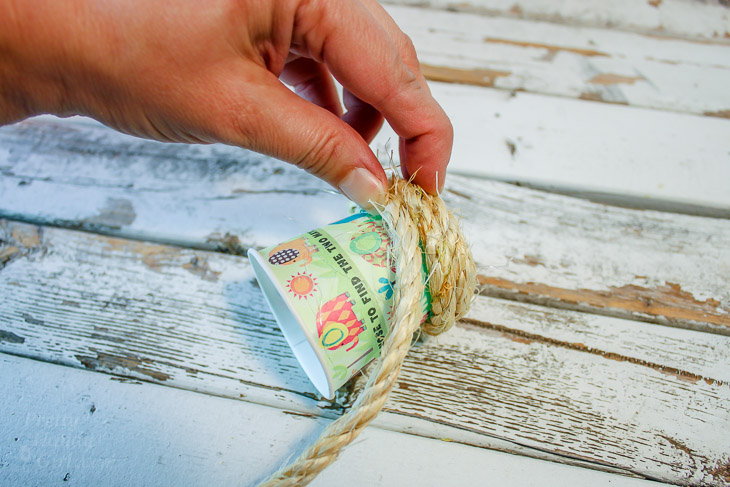
Add glue around the sides and wrap the rope around the sides of the Dixie cup. Be sure to firmly press the rope toward the bottom of the cup to avoid gaps.

Easy to Make Hot Air Balloon Decorations | Pretty Handy Girl
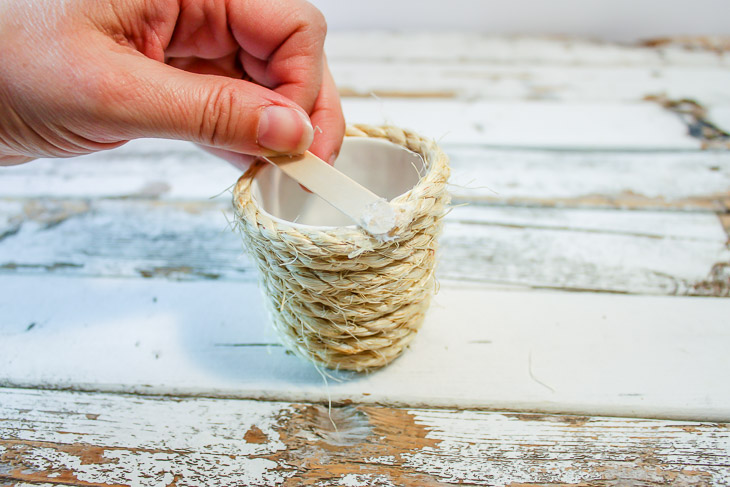
When the entire cup is covered, cut the rope and secure the end with more hot glue.

Easy to Make Hot Air Balloon Decorations | Pretty Handy Girl

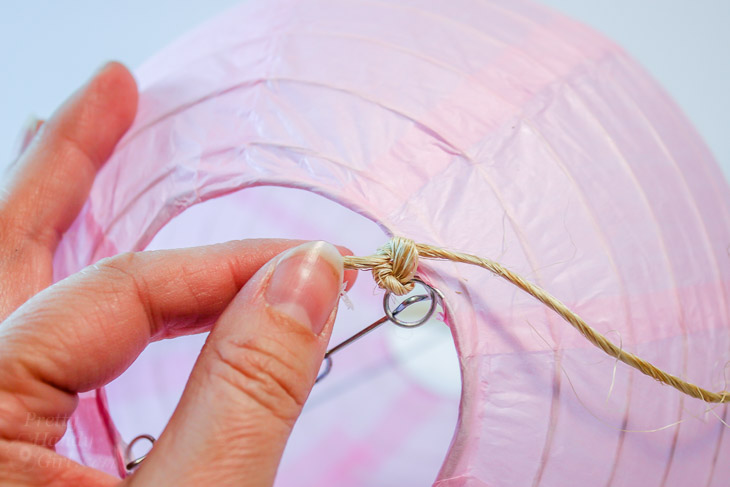
Tie one end of sisal twine to the bottom of the Chinese lantern.

Easy to Make Hot Air Balloon Decorations | Pretty Handy Girl
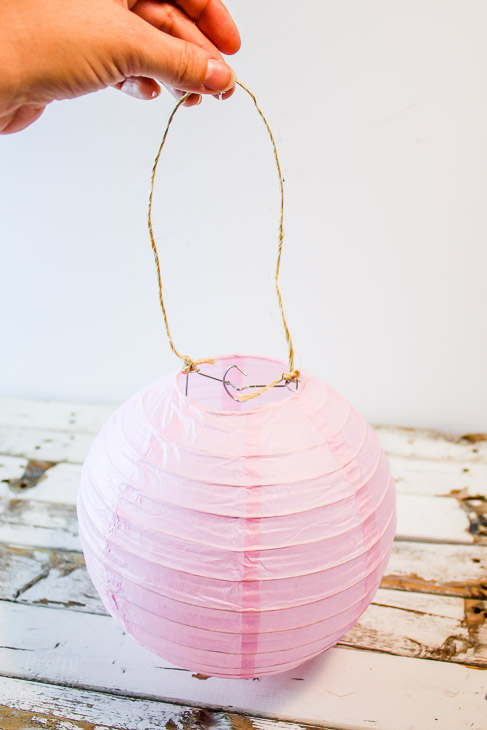
Measure the length you want for the twine and cup to hang from the lantern and cut the twine. Tie the other end to the lantern. Fold the twine in half to find the center.

Easy to Make Hot Air Balloon Decorations | Pretty Handy Girl

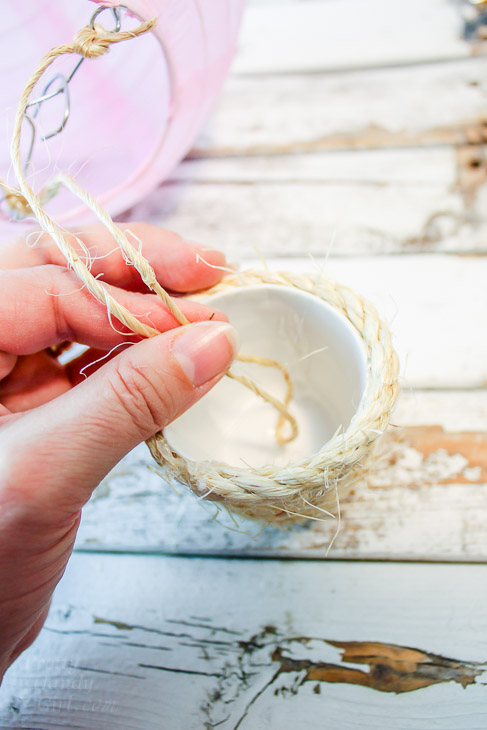
Put a dollop of glue inside the bottom of the Dixie cup. Press the center of the twine into the glue. Let harden for a minute. Run glue up both sides of the inside of the cup and press the twine into the hot glue. Make sure to adjust the twine until the cup hangs level under the lantern.
Easy to Make Hot Air Balloon Decorations | Pretty Handy Girl

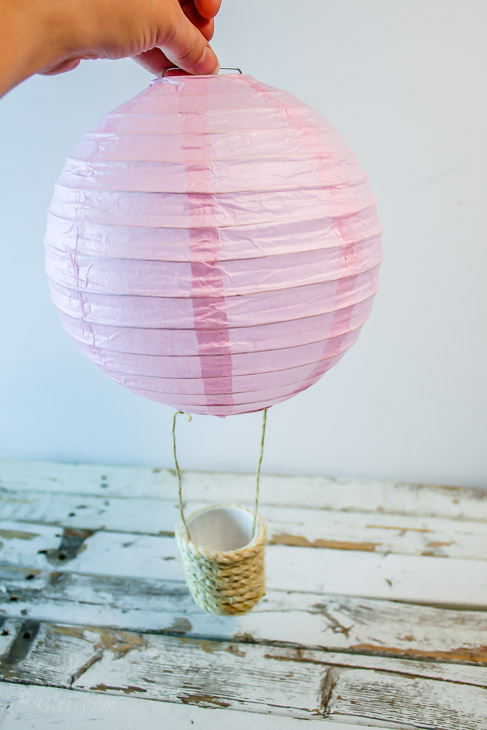
Once the hot glue hardens, you can hang your hot air balloon!

Easy to Make Hot Air Balloon Decorations | Pretty Handy Girl

It could be fun to prop little lego people into the baskets. Or add a tea light into the baskets and light them at night.

Easy to Make Hot Air Balloon Decorations | Pretty Handy Girl

Making Hot Air Balloon decorations is an easy craft project with big cuteness factor!

Easy to Make Hot Air Balloon Decorations | Pretty Handy Girl

Hope you find somewhere to hang these mini hot air balloons because they will bring a smile to your face.

PHGFancySign