La-Z-Boy Living Room Decisions | Pretty Handy Girl

La-Z-Boy Living Room Decisions | Pretty Handy Girl

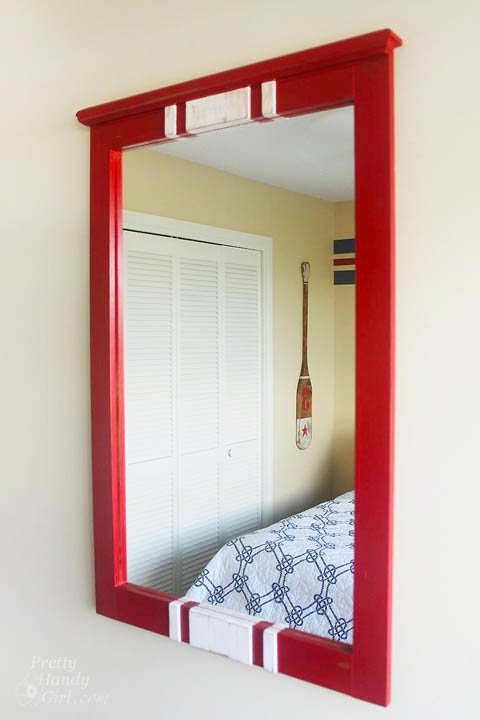
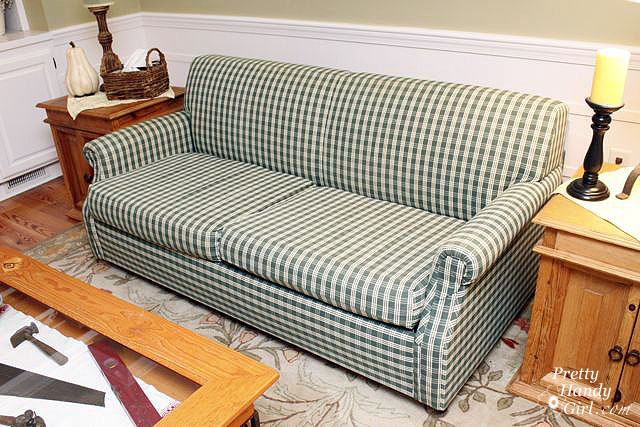
Remember when I admitted to you that we sit on a dead couple’s sofa? I’m ashamed to admit it, but Pretty Handsome Guy and I have the same sofa that was handed down to us by my godfather when his parent’s died. Several years ago I agreed to stop bringing home inexpensive big furniture pieces. Instead, we decided to wait and save for quality furniture that would last a long time. During the wait, I made the best of an ugly situation and covered that old sofa in hunter green plaid in the 90’s.

plaid_sofa

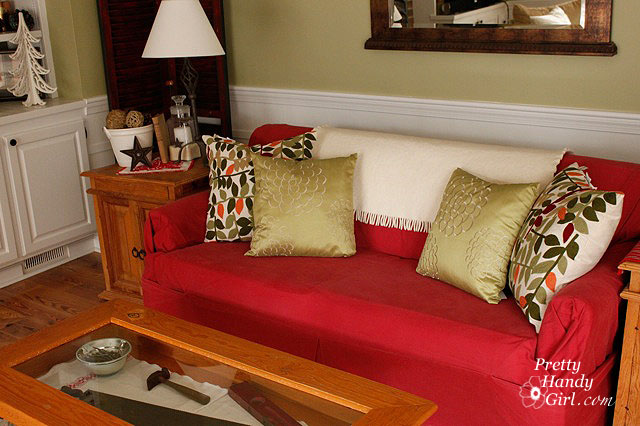
Then I bought a bright red slipcover for it in the early 2000’s.

CouchAfterFull

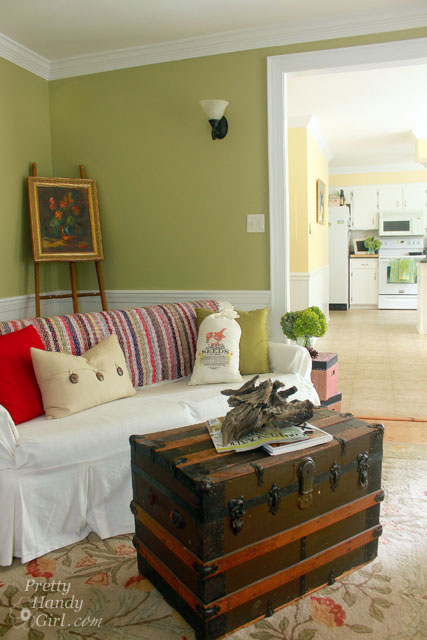
A few years ago, I added a white slipcover to hide it’s true identity.

living_room_vertical

But, when guests sit on it, they know. I know it by the looks on their faces as their rear ends collide with the hard cushions. It’s like sitting on concrete. Not to mention that the sofa is small. Not just in width, but in height too.

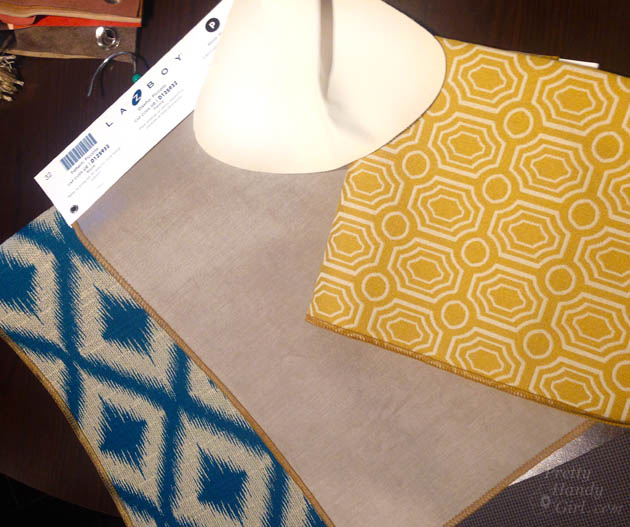
I was talking to my sister the weekend we were working on the beach condo. She is an interior designer and she expressed her disgust with my poor excuse for a sofa, “Brittany, for heaven’s sake, you are in your 40’s! Grow up already and buy a new sofa.” I was shamed and agreed that we needed to find some time to go furniture shopping again. But, this was akin to driving a broken ox to plow through a muddy field (Amazing Race reference.) Handsome Guy hates shopping…especially when it involves looking at multiple colorful swatches and fabrics. I on the other hand don’t mind that part, but I’m particular about quality and comfort. Finding furniture that will last the abuse of our boys and last for decades is important to me.

We set out one date night to hunt down the perfect sofa and drag it home to our lair. We went to half a dozen furniture stores, but none of the showrooms felt right. One was too modern. One had cheap quality sofas. One store had a pushy salesman. (Am I sounding like Goldilocks here?) Sadly, we returned home empty-handed.

In a twist of fate, I was introduced to the new look of La-Z-Boy when they approached me about participating in the Design Dash. Before then, I never considered buying a sofa at La-Z-Boy because — you know — my grandfather had a big fat roll filled La-Z-Boy and it wasn’t stylish! Boy was I wrong!

I walked into that showroom and was blown away…as in “Shut the Front Door! This can’t be a La-Z-Boy showroom.” Read more

leather heart necklaces

Hello Pretty Handy Readers!  We survived the holidays! Yes, January can be quiet but February will be here before you know it and that means Valentine’s Day. Jaime here today from That’s My Letter sharing this DIY leather heart necklace, no sewing necessary!

I’m a huge fan of giving valentines that are NOT CANDY and this project certainly fits the bill.  I used leather scraps and waxed hemp cording to make these simple leather heart necklaces.

leather heart necklaces 1

Add a lot of hearts or only one. It’s completely up to you!

leather hearts necklace 2

My necklaces are finished with adjustable sliding knots so the person wearing the necklace can have it loose and dangly or more snug up on the collarbone.

Materials:

leather heart necklace supplies

  • Leather (small pieces or scraps)
  • Cardstock (small piece for heart template)
  • Pen
  • Scissors
  • Waxed hemp cording
  • Hot glue gun & glue sticks

Step 1: Make a pattern for a heart shape similar to the one pictured above – two hearts with their points together.  Cut the pattern out of cardstock. Using a pen and your leather scrap trace around the pattern then cut out desired number of hearts.

leather heart necklace step 1

Step 2: Cut 34″ of cording for one necklace.  Place one heart shape under the cording as shown. Read more

Metallic Color Block Canisters | Pretty Handy Girl

Metallic Color Block Canisters | Pretty Handy Girl

I’m back with another easy Lowe’s Creative Idea this month. When you get tired of your cobalt blue canisters you can easily spray paint them with a metallic color block pattern. That’s exactly what I decided to do with my thrift store canisters.

I’ve been on a major mission to purge things I no longer use or love from my house. I have almost completely filled our dining room with things to donate. I had contemplated donating my cobalt kitchen canisters because the color wasn’t making me happy anymore. But, then I realized that I could give them an entirely new look with some spray paint.

Materials:

Instructions:

Remove the lids, the metal ring, and spoons from your canisters.

Metallic Color Block Canisters | Pretty Handy Girl
(Wood plank photo backdrop courtesy of Leen the Graphics Queen.)

Use a sanding block to lightly rough up the surface of the canisters. Wipe all the sanding dust off with a damp rag.

Metallic Color Block Canisters | Pretty Handy Girl

Spray the outside and base of the canisters with Valspar Premium Primer. Read more

rustic wine bottle centerpiece

Hey everyone!  Jacque here from The DIY Village again to bring you another quick DIY tutorial! A few years ago I was given a really cool set of drinking glasses made out of old wine bottles.  Recently we purchased some new glasses but I wasn’t ready to donate the old glasses quite yet and decided to come up with a way to recycle them and keep them functional in our home.  After some thought, my rustic wine bottle centerpiece was born.

MATERIALS:

  • 1/2″ x 4″ x 4′  Poplar Board – Cut into 2- 5 1/2″ wide pieces
  • 1/2″ x 5 1/2″ x 4′ Poplar Board – Cut in half
  • 12 – 8 Penny Nails (Truss Hanger Nails)
  • 1/8″ Drill Bit
  • Drill
  • 3 1/2″ Hole Saw
  • Clamp
  • Sandpaper
  • Drill Press
  • Straight Edge (Speed Square)
  • Sliding Rule Square
  • Walnut Gel Stain
  • Foam Brush
  • Paper Towels
  • Pencil

Instructions:

measure in

Start by cutting the 5 1/2″ board in half to leave you with  two boards approximately 24″ long.

measure over 7

Measure 3.5″ out from the center line and mark a line with your speed square. Repeat on the opposite side of your center line. Measure 7″ out from the two center lines and make a mark with your speed square. These will be the center points for your four openings.

find center

Use the wine bottle glass as a guide to help center the glass on the board.  Set the sliding rule square and use as a guide so that the glasses will be straight across the rest of the board.  Using a pencil to trace around the outside edge of the glass, repeat for all four holes. Read more

Racing Stripe Mirror Makeover | Pretty Handy Girl

Racing Stripe Mirror Makeover | Pretty Handy Girl

While my sister and I were renovating the Topsail Beach condo we had a strict budget. Finding a large mirror for less than $15 was challenging until I found this mirror with potential. I know my sister was doubtful, but I had a vision. Some red milk paint, lattice and glue would make this racing stripe makeover complete!

Racing Stripe Mirror Makeover | Pretty Handy Girl

To transform the mirror, I disassembled the top and cut off the panel portion using my Dremel MultiMax. I salvaged the top crown moulding and re-attached it to the new top of the mirror with glue and finish nails.

Then it was time to add stripes.

Materials (some links are Amazon affiliate links):

Instructions:

Tape off the edge of the mirror where it meets the frame. Paint two coats of Miss Mustard Seed Tricycle red paint onto the frame. (See this post for painting with milk paint.)

Racing Stripe Mirror Makeover | Pretty Handy Girl

After the paint dries, wax it or leave it unfinished. Mark the center of the frame at the top and bottom of the mirror.

Racing Stripe Mirror Makeover | Pretty Handy Girl

Cut pieces of lattice to fit the mirror frame width. (I used three pieces of lattice and cut a fourth piece in half for the outer stripes.) Pre-paint the lattice pieces ironstone (white) and let dry.

Wet the frame and the back of the lattice. Apply a small amount of Gorilla Glue to the backs of the lattice.

Racing Stripe Mirror Makeover | Pretty Handy Girl

Line up the center lattice piece with the pencil mark. Attach it and the other two pieces beside the middle lattice.

Racing Stripe Mirror Makeover | Pretty Handy Girl

Use a ruler to create a space between the middle stripe and the outer small lattice piece. Glue the outer pieces in place.

Racing Stripe Mirror Makeover | Pretty Handy Girl

Set a weight (or paint can) on top of a scrap board and the lattice pieces while the glue dries.

Racing Stripe Mirror Makeover | Pretty Handy Girl

Remove the weight. Paint the top and bottom edge of the mirror frame white to create the illusion that the stripe continues around the frame edges. Distress the lattice pieces with sandpaper if you want a rustic look.

Racing Stripe Mirror Makeover | Pretty Handy Girl

Hang your mirror on the wall and admire! Not bad for $15, two coats of paint, and some scrap lattice!

Some red milk paint, lattice and glue transform this $15 find into a charming racing stripe mirror perfect for a boys' room! | thrift store makeover | DIY mirror | mirror tutorial | #prettyhandygirl #DIY #tutorial

The mirror hangs happily in the twin bedroom at the Topsail Beach Condo. Click here to see the rest of the condo!

Some red milk paint, lattice and glue transform this $15 find into a charming racing stripe mirror perfect for a boys' room! | thrift store makeover | DIY mirror | mirror tutorial | #prettyhandygirl #DIY #tutorial

Hope you never turn down a $15 mirror again ;-).

PHGFancySign


Pin for later!