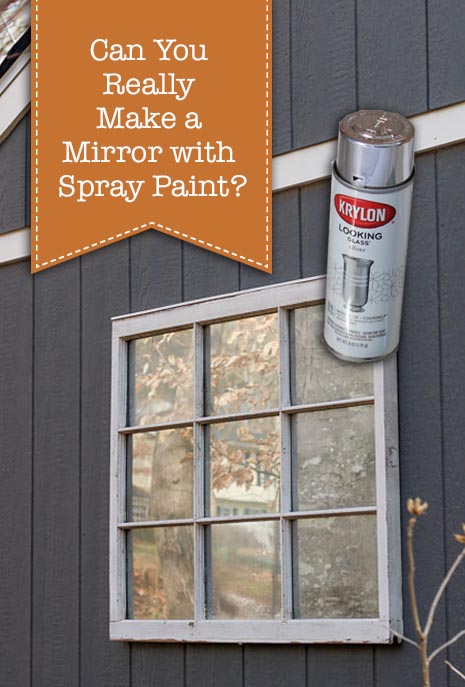
 Can You REALLY Make a Mirrored Window with Spray Paint?
I have to admit, I was skeptical when I picked up a can of Krylon Looking Glass spray paint. According to the directions, you can Make Your Own Mirrored Glass with Spray Paint. I decided to give this “magical” spray paint a try, and I’ll let you know how well it works. Luckily, I had the perfect project to use it on: a faux window on the back of our garden shed.
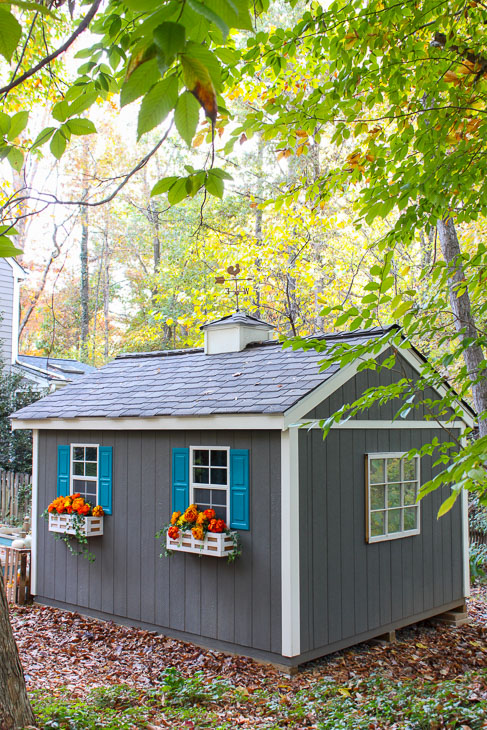
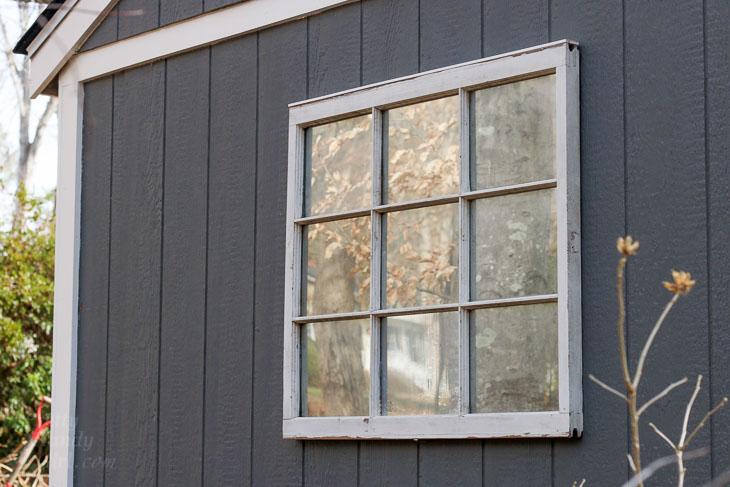
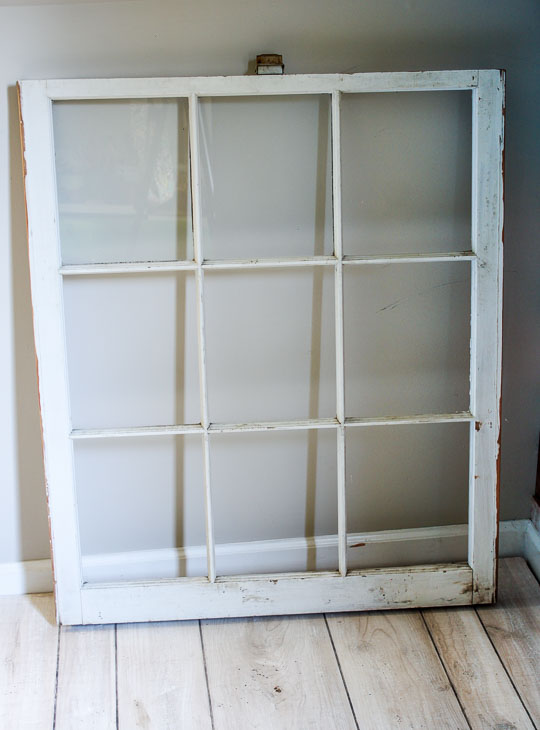
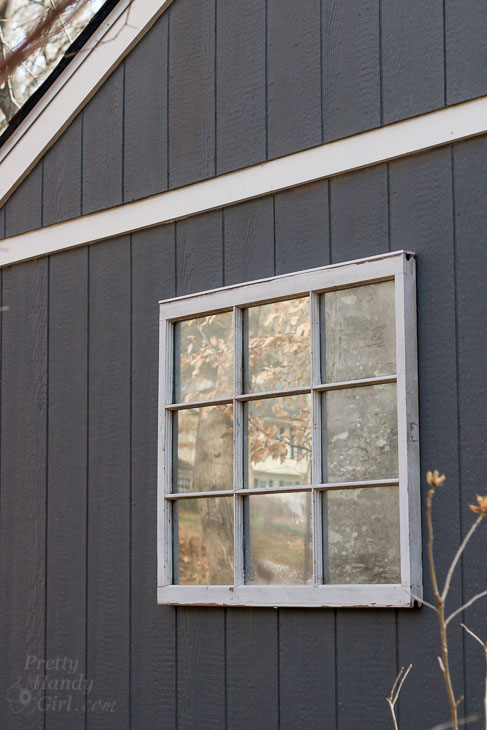
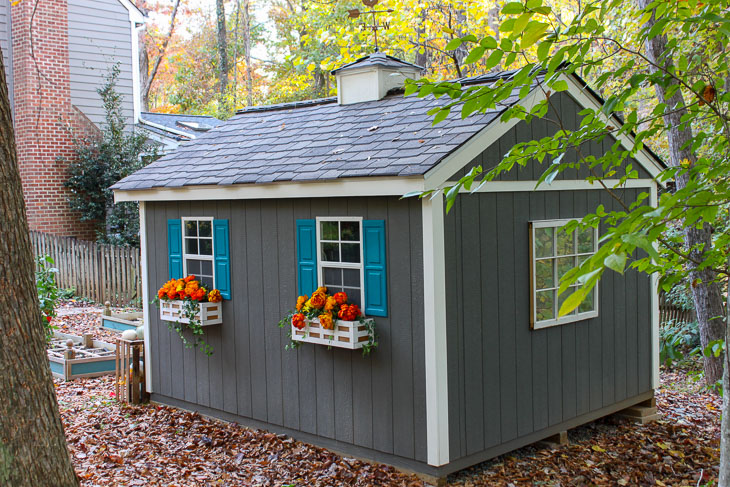
When I built this cute garden shed, I was very concerned about the view from the neighbors’ house. The plans were to build the shed on the side of our property, but the back of the shed was facing my neighbor’s driveway. I wanted to make sure they had something pretty to look at instead of a big gray shed butt. I toyed with the idea of installing a trellis with a pretty climbing vine. But, that side of the shed gets very little sun. Ultimately my decision was helped by a trip to our local Habitat ReStore. While there I stumbled across a pile of old windows that were $10 each. Yes, $10! If you haven’t been to your local Habitat ReStore, you need to go right now. (Well, maybe wait until you finish reading this tutorial.)
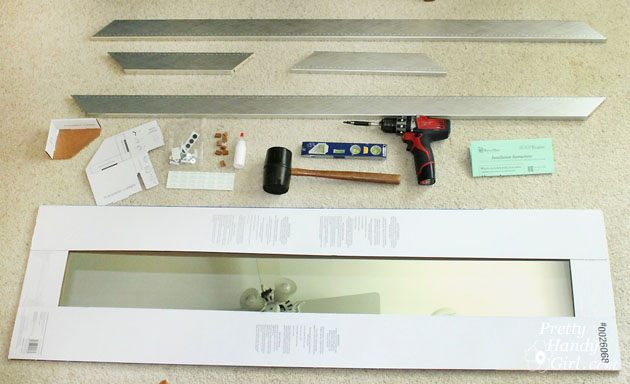
Mirrored Window with Spray Paint Materials:
(I’ve included affiliate links for your convenience. I earn a small percentage from a purchase using these links. There is no additional cost to you. You can read more about affiliate links here.)
- Old window
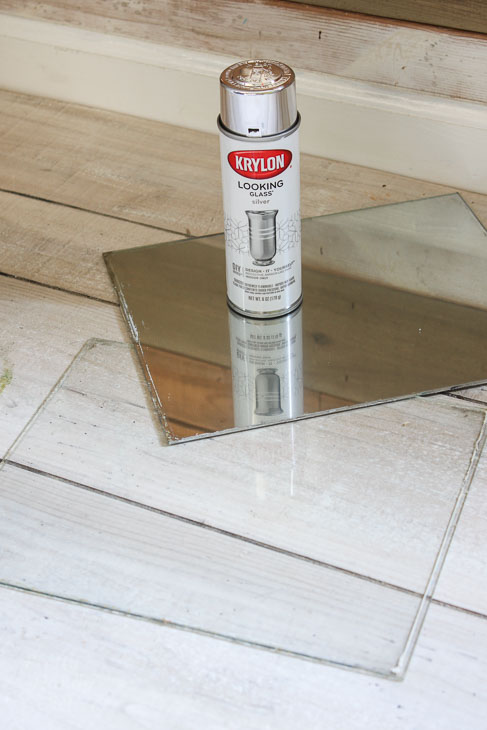
- Krylon Looking Glass Spray Paint
- Clean rag
- Windex
- Clear exterior caulk sealant
- Caulk gun
- Scissors to cut caulk tube
Optional:
Mirrored Window with Spray Paint Instructions:
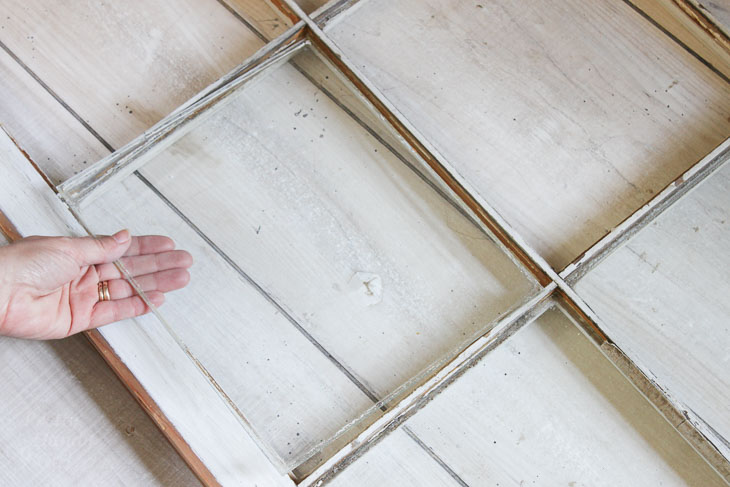
Clean the window with windex to get rid of any dust, dirt, and grime. Pop out the glass panes (if the glazing is super old and cracked it should come out easily. If not, use a utility knife and/or a 5-in-1 Painter’s tool to cut out the glazing and then remove the glass.) Unsure which side of the window is the glazed side? Look for the smooth side vs. the wood profiled side.
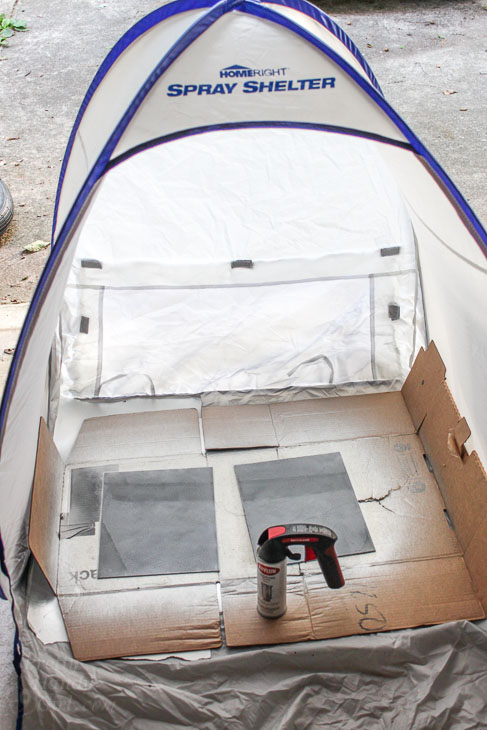
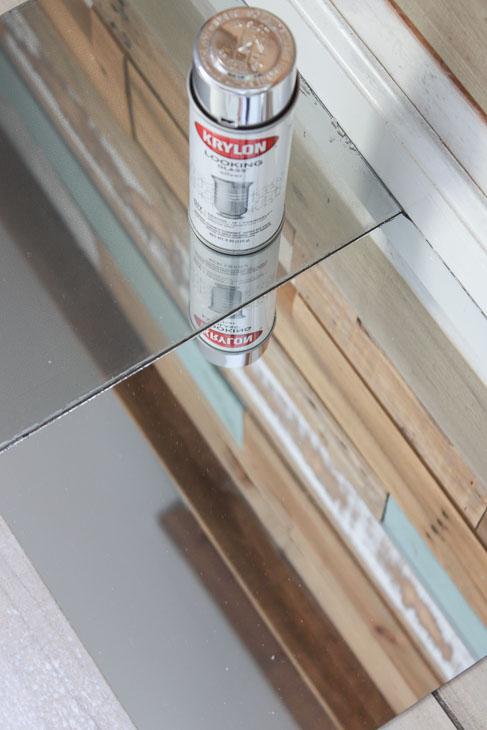
Set up an area to spray your panes of glass. Shake your can of Krylon Looking Glass spray paint for at least 2 minutes.
I finally tried this HomeRight Spray Shelter pop up tent. It definitely helps control the spray and makes clean up easy. Plus, the shelter folds down into a little bag to store in small spaces. (Disclosure: HomeRight sent it to me to try out ages ago. I just got around to using it. But, I’ll be using more often now.)
To get the best results with the Looking Glass spray paint, spray several light coats onto the back side of your glass. While the paint is drying, it will have a mottled look (do not panic.)
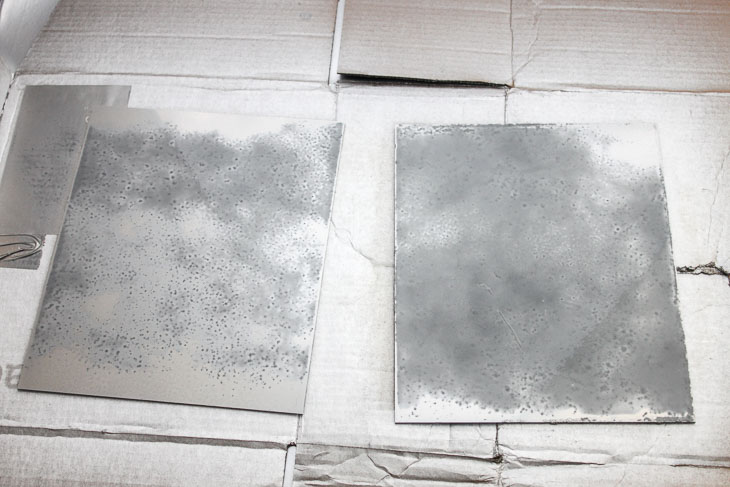
When you have finished applying several coats (and you have achieved an opaque mirror finish), let the glass dry completely.
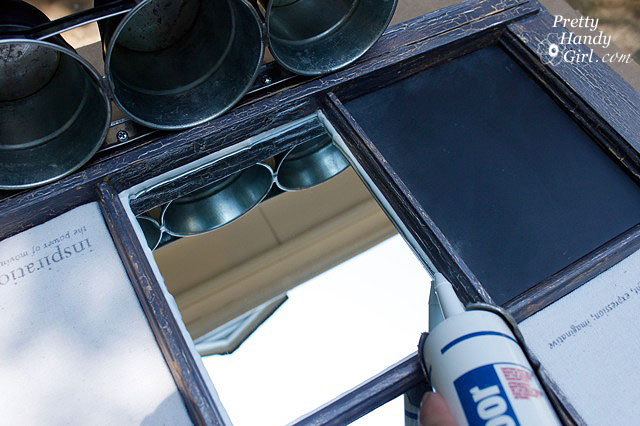
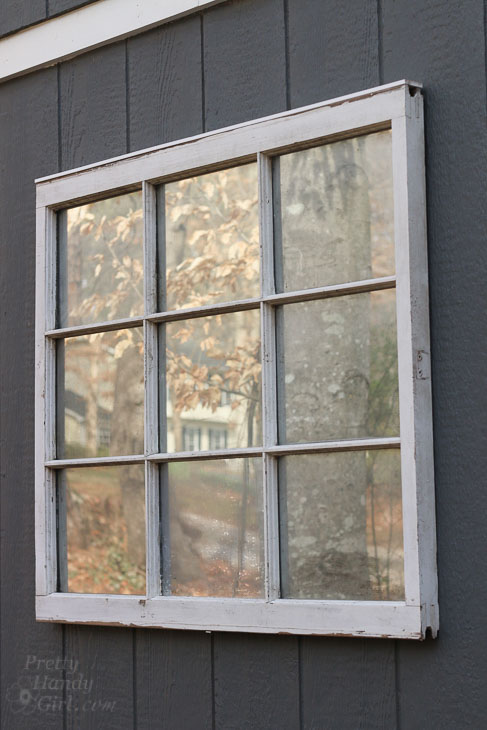
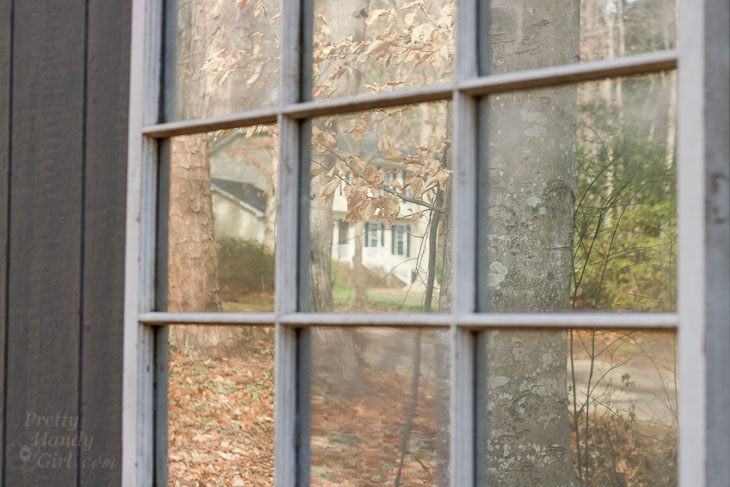
Flip over your mirror spray painted glass. Secure the mirrored panes back into your window. Use a line of caulk on the back side of the mirrored glass where it sits against the window. (Yes, I forgot to take a picture as I caulked the window, this is a recycled picture from my artist inspiration board. You get the idea, right?)
Hang your mirrored glass window anywhere you want a faux window.
Are you wondering how good the looking glass mirror spray works? I placed one of the pieces of the spray painted glass next to real mirror. You can see that they are both reflective. But, the Looking Glass spray has a slightly muted look.
To be completely honest, I actually like the look. It gives the mirror finish an aged appearance.
You can see a good example of the finish here:
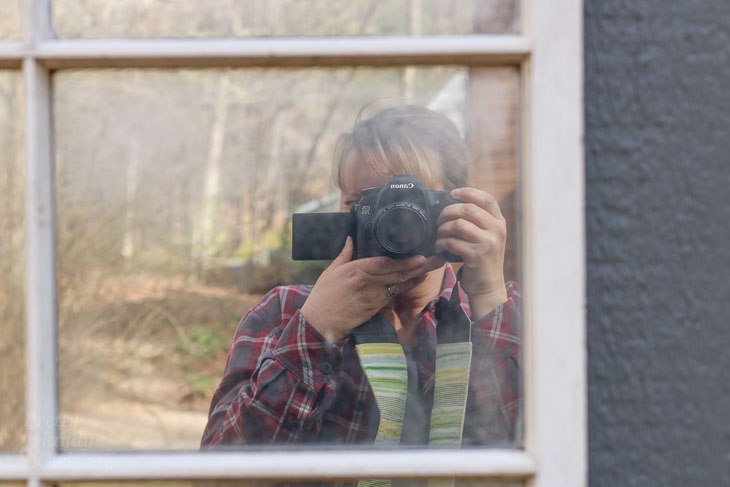
It’s still reflective enough to act like a mirror, but isn’t a perfect reflection when you look up close.
What do you think? Will you try the Krylon Looking Glass spray paint on something?
If you still have some mirror spray paint leftover, you can follow this tutorial to make your own mercury glass decor items (using a vinegar and water mixture.)
I am still debating whether to make some shutters to go on the sides of my faux window. What do you think?
Let me know if you have any other ideas for using this fun mirrored glass spray paint.
Have a great weekend, friends.
![]()