We had a great turnout at the Habitat ReStore demonstration on Saturday! Thank you to everyone who showed up. It was nice meeting some new friends. There will be another talk at 1 pm on Saturday, December 10th at the Cary, NC Habitat ReStore! I hope you can make it, because I’ll be showing how to turn some common ReStore items into holiday gifts and décor.

And now for the tutorial that you really wanted to see — but couldn’t make it to see — making a shoe storage bench out of an kitchen wall cabinet!

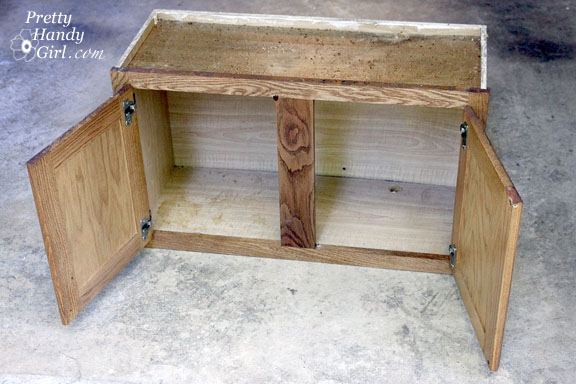
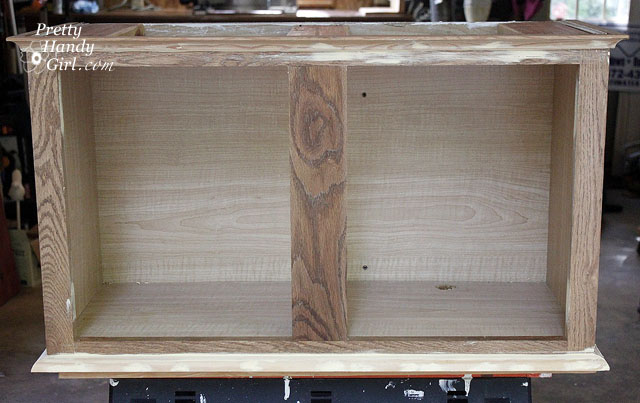
Wall cabinets that fit over your fridge or stove work really well for this shoe storage bench project. Ideally the cabinet will be 18″ in height (standard seat height). If it is shorter, you can build a base for your bench to raise it up a little.

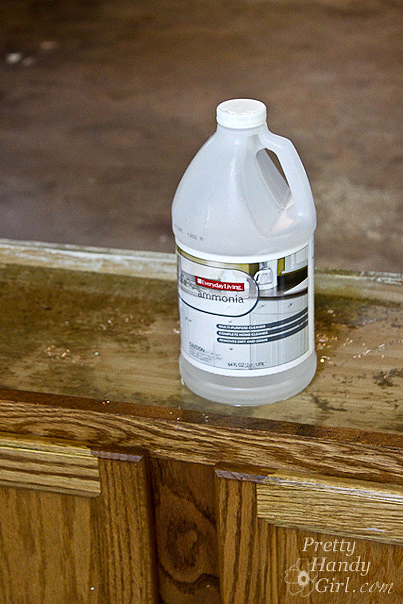
It is more than likely that these cabinets will be coated with about 5 lbs. of grease. But, have not fear, I found THE BEST cleaner for removing grease. Hot water and ammonia! You must work in a well ventilated area when working with ammonia. Sponge on the ammonia and hot water concoction and wait about 10 minutes. Wipe off the cabinet and repeat until clean.

Materials:

  • Ammonia, hot water and a sponge or rag (to clean off grease)
  • Screwdriver
  • Hammer
  • Nail set
  • Miter saw
  • Pencil
  • Level
  • Tape measure
  • Wood putty
  • Sandpaper
  • Construction or thick wood glue
  • Primer
  • Paint
  • Paint brush
  • 2″ finish nails
  • 1 and 1/4″ finish nails
  • Quarter round moulding for base of cabinet
  • Cove moulding for top of cabinet
  • 1″ thick board (cut to fit inside cabinet dimensions)
  • 1×4″ pine firring strips
  • Plywood or pine board cut to fit 3″ wider and 1.5″ deer than finished dimensions of the cabinet (after moulding is added.)
  • Optional: Thin plywood to use as a filler strip


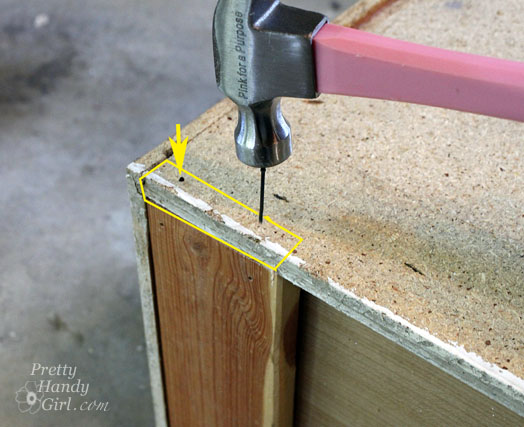
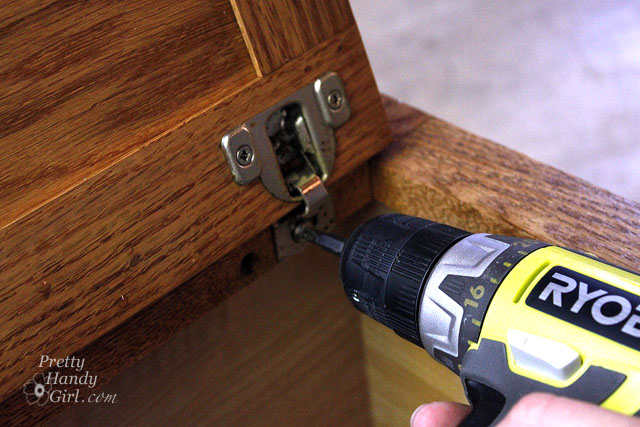
Remove all the hardware and the doors. Remove any nails that are poking out or hammer them flush with the wood.
Measure the inside depth of the top of your cabinet.

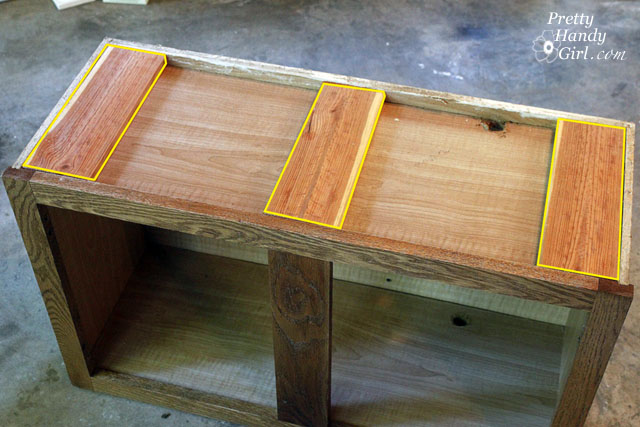
Cut three 1×4″ boards to sit on top of the cabinet and use for the bench support and to give your nails something to grip when attaching the bench top. (Without these supports it would be very difficult to nail or screw into the particle board cabinet without it flaking and chipping.)

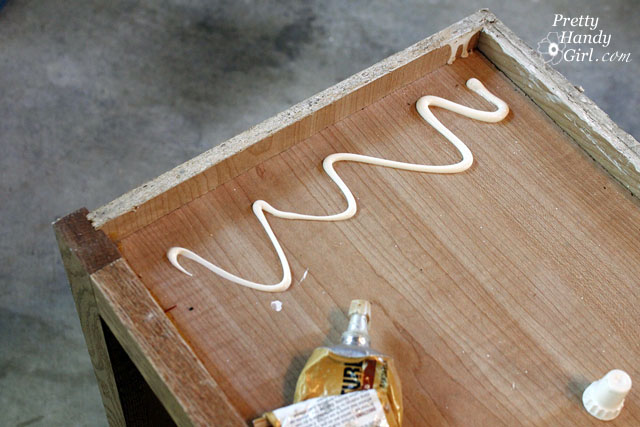
Use thick construction glue to attach the boards. (Glues that have a toothpaste consistency.)

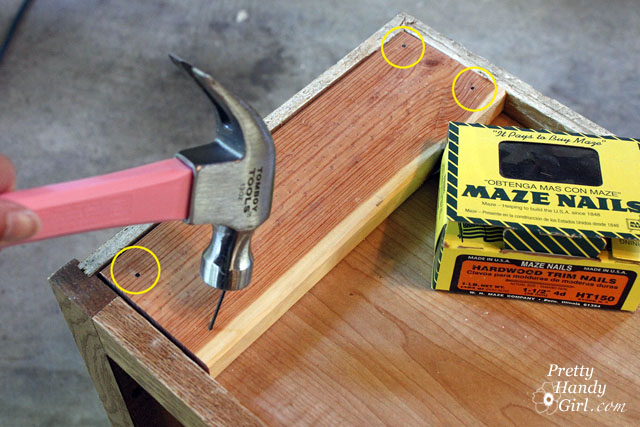
Nail finish nails into the boards at an angle to secure them.

For good measure, nail two more finish nails through the back of the cabinet and into the ends of the support boards.

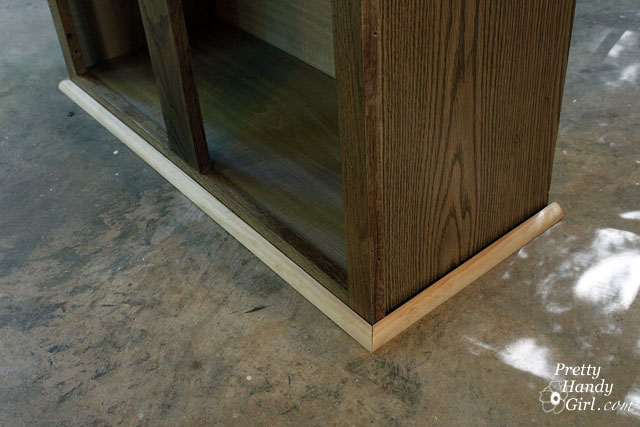
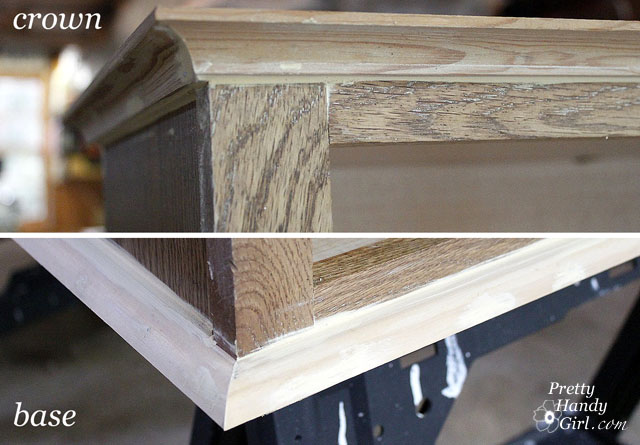
Measure your cabinet sides and front. Cut quarter round (convex shape) for the base of your cabinet and cove moulding (concave shape) for the top of your cabinet.

Here is a close up of the moulding I used for the base and crown of the cabinet.

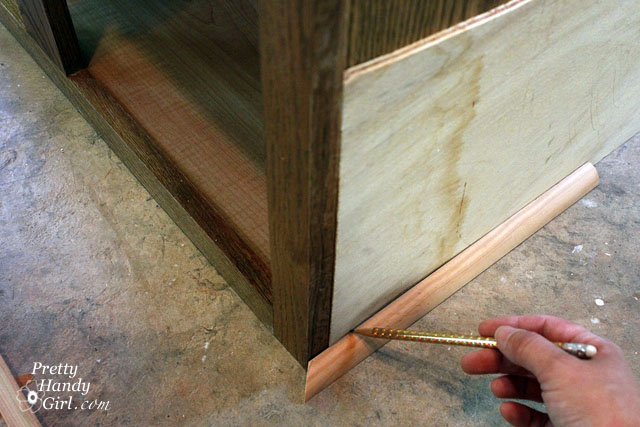
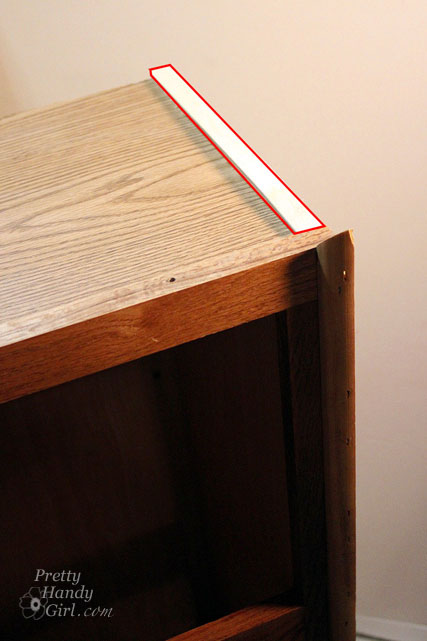
If the face frame of your cabinet juts out past the side, you’ll have a gap (see below). No worries, we can fix that!

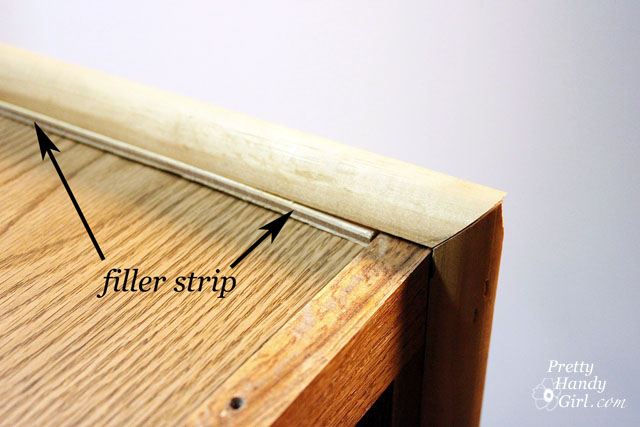
Slip a piece of thin plywood to fit behind the quarter round (and cove moulding). Draw a line at the top of your quarter round (and bottom of the cove moulding). Cut the plywood piece with a jig saw.

Glue the thin plywood strip onto the cabinet.

Rest your moulding on top of the filler strip.

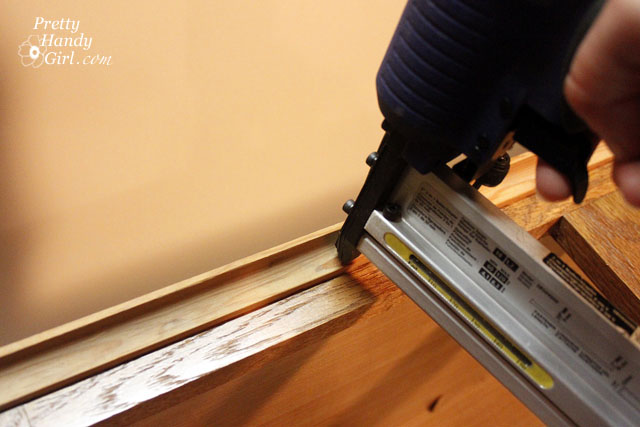
Predrill holes in your trim moulding, then hammer finish nails to secure the trim. If you are using a finish nailer to secure the moulding pieces, you won’t need to pre-drill.

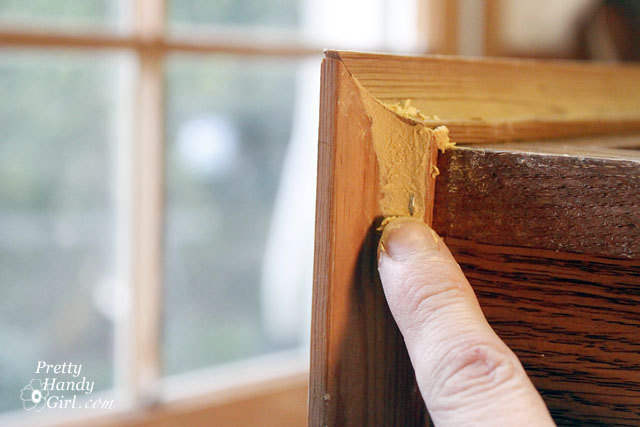
Fill any nail holes or cracks with wood putty.

Fill the seams of the filler strips with wood putty too.

Allow the wood putty to dry and then sand it smooth.

Your cabinet should look something like this:

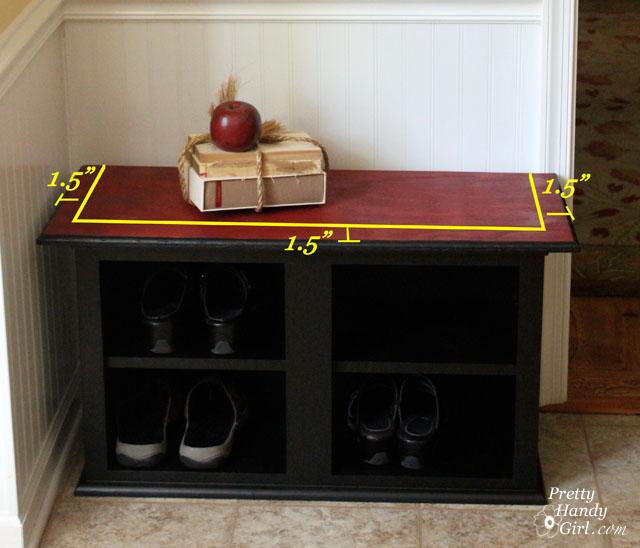
For the top of your bench, cut a piece of wood that is 3″ wider and 1.5″ deeper than the top dimensions of the cabinet (be sure to measure to the edge of the crown moulding.) Sand it smooth. Stain or paint the bench top.

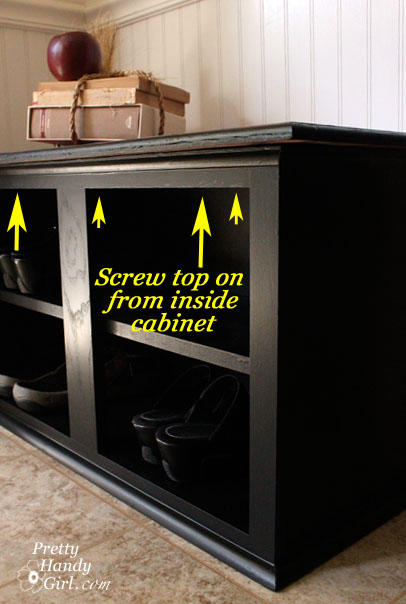
At this point, you can attach your bench top by screwing a few screws from inside the cabinet up through the support pieces and into the bench top.

*For demonstration purposes, the video will show how I attached the bench top with glue and finish nails from the top: Add some construction glue to the wood supports. Then, nail the top into the three support boards on top of the cabinet. Fill the holes left by the nails. And touch up the spots with stain or paint. Either way will work, but the screws from below will save you the work of adding wood putty and/or touching up the nail holes.

To install the shelf, level the board you cut to fit inside the cabinet (or shall I call it a bench since we are almost done!)
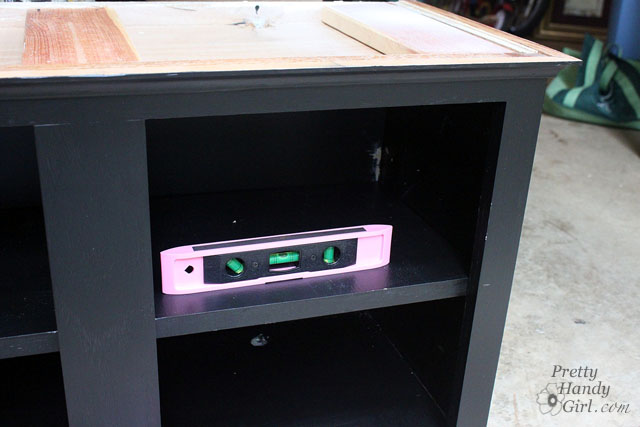

Use either “L” brackets inside the cabinet to hold the shelf or hammer nails from the side and into the ends of the shelf to secure it. Luckily shoes aren’t super heavy, so you can get away with using finish nails to hold the shelf in place.
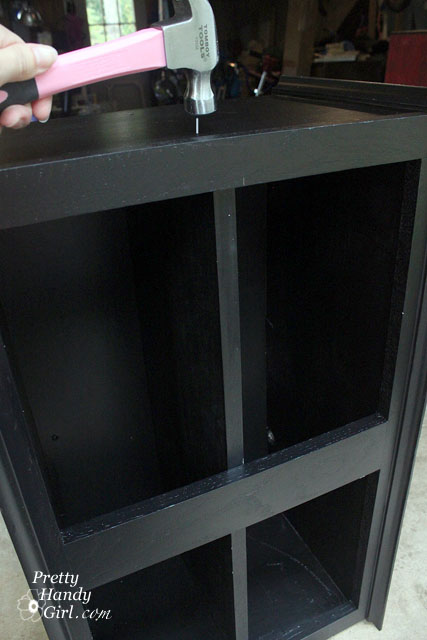

Use a nail set to sink the nail below the wood surface.
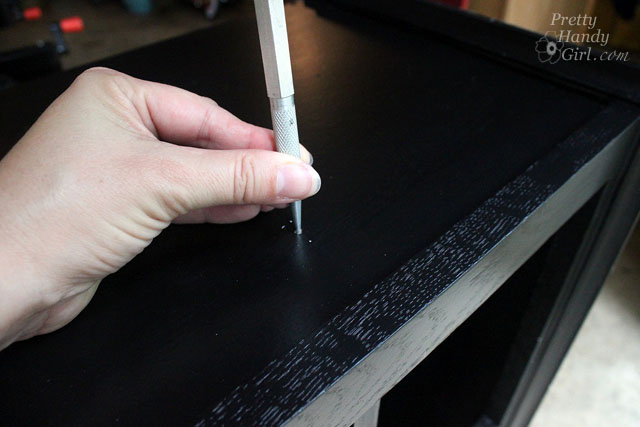

Add a small amount of wood putty to the nail hole.
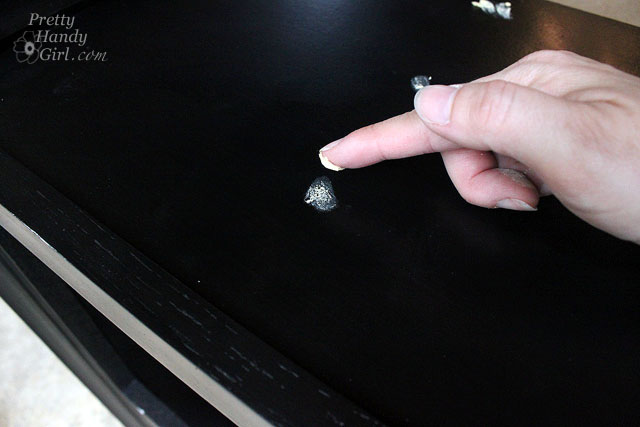

Gently sand the cabinet and shelf to scuff up the surface and give it a “tooth” for the primer to adhere to. Prime the cabinet and bench.
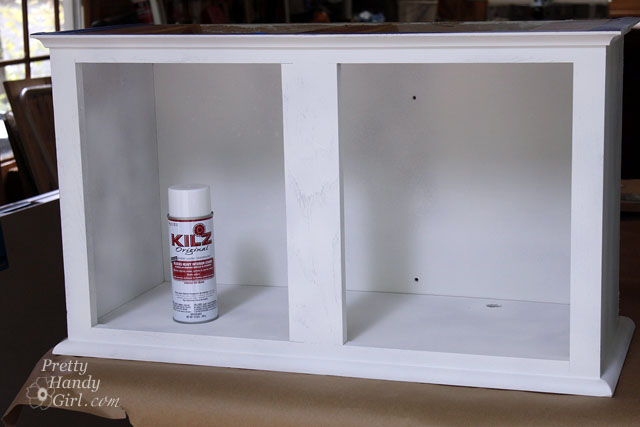

Paint the cabinet, shelf and bench.
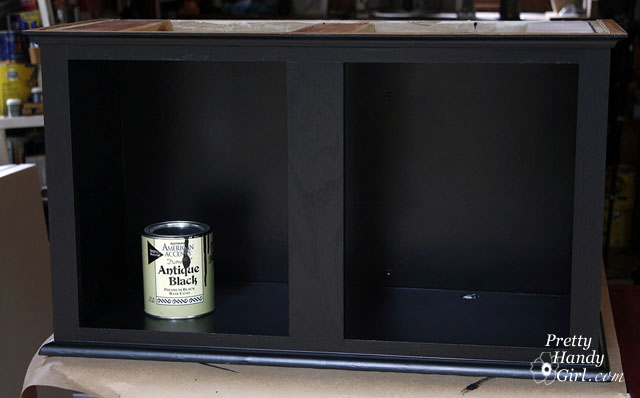

Protect your bench with a few coats of polyurethane and you are done!
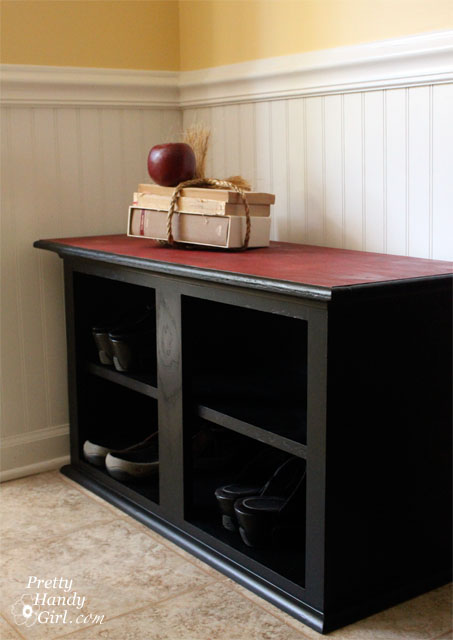

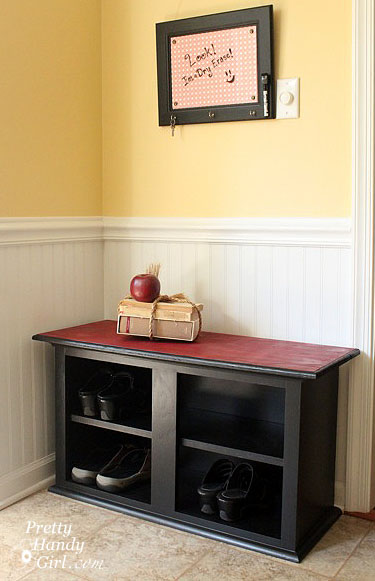
Room for about 8 pairs of shoes! If you wanted a larger bench or more storage, you could attach two cabinets side by side.


Here is the video from my Habitat ReStore talk. (I apologize about some of the background noise.)

By the way, thanks to my sponsors Bogs Footwear (boots) and Tomboy Tools (tool belt.) I need to lower that belt a little ;-). I was rushing in and just buckled it on me without adjusting it.


Sharing this tutorial with Home Stories A2Z Tutorials and Tips Link Party and The Shabby Creek Cottage’s Transformation Thursday

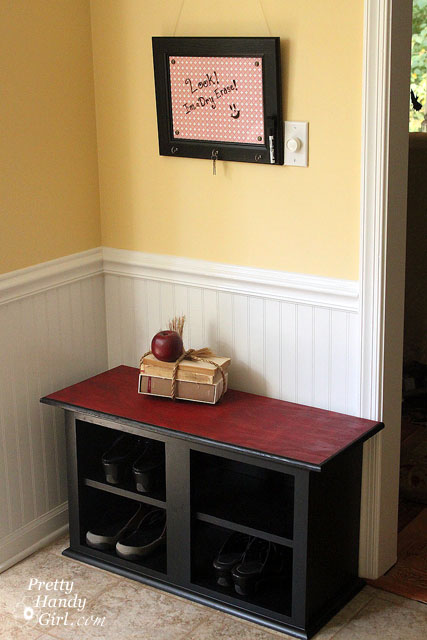
Happy Monday morning y’all! I’ve been working like a busy bee this past month. So many projects! I need to clone myself so one of us can work on the projects like this dry erase message board and the other can write the posts. (Luckily I had an extra hour yesterday thanks to switching back to standard time.)
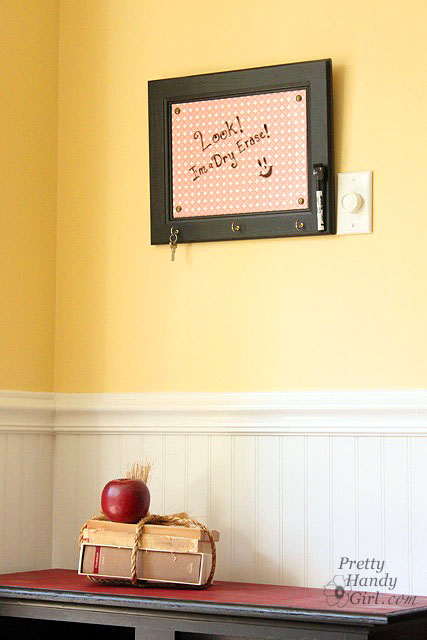
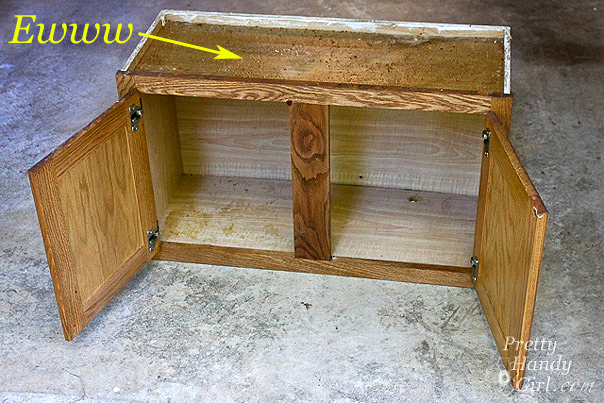
One of the reasons I’ve been so busy is that I will be giving my first demonstration at the Raleigh Habitat for Humanity ReStore this Saturday at 1pm. If you are in the area, I’d love to see you. Here is the address and more information about the  ReStore. I will be demonstrating how I turned a truly nasty greased wall cabinet into this charming shoe storage bench.
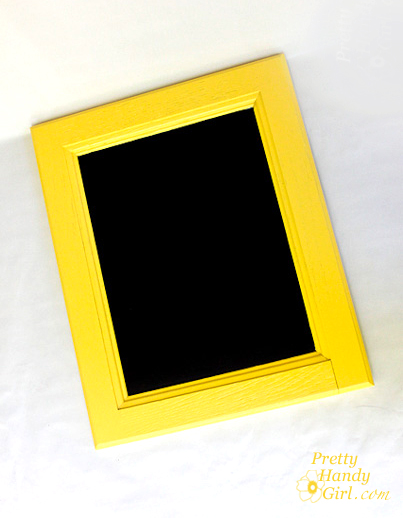
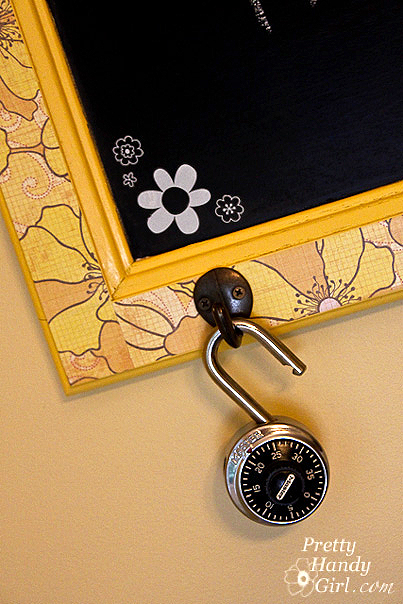
I’m not the type who can throw something away, so when I removed the cabinet doors to make the shoe bench, I decided to salvage them and make message boards. The first one was transformed into a cute chalkboard frame.

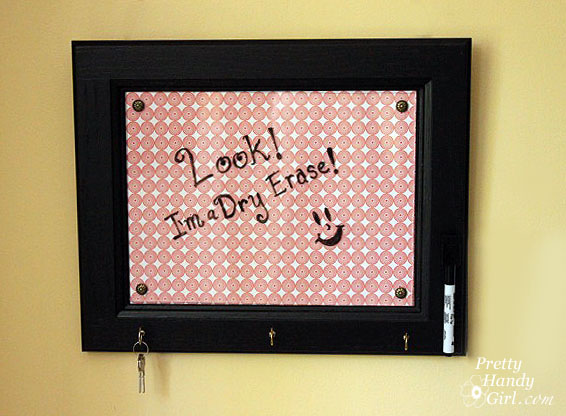
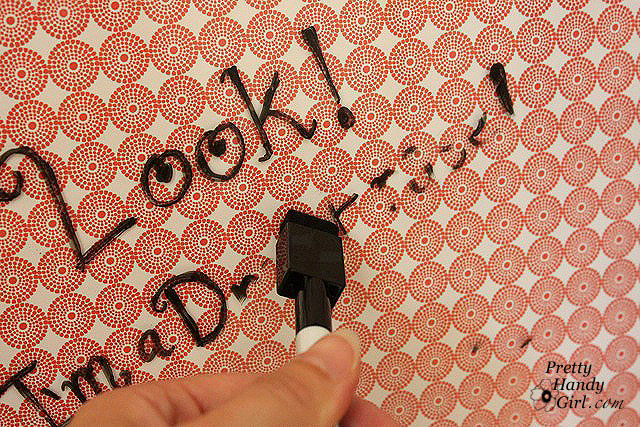
The other one was turned into a — you guessed it —  a dry erase message board!  And of course (because I love you), I’ll share with you how I made it.


Materials:

  • Cabinet door (pre-primed and painted)
  • Plexiglass cut to the interior panel dimension
  • Scrapbook paper (choose a light color that dry erase marker will show up on top of)
  • 4 Nail head trim tacks
  • 3 Cup hooks
  • X-acto blade
  • Metal ruler
  • Sharpie marker
  • Drill and bits
  • Scrap of wood
  • Hammer
  • Needle-nosed pliers
  • Dry erase marker
  • E-6000 glue

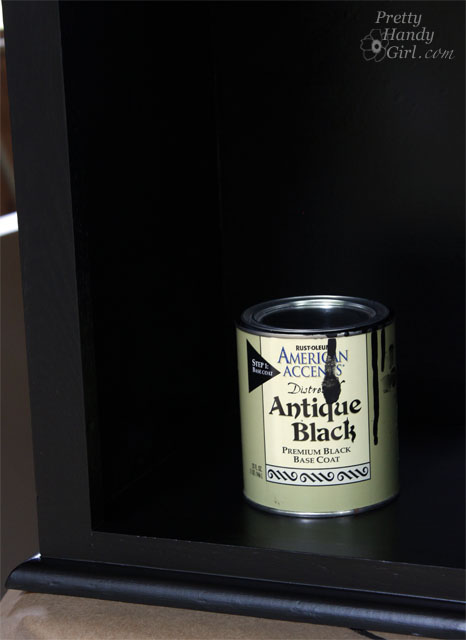
1. If you haven’t already: clean, prime and paint your door. It isn’t necessary, but if you want to give your cabinet door a new look, go ahead and paint it any color you like! The sky is the limit on color. I used American Accents Antique Black.

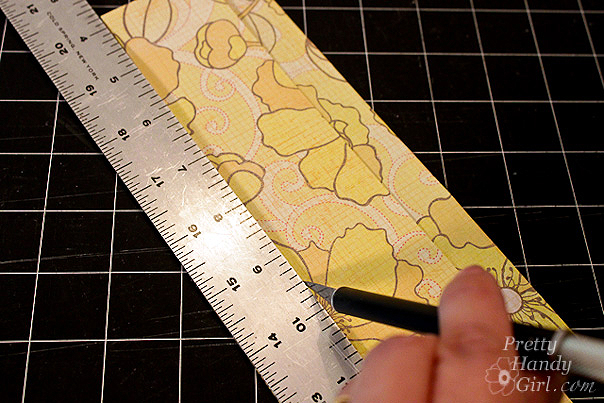
2. Now, cut your scrapbook paper to fit inside the cabinet door panel. As always, be sure you are using a fresh new x-acto blade and a metal edged ruler.

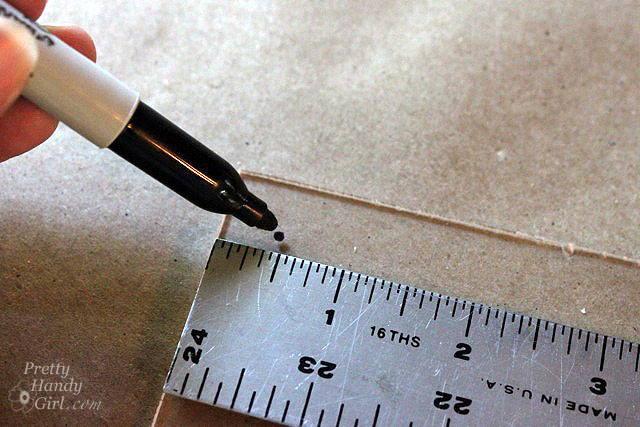
3. Next mark a dot 1/2 inch from the corners of the plexiglass.

4. Drill a small hole through the plexiglass at each dot. Use a drill bit that is slightly larger than the nail on your nail head tack.

5. Lay your scrapbook paper into the panel, then rest your plexiglass on top of the paper. (I purposely didn’t glue the scrapbook paper so I could change it out when I want a décor change.)
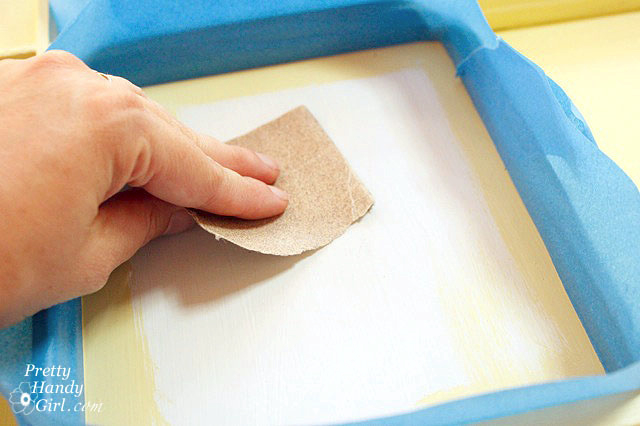
6. Set a nail head into each corner hole in the plexi. Hold the nail with the needle-nosed pliers as you hammer each tack into the cabinet door.

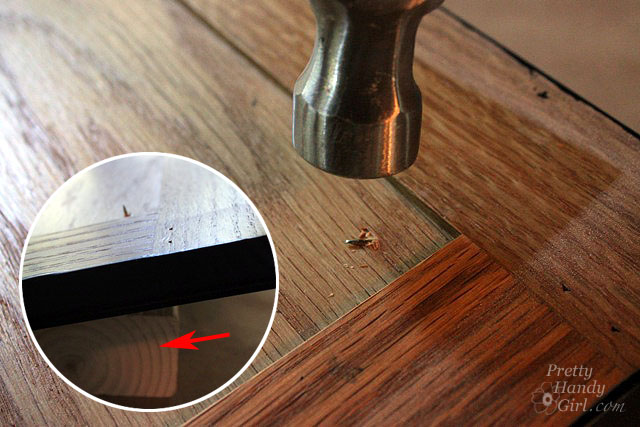
7. If your tacks go through the back, flip over the cabinet door. Set the piece of scrap wood (red arrow) under the nail head and hammer the point of the nail to bend it to the side (so no one gets poked!)

8. Use a ruler to mark where you want your cup hooks mounted. Pre-drill holes for your cup hooks using a drill bit slightly smaller than the cup hook screw end. Then screw them into the holes.

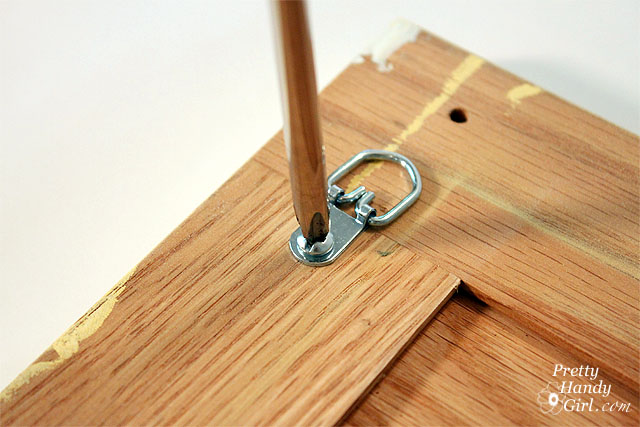
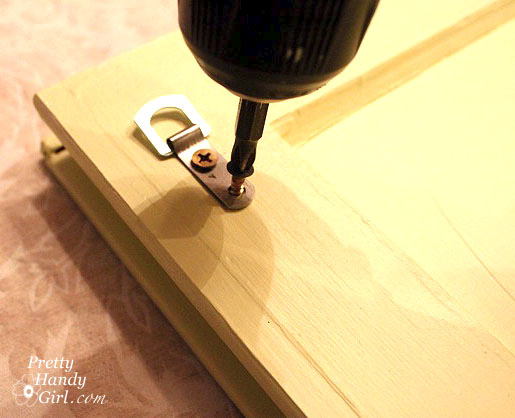
9. Attach D-ring hooks to the back of the door.

10. Attach a dry erase pen to the board using string. Or if you find a marker with a magnetic cap, you can glue a magnet to the board using E-600o. Now you can hang the marker back on the board when you’re done writing a message.

11. Hang that cute little dry erase board up on the wall! Did you see this and this tip for hanging frames that have two hooks? Genius!

That is how you can make a custom dry erase board out of an old cabinet door! I love how it matches the bench colors and can match anything I want it to by changing out the scrapbook paper. Shoot, I could probably put photos behind the plexi too!


Okay, so who is coming out to join me on Saturday? Please don’t let me show up and give a talk to the crickets. 😉


“It’s a Party and I’ll Paint if I Want to…Paint if I Want to… Paint if I Want To…You Would Paint Too if you had Scotch Bluuuueee!”
I think I’m going to call 3M ScotchBlue right now and suggest this as their new jingle. Kind of catchy isn’t it?!

Check out my project tutorial on revamping an old cabinet door below.

Go ahead, grab your paint and brushes — and don’t forget a roll of ScotchBlue painter’s tape!

I have been using ScotchBlue painter’s tape for a while and I really like it. I am not being paid to say this (even though they did send me a few free rolls of painter’s tape.) You’d know I like ScotchBlue tape if you have read the backlit bookcase post, painting the bamboo rug post and the painting like a pro post (where I share some tips for using ScotchBlue Painter’s Tape!)

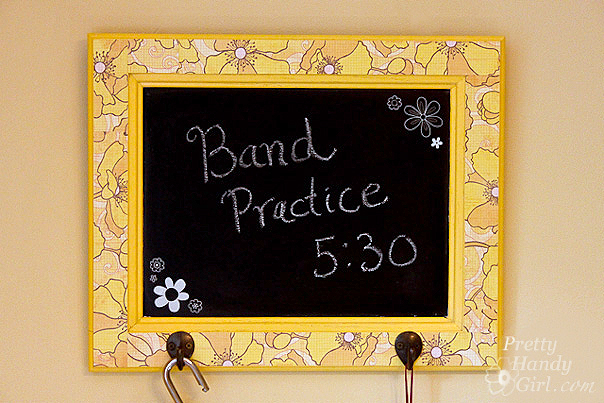
But, enough looking back, I want to share with you how to make something out of a disgustingly filthy grease covered discarded cabinet door. So, let’s hop to it! While building my mudroom bench, I took off the doors and kept them in the hopes of being able to use them another day. I’m working on a new bench for my Habitat ReStore demonstration, so I have more cabinet doors now! I devised a plan to reuse the doors in a creative way, a way that would be fun and yet help us keep track of our comings and goings. Meet my cabinet door turned into a chalkboard message board with hooks:

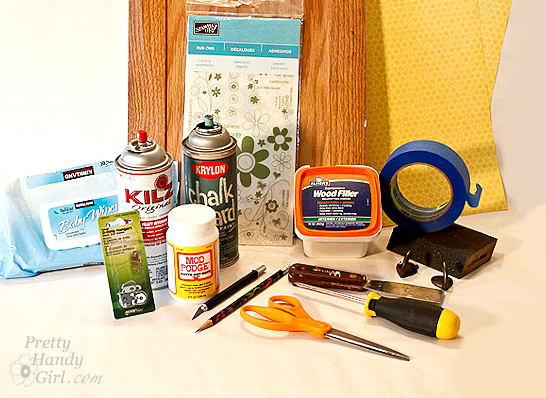
Materials:

(I’ve included affiliate links for your convenience. I earn a small percentage from a purchase using these links. There is no additional cost to you. You can read more about affiliate links here.)

Instructions:

Clean the doors! If you have a cabinet that has finished it’s first life as a kitchen cabinet, and has so much grease on it that you could grease a pig…well, you need to clean it off. I experimented with several different techniques (GooGone, Dawn Detergent, Shakelee DeGreaser Spray, and Ammonia), but the one that worked best was inexpensive ammonia mixed with hot water.


I saturated the cabinet with the ammonia mixture. Let it sit for a few minutes and voila! The grease came off like butter (no pun intended.)


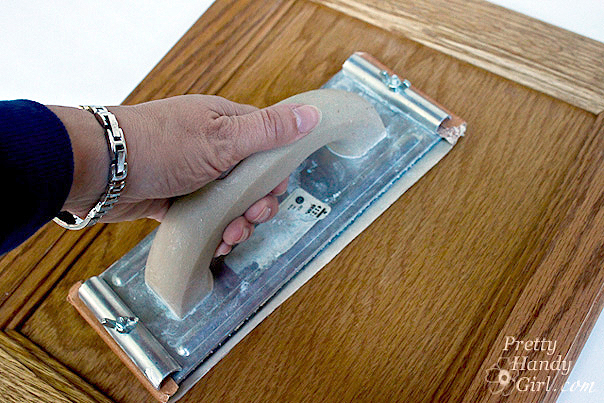
Dry the cabinets and gently sand all the surfaces to rough them up slightly. (Don’t rough ’em up too much boys, we need him to be alive. LOL! Spoken like a true Western character.)


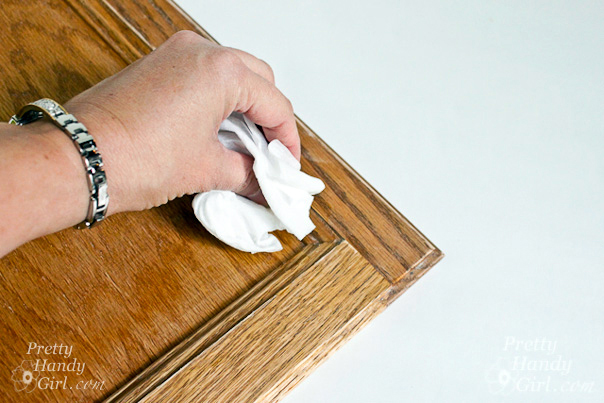
Wipe off the door thoroughly with a damp baby wipe.


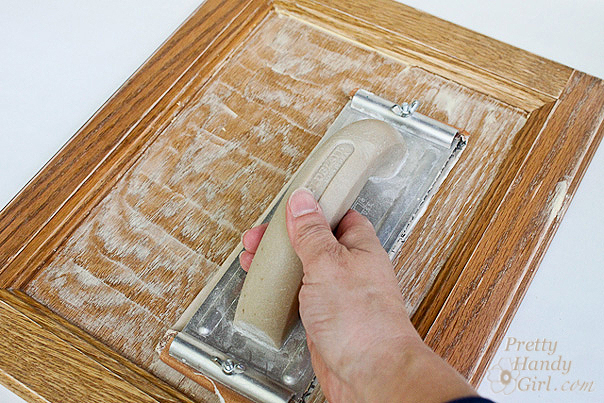
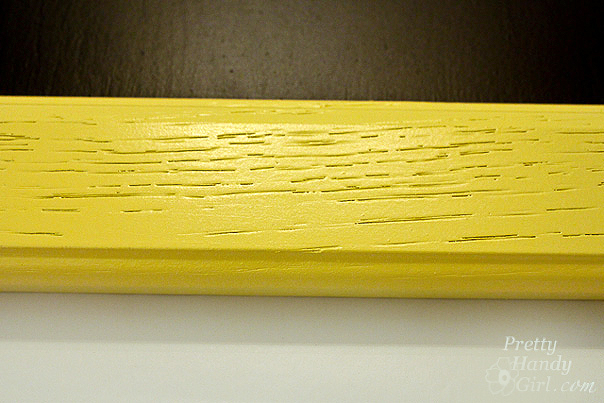
Use wood putty to fill in the wood grain on the middle panel of the cabinet. (You could also fill in the cracks on the frame of the cabinet too, but I have other plans for the frame.)


Let the putty dry for about 10 minutes. Sand the panel until it is smooth.


Wipe off the cabinet door again. Be sure to get all the sawdust off.

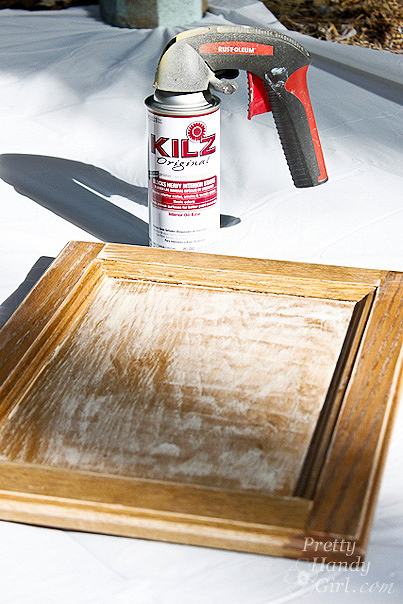
Spray your cabinet door with spray primer. One coat should be enough to cover the door. It helps to elevate the cabinet with a block or two underneath so it doesn’t stick to your drop cloth.


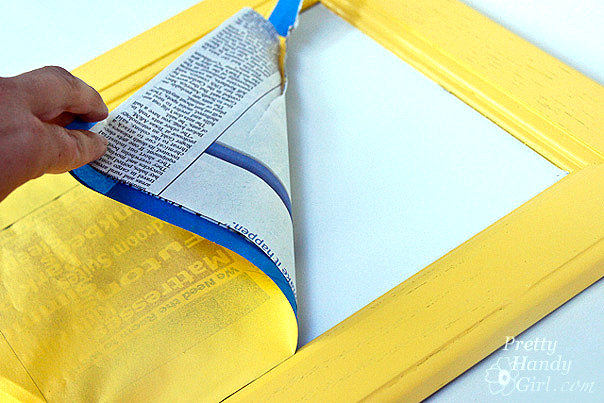
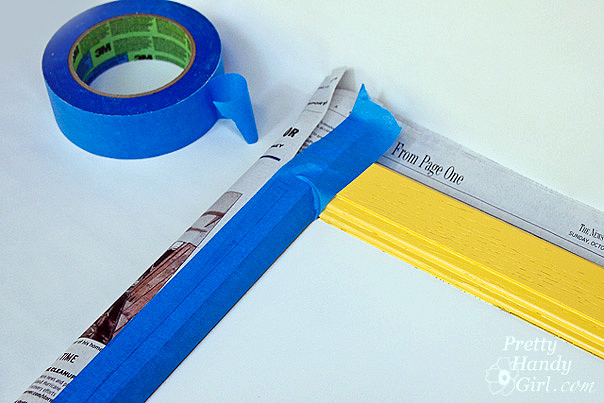
Mask off the middle of your door with newspaper and ScotchBlue Painter’s Tape. Press the edges down firmly by running a finger along the edge. (If your cabinet door is very textured, you can seal the edges by brushing matte medium where the tape meets the door.


Spray the frame with 2 even coats of the summer squash yellow color (allowing the paint to dry between coats.)


Remove the mask, now ooo and aaaa over that clean edge! Give the paint about an hour to cure before the next step.


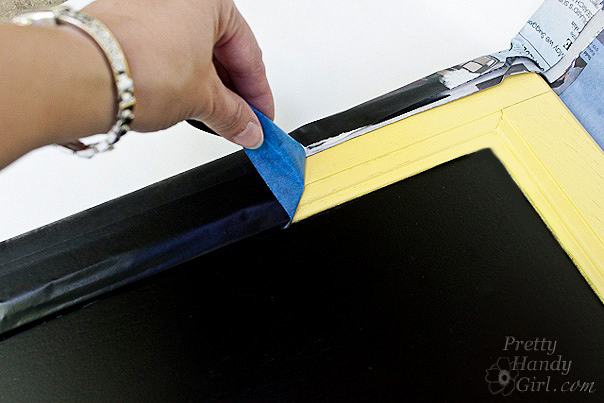
Wrap newspaper around the back of the cabinet door and fold the edges up. Use ScotchBlue painter’s tape to tape the edges of the frame off (cover all the yellow with tape or newspaper.)


Spray the inside panel with 2-3 even coats of the chalkboard paint. Let it dry throughly before you remove the tape and newspaper mask.


It is starting to look rather purrrrdy, ya think?! Feel free to stop here and say that you are done…


…or if you are a perfectionist (like me), you will want to cover the woodgrain on the frame with scrapbook paper.


Simply measure your border and cut scrapbook sheets to that width. It is okay if your sheets aren’t long enough to fit on one length, you can tile them.


Brush one layer of mod podge onto the frame then lay the scrapbook paper on top of the mod podge. Press out all the air bubbles. Let the mod podge/paper dry for a few minutes.


Then brush 1-2 coats of the mod podge on top of the scrapbook paper borders to seal the paper.


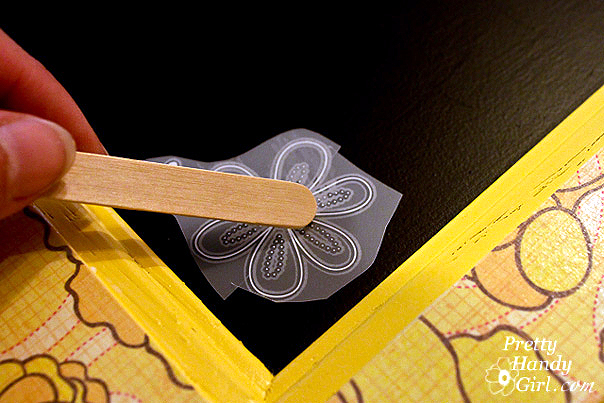
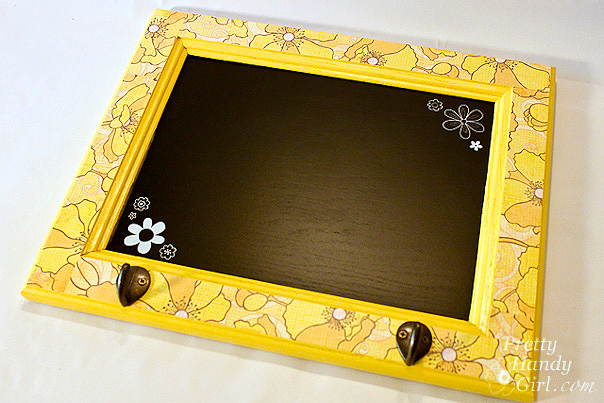
If you want to embellish your chalkboard frame, you can rub on transfer decals (or paint some decorations using white acrylic paint.)


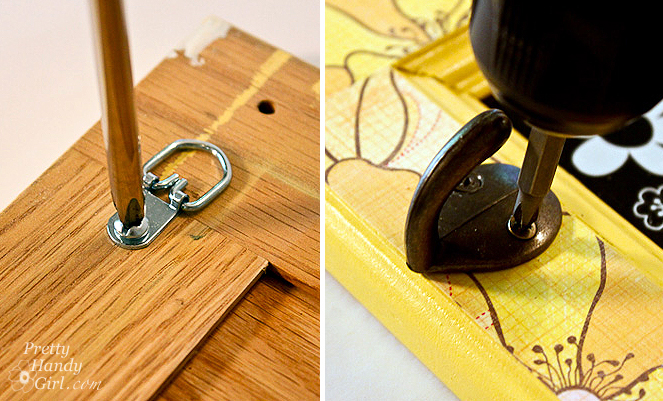
To make your chalkboard frame more functional, add 2 D-rings on either side of the back for hanging purposes. Then add some garment hooks to the front.


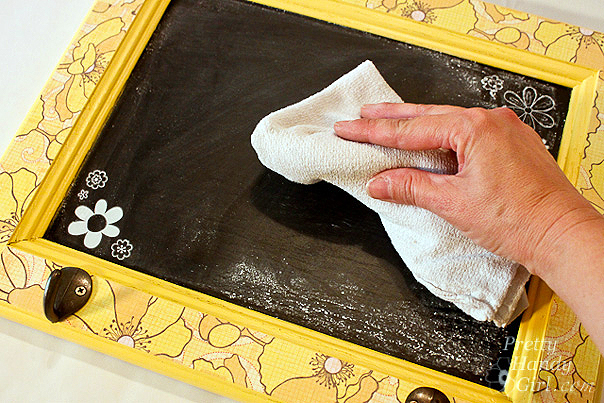
Don’t forget to season your chalkboard. (I prefer Old Bay seasoning…just kidding! I always wanted to say that.) Rub a piece of chalk on its side all over the surface and then wipe it off with a dry rag.


And that concludes the tutorial. Don’t you think the results are sweet! Especially because it is made from something that would have otherwise been discarded.


I envision a wall with several of these chalkboard frames lined up, one per family member. That way a message can be written to each person. I guess I better get busy and make 3 more.


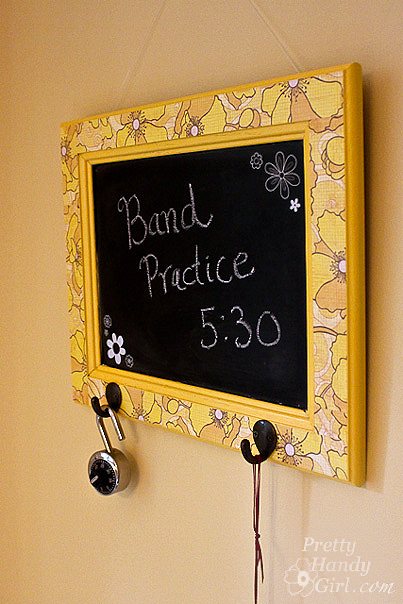
I love how the hooks add additional storage! Be sure to use two picture hangers (one for each D-ring hook.) If you have good eyesight you might have noticed my fishing line that is hanging the cabinet above. This was for photography purposes only. Unless you want your frame to rip the drywall and land on the floor the first time your child wants to hang something heavy on the hooks, do as I say, not as I do.


Awww, isn’t she just a perfect little slice of sunshine on a blank wall? She makes me happy.


You made it through another one of my insanely long tutorials! Congrats!


Disclaimer: I was one of the bloggers chosen to host a ScotchBlue Painting Party. I was not paid or compensated for this post. I was sent a few rolls of ScotchBlue painter’s tape, but I honestly can’t remember if it was 2 or 3 or 5 because they promptly got added to the collection of ScotchBlue tapes I already own.

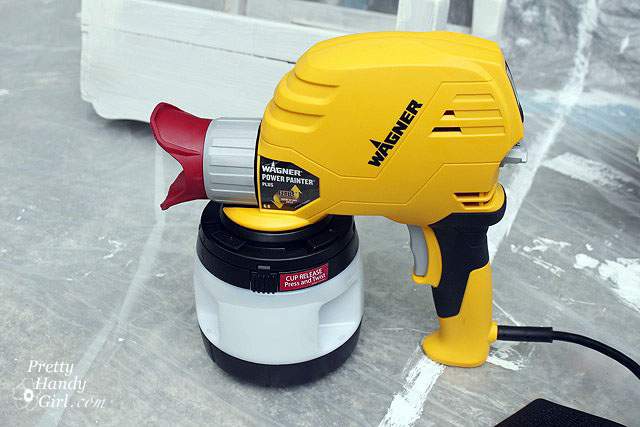
I have amassed quite a collection of “project” furniture and objects waiting for a future date with my creative magic sessions. I worry that some of this behavior is bordering on packratness (I don’t think that is a word, at least my spell check says it isn’t. But, you get my drift, right?!) So, when a Wagner rep contacted me about trying one of their paint sprayers, I couldn’t reply “YES!” fast enough. I had visions of setting up all those projects and spraying them down in a line-up fashion. But, I reined in my “glass half-overflowing” mentality and decided to tackle one project at a time. Good thing too, because although the Wagner Power Painter Plus with EZ Tilt (affiliate link) did spray at lightning fast speed, there were a few drawbacks.

But, I don’t want to get ahead of myself. I still want to give you a bonafide tutorial on how to fix, prep, paint and finish a wobbly yard sale find for yourself.


Materials:

(I’ve included affiliate links for your convenience. I earn a small percentage from a purchase using these links. There is no additional cost to you. You can read more about affiliate links here.)

*These items are purely optional. You don’t NEED them, but they help.

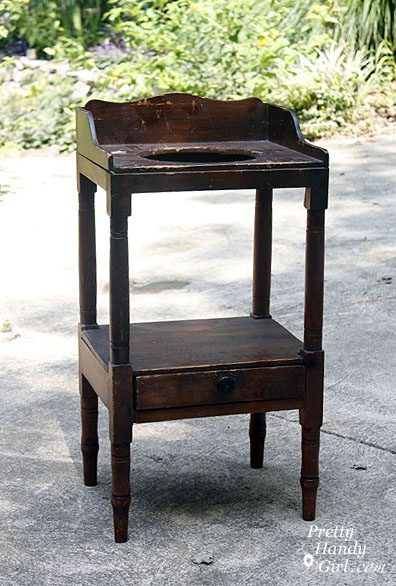
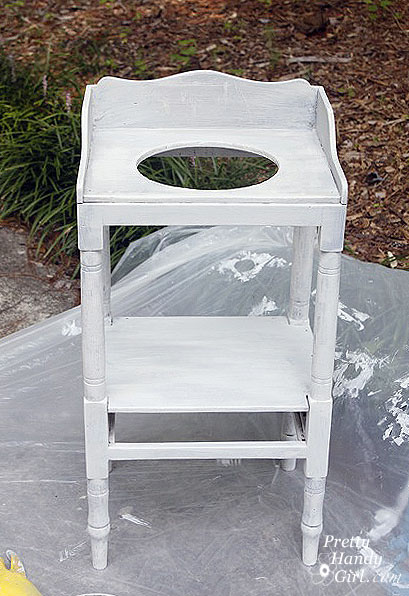
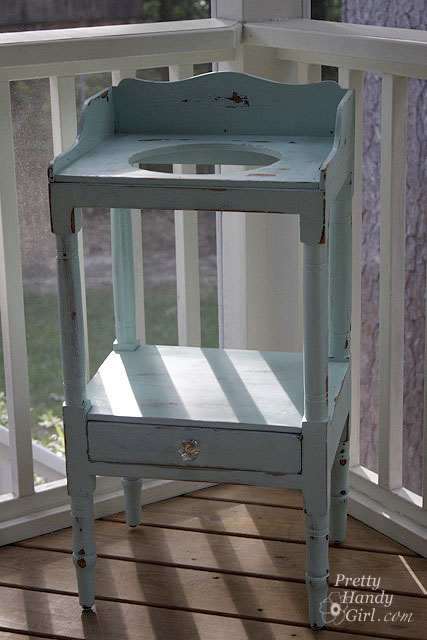
This wash stand had a $5 price tag on it. But, my neighbor gave it to me for $3. Is that robbery to talk someone into less than $5 for this antique?! In self defense, the stand was in pretty poor shape. It was VERY wobbly and had some big scratches on it. Can you forgive me?

Here is what you do when you find yourself as the new owner of a “this really should be trashed” purchase. Take it apart and rebuild it from the ground up. Having done this before with Daisy the Discarded Chair, I was prepared to tear this wash stand down to the ground. But, luckily it had some better joints than I had anticipated. So, I basically pulled apart anything that was not tightly joined.

The shelf over the drawer came off super easy.

As did a few joints.

I wiped the whole wash stand down with a wet rag.

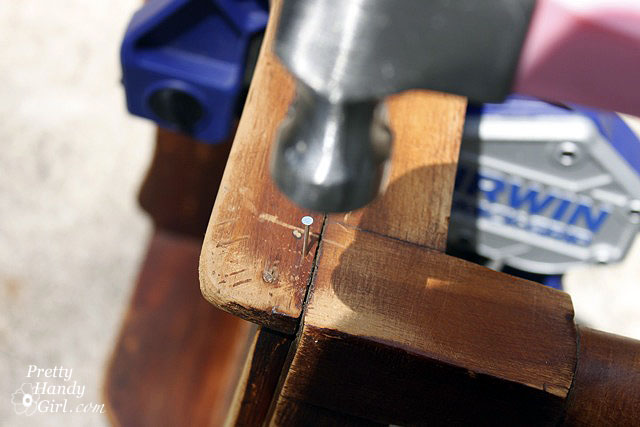
Then, the side of the stand got some new glue and a few finish nails.

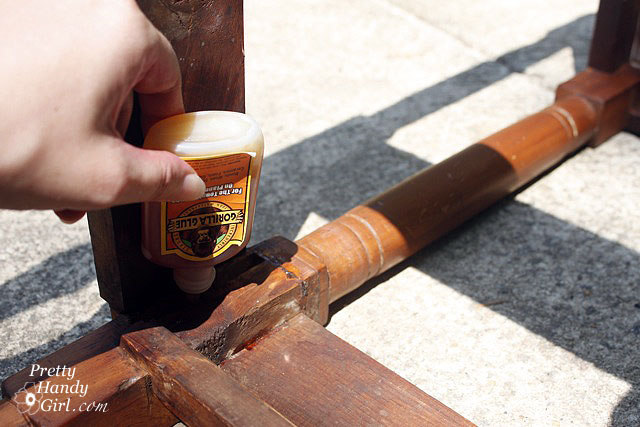
The joints got some Gorilla Glue and were set back together. And, I added a thin bead of glue and some finish nails to re-secure the shelf.

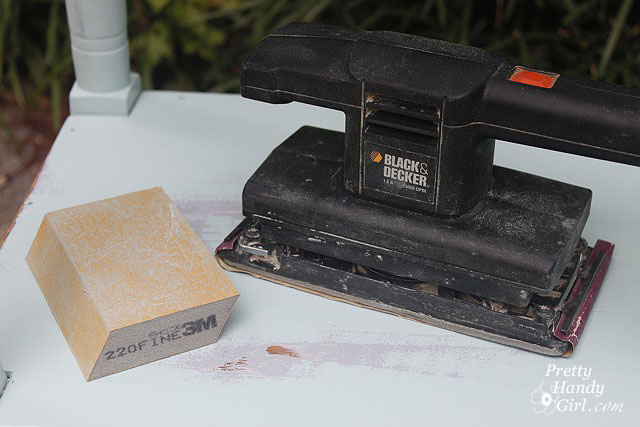
Next I sanded down the whole piece of furniture with these two 3M sanding blocks. I like to call them Tweedle Dee and Tweedle Dum because they are super easy to use. Even an idiot can’t screw up.

They work great for around spindly legs because they can bend and flex (I wish I could bend and flex like that!)

After wiping off all the sawdust, my wash stand looked like this:

Almost too pretty to paint, but it had some serious gouges, so I took a picture and said goodbye to the beautiful wood.

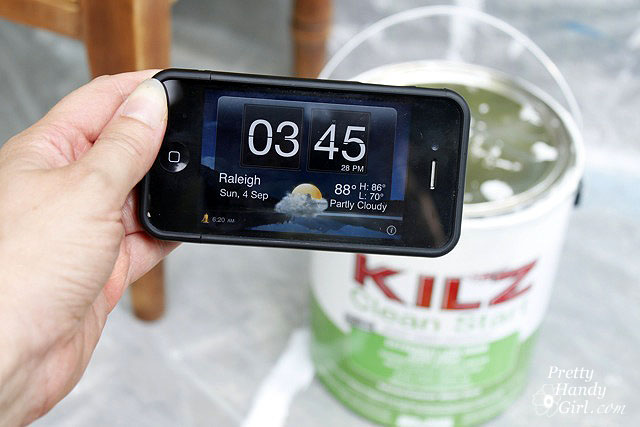
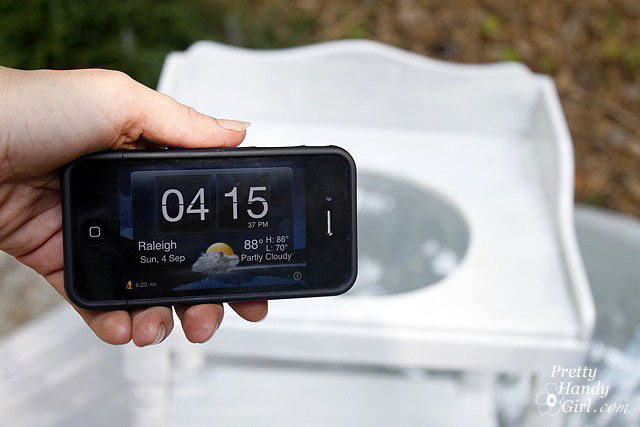
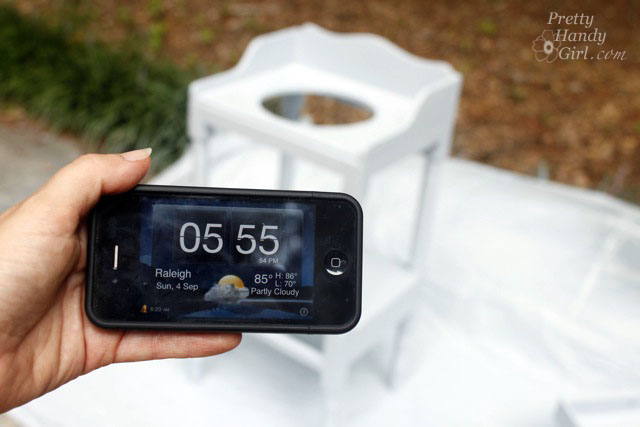
Here is where the race began. I decided to time myself painting on the primer with a brush. Then time myself using the sprayer for the first coat of paint.

Start your engine….paint brush and KILZ Clean Start Primer…GO!


After 30 minutes I had primed the entire stand from top to bottom.

After the primer dried, I gave the stand a quick, light sanding with a 220 grit sanding block and wiped it down with a damp rag.

I set up the sprayer, read all the directions (very important!) Then I filled the quart size reservoir and attached it to the sprayer. The Wagner Power Painter Plus doesn’t require a compressor, just a good old fashioned extension cord plugged into your household outlet.

Start your engine…Wagner Power Painter Plus…GO!

VROOOOOOM! The sprayer let out the loudest and most obnoxious noise I had ever heard (Note to self to wear ear protection next time.) I thought the sprayer was going to self destruct, so I let go of the trigger. Then I pulled it again and the noise returned, only to abate after a few seconds once the paint started to come through the nozzle. Phew, that scared me.

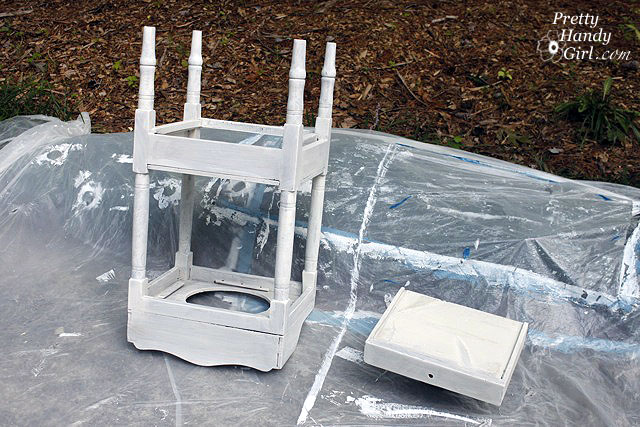
I breezed through painting the entire wash stand from top to bottom. I started with it upside down and quickly flipped it while it was still wet (I left a finger print underneath, but no one will know about that unless you squeal.)

And I was done. Then I looked at my timer and WHAT?!!! 5 MINUTES! Holy Cannoli! I had no idea a sprayer could shave that much time off a paint job.

I left the wash stand outside, while I took apart the paint sprayer.

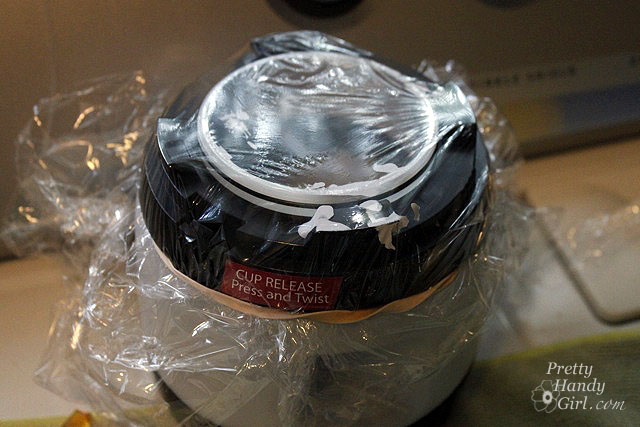
To avoid emptying the paint canister, I covered the container with saran wrap and a rubber band.


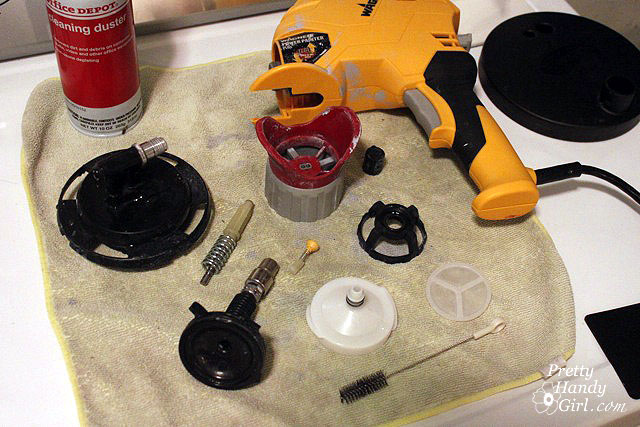
Then I took apart the ENTIRE sprayer and cleaned out all the parts. It is soooo important to clean the sprayer thoroughly or you risk paint drying in your machine and ruining it. This is a look at the sprayer disassembled.

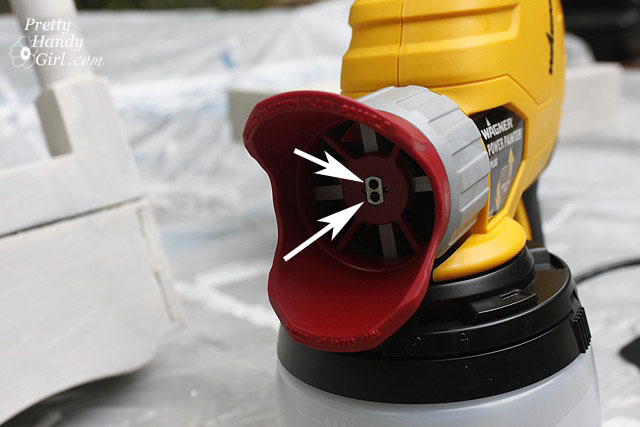
It is paramount to clean the tiny dual spray tips on the machine. They are small slits that can clog easily if the paint is allowed to dry in them.

After the wash stand had dried. I put the sprayer back together and screwed the paint container back onto the gun.

I was all pumped and excited to be done in 5 minutes! With dusk still 30 minutes away, I had no fear. BIG MISTAKE!

What was to ensue was a stressful 45 minutes of paint globbing, paint sputtering, my cursing, and frantic cleaning of the sprayer again. I finished spraying, but I had to use a different top coat color because I ran out of the first paint color. (Which ended up being one of those happy mistakes. You’ll see.)

I wiped off the big globs of paint and decided to give those areas a little “extra” distress in the morning.

After stepping back from the project, doing some research and having a twitter conversation with Shaunna (the furniture painting guru), here is what I concluded from my disasterouos 2nd attempt:

  1. The paint sprayer MUST have a full paint cup in order to work properly. When the reservoir gets down to less than 1/4 full any air that gets into the paint suction tube will cause the sprayer to sputter and discharge big globs of paint, instead of a nice even spray.
  2. The sprayer dispenses an INSANE amount of paint in 5 minutes and when it runs low #1 happens. I used a half gallon of paint on the first coat of paint on this small wash stand. Whereas, I normally would have used maybe half a quart to brush on two coats total. The drop cloth was so heavy with paint when I cleaned up, that I realized the majority of the paint was wasted in overspray.
  3. The Plus does not have a low paint level indicator. Therefore, it is very difficult to determine when you are getting low on paint until the sprayer starts to sputter and shoot out globs of paint onto your project.
  4. In the same vein, the paint canister only holds a quart of paint, and 1/4 of that isn’t useable unless you like Jackson Pollock style painting.

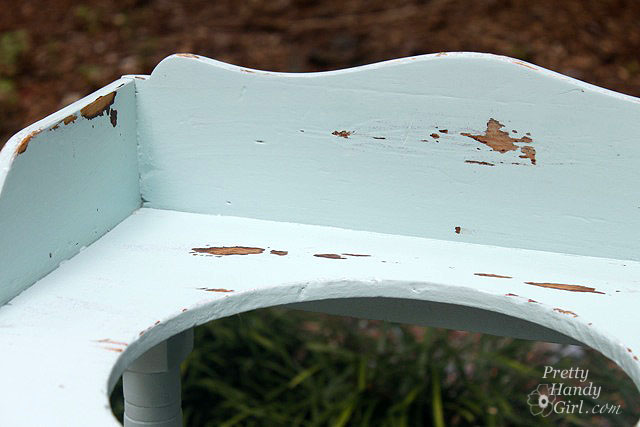
The next morning, I took out my power sander and gave the sink some character by distressing it.


This is where the happy accident occured. Because I had to use an aqua blue as the top coat on my sink, you could see the blue gray color peeking out! Which I think makes it look sweet, shabby and old.

Once I was happy with the amount of distressing, I sanded any chipping paint and rough spots with the 220 grit sanding block. Then, I cleaned off the wash stand with a damp rag. To protect the sink, I used Minwax wipe-on Polyurethane. I like the wipe-on Poly for speed. But, it doesn’t leave as thick a coat as the traditionally brush on kind. So, if you really want to protect a piece of furniture, use the brush on kind instead.

I added a cute little crystal cheap acrylic knob to the drawer.

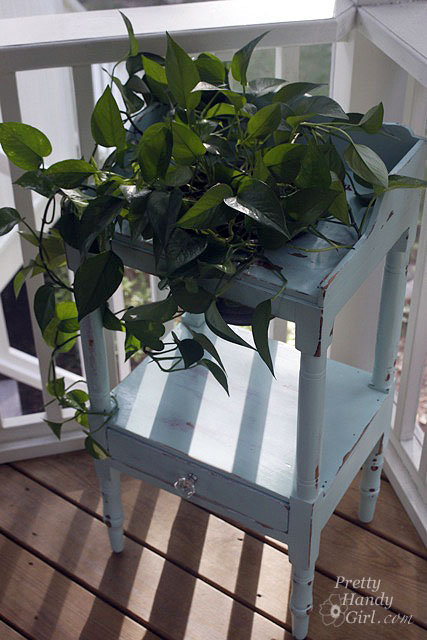
And my new/old dry sink looks right at home in the corner of my porch! Although, it needed something…hmmmm….

…how about a plant! I dropped in a plastic pot with NO holes in the bottom. I filled the bottom 1/4 with rocks for drainage. And my pothos plant. I used to have a chippy pedestal that sat there, but sadly I had to get rid of it. I’ll fill you in on the details next week. It is a sad story ;-(.

Here is my summary of working with the Wagner Power Painter Plus model:

  • Pros – Saves time. $100 price tag. No compressor needed.
  • Cons – Small Paint Cup, No Flow Speed Selector, No Low Paint Level Indicator, Lots of overspray and wasted paint.

I will definitely try the sprayer again. When I do I might add Floetrol to my paint, which is supposed to help your paint even out and give you a smoother finish. (Especially if it globs on you.)

  • Wagner Power Painter Max has a two speed selector AND a paint level indicator. This model runs under $100. Have a great weekend and see you next week with some more DIY goodies.

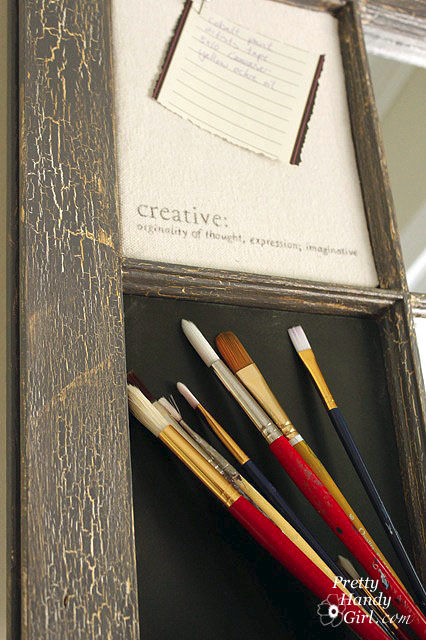
Artist Inspiration Board

Hey guys, today I’m dishing up a triple dose of posts for you. I’ve been busy, really busy, super busy! And you don’t know the half of it. As you are reading this, I’m on my way home from California. I flew out to surprise my little sister for her birthday. She and her husband are expecting their second child and I wanted to go all “Pretty Handy Girl” on their home ;-D.

First, you can read my tutorial for making this whimsical message center, from a curbside window, over at my friend Sandra’s blog,

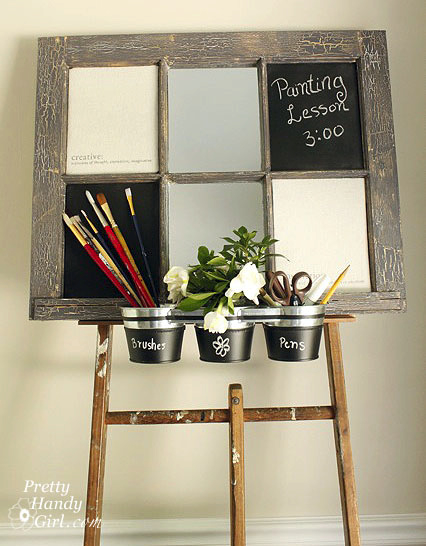
Then you can come back here and read about this Artist’s Inspiration board also made from an old window.

Finally, if you like what you see you can head over to Parentables to see an entire post on curbside transformations! You won’t believe some of the before and afters!

Okay, ready? Well, let’s get this show on the road.

Materials:

  • Old divided light windows
  • Foam core
  • Tin snips
  • 3M duct tape
  • Scissors
  • Primer
  • Chalkboard paint
  • Irwin mat knife (or x-acto knife)
  • Clear Caulk (window and door sealant)
  • primer
  • fine grit sand paper
  • Two colors of paint (gold and medium gray)
  • Crackle medium
  • Polyurethane
  • Foam double stick tape
  • mirror
  • ruler
  • mirrored glass
  • tin pots, buckets or recycled cans
  • drop cloth bulletin boards from THIS post

Prepping your window:

You will need to clean, prime and paint your window before beginning this tutorial.

Here is what I did during the prep phase: Cleaned the windows (I used a bleach solution because there was mold and mildew present.) I repaired the glazing that was cracked and missing. I used paintable caulk. No need to buy glazing.

Prime the entire window, glass and all! Once the primer has dried, use the sandpaper to gently rough up the primer (especially on the glass. But, be careful not to scratch through to the glass.)

For the beautiful crackle finish on my window, I started by painting the window a metallic gold color.

When the gold had thoroughly dried, I coated the entire window with the crackle medium. Once that had dried, I painted a medium gray on top. That’s when the magic happens. The paint separates and reveals a hint of gold. It is important not to go back over the gray paint after you paint it on or you will get a gloopy mess!

I finished off the painting prep steps by applying two coats of water-based polyurethane.

Tutorial:

Measure all the individual window panes. Be sure to measure only the exposed glass.

Transfer your measurements to cut 2 squares of foam core. Make sure your blade is sharp! Dull blades will drag and tear the inner foam.

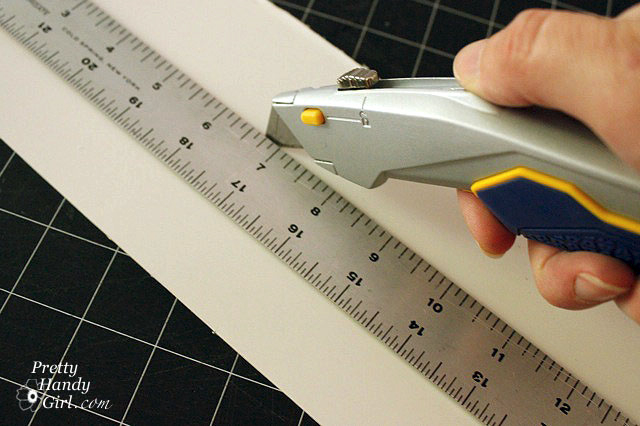
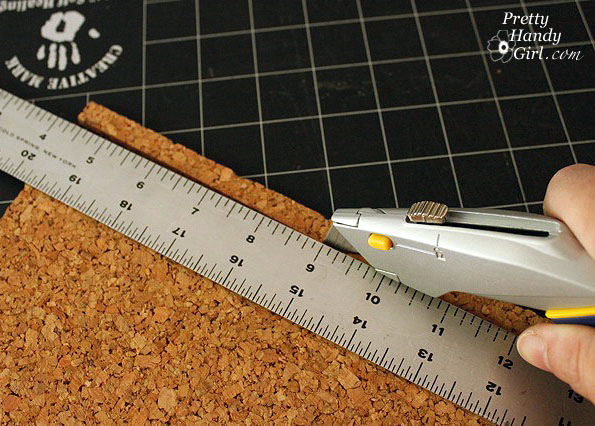
Next, transfer your measurements to cut two pieces of cork board. Cut the cork board with a ruler and mat knife.

Finally cut two pieces of mirrored glass to fit the remaining two panes (need help cutting glass? Have a professional do it, or watch Sandra’s tutorial HERE.)

You should now have 2 pieces of foam core, 2 pieces of cork board (wrapped in drop cloth as I showed you the other day), and two pieces of mirrored glass.

Dry fit all the cut squares to make sure they will fit in the window openings.

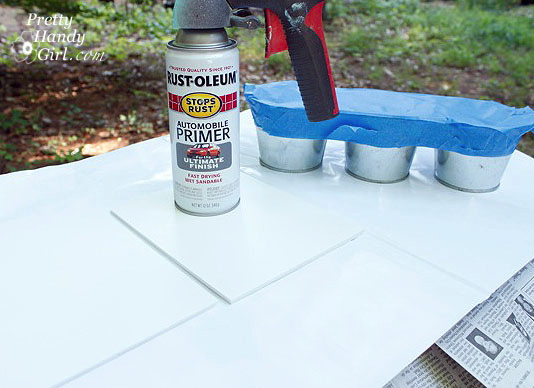
Take the foam core and tin pots outside. Spray them with primer.

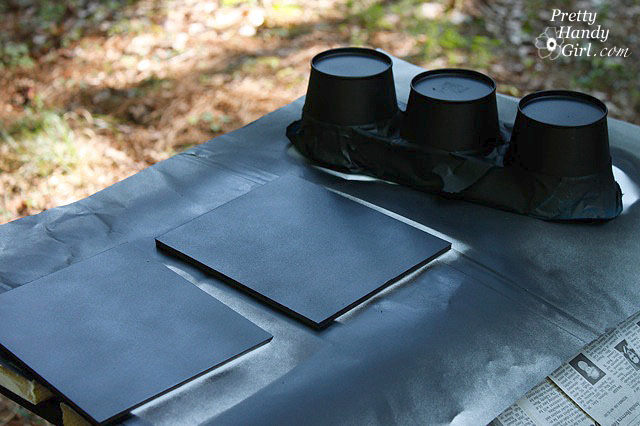
When the primer has dried, spray the foam core and buckets with a few coats of chalkboard paint.

To view how to print onto painter’s drop cloth, refer to my tutorial here.

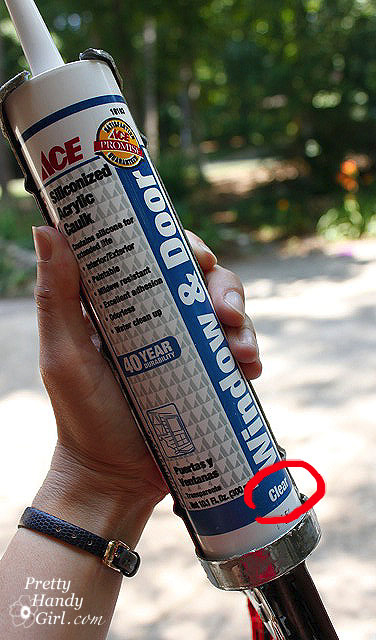
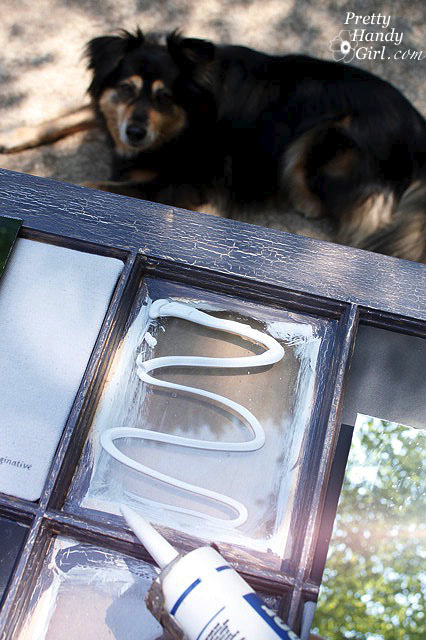
To attach the chalkboard foam core, mirrored glass, and drop cloth squares, you will need clear window and door caulk. Snip the top off at an angle. Insert a straightened coat hanger into the tip to puncture the inner lining of the caulk.

Put a fair amount of caulk onto each glass of the window. (Lazy supervisor in the background!)

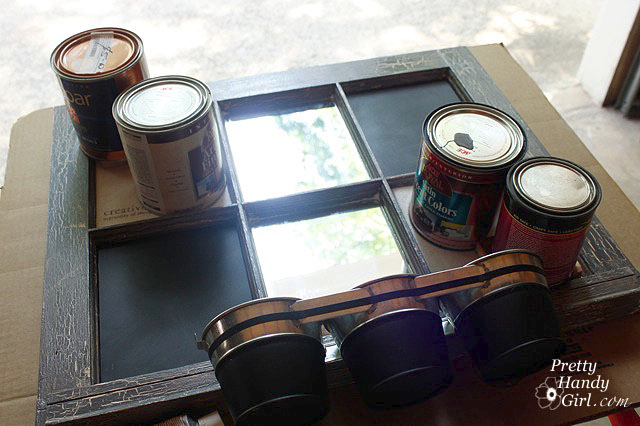
Press the individual squares into it. Weight the drop cloth squares (with paint cans) while they dry.

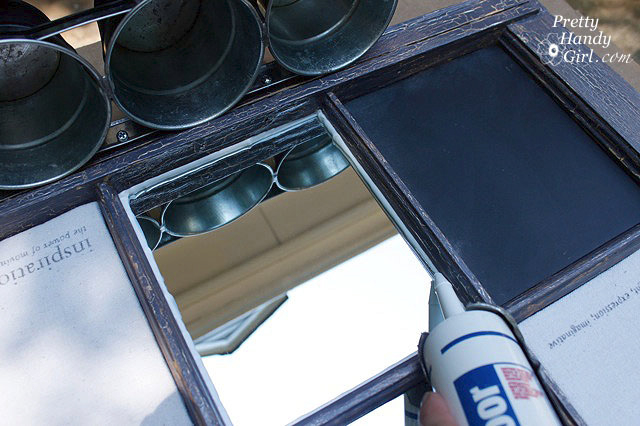
To secure the chalkboard and mirror sections, run a bead of caulk along the edges of the boards.

Use a damp paper towel to smooth and clean up the caulk edging.

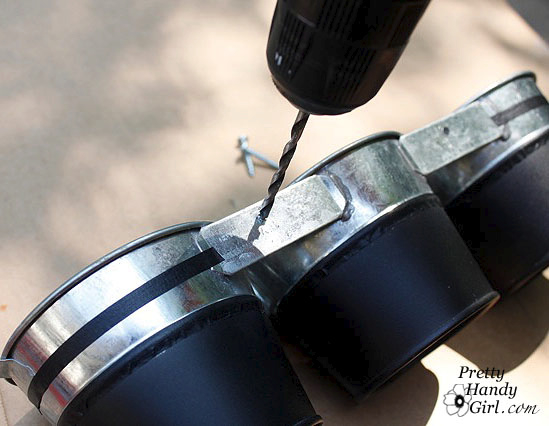
Once the caulk has dried, you can affix the tin buckets to the window. Drill holes through the bucket bracket or tin cans.

Attach a screw through the hole and screw it into the window pane.

To add a hanger to your memo center, flip the window over and measure down 3″ on both sides.

Use a drill to drive the screws into the D-ring style hangers.

I made this artist’s board to sell, but honestly I’m having a hard time parting with it. So, it may just find a home in my painting studio (aka Bonus Room). But, maybe you could convince me otherwise. How much would you pay for this one of a kind artist’s board? I keep thinking it is a real life version of Pinterest.

Don’t forget to view more of my curbside transformations.