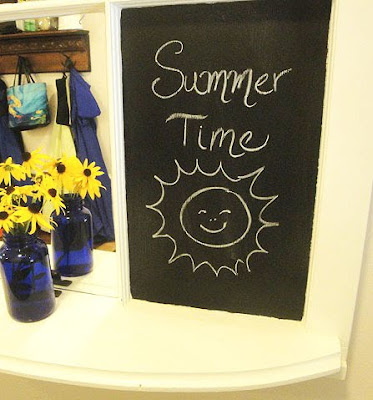
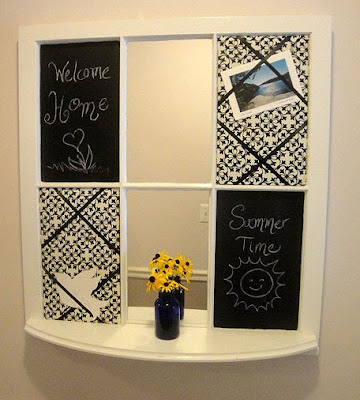
If you came by for my mudroom tour, you saw this message center made from a curbside window frame.

This was a super easy project and I built it in about 2 hours.

First, I gave the whole window a fresh coat of white paint. Then, I taped off the edges of the upper left and lower right windows and used 2 coats of chalkboard paint in those panes.

While the paint dried, I cut two pieces of foam core to size for the upper right and lower left panes. Then added some batting and wrapped the fabric around. I used a hot glue gun to attach the fabric to the back of the foam core. Then positioned the black ribbons on top and glued them to the back of the foam core as well. While the glue gun was still heated up, I ran a bead of glue around the edge of the window panes and inserted the two upholstered foam core pieces in place. (Pictorial directions for the upholstered foam core can be viewed here.)

Next, I had some leftover cheap mirror glass* that I used for the the mudroom coat rack. I used my glass cutter and cut those two panels down to size. Then I put some E-6000 onto the window pane and inserted my mirrored glass. To seal and hide the edges of the mirror, I used white bath and tile caulk around the edges of the mirror.

* Cheap Mirrored Glass Source: Find those $10 back of the door full length mirrors. Buy one at Walmart, Kmart or Target. Just peel off the glued frames and paper backing and cut your mirror pieces from it.

To build the little curved shelf, I actually already had the curved board leftover from another project. But, you can cut a piece of 1″ x 6″ with a jigsaw. Then use a router to give it a decorative edge. Then sand it, prime it and paint it.

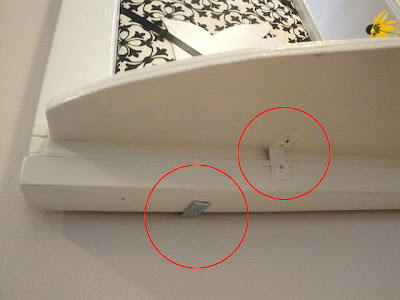
To attach the shelf, I used 3 L-brackets on the underside and painted them white to be less noticeable. I also nailed a piece of 1″ x 2″ (painted white) to the bottom of the window so I could screw the brackets into it.

Once the message center was finished and dry, I located the studs on our mudroom wall and hung the window with two L- brackets on the bottom (see pictures above) and one on top.

Now I have a cute place to welcome guests, hang postcards and birthday invites, and check for ORT (object remove from teeth) before heading out the door.

Painting Brick Fireplace

This is the first in a five part series on renovating our living room:

1. Faux painting brick over a previously painted white brick fireplace (this post)
2. Lightening up a room in 5 steps
3. Painting decorative graphics on a wall
4. Preparing to Install Antique Heart Pine Floors (and living to tell about it!)
5. Installing Heart Pine Floors and the Final Reveal

I know the trend lately is to paint fireplace brick white. Especially if the brick is an ugly bright red or some other ugly color. I’m pretty sure that is why our fireplace was painted in the first place.

Painting Brick Fireplace
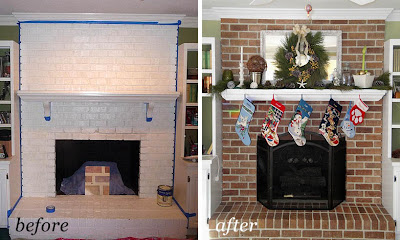
Before Shot

Painting Brick Fireplace

But, the fact that our fireplace, mantle and the built-in bookshelves on both sides of our fireplace are white, made for an overwhelming amount of white on that one wall. I thought about painting the mantle, but only briefly. I really wanted the warmth and contrast of bricks to set off all the white in our living room.

I stumbled across a few websites showing painted brick here and here. Then I thought, “If someone can do it, then there is a 95% chance that I can do it too!”

I wasn’t sure how it would turn out, but in the end I am amazed by how real it looks. And, how easy it was to do! The true test came when I fooled the builder of our house (he has lived on our street for over 30 years) into thinking I had stripped the paint off the bricks! Sweet success.

This is a relatively easy project. It took several hours, but can be done in sections.

Painting Brick Fireplace Materials Needed:

TSP cleaner
Scrub brush for use with TSP cleaner
Drop cloth
Newspapers
Painters Tape
Paint Roller and Tray
Stiff 2″ paint brush
Car wash sponge or large 6″ x 3″ sized sponge
Spray bottle with water
7 paper plates
Rags for clean Up
Acrylic Paint (see below for colors)

Before you do anything, buy some TSP (tri-sodium phosphate) cleaner at the hardware store and follow the directions to clean your brick. Be forewarned that you may actually like the color of your bricks once they are clean and dry! If you still hate the color, proceed…

After working up a test board by playing with several color combinations, I chose a warm brown brick color. I also tweaked my mortar color before painting it on my fireplace.

Painting Brick Fireplace

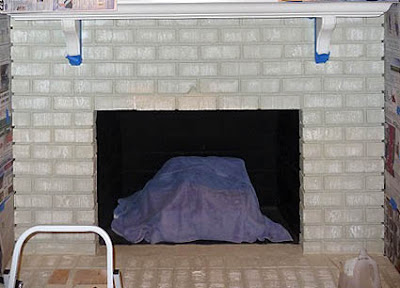
I covered the mantle and bookcases by taping newspapers to them. Then, covered the floor with a drop cloth.

I mixed up a small container of my mortar color. I used some leftover latex satin taupe paint from our other house and added some black and a little dark brown to achieve the perfect mortar color.

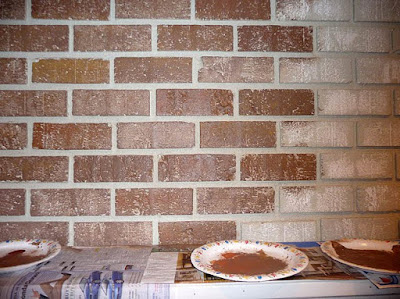
My color looks like this warm gray cement color:

Painting Brick Fireplace

I painted all the mortar areas between the bricks with a 2″ paint brush.

Painting Brick Fireplace

As the mortar color dried, I mixed up a bucket of my base color for the bricks. Then poured it into a paint tray.

Painting Brick Fireplace

Then, I laid out my seven paper plates and filled the first one with a deep chocolate oops paint (Valspar Latex Eggshell Chestnut).

And poured a half dollar size of the following colors onto the other plates (one color per plate).

Painting Brick Fireplace

I used a paint roller to roll the base color onto small 3′ x 3′ sections of my fireplace. (Don’t worry if the paint doesn’t soak into all the grooves. Some of the white showing through made my bricks look old and rustic.)

While the base color was still wet, I covered my sponge with the Chestnut color. Then dipped the sponge into one or two of the brick tint colors. I sponged one brick at a time using the same color tints sporadically around the wall. Keeping the brick colors varied and random make them look real!

Painting Brick Fireplace

When the sponge needed to be reloaded with paint, I began with the chestnut color first, then added one or two new color tints to the sponge. You will have to refill the paper plates as you use up the paint.

I kept working in small sections, to be able to work while the base color was still wet (use the spray bottle of water to lightly wet the bricks if it dries too quick).

Painting Brick Fireplace

The best part was that if I didn’t like a color, I could go back over it and try a different tint. Notice how I randomly dispersed the darker brown bricks. This is key to having a realistic look.

Painting Brick Fireplace

On the hearth I had to press more gently with the sponge since the mortar lines on our hearth were almost level with the bricks. I kept a wet rag near by to wipe up any wandering brick paint.

Painting Brick Fireplace
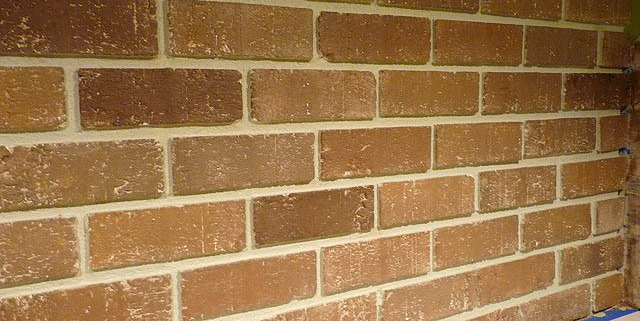
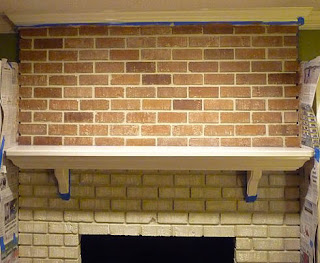
Close up picture of the bricks.
Notice how the white specks showing through really make the bricks
look like they are re-claimed and rustic.
Painting Brick Fireplace
After Picture
Painting Brick Fireplace
Daylight picture after decorated for the holidays.
I can’t believe what a huge difference painting the bricks made in our living room. It warmed up the space and actually made our fireplace recede into the room. Let’s take one more look at the before and after:
Painting Brick Fireplace
Side note: The latex and acrylic paint has held up great (even after several fires using our gas logs.)  If you need to paint the bricks inside the firebox, you will need to use paint that is heat tolerant.

And for those wondering how long this took. Including the prep work (cleaning, taping, mixing colors) it took about 5 hours total. Not too bad since I’m a night owl and could watch DIY network while painting!

Be careful not to put anything heavy on the hearth for a few weeks while the paint hardens.

Next up in the series: 5 Ways to Lighten up a Dark Room. 
Followed by: Painting Decorative Graphics on Your Wall.
And I saved the best for last (coming soon): Installing Antique Reclaimed Heart Pine Flooring

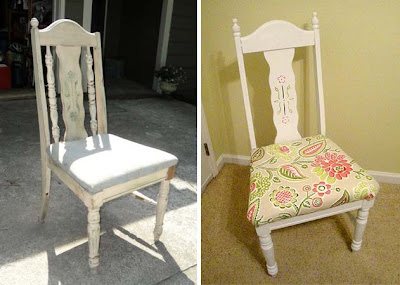
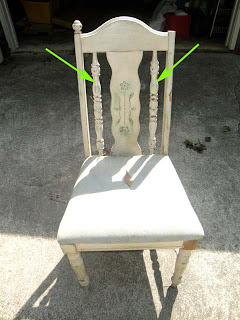
I have a serious problem. I can’t bear to see a piece of furniture being thrown away. It could be the ugliest, most broken down chair and I still feel the need to save it from Mt. Trashmore. That was the case with “Daisy” this poor ugly chair that I found on the curb awaiting the trash trucks a few weeks ago. I threw her in the back of my car and brought it home.

Two missing parts

Only when I got home did I assess her condition. Moldy seat, chipping and peeling paint, structurally falling apart, cobwebs, missing parts…

GROSS! Stained and moldy seat.

…and then a dead roach dropped out! Ewwww! I must be insane.  But, I still saw potential through all the disrepair.

This chair had some serious structural issues. I knew it was a case of tear her down and rebuild. This intro kept playing in my head the during the whole process:

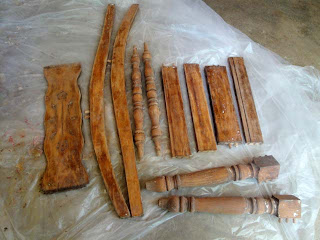
I pulled apart the chair (mostly with my bare hands and then with some assistance from a hammer.)

Until I was left with a skeleton of a chair.

I stripped the paint layers off the chair using the same technique as I did for this chair (see details here.) Unfortunately this chair had 5 layers of paint, therefore it took several hours and several re-applications of Citri-strip to get down to the wood.

If you remember, there were several missing parts on this chair. I had a lightbulb moment when I realized that I could used the spindles from the chair back for the missing parts to connect the legs.

I removed the back spindles.
Almost a perfect size and I had two of them!

I cut down the spindles on the miter saw (but these could easily be cut with a hand saw).

And then notched the ends so they would fit into the holes on the legs. (I did have to enlarge the holes on the legs slightly using my drill and a 3/4″ spade bit.)

Notching the spindles. Cut around the diameter, then cut from the end in towards the first cut. Repeat on all sides.

After dry fitting all the pieces back together, I used Gorilla glue to glue the chair back together.

I clamped the chair tight by using rope to wrap around the chair.

Daisy had also lost one of her decorative corner finials. So, I bought two new finials at Home Depot for $5.

In order to screw on the new finials in, I had to plug the hole with wood. (As promised: a tutorial on filling holes in wood.)

I also filled the holes where the spindles used to be with wood putty.

Next, I primed Daisy. Just a side note here, one reason the original five coats of paint on Daisy were peeling and flaking is that the proper prep work wasn’t done. No sanding to scuff up the glossy polyurethane and no primer. It is so important to sand (rough up your surface) and use a primer. If you cut corners here, you might as well kiss your beautiful finish goodbye in a few years. Especially if the chair is exposed to the elements.)

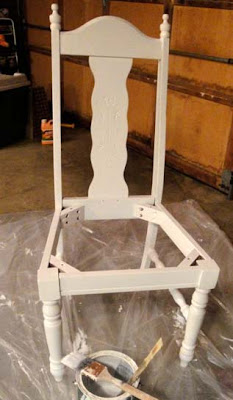
Finally, I added two coats of white paint (sanding lightly between coats.)

The chair seat was in really bad shape. Therefore I decided to cut a new one out of plywood using my jigsaw.

Trace old seat on plywood, use ruler to make straight lines, cut out seat using jigsaw.

I checked my fit and then re-upholstered my chair. Check out this post to see how to re-upholster a chair seat.

Then for the finishing touches or the frosting on the cake. You can definitely do this step! The inset carving controls your brush for you. Kind of like bowling with bumpers.

And my chair is finished. Isn’t she beautiful!

Hard to believe that 48 hours ago this chair was definitely worthy of Mt. Trashmore.

The chair is super solid now, and doesn’t move at all thanks to the Gorilla Glue.

How about one last look at the before and after pictures?

Want to see more furniture in my guest room? Take the tour here!

If you stuck through my ugly post yesterday. I have some pretty pictures for you today!

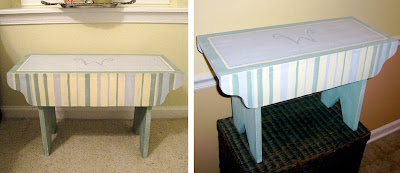
Two years ago I happened upon a cute little bench being thrown out with a neighbor’s trash. (I am addicted to trashed furniture. In fact, I have a NASTY chair in my garage that needs a lot of help structurally and asthetically.)

The roadside bench was painted a very blah beige color. I brought her home and gave her some decorative lines and a monogram. At the time we didn’t have anywhere to sit in our mudroom, so this little bench served the purpose well. Later I built a big mudroom hallway bench with built in shoe storage (I promise to create a tutorial for that at a later date.) So, this little bench was moved to the guest room where she sat by the window until this week.

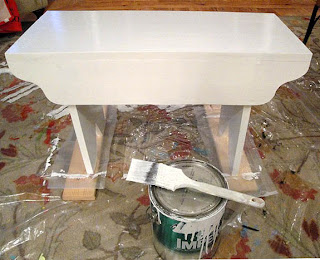
The first thing I did was give her a little rub down with some sand paper. Then I laid down 3 coats of fresh shiny white paint (leftover from trim and moulding painting).

I used some old foam I saved from our move (only 3+ years ago). This foam was the packing material used to ship ice cream cones! I received it from a nice woman off of FreeCycle.org and thought it could be used for a cushion at some point.

I cut some batting to fit over and wrap around the foam (so as to hide all the seams in the foam).

Then cut the arms off of an old t-shirt of Pretty Handsome Guys (don’t worry, he had already said goodbye to it.) And cut up the sides so I could use just the back of the shirt.

And finished off with the decorative fabric cut slightly larger than all the other layers.

I carefully folded my decorative fabric under being sure that I had the old t-shirt hidden in the fold. And put in two staples with the staple gun to hold the fabric on the one side.

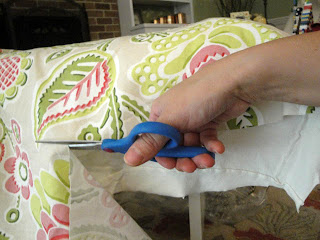
Moving over to the other side, I cut the t-shirt, batting, and decorative fabric down to size being sure to leave about an inch excess on the decorative fabric.

Then I repeated the same fold under and put in two staples.

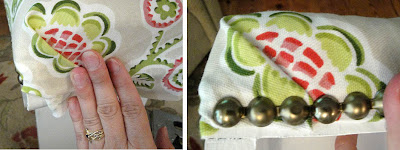
Now for the bling! I had plenty of leftover nailhead trim from this project (check that link out if you need a better tutorial on adding nailhead trim.) I began at the corner of the front of my bench and added the starter nail.

At this point my 6 yr. old had come over to my side telling me how bored he was and, “What can I do now?” I asked if he wanted to help me hammer. Once I started each nail, he was able to hammer it into the nailhead trim for me. (I did have to finish a few off myself.) We worked together adding the nailhead trim to the front and back of the bench.

Before adding the trim to the sides I neatly folded and tucked under all the layers (cutting excess off when necessary.) Until it looked like this. Then I added the trim on top to hold the fabric in place.

And there she was, my beautiful cushioned bench for our guest room. I’ve been busy trying to finish a few projects (rebuilding a curbside chair and making a night stand from a door and picket fence) in this room before my best friend from high school comes to visit. Nothing like a visitor to get your DIY butt in gear!

 Sittin’ pretty
Sweet smelling soaps in a coordinating bowl
My trash to treasure bench is now a sweet spot to land

If you have been following my blog, you may remember this light fixture that I rescued bought at our local Habitat for Humanity ReStore. Read below for a Pottery Barn Inspired Lantern.

Originally I thought about using it as a light in our foyer, but that plan changed after I found myself drooling over these lanterns at Pottery Barn and Restoration Hardware. I love going into PB & RH, but rarely have the nerve to plunk down the money they want to steal
claim from my wallet.

Instead, I decided to transform my dated light fixture from the ReStore into a stylish lantern.

This is a relatively easy project that anyone can do! Yes, that means you.

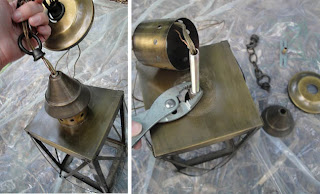
Begin by removing the glass from the light fixture. (A note of caution: You should wear gloves. In other words, do as I say, not as I do!)

My light fixture had little metal prongs that easily bent to release the glass.

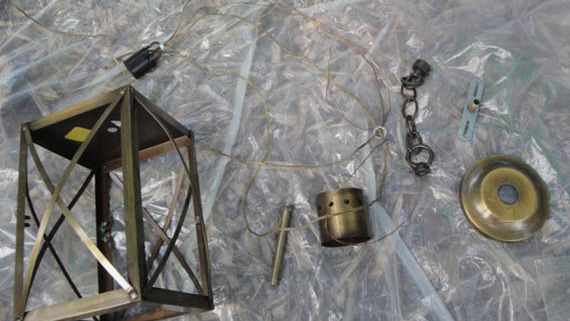
Next take apart your light fixture. Just start trying to unscrew parts. If they resist, grab your pliers.

I decided to save the wires, ceiling canopy and other wiring parts. Who knows, perhaps I will want to use it as our foyer light some day.

Okay, okay, also because I am a bit of a pack rat. I’m admitting one of my faults here: not being able to throw anything away. Don’t get me wrong, the producers of Hoarders are not knocking down my door, but I would prefer to Craig’s List, FreeCycle, reuse, or recycle anything I can’t use.

When all the parts were separated from the lamp, I needed to break the chain to the top of the light fixture. Here is an easy way to open up links in a chain that is not soldered together.

Place two screwdrivers inside the link you want to break. Lean one to the left and one to the right and apply pressure in opposite directions. The link should separate enough for you to remove the chain.

While the lantern is in pieces, you can rough up all the metal surfaces with sand paper. I actually did this to all the parts so I could paint them and potentially use them in the future. Wipe off the metal with a damp rag to remove any particles.

Now, you can re-assemble your light fixture (using only the parts you need to make your decorative lantern.)

I used brown Rustoleum spray primer. I like using a darker primer when my top coat color will be dark.

Be sure to rotate the parts and the lantern so you get all the sides coated with primer.

Now the most gratifying step, spray your lantern with your finished color. I coated the lantern with 3 light coats of a satin black spray paint to allow the lantern to look less new and more like old rustic iron.

And here is my new (old) Pottery Barn inspired lantern! $5 for the lantern + $6 for spray paint  = $11

What do you think of that, Mr. Pottery Barn merchandiser who wants to charge me $59 for the same size lantern?

Update: I received several emails and comments on this lantern and a few of you have been inspired to create your own! If you post it in your blog, I’d love to share your results.

Amanda at The Hand Me Down House, shows how she painted hers. She made the glass look like colored glass with Modge Podge and food coloring! Yes, you read that right. See her tutorial here.