
15 simple bird feeders and DIY birdhouse ideas to build—easy, creative projects to attract different birds and add charm to your outdoor space.

DIY Birdhouse Ideas
Now is the perfect time to add homemade birdhouses to your outdoor space for your feathered friends. Spring has sprung and you can hear all the birds outside looking for a new place to nest & feed.
I’ve gathered a great collection of DIY bird feeders and houses you can DIY, as well as some of my favorite bird feeders and bird watching items on Amazon. Be sure to read to the end of this post to see those!
Bird Feeders & DIY Birdhouse Ideas

Learn How to Make a Stone Birdhouse
Follow these step-by-step instructions to create a charming stone birdhouse for your garden. Designed for small birds, it's a fun project to make. Plus, with the right adhesive, it can withstand the elements for years.

Doodle-Painted Birdhouse Tutorial
If birds are active in your area, they’re likely searching for a nesting spot. Try doodle-painting a charming little birdhouse to give them a cozy place to start a family. It's a great way to add a pop of color to your yard too!

How to Repurpose a Vintage Tin Dollhouse
Learn how to repurpose a vintage tin dollhouse into an adorable and unique birdhouse for your garden. Check out thrift stores yard sales, or antique stores for a dollhouse you can repurpose.

Upcycled Birdhouse from a Table Clock
This decorative desktop clock was perfect for an upcycling project—it wasn’t well-made, and the battery in the clock mechanism had corroded. That made it the ideal candidate for a creative transformation into a unique upcycled birdhouse with acrylic paint.
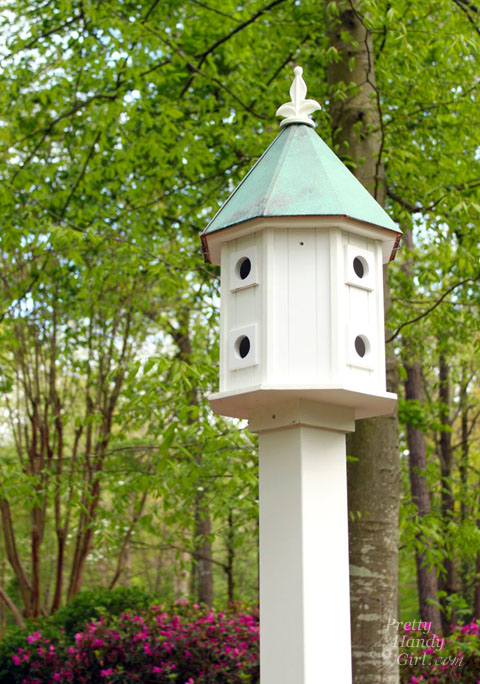
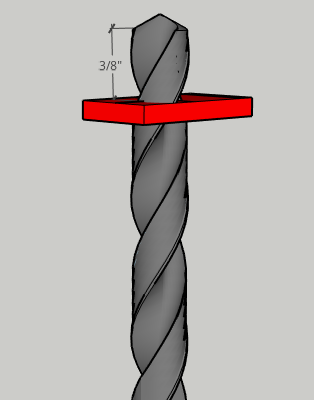
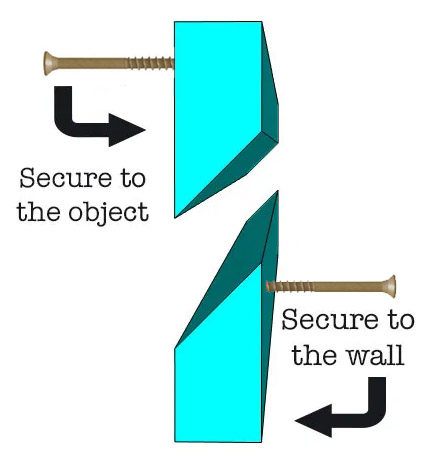
How to Install a Birdhouse on a Post
Learn how to install a birdhouse on a post using a 4x4 post, or even use upcycled fence posts. Get tips on the correct height for attracting birds and a lasting placement. This is a quick and easy guide for a perfect backyard setup!

DIY Birdhouse with a Penny Roof
Create a charming DIY birdhouse with a unique copper roof made from pennies! This budget-friendly project adds rustic elegance to your garden while giving birds a stylish place to nest. Simply glue cleaned pennies to the roof for a weathered copper look that shines beautifully in the sunlight.
Painted Flower Garden Birdhouse DIY
Add a playful touch to your pre-made birdhouse by painting it with cheerful dipdot flowers using the end of a paintbrush. For extra charm, Mod Podge some cute scrapbook paper onto the roof to give it a colorful, custom finish that's both fun and unique! Be sure to include enough ventilation holes in the house.

DIY Modern Birdhouse
Learn how to build the most adorable and trendy DIY mid-century modern birdhouse! This budget-friendly A-frame design is easy to make and lets backyard birds live in sleek, modern style.

Knife Topped Birdhouse Tutorial
Create rustic birdhouses with an edgy twist! Learn how to make a knife topped birdhouse for a creative blend of function and farmhouse flair. This unique DIY project repurposes old kitchen knives as a decorative roof topper, giving your feathered friends a one-of-a-kind home.

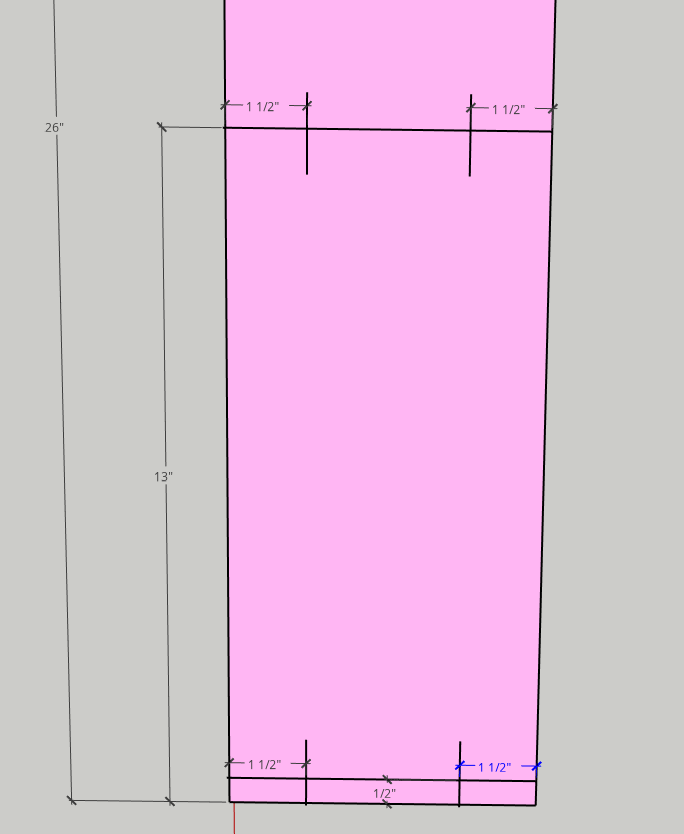
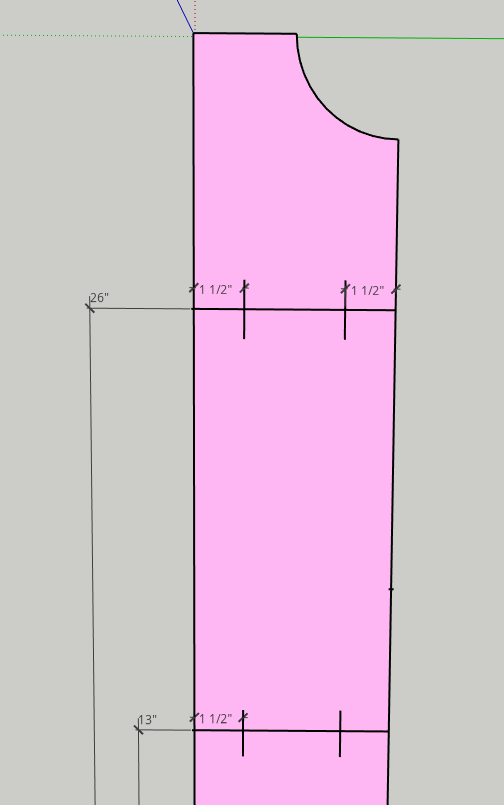
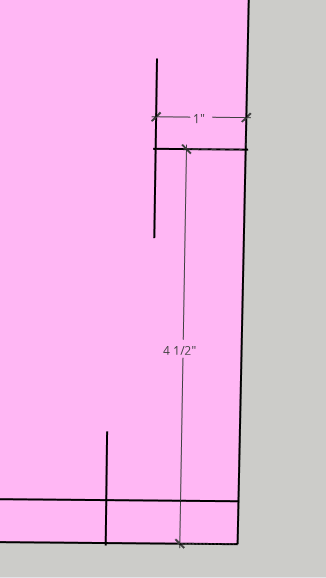
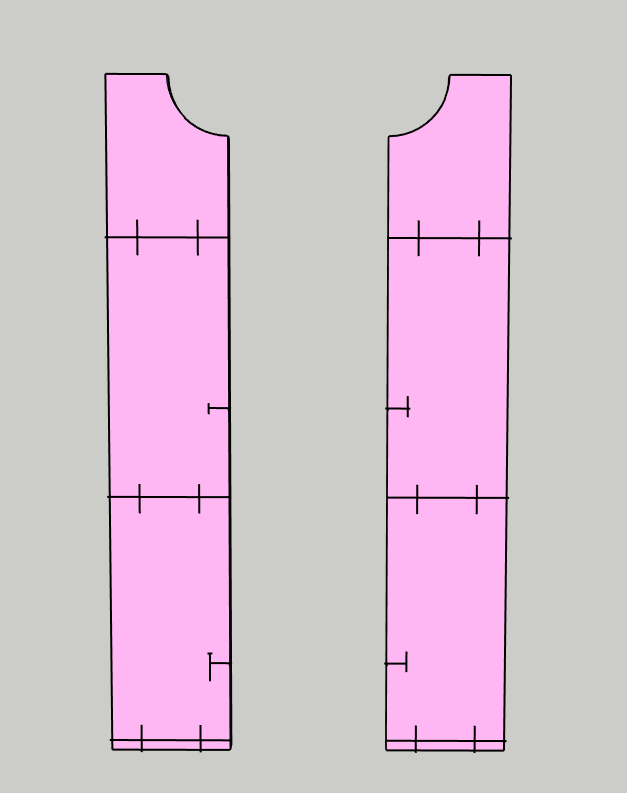
Classic Backyard Birdhouse with Free Printable Plans
Build a DIY classic backyard birdhouse featuring a simple design sparrows will love. With easy-to-follow birdhouse plans and a sturdy roof board, this timeless project is perfect for any backyard birdwatcher. You can use a single pine board to make your own!

Old Birdhouse With Vintage Hardware And Jewelry
This birdhouse, featuring vintage hardware, is a great example of turning something plain into a charming masterpiece using what you already have on hand.

DIY Log Bird Feeder Tutorial
Let's explore how to make a charming DIY log bird feeder treat to attract a variety of birds. It’s a simple family activity and makes a thoughtful handmade gift for any bird watching enthusiast!
DIY Hummingbird Feeder Kid-Friendly Craft
Create a DIY hummingbird feeder with this easy kid-friendly craft that’s perfect for getting children involved in nature. Using simple materials, kids can build and decorate their own feeder to attract these tiny, colorful birds to the backyard.

Make a Pinecone Roof for a Hand-Painted Birdhouse
Add a natural touch to your hand-painted birdhouse by making a pinecone roof—an eco-friendly and eye-catching roof material. This simple DIY technique gives your birdhouse rustic charm while blending beautifully with your garden.

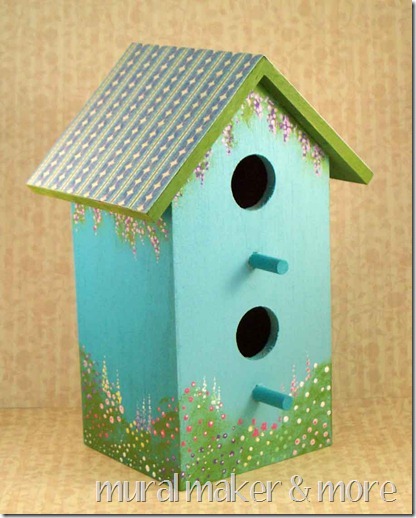
Make Hand-Painted Birdhouses with Style
Unpainted birdhouse kits from the craft store offer a blank canvas for your creativity. Hand-paint a scenic design and add unexpected details to transform a simple shelter into a stylish, one-of-a-kind home for feathered friends.
Hey bird lovers! My family loves bird-watching, too. Over the years we’ve experimented with several bird feeders, bird houses, bird seed, and resource books. I’ve created a list of our favorite bird-feeding and watching items on Amazon:
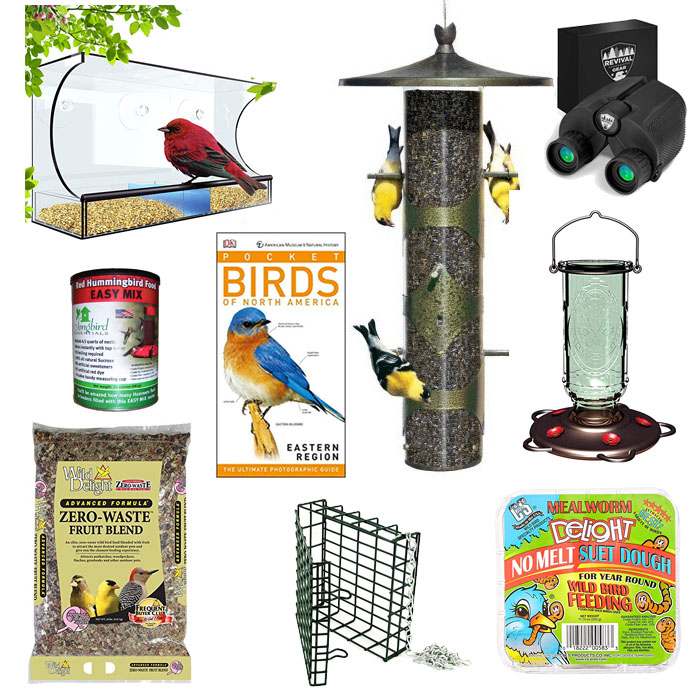
(I’ve included affiliate links for your convenience. I earn a small percentage from a purchase using these links. There is no additional cost to you. You can read more about affiliate links here.)
Pin for Later:

With these 15 DIY birdhouse and bird feeder ideas, you can turn your backyard into a charming haven for birds and a delightful spot for yourself.
Whether your style leans rustic, whimsical, or modern, there’s a creative project here to inspire every bird lover and DIY enthusiast.

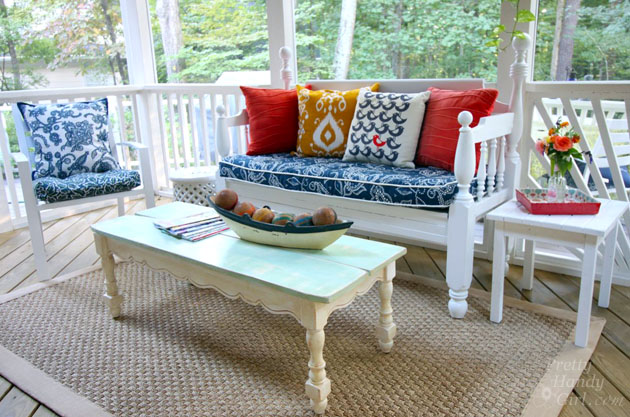
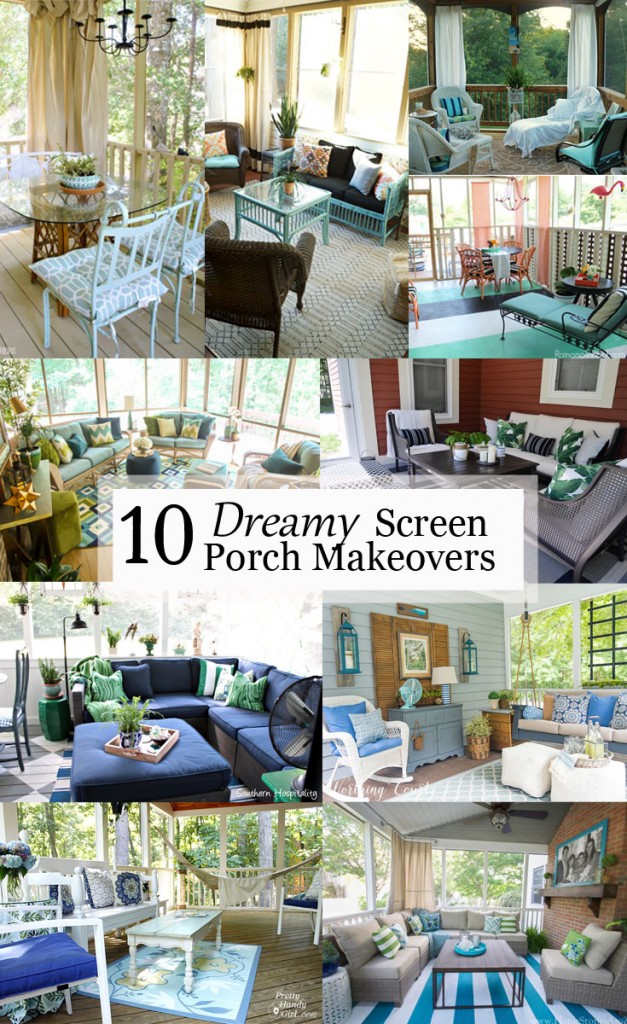
If you are looking for summer decor, check out these beautiful screen porch decorating ideas.


