How to Clean Your House Exterior without a Pressure Washer or Ladder

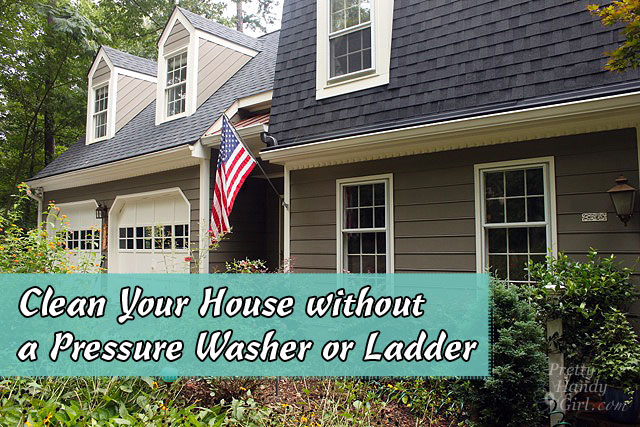
Is your home ready for Halloween? I don’t mean decorating. I mean is it so grimy and dirty that you don’t need to decorate to scare off the trick or treaters?

How to Clean Your House Exterior without a Pressure Washer or Ladder

Umm, yup, that was my house. But, a few weeks ago I was introduced to my new CBFF (Cleaning Best Friend Forever.)

Krud Kutter Exterior Clean Up

Krud Kutter Original - My Cleaning BFF

Seriously, you can ask my sister and stepmom! I was toting around a bottle of Krud Kutter this past weekend while working on renovating a VERY dated beach condo. What? You didn’t know I was doing that?!

Pretty Handy Girl Instagrams from Topsail

Well, you NEED to follow me on Instagram to get the latest deets of my DIY life!

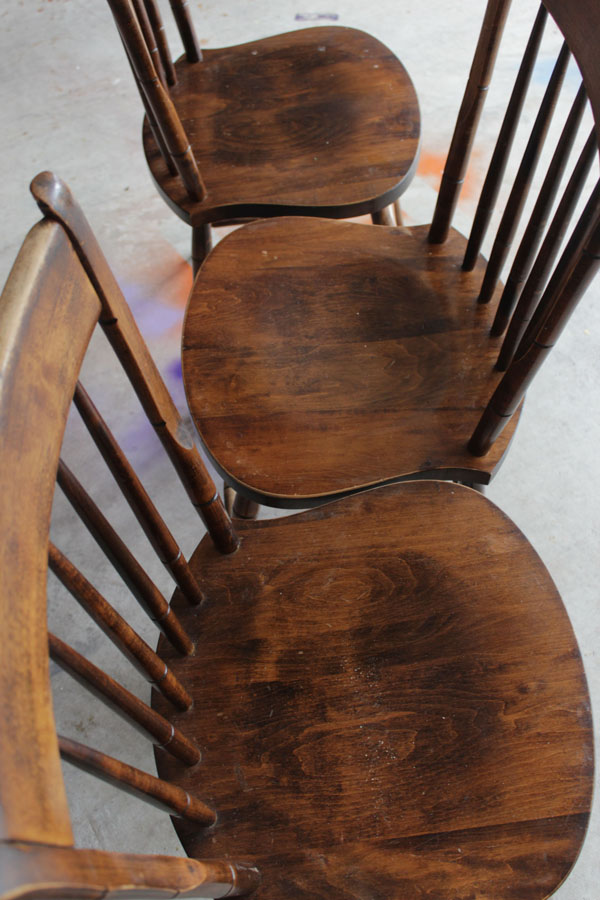
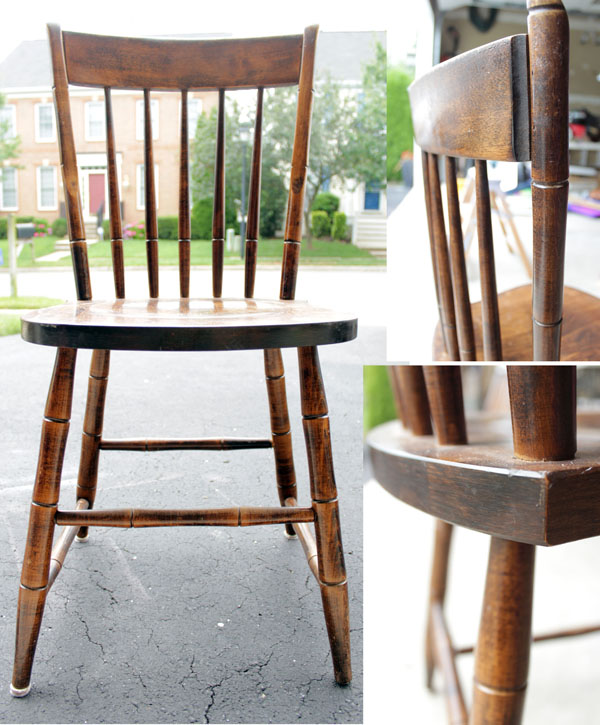
Anyway, back to Krud Kutter. The folks at Krud Kutter couldn’t believe I’d never used their products before. So, they offered to send me some to try. But, before I agreed, I checked with a few DIY friends like Holly.  And, they all agreed, “Oh yeah, that stuff ROCKS!” Holly says she uses it to clean grimy furniture before painting it. I figured if she likes it, I might.

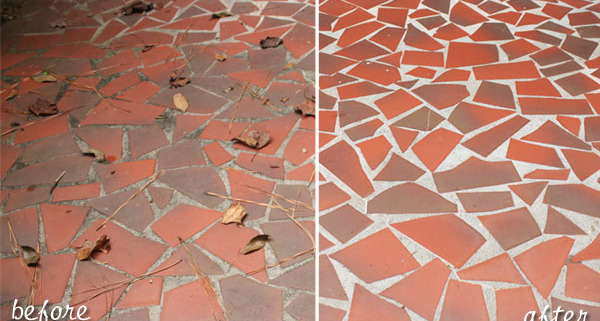
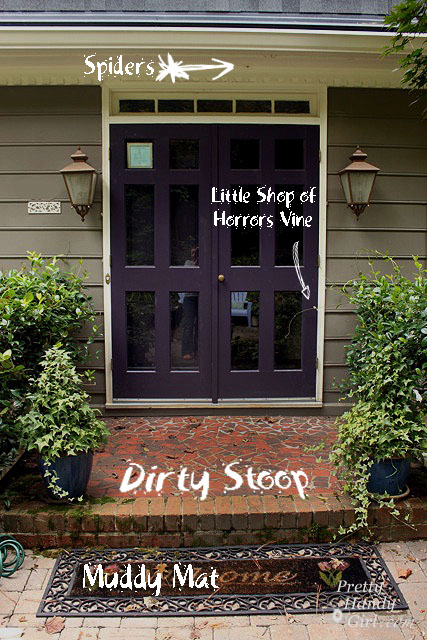
Within a few days, a box containing some Krud Kutter Original and Krud Kutter House Wash showed up on my VERY dirty doorstep. I’m sure my UPS driver thinks our stoop is a disgrace. I had contemplated buying a pressure washer to clean it.

How to Clean Your House Exterior without a Pressure Washer or Ladder(That white grout you see at the top of the picture was protected under the door mat for years.)

You can imagine my skepticism that a little plastic bottle could do the same job as a pressure washer.  But, I was shocked at what happened next.

Read more

Painting chairs - a second chance makeover | Pretty Handy Girl

My search for some small chairs for the kitchen table area is finally over!  The chairs I had before blocked the view from my kitchen to the family room and vice-versa, their backs were too high and overall they were too big for that small space.

kitchen area before RLC

I’d seen some pretty, small and colorful chairs from the catalog magazines I receive, but their prices weren’t that pretty. Almost $150 per chair!  Craiglist was my searching place, it almost took me a year but I found them, $5 each!

Painting chairs - a second chance makeover | Pretty Handy Girl

Their condition was good, no squeaky sounds, loosened parts or missing screws. Their appearance was on the drab side, they looked better in these pictures than they did in real live.  At some point they had been re-stained but the job was poorly done because they felt bumpy.

Painting chairs - a second chance makeover | Pretty Handy Girl

I knew they deserved a second chance! And I knew just how to do that.

Painting chairs - a second chance makeover | Pretty Handy Girl

Materials: Read more

Painted Lampshade & a Quick Guest Room Makeover | Pretty Handy Girl

Easy Window Treatment Upgrades | Pretty Handy Girl

Whoa. What happened to summer? Labor Day is here and that means the holidays are just around the corner. I’ve started to think about sprucing up our guest room in anticipation of having guests. The number one complaint our guests have (not that many of them complain) is that there is too much light that comes in the window in the morning. When Lowe’s asked us to focus on window treatments in September, I realized the time had come to address this blinding light situation. Little did I know, that installing new blinds and curtains would take less than an hour!

Here is the basic window that I started with. (Yes, there’s a roller shade there, but it was hidden under a valance and frankly it’s a pain to use.)

How to Install Window Blinds and Curtains | Pretty Handy Girl

After taking a few measurements, I headed to Lowe’s to look at the options for window blinds and curtains. It was a tough decision because I really liked some of the roman shades. But, I wanted a blind that wouldn’t block much light when it was raised. I settled on the Levolor cordless room darkening cellullar shade. Not only does it have a low profile when installed, but raising it and lowering is as easy as pressing a button. Plus, no strangulation hazards because there are no external cords! I’m kicking myself for not doing this sooner.

How to Install Window Blinds and Curtains | Pretty Handy Girl

How to Install Blinds and Curtains from Lowe’s in less than an hour: Read more

Notched Hanging Brackets

Hang Wall Decor Straight

Have you ever had the frustrating experience of hanging something on the wall only to notice afterward that it wasn’t straight? Yah, this happens to me all the time. So – let’s talk about how easy it is to Hang Wall Decor Straight Every Time.

Recently my wife wanted to hang a cork/dry erase board in our laundry room so that we can keep track of the kid’s activities. When tackling small projects like this one I always think, “How can I make this easier than it looks?”.

Well, fortunately my memory isn’t shot yet. I remembered that I received a pen laser level for my birthday and it would be perfect for getting the cork/dry erase board straight and level. If you’re going to hang a heavy mirror, tons of pictures, or several pieces of wall art I highly suggest getting something like this level because you’ll save precious time, countless re-hangings and eliminate the agony most of us experience during this process.

The Bosch pen laser level I have costs $35 on Amazon but any similar product will suffice.

Here are the additional supplies you need for this 20 minute project: Read more

How_to_Install_Lutron_Maestro_Sensor

Teaching kids to turn off the lights in a room they are no longer in is a tough job. No matter how many times I try to explain that leaving the lights on wastes electricity, it just doesn’t seem to sink in. In their defense, they are like little wind up tops flitting from room to room playing with trains in one; reading in another and barely stopping to use the toilet in the bathroom (putting the lid down is a whole other issue! Ugh.)

When Lutron approached me about giving my kids a helping hand with the lights, I was immediately intrigued. It turns out that Lutron has just introduced the Maestro occupancy sensor dimmer that can be easily installed in place of an existing light switch. (Single pole switches are easiest. Dual or Multi-location switches may require a little more wiring and programming to work properly.) After some thought, I decided to try the Maestro in our art & craft studio. This is the room that we least notice when the bulbs are burning (it is over the garage and is separated by our guest room from the rest of the house.)

Follow along to see how to install your own. Your attentive nature may be rewarded at the end. 😉 Read more