
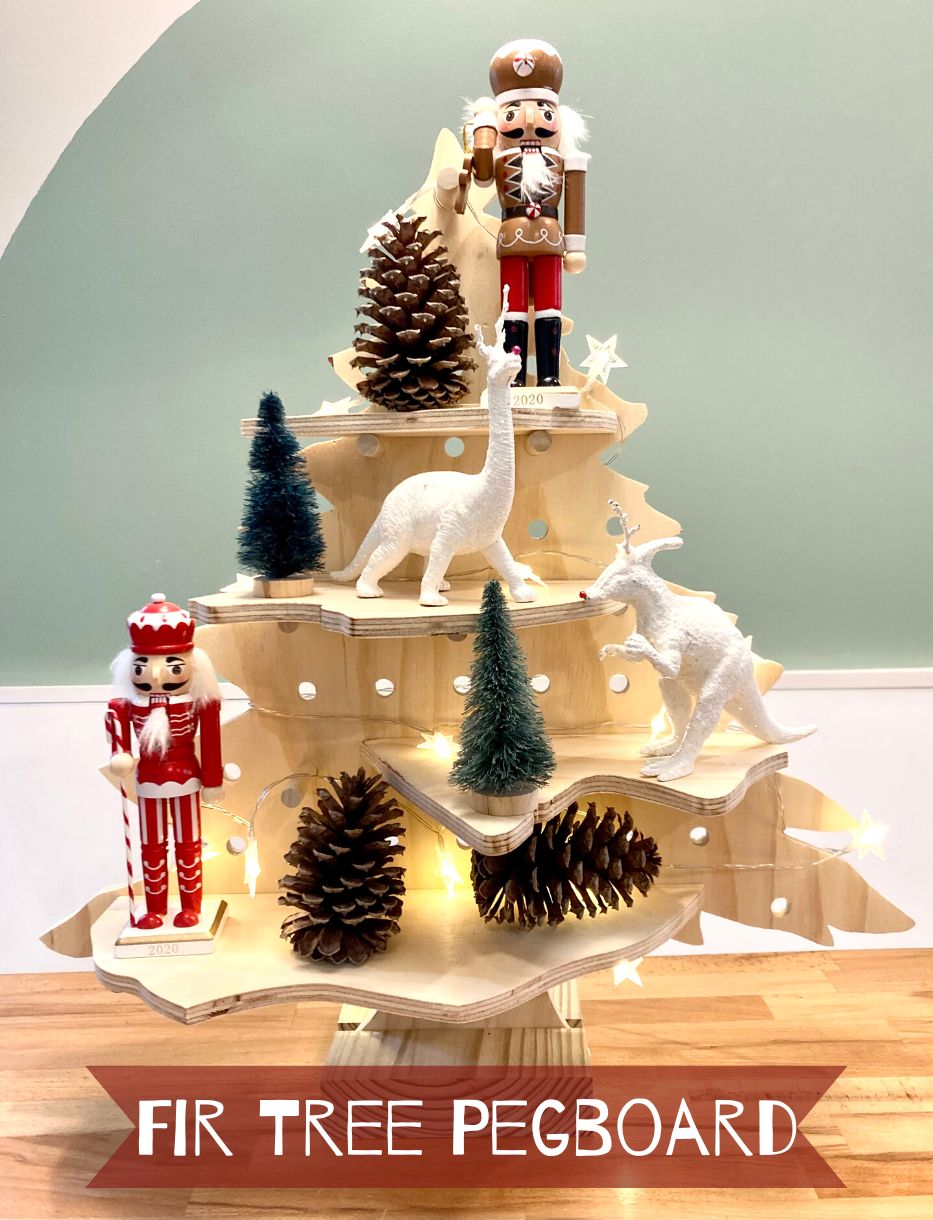
How to Make a Fir Tree Pegboard
Looking for a last-minute holiday craft you can do with your kids (or alone in your own quiet spot)? How about a fir tree pegboard! This is a festive, fun project you can make in an evening.
How to Make a Fir Tree Pegboard
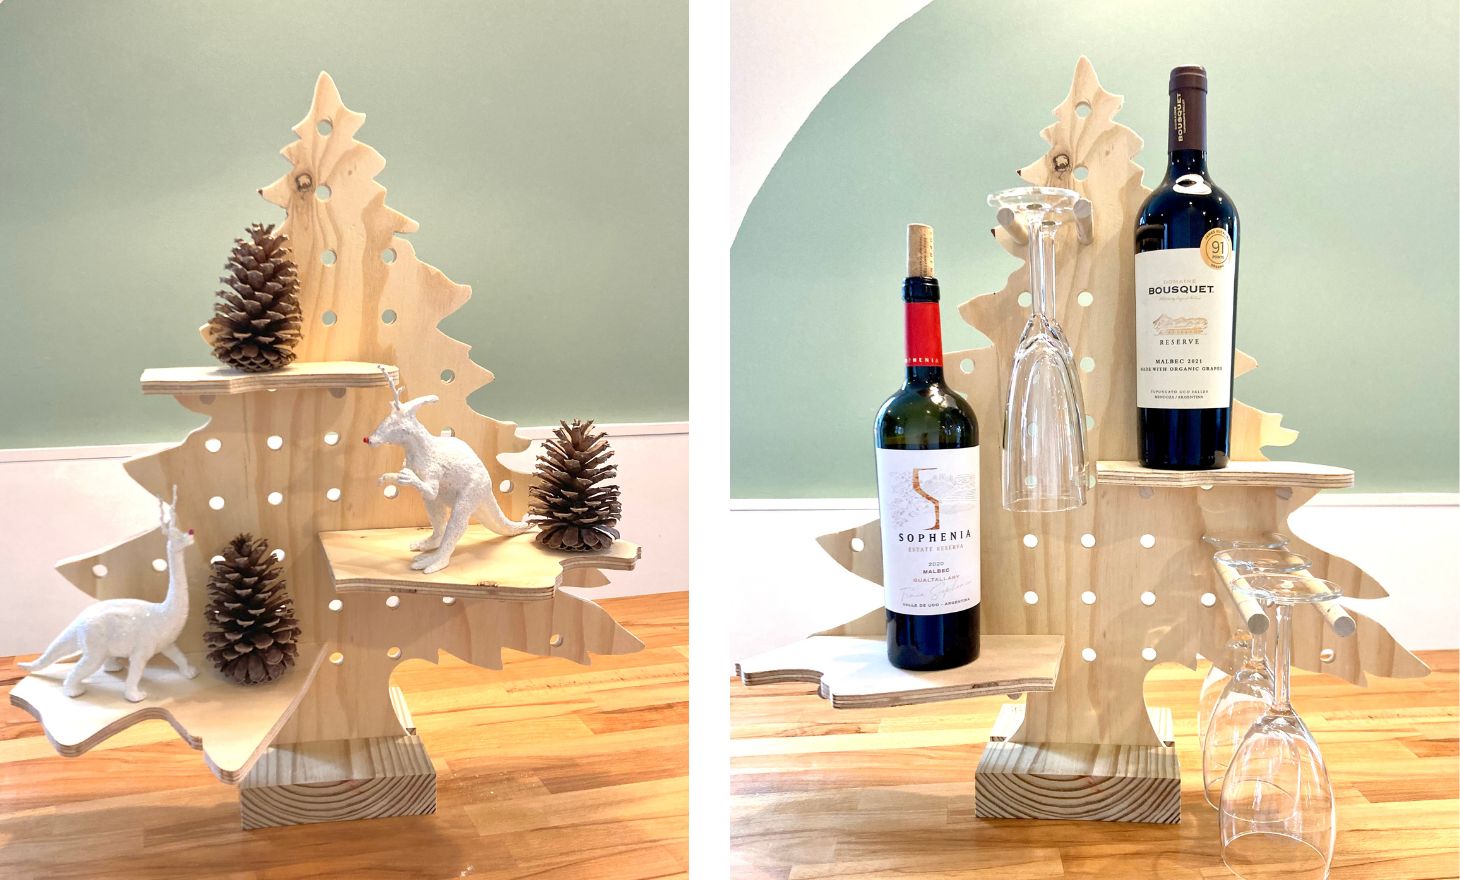
There are so many fun ways to use this pegboard tree! We’ve made a dino tree, a wino tree, and have big plans for a charcuter-tree (a.k.a. a vertical tree-shaped meat and cheese tray). I imagine even the Elf will find a “shelf” or two to relax on over the next few weeks. When the holidays are over, this tree can shed its twinkle lights and function as a nature-themed table display or become a donut tree! What are your creative ideas for this pegboard? Leave a comment below!
Materials:
- 1/2” plywood (only need a 2X2-foot piece)
- 1/2” dowel at 5 feet long
- 2×6 at 7 inches
- Paint (optional but not recommended)
(I’ve included affiliate links for your convenience. I earn a small percentage from a purchase using these links. There is no additional cost to you. You can read more about affiliate links here.)
Tools:
- Jigsaw
- Miter saw or hand saw
- Table saw or circular saw
- Orbital sander and/or sandpaper
- Drill
- 1/2” forstner bit
- Yard stick or tape measure and a straight edge
Instructions:
Step 1: Determine the desired size of your fir tree peg board. I wanted something 2 feet tall and approximately 2 feet wide at the base with a 7-inch stump at the bottom. Using a table saw or a circular saw, trim down your plywood to a square or rectangular that will fit the outline of your tree. If you purchase plywood from your local hardware store, you can ask them to cut it down to your specifications.
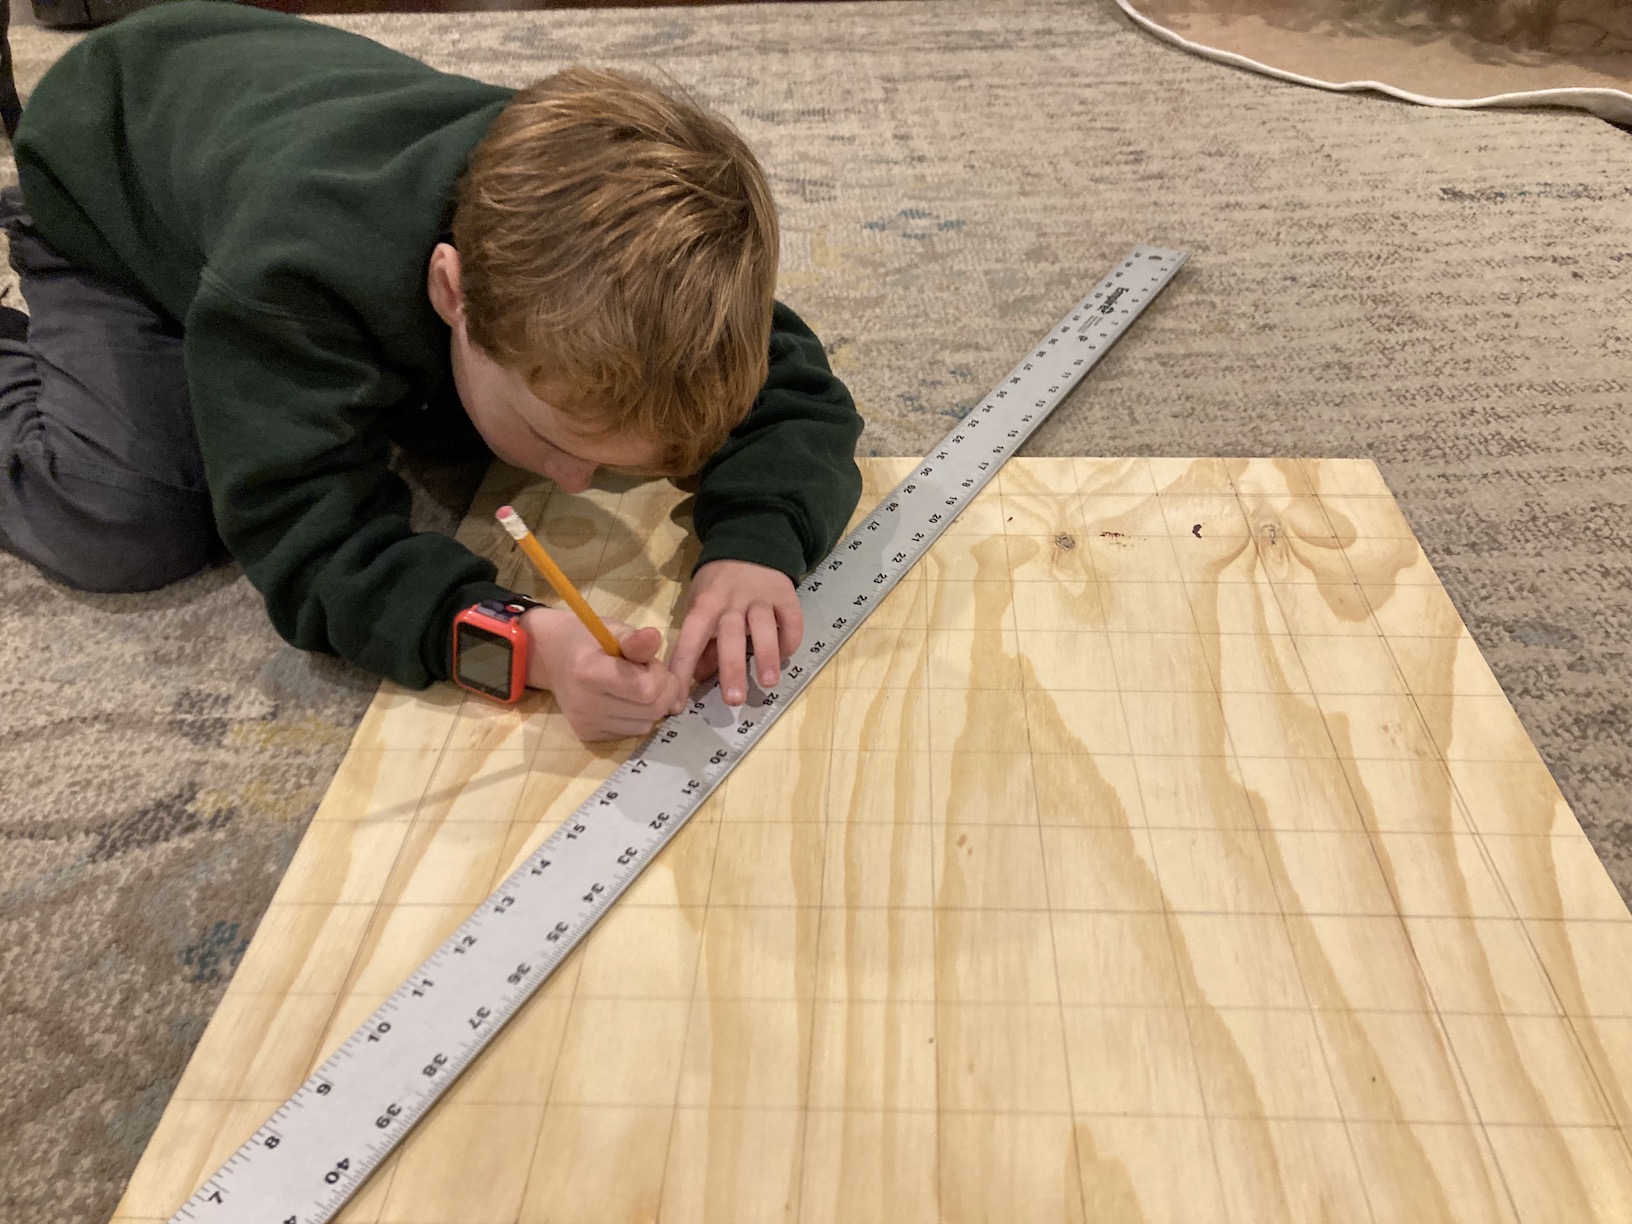
Step 2: With your plywood cut, determine how far apart you want your peg holes. Mine are spaced 2 inches apart from the center of each hole. Unpro tip: If you make the dimensions of your plywood section evenly divisible by the distance between the holes (for example, 24 inches wide with 2-inch hole spacing, or 21 inches wide with 3-inch hole spacing), this process is a breeze. If not, be prepared to do some 8th grade level math. Use a pencil to mark the hole spacing along each edge of the plywood, then use a straight edge to connect the marks from side to side.
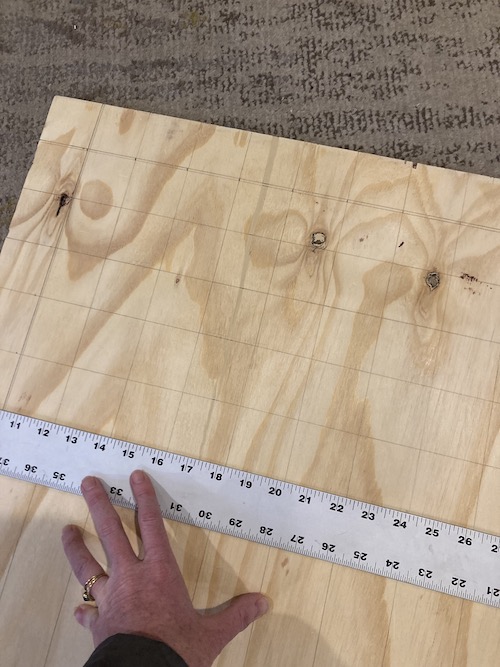
Step 3: You should have a grid on your 1/2” plywood. If you are artistically inclined, use a pencil to freehand sketch the shape of a tree, starting from the center point at the top. The intersection of each grid line is where you will place a 1/2” hole, so plan the edges of your tree accordingly. Of course, you always have the option of omitting holes too close to the edges. If you aren’t artistically inclined, make a guide by drawing a triangle from the center at the top and down to each bottom corner.
Then sketch the tree branches following the lines on each side. I made a stump at the bottom because my son couldn’t fathom a flat bottom tree (dramatic gasp!). I am NOT a gifted sketcher, but doing it this way was nearly foolproof. Alternatively, a simple triangle pegboard could make a stunning minimalist tree and I love that for those of you who are overwhelmed by the thought of drawing and then cutting fir tree branches.
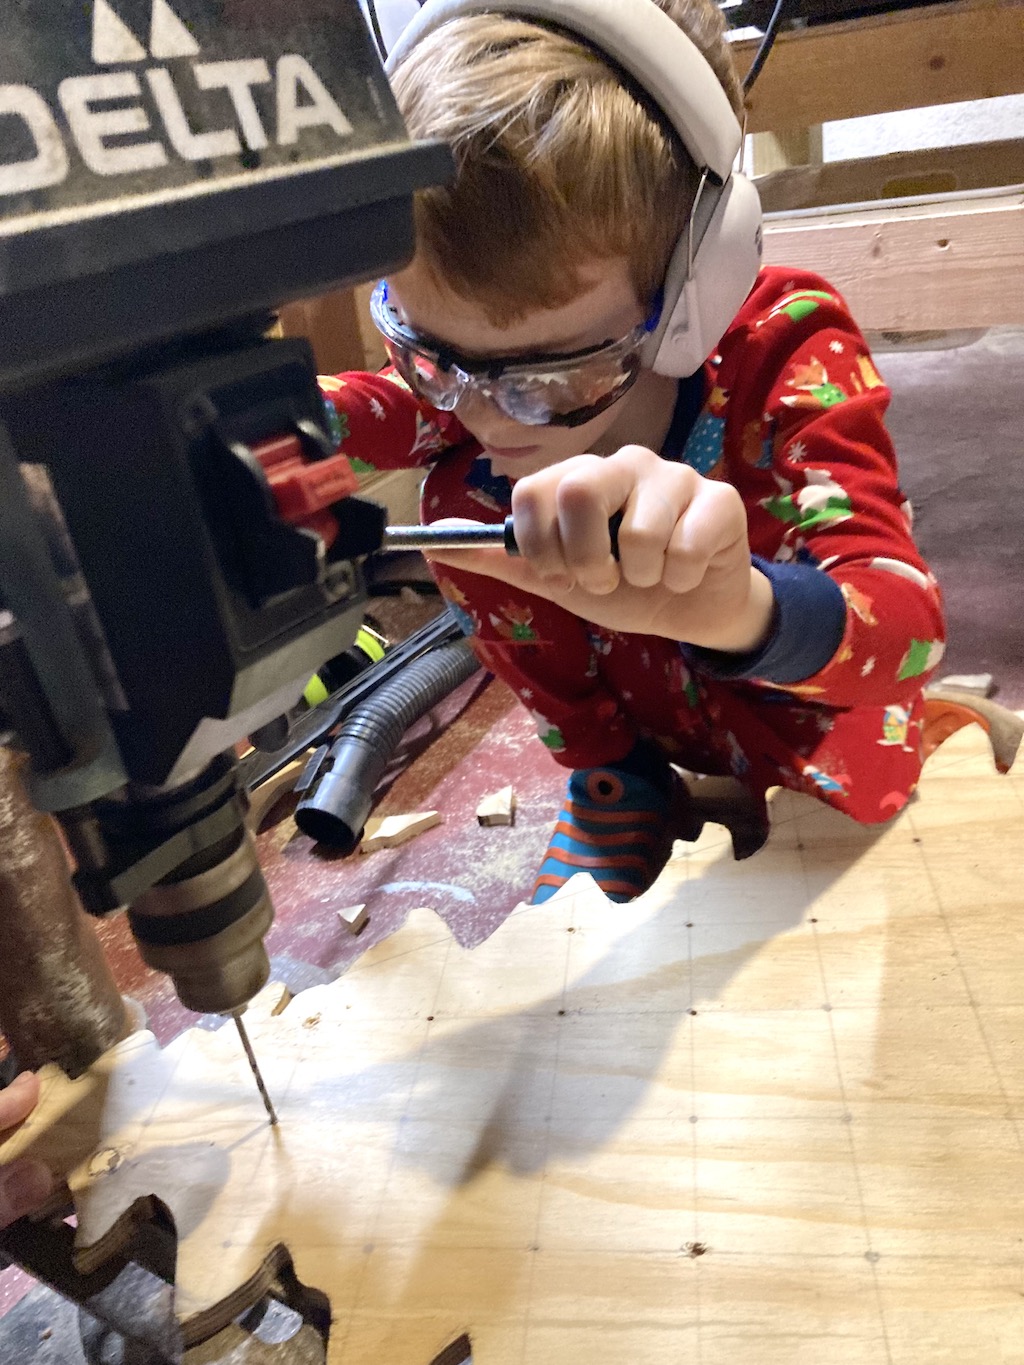
Step 4: Now for the tools. Both of my kids are notorious for following me into my workshop dungeon and I encourage it! But we have strict rules to keep everyone safe.
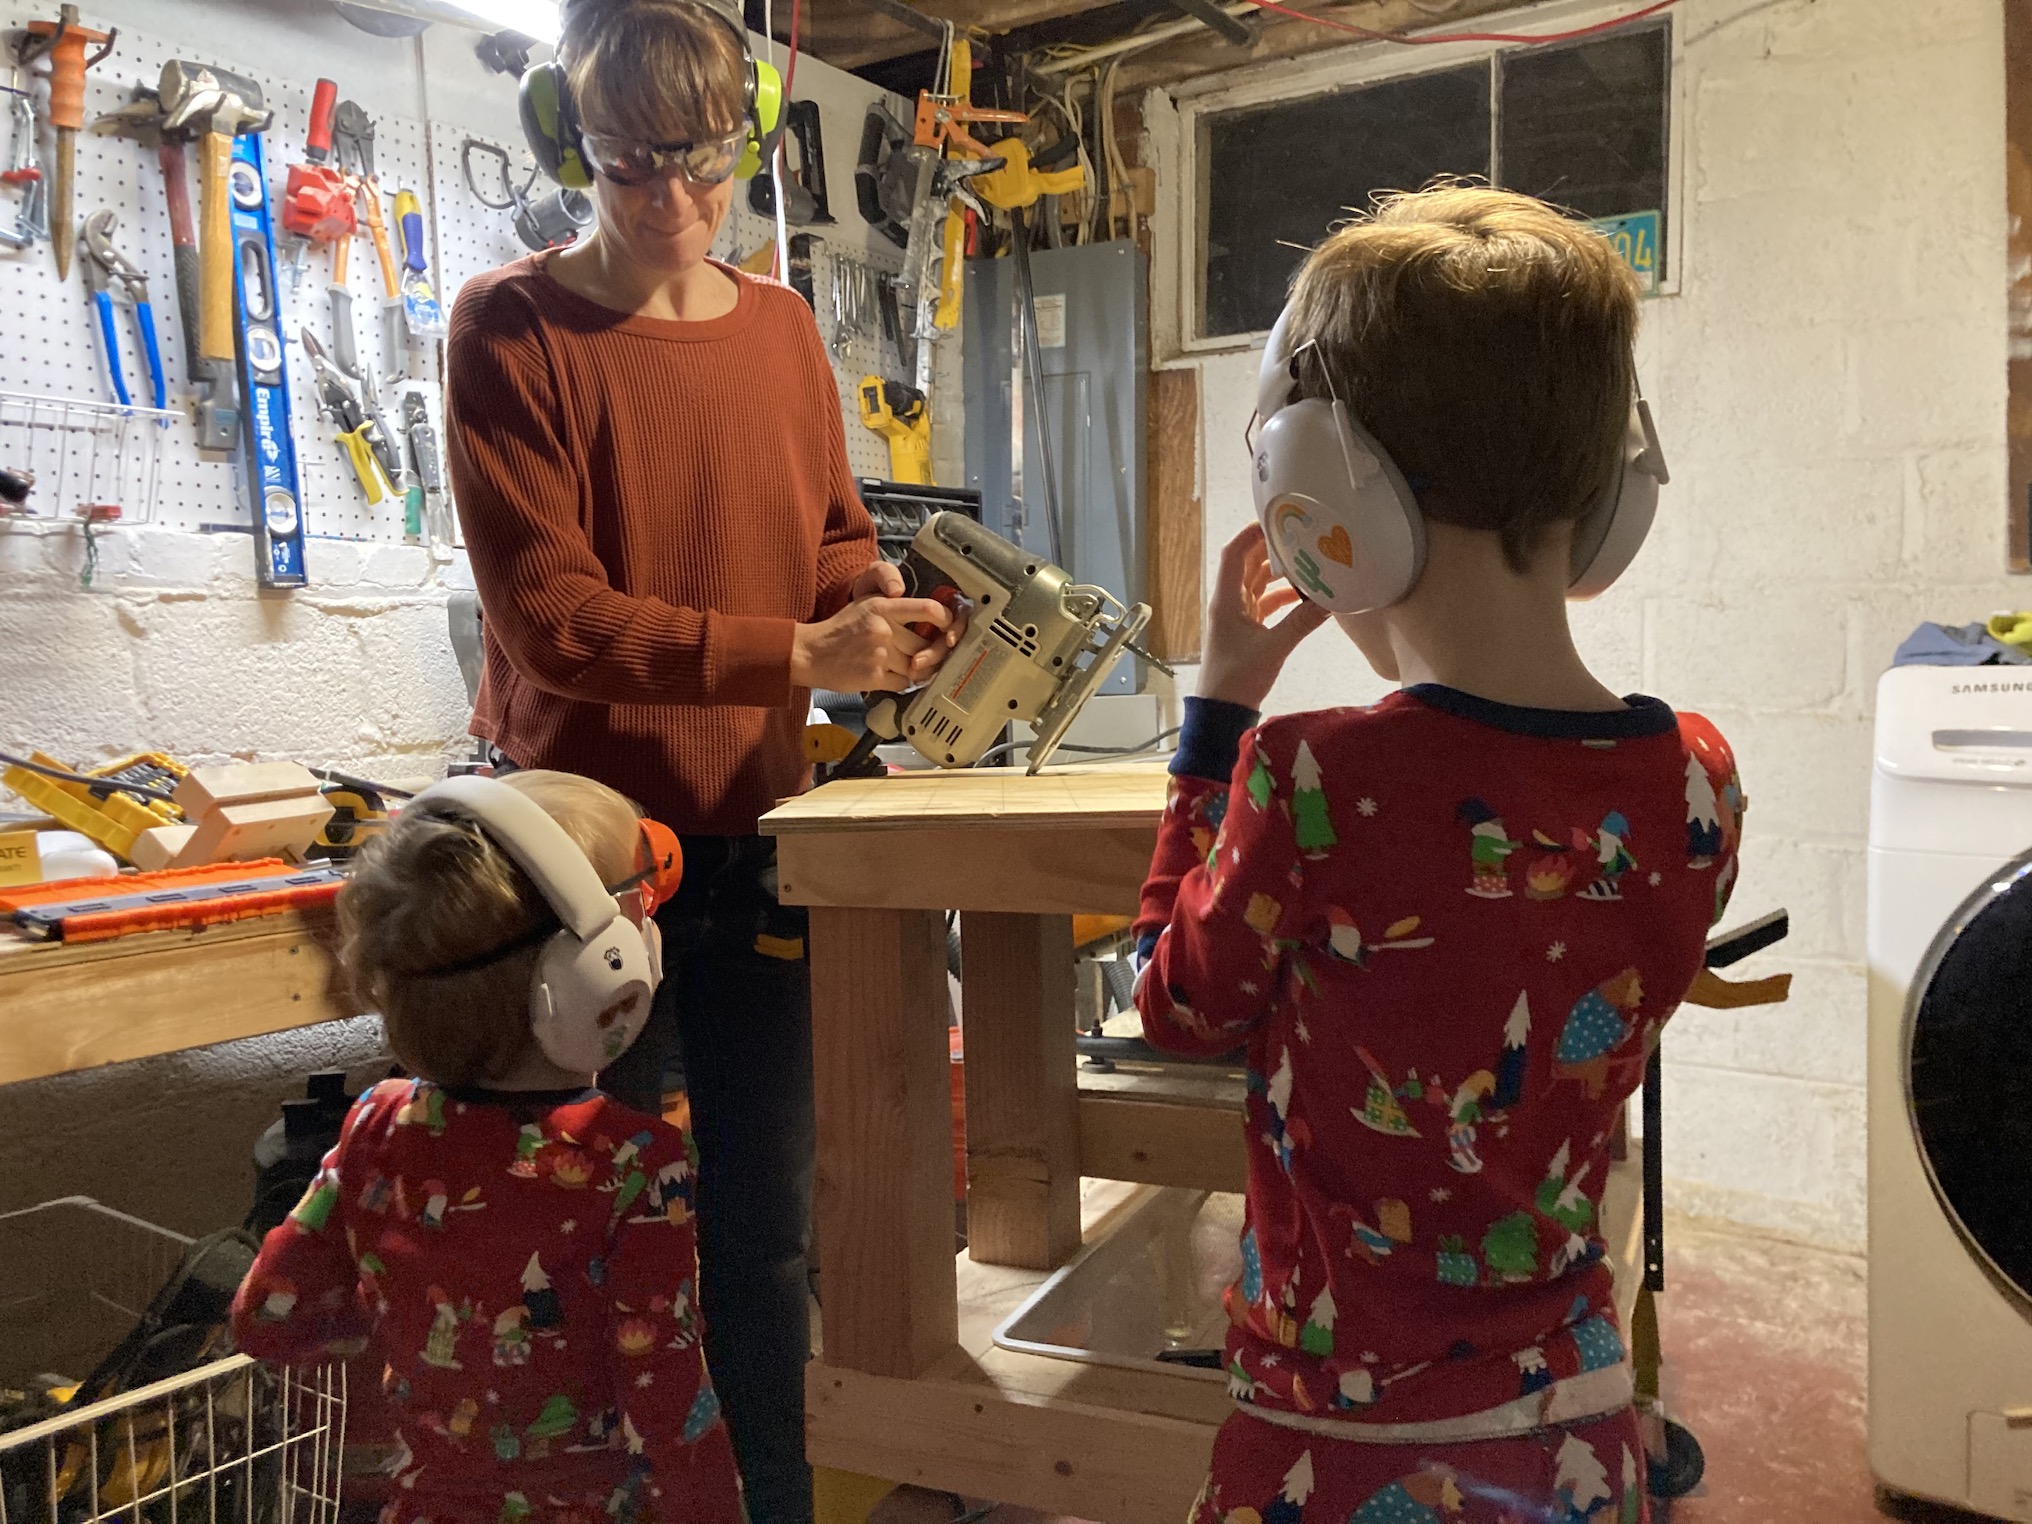
Rule number one is that no matter which tools we are using, everyone wears properly fitted (i.e. kid-sized) ear and eye protection. This creates good habits from an early age and prevents those “whoops!” moments when you use the miter saw for “just a quick second” and now everyone’s ears are ringing. A quick hearing fact for the DIYers with kiddos: 1 in 6 school-aged in the children in the US suffers from noise-induced hearing loss. This is permanent hearing loss that can impact their social development and academic success and will ultimately need to be treated with hearing aids to offset the increased risk of early on-set dementia. Take a moment to let that sink in. This is why I am so cautious with my kids around loud tools (not to mention at loud events and on airplanes). My kids wear hearing protection made specifically for children. We use Wise Little Ears hearing protection from an audiologist and educator-owned company. In full disclosure, I am the educator half of this mom-owned business! We assure each pair is high quality and comes with guidance for how and when to use them. If you have children, I hope you’ll look into our Wise Little Ears protective products for your little ones.
Now, with your safety gear on, clamp the plywood to a sturdy surface and use a jigsaw to cut out the shape of the tree on one side, then on the other side. Go slowly and make extra cuts to get into tight turns. Save the scraps, you’ll use them for branch-looking shelves later.
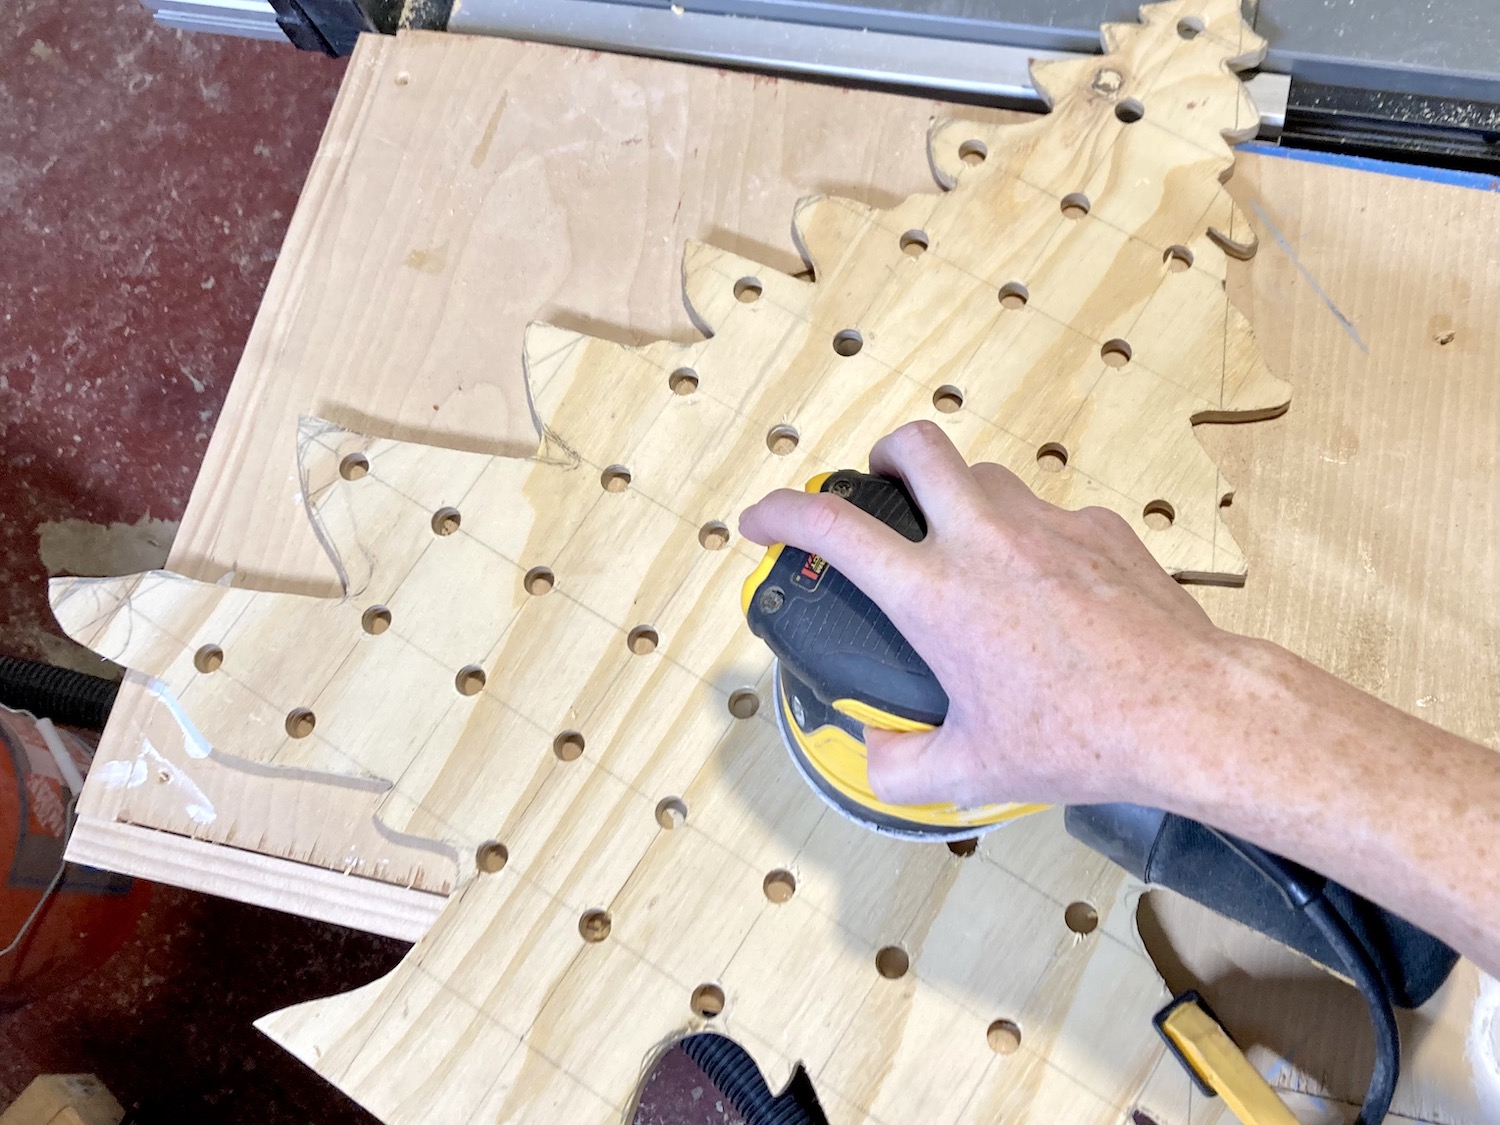
Step 5: You should have the outline of your tree with gridlines. Using a pencil, make a mark at all the intersections that are not close to an edge. Remember that the peg holes will be a 1/2” in diameter, so they need a little space. Skip any hole that is too close to the edge. Using a drill, make small pilot holes at each mark. Pilot holes are optional, but they help guide the forstner bit.
(Drill press not necessary, a hand held drill would work fine.)
Then, using a sharp 1/2” forstner bit, place the center of the bit into the pilot hole, drilling slowly at first, then speeding up through the plywood and out the back. When all the holes are drilled, lightly sand both sides of the plywood with 180-220 grit sandpaper to clean up and remove the pencil lines. Then lightly sand the edges and the bottom to remove splinters or sharp edges.
Step 6: To make a stand for your pegboard, cut a 2×6 the length of the bottom of your tree or stump and make a deep groove (also called a dado) through the middle of the 2×6 that is the same thickness of the plywood. You can do this with a router and a 1/2” strait bit (be sure to clamp your wood for a hand held router. Alternatively, you can use a table saw.
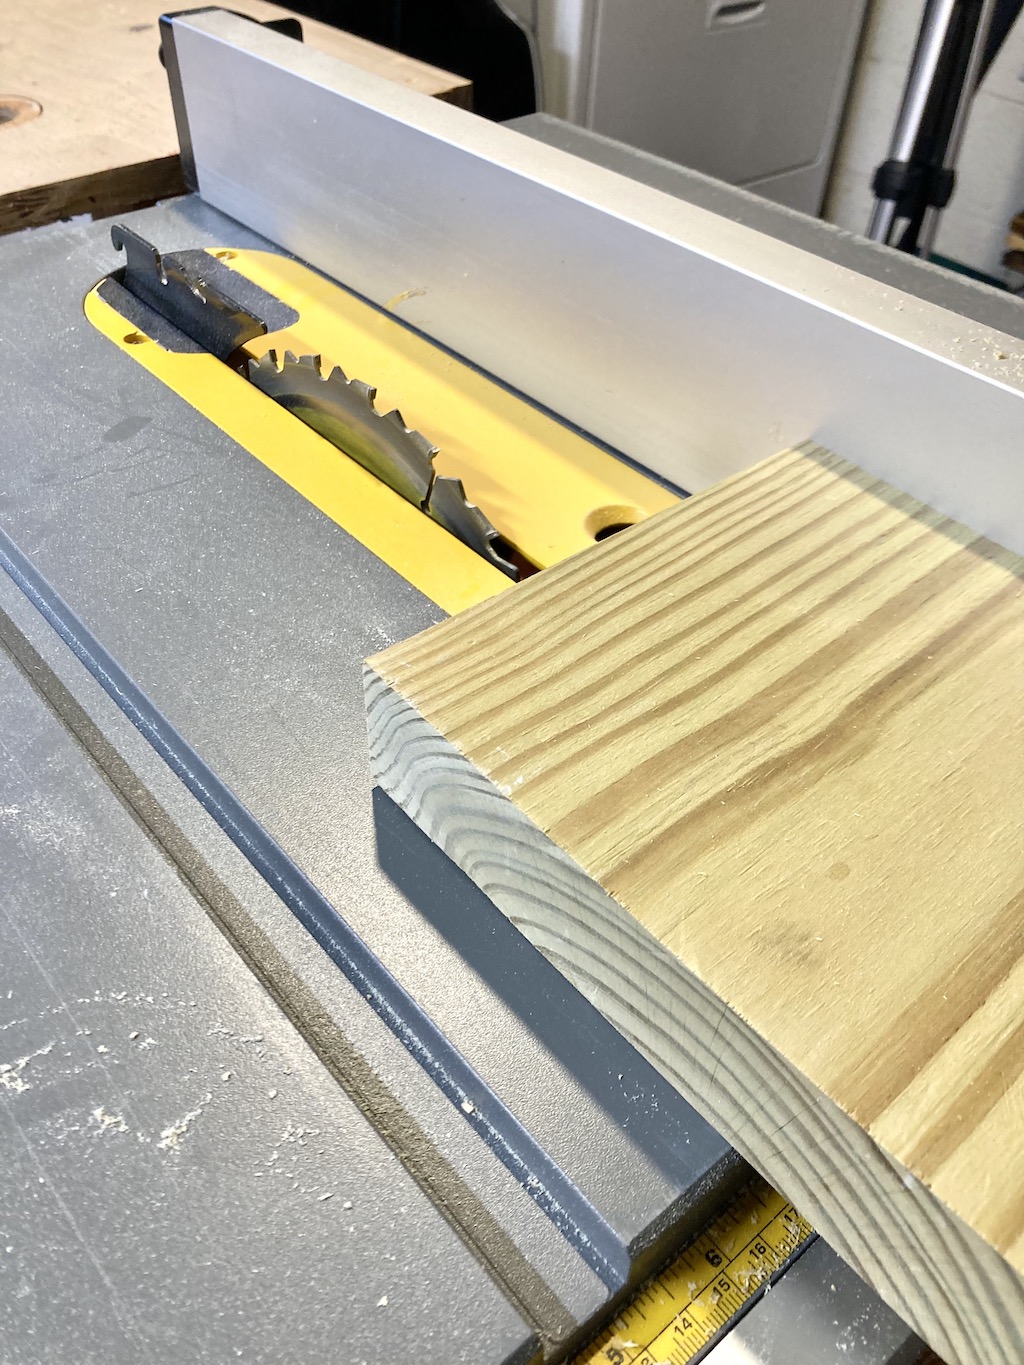
To use a table saw, set the blade depth to about one inch so that when you pass the 2×6 flat over the blade, it cuts a channel instead of cutting all the way through the wood. Set the saw fence to the middle of the 2×6 (this doesn’t have to be exact) and make your first pass over the blade. Turn the saw off, move the fence over slightly less than the width of the blade (typically 1/8”), then run your board in for another pass. Continue this process, checking the width of the groove after each pass with a scrap piece of the tree cutout, until the channel is the same thickness as the plywood. It is important that the tree fits snugly into the base, otherwise the tree will tip to one side or the other.

If you went big with the size of your tree, like REALLY BIG, you will need to modify the base to make it sturdier. For example, if your tree is in the 2-to-3-foot range, a 2×6 will work. Tree peg boards that are larger than 2-3 feet wide will need a larger base or create additional feet on the front and back.
Step 7: Now it’s time to make your shelves and cut your pegs! Collect your leftover plywood scraps and determine which pieces would make good shelves. A good shelf must be longer than the distance between at least two peg holes and have a flat side that will sit flush against the tree. I picked the longest sections with interesting, branch like curves. If you didn’t manage to get anything that fits this description, you can use your jigsaw to create a shape in any piece with at least one flat side. Or, if you prefer, you can cut standard 90 degree shelves.
Cut your pegs according to the depth of your shelves. The pegs should extend to the edge of the shelf for more stability. Cut a few long pegs to hang wine glasses and short pegs to hang coffee mugs, ornaments, or to string lights.
Optional step: Paint. Here’s the thing about paint and peg boards. Painted surfaces, especially with sheen, will stick together. There is also a good chance that a painted peg will fit not fit into painted hole because paint adds thickness to both surfaces, making the pegs slightly bigger and the holes slightly smaller. The easiest solution is to leave the tree and pegs completely unfinished. But if that’s not an option for you, your kids, or your wine glass, here are a few suggestions:
- Pick a paint with a matte finish so there is less stick.
- Don’t paint the pegs OR the inside of the holes. Unpainted pegs and hole edges would look fun!
- Thin out the (matte) paint and do a paint wash.
- Sand the pegs and the holes. This is a risky option because if you sand too much, the pegs won’t be tight in the holes and if you don’t sand enough, they won’t fit.
- Use a sponge to make a textured accent rather than a solid coat of paint.
And there you have it! A fun festive project with endless options. Remember to check out Wise Little Ears for more information on protecting your little builder’s ears.
Build scrappy and be safe!


What a great project. I wish I had the tools to do this with my grands! Thank you for sharing.