Two weeks ago I was thrilled when one of you wonderful readers signed on to become my 100th follower! What a milestone for a relatively new blog.
This lucky, 100th follower was Sharon, who has an equally amazing blog called This Thrifty House. If you haven’t been to her blog, you have to check out some of her projects!
Here is just a small sample of some of her creative juices flowing:
As a BIG thank you to Sharon for signing on as a follower, I had to make her something special. I took pictures and wanted to create a tutorial for you, but I’ve had to sit on my fingers to keep from spilling the beans before she received it.
So, the time has come, Sharon received my package in the mail, and without further delay, here is the tutorial!
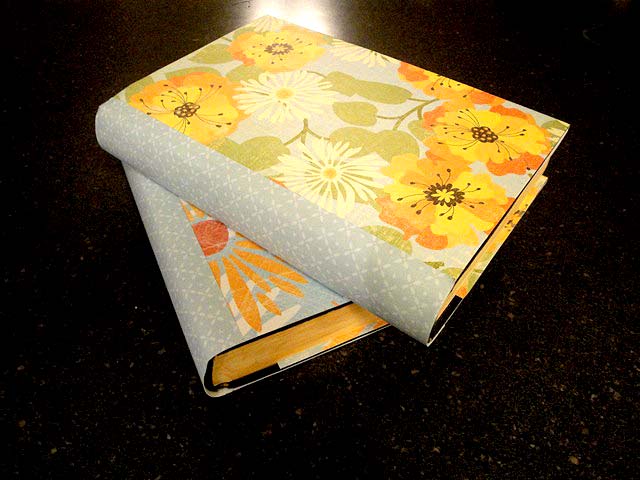
Before the end of school I made four of these beautiful decorative books for my sons’ teachers. They looked so pretty that I didn’t have to wrap them in gift wrap.
I simply tied a bow around them and gave them to the teachers. Imagine their surprise when they opened them to find…
a gift card to Borders!
Now they have a pretty book to decorate with and a secret compartment for hiding something.
To make these decorative books with storage you will need:
1 Thick hardback book (I buy these for super cheap at Goodwill or use one of your own)
2 sheets of decorative scrapbook paper (12″ x 12″)
1 sheet of coordinating decorative scrapbook paper for the spine
Rubber cement
Scotch Tape
Xacto blades
Metal ruler (or ruler with a metal edge)
Mod Podge
Gold acrylic paint (optional)
Wax paper (save the liners from cereal boxes and never buy wax paper again)
Heavy weights
and most importantly….patience.
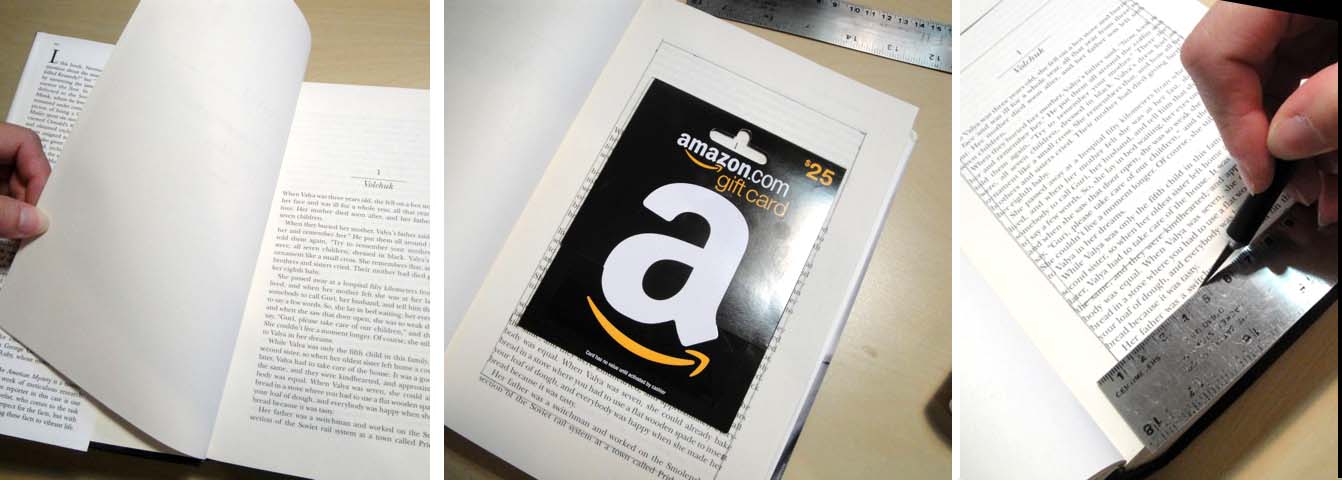
Begin by removing the dust cover or jacket from your book.
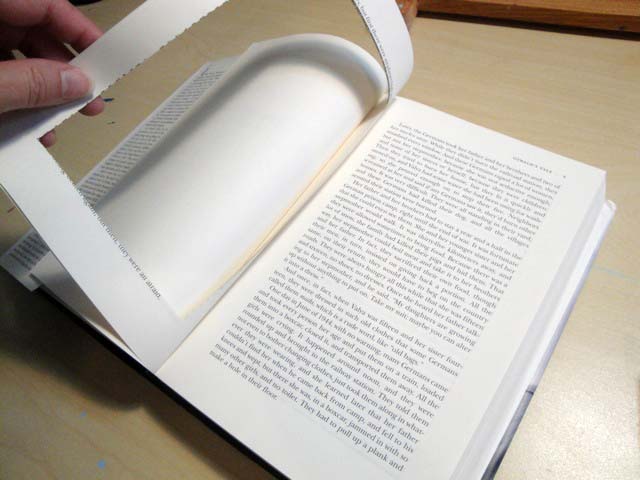
Open your book a few pages to determine where you want your hole to be. I usually leave a few pages in the front for more secrecy. Lay your gift card or item to hide on the page and trace out a rectangle guide for cutting. Use your x-acto blade and ruler to cut out one or two pages.
Put a piece of wax paper between your first cut page and the rest of the pages. Put a second piece of wax paper between the back cover of your book and the last page of your book. This keeps the paint/mod podge mixture from getting on the areas of the book you want to keep clean.
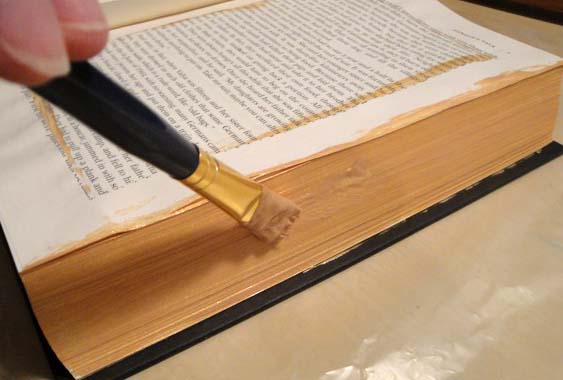
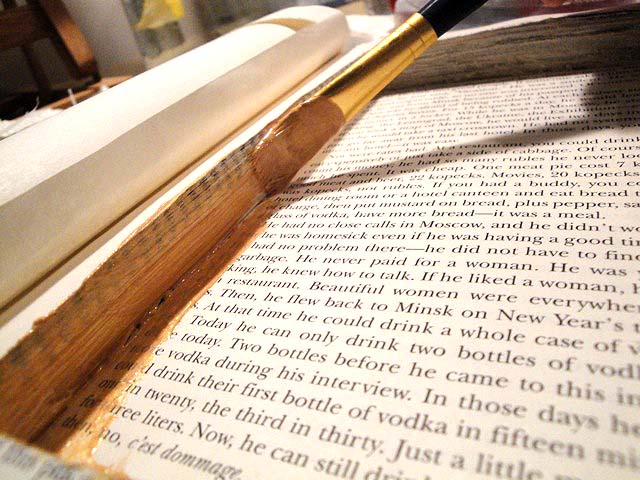
Now, mix your mod podge with a small bit of gold acrylic paint and brush the gold mod podge on the three sides of your book pages. Be sure you have covered your pages well.
Now, close your book (being sure that the wax paper is still protecting the back cover and the reserved page.) Get your heavy weight (hooray, finally a use for those heavy free weights that take up valuable closet space.) Do one bicep curl and drop the weight on top of your book.
Wait about 30 minutes for the modge podge to dry. While I’m waiting I put a piece of saran wrap over my mod podge mixture and paint brush and stored it in the fridge to keep it from drying out.
While you wait for the book to dry, you can assemble your decorative book cover.
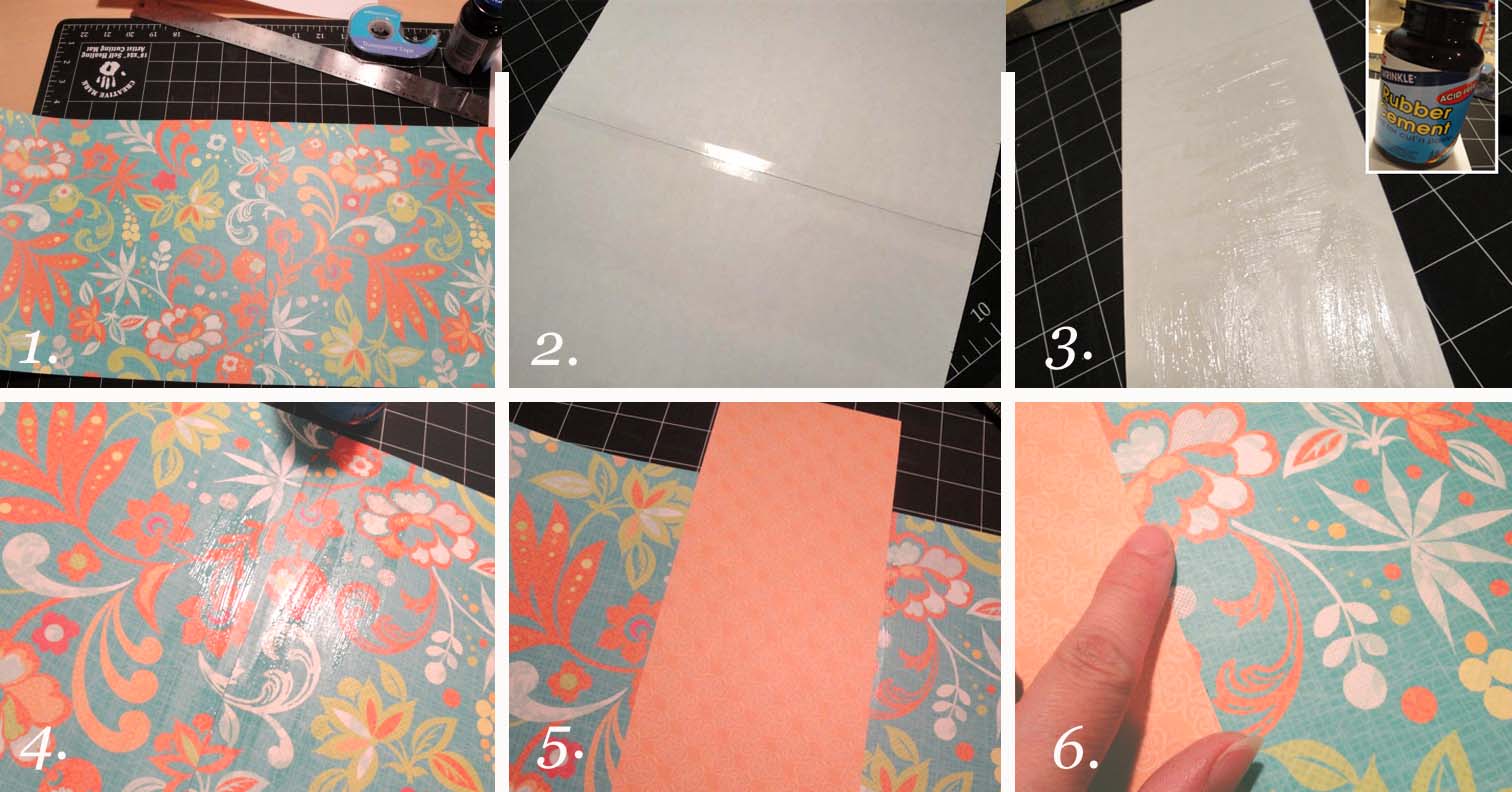
(1) Butt your two scrapbook pages together and (2) put a piece of scotch tape along the seam.
Use the removed cover of your book (or measure the book) to figure out how tall you want your decorative cover to be. Trim your cover down to the correct height. Next determine how wide you want your decorative spine to be. Mine is the width of the book plus 2 inches. Cut your spine paper to size width-wise.
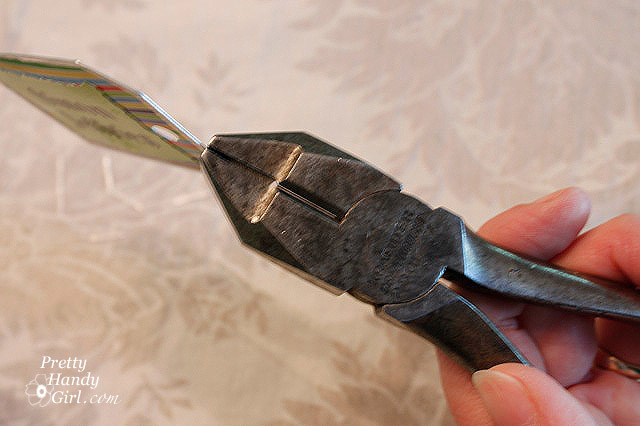
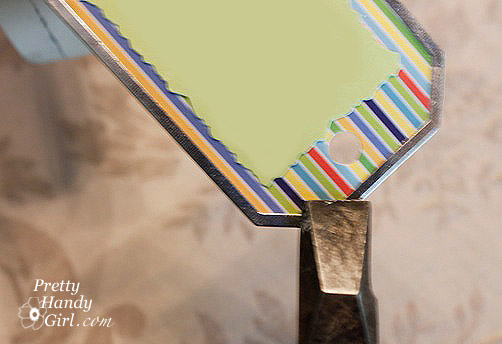
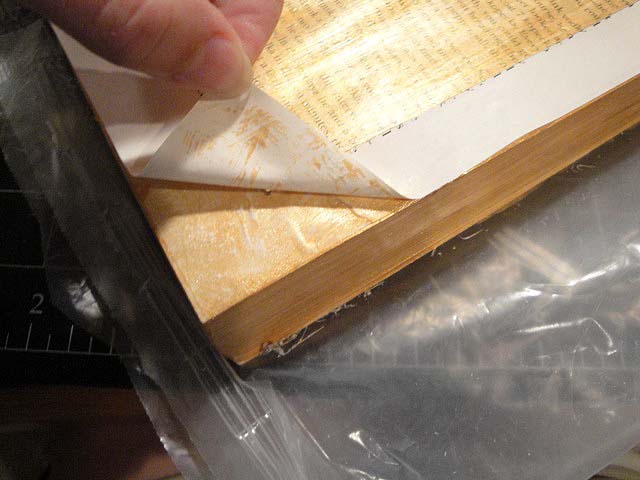
Center the spine on your book cover and draw a light pencil line on the book cover around the spine edges. (3) Open your rubber cement and coat your spine with a coat of rubber cement. Let it dry slightly while you (4) put another coat on the book cover in between the guide lines you drew on the cover. To get a strong bond with rubber cement you need two coats (one on the surface you are attaching, and the other on the surface you are gluing the piece to. This is standard for rubber cement unless you happen to purchase one coat rubber cement. (5) While the pieces are still tacky, gently lay the spine on top of the cover. You only have one shot at this, so go slow. Press the paper together. (6) Then run your finger along the spine edges wiping up any rubber cement (go ahead, you know you want to make little fake boogies!) Now, take your ruler and xacto and trim off the excess top of the spine.

Set your cover aside and check on your book. If the modge podge is dry, go ahead and open the book. Now, put your patience cap on.
You will continue to keep your one reserve page separate, but use it to draw your guide lines on the first page of the glued pages. Then be sure to protect that one reserve page so you can cover up your jagged cut lines later.
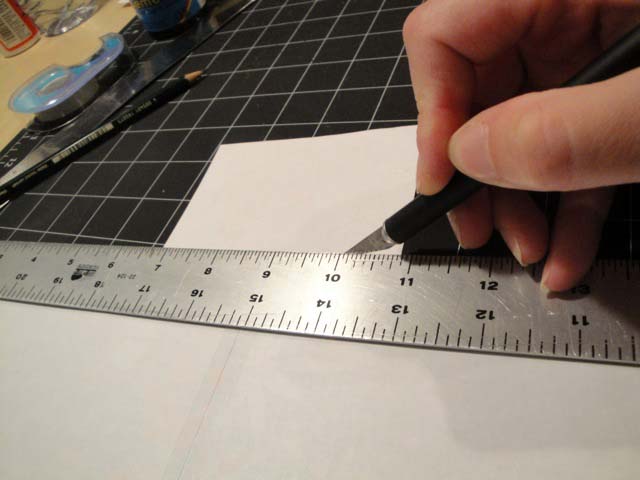
Use your ruler and a VERY sharp brand new xacto blade (you may go through 1 or 2 more blades during this part. Be sure to change your blade if the blade starts to pull pieces of the pages with it instead of cutting through them.) Gently but firmly cut along your guide lines. BE SURE TO KEEP YOUR FINGERS AWAY FROM THE RULER EDGE! (You don’t need to loose a finger, unless you are a two finger typer.)
Score a few times in the same spot being sure to press firm but not too hard as to break your blade. Try to be sure that you are cutting all the way to your corners. My method was to cut 4-5 times along one line, then rotate the book 90 degrees and repeat.
When you have cut through several pages, pull them out (cutting any corners that are still attached.) Now repeat, repeat, repeat……..until you have reached the desired depth for your hidden storage area. Phew, do you have a hand cramp yet? Hopefully that is all you have, no cuts I hope.
Now, clean up any edges of your opening.
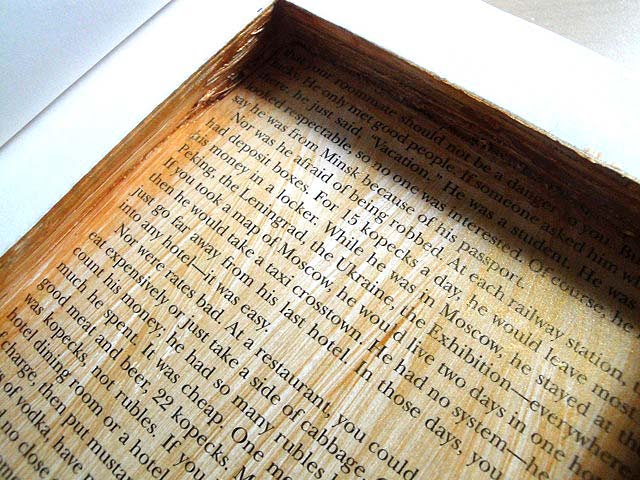
Get your gold mod podge out of the fridge and seal the edges of your opening and paint the bottom of your opening.
Then paint the exterior edges around your opening (the first page in your glued stack.) NOW, lay your reserved page on top of this one and you have a clean border!
Put a piece of wax paper on top of your reserve page and pick up your weight. Use your opposite arm and do one bicep curl and drop that weight back on the book! There, you did your workout for today. Feel better?! No? Well then take the next 30 minutes to work out.
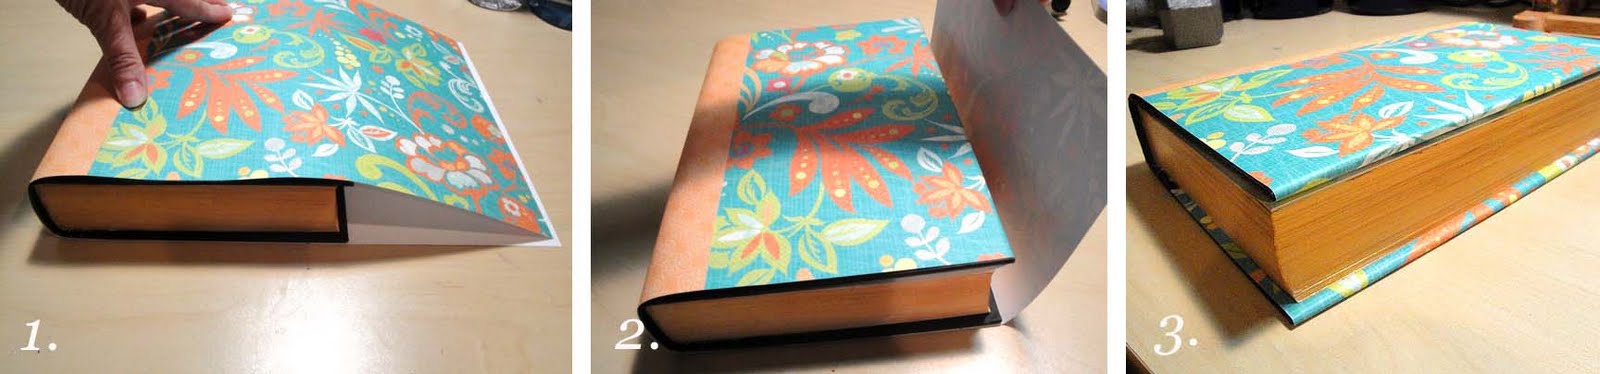
After 30 minutes open your book. (1) Lay your decorative cover over your book, making sure the edges are even. (2) Fold the top edge over your book front cover. (3) Then repeat for the back cover.
Stand back and admire.
Too pretty to give away, isn’t it?
Just think how happy the recipient will be!
Again, thank you to all my followers! I will have another surprise gift if I reach 500 followers. Next time I will pick one of you at random. So, tell your friends and family. Send them on over to be empowered at PrettyHandyGirl.com!
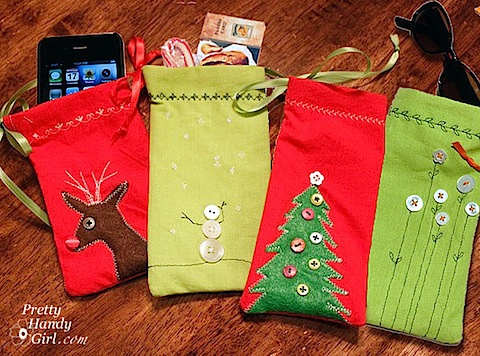
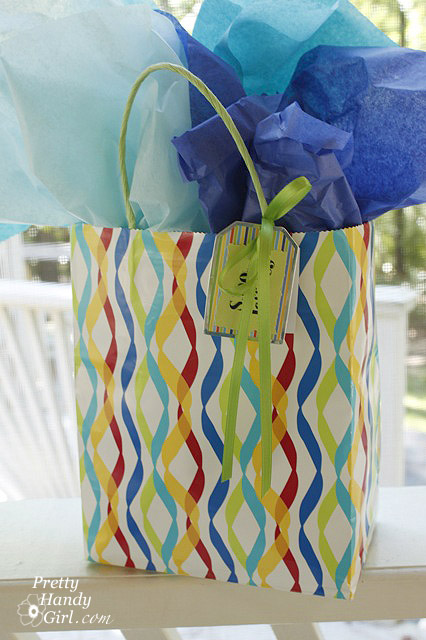
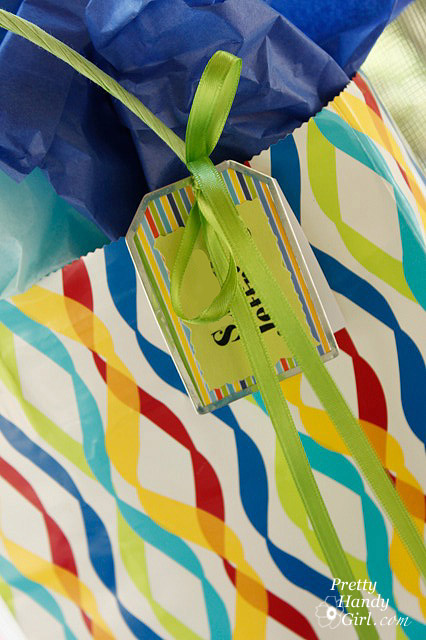
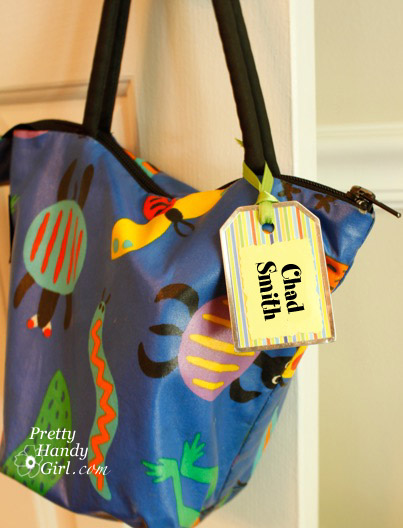
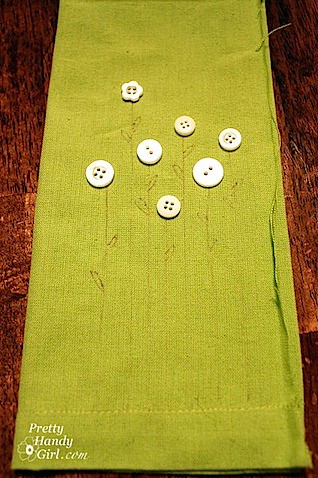
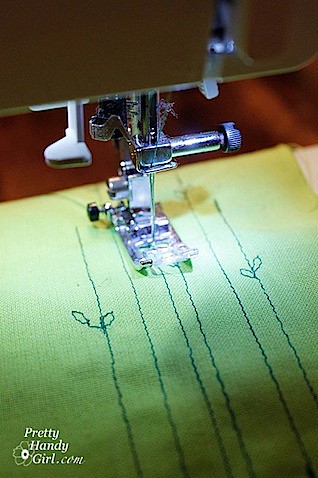
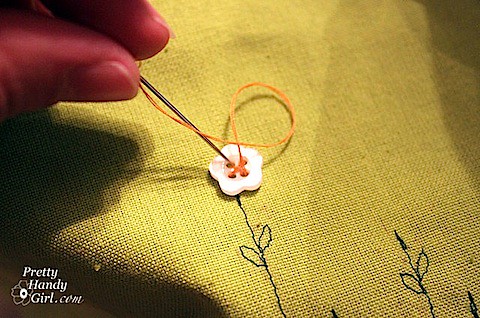
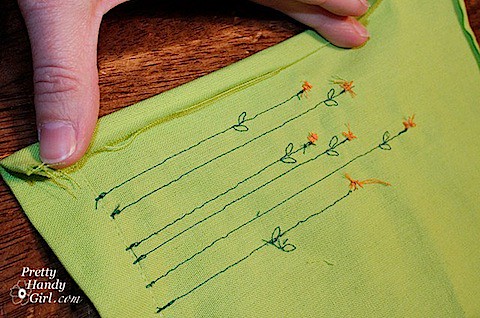
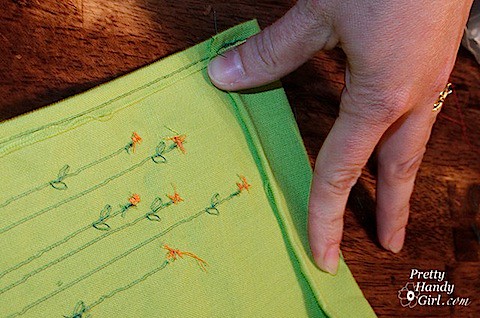
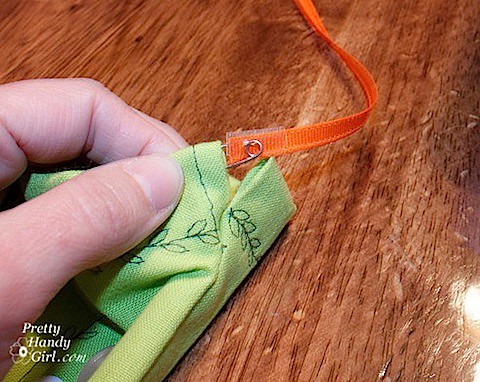
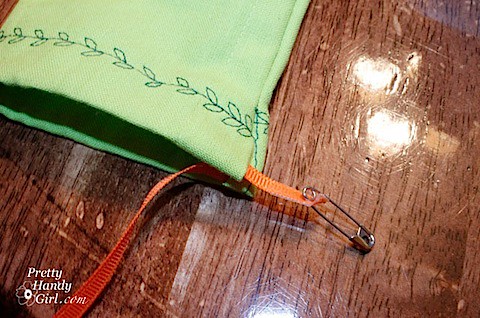
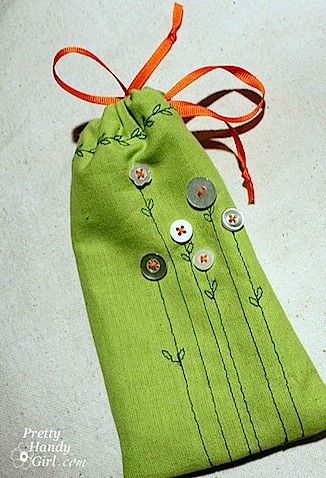
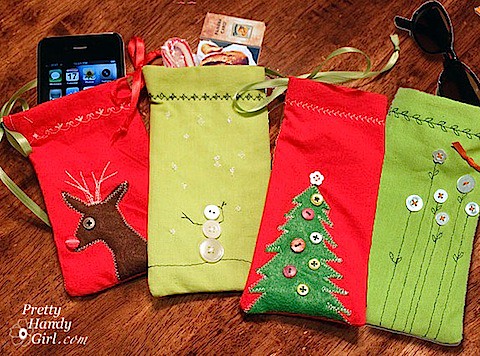
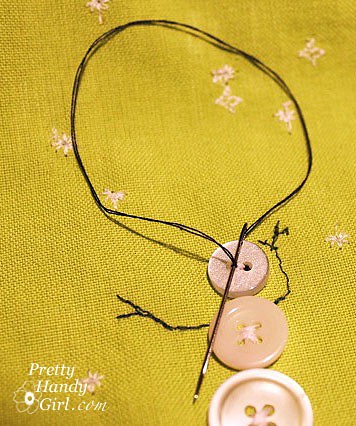
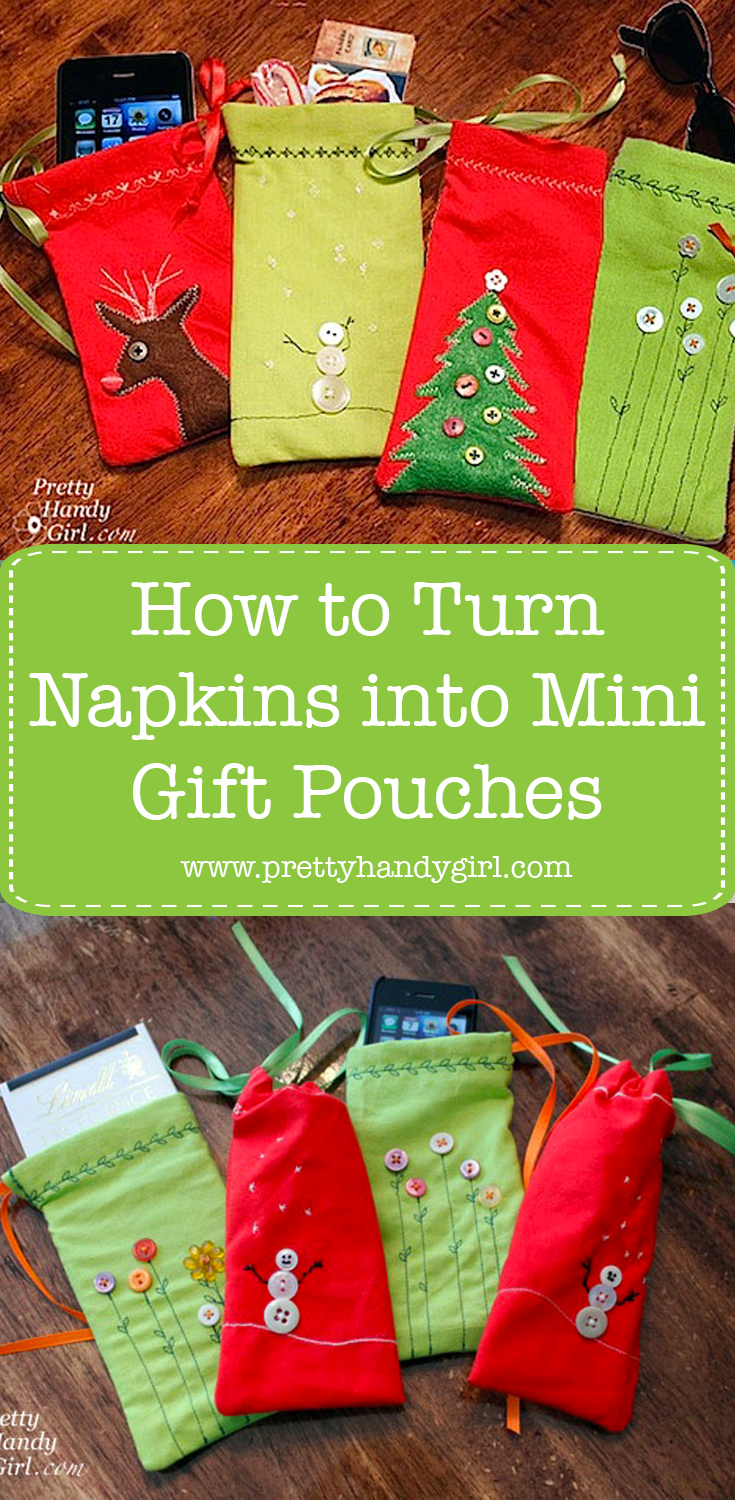
 Oh the quandary of what to get my boy’s teachers, the sitter, and all those other important people in our lives. Usually I take the easy way out and buy gift cards. Well – okay – I’m still going to give the gift cards, but this year I wanted to present them in something a little nicer. Something handmade with love. Cute mini gift pouches!

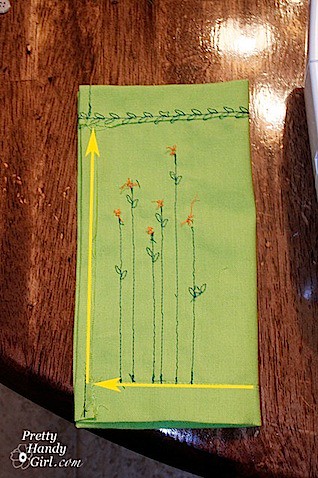
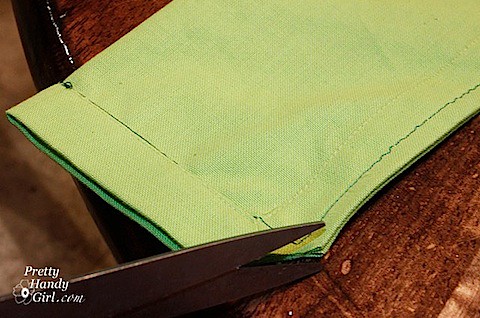


 Repeat for the other side.