iphone charging by bedside usb charging outlet

Learn how you can make simple electrical upgrades to your home. Today I’ll show you how to install an outlet that charges your USB devices and powers your appliances at the same time.

How to Install USB Charging Outlets

How to Install a USB Charging Outlet

I’m so excited to share this tutorial with you. Anyone who has a tablet, mobile phone, or other USB connected device will love this tutorial! How many times have you combed through your house for the plug to the cord for your device? I think I lost count how many times those little square plugs have eluded me. But, today they can stay hidden forever! I don’t need them now that I discovered How Easy it is to Install a USB Charging Outlet! As one of the Saving Etta sponsors, Leviton sent me several USB charging outlets to install in the house. (Spoiler Alert: I’ll be sharing some photos of the finished Saving Etta project. If you want to wait for the progress posts, go ahead and avert your eyes.) My electrician and I installed the outlets in strategic places where the homeowners would likely want to charge their USB devices.

Each bedroom received at least two outlets on either side of where a bed might be positioned.

usb charging outlet next to bedside table in master bedroom

The kitchen has a few on the counters…

white usb charging outlet on white subway wall open shelving

…and one in the island (in a matching gray color.)

gray usb charging outlet in gray island cabinets

The upstairs bedroom has a few more, especially under the little built-in desk between the closets. This is the perfect spot to sit and work while enjoying the view out the window.

vintage typewriter on desk by window between closets

Are you ready to learn how to install your own Leviton USB Charging Outlet in your home? It’s easy and takes about ten minutes to complete. Grab these few tools and let’s get busy.

Materials:

(I’ve included affiliate links for your convenience. I earn a small percentage from a purchase using these links. There is no additional cost to you. You can read more about affiliate links here.)

materials for installing outlets

Required Safety Instruction:

Turn off the power to the outlet you are working on. Check the outlet with a voltage tester. If you don’t have one, I highly recommend putting a night light or light in the outlet and turn it on. Then shut off the circuit at your circuit breaker and check to see that the light has gone out.

How to Repair Your Dishwasher - Control Panel Replacement

Ok, now that you have all of your materials and the power is off, you’re ready to go. To see how to install this USB charging outlet watch this step-by-step video tutorial below. It also shows you how to install the outlet it if you are starting with a new construction junction box.

If you need to remove your old outlet, you can follow the directions in this post on replacing an ugly old outlet.

Now that you are finished, aren’t you feeling proud of yourself? Taking on a simple electrical project like swapping out an outlet is super simple. I hope you’re motivated to make more electrical upgrades in your home!

For example, why not learn how to install a smart dimmer switch you can control with your phone or with a voice-activated device like Alexa or Google Home!

How to Install Smart Dimmer Switches

Gotta run now, I’m still finishing up some last punch list items at the Saving Etta house. While I work, it’s been nice having the ability to plug in my phone to charge while listening to my Pandora stations!

iphone charging by bedside usb charging outlet

Visit the Leviton website for more information, installation instructions, and where to buy devices from Leviton’s residential product family.

Disclosure: This is a sponsored post for Leviton. I was compensated for my time and efforts to promote the Leviton Residential products. However, all ideas and opinions are my own. I will always let you know when you are reading a sponsored post. You should also note that I’m very particular about the brands I work with.

change-ugly-recessed-lights

Do you have those old discolored recessed can lights in your home that use big hot flood bulbs? If so, it’s time for an upgrade!

Update Ugly Recessed Can Lights with Energy Efficient LED
How to Update Ugly Recessed Can Lights with Energy Efficient LED Lights

Today I want to show you how to update ugly recessed can lights with energy saving LED recessed lights. This process is quick and easy, not to mention the new lights will look better, last longer, and save you money on your energy bill! What more could you want? Change out all your ugly recessed lights in no time by following this simple tutorial.

Materials:

(I’ve included affiliate links for your convenience. I earn a small percentage from a purchase using these links. There is no additional cost to you. You can read more about affiliate links here.)

Instructions:

Here is what my old lights look like. Not only are they ugly, but they use the large flood light bulbs that use too much energy, radiate heat, and burn out quickly. I don’t know about you, but I am tired of changing these burned out bulbs.

Update Ugly Recessed Can Lights with Energy Efficient LED

Want to see how quickly you can change out your lights? Here’s a one minute video (that’s how fast you can do it):

The first step to replacing these recessed lights is to remove the light bulb by simply unscrewing it from the socket. Unless you’re extraordinarily tall, you’ll probably need a step ladder for this project.

Update Ugly Recessed Can Lights with Energy Efficient LED

Next, find two small springs inside the baffle, as shown in photo below. They look like a wire with a loop in the center. Pull up and out on the springs to release the baffle inside your can light.

Update Ugly Recessed Can Lights with Energy Efficient LED

Remove the trim by simply pulling it off the ceiling.

Update Ugly Recessed Can Lights with Energy Efficient LED

Grab your new retrofit LED recessed light and screw the adapter into the light bulb socket, exactly as you would screw in a light bulb. It’s that easy!

Update Ugly Recessed Can Lights with Energy Efficient LED

Inside the opening, find two metal clips. Squeeze the spring hinges on your LED light and insert them into the clips inside the old recessed can. These will hold the light in place.

Update Ugly Recessed Can Lights with Energy Efficient LED

Finally, gently push your light up into the ceiling. Believe it or not, you’re done!

Update Ugly Recessed Can Lights with Energy Efficient LED

Now you have a beautiful, white, and energy-efficient LED recessed light. Take some time to admire it.

Update Ugly Recessed Can Lights with Energy Efficient LED

Now you can easily change out all the can lights in the room and voila, your lighting is upgraded! This is such a quick, easy, and inexpensive project. There is no point in putting it off any longer.

Update Ugly Recessed Can Lights with Energy Efficient LED

I hope you enjoyed this tutorial. Feel free to share any questions or thoughts in the comment section below. Thank you for reading!

Update Ugly Recessed Can Lights with Energy Efficient LED

Liked this project? I know you’ll love these other lighting upgrades:

Update Ugly Recessed Can Lights with Energy Efficient LED

Change Out a Dated Hollywood Strip Light


Update Ugly Recessed Can Lights with Energy Efficient LED

How to Convert a Recessed Can Light to Accept a Hard-Wired Light

dimmer switches on wall

Learning how to install smart dimmer switches is one of those DIY skills that will improve your home and make life easier for you.

How to Install Smart Dimmer Switches

How to Install Leviton’s Decora Smart Dimmer Switches

I’ve resisted installing a lot of smart technology in my home. Basically I’m normally a no frills girl and am happy to function with low-tech appliances and light switches. But, one evening as my husband and I went through our usual routine of settling into the sofa to watch Netflix, I changed my mind.

Here’s how our Netflix evenings usually start:

Handsome Guy: “Ready to watch?”
Me: “Yes, just a minute, I want to grab a drink.”
Handsome Guy: “Ready now?”
Me: “Yes, go ahead and get the show started.”
I finally sink down into the couch.
Me: “Ugh, I forgot to turn off the light. Would you mind getting it?”
Handsome Guy: “I guess not.”
Handsome guy walks across the room and turns off the lights then returns to start the movie.

I can’t even begin to tell you how many times this happens. (Probably 99% of the time we sit down to enjoy a show.) But, when Leviton approached me about sharing the convenience of their Decora Smart products, my wheels began to turn. With the My Leviton app, I would be able to control the lights from my phone! Better yet, I can enable the smart home skills on our Amazon Echo and be able to control the lights with my voice. (The Leviton Decora Smart products also work with Google Assistant, Works with Nest, IFTTT (if this, then that) and of course Alexa.) Also, I liked the ability to set up schedules for the Decora Smart products (imagine a smart plug for your coffee maker so you can start brewing coffee the minute you wake up while your head is still on the pillow! Or set a schedule to turn your lights on and off when you are on vacation.) For those of us who are old school, the light switches always work like regular light switches: push them to turn on/off or to dim/brighten.

After learning all this, I decided it would be a great addition to our living room to end the need to jump up and turn off the lights before movie night.

How Easy Are The Decora Smart Switches to Install?

If you’ve ever wired an outlet or a light switch, you are capable of installing a smart dimmer switch. They are very straight forward and easy to install (if you have the proper wiring.) If you don’t, you might need to contact a licensed electrician to prepare your junction box to accept the dimmer switch. The Decora Smart Dimmer switches must be installed onto ground, neutral, load, and line wires.

Unfortunately for me, my box was not wired correctly. Luckily my favorite electrician is only a phone call away. He was able to talk me through a few changes I needed to make to the wiring.

How to Install the Decora Smart Switches:

Ready to learn how to install your own smart dimmer switches? You too can control your lights from your phone, your voice, and set up an away schedule for your lights. Watch this short video to learn how to install the Decora Smart Switches and enjoy the brief re-enactment of family movie night ;-).

Smart Dimmer Switches Materials:

(I’ve included affiliate links for your convenience. I earn a small percentage from a purchase using these links. There is no additional cost to you. You can read more about affiliate links here.)

materials for electrical work

Required Safety Instruction:
Always turn off the power to the fixture you are working on. It’s helpful to turn your lights on and then locate the circuit breaker to shut off the power to your lights. When your lights go out, you know you found the correct switch. For safety, double check the wires with a voltage tester to make sure the power has been turned off.

turn off circuit breaker test power

Smart Dimmer Switches Instructions:

Remove your Leviton Decora Smart dimmer switch from the packaging.

Leviton decora smart dimmer in packaging

Familiarize yourself with the terminal screws on the sides of the switch.

screw colors and meanings on decora smart dimmer switch

Your junction box should have wires to connect to all four terminals. If you have a three way switch, please follow the installation instructions provided by Leviton.

Wiring Your Dimmer Switch:

Use either a shepherd’s hook or straight wire ends to make your connections. The hook will slide under the terminal screws. A straight end will insert under the metal plate beneath the terminal screw.

If you are having trouble finding the “Line” wire, turn the power back on and use your voltage tester to determine which wire is carrying power. Turn the power off before proceeding.

Testing wires with voltage tester

Follow the wiring order below:

wiring up the decora smart switch

Turn the power on to your switch. Test the switch to see if it turns on your light.

test dimmer switch installed properly

If it doesn’t work, turn off the power and check for loose connections. If it works, turn the power off and secure the switch to the junction box and attach the switch plate cover.

add switch plate covers

Turn the power back on to your light. Download the My Leviton app and follow the instructions to connect to your light switch. (Feel free to remove the stickers from the switches so you can amaze your friends when you can control them “magically.” Or leave the stickers on so your friends can admire how SMART your home is!)

download my leviton app to control lights

Now that I’ve installed these smart dimmers, I’m plotting other spots in my home to use them. They are seriously that cool! I’ll also be adding some more of the Leviton products into the Saving Etta house and I can’t wait to show those to you.

Smart Dimmer Switches

Where could you use a Decora Smart dimmer in your home? Visit the Leviton website for more information, installation instructions, and where to buy devices from Leviton’s Decora Smart product family.

Smart Dimmer Switches

Disclosure: This is a sponsored post for Leviton. I was compensated for my time and efforts to promote the Leviton Decora Smart products. However, all ideas and opinions are my own. I will always let you know when you are reading a sponsored post. You should also note that I’m very particular about the brands I work with.

Did you like this smart home switch? Yes?! I know you’ll love learning how to install this motion sensor switch next:

Or try installing one of these USB charging outlets and never look for your charging plug again!

How to Install USB Charging Outlets


15 electrical fixes any homeowner can make social media image

15 Electrical Fixes Any Homeowner Can Make

Electrical work can be scary, even for seasoned DIYers who haven’t delved into electricity. Many people have a fear of electrocution or fear of burning their house down. There are definitely times to hire a licensed electrician (when adding new wiring or outlets or working with dryer or stove 240 volt circuits.) But, there are so many electrical fixes and updates you can make as a homeowner! All you need to know are the tools needed, what the wire colors mean, and how to turn off the circuit. The rest is easy! Here are 15 Electrical Fixes Any Homeowner Can Make. I hope you like these projects and they help you take on some basic home owner electrical changes!


How to Install a New Chandelier

How to Install a New Chandelier.


How to Hide Wires Behind a Wall Mounted TV

How to Hide the Wires, Install, and Mount Your TV 


How to Add a Switch to a Light Fixture

How to Add a Switch to a Light Fixture


How to Convert a Recessed Light to Accept a Hardwire Fixture

How to Convert a Recessed Light to Accept a Hardwire Fixture


How to Install Landscape Lights and Repel Mosquitoes

How to Install Landscape Lights


How to Install the Most Beautiful Ceiling Fan I Ever Laid Eyes Upon

How to Install a Ceiling Fan


Replace an Old Ugly Outlet with a New One


Replacing an Old Hollywood Strip Light with a New Fixture


How to Add an Outlet Extender

How to Add an Outlet Extender


How to Install Radiant Floor Heating using WarmlyYours

How to Install Radiant Floor Heating


How to Install Recessed Lights

How to Install Recessed Lights


How to Install a Hard-Wired Pendant Light

How to Install a Hard-Wired Pendant Light


How to Install a Light Occupancy Sensor 3 Way Switch.

How to Install a Light Occupancy Sensor


How do Install a Cable Outlet

How to Install a Cable Outlet


Converting a Recessed Light to a Pendant

Converting a Recessed Light to a Pendant


What do you think? Could you do these projects, or have you? What other electrical fixes are great for DIYers? I’d love to read your comments.

If you like this collection, please Pin this image to share with others:

15 electrical fixes any homeowner can make pinterest image


How to Install Knock Video Doorbell Camera

How to Install Video Doorbell Camera
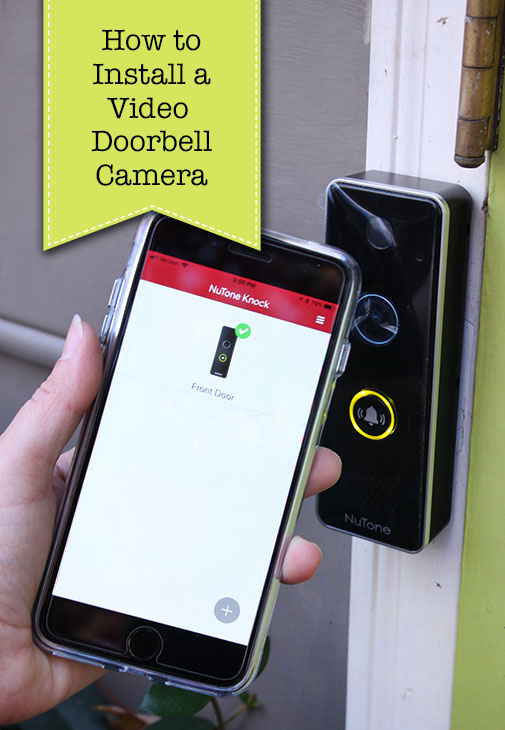
How to Install a Video Doorbell

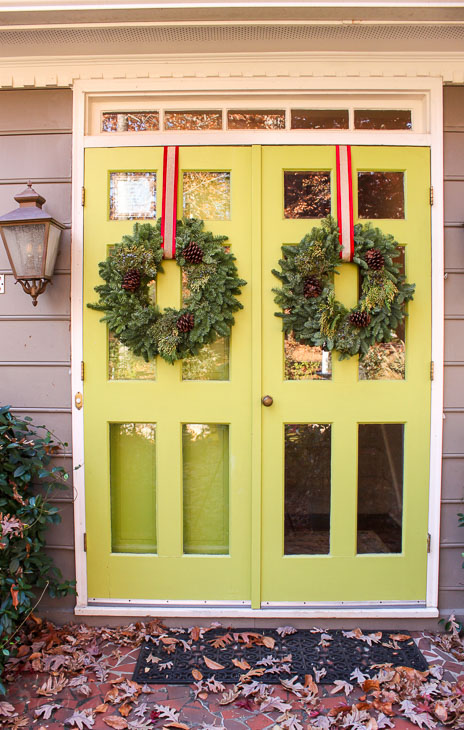
Do you want to install a video doorbell at your house so you can keep tabs on who’s at the door? You may be one of many who want to see who comes to the door when you aren’t home (or even when you are but don’t feel like venturing down to the door in a bath towel! Has that happened to you, too?) With the rise of package thefts, installing a video doorbell camera seems like a good idea to prevent thefts or at least capture a thief on camera. Before Christmas, I decided to install the NuTone Knock Smart Video Doorbell Camera by our front doors.

double lime green front door with Christmas wreaths

NuTone recently released the NuTone Knock Smart Video Doorbell Camera and asked if I’d like to try it out. At first I was hesitant because I thought it would be difficult to install. But, I discovered the installation of the NuTone Knock was fairly straightforward. (Although I did run into one issue with my existing doorbell’s transformer being too weak. But, I’ll explain more on this later.)

You should know this tutorial is sponsored by NuTone, but I wanted to give the NuTone Knock a good test run for several months before giving my honest opinion. This time also allowed me to tweak the settings to achieve a balance of alerts and monitoring that was comfortable for me. (Getting alerts at 3 am because a moth landed near the camera is not my personal preference.)

Lucky for you, I’ll share a tutorial for installing the NuTone Knock and let you peek at the settings I found best for us.

Are you ready to see how easy it is to install your own video doorbell camera? Let’s get your new doorbell installed!
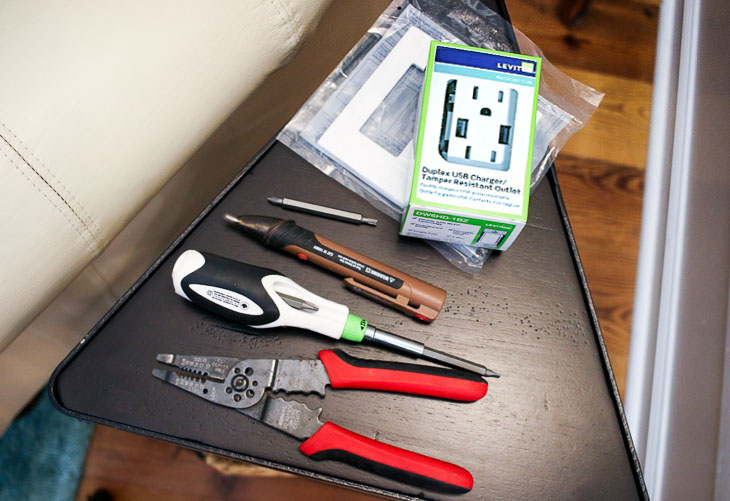
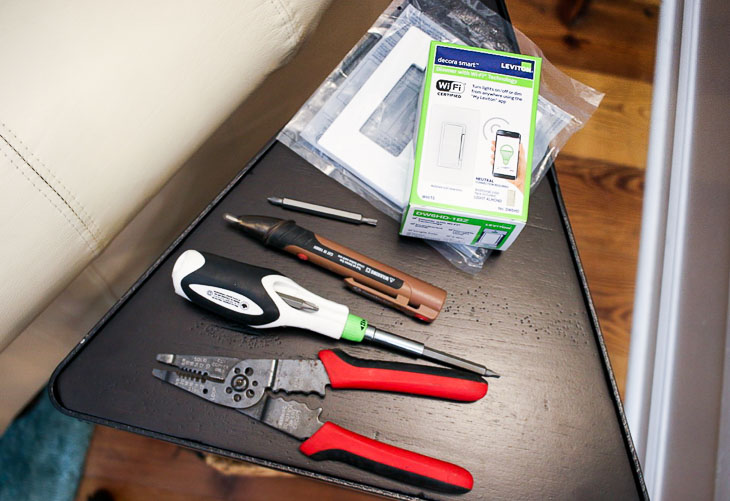
Materials:

(I’ve included affiliate links for your convenience. I earn a small percentage from a purchase using these links. There is no additional cost to you. You can read more about affiliate links here.)

Optional: 

Instructions:

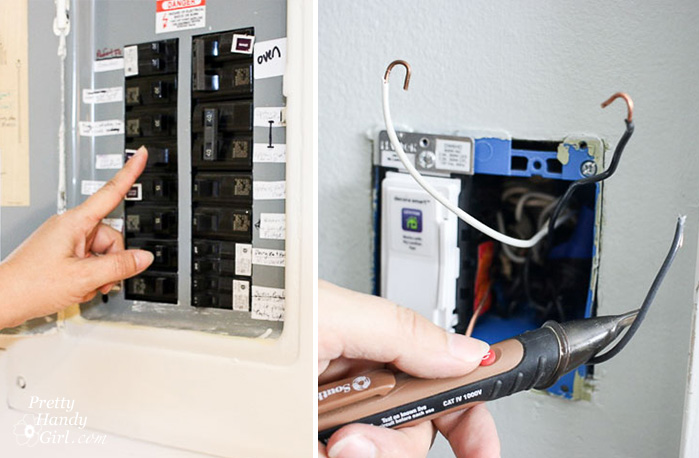
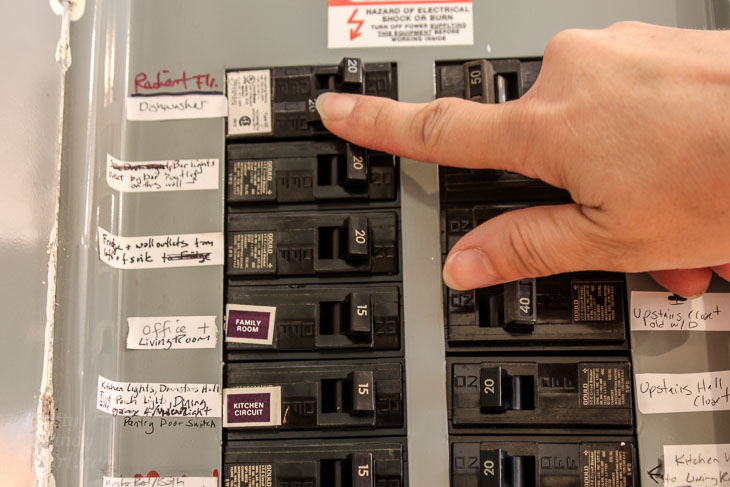
Begin by identifying the circuit providing power to your doorbell. Test the doorbell to make sure the chime rings, then turn off the circuit. Test your doorbell to verify there is no chime (meaning the power is turned off.)

How to Repair Your Dishwasher - Control Panel Replacement

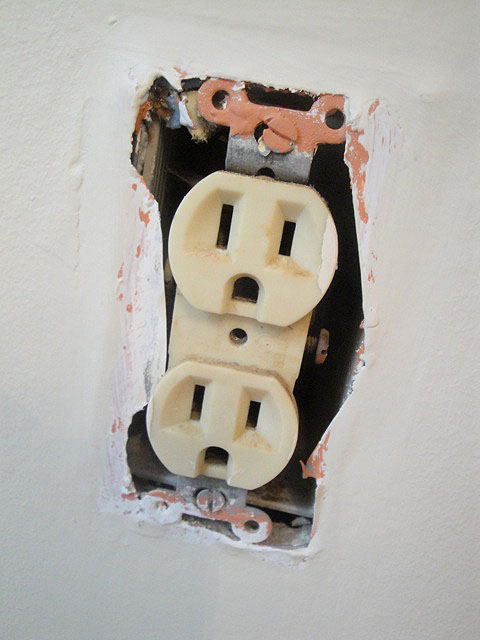
Unscrew the old doorbell button from the wall.

remove old doorbell

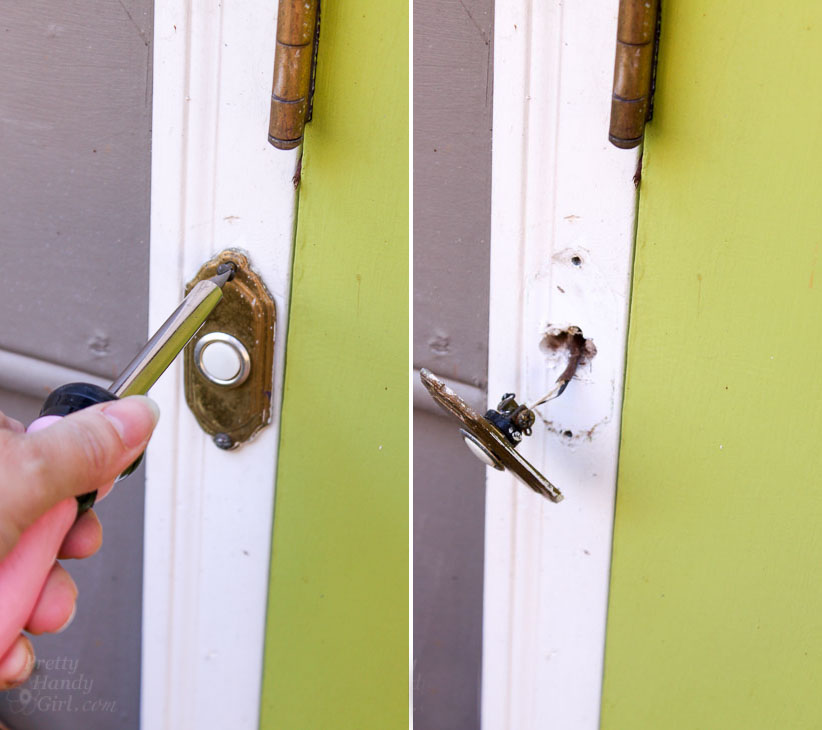
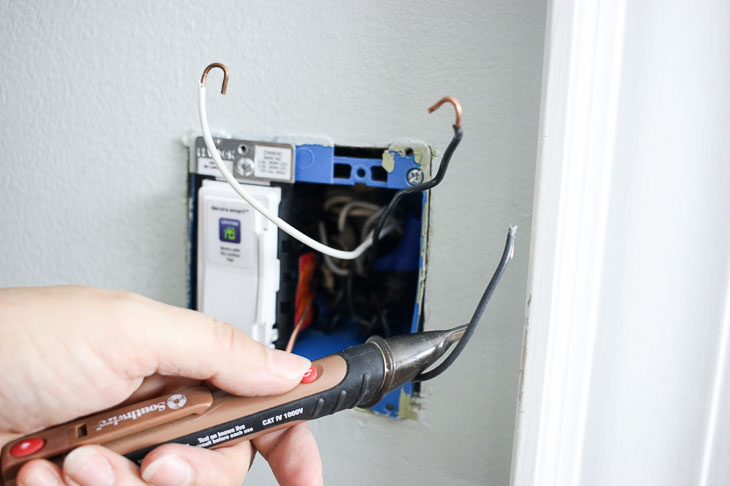
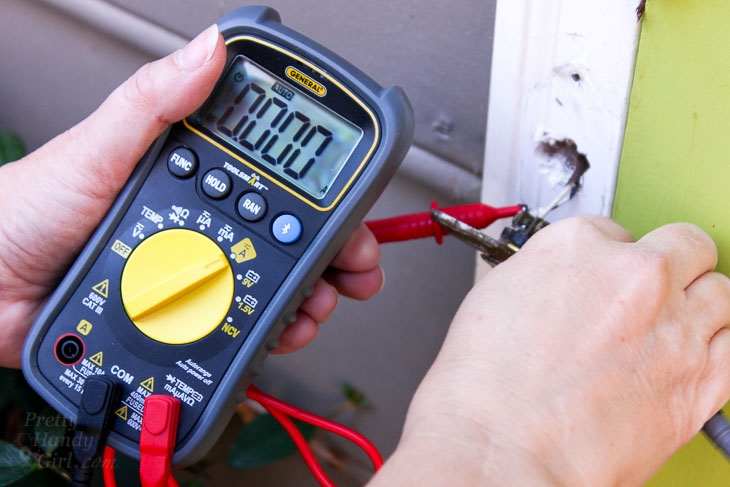
To be safe, you may want to verify that the power is off to the doorbell by using a voltage meter.

test power to doorbell

Loosen the terminal screws from the back of the doorbell button and remove the button.

Remove old doorbell

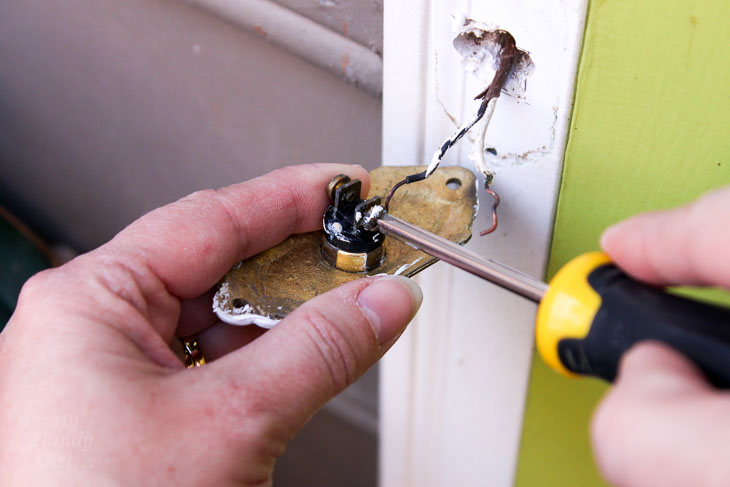
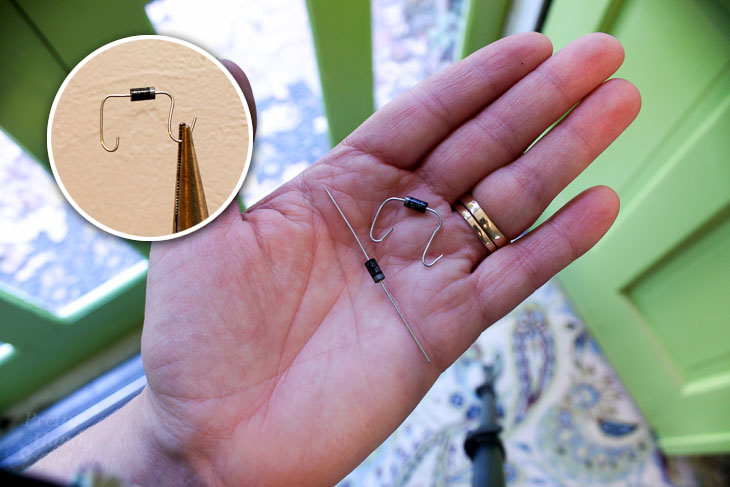
Following the installation instructions that are provided with your video doorbell camera, bend the two ends of one of the diodes (shipped with the NuTone Knock) using needle-nose pliers.

bend diode ends

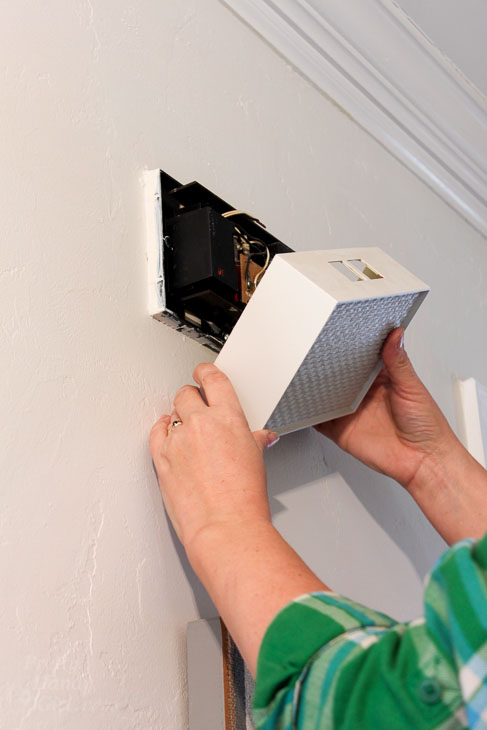
Remove the cover from the doorbell chime box.

remove doorbell chime cover

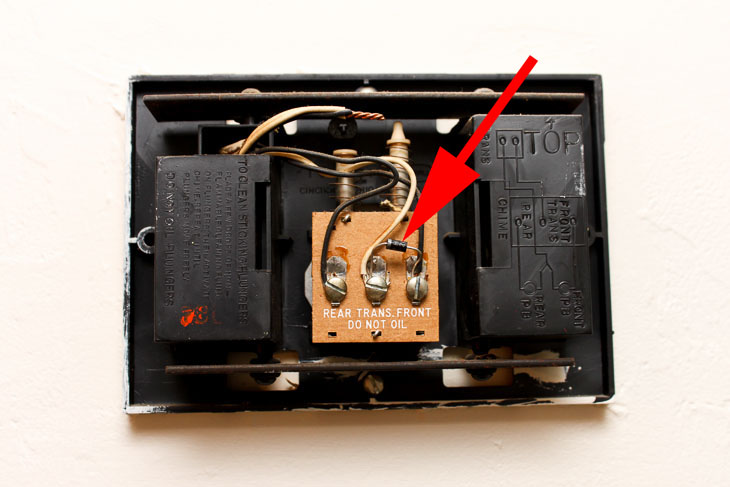
Unscrew the wire terminal screws and install the diode between the transformer and the front terminals (this is the set up for the front door location.) Tighten the terminal screws onto the diode and the doorbell wiring.

Install diode

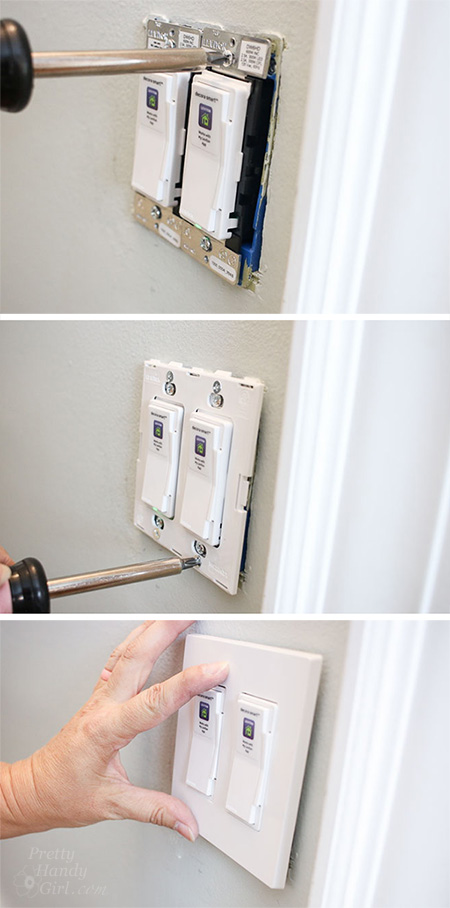
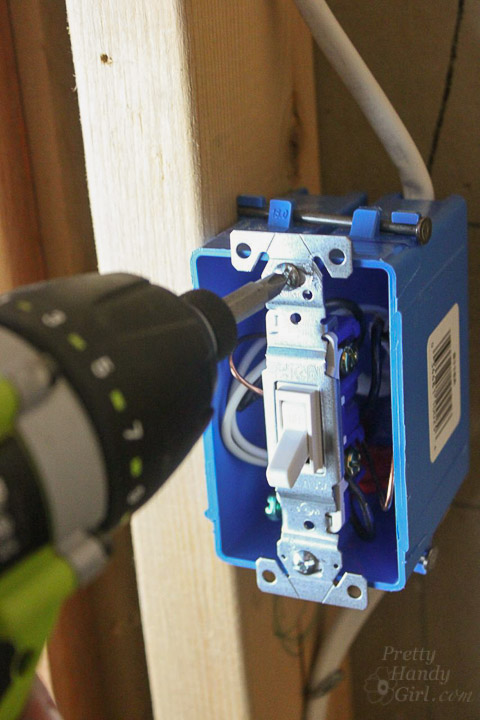
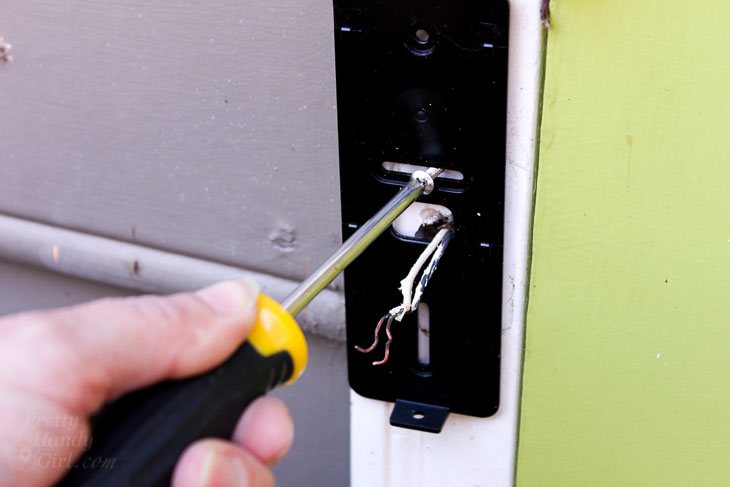
Thread the doorbell wires through the NuTone Knock mounting plate and secure with one screw.

install NuTone Knock mounting bracket

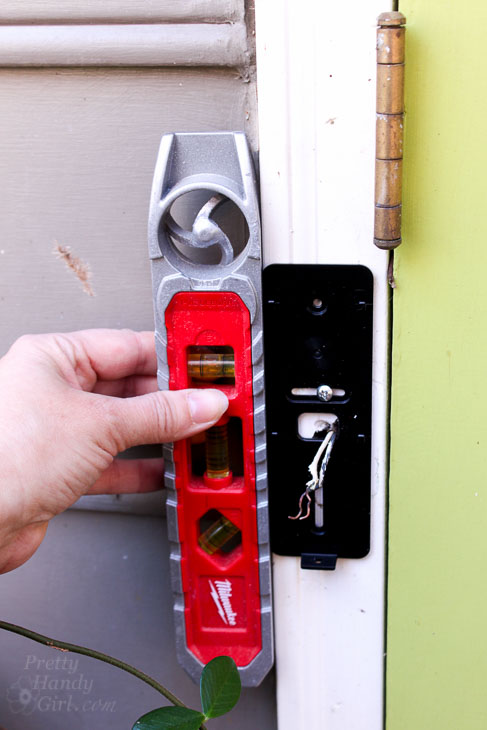
Level the mounting plate. . .

level mounting bracket

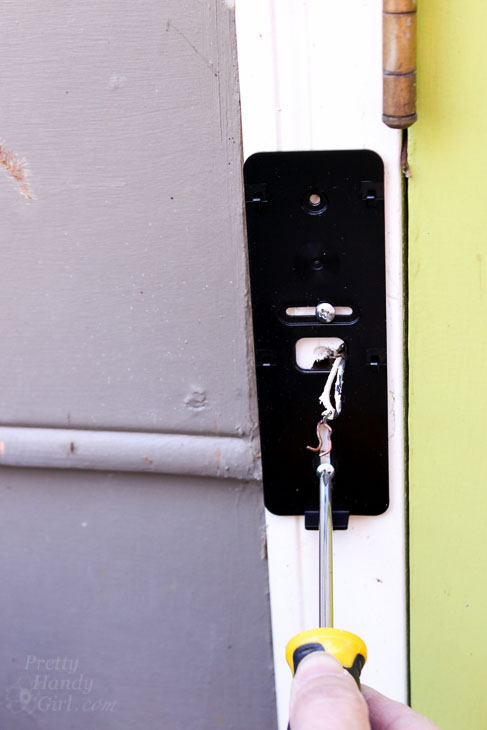
. . . and then secure with the second screw.

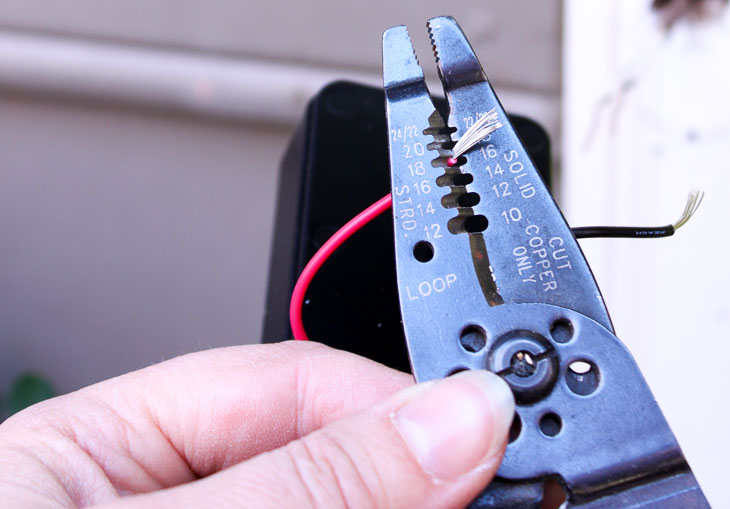
Remove the NuTone video doorbell from the box. Strip 1/2 inch of the insulation from the wires.

strip wires

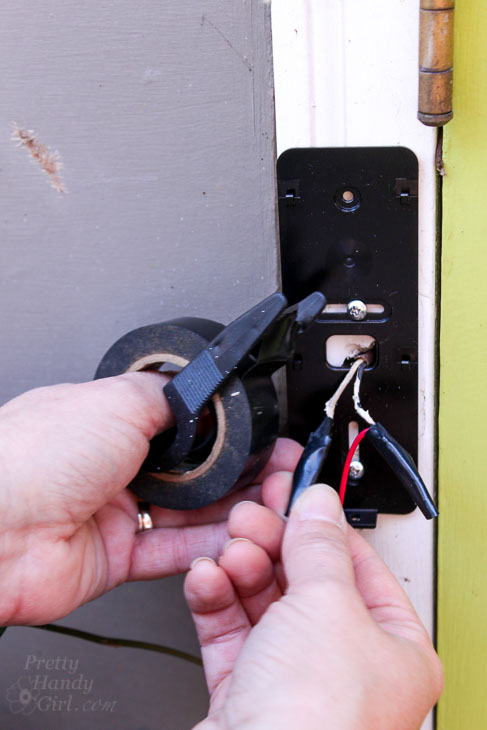
Connect the wiring from the Nutone Knock to the house wiring using the provided weather resistant wire connectors. Squeeze the connectors tight using pliers.

Crimp wires in weatherproof connectors

For additional protection (and to prevent the wiring from coming loose) secure some electrical tape over the connections.

optional: add electrical tape

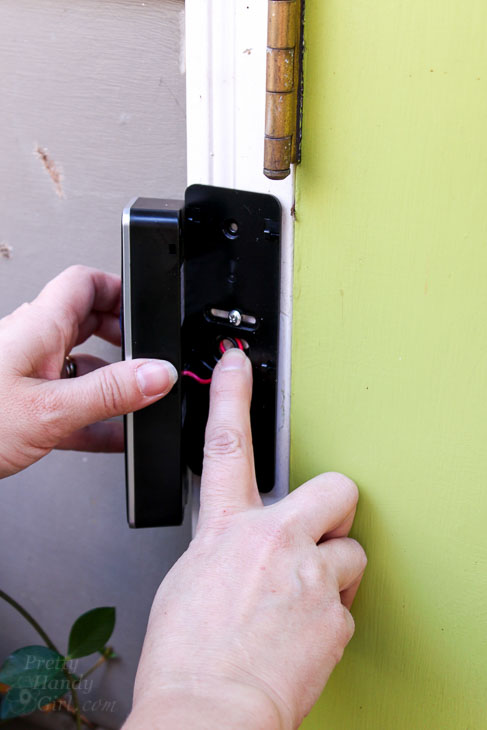
Gently press the wiring into the house.

tuck wires into house

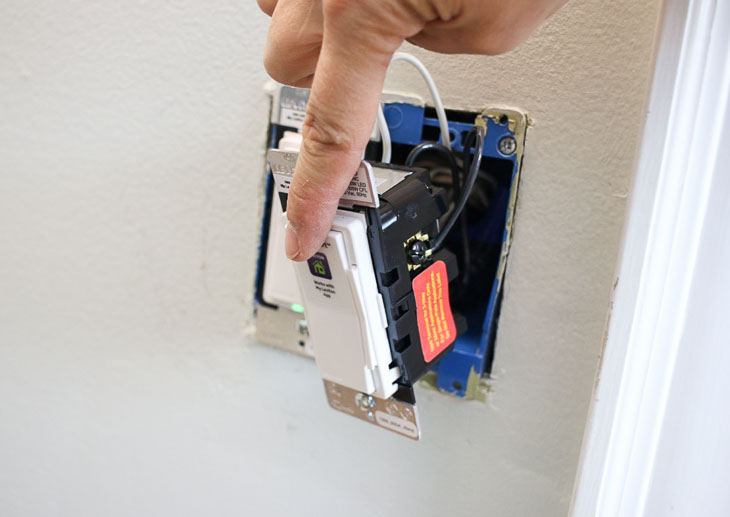
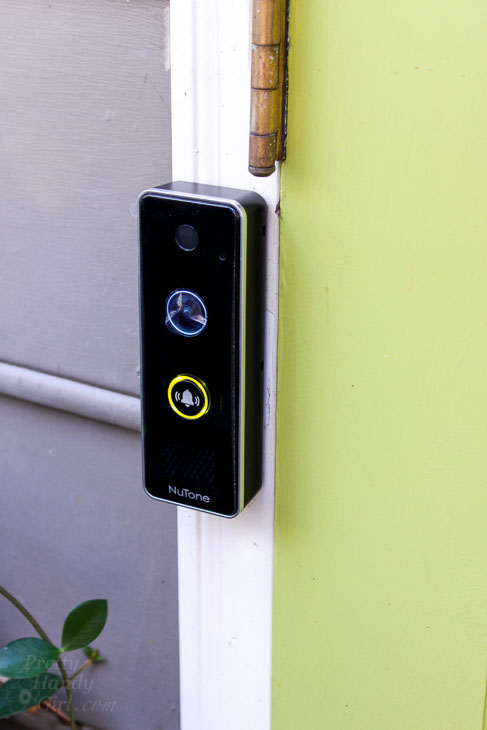
Slide the NuTone Knock Smart Video Doorbell Camera down to seat it into the mounting bracket.

Set video doorbell into mounting bracket

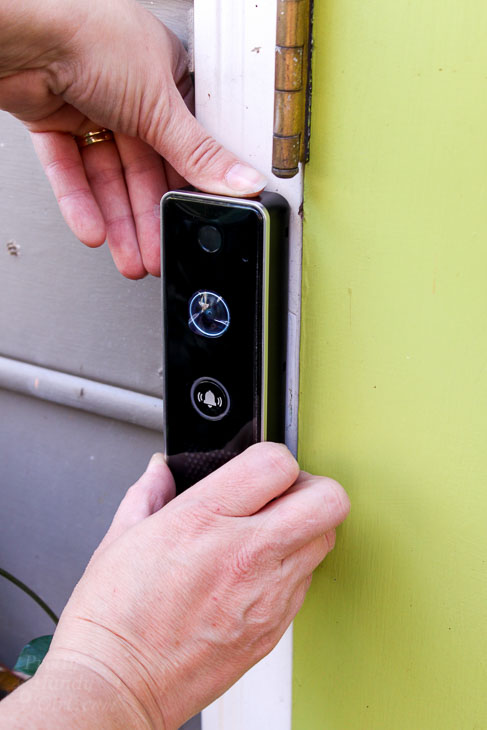
Turn the circuit breaker on for your doorbell. The red light will display because your video doorbell still needs to be set up.

Setting Up the NuTone Knock Smart Video Doorbell Camera:

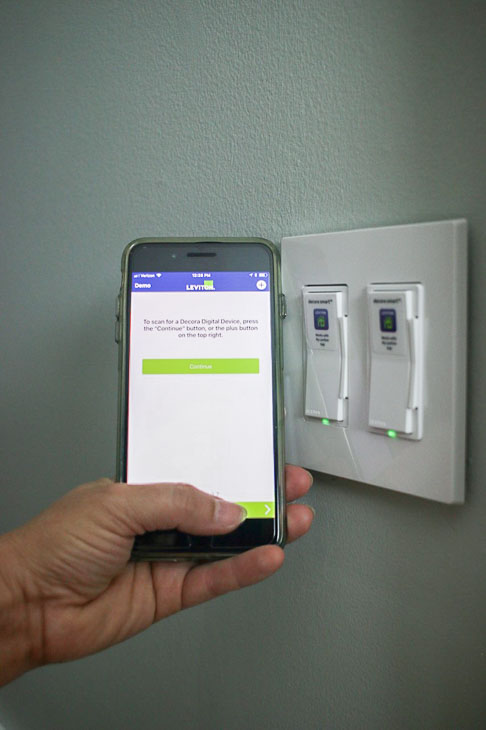
Download the NuTone Knock app on your smart phone.

Set up NuTone Smart Video Doorbell Camera

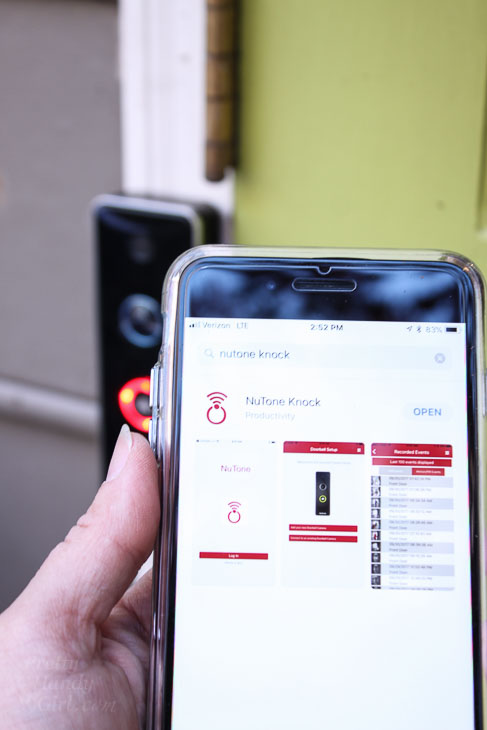
Follow the instructions in the app to connect your video doorbell to wifi.

smart video doorbell camera NuTone app display

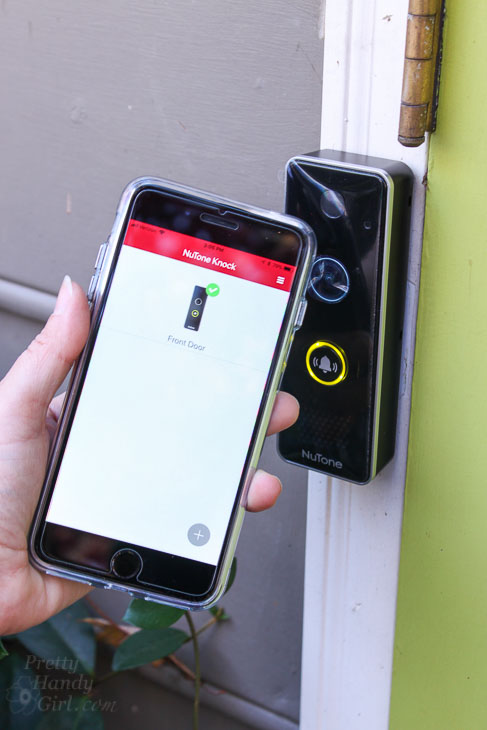
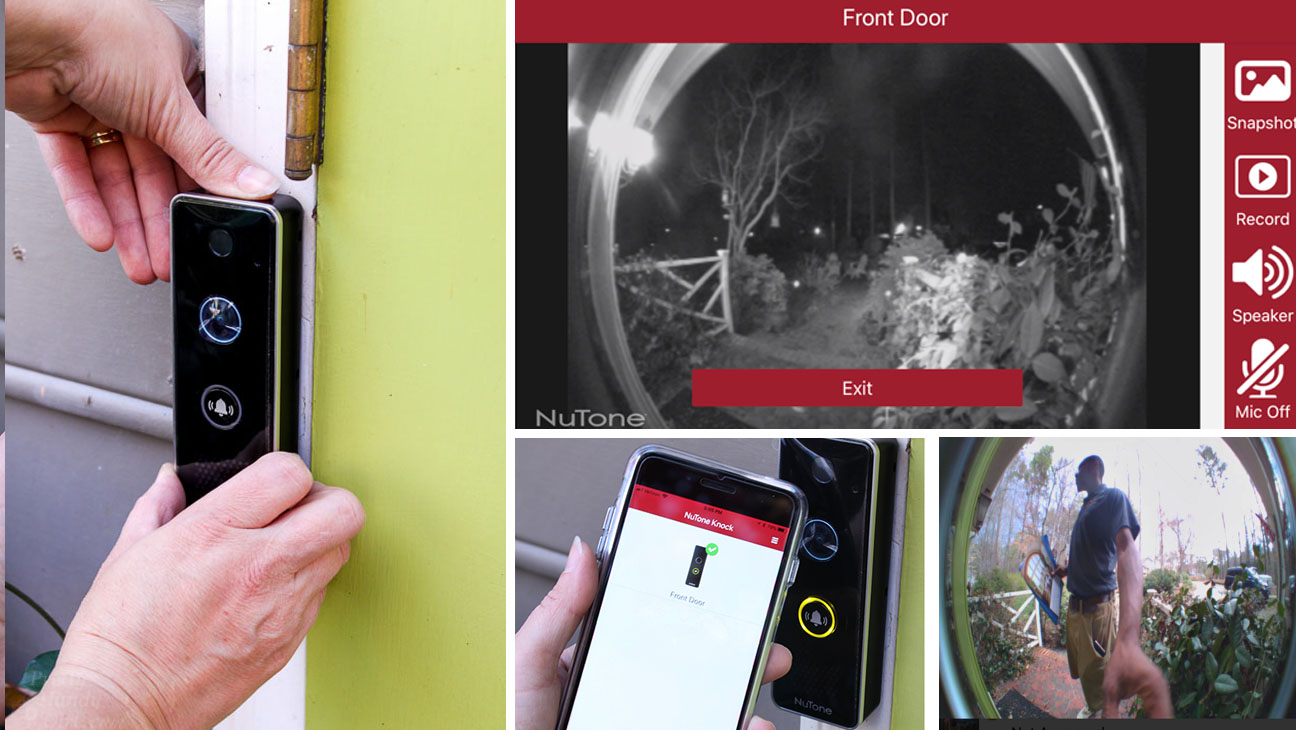
When your Knock video doorbell is connected correctly, the light will turn green. Familiarize yourself with the app and the Knock’s settings. Test the doorbell to make sure it sets off both an alert on your phone and the doorbell chimes in your home.

Green Light means NuTone Knock is working

Troubleshooting:

Does your new Knock Smart Video Doorbell Camera work properly? After testing the doorbell, I discovered that my phone was alerted with a doorbell sound, but my home doorbell chimes didn’t ring. This was an issue because if we had a sitter or my sons were home alone, they wouldn’t know the doorbell was rung.

After contacting NuTone customer service, they offered a few things to try, but ultimately we determined I needed a stronger transformer. Simple solution, but how do you find the doorbell transformer (let alone replace it?)

Luckily my electrician has a lot of experience with finding doorbell transformers in our neighborhood. He told me most of the time you can find it mounted to the top of a crawlspace light.

finding doorbell transformer on crawlspace light

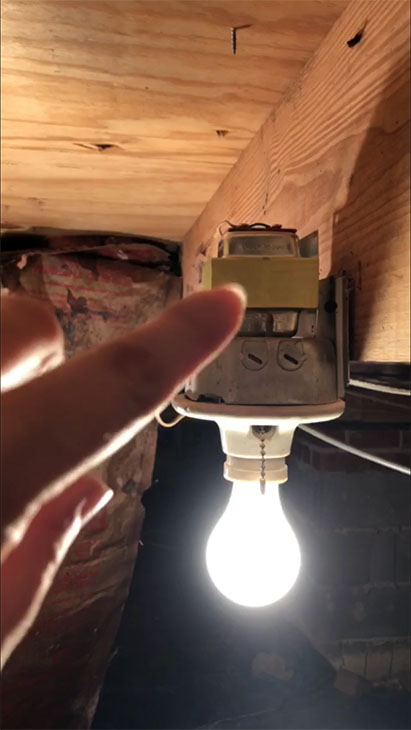
And, he was correct! If your doorbell transformer isn’t located on top of a light, try tracing the wiring (usually small low voltage wire) from your doorbell button to the chimes and ultimately to the transformer.

Replacing the Doorbell Transformer:

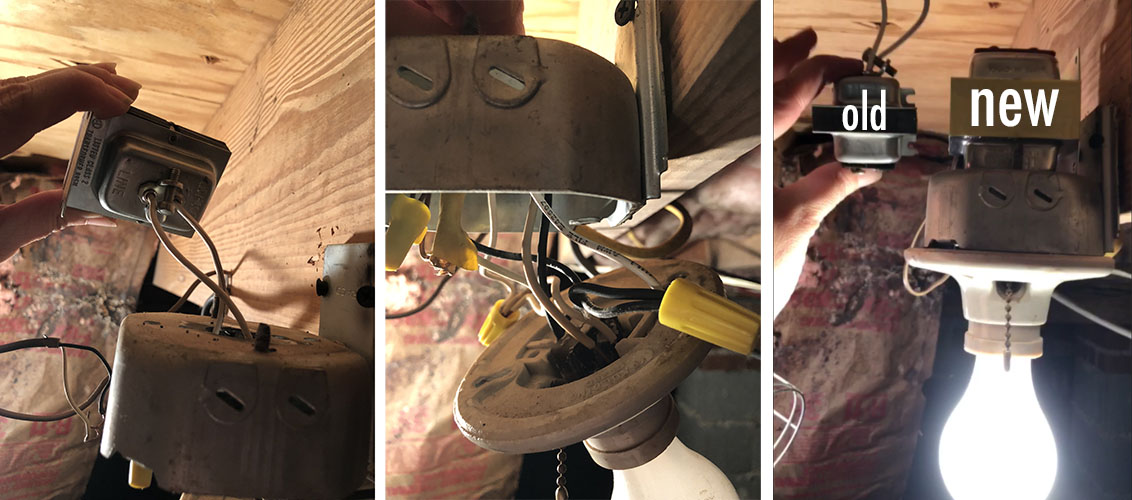
To change your transformer, you must turn off the power to the doorbell. Remove the old transformer. Replace it with a stronger transformer (this is the one I installed), taking care to wire the new transformer in the same order the old one was wired.

As you can see from the picture below, the new transformer is larger and strong enough to power the doorbell camera, the chimes, and a second NuTone Knock video doorbell (should I choose to install one at our side door.)

changing doorbell transformer

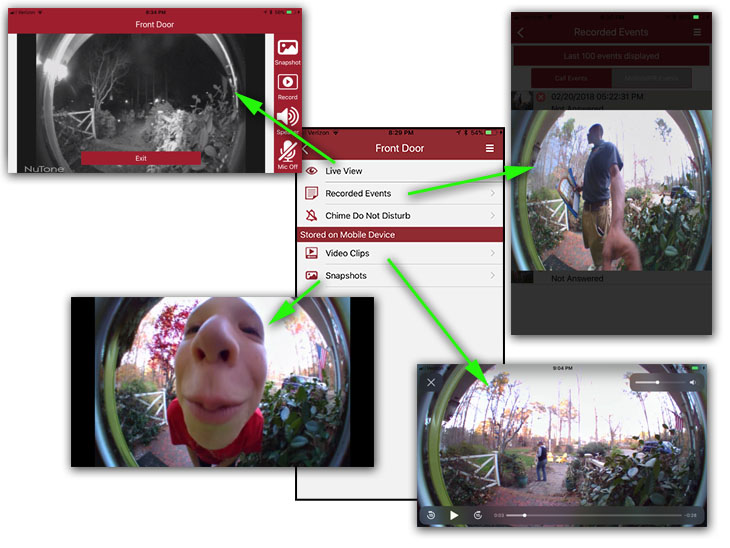
The NuTone Knock Mobile Phone App:

You’ll need to allow time to become familiar with the NuTone app. I also found it takes some time to adjust the settings to eliminate false alerts.

captured doorbell ring photo

When the doorbell button is depressed, you will receive an alert on your smart phone. At that time you can answer the ring to see and talk to the person at your doorstep. Regardless of whether you answer the ring or not, a video will be recorded.

When the app senses motion or heat, you will get an alert and again a video will be recorded.

What if someone comes to your door and knocks instead? The app will let you access the live view anytime you like (regardless if the button is pushed on the doorbell or not.) The live view feature allows you to see at any time.

NuTone Knock video and picture options

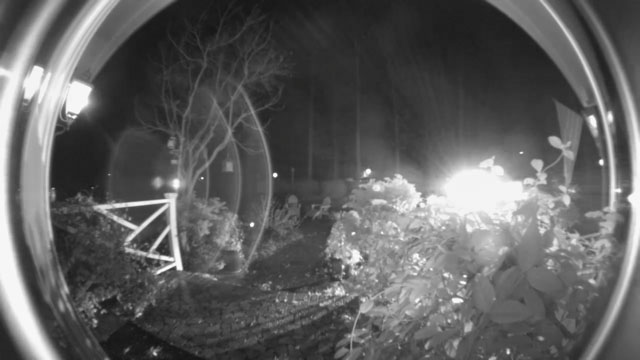
For the first month, I reviewed each motion notification. It took a while for me to figure out that the majority of the motion alerts were being set off by my neighbor’s auto headlights (as they pulled into their driveway) and our house lights when they turned off in the morning. The Knock was translating the change in light to a motion detection.

car lights setting off motion detection

I turned the motion detection sensitivity down to see if that would eliminate these false alerts.

set motion and heat settings

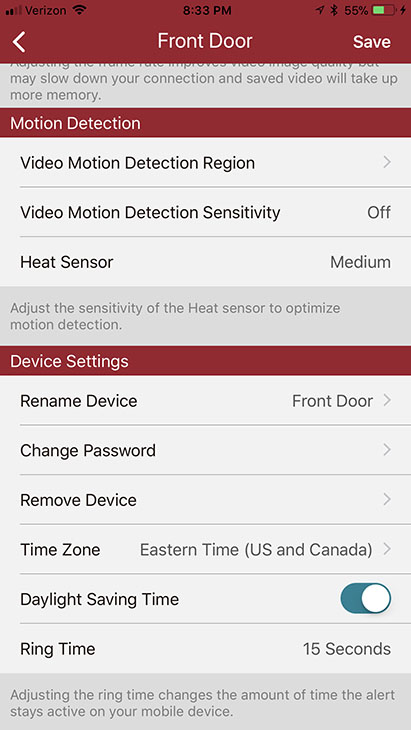
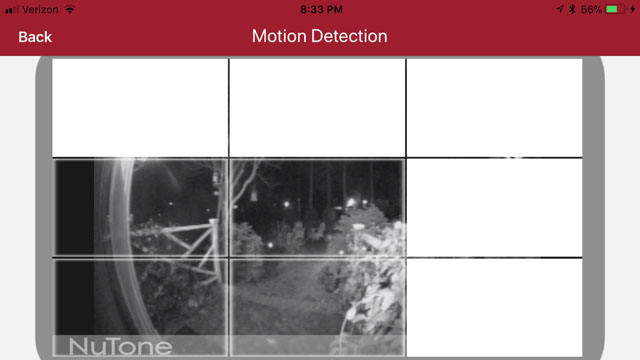
I also suspected that the plants around the front door and our flag might be setting off the alert. Therefore, I turned off motion detection in all quadrants but the few that a person would have to enter when stepping up to our front door.

set motion areas

The false alerts continued to happen as my neighbor’s came home at night or when our house lights turned off in the morning. (Although, the camera did catch a cute bunny rabbit hanging out on our front sidewalk one early morning.) Ultimately, I turned off the motion detection and set the heat sensor to medium. So far this seems to be the best setting to eliminate false alerts.

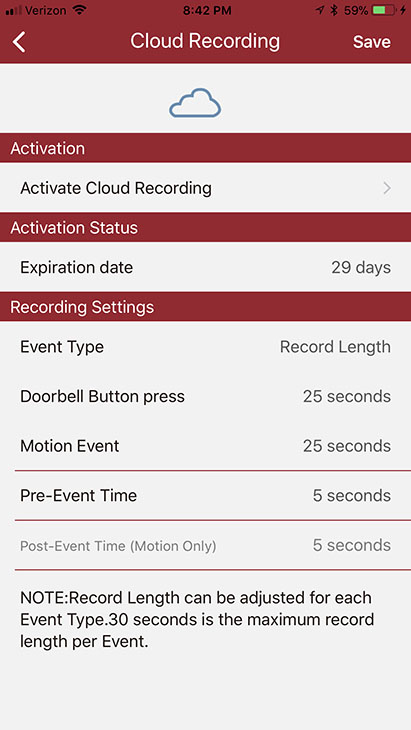
The Knock has the option to subscribe to cloud recording of all motion and ring events. This service costs $3 per month or $30 annual fee.

NuTone Knock cloud recording options

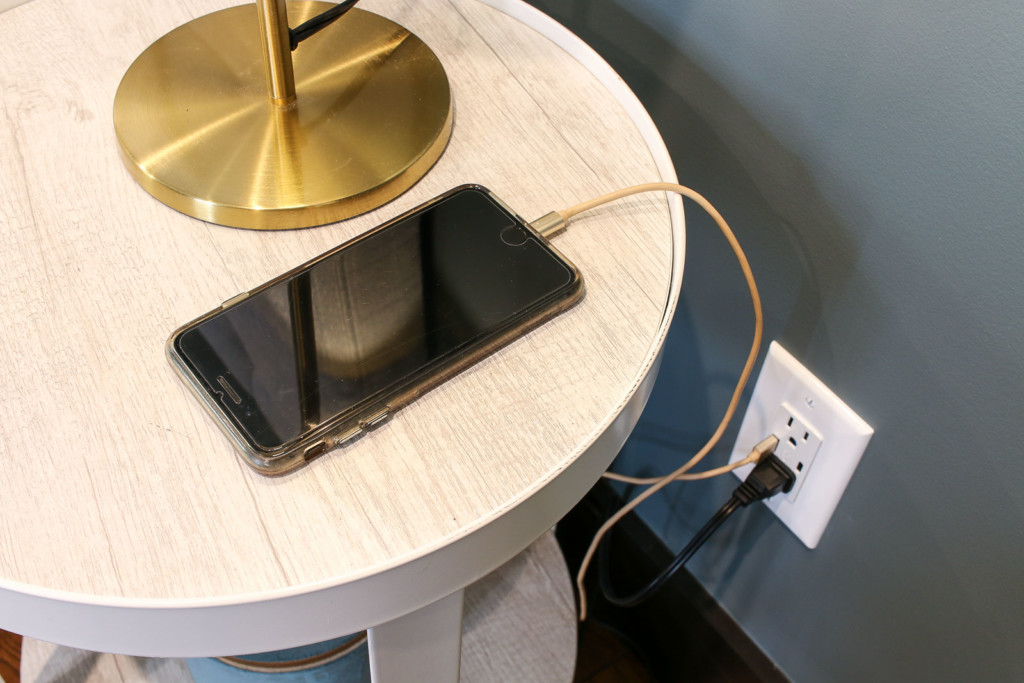
I am thrilled to be able to see activity and visitors who come to our door. It gives me piece of mind and lets me ignore those pesky door-to-door salespeople (especially when I’ve just stepped out of the shower).

If you are looking for the ability to view and record who is at your door, you will like the NuTone Knock. Just be willing to play with the settings for a few weeks until you reach a happy medium.

Disclosure: This is a sponsored post for NuTone. I was not told what to write. All opinions are my own. I was compensated for my time and efforts to create this tutorial. As always, I am very particular about the brands I represent and you will always be notified when you are reading a sponsored post on PrettyHandyGirl.com.

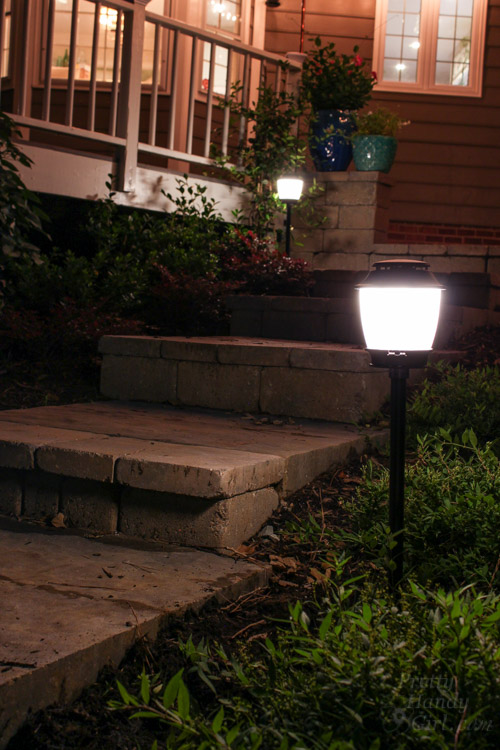
If you like this tutorial, you’ll also like:

How to Install a Motion Sensor Light

How to Install an Exterior Security Light | Pretty Handy Girl