Hanging A Barnlight Tutorial

Hanging a barn light tutorialHow to Hang A Barn Light

Hi everyone, it’s Dean from Diane and Dean today. I can’t wait to show you how to hang a barn light. Some may call it an obsession, but I  like to think of it as a significant interest! What is it? Exterior lighting! Most homeowners may not think much further beyond function, but exterior lighting can REALLY make a difference to the curb appeal of your home.

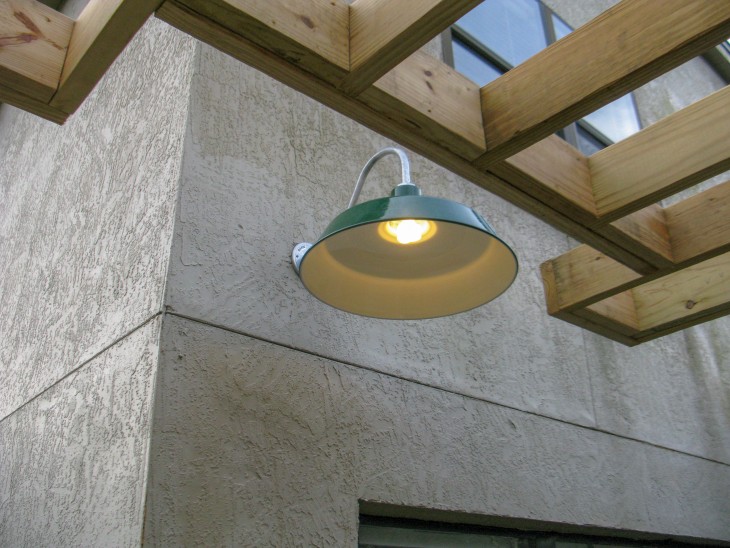
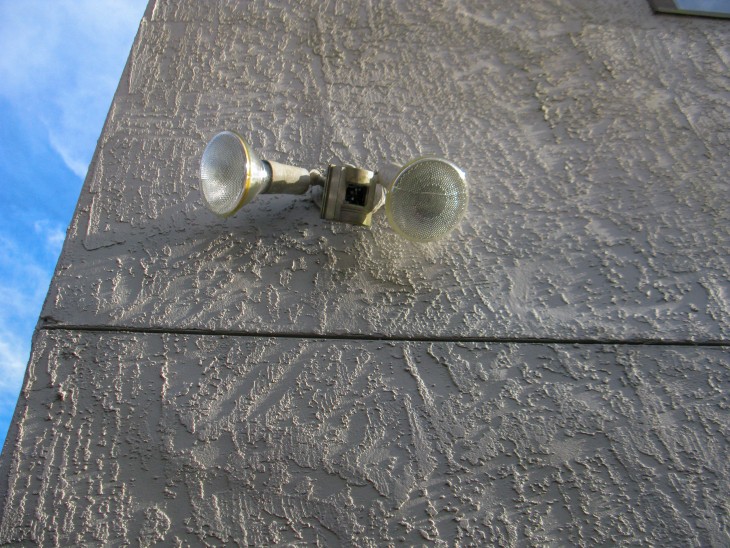
With fewer choices for lighting fixtures on the outside of the house (compared to the inside), getting the right light fixture is important. Like most typical homes, our’s came with the gratuitous flood light circa 1980. The light was mounted in a highly visible spot over a walkway to the paver patio and pergola. Unfortunately, the flood light lacked everything but function!

Hanging A Barnlight Tutorial

For a long time, I have been eyeballing gooseneck barn lights. They remind me of my summers in eastern Pennsylvania spent on my cousin’s dairy farm. These fixtures aren’t the most economical in price, but the prominent spot dictated reaching a little further into the old wallet. After placing the order with a local company, that makes replica fixtures by hand, I anxiously waited for its arrival!

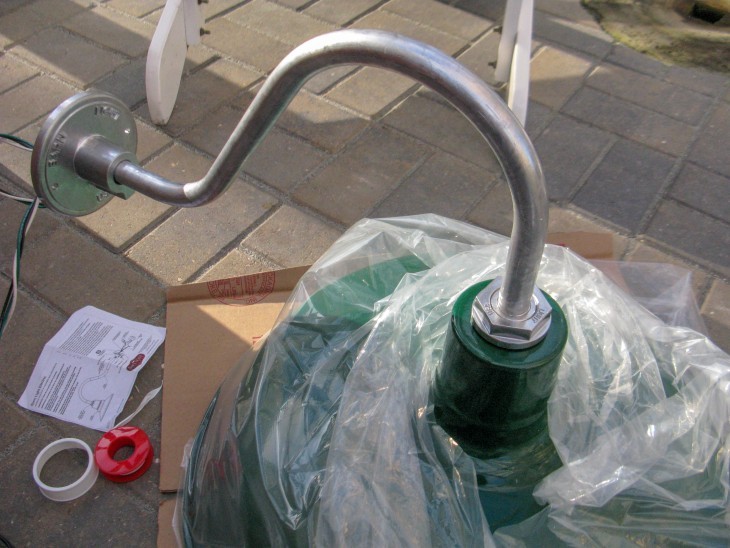
Here it is fresh out of the box, and it looks pretty simple to install because it is simple to install!

How To Hang An Exterior Barnlight

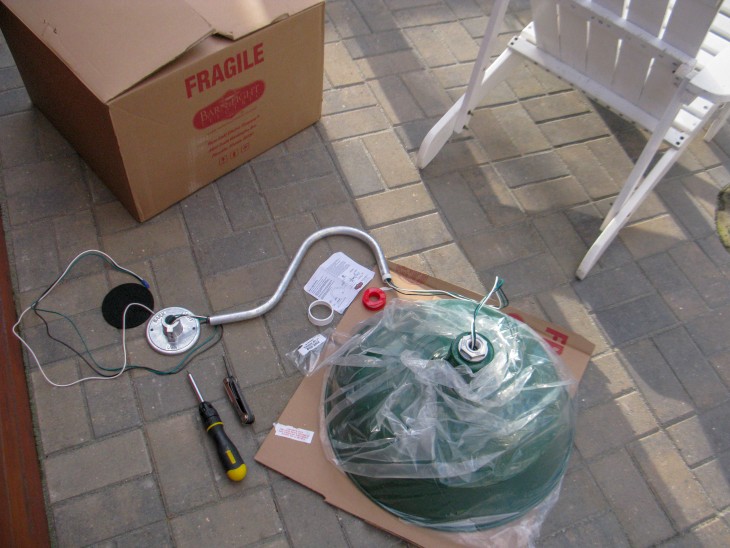
Let’s get to it and I’ll show you How to Hang a Barn Light!

Materials:

(I’ve included affiliate links for your convenience. I earn a small percentage from a purchase using these links. There is no additional cost to you. You can read more about affiliate links here.)

Instructions:

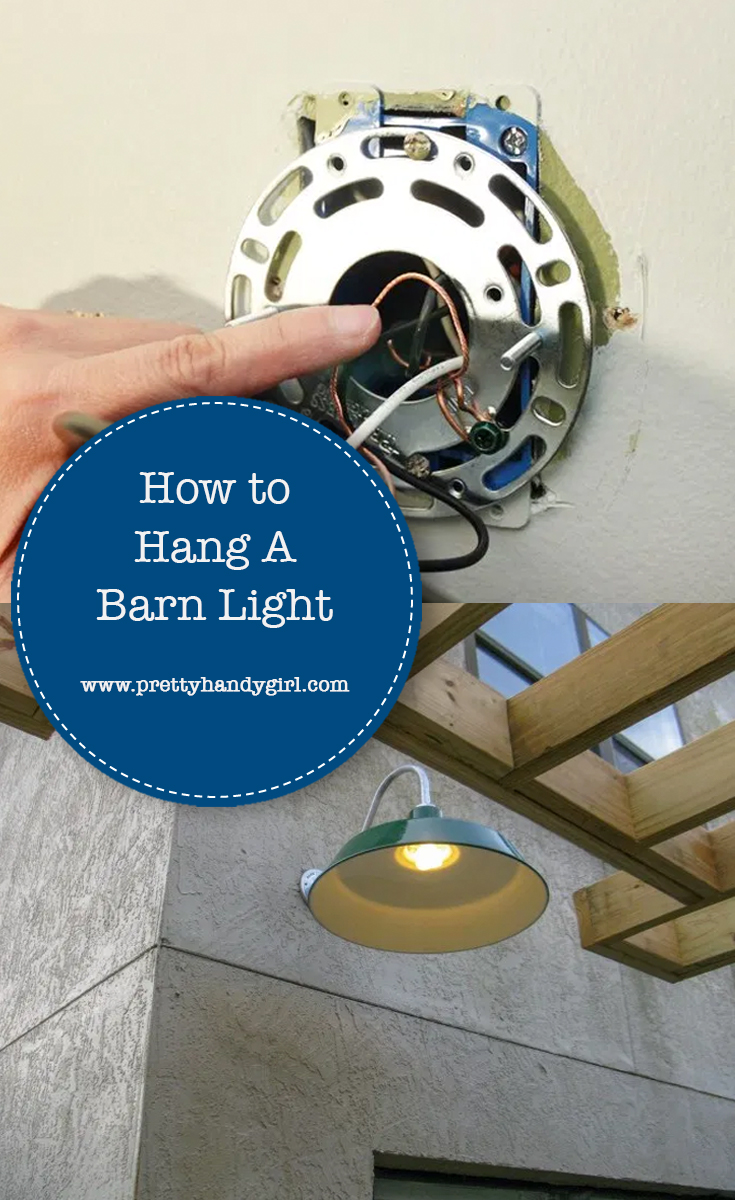
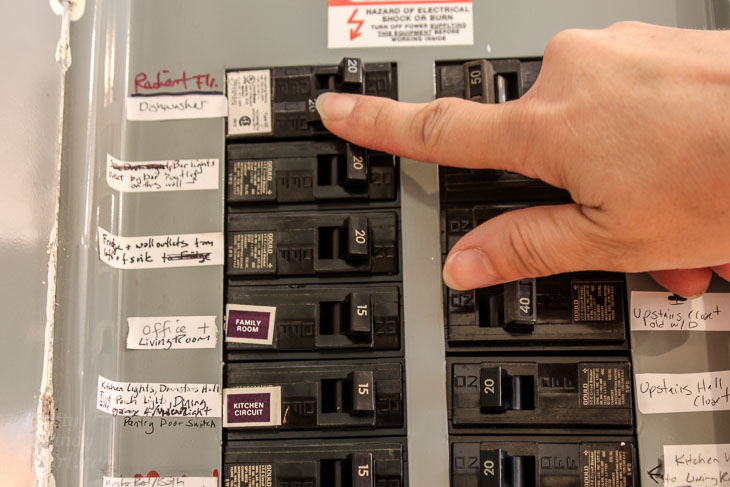
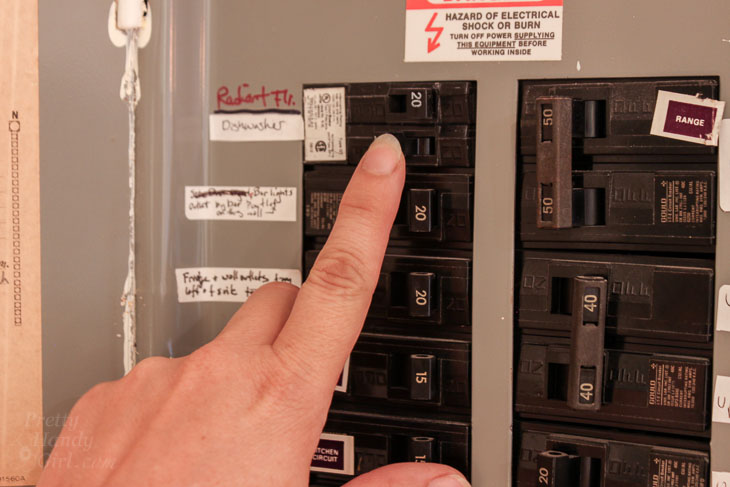
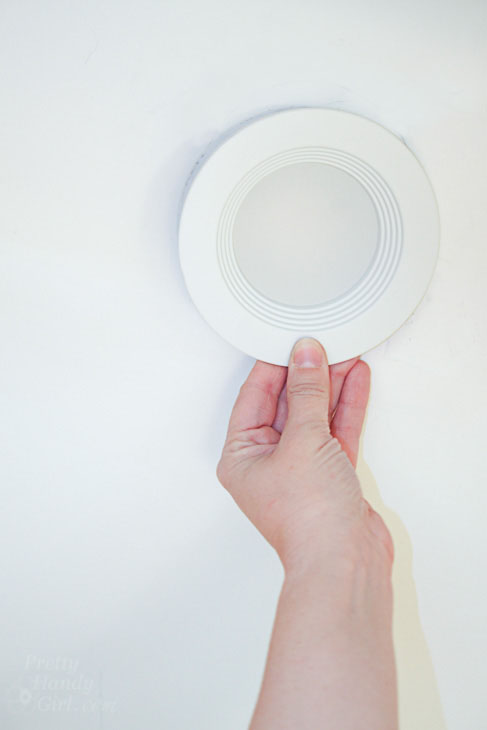
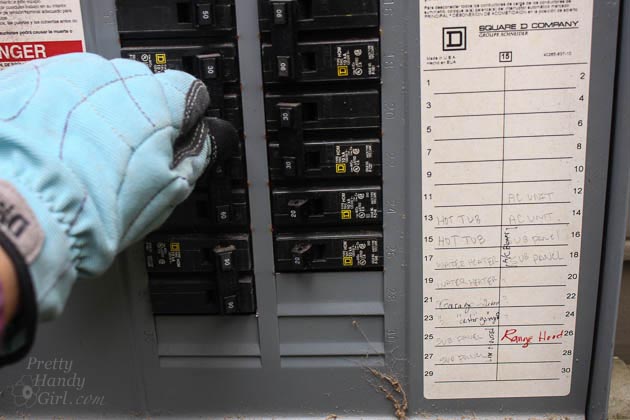
Step 1:  Turn off the power at the circuit breaker. (It’s a good idea to turn the light on before you turn off the circuit. Then you can visually verify that the power is indeed turned off to the light.)

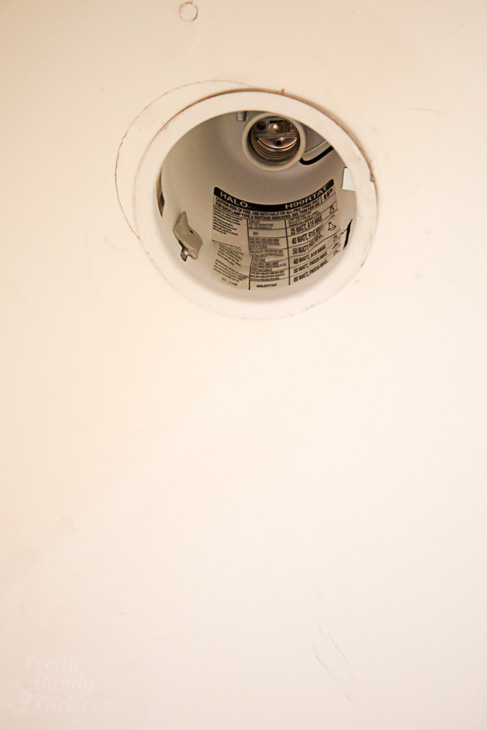
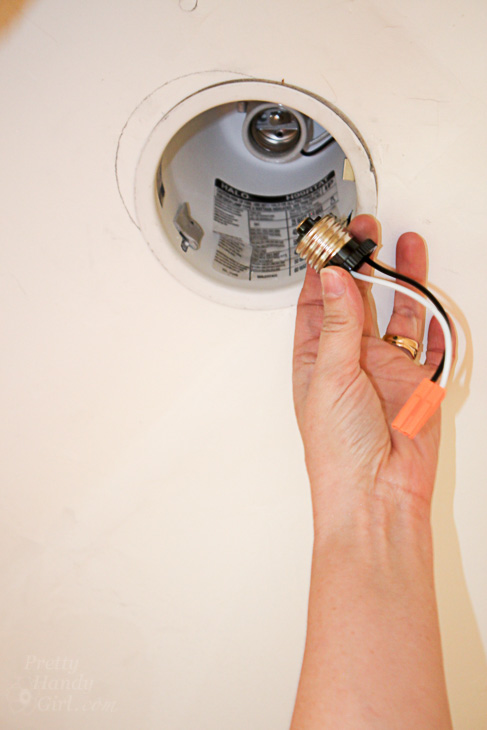
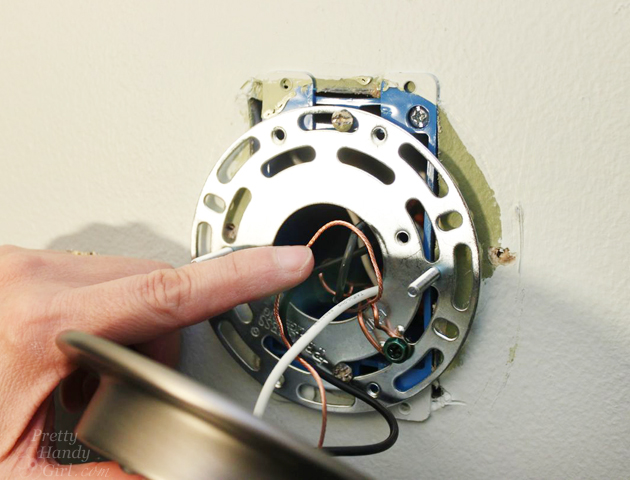
Step 2:  Unscrew the cover off of the flood light (or whatever fixture you are replacing.) Pull the wires out of the junction box. Unscrew the wire nuts. Discard or recycle the old fixture and throw away the old wire nuts. (I like to replace the wire nuts when installing new fixtures because they are inexpensive and it insures a good connection.)

Hanging A Barnlight Tutorial

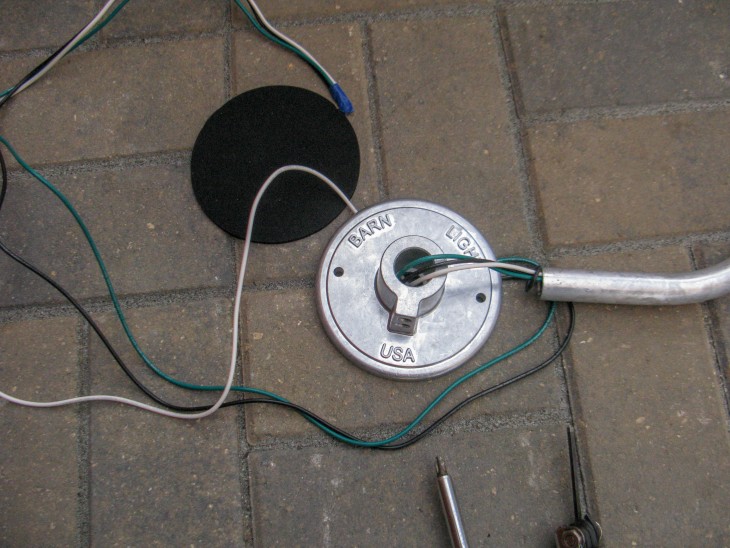
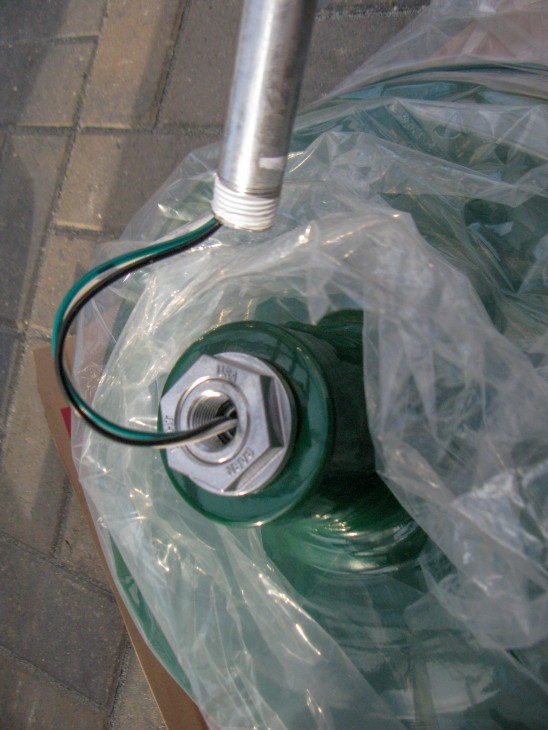
The gooseneck barn light comes with a face plate, a shade, and the gooseneck arm. All light fixtures have a white and black wire (together they provide the power); and a green wire (the ground wire). Thread the wires through the goose neck arm and the face plate (if not already threaded through). One end of the gooseneck arm is threaded and will attach to the shade. Wrap the threaded end of the goose neck arm with plumber’s tape (to prevent water from getting into the fixture.) Screw the threaded end into the shade. The other end is held into the face plate with a hex screw. Super easy, right?

Hanging A Barnlight Tutorial

Unfortunately, with this light, you must mount the entire fixture fully assembled (some fixtures can be installed by first mounting just the face plate first.) Therefore, you will need an extra set of hands to help hold the fixture in place while trying to connect the wire nuts and the fixture to the junction box.

NOTE:  This fixture is made from real materials (aka heavier than big box retail fixtures). You need to make sure your junction box will hold the weight of the barn light snug against the exterior wall. If not, you will need to replace a plastic junction box with a metal one to support the additional weight.

Hanging A Barnlight Tutorial

Step 3:  Cut the excess wires with the wire cutter. Using the wire stripping tool, remove approximately 1″ of the wire covering from each wire. (I like to remove a little bit more than usual because it can always be trimmed off if the wires don’t fit within the wire nuts.)

Hanging A Barnlight Tutorial

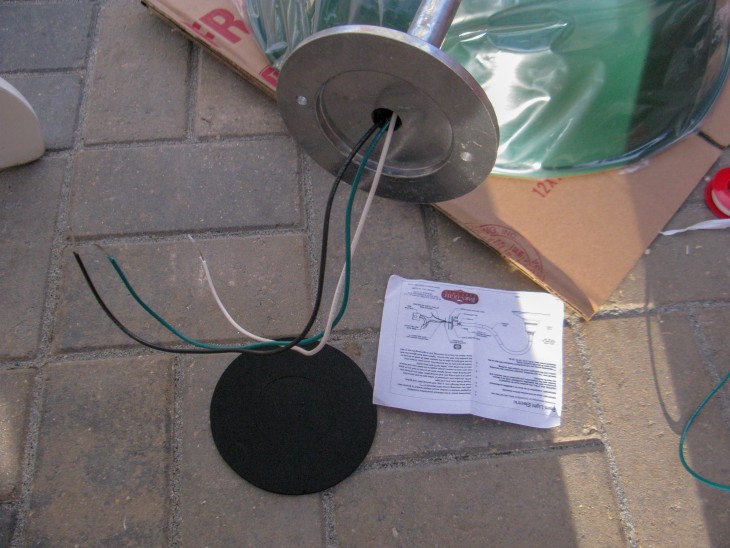
This fixture also comes with a gasket that goes on the back of the face plate (to prevent water from getting into the junction box.) Feed the wires through the gasket before the next step.

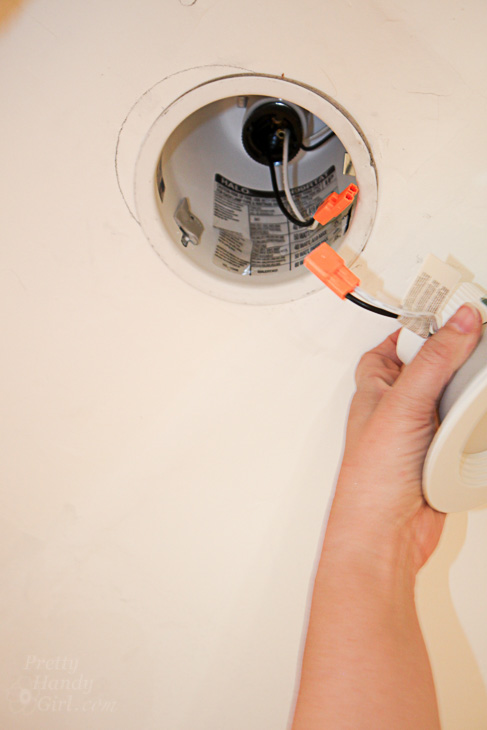
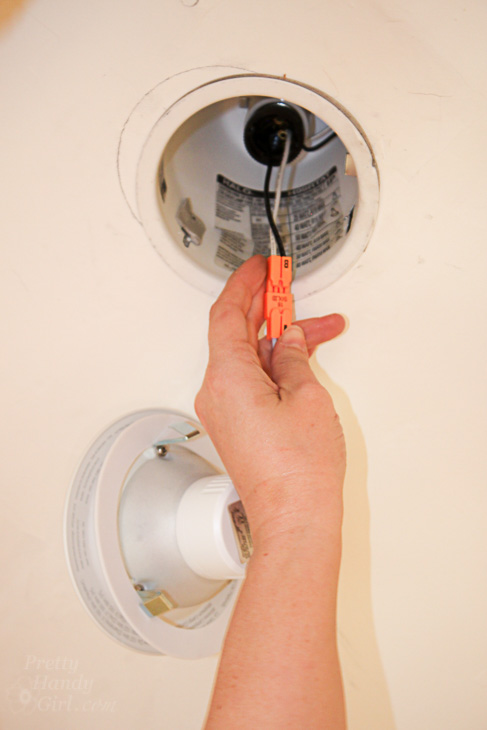
Step 4:  Holding the fixture close to the junction box, connect the green ground wire from the light fixture with the green or bare wire from the junction box. Connect the white with the white wire and finally the black with the black wire. Secure all the connections with new wire nuts.

How to Install a Wall Sconce | Pretty Handy Girl

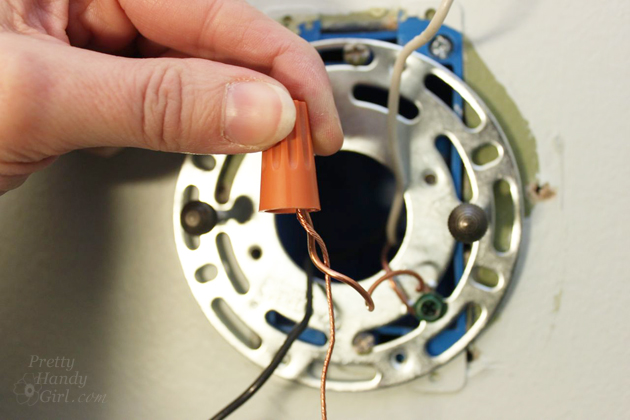
NOTE:  For safety, all wire connections need to fit inside the wire nut with no bare wires exposed. If you want, you can wrap electrical tape around the wire nut and wires to fully seal and secure the connections.

Step 5: Gently fold the wires into the junction box behind the face plate or mounting plate. Lift the light fixture into place against the wall. Thread the two mounting screws through the holes in the mounting plate and into the junction box. Tighten the mounting screws.

How to Install a Wall Sconce | Pretty Handy Girl

Congratulations! You have just learned How to Hang a Barn Light!

Hanging A Barnlight Tutorial

Do you love the look of the barn light? Much better than the bare floodlights, right. I hope you’ll try installing an exterior light to your home, it’s not hard to do.

diane and dean diy

~ See more of Diane +  Dean’s projects ~

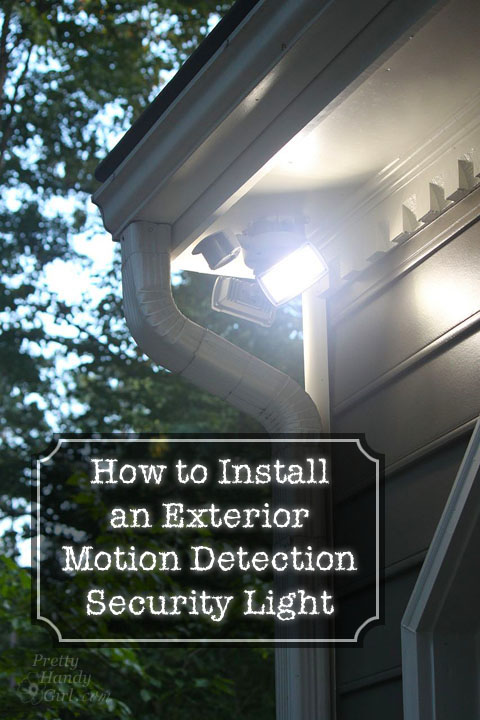
If you liked this tutorial, you’ll love How to Install a Motion Sensing Light:

How to Install an Exterior Security Light | Pretty Handy Girl

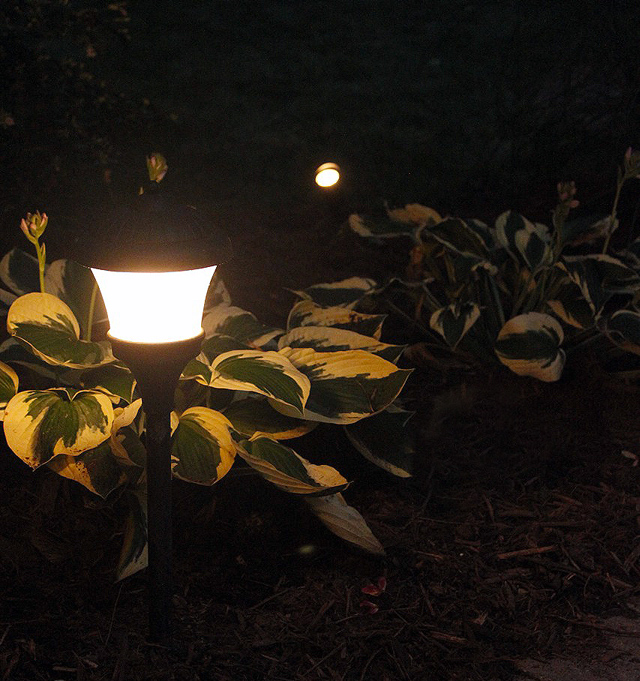
Or How to Install Low Voltage Landscape Lights:


Pin for later!

How to Hang a Barn Light | Pretty Handy Girl

How to Repair Your Dishwasher - Control Panel Replacement

How to Repair a Dishwasher: Control Panel

The holidays are here and your kitchen will surely be getting a work out! Now is NOT the time for your dishwasher to break. Recently we found ourselves with a non-functional dishwasher. The control panel buttons stopped working and nothing I did would start it working again. You may recall that I fixed our grill igniter a few months ago by ordering the parts from Sears Parts Direct. As smoothly as that repair went, I knew exactly where to turn to order parts for our dishwasher. Once again I’ve partnered with Sears Parts Direct to bring you this tutorial for Repairing Your Dishwasher – Replacing the Control Panel.

How to Repair a Dishwasher - Control Panel Replacement

Before we start, let’s talk real quick about how much you think it would cost to hire a repairman to come fix your dishwasher. If the average appliance repair person charges $75 per hour, the initial diagnosis visit fee would be $75. When the repair person diagnoses the issue as the control panel, he or she will have to order the part and come back a second time. Automatically you are in for $150 for the two visits. Now, factor in the cost of the part ($125 – $200 depending on any mark up that may be added.) In the end you are looking at repair costs in the range of $300 or more.

At this point many homeowners will make the decision to buy a new dishwasher instead of paying $300. But, what if I told you that you can repair your own dishwasher for only the cost of the part?  You are probably excited to hear that, and are ready to get fixin’.

Diagnosing the Problem:

To diagnose the problem, visit the Sears Parts Direct Repair Center and answer a few questions about your dishwasher problems. You can also view these 5 Easy Dishwasher repairs to see if the symptoms match your problem. You may end up with a few suggested fixes, but hopefully you can narrow down the issue with some logic. For our dishwasher, I knew it was likely a control panel problem since the buttons had been acting up a few weeks before it stopped working all together.

To order the part for your dishwasher, locate the model number. (Hint: It’s usually located inside the door.) If you have any problems locating the model number, Sears Parts Direct has some recommendations. Write down the model number and head over to Sears Parts Direct to order your part.

How to Repair a Dishwasher

After entering the model number, you’ll get a list of parts for your dishwasher. Locate the control panel and order it. The panel will usually arrive in a week. Hopefully you can suffer through hand washing dishes for a few days. (Don’t complain too much, I suffered through it for 4 months when we were without a kitchen.)

How to Replace Your Dishwasher Control Panel:

Preparation: Hooray, you have the part in hand. Now send the spouse away with the kids and tell them you need complete concentration for 2 hours while you repair your dishwasher! (Truth: It’s going to take you less than 10 minutes! So enjoy the rest of your hour and 50 minutes by binge watching Grace & Frankie on Netflix.)

Materials:

How to Repair a Dishwasher

Instructions:

Always start by turning off the circuit breaker for your dishwasher.

How to Repair a Dishwasher

Open your dishwasher and locate the torx screws securing the door panel.

How to Repair a Dishwasher

Remove the screws using a torx head screwdriver. Place the screws in a cup or bowl to prevent from losing them. (Yes, I started a timer to show you how long this repair will actually take.)

How to Repair a Dishwasher

For simplicity, you may be able to remove only the control panel and set it on a stool while keeping all the parts wired.

Remove the door latch wiring by lifting it off one side at a time.

How to Repair a Dishwasher

Use a flathead screwdriver to gently release the electronic control board.

How to Repair a Dishwasher

Lift the control board off the control panel.

How to Repair a Dishwasher

Gently disconnect the control board from the control panel by sliding off the ribbon wiring.

How to Repair a Dishwasher

You might need to wiggle it back and forth a few time to release.

How to Repair a Dishwasher

Check for any other parts that need to be removed from the control panel (like the handle) and remove them.

How to Repair a Dishwasher

Set the new control panel in place of the old panel on the stool.

How to Repair a Dishwasher

Work in the reverse order of the parts removed. Add the handle onto the new control panel.

How to Repair a Dishwasher

Attach the ribbon wiring from the new control panel to the electronic control board.

How to Repair a Dishwasher

Press the control board into place in the new control panel.

How to Repair a Dishwasher

Reset the door latch wiring in place.

How to Repair a Dishwasher

Set the new control panel onto the door.

How to Repair a Dishwasher

Drive the torx screws in place to secure the new control panel. And, BADABOOM, you are done! Let’s check that timer please: 8 minutes and 37 seconds!

How to Repair a Dishwasher

Go ahead and turn the power back on for your dishwasher.

How to Repair a Dishwasher

Check the buttons to see if it works. YES! We have a working dishwasher again.

How to Repair a Dishwasher

Didn’t that take a lot less time than you originally thought? Plus you are richer because you didn’t have to pay a repair person or replace your dishwasher! What are you going to do with that money you saved? Why not go ahead and buy yourself that present you really want.

Now that your dishwasher is working, did you know there is a right way to load your dishwasher? Or that there are items you should NEVER wash in your dishwasher?

If you haven’t already, you really need to check out SearsPartsDirect.com to find that part to fix all your broken appliances and more! Follow Sears Parts Direct on Facebook, Twitter, or YouTube to see a variety of repair articles and videos.

How to Repair a Dishwasher

I’m ready for the holiday baking rush now that our dishwasher is working, how about you? I’m also feeling relieved knowing that when my Mom visits for Christmas, she won’t feel guilty about our broken dishwasher and try to wash all our dishes by hand. Moms will always be moms, won’t they?!

Have a Happy Holiday y’all! I’m off to clean the baseboards around our dishwasher. I’m so embarrassed to see dirt and dog hair in that photo above. Ack!

Save your friends $$$ on dishwasher repairs by pinning this image:

How to Repair a Dishwasher

signature

Disclosure: This is a sponsored post for Sears Parts Direct. I was not told what to write. All opinions are my own. I was compensated for my time and efforts to create this tutorial. I am very particular about the brands I represent. Because I value your trust, you will always be notified when you are reading a sponsored post on PrettyHandyGirl.com.

Warm Solution for Cold Rooms in Your House

Warm Solution for Cold Rooms in Your House

Warm Solution for a Cold Room

I’m excited to share this solution with anyone who has a cold room in their home. Sometimes a room may be cold because it lacks a heating duct, is missing insulation, or is on a concrete slab. Whatever the reason, today I’m going to share with you a Warm Solution for that Cold Room in your house.

Warm Solution for Cold Rooms in Your House bathroom

My friend Beth has a bathroom in her home that no one (including guests) want to use. Unfortunately, I experienced the shock of using this bathroom once before and vowed never again. The half bathroom, added onto their home, has always felt like an ice box in the winter. And as you know, a cold bathroom means a cold toilet seat. Need I say more?

Beth had accepted the fact that she couldn’t do anything about her frigid bathroom without tearing down all the drywall or adding a vent (which would be messy and costly solutions). Then I discovered these wall heaters from Broan. Being that I am a Broan-NuTone influencer, I reached out to Broan to find out if I could get a complimentary heater for Beth’s bathroom. Of course, they felt for Beth’s situation and gladly agreed to send me the Broan 170 Wall Heater.

Notes: A few notes about installing a wall heater. View the available heater options from Broan. The heater you need will depend on several factors. Contact Broan’s customer service department for assistance selecting a heater that is right for you. This tutorial is strictly for informational purposes. You need a licensed electrician to install the heater. You may need to pull a permit when adding a supplemental heater to your home. Check with your local building and permit office to find out what the requirements are.

Finding a Location for the Wall Heater:

Locate a good location for the heater. Ideally you want an interior wall that doesn’t have insulation. Check to make sure the wall studs are far enough apart to allow the heater housing box to fit inside the studs. (Need help locating your studs? Here are 5 Ways to Locate Wall Studs without a Stud Finder.) Make sure that the location for your heater does not have any flammable items nearby. (Curtains or towels located near the heater could pose a fire risk.) Finally, assess the air current direction from your heater. You need the air to flow freely into the room and not be blocked by doors or other items.

Warm Solution for Cold Rooms in Your House

Preparing the Wall for Installation:

After locating an appropriate space for the heater installation, use the metal housing box to trace the opening size onto the wall. Cut through the drywall with a drywall saw or oscillating tool.

Warm Solution for Cold Rooms in Your House Drywall

Check to see if the housing will fit in the hole you just cut. Make any adjustments as needed. (Beth’s wall studs provided the exact opening for the wall heater (lucky us!) If your wall studs are further apart, you can use the mounting brackets that come with the heater.)

Warm Solution for Cold Rooms in Your House heater install

The location for Beth’s heater just happens to be underneath two switches, but we needed to run new wiring to accommodate the electrical load the heater needed.

Warm Solution for Cold Rooms in Your House switches

Adding Dedicated Electrical for the Heater:

**The power should be shut off during installation of the wall heater.**

We drilled a hole through the bottom of the wall plate inside the cavity.

Warm Solution for Cold Rooms in Your House wall heater install

As the electrician went into the crawlspace, I shone my flashlight down through the hole to assist with locating the newly drilled hole.

Warm Solution for Cold Rooms in Your House inwall heater electrical

The electrician fed wiring up through the hole. . .

Warm Solution for Cold Rooms in Your House electrical wiring

. . . and ran the other end of the wiring to the circuit breaker. After fishing the wiring into the space below the circuit breaker, he fished the wiring into the circuit breaker box (not shown below.) Depending on your circuit breaker, you may need to have a split breaker added if you don’t have room for a new breaker.

Warm Solution for Cold Rooms in Your House wiring circuit breaker

The electrician should handle installing the new breaker and connecting the wiring inside the breaker box.

Installing the Wall Heater:

The electrician inserted the electrical wiring through the bottom knock out hole in the housing box and then set it into the wall.

Warm Solution for Cold Rooms in Your House housing box

He secured the housing box with mounting screws into the studs (or he could have used mounting brackets if the studs were further apart.)

Warm Solution for Cold Rooms in Your House installation instruction

The electrician wired the heater to the house wiring following the installation instructions and wiring diagram that came with the heater.

Warm Solution for Cold Rooms in Your House electrical install

Then he attached the grille to the heater with the two screws provided.

Warm Solution for Cold Rooms in Your House cover install

The thermostat knob was pressed onto the thermostat stem.

Warm Solution for Cold Rooms in Your House install complete

The electrician turned the power back on and I tested the wall heater.

Warm Solution for Cold Rooms in Your House wall heater test

Oh my! The warm heat blowing out of the heater was an immediate improvement in this cold bathroom.

Warm Solution for Cold Rooms in Your House wall heater complete

Beth and her family are so happy with the new heater. She told me, “For ten years, our bathroom was labeled the Cold Bathroom. Today, my son announced the bathroom has a new name: the HOT BATHROOM.”

Warm Solution for Cold Rooms in Your House

Now when Beth and I take our walks with the dogs I have no qualms about running in to her house to make a quick pit stop. LOL.

Do you have a room in your house that is more like an ice box than a climate controlled room? Did you know you can add a supplemental heater? Check out all these Broan heaters that could solve your cold issues.

Disclosure: This is a sponsored post for Broan. I was not told what to write. All opinions are my own. I was compensated for my time and efforts to create this tutorial. As always, I am very particular about the brands I represent and you will always be notified when you are reading a sponsored post on PrettyHandyGirl.com.


15 Amazing DIY Lighting Ideas

15 Amazing DIY Lighting Ideas - pinnable collage image15 Amazing DIY Lighting Ideas

Lighting can make a dramatic statement in any room and is a crucial element of good design. A great light fixture not only adds style, but it creates a mood and vastly impacts how you feel.

One of the biggest benefits of DIY Lighting is you can choose your own materials to meet your desires:

  • number and wattage of bulbs
  • material (metal, fabric, paper, wire, glass, concrete, wood, tile, etc.)
  • color
  • shape
  • style (farmhouse, modern, traditional, vintage, eclectic, industrial)
  • mounting (pendant, flush mount, semi-flush, wall mount)
  • shades (solid, translucent, semi-transparent, perforated, open)

With DIY Lighting, the style options are endless. There are so many choices and ideas out there at all different price points. The great news is that you don’t need a large budget to have great lighting for your home, you just need a few supplies and some basic handy skills!

Here is a round up of 15 Amazing DIY Lighting Ideas to inspire you to brighten up your home!

DIY Button Pendant Light - Best Lighting DIYs - Pretty Handy Girl

Do you have a button collection? Use it to make this amazing DIY Button Pendant Light . It’s whimsical, sparkly, fun and is sure to be a great conversation piece when you have guests visit.


This Circle Diamond Pattern Light was created by updating an old brass light fixture. The tutorial will show you how to change out an old fixture and add some pizzazz to your room or hallway. You’ll have to see the pattern it shines onto the walls — beautiful!


Converting Recessed Light to Pendant Light - Best Lighting DIYs - Pretty Handy Girl

Learn how to Convert a Recessed Light to a Pendant and add a little character to your room with a great light fixture! Recessed lights are great, but sometimes you need a fixture to finish off that great room design. This tutorial will help you change out your recess light in 5 minutes or less!


New Painted Foyer Light Fixture

Another update, but this time you’ll learn how to make a Pottery Barn Inspired Hanging Light. See how to make a quick cosmetic change to an old fixture. No dated brass fixture will be safe after you read this tutorial.


DIY Copper Pendant Light - Best Lighting DIYs - Pretty Handy Girl

Check out these unique Farmhouse Style Copper Metal Pendants. Would you believe they were made by updating some UFO-like lights with storm collars, and spraying high heat spray paint?


Vintage Map Lampshade - Best Lighting DIYs - Pretty Handy Girl

For the ultimate traveler, this Vintage Map Lampshade creates a warm glow and would be a wonderful addition for any living room or office. Plus, you can customize it with maps of places you’ve been!


Glass Bowl Fixture - Best Lighting DIYs - Pretty Handy Girl

What do you do when the light you really love is sold out? You DIY it, of course! You’ll be amazed at how this knock-off DIY Glass Pendant Light by Ugly Duckling House was made. Hint: you may have one in your kitchen cabinet.


Ombre Paint Chip Lamp - Best Lighting DIYs - Pretty Handy Girl

Don’t run to the store now, but you know those free paint chips they give out at the paint store? This Ombre Paint Chip Lampshade is made using those freebie paint chips. Next time you have a bunch of extras after you’ve finished your painting project, consider reusing them to make a great lampshade!


Chicken Wire Pendant - Best Lighting DIYs - Pretty Handy Girl

Don’t you love this Chicken Wire Anthropology-Inspired Pendant in all its simplicity? If you love rustic or farmhouse style decor, this pendant is for you.


Minnow Trap Light Fixture - Best Lighting DIYs - Pretty Handy Girl

Whether you love to fish or not, these Minnow Trap Light Pendants are a great DIY option. They look great, give a lot of light, and set a casual mood.


Capiz Shell Light Fixture - Best Lighting DIYs - Pretty Handy Girl

This DIY Capiz Shell Light Fixture has a beautiful feminine and modern look. Build a quick frame; add some strings of capiz shells; and you have a beautiful new light fixture!


Twinkling Pendant Light - Best Lighting DIYs

The light pattern that this DIY Twinkling Pendant Light  shines onto the walls is so pretty and adds some fun and whimsy to any room. Bet you can’t guess what this pendant was in a former life!


Mosaic Glass Tile Lamp - Best Lighting DIYs

This Mosaic Tile Lampshade is gorgeous! With just a few supplies, you can add style and bling to your room without spending much money at all.


Industrial USB Charging Station - Best Lighting DIYs

Feeling super handy? This Industrial Light and USB Charging Station would be a cool addition to any room, and we all know you can never have too many charging stations these days.


Rustic Jar Pendant Light over kitchen sink - best lighting diys

Last but not least, learn to Convert a Recessed Light into a Hardwired Light. This gives you the option to hang pendant lights over a kitchen sink. . .or really anywhere else in your home. So many options!

I hope you enjoyed this round up of the 15 Amazing DIY Lighting Ideas and found some inspiration for your home!

If you like this collection, please share by pinning the image below.

15 Amazing DIY Lighting Ideas - Large pinnable image collage

Friends don’t let friends buy light fixtures if you can DIY them! Share this post with a friend.

signature

Now that you have your ideas for creating that light fixture, do you know how to install a hard-wired light fixture? I’m happy to show you how, it’s very easy!

Fall Decor in a Rustic Farmhouse Kitchen | Pretty Handy Girl


Add Energy Efficient LED Fixtures in Recessed Can Lights | Pretty Handy Girl

Add Energy Efficient LED Fixtures in Recessed Can Lights | Pretty Handy Girl

If you’re like me you are in tune with saving money and saving the environment. Over time I’ve been switching several light fixtures and bulbs in my house to more energy efficient LED bulbs. During the past few years there have been many developments in LED light technology. Recently I discovered a two pack of retrofit LED fixtures for recessed can lights and knew I had to try them. Stick around to learn How to Add Energy Efficient LED Fixtures in Recessed Can Lights!

Add Energy Efficient LED Fixtures in Recessed Can Lights | Pretty Handy Girl

In the past I’ve tried several CFLs when they were in vogue, but I hated the light they cast and they didn’t last as long as I had hoped. Plus, they were a pain to dispose of. Luckily LEDs have taken over the light bulb space in a big way. Although some of the LED bulbs had a purplish cast to them in the beginning, I’ve found some bulbs that I like and do a fairly decent job of imitating traditional incandescent bulbs. Then there’s these light bulb beauties:

12 Stylish Energy Efficient Bulbs | Pretty Handy Girl

But, let’s not get side tracked. I want to show you how you too can Add Energy Efficient LED Fixtures in Recessed Can Lights! Let’s get started because this should only take 2 minutes!

Materials:

(I’ve included affiliate links for your convenience. I earn a small percentage from a purchase using these links. There is no additional cost to you. You can read more about affiliate links here.)

Instructions:

Measure the diameter of your recessed can to make sure you have the correct sized retrofit lights. (Our cans are 4 inch diameter.)

Turn off the light switch. Remove the bulb. You may also need to remove the trim kit (usually held on with clips or springs.)

Add Energy Efficient LED Fixtures in Recessed Can Lights | Pretty Handy Girl

Locate the screw base from the LED retrofit kit. Screw it into the socket where the light bulb would be inserted.

Add Energy Efficient LED Fixtures in Recessed Can Lights | Pretty Handy Girl

Locate the LED retrofit light fixture.

Add Energy Efficient LED Fixtures in Recessed Can Lights | Pretty Handy Girl

Snap together the wiring clips.

Add Energy Efficient LED Fixtures in Recessed Can Lights | Pretty Handy Girl

Feed the wires into the recessed can.

Add Energy Efficient LED Fixtures in Recessed Can Lights | Pretty Handy Girl

Press the retrofit light energy-efficient LED light into the recessed can.

Add Energy Efficient LED Fixtures in Recessed Can Lights | Pretty Handy Girl

Turn on the light switch to test that the fixture is working. Enjoy many hours of savings as you use less energy and enjoy bright warm light.

Add Energy Efficient LED Fixtures in Recessed Can Lights | Pretty Handy Girl

That was an easy tutorial, right? You may also like my tutorial to convert any recessed can light into a junction box for a hard-wired light fixture.

Convert a Recessed Light to Accept a Hardwire Fixture | Pretty Handy Girl

Or the 5 minute way to add a pendant light to your recessed light can.

There’s no more excuse for looking at ugly recessed can lights! 😉