How to Add a Switch to a Light Fixture
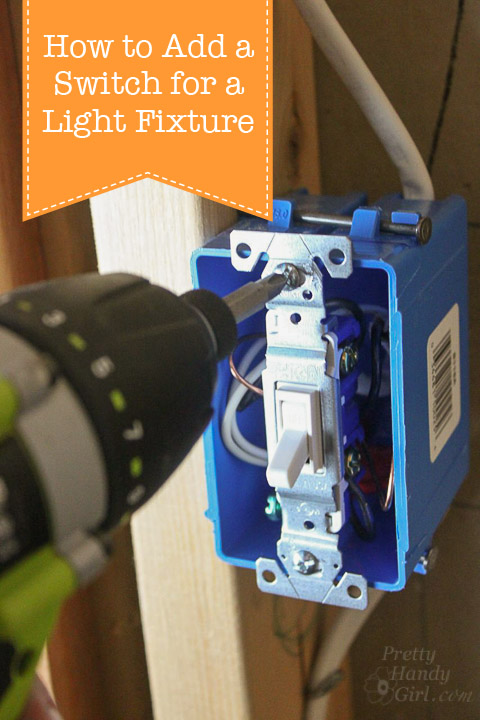
Have you ever wanted to replace a pull chain light with a standard light fixture and a switch? If so, I have a tutorial for you on How to Add a Switch for a Light Fixture!
A while ago my sons and I watched the movie, A Series of Unfortunate Events. When the movie was over my oldest son said he loved the library scene in the movie.

I’m not surprised. Both our boys are voracious readers and have amassed quite the collection of books. Handy Boy #1 lamented the fact that we didn’t have a library and asked if I could build one in our home. I escaped with a non-committal answer.
A few weeks passed and that library seed in my head had begun to plant itself firmly in my mind. I began to form a plan about where I could add a library in our home. It became clear when I opened the toy closet in the bonus room and found myself getting angry that it was (once again) a mess. As I began clearing a path on the floor of the closet, it occurred to me that 90% of the toys in the closet were for young children and my boys had grown beyond them. I spent the afternoon clearing out the closet…
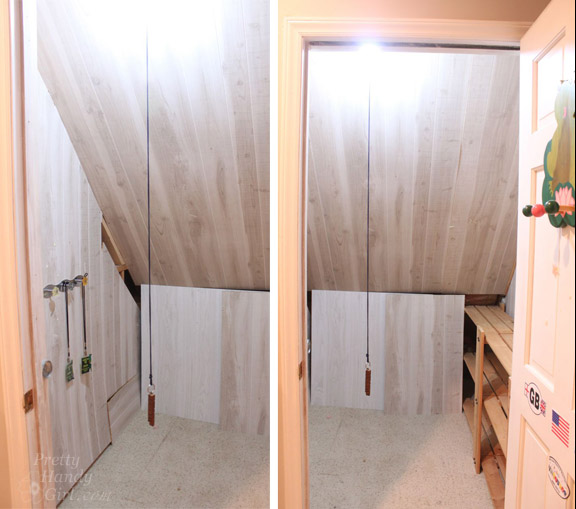
…and soon it looked like this:
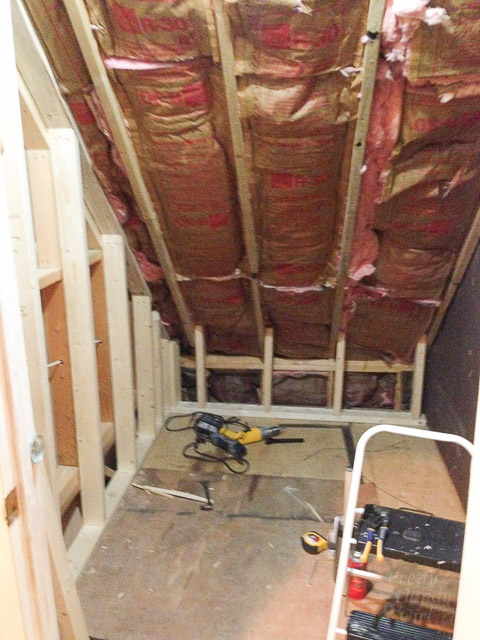
When, I clean, I really clean! Ha. I should explain that the room used to have paneling and scraps of carpeting. But, this closet was always freezing in the winter and hot in the summer. I was determined to get to the source of the lack of climate control. After adding more insulation and filling all the cracks and voids with Great Stuff, I framed out a second wall. Let me just say that some jack ass didn’t bury 12 wires in the wall, but instead wrapped them around the studs. Can you say, “NOT TO CODE!” Instead of hiring an electrician to re-run all those wires, I came up with the ingenious idea to add a second wall to encase the wiring mess. Then I moved on to the lighting situation.
The light in the closet was a pull chain. If you have children, you know that nothing is more irresistible than a dangling rope that turns a light on and off and on and off and on…until the chain breaks. I decided to add a switch to the light fixture. While I was at it, I also added a new LED light fixture that wouldn’t create heat or add to our energy bill if it was left on.
Materials:
(contains affiliate links)
- 14/2 Romex wiring (but, check your home to make sure you use the same wiring)
- Wire strippers
- Flat head screwdriver
- Philips head screwdriver
- Hammer
- Wire nuts
- Electrical staples
- Single outlet box (new work if you have the walls open. Old work for slipping inside sheetrock.)
- Voltage tester
- Needle-nosed pliers
- Single pole switch
- LED Light fixture
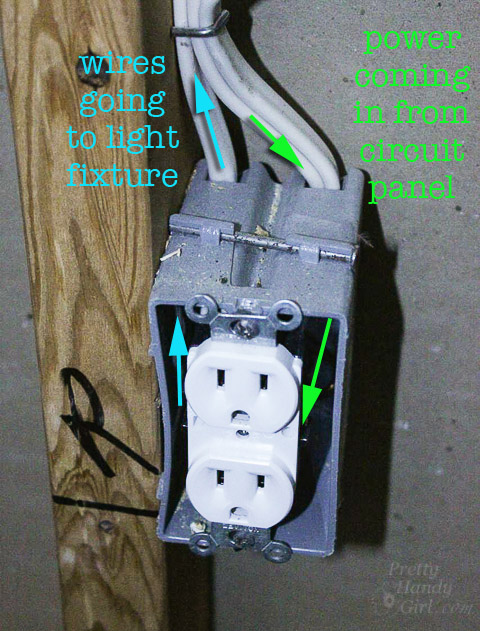
Before we begin, I want to show you the wiring configuration we have to start:
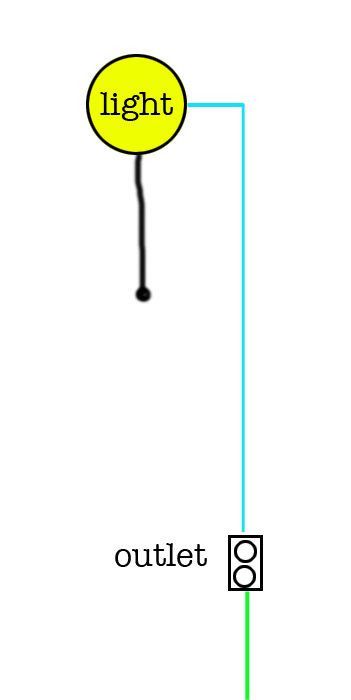
The green line represents the wiring coming from the home circuit panel. The blue line shows the power continuing from the outlet to the light with a pull chain. (If you have an eagle eye you’ll notice a third wire in the outlet box below. The other wire goes to another outlet.)
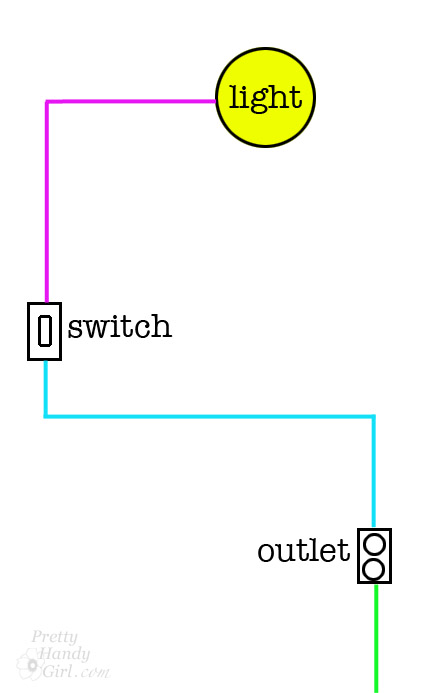
This next diagram shows the configuration we need to add a switch:
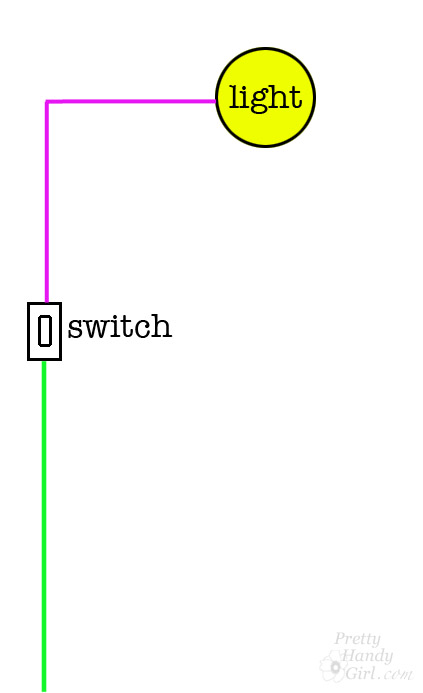
You don’t need to have the outlet in your configuration. It just happens to be wired on the same run as our light. In the simplest configuration, this is what you could wire:
Instructions:
Check your local building and electrical codes before you begin. Changing or adding electrical to your home may require a permit.
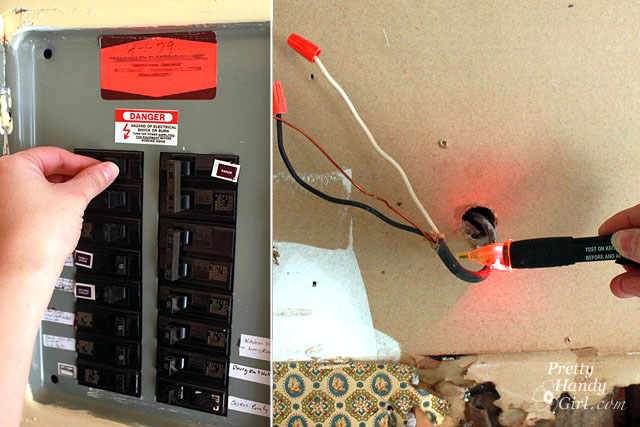
Shut off the power to the circuit you will be working on. Always check the wires with a voltage tester to assure that they are not still live.
Running wires:
Install your outlet box where you want the switch to be. Be sure to allow the box to stick out enough to be flush with the sheet rock when it is installed later.
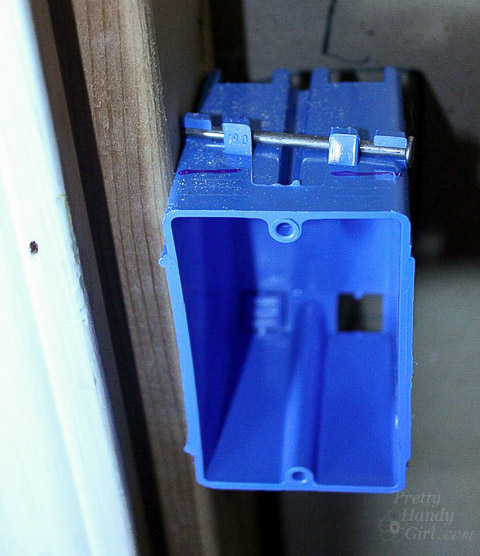
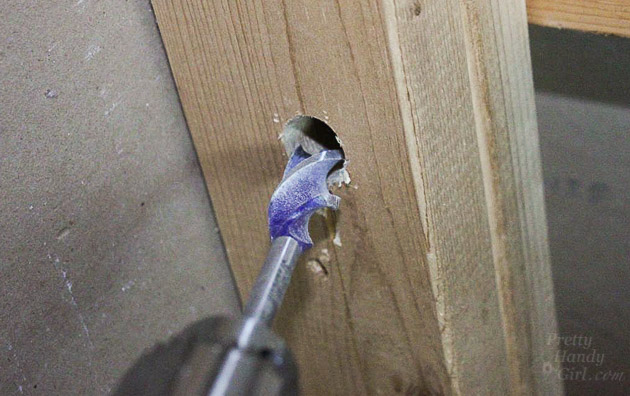
Plan a path for your new wiring. If you need to drill a hole into studs or ceiling joists, be sure to drill into the center. If your hole is too close to the edge, add a nail plate to the stud to prevent any nails or screws from going into the wiring.
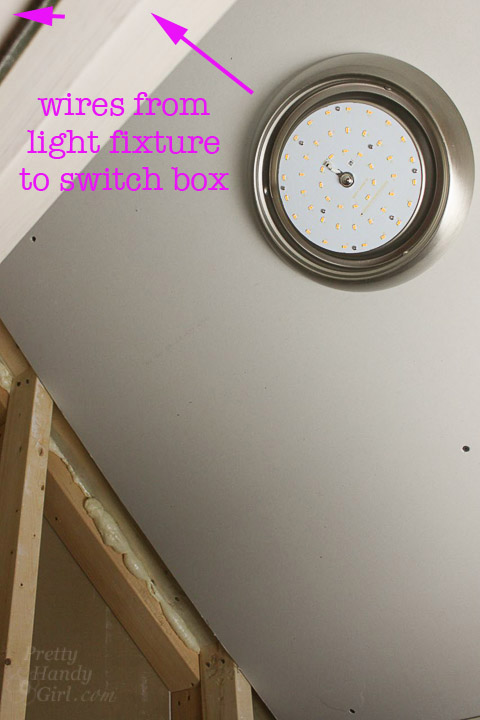
Disconnect the wiring from the light fixture and outlet. Install the new light fixture and fish the wires down to the switch box. If your wiring is long enough, you can use it to run to the switch. If not, you’ll have to wire a longer wire from the light fixture to the switch or from the switch to the power source.
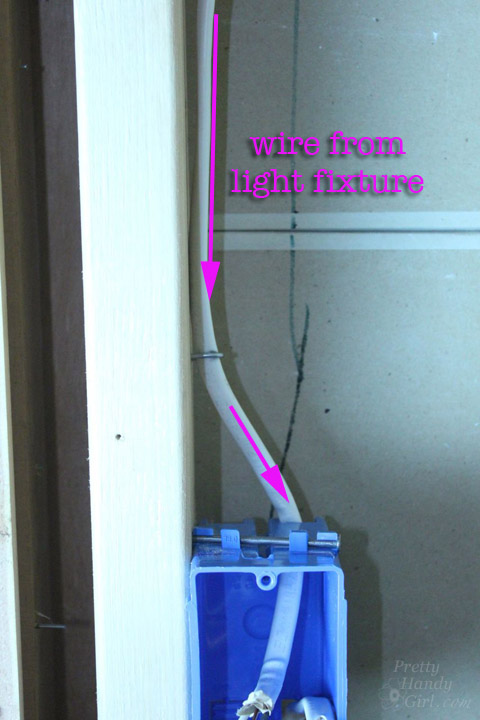
Feed the wire into one of the tabs in the back of the box. Allow 6-8 inches of wire to extend out of the box.
Now run your wiring from the power source (in my case a nearby outlet) to the switch box. Once again, leave 6-8 inches extending out of the box.
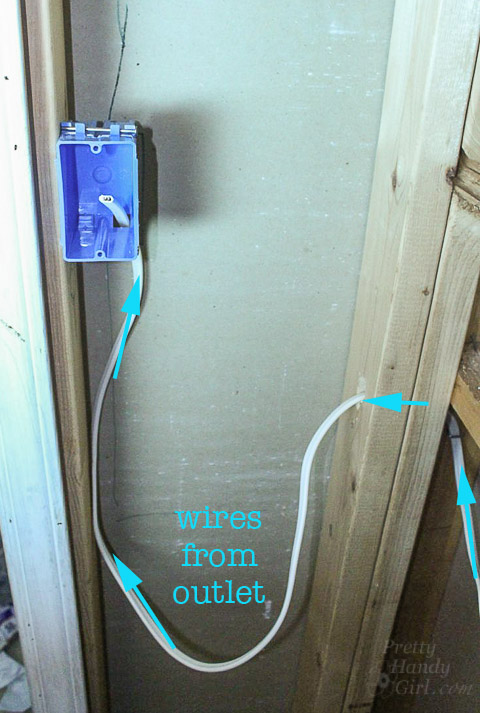
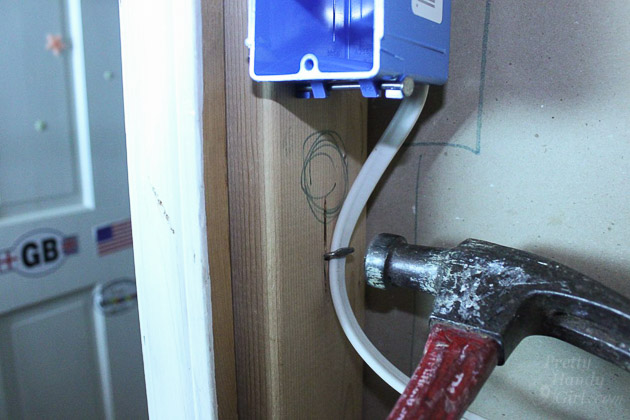
Secure all wires to the studs with electrical staples.
Wire the switch by attaching the two black wires to the screws on the side. Connect the two white wires together with a wire nut.
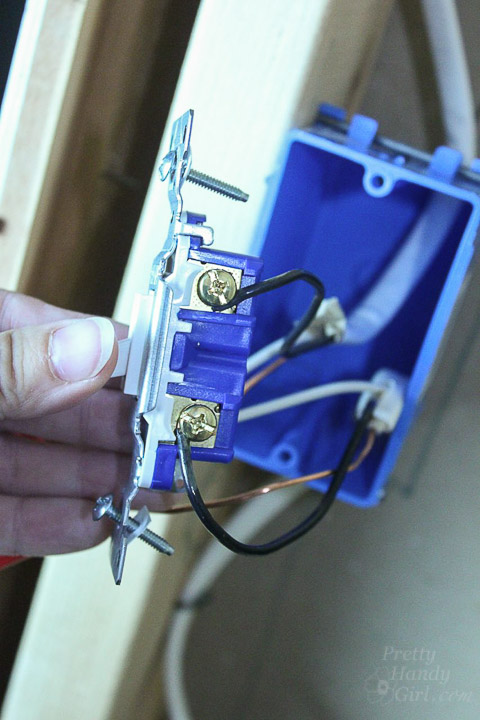
Line up the ground wires together and add a small section of copper wire to the group. Screw a wire nut on all three wires. Take the other end of the copper wire you added and attach it to the ground screw.
If you are unfamiliar with wiring a switch, this video does a phenomenal job of showing you how to:
Gently fold and press all the wires back into the junction box. Secure the switch to the box.
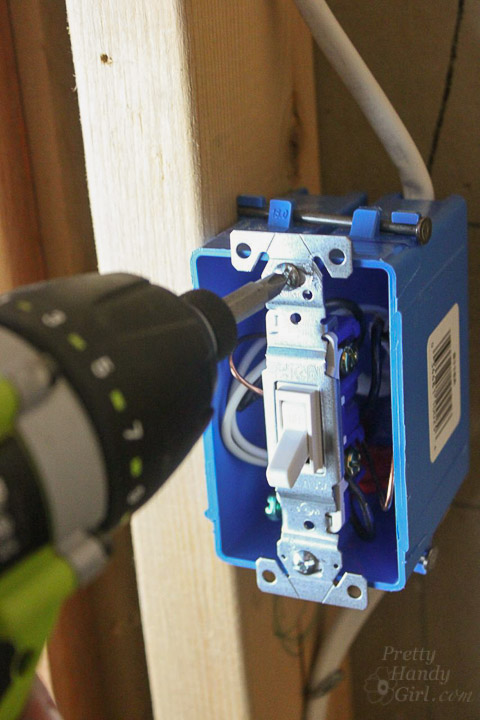
Turn on the power and test your switch!
How does it feel to get rid of that crazy pull chain light switch?! Crazy good, right?!
![]()


I tried this, seems like my situation is exactly the same as described here, I am only a little worse off than before, I no longer have a light in that position, but I will need an electrician to do the job. The new light does not come on regardless of the position of the switch, and the receptacle that it draws power from is now switched (I think that is the correct term – moving the switch to the off position also cuts power to that receptacle).
It’s hard for me to understand your situation without seeing a photo. I think consulting an electrician would be a good idea.
Maybe add a disclaimer to check you local codes?
Hi Brittany Bailey
That’s some really handy work which you brought up. But as you know electrical codes are different and may vary from one country to another.
In India and many other Asian countries the electrical works like these could be a very handy job to be done with as inner wiring is like a
mess around here.
Yeah a wire pulling chain is now being out dated and if you have little grown ups it could be a playing toy for them, which could result in
kind of short-circuit or could damage the inner wiring of your room. What could be done to avoid the over heating of the wires if I perform
the task manually. Indeed your post would be a great help to carry over with the lighting system, hope you could bring up some more of these
specially for carrying out the work on the bigger areas like, living rooms and etc.
Have a good day
Shantanu sinha
Electrical is definitely not as difficult or intimidating as a lot of people think and basic household wiring is within the abilities of most do-it-yourselfers. In fact, it was the first skill I learned early on when I first became a homeowner. However, done improperly it can be dangerous and for that reason, most municipalities will require a permit and inspection for even a project as simple as this one. There a re some municipalities that require ALL electrical work to be done by a licensed electrician. You may still be able to do the rough-ins yourself but the connections have to be made by an licensed electrician. CHECK WITH YOUR LOCAL BUILDING DEPARTMENT.
As a general rule, homeowners are allowed to replace switches and fixtures without permits, but are required to obtain a permit and have the work inspected if they ADD switches or fixtures.
With all due respect (and believe me, I certainly do respect you), there are a few potential issues with some of the electrical work displayed in this post:
In your photograph of the electrical outlet, three wires are stapled together to the stud. In Ontario, Canada, this would not pass inspection. Check your electrical code. This has to do with resistance and wires overheating or something (This was pointed out by an inspector that failed work that I had done for this specific reason). One wire per staple.
In your photo of the “wire from light fixture”, the wire is stapled on edge. It should be flat. This too would fail inspection here in Canada.
Again, I am only going by the electrical code that affects me. I am not as familiar with the National Electrical Code but from what I understand, the standards are mostly the same. And at least with ours, there is some room for interpretation by the individual inspector, so what one inspector fails, another might pass.
If you have a fire or other damage resulting from electrical work that was not permitted or inspected, your insurance company may not cover your loss. The manufacturing date is stamped on the Romex, so recent work is easy to spot if you purchased new wiring. And if there is no permit on file…well…
The last thing I want to do is take anything away from your positive message of empowerment, but I felt these points were too important to ignore.
Cheers from Canada.
Those are definitely some great points. Thank you so much for bringing these issues to light (no pun intended.)