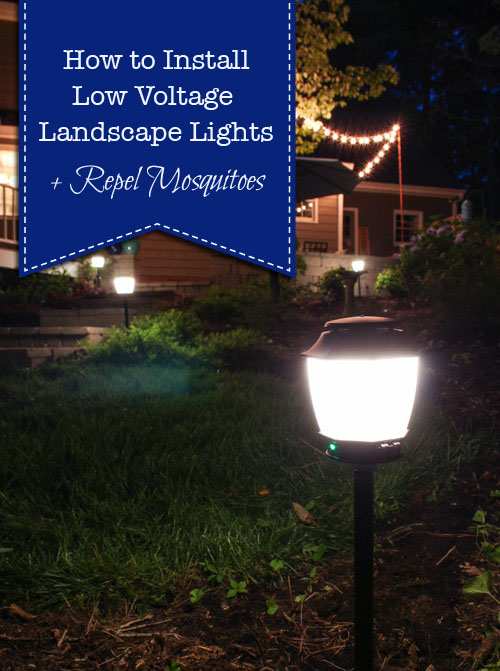
How to Install Landscape Lights and Repel Mosquitoes
Pop Quiz: How can you beautify your yard AND repel mosquitoes at the same time?
Do you give up? Introducing the new NuTone Haven Backyard Lighting & Mosquito Repellent System.
As a resident of the North Carolina, we fight a losing battle against mosquitoes for a better part of the year. My son and I seem to be especially attractive to those pesky suckers. With the Zika virus in the news, I was thrilled when NuTone asked me to install and review their Haven lights (via a sponsored post.) Today I’ll show you how to install these low voltage landscape lights (similar to most landscape light installation.) At the end of the summer I’ll check back in to let you know how I like them.
Ready to learn How to Install Landscape Lights and Repel Mosquitoes?
Materials:
(I’ve included affiliate links for your convenience. I earn a small percentage from a purchase using these links. There is no additional cost to you. You can read more about affiliate links here.)
- NuTone Haven Backyard Lighting & Mosquito Repellent System
- NuTone Haven Dual Controller/Timer
- 200 watt Low Voltage Transformer
- Wire cutters/strippers
- Dielectric Grease
- Utility Knife
- Drill
- Screwdriver
- Colored Duct Tape
- 12/2 Low Voltage Wire
- Hammer
- Square End Garden Shovel
Instructions:
Unpack your Haven Light & Repellent system from the box. Pull out the stake, stem and light to assemble.
Assembling the Fixture:
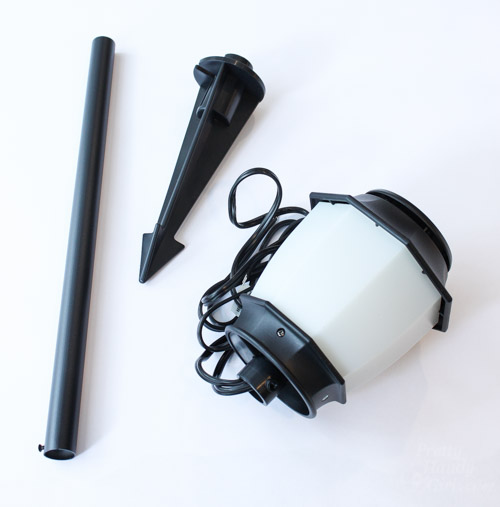
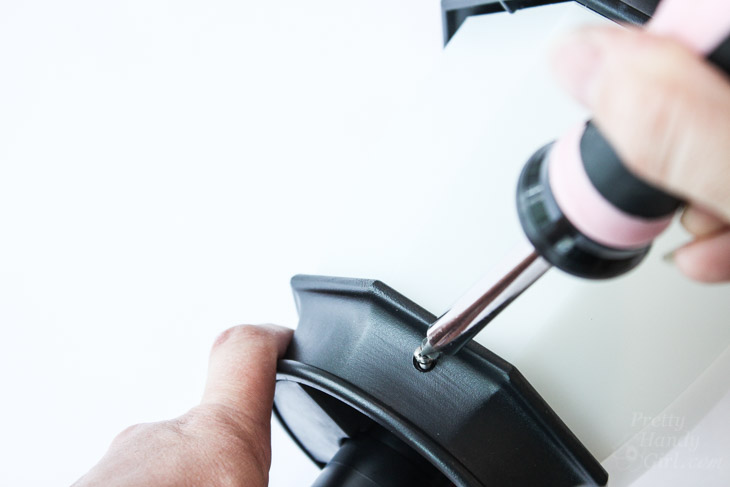
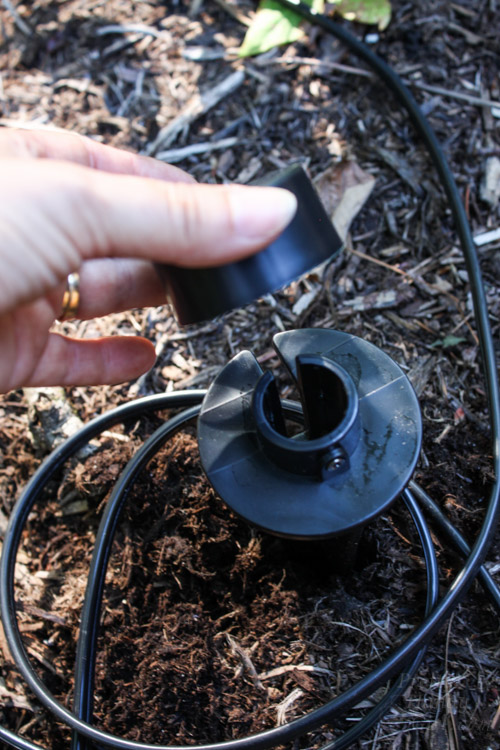
Loosen the screw on the stake.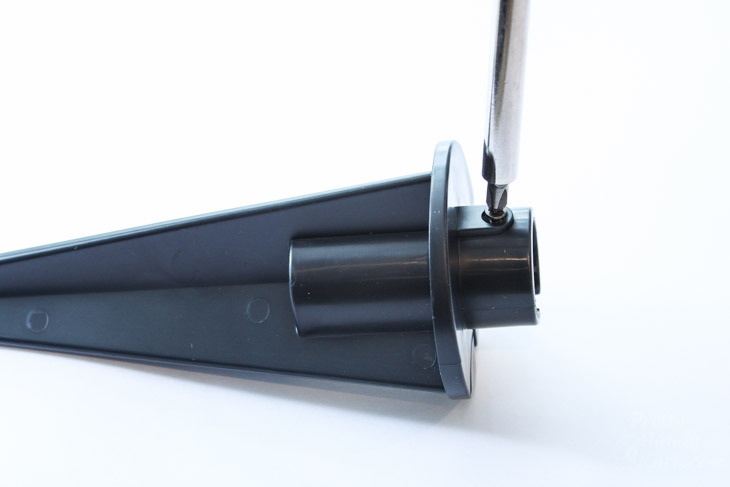
Loosen the screw on the stem.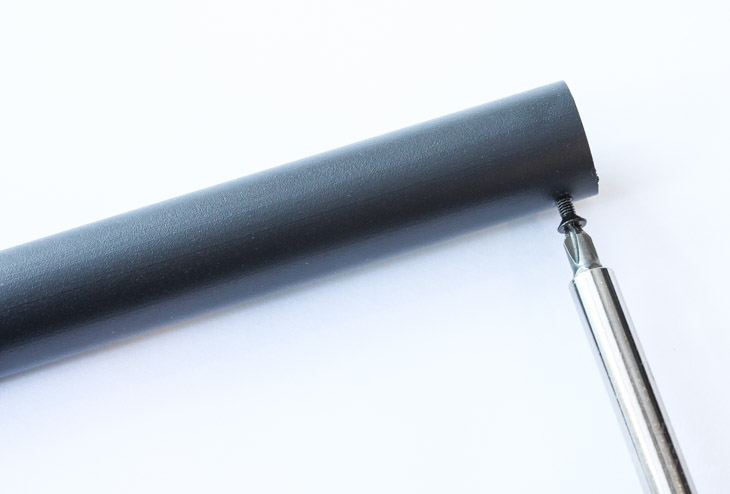
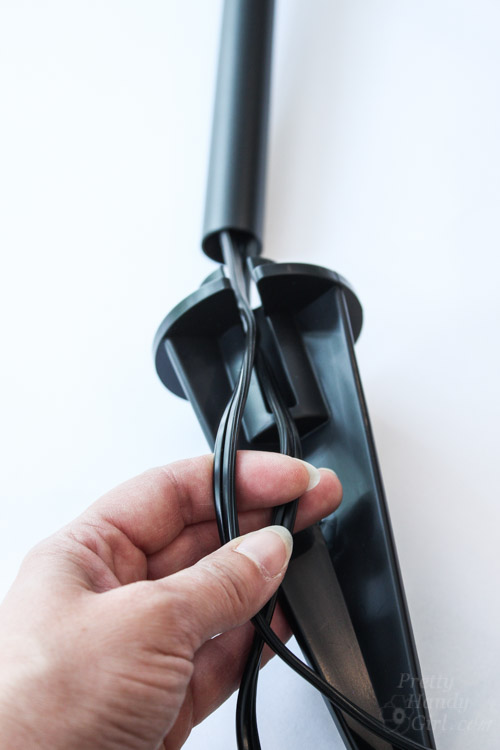
Feed the wires from the light fixture through the stem.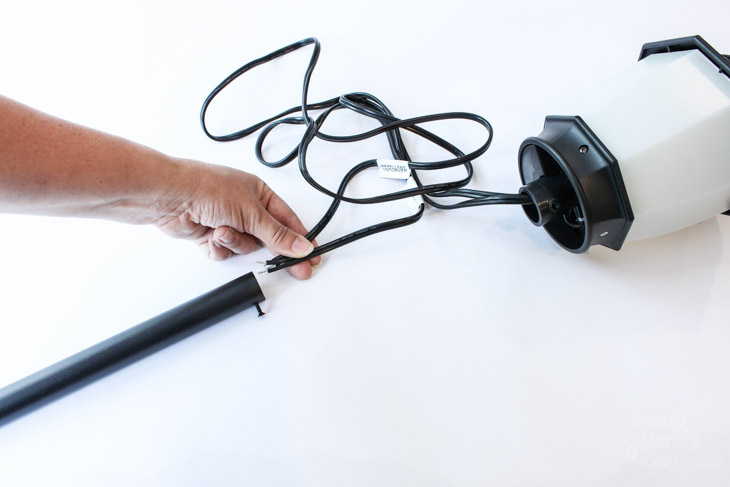
Pull the wires through the other end of the stem.
Loosen the screw on the light fixture base and insert the stem into the light fixture. Tighten the screw.
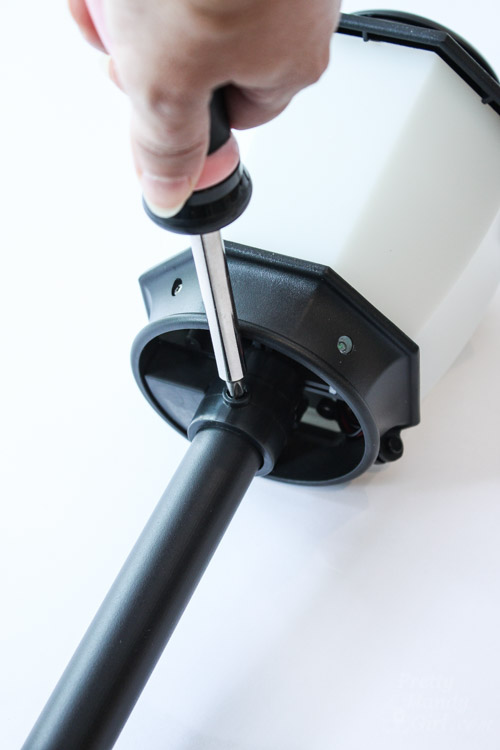
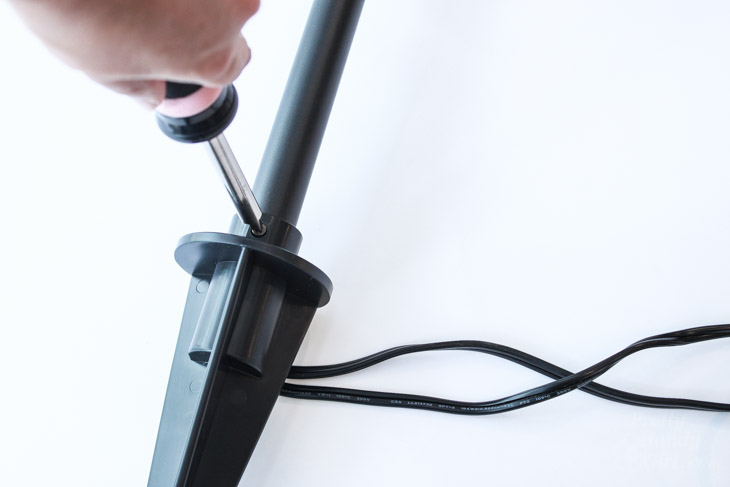
Feed the other end of the stem into the stake and position the wires into the open slot in the stake.
Tighten the stake onto the stem.
How to Install the Repellent:
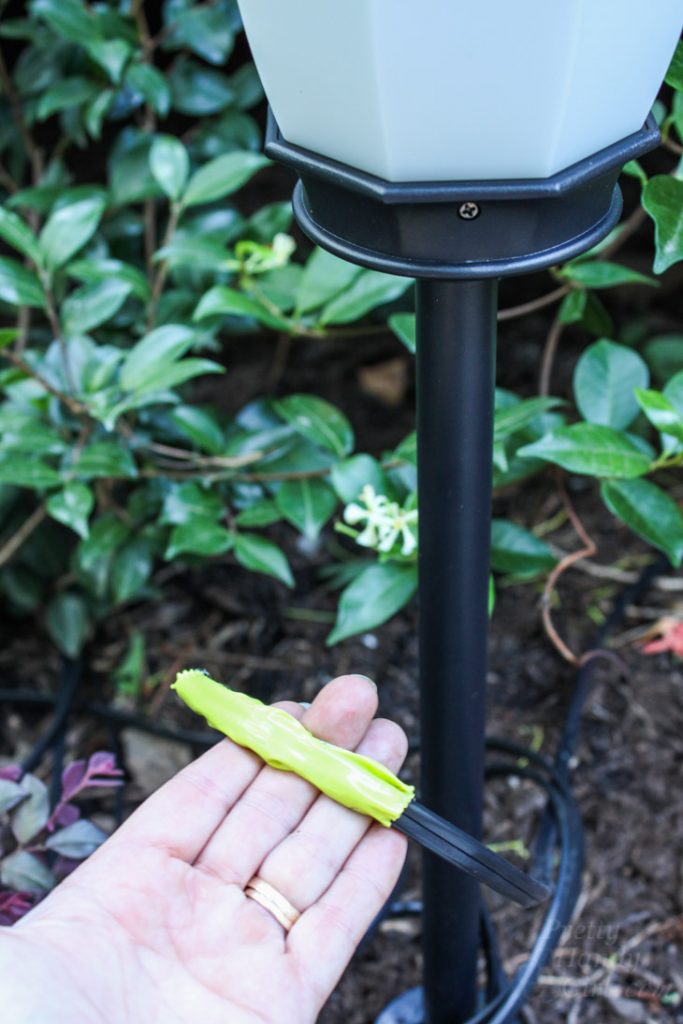
Locate the bottle of repellent. Remove the green protective cap. Attach the locking adaptor cap onto the bottle (make sure the spurs are at the bottom.) Twist the locking cap until secure.

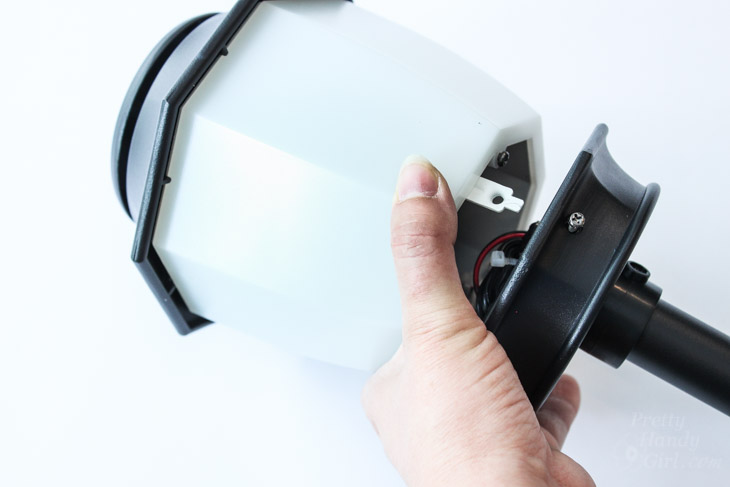
Loosen the screw just below the white shade on the light fixture.
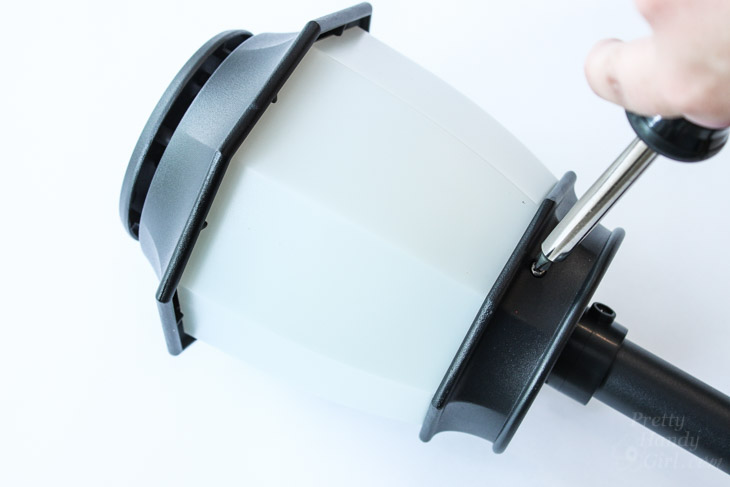
Tilt the fixture open to expose inside.
Insert the repellent into the light fixture. The wick fits into the hole in the center of the fixture.
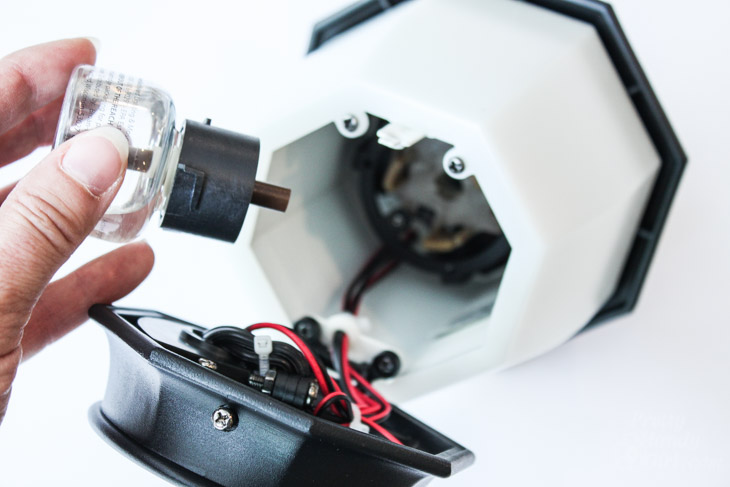
Twist the bottle 30 degrees to secure in place.
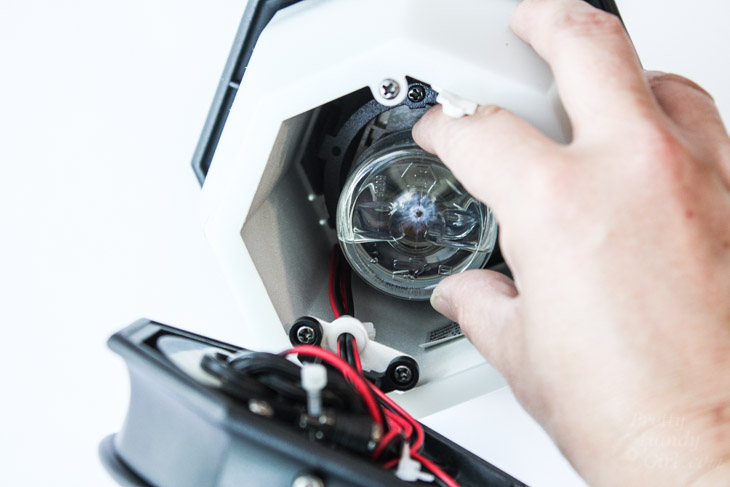
Close the light fixture and tighten the screw.
Repeat for any additional fixtures.
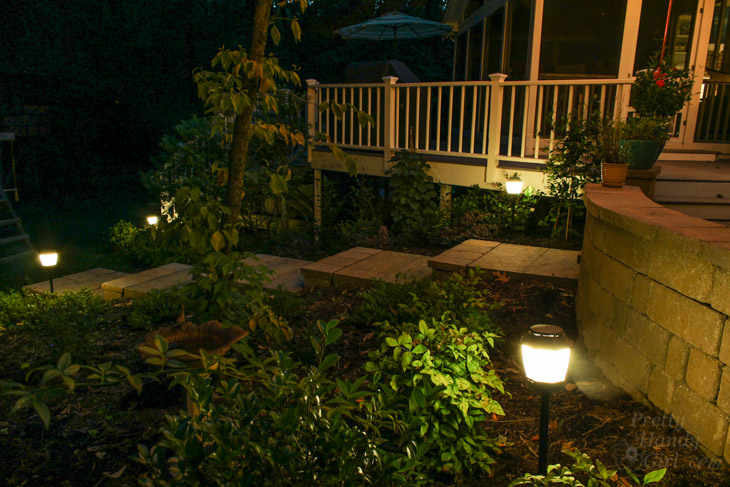
Installing Landscape Lights in Your Yard:
Set the fixtures in your yard and adjust the spacing (leave approximately 10 – 12′ between fixtures.)
When you are happy with the layout. Choose a location for your transformer (must be able to plug into a covered GFCI outlet.) Choose a path to connect your lights. (Ideally you’ll want to use the least amount of wire possible.) Run the first line of 12/2 low voltage wire from the transformer and around each light.
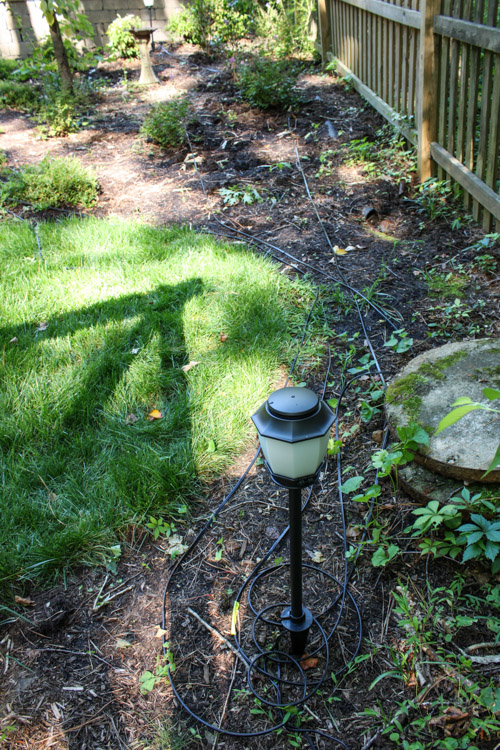
Loosely loop the wire around each fixture. It’s best to allow some slack in the wiring in case you have to move anything. Or to prevent connections from coming undone should someone pull the wire. Wrap colored duct tape around this wire near each fixture. This will label your first wire as the lighting wire.
Run a separate 12/2 low voltage wire around each fixture. Do not put tape on this wire.
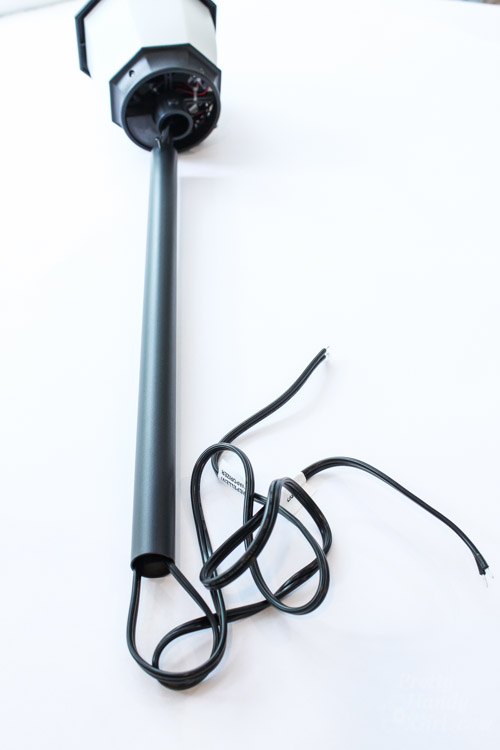
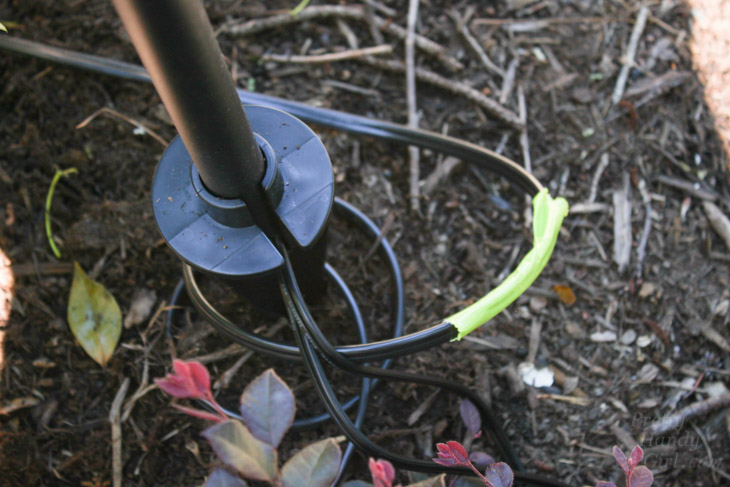
Loosen the screw in the stake and remove the light fixture. Place the provided cap on each stake.
Hammer the stakes into the ground until they are flush with the soil.
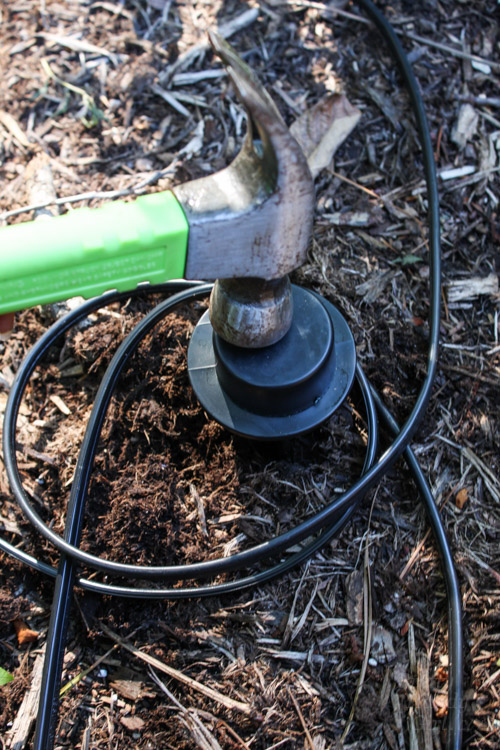
Replace the light fixture into the stake and tighten the screw.
How to Wire Low Voltage Landscape Lights:
Please note that low voltage landscaping light connectors will differ. They are all similar in that there is a connector that has metal prongs to puncture and connect to the low voltage wire cable. The NuTone Haven Backyard Lighting & Mosquito Repellent System requires two separate wires (one for lights and one for repellent.) The Mosquito Repellent-Only fixtures (and most low voltage lights) only require one wire.
Locate the wire that was marked with colored duct tape.
Place some dielectric grease on the wire where you wish to connect the fixture.
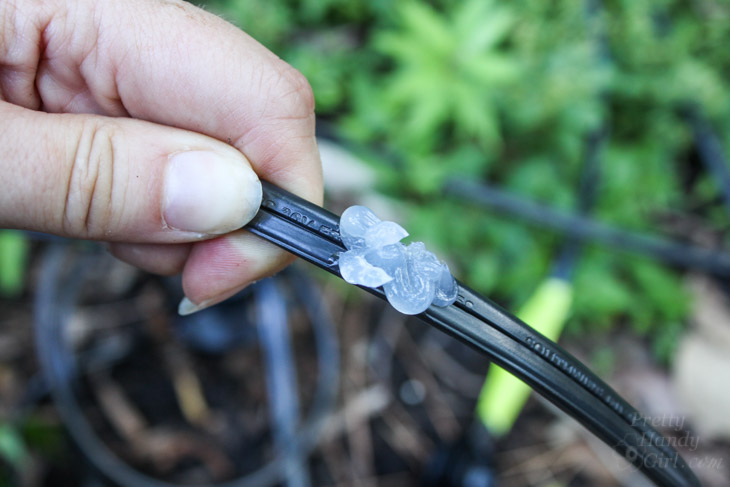
Locate one connector. Unscrew the connector. Press the wire firmly (grease side toward the prongs) into the lower portion of the connector (has metal prongs). (I’m not sure if this is necessary or not, but I made sure the negative prong for all my fixtures was on the side that has writing on my low voltage wire cable.)
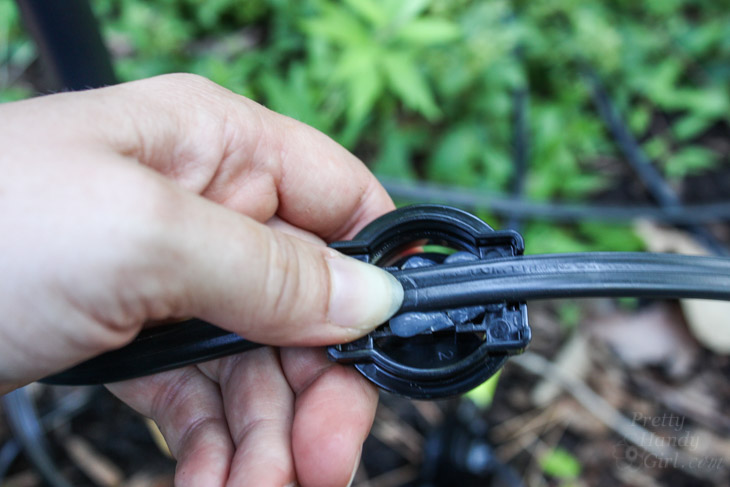
Thread the upper half of the connector onto the bottom portion.
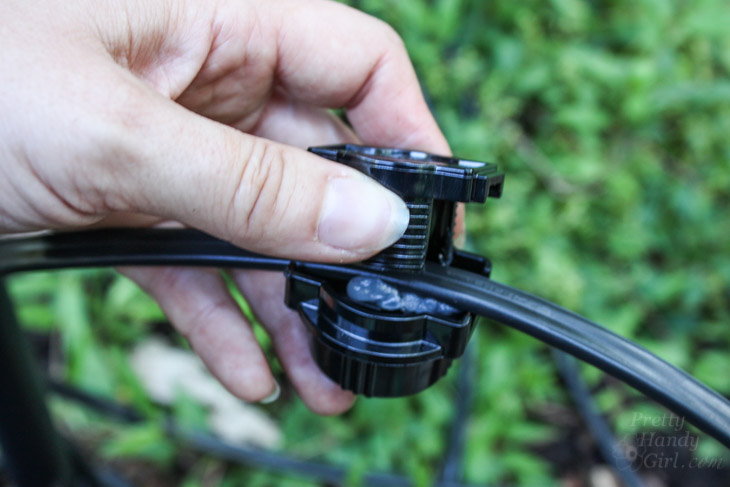
Twist the ring until the connector is tight. To help get a good connection. Tug at the wire to help the prongs pierce the wire insulation. Then tighten the ring further.
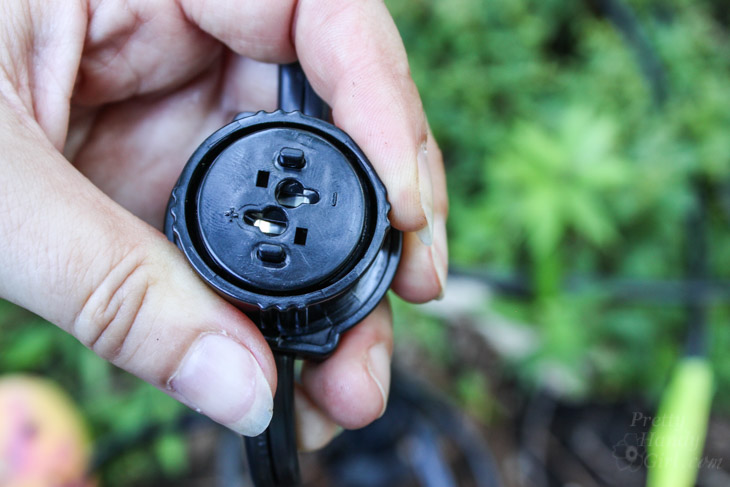
Squeeze some dielectric grease into both holes on the connector.

Firmly press the lighting wires into the slots.
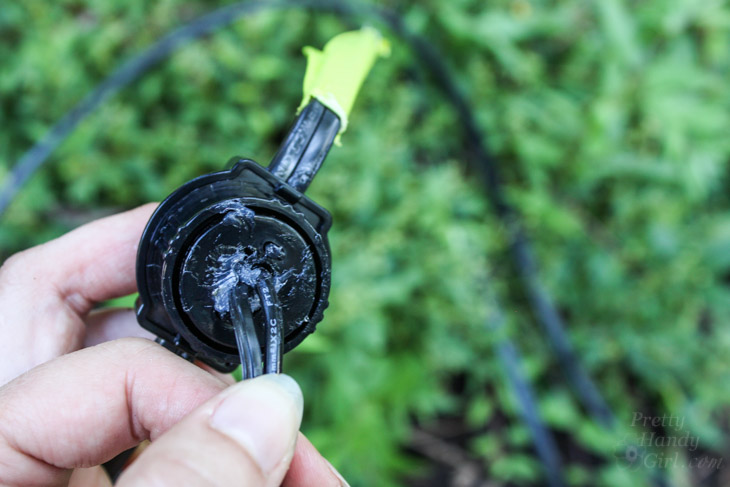
Repeat these steps to connect the repellent wires to the non-marked low voltage cable wire. Connect all your fixtures to the light and repellent cable wires.
Installing the Low Voltage Transformer and Controller:
Install the controller and transformer near a covered GFCI outlet. For ease of connection, you may want to remove them from the mounting screws during wiring. Make sure the transformer is unplugged.
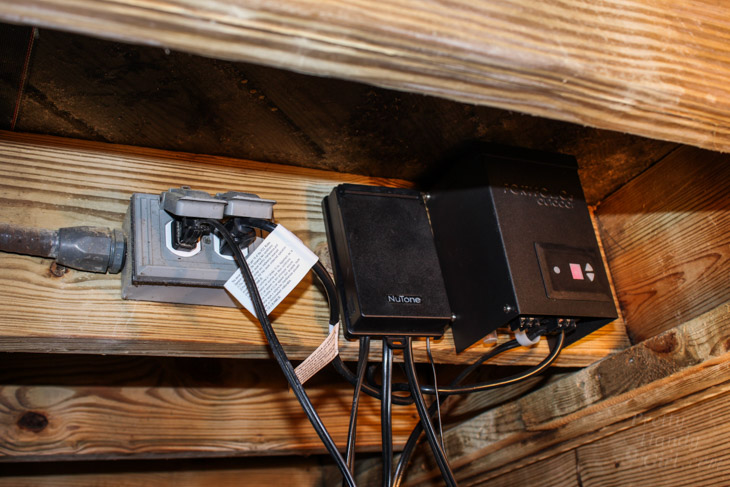
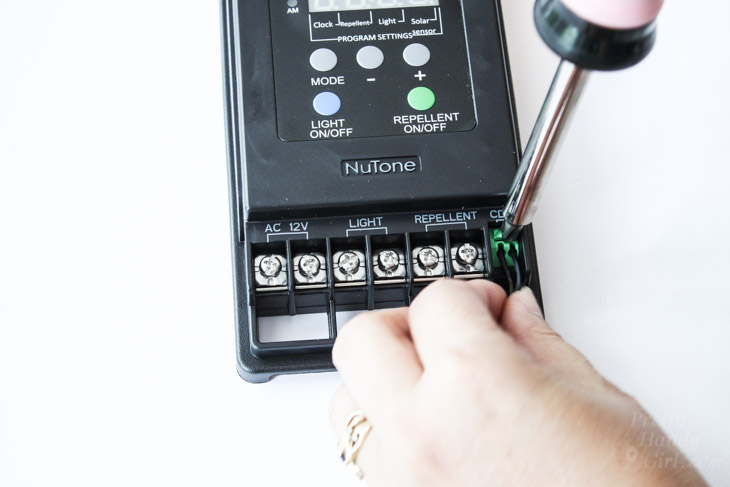
Locate the light sensor. While pressing down on the green buttons with a screwdriver, press both wires into the green “CDS” slots on the controller. Release the buttons and tug gently on the wires to make sure they are secured.
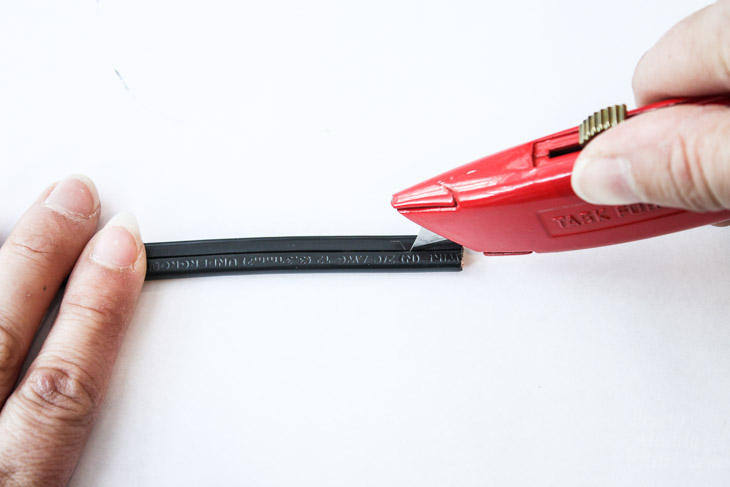
Cut a 12″ length of 12/2 low voltage wire. Split the two wires by scoring the center with a utility knife. Repeat on the other end.
Remove about 1/4″ from the end of both sides of the wire.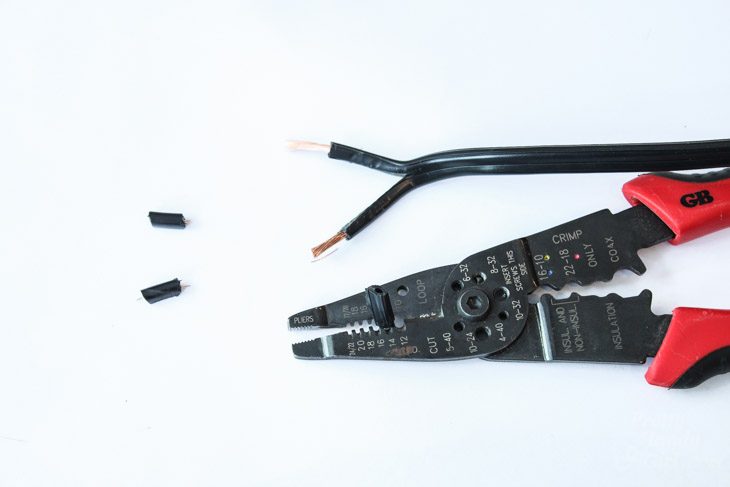
Attach one end of the cable wire to the transformer. Make sure the screws are tight over the wire ends.
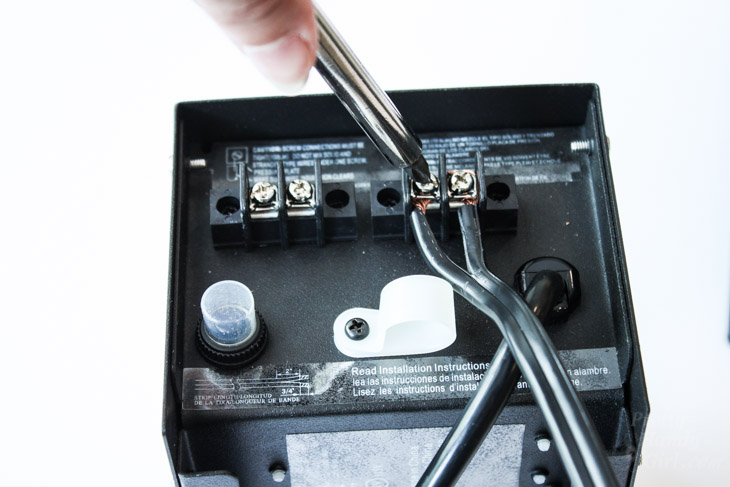
Attach the other end to the “AC 12V” screws on the controller. This will supply the controller with power.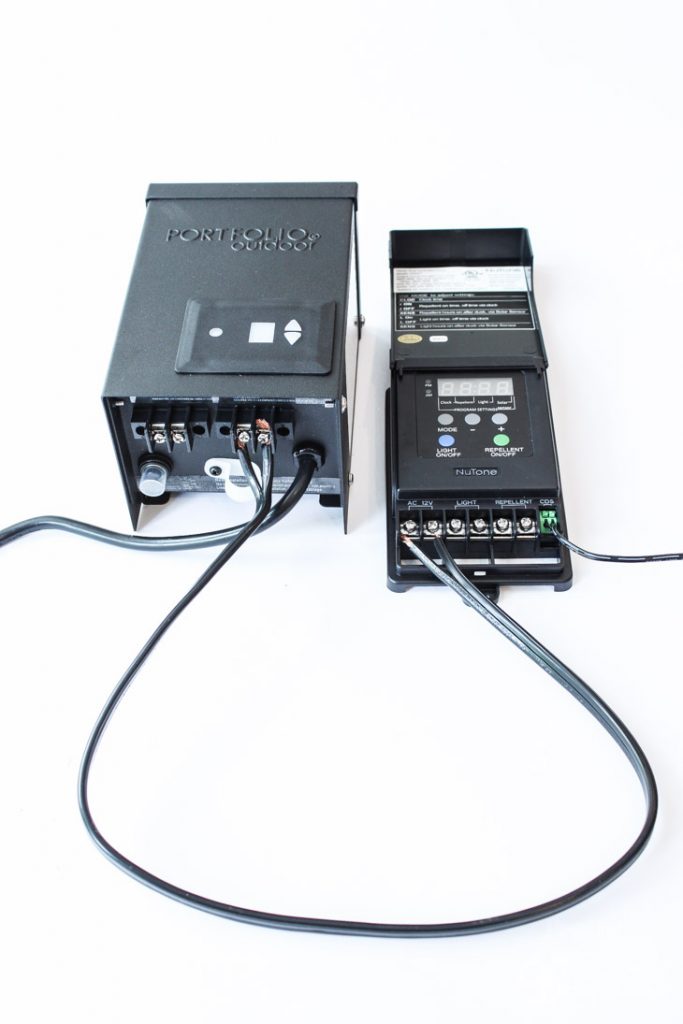
Connect the light wire cable to the “Light” screws on the controller. Connect the repellent wire cable to the “Repellent” screws.

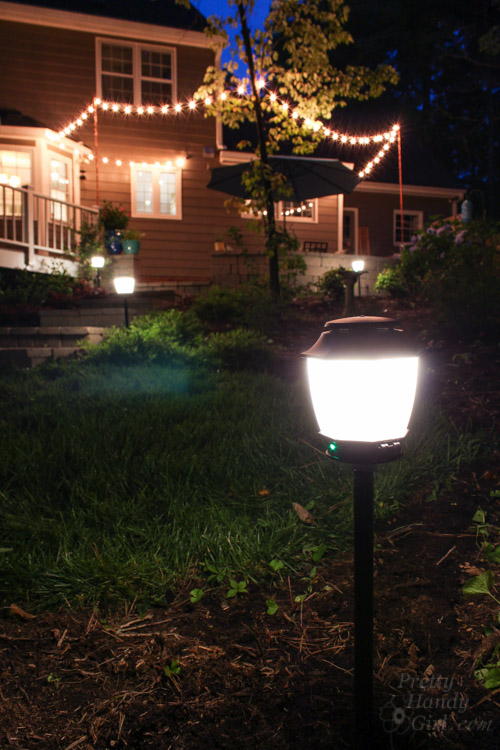
Time to test your lights! Plug in the transformer and turn it on. Turn on the lights by pushing the light on/off button on the controller. Look around your yard and make sure all the lights are lit.
Turn on the repellent by pushing the “Repellent On/Off” button. Check to see if the green light is illuminated at the base of each fixture.
If you have any fixtures that are not lit, check that the connections are tightened completely.
If everything is working, program your timer/controller per the instructions provided with the controller.
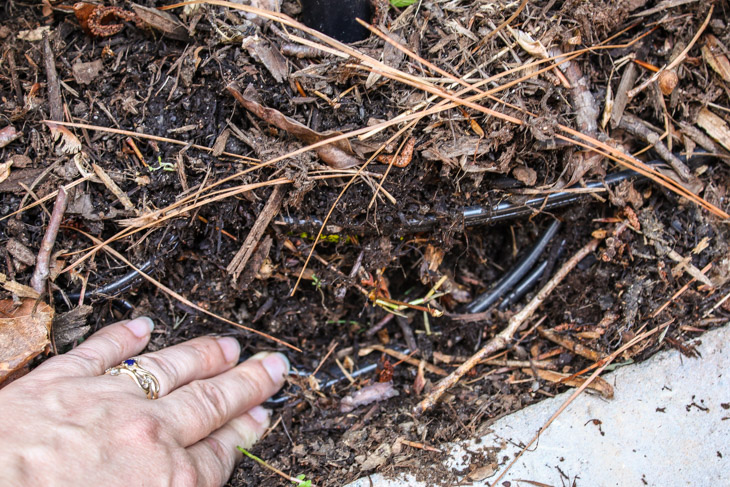
Burying the Landscape Wires:
Use the garden shovel to dig a trench 6″ deep next to the landscape wire (be very careful not to slice the wire.)
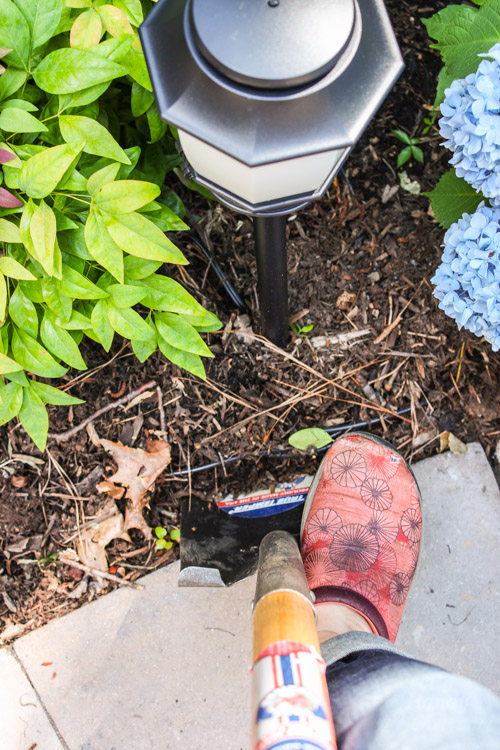
Press the landscape wiring and connectors into the trench and replace the dirt.
Now stick your tongue out and say “Nah Nee Nah Nee Boo Boo, You Can’t Get Me!” to all the mosquitoes.

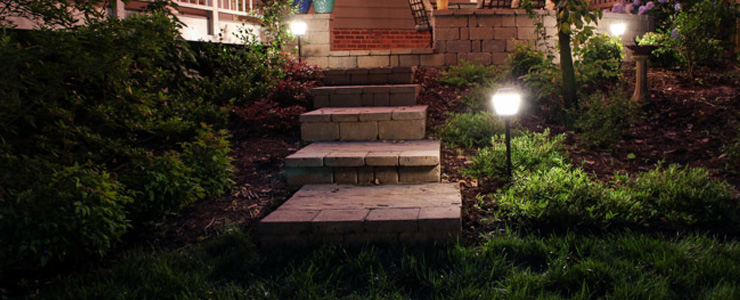
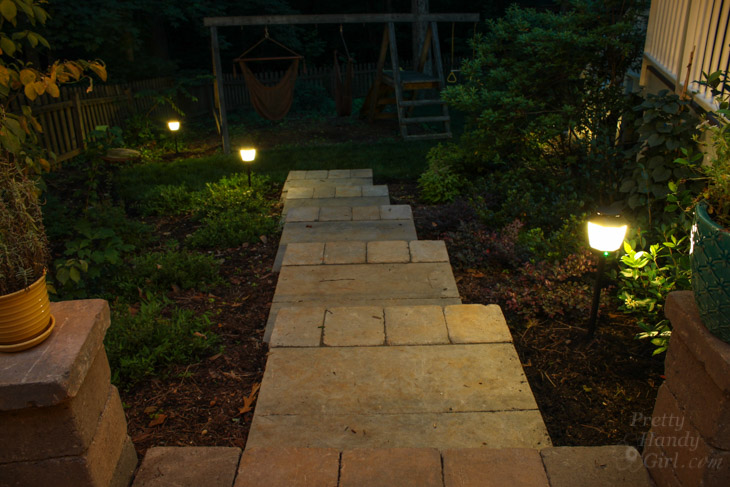
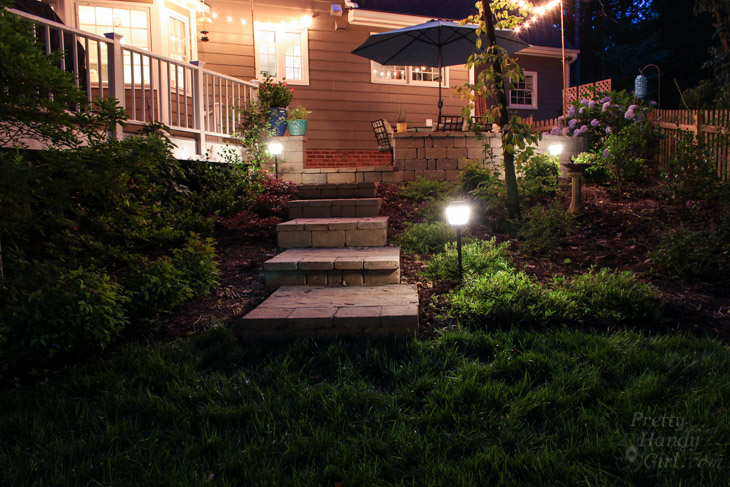
And enjoy your beautifully illuminated yard!
According to the manual that came with the Haven Backyard Lighting and Mosquito Repellant, the repellant will last approximately 215 hours. You control how many hours the repellant is emitted per day which will either extend or shorten the number of days until you need to buy refills.
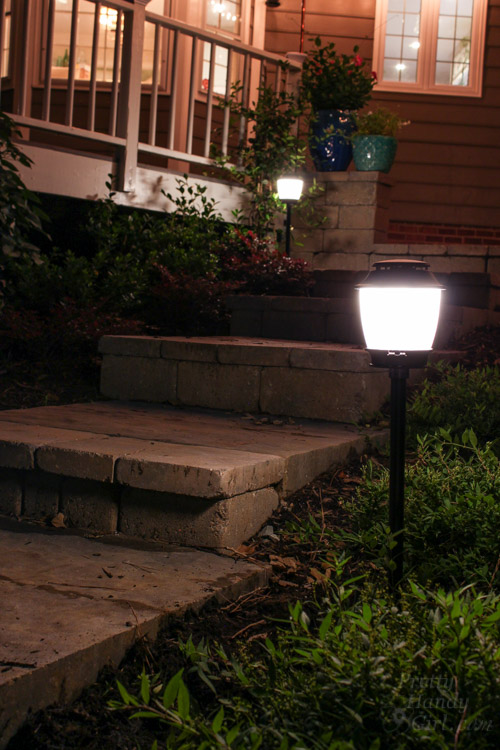
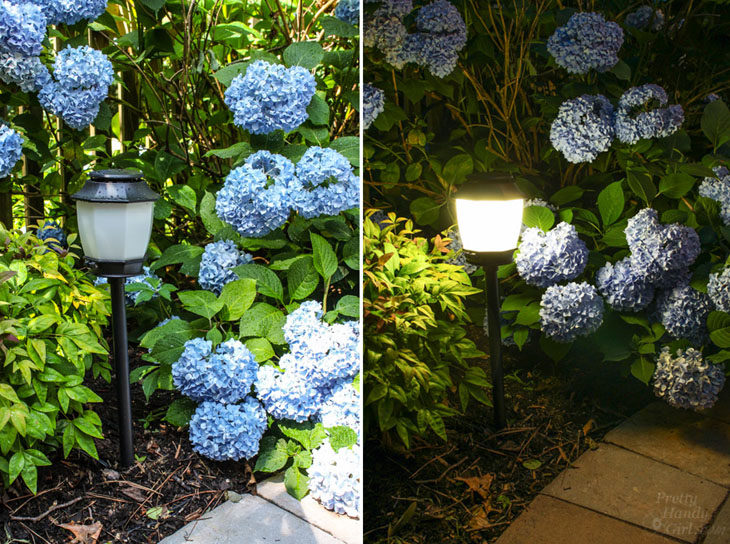
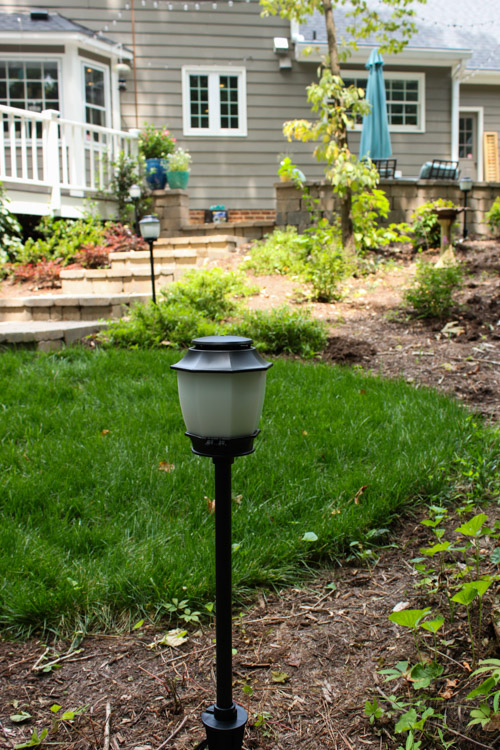
I definitely like the look of the landscape lights when they are lit…
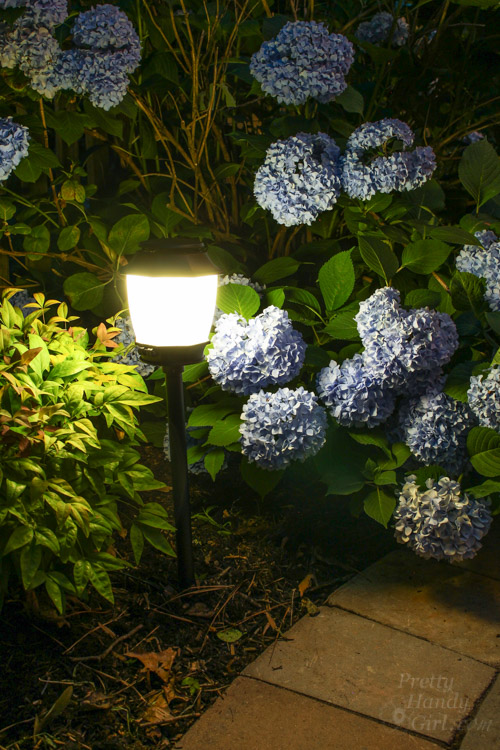
…and not lit.

Do you have a yard that could use some mosquito protection? NuTone has a stand alone repellant fixture. But, personally I like having the 2-in-1 fixture, because who doesn’t love having an illuminated yard at night.
![]()
Disclosure: This is a sponsored post for NuTone. I was provided with the landscape lights and compensated for my time. I was not told what to write. All instructions and opinions are my own. I have not had time to test these fixtures fully, but will write a review at the end of the summer.

I’m researching using the nutone mosquito repellant system. Can you tell me what you thought of it by the end of the summer you used them?
It worked well, but we didn’t replace the repellant. Found it would be cheaper to have our yard sprayed.
Great looking property too. I need to get a covered outlet like the one you have. I have one close enough to perform the job but its exposed.
Can you tell me where you purchased the NuTone lights and how much you paid?
Thomas, you can purchase them from Build.com at this time.
Your site have the right name, because you rock! I was able to follow what you did all the way until you got to connecting to tge transformer. I could never do that. I would sat the house on fire. I wish I was as talented as you are. Thank you so much for sharing. By the way, your landscape is beautiful. I love the idea of repellant in the light. I will have to check it out, but get my brother to help me install them.
Installing low-voltage lights looks quite a bit less complicated than I thought it would be. This might be something I’ll have to consider for my yard – it’s a great way to get exterior lighting without having all the bugs that lights attract on my house.