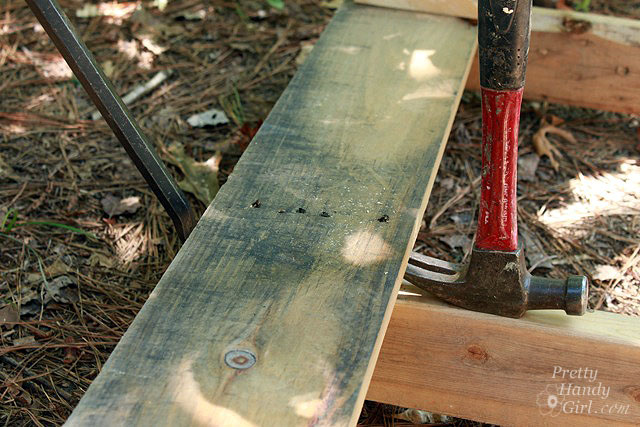
industrial style light DIY

TGIF, TGIF, TGIF!  Can you hear the crowd chanting? Yup, it’s Friday and today we have a real powerhouse of a DIYer in the Talent Parade. Here comes Gina with her baton in hand, she has the crowds on their feet and they are ready for a super transformation.

Before she gets to the grandstand, let me tell you about Gina and her blog: The Shabby Creek Cottage. Gina has single-handedly transformed her mobile into a beautiful cottage space for her family to live in. Seriously, you would never guess that this was a mobile home would you?

Gina’s home is one of my favorite online homes. She uses aquas and whites to create stunning magazine worthy rooms. She is ultra creative and always amazes me with her ability to design unique decor and furnishings.

But here comes that Queen of Transformations herself, so direct your attention to the parade route.

Hi! I’m Gina from The Shabby Creek Cottage – my blog where I share the adventures of transforming our shabby little cottage by the creek. I’m so excited to be hanging out with Brittany today – in real life (at SNAP) and here on Pretty Handy Girl – it’s truly an honor!

lighting before photoThis little light over our kitchen sink was a case of budget over beauty. I dreamt of one of those delicious Anthropologie lights, oozing with quirky style. However we had about $20 instead of $200, so we bought a Home Depot pendant and put a bucket on it – cute, but not quirky.

Anthropologie inspired light fixture I channeled my inner Pooh Bear, and did a little thinking. What did I have that would be me? Quirky, farmhouse, vintage inspired me? Then I remembered the roll of chicken wire I bought for $1 at my local Habitat Restore. Jackpot. The only tool I used was a pair of side cutters.

Chicken Wire Pendant Light Tutorial I cut a piece of the wire off the roll, about 10 inches by 12 inches. Cutting on the lines, I tried to keep the long twisty parts between the “combs” as long as I could to make the next step easier. I cut from the finished outer edge, so it could be the bottom of my shade.

how to make a chicken wire light I lined up the full first full roll of combs on each side to make a cylinder. I took the long twisty pieces where I cut, and wrapped them around the ones on the other side.

chicken wire light tutorial Once my cylinder was secure, I carefully started making a dome by pushing the unfinished edges towards the center. Kinda smush it with your hands to get the shape better.

industrial style light DIY You’ll need to make the hole in the middle work around the sleeve for the light bulb, which is kind of trial and error. Just take the coupler off that holds on the shade, then slide on the chicken wire and replace the coupler.

IMG_3304 You can make it look like a cloche, or smush it all wonky and make it more distorted – totally up to you.

chicken wire pendant light

A 10 minute DIY makes my Anthropologie lovin’ heart flutter…

IMG_3303

It might not be so cute anymore, but it sure is a bucket load of quirky.
Thanks, Brittany, for letting me share my tutorial today!

Seriously, that pendant light is adorable and Gina makes it so easy to replicate! I’m off to reclaim some wire from the chickens. Wait, I don’t have chickens, guess I’ll be heading over to Home Depot.

How are you enjoying the parade this week? Are you ready for more DIY Talent next week? Come back on Monday to see who’s marching down the street. And don’t forget to join the parade with your own talent on Friday with a special DIY Talent Link Party.

How to Swag a Light Fixture


Do you have a chandelier that is a little “off” in your dining room? Do you curse the electrician that didn’t bother to think about centering a hanging light fixture? Yeah, me too! I  had this problem in our laundry room.

Granted, “most people” don’t hang chandeliers in their laundry room, but I wanted to do it. Except there was one problem. The confounded light fixture box was no where near centered on the room or the washer and dryer. Grrrr. Read more

How to Add an Outlet Extender


Today I am going to show you How to Add an Outlet Extender. On Monday I showed you how easy it is to install the Flow Wall panels. The only thing that will slow you down is if you run into a light switch or an outlet. But, that’s easily remedied by cutting a hole in the material.

Materials:

(I’ve included affiliate links for your convenience. I earn a small percentage from a purchase using these links. There is no additional cost to you. You can read more about affiliate links here.)

Difficulty: Easy, but will require using some power tools and turning off the electricity.

Read more

Many of you guessed correctly that I would be scraping my own popcorn ceilings.

It wasn’t hard to do, but it also isn’t for the bad neck or bad back sufferers. Normally I hire out this job — but because our laundry room is so small — it seemed silly to pay someone else to do the work. Now that it is done, I’m really glad I decided to tackle this project. The sense of accomplishment and the resulting smooth ceiling is HUGE!

IMPORTANT NOTE: If you live in a house that was built around 1978, take several small samples of your ceiling and test it for asbestos before you begin. Even though the cutoff date for asbestos in popcorn texture was 1978, the inventory could still be bought from store shelves well into the 1980’s. Do yourself and your family a favor, If you have asbestos popcorn contact a professional who is trained in asbestos removal to handle the job. If you want to learn more, you can read more about our experience with asbestos remediation.


Read more


This past weekend I was able to make some serious progress on our laundry room. Yeehaw! Sometimes in order to make a room pretty, you have to make it uglier first. That was certainly the case with this project. If  you are just joining me, a few weeks ago the nice folks at Flow Wall sent me a custom wall system to install in the laundry room. The FlowWall system of storage will look something like this: Read more