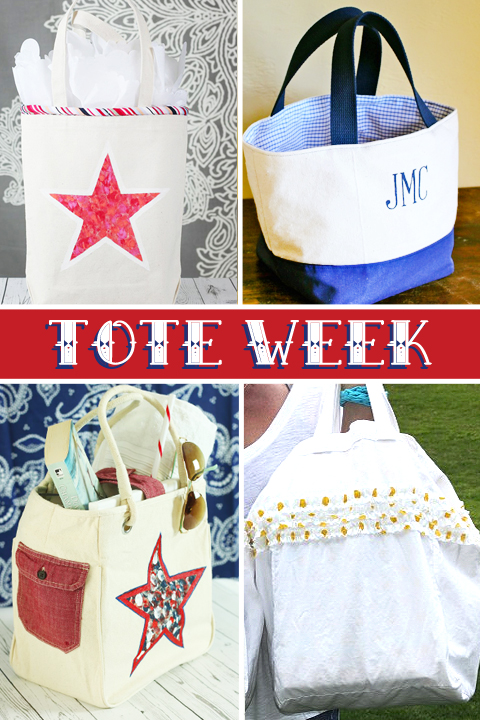
Hey guys! Do you know what today is? It’s the beginning of Tote Week! What, you had no idea? Tote Week here on Pretty Handy Girl is five days devoted to Tote Bags! Learn how to sew adorable tote bags and how to customize store bought tote bags.
If you’re just joining in here’s the line up:
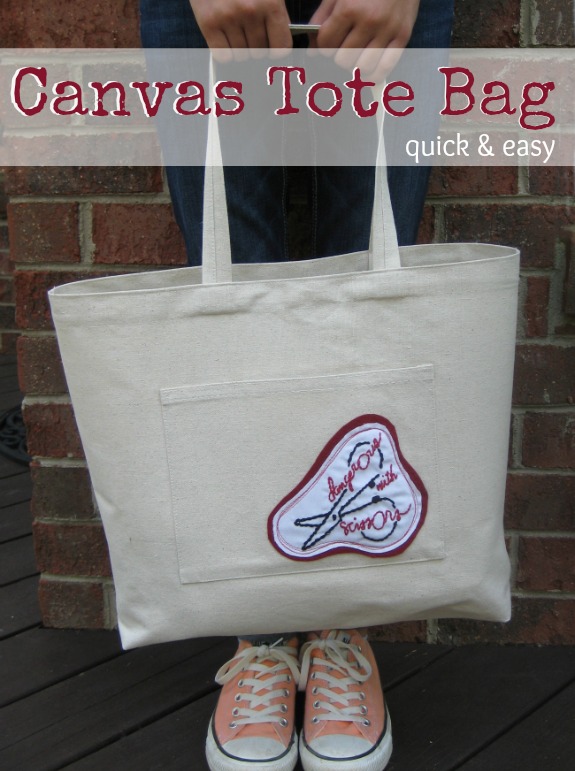
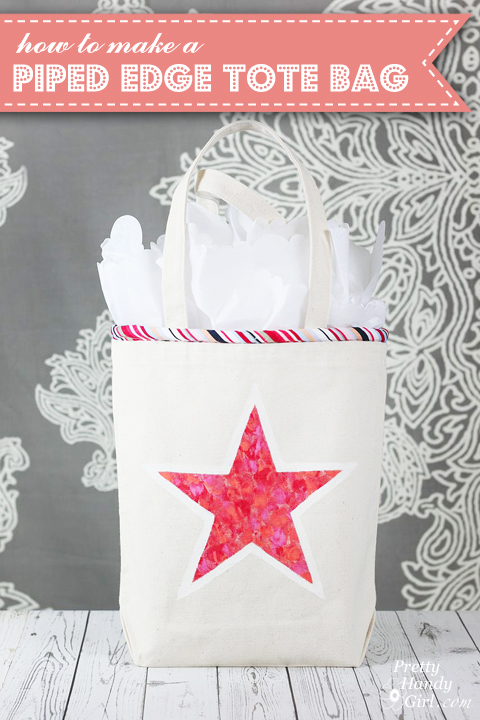
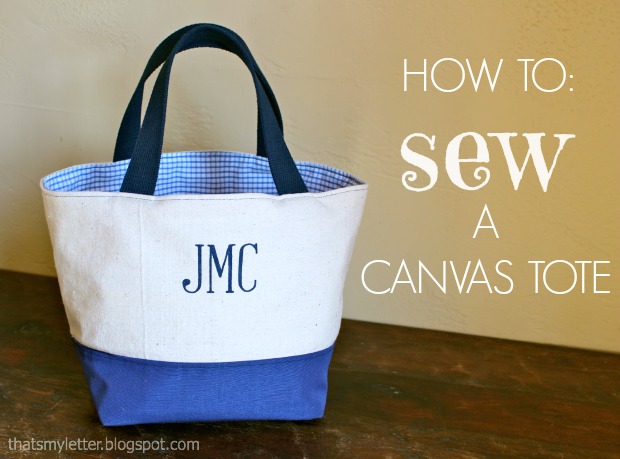
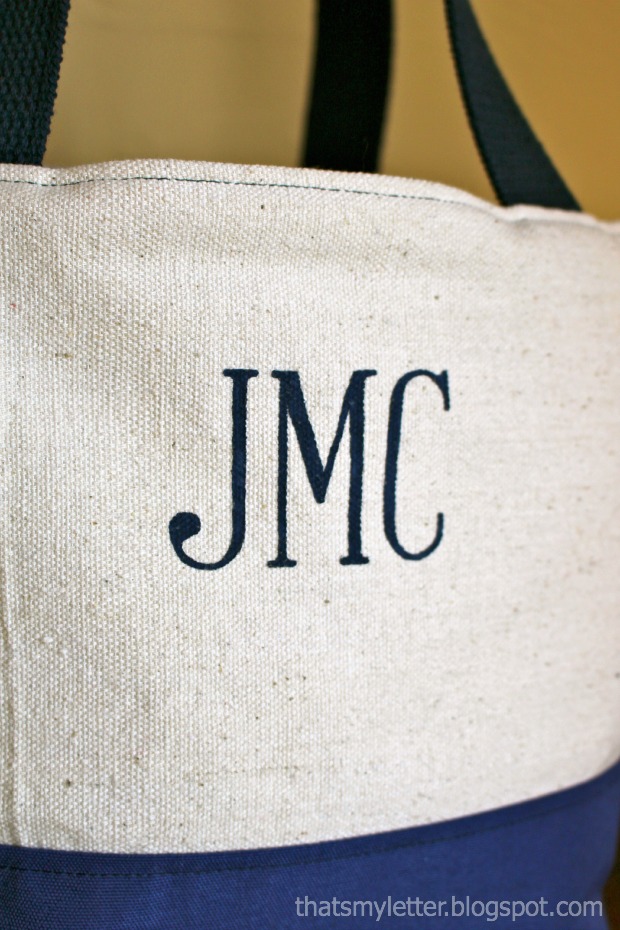
To start us off, Jaime is here to give you the basic sewing tutorial to make your own lined (and monogrammed) tote bag. Jaime is from That’s My Letter, a blog filled with DIY Tutorials. Today, she’s showing you How to Sew a Custom Canvas Tote complete with painted monogram:

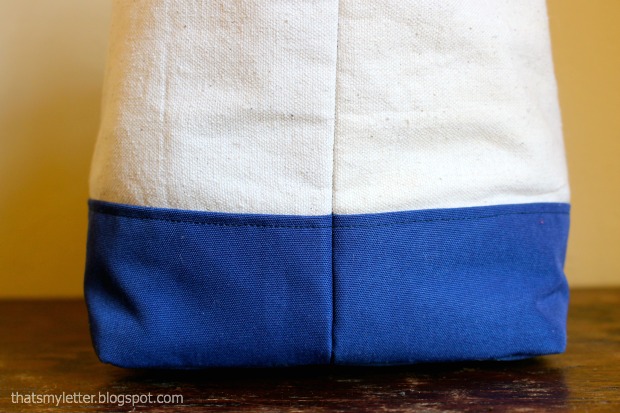
This tote makes a great everyday bag or purse, just big enough for all the important stuff but not too bulky. The finished size is 16″w x 9″h x 8″ square at the base, and the handles extend about 6″ in height.

The tote is fully lined and includes an interior zippered pocket. The zipper is easy as pie I promise! I’ll show you how down below.
You can add any monogram or name to personalize the tote. Then you’ll be making canvas totes as gifts for all your friends.
The square base makes for a nice wide tote and the canvas is super durable:
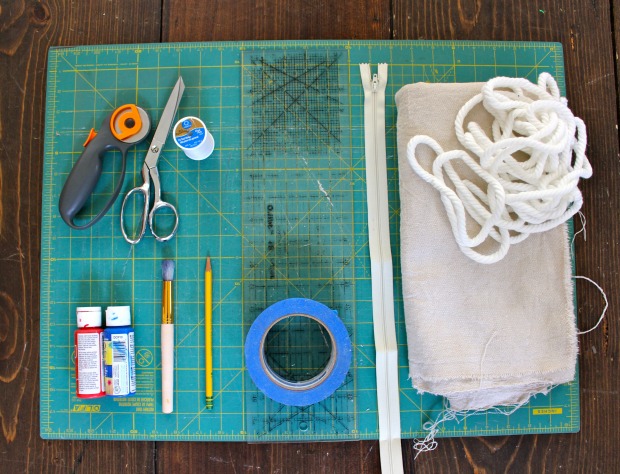
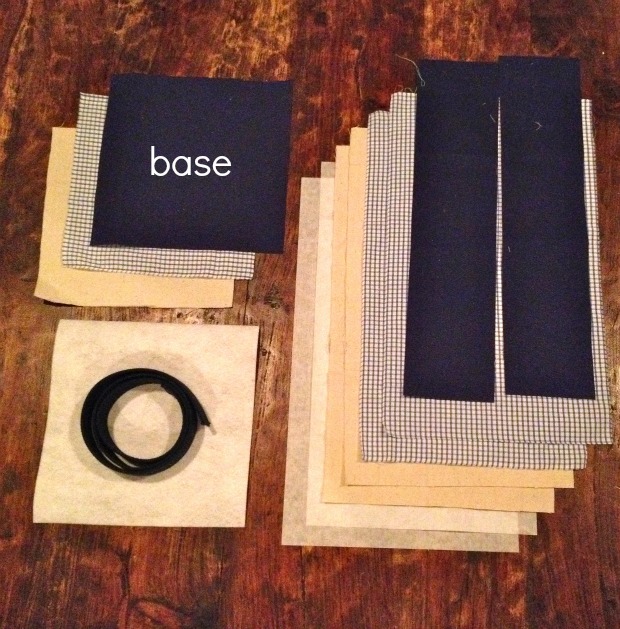
Materials:
- drop cloth canvas (1 yard)
- blue canvas (1/2 yard outdoor patio fabric Sunbrella or the like)
- lining (1 yard)
- medium weight fusible interfacing (1 yard)
- firm interfacing – 9″ x 9″
- 1 1/2″w cotton webbing (1 yard)
- 9″ zipper
- lightbox
- small paintbrush
- acrylic paint
- sewing machine, thread to match, iron, seam ripper
Materials Cut List:
Base:
- 1 – blue canvas 9″ x 9″
- 1 – lining 9″ x 9″
- 1 – drop cloth canvas 9″ x 9″
- 1 – firm interfacing 9″ x 9″
Body:
- 2 – drop cloth canvas 10″h x 17″l
- 2 – med. fusible interfacing 10″ x 17″
- 2 – lining 10″ x 17″
- 2 – blue canvas 4″h x 17″w
Handles: 2 – 1 1/2″w cotton webbing @ 17″l
Instructions:
Step 1: Cut materials (see cut list above).
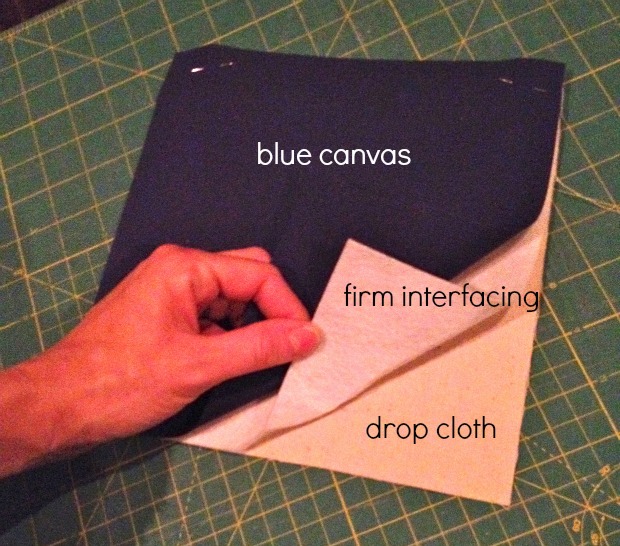
Step 2: Prepare base. Sandwich drop cloth, firm interfacing then blue canvas. Read more