Want to make a lamp shade that will bring some style and bling to your home? All you need are a few mosaic tile sheets, a lamp shade top piece, and some thread. In no time you’ll have a beautiful Mosaic Tile Lamp Shade!
Materials:
(I’ve included affiliate links for your convenience. I earn a small percentage from a purchase using these links. There is no additional cost to you. You can read more about affiliate links here.)
- Scissors
- Needle
- Thread
- Lamp shade with a separate top ring
- Paper towel roll
- Mosaic glass tile sheets
Instructions:
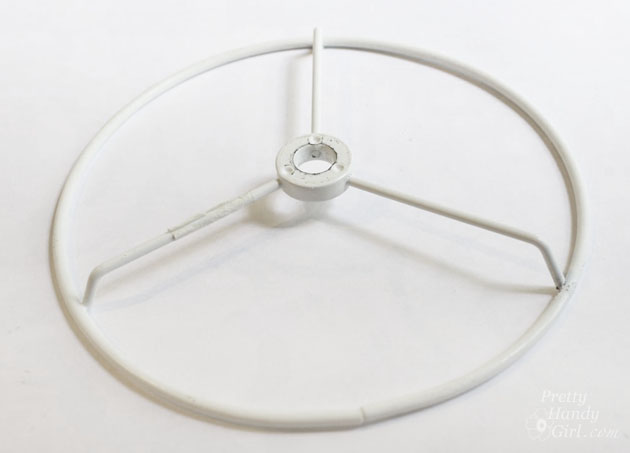
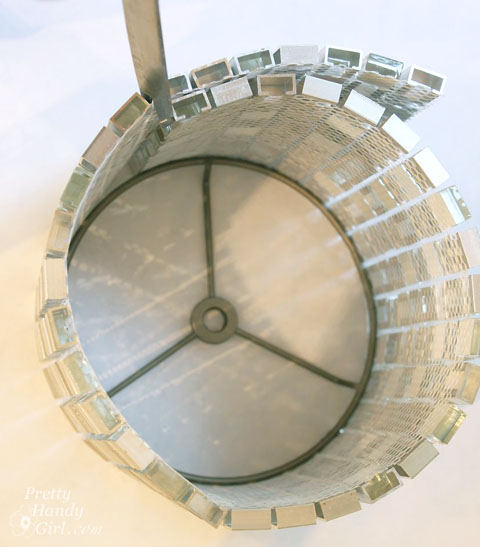
Cut up the lamp shade to expose the top ring.

This is what you should be left with:
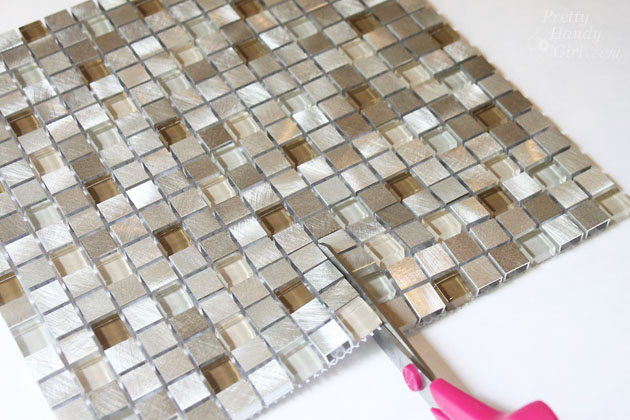
Lay out your mosaic tile sheets. Cut the mesh to the height you desire for your lamp shade. The lamp shade I created was small, therefore I only needed a 6 inch height to cover the lamp bulb.
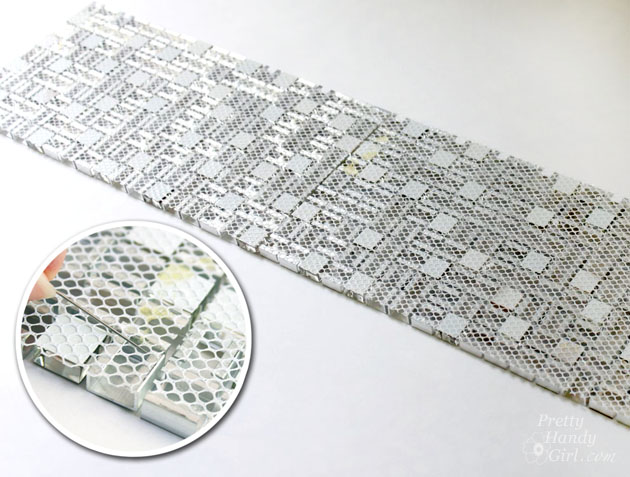
Lay two sheets of the tiles side by side and stitch the two sheets together at the seam from the mesh side.
Wrap the tile sheet around the lamp shade top ring and trim the excess tiles off.
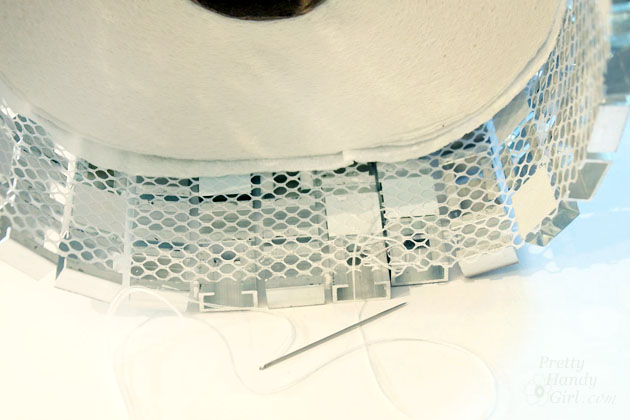
Stitch the open ends together. I found it easiest to slip a paper towel roll into the center to support all the tiles while stitching it.
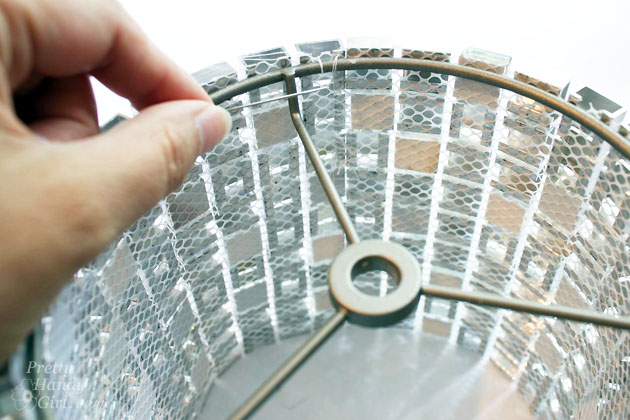
Stitch the lamp shade ring to the top of the mosaic tile tube. Loop the thread through the tile mesh and the lamp shade ring around the entire circumference.
Your lamp shade should look something like this:

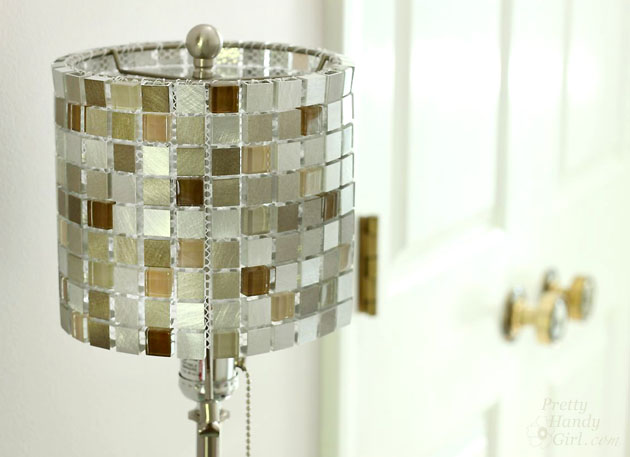
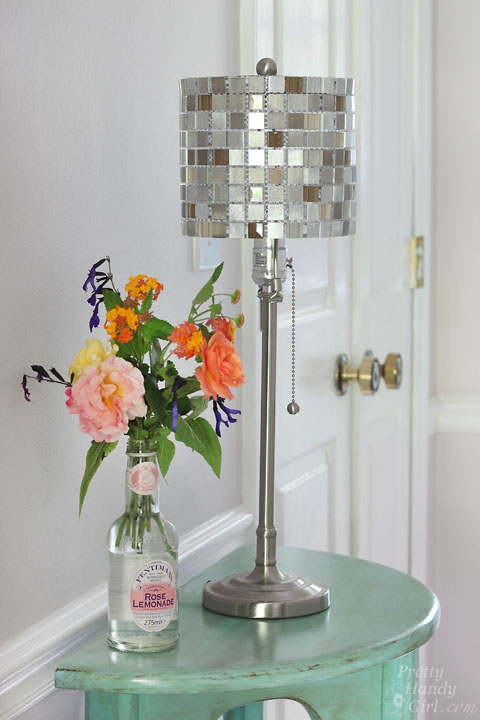
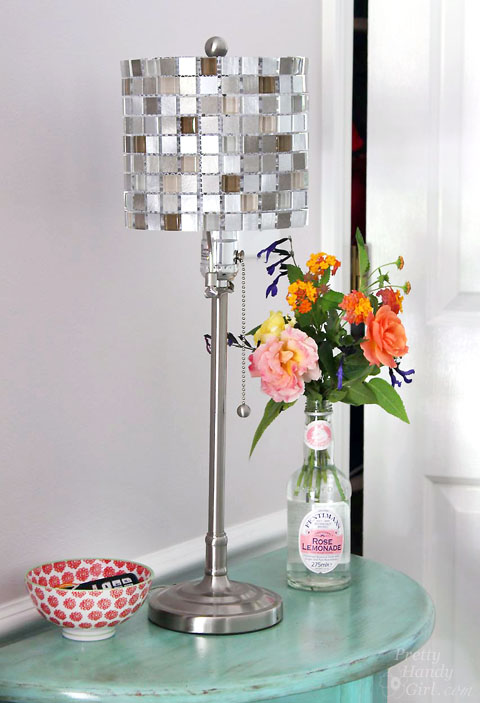
Attach your lamp shade to the lamp and admire!
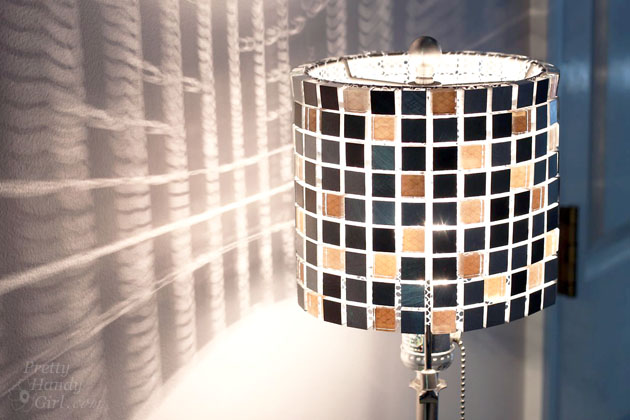
Lights out…
…and lights on. I love the shadows cast by the tile lampshade.
Enjoy a unique and beautiful lamp shade in your home. The mosaic tile lamp shade adds a touch of class and bling to our mudroom.
![]()
Want more creative lighting ideas? Subscribe to the Lowe’s Creative Ideas magazine:

Or view more creative ideas from the Lowe’s Creative Idea bloggers !
There’s also a magazine app so you can have inspiration on the go! And, don’t forget to follow Lowe’s on Pinterest or on Instagram!
 Disclosure: As a #LowesCreator, I was provided with a Lowe’s gift card to purchase supplies for this post. I was not told what to write. All ideas and words are my own.