Sew Star Pillows
Making Red & Blue Star Pillows

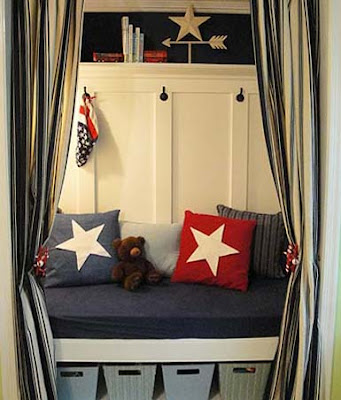
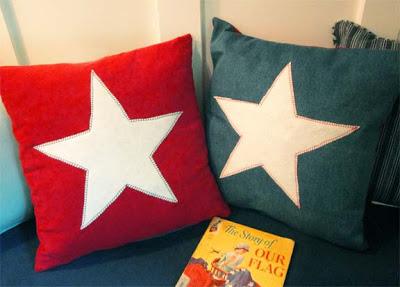
If you read yesterday’s post, you saw two star pillows on my son’s reading nook bench. I promised you the tutorial, so here it is:

These were super easy to make. I made two pillows in just over an hour on my Brother CS6000i sewing machine. This was a great Mother’s Day present from my hubby 2 years ago. (Last year he bought something most men would swoon over – A 10 inch sliding dual bevel compound miter saw. I just love saying that long name!)

This sewing machine is very reasonably priced at $125 and it has loads of decorative stitches!

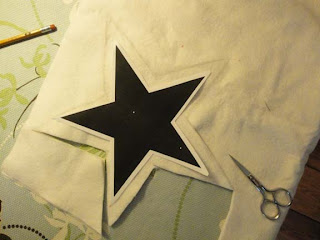
The first thing I did was print out a star symbol from the computer as large as I could on letter size paper. (Look through your dingbat fonts if you can’t find a star. Mine is Option + H when using zapf dingbats font. But, yours may differ. Or better yet, google star in the images tab.)

Then I traced the star slightly larger than my print out onto white felt. Be sure you are using sharp scissors when you cut the felt or it will tear.

Making Red & Blue Star Pillows

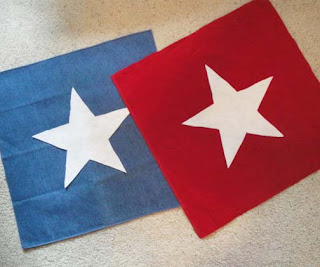
Luckily I had leftover fabric from some pillows I made for Christmas presents and 2 denim cloth napkins handed down to me from my super stepmom!

I simply cut out two squares of red corduroy the same size as the napkins. At this point I should have ironed my fabric, but I was too impatient to finish sewing these starry stunners.

Making Red & Blue Star Pillows

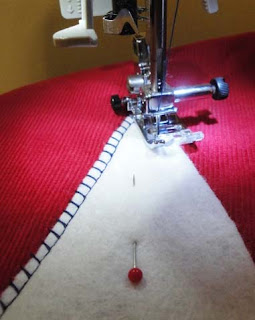
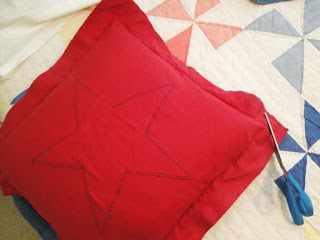
I laid out the stars on the center of the fabric (one on blue and one on red.) Then pinned them in place and stitched the stars onto the fabric.

Making Red & Blue Star Pillows

I used this decorative stitch (I don’t know the name of it…can anyone tell me?), because it made it looked hand-stitched. I used red thread on the blue denim pillow and navy on the red corduroy pillow.

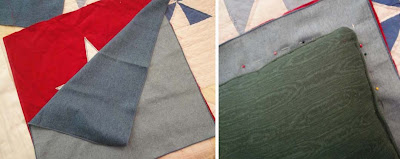
Then I matched up one denim napkin with the red corduroy star front and vice versa for the denim star pillow. After laying out my pillow (gotta love that I kept those hunter green pillows from the 90’s!) on top of the fabric, I pinned the fabric right sides together forming a guide for where my seams would be.


Next I straight stitched the sides together leaving an opening, about half the width, at the bottom to stuff the pillow inside. I checked to make sure the pillow fit before I turned it right side out. Then trimmed my extra salvage edges and made 45 degree cuts at all corners. At this point, I turned the pillow case right side out.

Making Red & Blue Star Pillows

I used the blunt tipped scissors to poke the corners out (broken tipped pencils or other blunt pointy objects work just as well. Wow, that sounds like a murder weapon.) Then stuffed my pillow back inside and pinned the bottom of the pillow together.

Last, I stitched a straight stitch as close to the bottom of the pillow as I could to seal the open edge.

And that is my super-duper, easy and quick guide to creating star pillows.

Making Red & Blue Star Pillows

But, who says you have to make star pillows. Get inspired to make your own pillows! Here are some other ideas:

Poinsettia pillows made with corduroy and felt on Centsational Girl’s blog.  I loved the combination of the textures and the graphic images.

Or adorable pet silhouette pillows. I made a dog portrait pillow for my pretty handy sister and my super talented mom (who both coincidentally own black dogs.)

Next up will be a tutorial on rewiring and adding a switch to the copper wall sconce lamp that hangs in the closet turned reading nook project, that I bought from the Habitat for Humanity ReStore!

Inspired by:
Visit thecsiproject.com
Check out some other Independence Day inspired projects on their site.


and


Project completed just in time to participate at Centsational Girl’s
Check out other Independence Day themed projects on her site as well!


Happy Fourth of July!

Now that my re-upholstered office chair is complete, I wanted to address the dark looming bookcase that I sit next to. I am obsessed with natural light and the color of a room can really effect my mood. We recently painted our office and had ceiling lights installed in the ceiling. Anyone else out there have one of those old houses where the light switch on the wall controls the outlets? I HATE this! Let there be light in all my rooms. Let’s talk about a Quick and Easy Bookcase Facelift.

Now that we have light in the ceiling, I also want to be sure that I take advantage of natural light as well. The majority of the furniture in our office is a dark cherry color. Bookcases, armoires and other recessed furniture will absorb light. I knew I wanted to lighten up the back of the bookcase, but didn’t want to paint it or do anything to destroy the value of the furniture. So, I set to work on this super quick and easy project, making decorative backer boards for the bookcase.

Materials:
Foamcore (32″ x 40″ made 3 backer boards)
Decorative Fabric (leftover from my chair upholstery project)
Batting
Scissors
Hot Glue Gun
Cutting surface
X-acto knife and fresh blade
Metal Ruler (or ruler with a metal edge)
Pencil
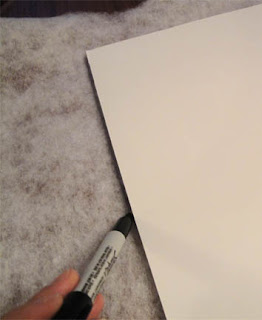
Sharpie Marker

First measure the bookcase cubby dimensions.

Next draw out the dimensions on a large piece of foamcore.  Then lay your foamcore on top of your cutting surface. Personally I like the self healing cutting mats. I use them for everything (matting, paper cutting, sewing, craft projects, etc.) I recommend buying at least a 24 x 36″ size. You can find them for about $40 here: https://www.jerrysartarama.com/discount-art-supplies/Mat-and-Paper-Cutters/Creative-Mark-Self-Healing-Cutting-Mats.htm

A Note on Safely Using an X-acto Knife:

First, be sure that you always use a clean and new x-acto blade while you are cutting foamcore. Otherwise, the blade will catch on the foam interior and tear up your board.  I learned the hard way how to use an X-acto knife while in art school. Let’s just say I’m glad that thumb tips grow back. Always use a ruler that is metal or has a metal edge. When holding your ruler, be sure your fingers are WELL AWAY from the edge of the ruler you are cutting on.

Try to cut with your blade on the waste side of the piece you are cutting. That way if the blade slips, it will mess up on the waste edge. For cutting foamcore or mat board, use light pressure and pull your blade through the material and towards you. You will need to make several light cuts until you are through the material completely. You will get a cleaner cut this way as opposed to using heavy pressure and try to cut through your material in one pass.

If your board is larger than your cutting surface, cut half your foamcore, then move the board on the cutting surface to protect the floor or furniture you are cutting on.

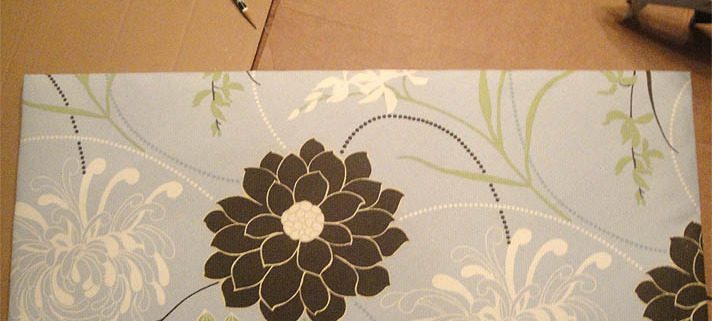
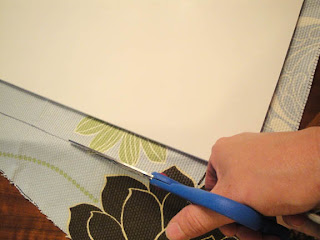
If you successfully cut your foamcore backer boards and still have all your fingers, you can now lay your decorative fabric on top of the foamcore. I played with the placement to make sure I liked the pattern that would be shown. Then trace a 1″ border around the boards and cut the fabric.

Next you will want to trace your backer board on top of the batting (no need to add a 1″ border on the batting. Just trace to size.) Then cut the batting.  Lay your fabric right side down, then the batting, and finally put your foamcore backer board on top.

Heat up your glue gun. While you are waiting for it to heat up, trim the corners on your fabric. Trim about 1/2″ away from the corner. This will help you neatly fold your corners when you glue them.

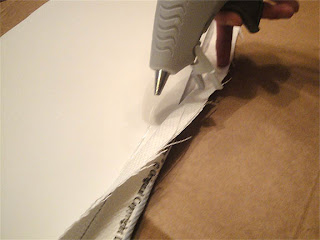
Run a line of glue on the edges of your backer board and fold your fabric over on top of the glue.

When you are done, flip over your board and admire.

Now comes the super easy part! Walk over to your bookcase and insert your backer boards. Tilt the top in first and then push in the bottom. The fabric and batting should allow the board to stay in with tension. Plus, the great thing about using foam core is that it will crush slightly to fit your space.

AND, if you want to use it as a bulletin board you can! I’ve been thinking about using the leftover decorative nail head trim nails (from my chair upholstering project) as push pins. But, for now I’m enjoying the lighter back of my bookcase! And, loving the way it coordinates with my desk chair.