Seaside Theme Bathroom Refresh #LowesCreator | Pretty Handy Girl

Seaside Theme Bathroom Refresh #LowesCreator | Pretty Handy Girl

You know those projects that you complete 80% of the room and think to yourself, “This is good for now. I’ll do the rest in a day or two.” Yup, the boy’s bathroom was one such 80 percenter. I finally took the time to finish the last 20 percent of this bathroom makeover by giving it a refresh with some paint and new knobs.

The bathroom used to look like this:

Seaside Theme Bathroom Refresh #LowesCreator | Pretty Handy Girl

But, before that, it looked like this:

I find it comical that I took an underwater themed bathroom and gave it a seaside retreat feel. I guess you could say I pulled this big whopper from within the ocean and laid it out on the beach. LOL.

Let’s break it down now. Here’s how to paint a bathroom vanity so it will withstand the abuse of two young boys: Read more

Farmhouse Painted (chalk like paint) Jar Vases | Pretty Handy Girl

Farmhouse Painted (chalk like paint) Jar Vases | Pretty Handy Girl

Two weeks ago was Teacher Appreciation Week at my son’s school. Every year I have a bit of a knee jerk reaction to this week. Is it because I don’t appreciate my sons’ teachers and administrators? Definitely not true! I appreciate them more than I can ever show. It’s a joke in our house that if I homeschooled, we probably wouldn’t have children. We all need that time away. And, my kids are so headstrong, that they learn much better from talented educators that don’t tuck them in bed at night.

So, why you ask do I have a knee jerk reaction? Let me explain.

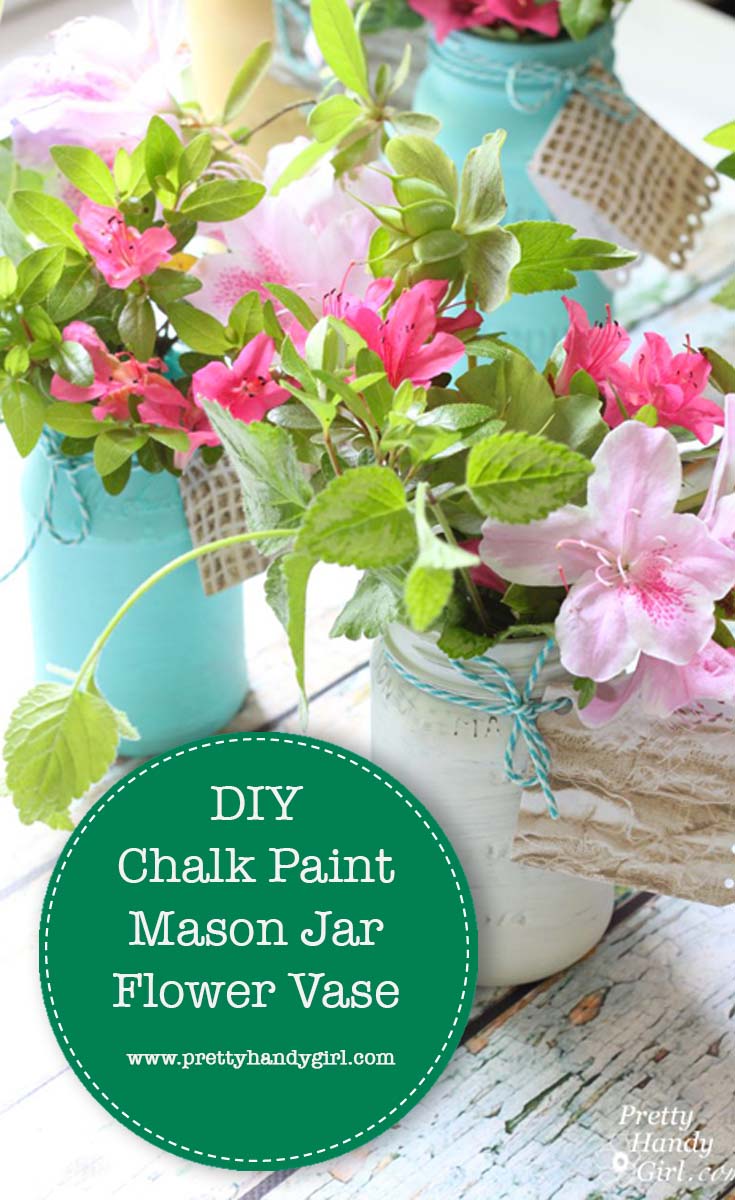
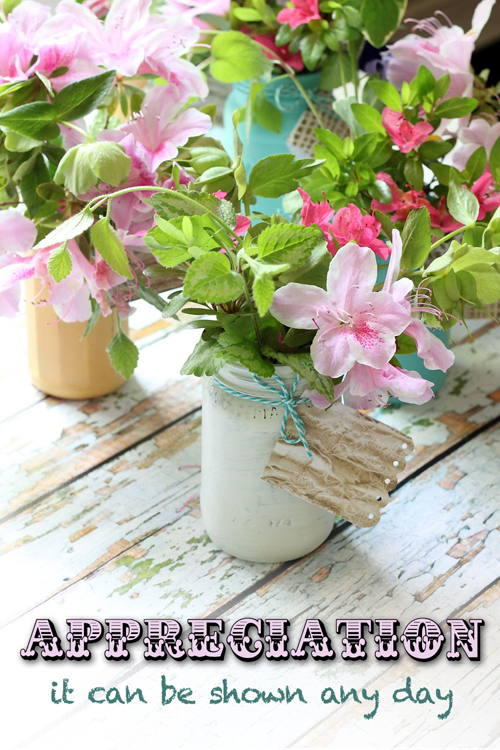
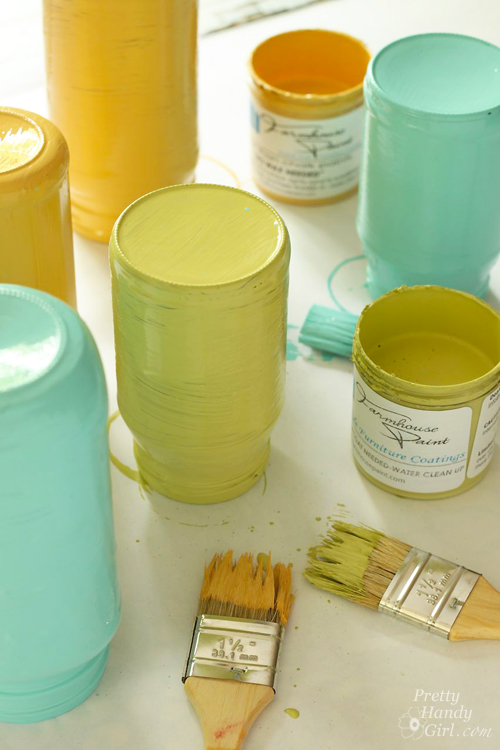
Two weeks ago I spent less than 20 minutes whipping up some really cute vases using recycled jars painted with Farmhouse Paint. Wait…What is this paint?

Farmhouse Painted (chalk like paint) Jar Vases | Pretty Handy Girl

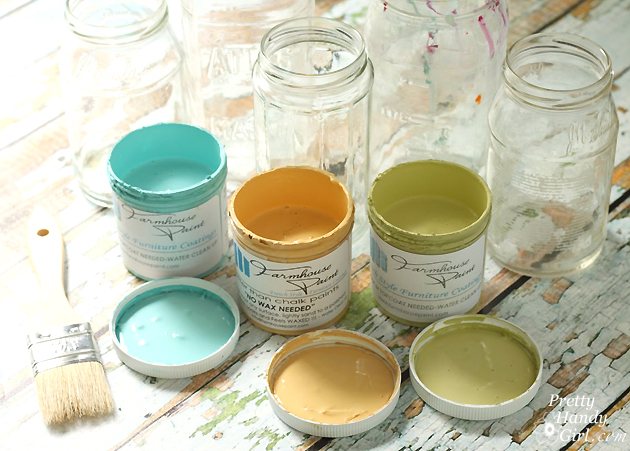
Well, it’s “paint formerly know as chalk paint”  (don’t even get me on the soap box about everyone else not being able to call it chalk paint anymore because a particular company has trademarked the name. I mean, that’s like saying that no one can call it latex paint anymore because Brand X trademarked it. Sorry, I get riled up easily.)

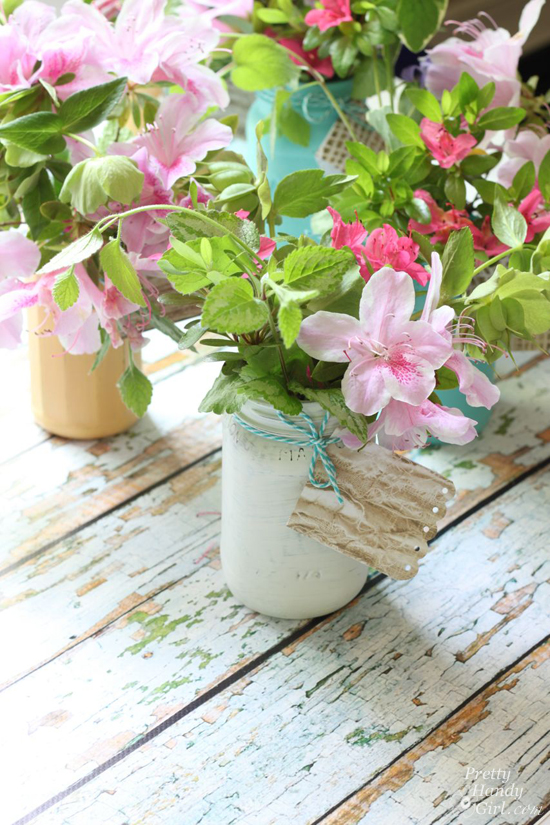
Anyway, back to my story, I made these adorable little vases by saving up a bunch of recycled jars.

Farmhouse Painted (chalk like paint) Jar Vases | Pretty Handy Girl

Then I painted them with two coats of Farmhouse Paint. I’m in love with this paint. The colors are vibrant and you don’t need to wax after painting. Just a light sanding with fine grit sandpaper and it give you the same soft sheen as waxing would.

Farmhouse Painted (chalk like paint) Jar Vases | Pretty Handy Girl

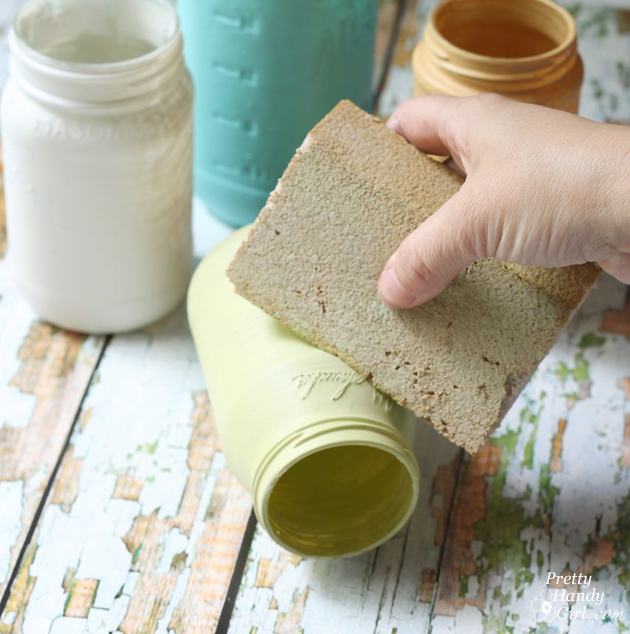
After the paint has dried I sand some areas (especially on any writing).

Farmhouse Painted (chalk like paint) Jar Vases | Pretty Handy Girl

Finally, I added some fresh cut flowers from my yard and tied a string around the neck with a personal message.

Farmhouse Painted (chalk like paint) Jar Vases | Pretty Handy Girl

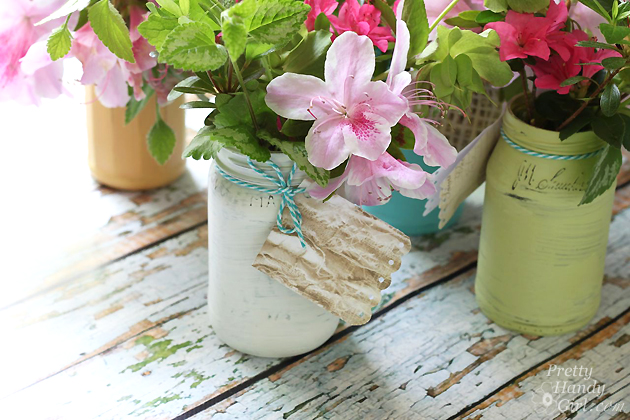
These little vases were adorable. They were cute and they seriously took me less than half an hour to put together (20 minutes to paint and a few more minutes cutting flowers in the yard.)

When I arrived at school, I began distributing the flowers. First the principal’s office — her desk was filled with more flowers vases than a florist’s counter. And the overflow was on her conference table.

     Farmhouse Painted (chalk like paint) Jar Vases | Pretty Handy Girl

The assistant principal’s desk had the same overcrowded vase problem.

I made my way around to my sons’ classrooms. Tins of cookies and more vases littered their desks. I was sad. Although I knew they appreciated the kind gifts, it must be overwhelming to get everything on one day or one week of the school year.

After the week is over and the cookies are gone, what is there? Nothing. Desks filled with papers to grade of course. But, no gifts; no notes of appreciation; no flowers…nothing.  That appreciation day is long forgotten.

That’s why I’m doing something different next year. Heck, I might even do some appreciating at the end of this school year!

Where are the gifts and flowers during the first week of school when the kids are scared, tired, disappointed, weepy for their Mom and Dad? Where are the gifts when the principal and other administrators have to deal with outraged parents because the school bus didn’t come on time to pick up their child? Or worse yet, what about the day after a weeknight Halloween? I know the children pour into their seats sleep-deprived and burned out after a high sugar evening. Heaven help me this year when Halloween falls on a Friday night. I might check into a hotel for two nights.

Anyway, I’m vowing to appreciate the staff and teachers at my sons’ school on any old ordinary day from now on. I’m sure that a small recycled jar turned into a sweet little vase of flowers will surely brighten the day of one tired educator. I may even slip a little gift card underneath. I know in our state, teachers are not paid nearly enough and we are facing a crisis as teachers leave schools searching for better paying jobs.

To all the teachers, school staff and administrators out there. I APPRECIATE you more than you will ever realize! Please forgive me if I don’t bring you a gift during Teacher Appreciation Week. I’ll surprise you some other time. 😉

Farmhouse Painted (chalk like paint) Jar Vases | Pretty Handy Girl

What do you say? Why not whip up a little painted vase to appreciate your child’s teacher on Monday. Or the last week of school? Or just on one ordinary not celebration day. Am I crazy? Doesn’t this make sense to you?

PHGFancySign

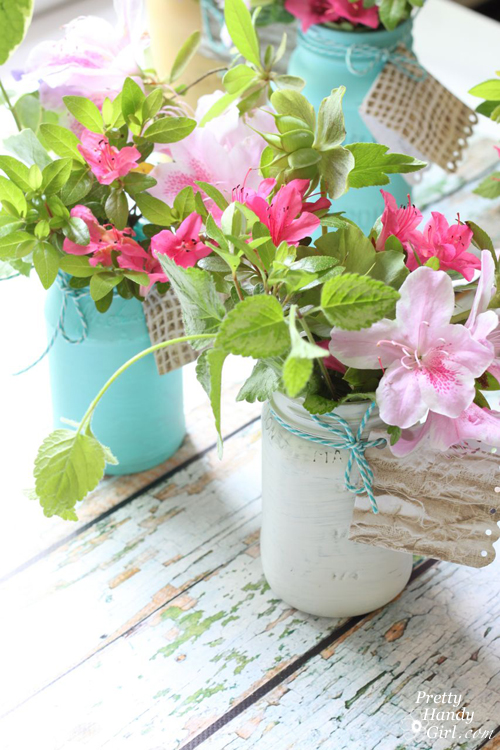
P.s. Did you like the chippy paint board backdrop I used? It’s not real wood, it is actually a vinyl backdrop made by my good friend Leen the Graphics Queen. It rolls up and stores neatly away. She should be selling them soon.


Pin for later!

DIY Chalk Paint Mason Jar Flower Vase

How to Make an Old Sign

How to Make an Old Sign

One project I really wanted to make was an old wooden-looking sign. I hoped to stumble upon a salvaged piece or something found. Lucky enough, I happened to find a foot board from a bed right down the street. It was the perfect shape to make into a sign. When someone throws something out, I usually take it for a project! With some paint and lettering, you can make this or any piece into an old sign. Here’s how!

Materials

  • Foot board – You could pick one up at a thrift or salvage store for only a few dollars
  • Sand paper
  • TSP
  • Chalk paint or regular paint
  • Paint brush
  • Sealant like wax or polycrylic
  • Printer and paper
  • Scissors, tape, ballpoint pen

Instructions:

This was the foot board I scored on the curb. It had a perfectly rounded top with molding on it and had the shape of an antique sign. I remember seeing one like this at Ballard Designs that sells for hundreds of dollars. Since I had all the supplies for this, it cost me nothing! The legs were really neat, but we ended up cutting them off to make this a sign. I thought it would look better that way. Who knows, maybe I’ll make something else out of the legs?

Foot Board Before

Lightly sand down the foot board and clean it with TSP. This will prep it for painting and take off any dirt.

Sanding and TSP Read more

Unique Wine Rack

Unique Wine Rack

Hi everyone! It’s Jessica from Décor Adventures, back again and ready to show you a furniture makeover project I’m just in love with. This isn’t just any furniture makeover. This is how to turn an old dresser into a rack to hold your favorite reds and whites – wine that is!

One of my favorite things to do is redo furniture. Chairs, mirrors, tables, dressers, you name it. A while back I found this dresser at a thrift shop for only $10 and took it home only to find the drawers didn’t work well at all. I had an idea to ditch the two large drawers and turn this piece into a wine rack. If it doesn’t work for clothes, why not make it work for wine! Here is how to make your own unique wine rack from a dresser.

Materials
Many of these materials are based on how I painted the dresser and how we cut the shelves. We cut them ourselves with a table saw, but if you don’t have one, you can have them cut at the home improvement store or use a circular saw.

  • Dresser with a few drawers removed

Paint:

  • primer, paint, stain, paint brush and roller;
  • Furniture wax or sealant/polycrylic (or whatever you might want to use to finish the dresser)

Racks/Shelves:

  • Two 2’x4’ sheets of ½” MDF
  • Two pieces of quarter round to finish fronts of shelves;
  • Several feet of ½” square wood dowels {they come in 36” pieces}

Tools:

  • Table saw {unless you have the shelves cut to size at the home improvement store};
  • Nail gun
  • nails
  • air compressor
  • Random orbital sander {Optional if you distress the dresser}
  • Miter saw or hand saw

Supplies:

  • Wood glue;
  • 220-300 Sand block or sand paper.

Instructions
These instructions will be in a three sections, so you can easily see how this project comes together. First you will paint or stain your dresser, {or maybe you love it as is and will leave it}, second you will prepare the shelves and put them together to create the wine racks, and last you’ll put the whole dresser together.

Preparing the Dresser
This was a piece I bought at a thrift store and it was already painted but I had to fix it up. The back was not painted and didn’t look very pretty so I ended up painting that too. You can see in this picture how wonky the bottom large drawers were.

Dresser Before Read more

wall chalkboard

Chalkboards are popping up everywhere (like Brittany’s DIY chalkboard calendar from last week) and you can easily make one, but how about upping the usefulness by making a chalkboard WITH a chalk ledge?  Jaime here from That’s My Letter to show you how easy it is to add a chalk ledge to your chalkboard.

chalkboard with ledge

You definitely need a place to put all that chalk (or chalk markers like we prefer).  This chalk ledge protudes a minimal  1 3/4″ from the wall but still has space enough to hold lots of chalk.

chalkboard with ledge 5

I also attached a galvanized pail for more chalk markers.

chalkboard with ledge 1

wall chalkboard 1

I installed this chalkboard near our back door mudroom area.  Unfortunately the key pad for our alarm system is nearly smack in the middle of that wall.  I simply cut out a square in my plywood using a jig saw to accommodate the key pad.  My kids love their new chalkboard and somehow the key pad isn’t quite so obvious once they start drawing around it.

chalkboard with ledge 2

Supplies:

  • 1/2″ plywood (cut to desired size)
  • 1×2 pine board (cut to length of plywood)
  • 1 3/8″ x 1/4″ thick flat trim moulding (cut to length of plywood)
  • black chalkboard paint
  • blue painters tape
  • stain
  • polyurethane
  • foam brushes
  • drill
  • Kreg pocket hole jig (not necessary but definitely easier if you have one)
  • 1″ pocket hole screws
  • wood glue
  • 3/4″ trim nails
  • countersink bit
  • 2 1/2″ toggle bolts
  • 5/8″ spade bit (check toggle bolt requirements)
  • pencil
  • level

Instructions:

Step 1: Cut your plywood to size, using your Kreg pocket hole jig make pocket holes every 8″ along bottom edge of plywood (on back side). (I used the portable base with automaxx clamp here, much easier that slipping a large piece of plywood into the jig.) Read more