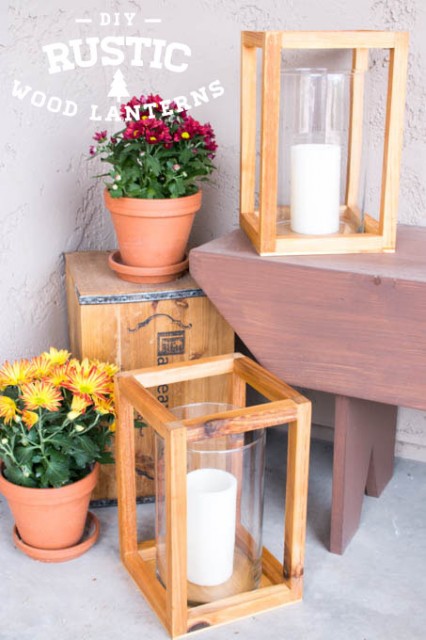
DIY Rustic Wood Lanterns

Lanterns are the perfect way to add warmth into your decorating. Today on the Rockstar DIY stage is Katie, with the tutorial to create these beautiful DIY Rustic Wood Lanterns.

Rockstar DIY Series

You probably already know this Rockstar, because Katie is part of the Pretty Handy Girl rockin’ group. She is also the phenomenal DIY creator at Addicted 2 DIY. This girl doesn’t just build small lanterns, she also builds gigantic workshop garages from the ground up! She’s one bad ass DIYer.

katie-contributor-headshot

I hear the rat-a-tat-tat of the nail gun, so she must be ready to take the stage. Take it away Katie!

page_break_2

Rustic Wood Lanterns

Hey everyone!  It’s Katie again.  I’m back to show you how to make these simple, DIY rustic wood lanterns.  I love wood lanterns and have been wanting some for quite some time, but they can be pretty pricey.  With some square dowels, a little plywood, and some nails, I was able to create these gorgeous lanterns in no time at all.  I made mine from cedar boards that I ripped down into square sticks, but square dowels will work just fine.  The sizes of these are based on 10″ x 6″ hurricane vases I bought at Michaels, but these can be easily customized to fit whatever size vase you have, or no vase at all!

Rustic Wood Lanterns Materials:

  • 3 – 4′ long x 3/4″ square wood dowels (6 if you’re making two)
  • 1/4″ plywood or hobby board*
  • 1 1/4″ brad nails
  • 5/8″ brad nails
  • wood glue
  • wood sealer (I used Thompson’s WaterSeal Timber Oil in Natural)
  • hurricane vases (optional)
  • candles (optional)

*NOTE:  I used scrap 1/4″ plywood for the bottoms.  You can purchase small pieces of plywood or even 1/4″ hobby board at your local home improvement store.  It’s not absolutely necessary to use 1/4″ thickness.  If you happen to have 1/2″ or even 3/4″ plywood lying around, I’d definitely use that.  It makes this project even cheaper and everyone loves that!

Rustic Wood Lanterns Instructions:

Let’s get started assembling the lanterns.

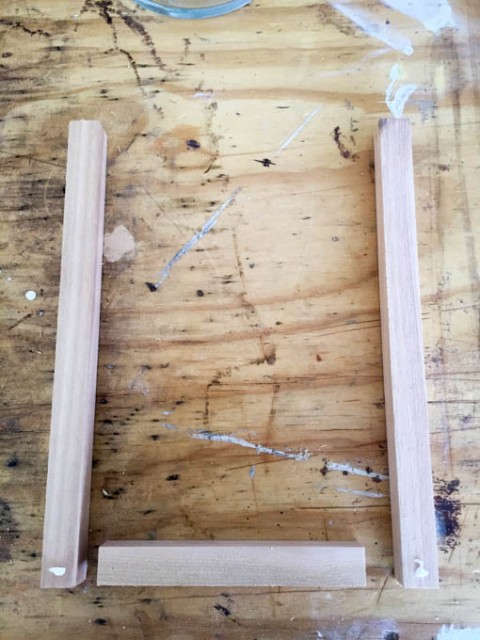
For each lantern, cut 4 – 12″ sticks of wood and 8 – 6.5″ sticks.  Cut the base of the lantern into an 8″ square.

cut-wood-for-lanterns

Assemble the frame of the lanterns using wood glue and 1 1/4″ brad nails.

IMG_0756

Clamp the frame to hold the frame square while you shoot the nails into the wood.  Read more

Create this fabulous knock-off West Elm wooden framed mirror without any fancy power tools. Just use a 1x6 tongue and groove board which is the perfect fit to insert an inexpensive IKEA mirror.

Today on the Rockstar DIY stage is Kim, with the tutorial to make this beautiful money saving West Elm Inspired Framed Mirror!

Rockstar DIY Series

Kim is the power DIY blogger behind The Kim Six Fix. She shares the belief that there isn’t any project big or small that she can’t tackle. Currently Kim lives in California with her husband and three little ones. But, she used to live practically in my backyard in Durham, NC. Unfortunately we never met before she moved. #MissedOpportunity Because if we had, we probably would have fixed up an entire block of houses together!

Kim Six

Today Kim is here with the genius solution to building a West Elm Inspired Framed Mirror using tongue and groove boards. Those saws have started buzzing, so I know she’s ready…take it away Kim!

page_break_2

I’m so excited to be here on Brittany’s blog today! I have been a HUGE fan since I first started blogging about my DIY projects and so it is surreal to be actually posting here…  ON HER BLOG!!! Squee!!  Of course I want to thank her so much for this opportunity, and I hope you all enjoy my project.

Okay, enough fan-girling.. On to the post: 

If you know me, you know I am a big fan of knocking off overpriced high priced name brand home decor. There is almost a challenge to it.  And when I saw this simple mitered block wood mirror on the West Elm website I knew I could create the look for a lot less.

Create this fabulous knock-off West Elm wooden framed mirror without any fancy power tools. Just use a 1x6 tongue and groove board which is the perfect fit to insert an inexpensive IKEA mirror.
Now, unlike a lot of the other guest bloggers who have been sharing their amazing tutorials, I don’t yet have a fabulous tool stash (something I am trying to remedy.)  What that means for you is that you don’t need a big tool stash either! We’re in this together!

So in this case, when I saw the mirror had the glass inset into the wood, (something typically achieved with a table saw or a router) I knew I would have to think outside of the box. How could I get the wood to wrap around the mirror without cutting it myself?

A trip down the lumber aisle of the hardware store revealed the answer: Tongue and Groove 2×6 boards  (typically used on walls or floors).  It has a ’tongue’ on one side which insets into the ‘groove’ on the other.  Perfect: A board with a built-in mirror holder!

2x6 southern yellow pine tongue and groove flooring 425
The boards they had in stock at the big box home improvement store weren’t anything super special, and they weren’t very expensive. For my project I only needed two 8 foot boards at $8 each.

Usually these types of boards are made of whitewood (or pine) since that is the least expensive. However, my store actually used Cypress (a whitewood alternative), which was a fun change for me. This was my first project with that wood type and it pretty much acted like pine.. .so I was in my comfort zone. You could do this with cypress or pine (or even hardwood).

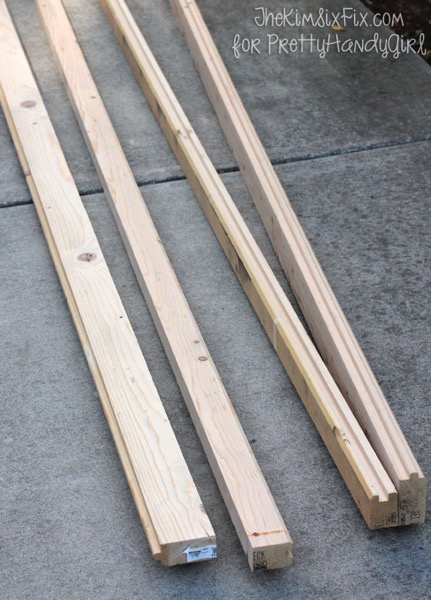
Now that I had the boards, I had to get them down to the correct dimensions, and I didn’t want the tongue, only the groove.  The first thing I did was rip the boards down to the width I wanted for the mirror frame.  Now, once again, most people would do this on a table saw, but I don’t have one.  I only have a circular saw, so I used it plus the Kreg Rip Cut, to cut the boards down lengthwise:
Next I sanded them like crazy.  The circular saw doesn’t leave the cleanest cut, and the boards were in pretty rough shape.  Nothing a random orbital sander couldn’t help.

Sanding boards for mirror frame
Here is a good closeup of how exactly the mirror fits in the groove.   You can see where the mirror (a $9 one I picked up at IKEA) fits into the groove of the board. And although it isn’t obvious, each side of the groove is actually shaped differently. On one side it was squared off, while the other was rounded down.  You can use either edge as the ‘front’ of the mirror frame, but just make sure you are consistent!

Channel in 2x4 for framing Mirror
I liked the square edge facing out (I thought it was closest the inspiration piece.)

Also, be aware when measuring your mirror, that it will extend down into the mitered corner.  You can’t just measure the perimeter of the mirror and cut the frame the exact same size.   The frame will actually be slightly smaller.
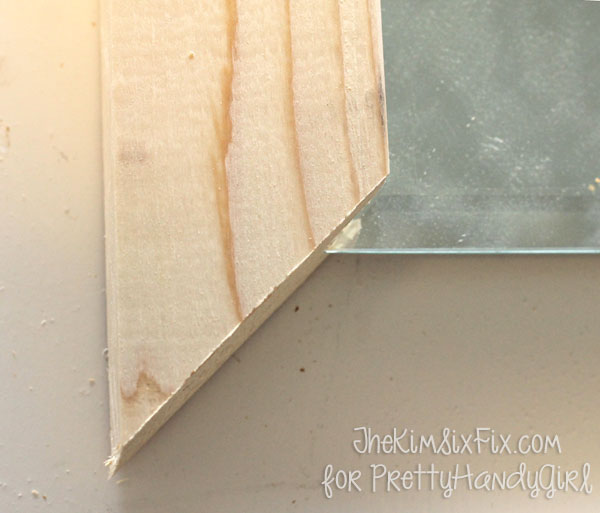
Inseting mirror into frame groove

I measured by putting the mirror into the notch of the board and sliding the 45 degree pre-mitered corner down onto the perpendicular board (which should also have the mirror placed in the groove.) Where the point of the mitered board hits the perpendicular board is where you should put a mark. Then miter the second board at a 45 degree angle with the longest point hitting that mark.

Measuring and Marking Mitered frame
You want a pretty tight fit because the only thing holding the mirror into the frame will be that channel. If you cut the edges too long, the mirror will want to fall out.  Be as accurate as you can, and make sure you make plenty of dry fitting before you start the assembly process: Read more

one of the easiest pallet projects ever

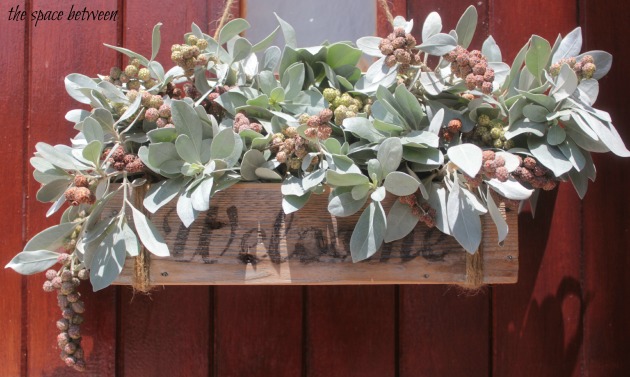
A DIY Pallet Slat Bin makes a hanging display box or centerpiece. Today on the Rockstar DIY stage is Karah, with the tutorial to make this beautiful pallet bin.

Rockstar DIY Series

If you haven’t met Karah yet, I know you’ll be fast friends. Karah blogs at the space between.

Both Karah & I love serious DIY. We both grew up in houses that were always at one stage or another of completion, which has probably heightened our ability to deal with all of the house projects we seem to always be tackling. Karah is kicking off our Rockstar DIY Series straight from the beautiful beaches of Aruba (lucky duck!) Take it away Karah!

page_break_2

Hey everyone! I’m Karah and I blog at thespacebetweenblog.net. If you’ve been a Pretty Handy Girl reader for a while you might remember me as the one who PHG was separated from in childhood.

separated-at-childhood

If we haven’t met before, hey there! Nice to e-meet you. And no, I don’t always wear matching shirts with my friends. Only when we know there are cameras close. 😉

By way of introduction, my blog is about DIY and home improvement with a focus on all things repurposed, re-invented or upcycled. The blog is also a journey through our evolving life that brings us all over as we follow my husband’s career. Which right now finds us living in Aruba (I know!), so I am also all about the super simple projects that don’t pull me away from the beach, or just staring at the view, for too long. 😉

Palm Beach Aruba rainbow

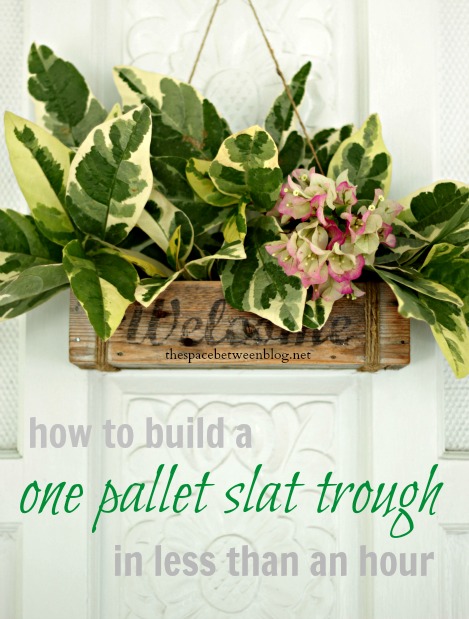
So here is an easy upcycling idea using only one pallet slat that makes a great project that you could hang on your front door, or use as part of a table arrangement or centerpiece.

welcome to fall

Project: DIY Pallet Slat Bin

Materials:

  • 1 pallet slat
  • handful of small finish nails
  • jute twine (optional)
  • 150 grit sandpaper

Tools:

  • pry bar
  • hammer
  • tape measure
  • saw

I didn’t even use any power tools to make this but you could speed up the already quick process by using a nail gun (like this one) or a miter saw (like this). (affiliate links)

Instructions:

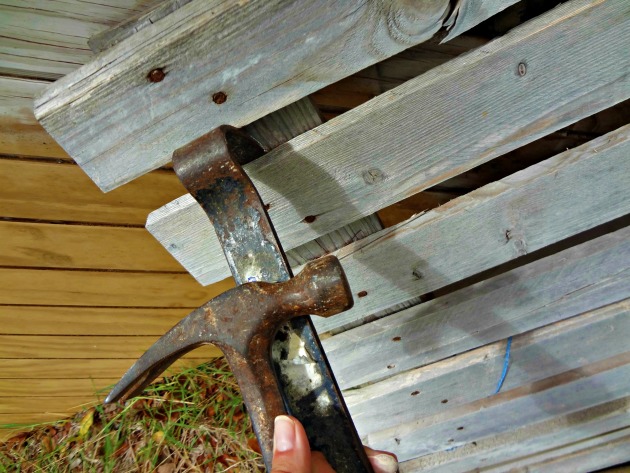
Step 1: If you’re not lucky enough to happen to have just a single pallet slat on hand use the hammer and pry bar to remove one pallet slat from a pallet.

12May wonder bar hammer pallet

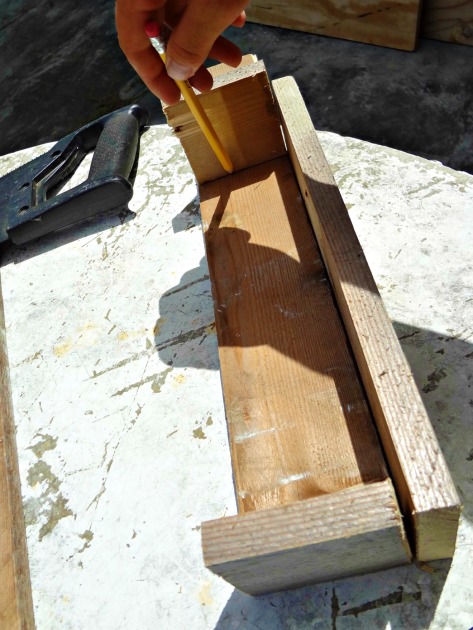
Step 2: Use your saw to cut two pieces 12 inches long (for the front and back) and two pieces 3 inches long (for each end), then put them together like this to mark where to cut the piece for the bottom.

12May cut pallet slats.jpg

Step 3: Use the hammer and nails, rusty finish nails optional, to put it all together. Read more


kids scooters title

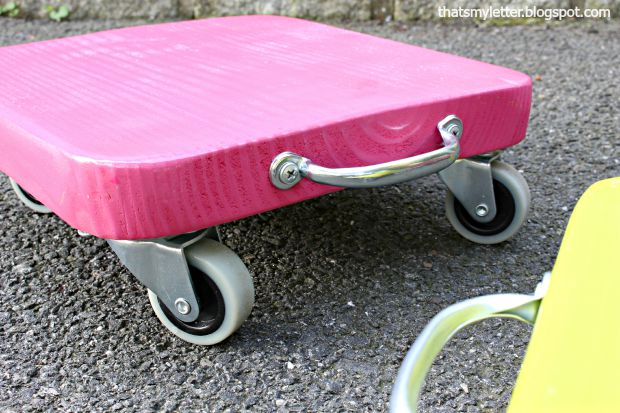
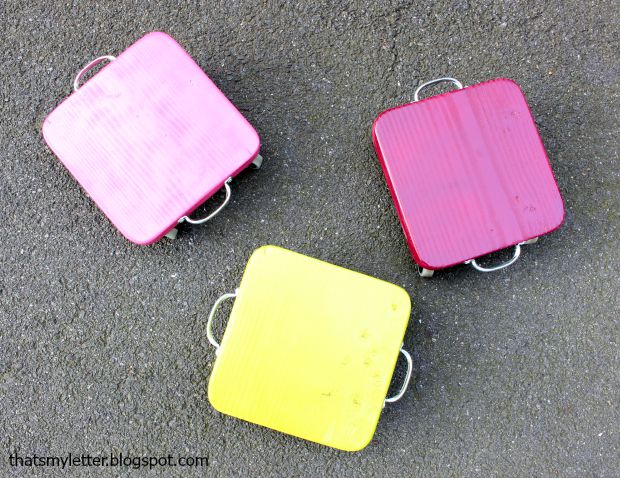
Looking for a quick and easy DIY kids toy you can make at home?  Let’s make kids scooters!  Hello Pretty Handy Readers I’m Jaime from That’s My Letter here to share how to make these DIY Kids Scooters using scrap wood and a few hardware bits.

kids scooter action

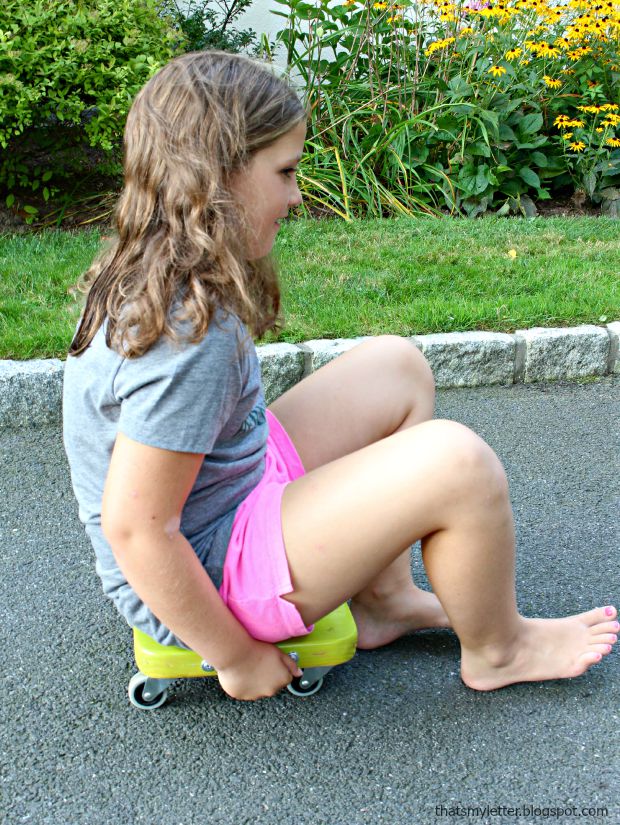
My 9 year old daughter is here giving the scooter a whirl and she fits fine but it’s really my 7 year old boy who loves the scooters.  (Unfortunately, I don’t have a picture of him on a scooter, but you’ll have to trust me.)  I would say this DIY toy is aimed at kids 8 and younger as they especially love pushing each other on the scooters!

kids scooter detail

If you happen to have a piece of 2×12 scrap wood lying around then this project was made for you.  The chunky 1 1/2″ thick material is solid and sturdy and can be painted any color you choose.

kids scooters 1

Materials:

  • 1 – 2×12 @ 11 1/4″ (must be a square, measure your 2×12 first, some are 11 1/8″w)
  • 4 rotating casters (2″ wheels)
  • 2 handles
  • jigsaw
  • sandpaper
  • drill
  • 1 1/4″ self tapping screws
  • measuring tape &  pencil
  • curved object (small paint can)
  • paint


kids scooter sketch

Instructions: Read more

Plenty 'o Storage from One Board | Pretty Handy Girl

Before we get started, did you enter the $1,000 Build.com #LoveItMoment giveaway? Only a few days left, so get crackin’!

What would you say if I told you that I took one board…one 1″ x 8″ x 8′ board and created a faux cubby box with Plenty O’ Storage that will work in any room in your home!

Plenty 'o Storage from One Board | Pretty Handy Girl

This is a project born out of the #OneBoardChallenge. What’s that you ask? In short, it’s a challenge thrown down by Jen from House of Wood. She challenged 17 bloggers to make something amazing out of one 1″ x 8″ x 8′ board.

One-board-challenge-graphic

I’m here to show you how that one board can be cut up and turned into this beautiful fake cubby storage box:

Plenty 'o Storage from One Board | Pretty Handy Girl

And it can store anything you don’t want in plain sight.

Plenty 'o Storage from One Board | Pretty Handy Girl

Today I’ll show you how to build your own Storage Box with Plenty O’ Storage!

Plenty 'o Storage from One Board | Pretty Handy Girl

Materials:

  • 1 – 1″ x 8″ x 8′ board
  • Drill
  • 3/32 drill bit
  • Philips head screwdriver
  • Wire mesh
  • Tin Snips
  • Staple gun
  • 1/4″ staples
  • Pencil
  • 2 – 2″ hinges
  • Magnetic latch
  • 5 – Sash hook lift hardware
  • 4 – {6 x 2 1/4″} wood trim screws
  • Miter saw
  • Table saw
  • Jig saw or Bandsaw

Cut list:

(Note that a 1″ x 8″ board is actually 3/4″ x 7 1/4″. Cut list sizes are actual sizes.)

Plenty 'o Storage from One Board | Pretty Handy Girl

  • 1 – 5 1/4″ x 25″
  • 2 – 7 1/4″ x 25″
  • 2 – 7 1/4″ x 8″
  • 1 – 2″ x 25″ (optional for hanging cleat or back stop)


Instructions:

Cut your 1×8″ board into the pieces listed in the cut list above. Most cuts can be made on a miter saw, but you’ll need a table saw to rip the 2″ board and to cut grooves into the face of the storage box. Alternatively, you could skip the fancy details and create a plain face.

Plenty 'o Storage from One Board | Pretty Handy Girl

Set the table saw depth to 1/8″ above the saw table. Set the fence at 5″. Cross cut the board along the saw blade to cut grooves into the board. Rotate the board and cut across the other ends of the board. Set the fence at 10″ and repeat on both ends.

Plenty 'o Storage from One Board | Pretty Handy Girl

Your board will look like this when you flip it over:

Plenty 'o Storage from One Board | Pretty Handy Girl

Download the template shown below, print and cut out the shape.

Plenty 'o Storage from One Board | Pretty Handy Girl

Using the template to trace the cut out onto the top of the face sections.

Plenty 'o Storage from One Board | Pretty Handy Girl

Use a jigsaw or bandsaw to cut the face profile.

Plenty 'o Storage from One Board | Pretty Handy Girl

Pre-drill holes into the four corners of the two 8″ x 7 1/4″ boards.

pre-drill-screw-holes

Collect the four sides of the box ( 2 – 7 1/4″ x 25″ and 2 – 7 1/4″ x 8″)

Plenty 'o Storage from One Board | Pretty Handy Girl

Drive wood screws into the sides and into the base of the box. Read more