West Elm Inspired Wood Framed Mirror

Today on the Rockstar DIY stage is Kim, with the tutorial to make this beautiful money saving West Elm Inspired Framed Mirror!
Kim is the power DIY blogger behind The Kim Six Fix. She shares the belief that there isn’t any project big or small that she can’t tackle. Currently Kim lives in California with her husband and three little ones. But, she used to live practically in my backyard in Durham, NC. Unfortunately we never met before she moved. #MissedOpportunity Because if we had, we probably would have fixed up an entire block of houses together!
Today Kim is here with the genius solution to building a West Elm Inspired Framed Mirror using tongue and groove boards. Those saws have started buzzing, so I know she’s ready…take it away Kim!
I’m so excited to be here on Brittany’s blog today! I have been a HUGE fan since I first started blogging about my DIY projects and so it is surreal to be actually posting here… ON HER BLOG!!! Squee!! Of course I want to thank her so much for this opportunity, and I hope you all enjoy my project.
Okay, enough fan-girling.. On to the post:
If you know me, you know I am a big fan of knocking off overpriced high priced name brand home decor. There is almost a challenge to it. And when I saw this simple mitered block wood mirror on the West Elm website I knew I could create the look for a lot less.

Now, unlike a lot of the other guest bloggers who have been sharing their amazing tutorials, I don’t yet have a fabulous tool stash (something I am trying to remedy.) What that means for you is that you don’t need a big tool stash either! We’re in this together!
So in this case, when I saw the mirror had the glass inset into the wood, (something typically achieved with a table saw or a router) I knew I would have to think outside of the box. How could I get the wood to wrap around the mirror without cutting it myself?
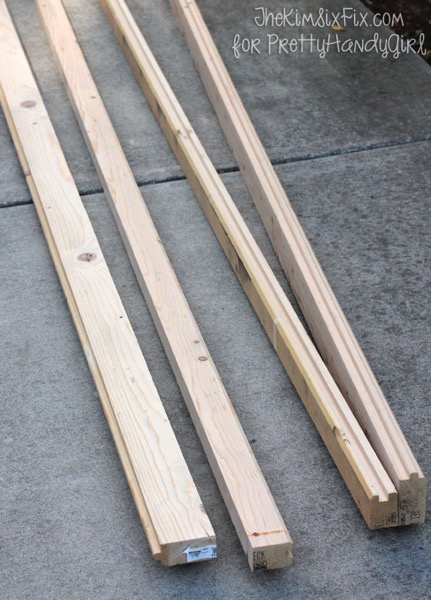
A trip down the lumber aisle of the hardware store revealed the answer: Tongue and Groove 2×6 boards (typically used on walls or floors). It has a ’tongue’ on one side which insets into the ‘groove’ on the other. Perfect: A board with a built-in mirror holder!

The boards they had in stock at the big box home improvement store weren’t anything super special, and they weren’t very expensive. For my project I only needed two 8 foot boards at $8 each.
Usually these types of boards are made of whitewood (or pine) since that is the least expensive. However, my store actually used Cypress (a whitewood alternative), which was a fun change for me. This was my first project with that wood type and it pretty much acted like pine.. .so I was in my comfort zone. You could do this with cypress or pine (or even hardwood).
Now that I had the boards, I had to get them down to the correct dimensions, and I didn’t want the tongue, only the groove. The first thing I did was rip the boards down to the width I wanted for the mirror frame. Now, once again, most people would do this on a table saw, but I don’t have one. I only have a circular saw, so I used it plus the Kreg Rip Cut, to cut the boards down lengthwise:
Next I sanded them like crazy. The circular saw doesn’t leave the cleanest cut, and the boards were in pretty rough shape. Nothing a random orbital sander couldn’t help.

Here is a good closeup of how exactly the mirror fits in the groove. You can see where the mirror (a $9 one I picked up at IKEA) fits into the groove of the board. And although it isn’t obvious, each side of the groove is actually shaped differently. On one side it was squared off, while the other was rounded down. You can use either edge as the ‘front’ of the mirror frame, but just make sure you are consistent!

I liked the square edge facing out (I thought it was closest the inspiration piece.)
Also, be aware when measuring your mirror, that it will extend down into the mitered corner. You can’t just measure the perimeter of the mirror and cut the frame the exact same size. The frame will actually be slightly smaller.
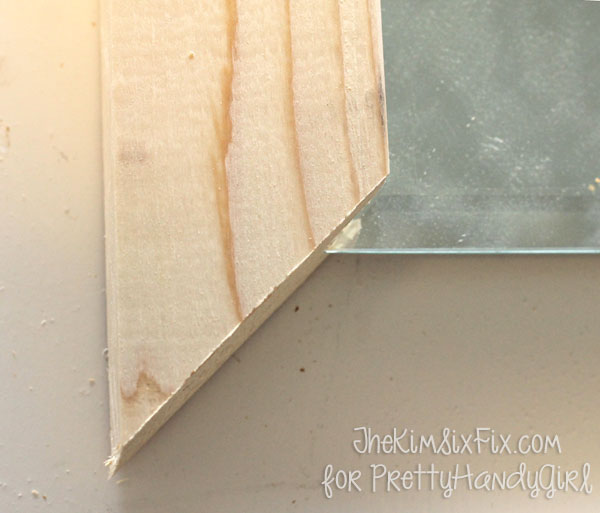
I measured by putting the mirror into the notch of the board and sliding the 45 degree pre-mitered corner down onto the perpendicular board (which should also have the mirror placed in the groove.) Where the point of the mitered board hits the perpendicular board is where you should put a mark. Then miter the second board at a 45 degree angle with the longest point hitting that mark.

You want a pretty tight fit because the only thing holding the mirror into the frame will be that channel. If you cut the edges too long, the mirror will want to fall out. Be as accurate as you can, and make sure you make plenty of dry fitting before you start the assembly process:

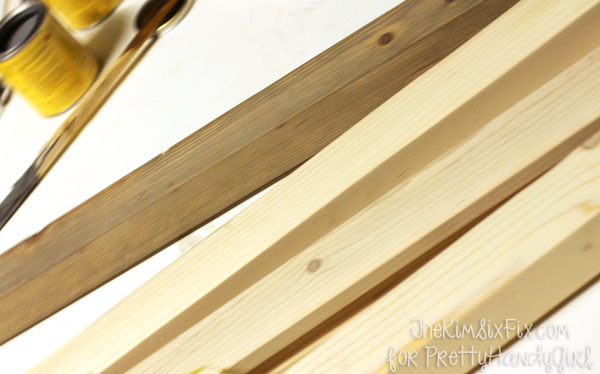
Staining: I used what I had on hand, a can of golden oak and a can of grey stain. Neither of which I liked on their own. Too orange to too grey. So I decided to make my own custom mix (and this helped me get the color closest to the West Elm inspiration.) I ended up with 2 parts grey to 1 part golden oak. To measure I used a disposable medicine dropper.

I love the final color. And it was pretty close to the West Elm version which was a bonus:
Once the boards were stained, I wanted to seal them.

I added 2 coats of polycrylic and allowed them to dry.

Assembly: For this I used pocket holes at the corners of the frames. You could also screw them in from the side, but I didn’t want any hardware to show (since it doesn’t show in the West Elm version). It was a little tricky to get pocket holes into the 45 degree angled cut, but I eventually figured it out.

Be sure you have everything clamped in place when screwing them together. They have the tendency to slide around. (I did add a few finishing nails in the corners to keep the boards from twisting.)

I really like the final project. It is much larger than the inspiration piece, but for 1/10th of the money. Plus I did it all with nothing more than a circular saw and a Kreg jig. You never would have guessed!

I really love the pretty grey-brown finish, just like the West Elm inspiration piece.

Sometimes it is is definitely worth thinking outside of the box!
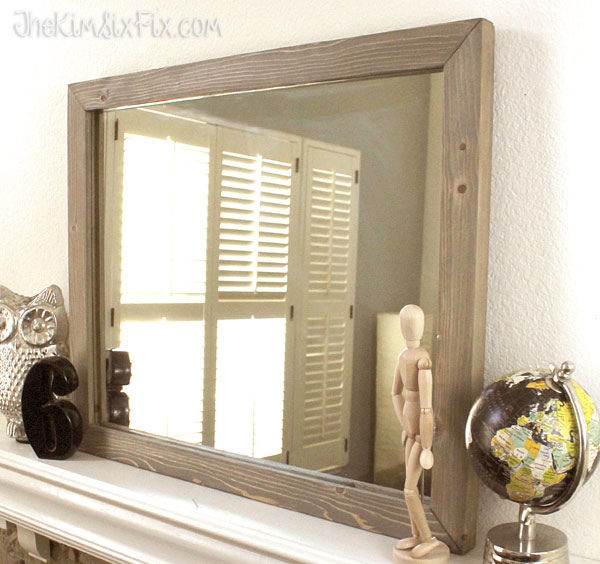
And proof you don’t need to be Norm Abrams to create some beautiful wood pieces!
Wasn’t that a fabulous DIY tutorial? Thanks Kim. Stay tuned for more of the Rockstar DIY series!
Here is a list of the project performances so far:
Pin for later!





Love this! And that you took the time to explain that you don’t have to have lots of tools to make something work!
kim,
I love, love, love this idea. I just ripped a bunch of tongue and groove tonight (flooring) now I wish I had left the grooves!
pinning!
gail
Great project Kim! It’s so cool to see you posting over here! I’m inspired by your ability to use a smaller arsenal of tools!
Awesome tutorial & the mirror looks wonderful.