How to Cut an Art Mat Like a Pro | Pretty Handy Girl

How to Cut an Art Mat Like a Pro | Pretty Handy Girl

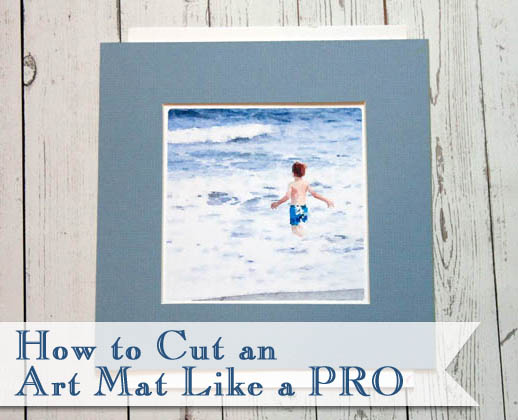
Want to save some money and mat your own prints and artwork? It’s not hard, but having the right tools will really help you cut a straight, clean and beveled mat.

I’ve been giving the boys’ bathroom a little updating and one of the things that I wanted to do was add some artwork. Because the bathroom has predominantly blues and whites, I’ve been sticking with a coastal theme. I decided to create my own art using photos of the ocean.

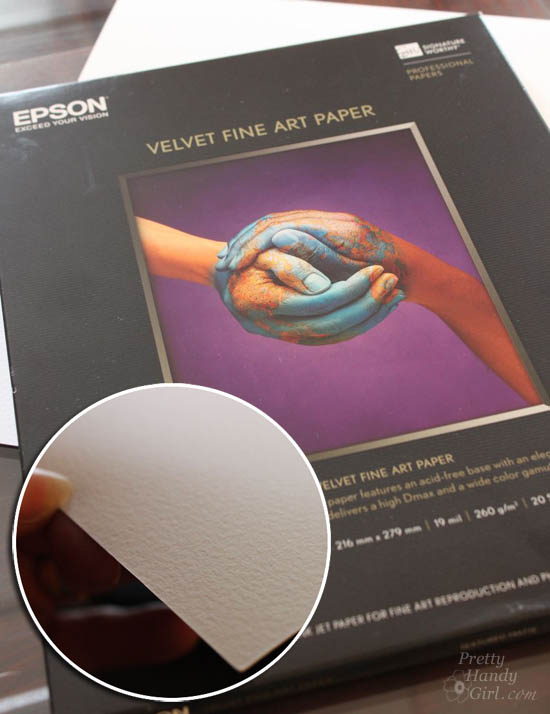
I found two photos that I took of the boys from past vacations and emailed them to myself. Then I saved them to my phone and ran them through the Waterlogue app (only available for iPhone right now.) The app turns any photo into a beautiful watercolor painting. I’m seriously addicted to this app right now.

How to Cut an Art Mat Like a Pro

After running the photo through the app, I emailed myself the new photo. Then all I had to do was open it on my computer and print it onto Epson Velvet Fine Art Paper. The paper has a watercolor paper texture and produces beautiful images.

Epson Velvet Fine Art Paper | Pretty Handy Girl

And viola! Instant meaningful art!

How to Mat a Picture Like a Pro | Pretty Handy Girl

Luckily I already had frames on hand to use for this project.

How to Mat a Picture Like a Pro | Pretty Handy Girl

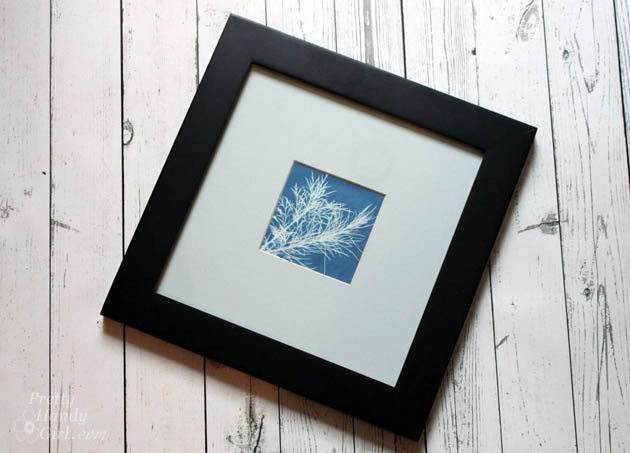
Before cutting the mats, I painted the frames with Annie Sloan Paris Grey and finished them off with Miss Mustard Seed’s Linen. Then I distressed the edges of the frames.

Now, about matting that artwork…

How to Cut an Art Mat Like a Professional:

First, choose a firm and flat surface to work on. Hopefully you have a self-healing cutting mat to cut on top of. If not, you can use thick chipboard or scraps of linoleum, but be careful that you can’t cut through to your work surface.

Materials:

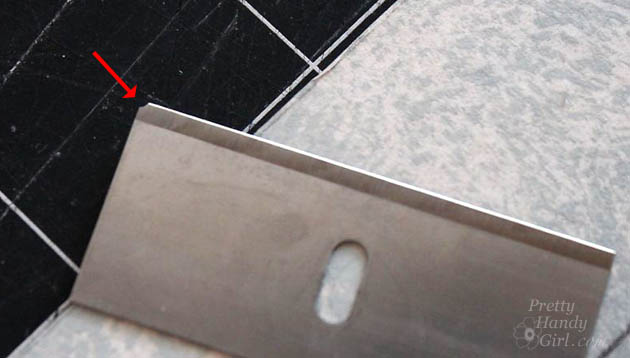
A Note about Cutting Blades:

When cutting mats it is imperative that you have a fresh blade. I sometimes have to use 2 blades per mat. So, don’t be shy about swapping that blade out. If a tip breaks off, it’s going to drag on the mat and won’t give you a clean cut. (Discard old blades by wrapping them in tape to avoid personal injury.)

How to Mat a Picture Like a Pro | Pretty Handy Girl

If you don’t own a mat cutter, you can cut your mat window with an x-acto knife, but you won’t achieve a good clean bevel. Typically, if you cut 2-3 of your own mats, your tools will pay for themselves! The Logan mat cutter I use runs about $50 for the guide and cutting handle.

Instructions:

Read more

Breeze Inn Cottage - Tybee Island | Pretty Handy Girl

Breeze Inn Cottage - Tybee Island | Pretty Handy Girl

I can’t wait to invite you in to tour this adorable Mermaid Cottage on Tybee Island, GA. Breeze Inn is full of charm, color and antiques. This beach cottage is owned by the fabulous fiction author, Mary Kay Andrews. Decorating and furnishing this cottage was a labor of love for Mary Kay. In fact, she told me that many of the things that you see in the cottage were collected for years before she owned Breeze Inn! Check out this Breeze Inn Cottage Tour – we love it!

Mary Kay was sweet enough to let me tour and photograph her cottage. Won’t you come on in and join me?!

Right inside the door is a one-of-a-kind decoupaged dresser with fun fish decorating the drawers! And I am crushing on the amazing shell framed mirror over it. The plank walls add that perfect relaxed coastal feel to this little house.

Breeze Inn Cottage - Tybee Island | Pretty Handy Girl

You enter directly into the cozy and comfortable living room. The dining room is part of the open front room of the cottage. I can imagine playing games at the table with the kids, while keeping up with conversations happening on the couch.

Breeze Inn Cottage - Tybee Island | Pretty Handy Girl

Just off the dining room is the kitchen. The sherbet green walls are fun and funky… Read more

David Bromstad HGTV host

If I had to choose one HGTV host that I would like to meet in person, that would be a no-brainer. David Bromstad has always been my favorite designer with the transformation talent. With his “push the color envelope” attitude and ever present jovial (and often joking) nature, I think he’d be a blast to meet at a party or maybe collaborate on a DIY project for charity! (A handy girl can dream, right?) The other thing that gains David extra gold stars on my list of celebrities I’d like to meet, is the fact that he’s an artist too.

David Bromstad painting

I am in love with his short painting tutorials on Color Splash. He really knows how to empower others to try their hand at artistic expression.

David-Bromstad-painting_tutorial

You can imagine that I’d be super excited when I received an email asking if I wanted to interview David Bromstad. That email was replied to INSTANTLY! Of course I hoped it meant he was coming to Raleigh, NC and we’d have coffee together and chat. But, you know, that was a dream that didn’t happen this time. Instead, I interviewed David just before the holidays via a phone conversation.

Without further adoration and praise… I have with me (virtually) today: the one — the only — Color Splash host, David Bromstad! Jump on your couches, scream like the Beatles are playing at the Ed Sullivan theater and share my exuberance to have him on the blog today. Read more

All You Need is...Valentine String Art | Pretty Handy Girl

All You Need is...Valentine String Art | Pretty Handy Girl

All you need is some scrap wood, and maybe a little string. And a few nails. And how about a gum wrapper? If you had all those you could be like MacGyver and build some kind of cool device that would catch fire. But, since I had everything except the gum wrapper, I decided to make a Valentine art project. Follow along and I’ll show you how easy it is to make your own heart string art and engraving art for Valentine’s Day. If you need any of the materials, you can pick up most of them at your local Lowe’s Home Improvement store (probably the same place MacGyver shops because they have gum at the registers.)

(I’ve included affiliate links for your convenience. I earn a small percentage from a purchase using these links. There is no additional cost to you. You can read more about affiliate links here.)

Materials:

Instructions:

Start by painting your wood red.

All You Need is...Valentine String Art | Pretty Handy Girl

After the paint has dried, draw a heart with chalk. Read more

double ribbon heart wreath on door 1-l

Hi, this is Cristina from Remodelando la Casa, I’m so glad to be here once again, sharing with you a cute and easy project just in time for Valentine’s day.

While walking through Costco (it always happens there, you go for groceries but come back home with so many things that weren’t on your list!), I spotted some gigantic spools of ribbon that for only 8 bucks, so I grabbed one and my project began taking shape inspired by a wreath created by Jessica.

2 ribbon spool

Materials:

  • One wire hanger
  • 15 yd. wired edge ribbon (1.5″ wide)
  • 15 yd. wired edge ribbon (.62″ wide,  a contrasting color from the previous one)
  • Pliers
  • Awl
  • Small decoration to hang in the center of wreath
  • 2 yd. decorative ribbon to hang the wreath in place
  • Scotch tape or glue gun

Instructions:

Using pliers, unravel the coil on the hanger.  Make a heart shape out of the hanger. Read more