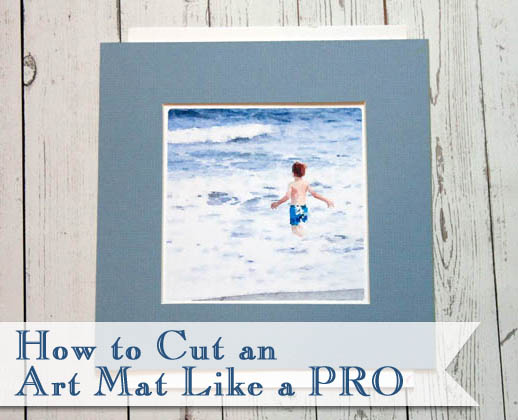
How to Cut an Art Mat Like a Pro
Want to save some money and mat your own prints and artwork? It’s not hard, but having the right tools will really help you cut a straight, clean and beveled mat.
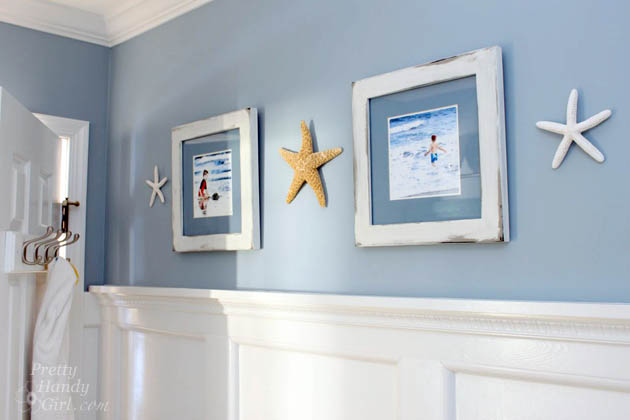
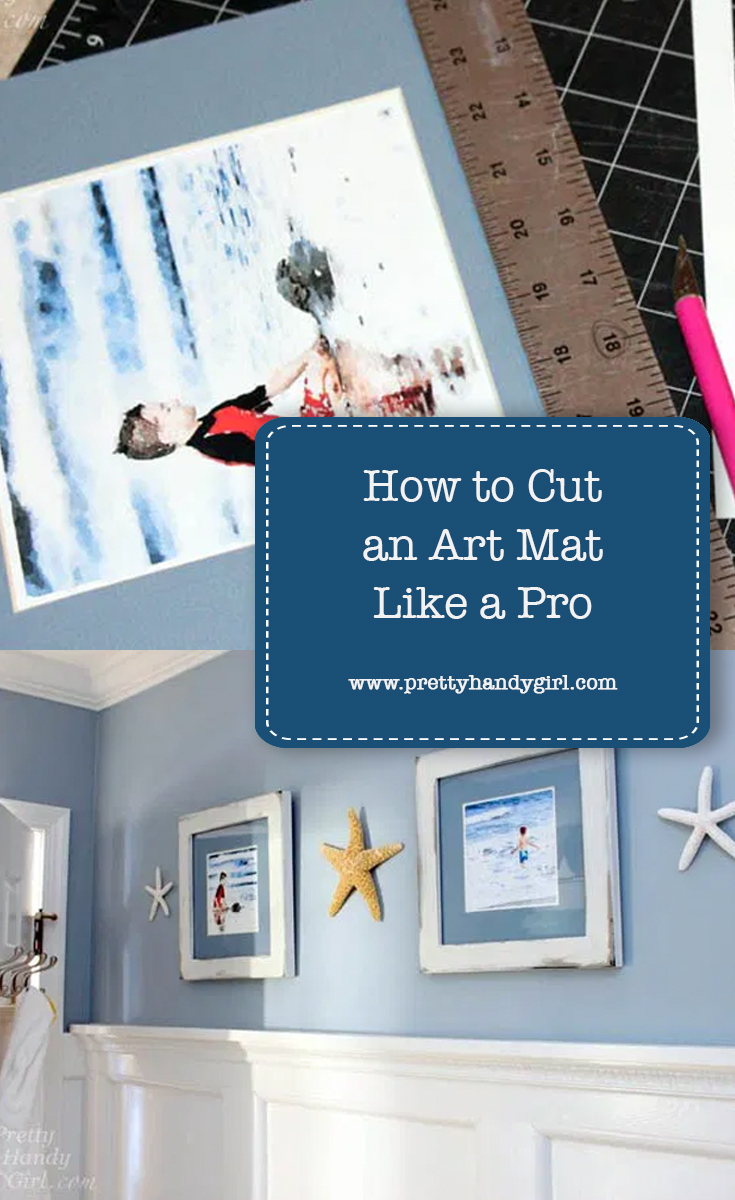
I’ve been giving the boys’ bathroom a little updating and one of the things that I wanted to do was add some artwork. Because the bathroom has predominantly blues and whites, I’ve been sticking with a coastal theme. I decided to create my own art using photos of the ocean.
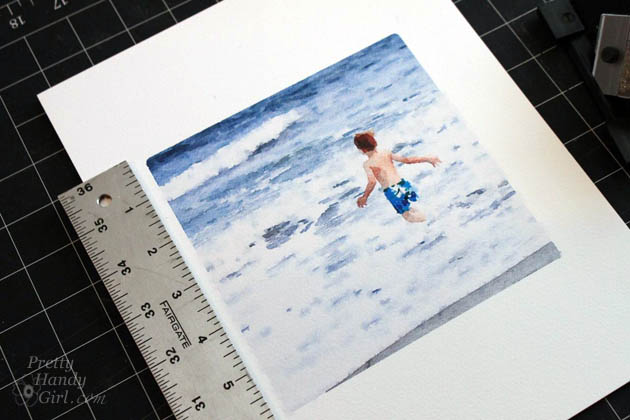
I found two photos that I took of the boys from past vacations and emailed them to myself. Then I saved them to my phone and ran them through the Waterlogue app (only available for iPhone right now.) The app turns any photo into a beautiful watercolor painting. I’m seriously addicted to this app right now.

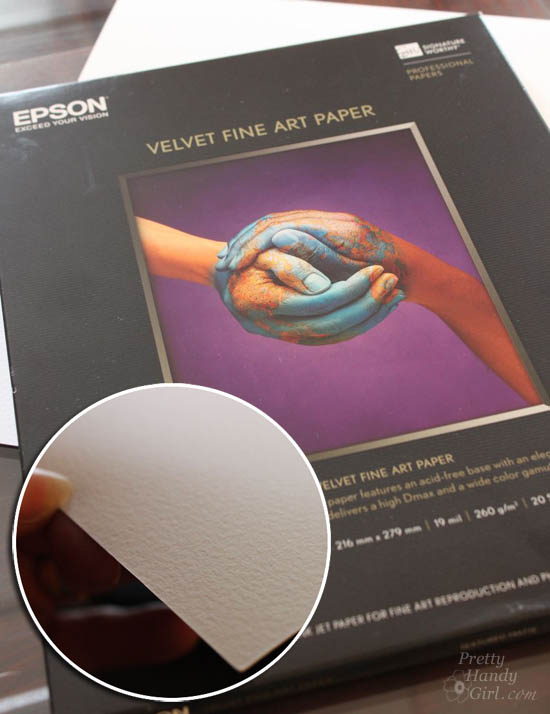
After running the photo through the app, I emailed myself the new photo. Then all I had to do was open it on my computer and print it onto Epson Velvet Fine Art Paper. The paper has a watercolor paper texture and produces beautiful images.
And viola! Instant meaningful art!

Luckily I already had frames on hand to use for this project.
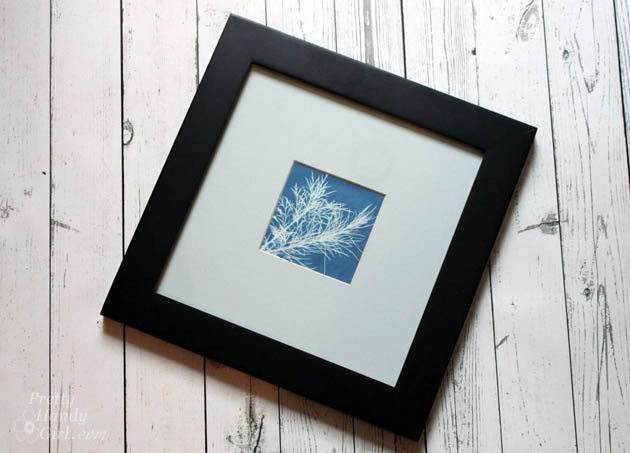
Before cutting the mats, I painted the frames with Annie Sloan Paris Grey and finished them off with Miss Mustard Seed’s Linen. Then I distressed the edges of the frames.
Now, about matting that artwork…
How to Cut an Art Mat Like a Professional:
First, choose a firm and flat surface to work on. Hopefully you have a self-healing cutting mat to cut on top of. If not, you can use thick chipboard or scraps of linoleum, but be careful that you can’t cut through to your work surface.
Materials:
- Colored Mat
- Artwork
- White Artist’s tape (you can use masking tape or scotch tape, but it might discolor your print over time.)
- Logan Mat Cutting System
- Extra Mat Cutting Blades
- Self-healing cutting mat
- X-acto knife
- Ruler
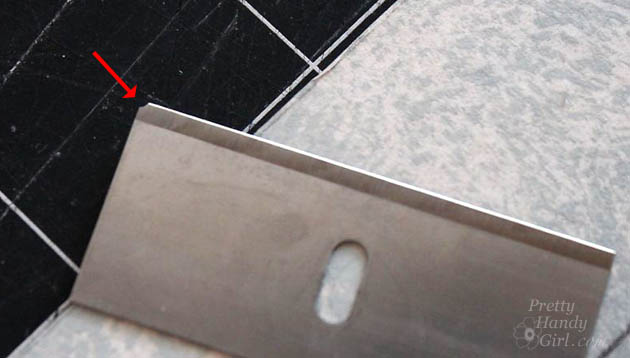
A Note about Cutting Blades:
When cutting mats it is imperative that you have a fresh blade. I sometimes have to use 2 blades per mat. So, don’t be shy about swapping that blade out. If a tip breaks off, it’s going to drag on the mat and won’t give you a clean cut. (Discard old blades by wrapping them in tape to avoid personal injury.)
If you don’t own a mat cutter, you can cut your mat window with an x-acto knife, but you won’t achieve a good clean bevel. Typically, if you cut 2-3 of your own mats, your tools will pay for themselves! The Logan mat cutter I use runs about $50 for the guide and cutting handle.
Instructions:
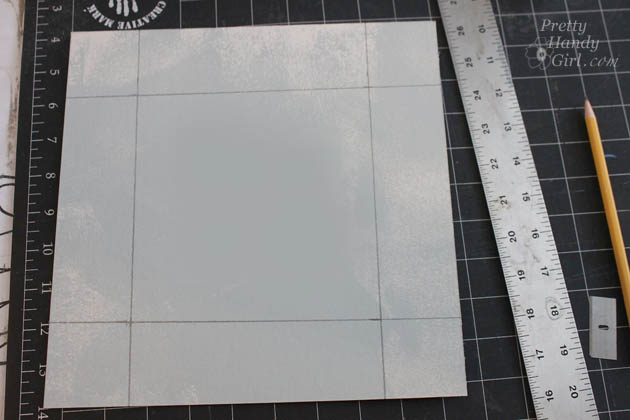
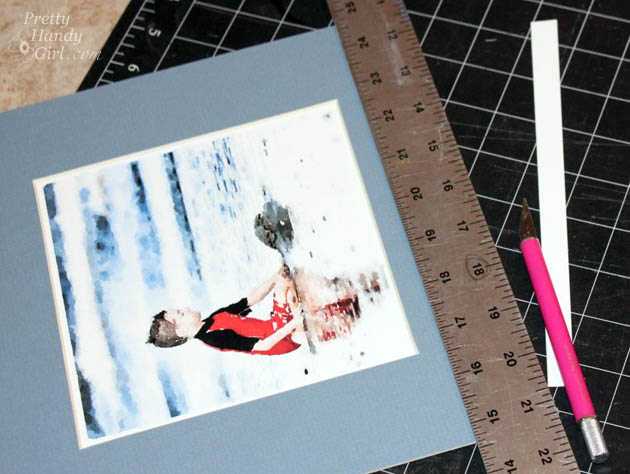
Before you begin, cut your mat board to the size of your frame. Use an x-acto knife and a metal ruler to cut through the mat board.
1. Measure the reveal area you want around your art. Typically I leave a 1/4″ on all sides. This leaves a nice clean white border around the art. However, it does make it more noticeable if your cuts aren’t square. You may choose to have your mat overlap your art while you are first learning to cut mats.
2. Transfer the opening measurements onto the center of the BACK of your mat. Extending the lines out help for guidance on where to stop. You may want to add a bit more distance from the bottom of your mat board to the bottom of the opening (usually 1/4 – 1/2″ extra.) This is called weighting the bottom and is often used in professional matting. You probably never noticed it because without the extra “weight” the bottom visually feels shorter. I chose not to add weight to the bottom because I was hanging my art above eye level and it would be noticeable when looking upwards.
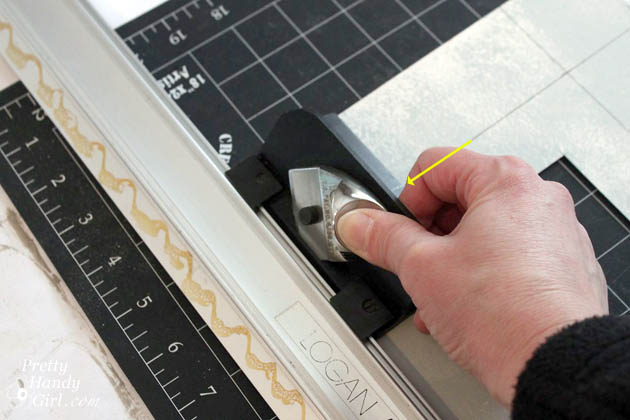
3. Rest your mat cutting rail (or metal ruler) directly on the line of your opening.
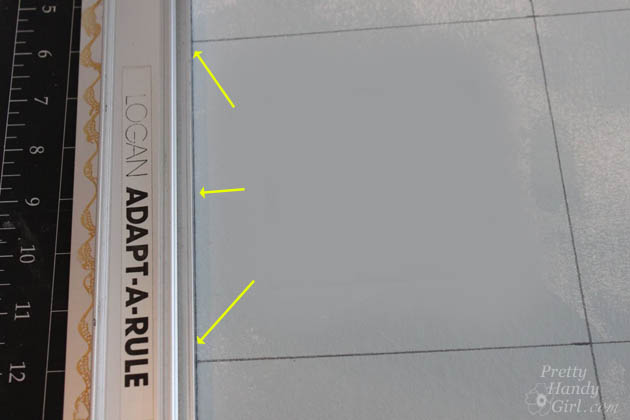
Set your cutting blade against the rail (the Logan Adapt-a-Rule has a lip that the mat cutter slides along.) Line the mark at the back of the cutter up slightly outside the bottom line of the window opening.
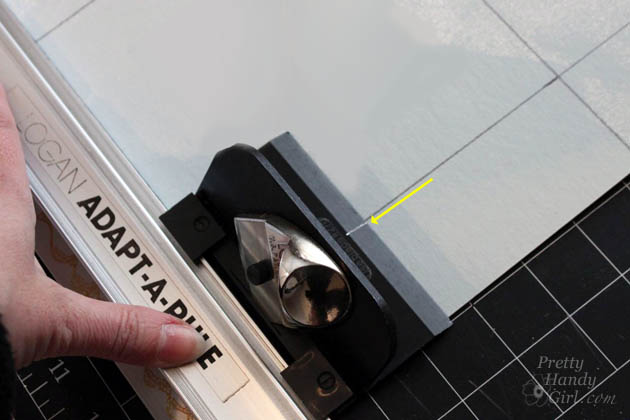
4. With firm downward pressure, hold the metal rail firmly in place. Then press down on the thumb depression on the mat cutter to plunge the blade into the mat. Move the cutter along the rail (towards the top of the opening) while applying firm downward pressure until you reach the upper line. Slowly press the mat cutter about 1/16″ beyond the opening’s top line. This ensures that all the corners are cut completely. Repeat steps 3-4 for the remaining three sides.
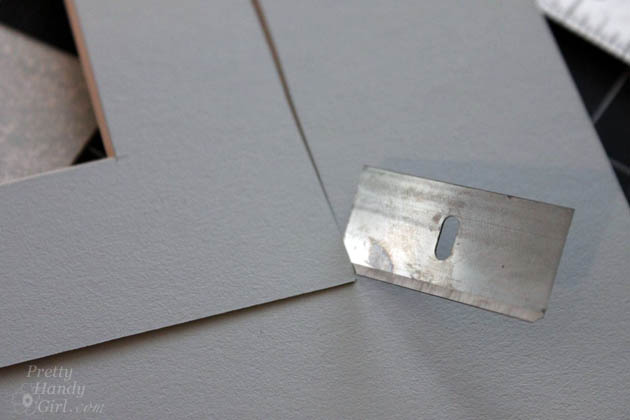
If your corner doesn’t cut completely, wait until you’ve cut all four sides. Then flip your mat over and use the x-acto knife or an extra blade to gently and neatly complete the cut.
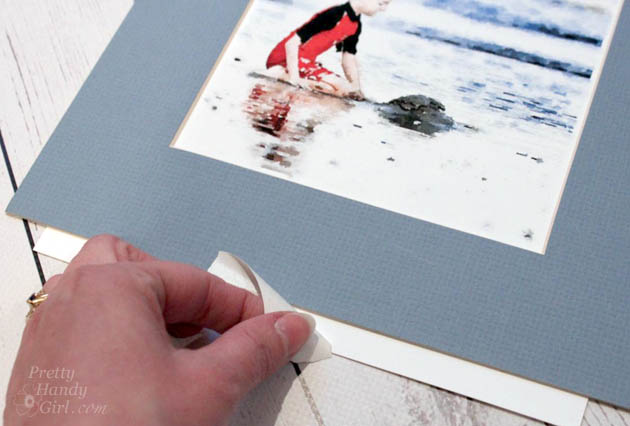
5. Center your newly cut mat over your art image. Take a small piece of artist’s tape and press it on your jeans or shirt first (adding lint to the tape will remove most of the stickiness and prevent it from ripping your mat or paper when removed.) Then put the tape on the mat and image to hold them in place. You may need a second piece of tape at the top of the art and mat.
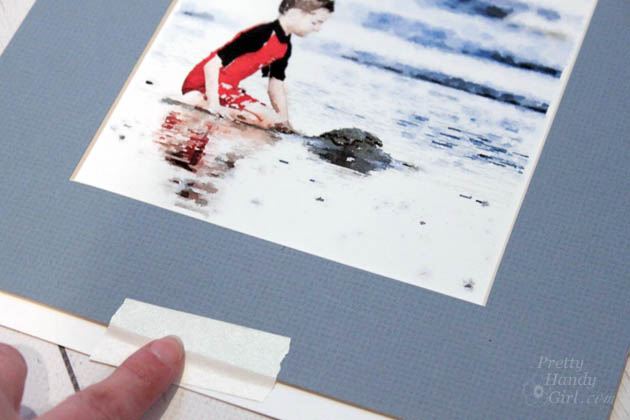
6. Flip the mat and image over and secure the art to the back of the mat with artist’s tape on at least two sides (if not all four.)
7. With the image secured, you can now remove the little piece(s) of tape. It should come off cleanly since it is less tacky from the lint.
8. Trim off any excess from your picture using the x-acto knife and metal ruler. Set your matted art into the frame of your choice.
Hang your picture up and enjoy!
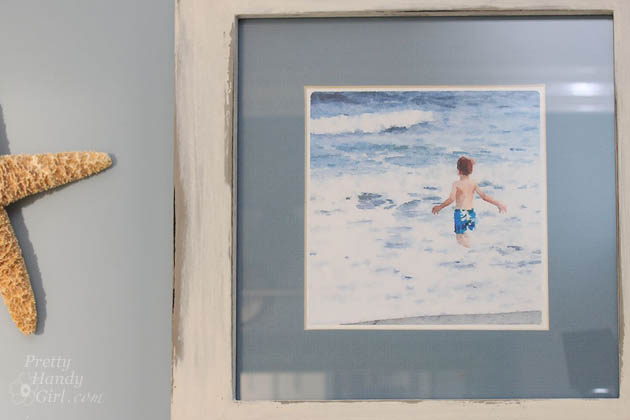
I love our new “watercolor paintings” of the boys! They have meaning to us and look like professional paintings.
FYI, I tried to find a good substitute for Waterlogue for those of you that don’t have an iPhone. I wasn’t able to find one, so I suggest asking a friend or relative who has an iPhone if they can download the app and let you send them your photo to run through it. (You could offer to pay for the app to sweeten the deal. It’s only $2.99 right now. ) 😉
Have a great week y’all!
![]()
Disclosure: This is NOT a sponsored post. I wasn’t paid to mention the Waterlogue app or Logan mat cutters. They are the tools I use and like, so I linked to them for your convenience.
Pin for later!

Where do you get your mat board? I can’t find any that thick and nice.
Art supply stores
Where you say to draw lines for the inside cut is the back of the mat. How can bevel be done on the back, wouldn’t it be the front.
I do this all the time. You just have to position the cutter inside the square when cutting to get the bevel going the right way.
Super helpful. Thank you!
I stumbled across your site while looking for directions on mat cutting and then fell in love with your pictures from the Waterlogue app! I bought the app and can’t stop playing with it now. I’m addicted! I want to see how every picture on my iPhone looks as a watercolor. lol
I would like to print some of my pictures and was wondering what printer you use? They turned out beautifully.
I have an Epson 2200 photo printer. I love it, but I think it’s old technology now. I’ve always had Epson printers and they have all produced great prints.
Wow, I was just looking for how to cut a mat but I love the tips about printing on art paper to get a watercolor look. Just exploring water-coloring and this give me ideas how to take an photo and paint it. Love it
Well this is all kinds of brilliant. You have an excellent eye. Thanks very much for this tutorial.
Try Lunapic on your computer. It has a variety of effects that you can use on photos uploaded from your computer. I like it. Free. http://www190.lunapic.com/editor/
Drat, no iPhone- I keep seeing all these beautiful pics with the waterlogue app, sure hope they come out with an android version soon. Thanks for the mat cutting info- I have tried with an xacto knife, but it just doesn’t cut it. 😉
Great transformation! Thanks for sharing the Waterlogue app, I hadn’t heard of it yet and am definitely going to download to my iphone.
Thanks Beth. IT is a great app!
What a great post and what great information. I recently had some mats made and it can be quite expensive. This mat cutter will surely save me some major bucks in the future. Thanks for sharing.
I use (and love) both the products you mentioned in this post.. I also LOVE that you can cut an angle in foamboard with that mat cutter (if you set the blade lower..) There are a lot of creative things you can do with fancy cut foamboard!
You did a fabulous job with framing those photos turned paintings. They look perfect hanging there in your bathroom!