My kids like to raid our recycling bin. They make the most imaginative things out of milk jugs, strawberry pints and toilet paper rolls. In fact, my five year old has been making his own Halloween costume from paper bags and tape. So, when #CollectiveBias sent out a challenge to make trick or treat bags with Elmer’s Craft Bond Glue Spots and Elmer’s Foam Board, I knew right where to head for supplies: Walmart AND the recycling bin! I hereby invite you to join me (and my escort) as we gather the supplies for this project.

Materials:


Instructions:

Start by removing the handles from the paper grocery bag and then cuff the top of the bag by rolling it under two times.

Pick out two sheets of newspaper (I used the obituaries. Truly Halloweeny don’t you think?!) and bring the paper bag and newspapers outside and spray them with spray adhesive.

It is important to wrap the paper bag with the newspapers as soon as possible for a maximum bond.

Wrap the bag neatly like a present with the newspaper. Use clear packing tape to tack any loose edges down. Also add a strip of packing tape to the inside of the bag cuff for extra support for the handle (should your child bring home pounds of candy!)

Take out your sharpie pen and draw lines in a spiderweb pattern on the bag.

Set the bag aside and collect the orange foam board, x-acto knife (with a fresh blade), pencil and the letter print out.

Set the letter on top of the foam board. I usually line the edge of the letter up with the edge of the foam board for less material waste.

Press firmly with the pencil as you trace around the letter. When you remove the print out you should see an indented outline.

Using the x-acto knife, cut out your letter shape. Use a metal ruler to cut straight lines. If your knife starts to tug and pull at the foam board, put a new blade in.

Clean up any ragged edges with the x-acto knife.

Use a few Elmer’s Craft Bond glue spots to affix the Elmer’s foam board letter to the bag.

To create a little spider, glue two pom-poms together with another glue spot. If you have black twisty-ties you are good to go aren’t you special, you don’t have to color them. (I only had white ties so I colored them with the black sharpie.) Wrap four twisty-ties around the middle to create the spider’s eight legs.

Use another glue spot to glue the spider to the bag.

Print out a bat silhouette downloadable template and layer it on top of black poster board. Cut out a few bat silhouettes.

Use a glue spot on the center of each bat to glue them to the bag. Fold the bats wings up for more dimensional interest.

Add stickers (or pre-punched paint chip stars using Elmer’s Glue-All multi-purpose glue) to the bag.

I incourage you to decorate your bag anyway you like. Bust out your craft supplies for inspiration.

If spiders and bats aren’t your thing. How about spooks and spirits?

To add the handles, follow the directions on your grommet kit. 1. Punch a hole in the bag at the top of the bag using a hole punch. 2. Insert a long grommet through the hole. Lay a short grommet on top. 3. Hammer the grommets together using the metal rod tool that came with the grommet kit.

Cut off the sleeves from a t-shirt. Cut two 2.5 – 3″ wide strips. Then stretch the sleeve loop in opposite directions. This will make the shirt material roll.

After you have stretched and rolled the sleeve loops, cut them at the seam. Then thread each end through the grommets on the bag and tie a double knot on the inside of the bag.

Now gather up your little trick-or-treater and give him this unique candy collection bag! My sons’ had the biggest smiles on their faces. Definitely worth the effort to make these bags.

This eency weency spider is my favorite!

Way more personalized than these generic plastic pumpkins, don’t you think?!

Which one is your favorite? I can’t decide, because I love them equally as much. Spook or Spider?

Eeeeeekkk, we can hardly wait for October 31st!

Disclosure: This project has been compensated as part of a social shopper insights study for Elmer’s #gluenglitter #CollectiveBias #CBias. The ideas and opinions shared in this post are purely my own from my own crazy creative head.

Follow up: Well, my youngest loves his bag so much that he told me, “Mom, we should decorate every side with a different holiday.” And that is exactly what he did today during quiet time. I just want to stop time and keep him five forever!

Today I am going to show you how to Make Your Own Fall Wreath. If you’ve been following me for long, you were witness to my one wreath with many different looks for one year. Well, I’m ready for a change. So, I decided to create something completely different.

When I think of fall, I think of cooler weather, sweaters, autumn leaves and flowers. This wreath encompasses all those elements.

Lucky for me I had all the materials on hand. Especially the XL cable knit sweater that I picked up at Goodwill thinking I could make sweater vases out of it.

Materials:

(I’ve included affiliate links for your convenience. I earn a small percentage from a purchase using these links. There is no additional cost to you. You can read more about affiliate links here.)

Instructions:

Start by cutting off the sleeve of the sweater.

Cut, the sleeve in half lengthwise. Then put the right sides together.

Stitch the ends together (try to line up the stripes or cable knitting.) Trim off any excess.

Open your sleeves up to give you one long length of sweater material.

Preheat the hot glue gun. Lay the wreath form on top of the sweater material.

Put a bead of hot glue on the back side of the wreath form and glue one edge of the sweater material to the wreath.


Squeeze out another bead of hot glue, wrap the other side of the sweater material up and glue it against the already glued piece.


Realistically, this is the backside of the wreath, but if you have a see through door like I do, you will want to roll under your raw edges to hide the seams.


Work in 3-4″ sections, adhering one side and then the other until you reach the end of your wreath. Cut your sweater material slightly longer than you need, then roll under the raw edge and glue it down.


Your wreath should resemble something like this:


Hot glue some leaves onto the wreath covering one of the seams.


Then add some flowers. And more leaves, and more flowers, until you have burned your fingers to smithereens!


Next tie one loop of ribbon to cover the top seam.


Tie more ribbon to the loop to give your wreath a more “substantial” bow.


And now you have a warm, cozy and colorful fall wreath! What do you think? I just want to snuggle up to it every time I walk through the door.


Have you started to decorate for fall? Do you have your wreath yet? I’d love to hear about your unique wreath project. And if you need more ideas, enjoy these 24 more Fall wreath ideas:

24 Creative Fall Wreaths | Pretty Handy Girl
Y’all have a fabulous weekend!


I have amassed quite a collection of “project” furniture and objects waiting for a future date with my creative magic sessions. I worry that some of this behavior is bordering on packratness (I don’t think that is a word, at least my spell check says it isn’t. But, you get my drift, right?!) So, when a Wagner rep contacted me about trying one of their paint sprayers, I couldn’t reply “YES!” fast enough. I had visions of setting up all those projects and spraying them down in a line-up fashion. But, I reined in my “glass half-overflowing” mentality and decided to tackle one project at a time. Good thing too, because although the Wagner Power Painter Plus with EZ Tilt (affiliate link) did spray at lightning fast speed, there were a few drawbacks.

But, I don’t want to get ahead of myself. I still want to give you a bonafide tutorial on how to fix, prep, paint and finish a wobbly yard sale find for yourself.


Materials:

(I’ve included affiliate links for your convenience. I earn a small percentage from a purchase using these links. There is no additional cost to you. You can read more about affiliate links here.)

*These items are purely optional. You don’t NEED them, but they help.

This wash stand had a $5 price tag on it. But, my neighbor gave it to me for $3. Is that robbery to talk someone into less than $5 for this antique?! In self defense, the stand was in pretty poor shape. It was VERY wobbly and had some big scratches on it. Can you forgive me?

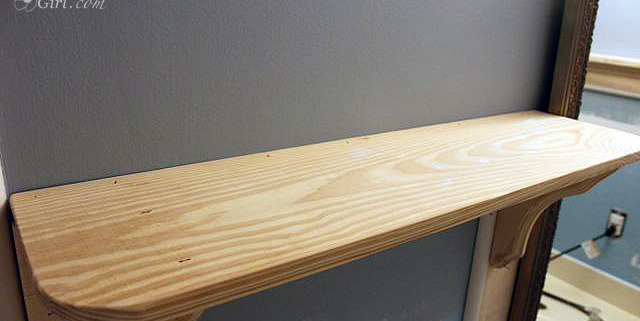
Here is what you do when you find yourself as the new owner of a “this really should be trashed” purchase. Take it apart and rebuild it from the ground up. Having done this before with Daisy the Discarded Chair, I was prepared to tear this wash stand down to the ground. But, luckily it had some better joints than I had anticipated. So, I basically pulled apart anything that was not tightly joined.

The shelf over the drawer came off super easy.

As did a few joints.

I wiped the whole wash stand down with a wet rag.

Then, the side of the stand got some new glue and a few finish nails.

The joints got some Gorilla Glue and were set back together. And, I added a thin bead of glue and some finish nails to re-secure the shelf.

Next I sanded down the whole piece of furniture with these two 3M sanding blocks. I like to call them Tweedle Dee and Tweedle Dum because they are super easy to use. Even an idiot can’t screw up.

They work great for around spindly legs because they can bend and flex (I wish I could bend and flex like that!)

After wiping off all the sawdust, my wash stand looked like this:

Almost too pretty to paint, but it had some serious gouges, so I took a picture and said goodbye to the beautiful wood.

Here is where the race began. I decided to time myself painting on the primer with a brush. Then time myself using the sprayer for the first coat of paint.

Start your engine….paint brush and KILZ Clean Start Primer…GO!


After 30 minutes I had primed the entire stand from top to bottom.

After the primer dried, I gave the stand a quick, light sanding with a 220 grit sanding block and wiped it down with a damp rag.

I set up the sprayer, read all the directions (very important!) Then I filled the quart size reservoir and attached it to the sprayer. The Wagner Power Painter Plus doesn’t require a compressor, just a good old fashioned extension cord plugged into your household outlet.

Start your engine…Wagner Power Painter Plus…GO!

VROOOOOOM! The sprayer let out the loudest and most obnoxious noise I had ever heard (Note to self to wear ear protection next time.) I thought the sprayer was going to self destruct, so I let go of the trigger. Then I pulled it again and the noise returned, only to abate after a few seconds once the paint started to come through the nozzle. Phew, that scared me.

I breezed through painting the entire wash stand from top to bottom. I started with it upside down and quickly flipped it while it was still wet (I left a finger print underneath, but no one will know about that unless you squeal.)

And I was done. Then I looked at my timer and WHAT?!!! 5 MINUTES! Holy Cannoli! I had no idea a sprayer could shave that much time off a paint job.

I left the wash stand outside, while I took apart the paint sprayer.

To avoid emptying the paint canister, I covered the container with saran wrap and a rubber band.


Then I took apart the ENTIRE sprayer and cleaned out all the parts. It is soooo important to clean the sprayer thoroughly or you risk paint drying in your machine and ruining it. This is a look at the sprayer disassembled.

It is paramount to clean the tiny dual spray tips on the machine. They are small slits that can clog easily if the paint is allowed to dry in them.

After the wash stand had dried. I put the sprayer back together and screwed the paint container back onto the gun.

I was all pumped and excited to be done in 5 minutes! With dusk still 30 minutes away, I had no fear. BIG MISTAKE!

What was to ensue was a stressful 45 minutes of paint globbing, paint sputtering, my cursing, and frantic cleaning of the sprayer again. I finished spraying, but I had to use a different top coat color because I ran out of the first paint color. (Which ended up being one of those happy mistakes. You’ll see.)

I wiped off the big globs of paint and decided to give those areas a little “extra” distress in the morning.

After stepping back from the project, doing some research and having a twitter conversation with Shaunna (the furniture painting guru), here is what I concluded from my disasterouos 2nd attempt:

  1. The paint sprayer MUST have a full paint cup in order to work properly. When the reservoir gets down to less than 1/4 full any air that gets into the paint suction tube will cause the sprayer to sputter and discharge big globs of paint, instead of a nice even spray.
  2. The sprayer dispenses an INSANE amount of paint in 5 minutes and when it runs low #1 happens. I used a half gallon of paint on the first coat of paint on this small wash stand. Whereas, I normally would have used maybe half a quart to brush on two coats total. The drop cloth was so heavy with paint when I cleaned up, that I realized the majority of the paint was wasted in overspray.
  3. The Plus does not have a low paint level indicator. Therefore, it is very difficult to determine when you are getting low on paint until the sprayer starts to sputter and shoot out globs of paint onto your project.
  4. In the same vein, the paint canister only holds a quart of paint, and 1/4 of that isn’t useable unless you like Jackson Pollock style painting.

The next morning, I took out my power sander and gave the sink some character by distressing it.


This is where the happy accident occured. Because I had to use an aqua blue as the top coat on my sink, you could see the blue gray color peeking out! Which I think makes it look sweet, shabby and old.

Once I was happy with the amount of distressing, I sanded any chipping paint and rough spots with the 220 grit sanding block. Then, I cleaned off the wash stand with a damp rag. To protect the sink, I used Minwax wipe-on Polyurethane. I like the wipe-on Poly for speed. But, it doesn’t leave as thick a coat as the traditionally brush on kind. So, if you really want to protect a piece of furniture, use the brush on kind instead.

I added a cute little crystal cheap acrylic knob to the drawer.

And my new/old dry sink looks right at home in the corner of my porch! Although, it needed something…hmmmm….

…how about a plant! I dropped in a plastic pot with NO holes in the bottom. I filled the bottom 1/4 with rocks for drainage. And my pothos plant. I used to have a chippy pedestal that sat there, but sadly I had to get rid of it. I’ll fill you in on the details next week. It is a sad story ;-(.

Here is my summary of working with the Wagner Power Painter Plus model:

  • Pros – Saves time. $100 price tag. No compressor needed.
  • Cons – Small Paint Cup, No Flow Speed Selector, No Low Paint Level Indicator, Lots of overspray and wasted paint.

I will definitely try the sprayer again. When I do I might add Floetrol to my paint, which is supposed to help your paint even out and give you a smoother finish. (Especially if it globs on you.)

  • Wagner Power Painter Max has a two speed selector AND a paint level indicator. This model runs under $100. Have a great weekend and see you next week with some more DIY goodies.

Thank you for all the kind comments about my boys’ bathroom. One of my favorite changes in the room was the addition of the built-in decorative shelf. It was fairly easy to build and install. I used a router to give the shelf a decorative edge, but it isn’t necessary if you don’t have a router (or are afraid to use one.)

Materials:

  • 1x 8″ Pine board (cut to length for your shelf)
  • 2 Wooden shelf brackets (with included mounting screw)
  • Sandpaper
  • Construction adhesive
  • Finish nails or nailgun
  • Hammer
  • Primer
  • Paint
  • Brush
  • Router and bit (optional)

Instructions:

Cut your shelf board down to size. If you want to add some pizzazz, use a router to give your shelf a decorative edge.

Sand any rough edges down with sandpaper.

Set the shelf aside and get the shelf brackets. Line up the top of the shelf bracket with the top of the board and batten moulding.

Insert the mounting screw into your shelf bracket and press it into the board and batten where you wish to install the shelf.

Remove the screw and drive it into the board and batten where you left the mark. Slip the bracket over the screw. Adjust the depth of the screw until the bracket fits snug against the board and batten.

Squeeze some construction glue onto the back of the bracket and then slip it back onto the screw. Insert two finish nails through the bracket and into the board to further secure the bracket.

Repeat the installation steps for the other bracket. Lay the shelf on top to check the fit. Little gaps are okay because you can always caulk them later.

Remove the shelf. Squeeze a bead of construction glue on top of the board and then reposition the shelf on top of the board and shelf brackets.

Nail finish nails through the top of the shelf and into the board and the top of the shelf brackets.

Your shelf is now attached.

If you want, you can add decorative moulding underneath your shelf at the top of the board. I cut the edge of the decorative moulding at a 30 degree angle.

The moulding was cut at a straight 90 degree angle between the two brackets.

Caulk, prime and paint your shelf. Then wait about 3 days before resting anything on the shelf to avoid it sticking to the newly painted shelf.

But, then you need to put some pretties on that shelf and admire your handywork!

And now the moment that you have all been waiting for! We have a winner of the MirrorMate giveaway! I really wish I had more than one. But, don’t forget you can still get a 10% discount. Simply use: PHGBlog at checkout. Hurry because it expires on Sept. 27th 2011.

Let’s give a big “Congratulations!” to Diana C. who was chosen at random to win the MirrorMate frame credit!


Diana said: “What a great and easy way to update a bathroom mirror! I liked MirrorMate on FB … and my favorite frame is the simple, yet elegant look of the Chelsea Espresso frame!” Nice choice Diana, I hope you send me before and after pictures of your mirror.

Ta ta for now, I’ll be back soon with another fabulous giveaway!


If you are just joining me and missed the tutorial for building board and batten moulding, you can view that tutorial HERE. Today I want to show you how to hide the holes, seams and how to paint the board and batten moulding. Plus, how I paint the wall so it looks more like wood and not like drywall.

Start by taping off the moulding. I used ScotchBlue painter’s tape with edge lock technology because 3M just sent me these rolls to try out.

If you are re-painting the crown moulding and the door, tape them off as well.

Usually I fill the nail holes with wood putty. Then I fill seams with caulk. To view a tutorial on filling holes with wood putty, click HERE.

I actually just read about a neat tip on Diane’s blog (who also just added board and batten moulding in her bathroom.)  She uses ice cubes and cold water for working with caulk. I’ve never tried this, but am happy to report that it really helps smooth the caulk and keeps it from sticking to your fingers.


Which caused me to amend the Pretty Handy Girl’s tried-and-true caulking method:

  1. Squeeze out your bead of caulk, using a caulk gun.
  2. Dip finger in the ice cold water.
  3. Run your finger along the bead to smooth it.

Seal every seam in your moulding and then let it dry.

Once all the putty and caulk has dried, get the primer out. Paint primer on all the wood moulding using a paint brush. In the center (drywall areas), you can roll on the primer.

But, before the primer dries use the brush to spread it in long vertical strokes.

After the primer has dried, go ahead and add one coat of paint. Follow the same direction of strokes with the brush as you did when priming.

I made a video to show you the technique I used to give the wall a wood grain texture. Please forgive the painting clothes and unwashed hair! I haven’t hired a hair, makeup and costume stylist yet.

I have yet to be able to get away with only one coat of paint. If you look close you can still see some of the blue wall color showing through.

After the paint has dried, it is time to remove the tape. Anywhere that you caulked between the wood and the tape, you need to score the caulk to give it a clean edge when you remove the tape.

Remove the tape and looky at that clean edge! I’ve used ScotchBlue painter’s tape before, but I can honestly tell you that the new Edge lock technology is a big improvement. As long as you press the edges down firmly there is hardly any places where paint seeped underneath. The only places seepage occurred was where there was a dimple or imperfection in the wall.

One thing I didn’t caulk was the light switch plate which I had to cut to fit next to the batten. I will probably go back and add a little caulk between the switch plate and the moulding.


I hope you learned something today. Coming up next, the bathroom reveal!