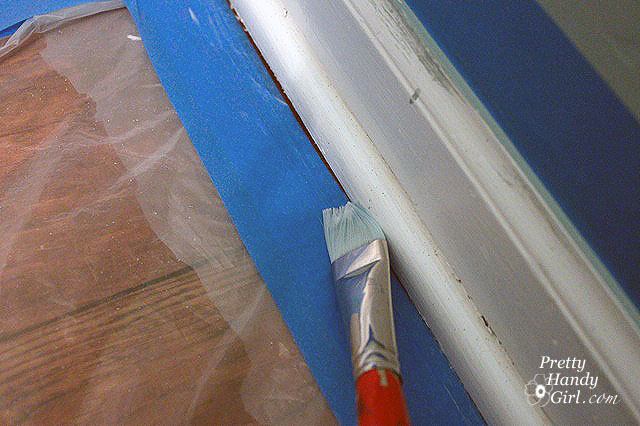
Board & Batten moulding is very popular right now. And why not? It is easy to work with and looks great (after it is painted)! If you remember, I used board and batten in my  my son’s closet turned reading nook last year.

I decided to create a similar look in the boys’ bathroom. Only this time I wanted to round the edges of the battens for more visual interest. I’m warning you now, this tutorial is a bit photo intensive. But, how else would I give you a step-by-step tutorial?

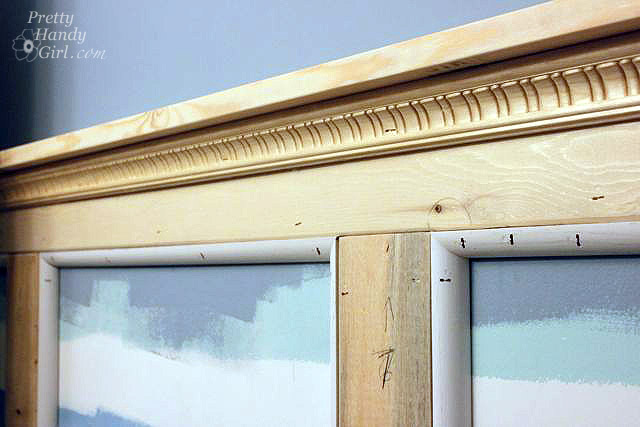
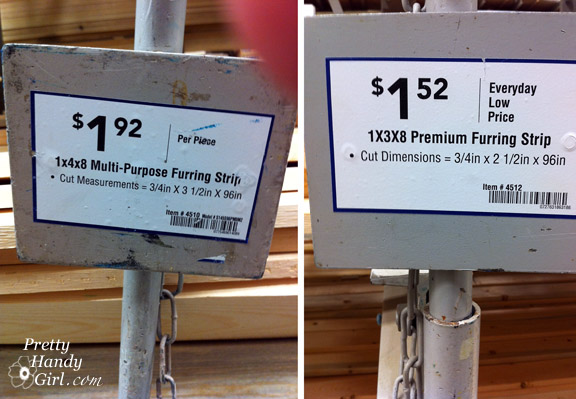
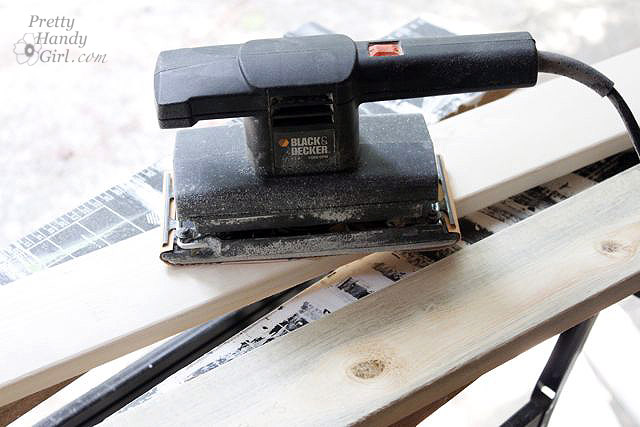
I started by purchasing my lumber at Lowe’s. Did you know you can buy cheap furring strips for your battens? It will save you money. Especially if you don’t mind sifting through the stacks to find the straighter boards and sanding the face of your boards after cutting them. I bought 1x4x8 boards for the battens. And 1x3x8 boards for the upper ledge. I also purchased quarter round moulding and decorative moulding for underneath the upper ledge.

Removing Baseboard Tiles:

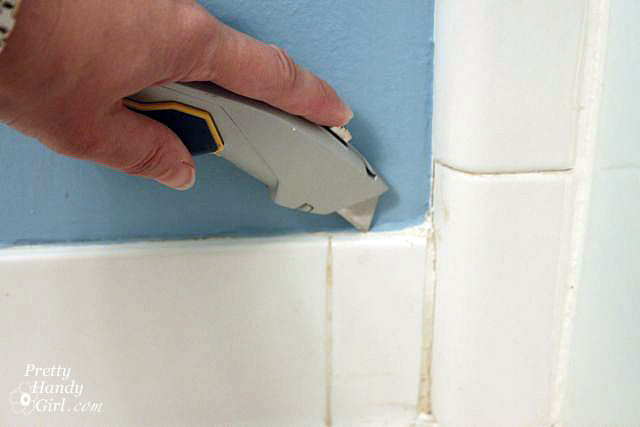
The bathroom had baseboard tiles that had to be removed. I grabbed a few tools and made quick work of removing them. The ear muffs and safety glasses were definitely a must!

Score the edges of the tile with a utility knife.

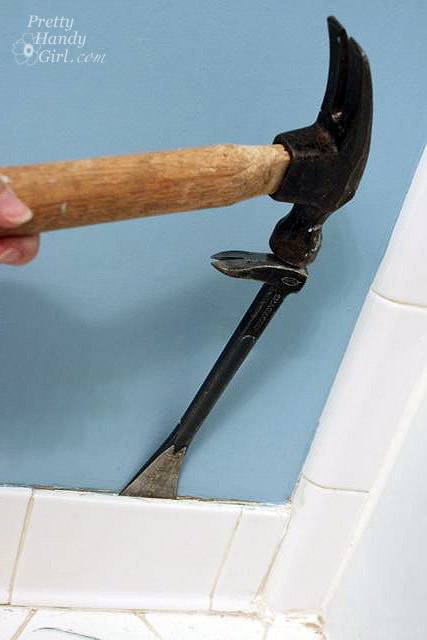
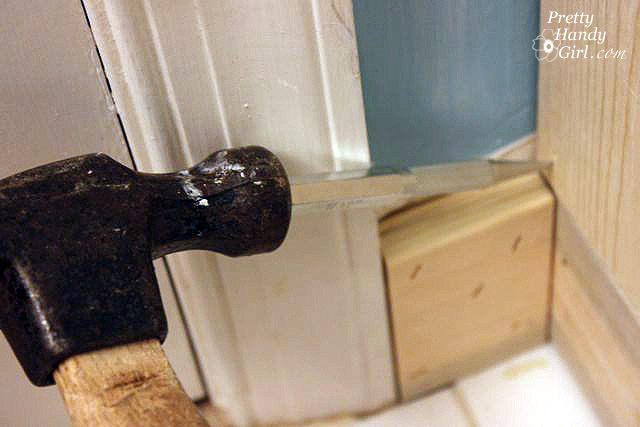
Hammer a flat pry bar behind the tiles.

Remove each tile one at a time.
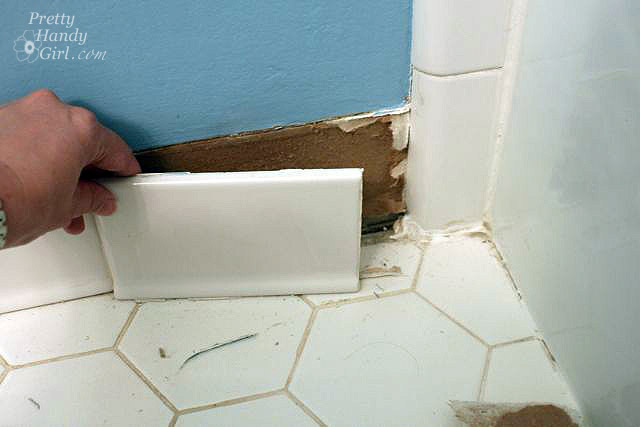

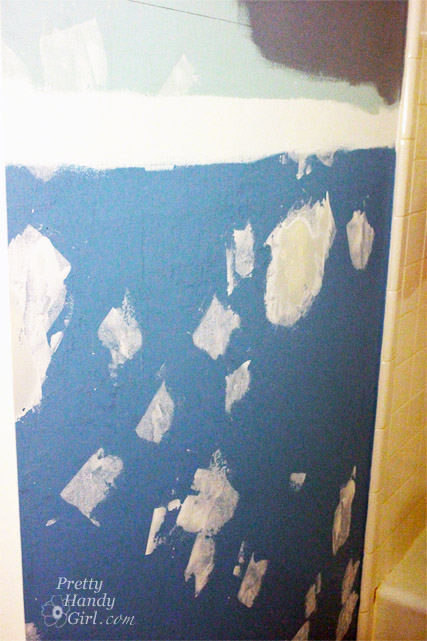
Take some time to patch any holes that are in your wall. You can view a tutorial on patching drywall HERE. I needed my walls to be as smooth as possible since I wasn’t going to add board behind the battens.

Installing Board and Batten Moulding:

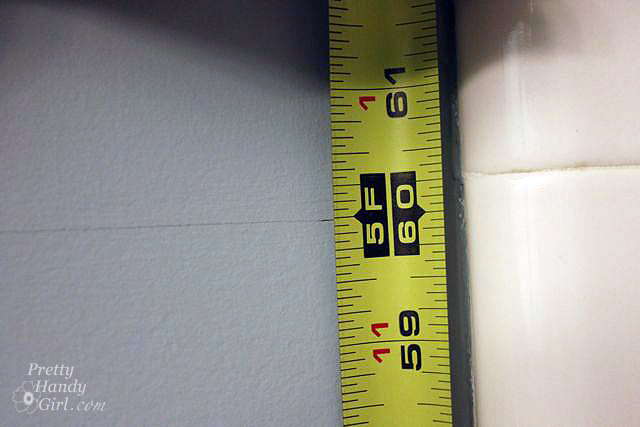
Mark the height where you want the top of your moulding to be. I used 5′ as the height, but then ended up lining up the bottom of my boards on the 5′ mark. So, for the 8′ ceiling room, the top of my moulding was at 65″. Use a level mark as a guide line across the width of your room.

Next measure the widths of the sections that your horizontal boards will be attached to.

Cut your boards to size.

Test fit your boards.

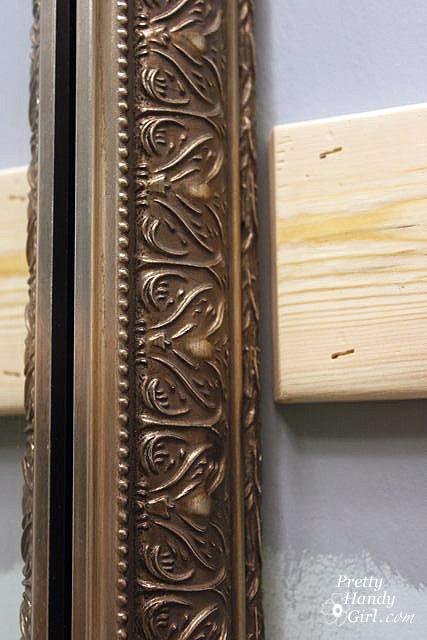
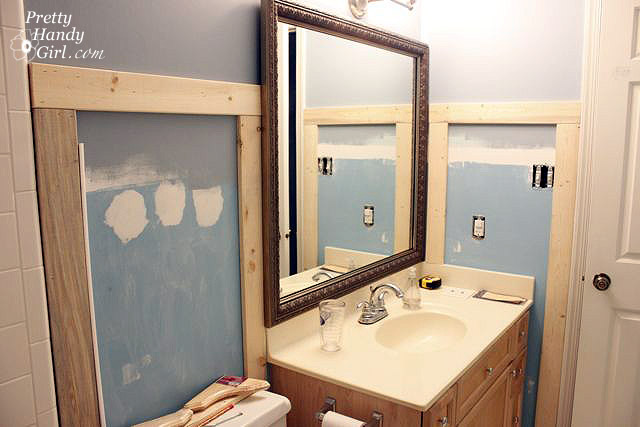
I cut the board that butted up to my mirror at a 30 degree bevel.

Once you have cut all the boards and they fit. Sand down the face and edges.

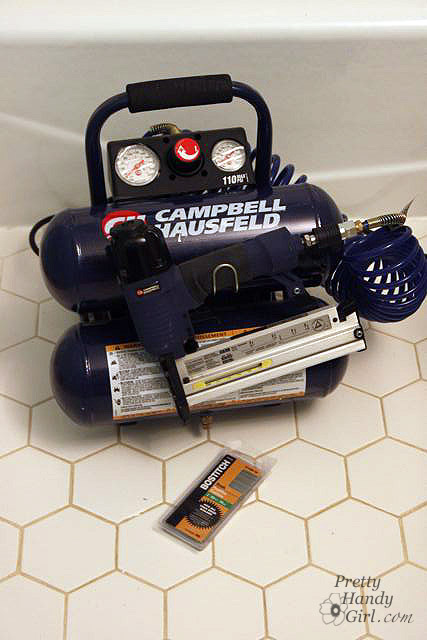
A nail gun and compressor are not a necessity, but they do make the job a lot easier! Otherwise, you will be doing a lot of hammering and nailing while holding boards in place.

I used the compressor at 110psi, which worked well for the 1″ pine boards. I used 2″ nails for the boards and battens and 1.5″ nails for the quarter round.

Be sure to wear your safety gear. The compressor is LOUD and no need to risk your eyesight. I know, you are jealous of how attractive I look in my safety gear (not!)

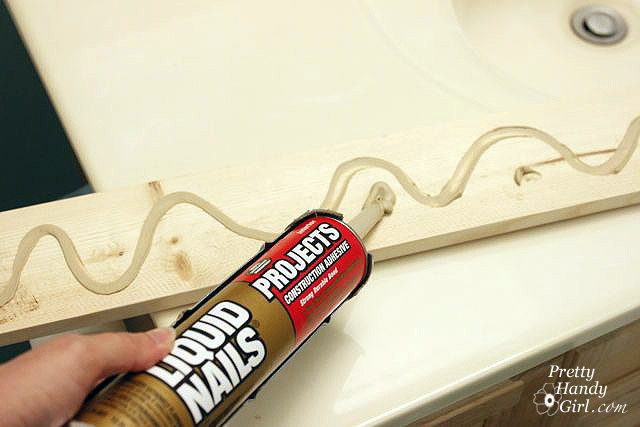
For the horizontal top boards, I added some construction adhesive. This is not 100% necessary unless you have monkeys for children. And I do, so the extra adhesive seemed like a good idea.

Press the board onto the wall.

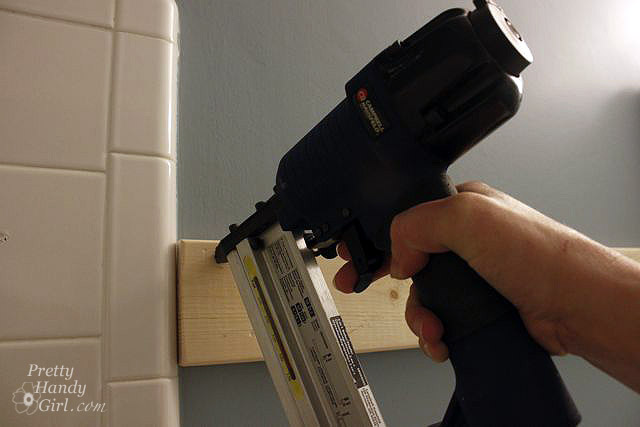
Shoot several 2″ nails into the moulding to hold it in place. Be sure to angle your nails to make it more secure.

That board shouldn’t go anywhere now!


Repeat the same steps for the baseboard boards (minus the construction adhesive.)

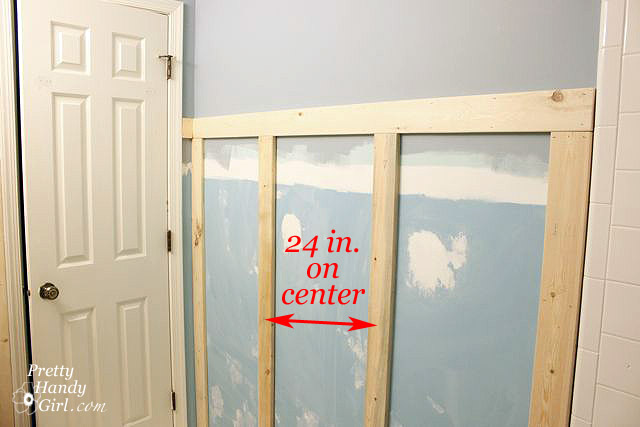
Next, measure the vertical distance between the top and baseboard battens. Be sure to measure at the exact location that a vertical batten will go. I’m sure your heights will vary.

Cut all your vertical boards and sand them down.

When you are figuring out the spacing, be sure to take into account if you will be adding a towel bar or other fixtures to the wall. My old towel bar was 24″ wide, so I made sure to space the battens to accommodate the towel bar.

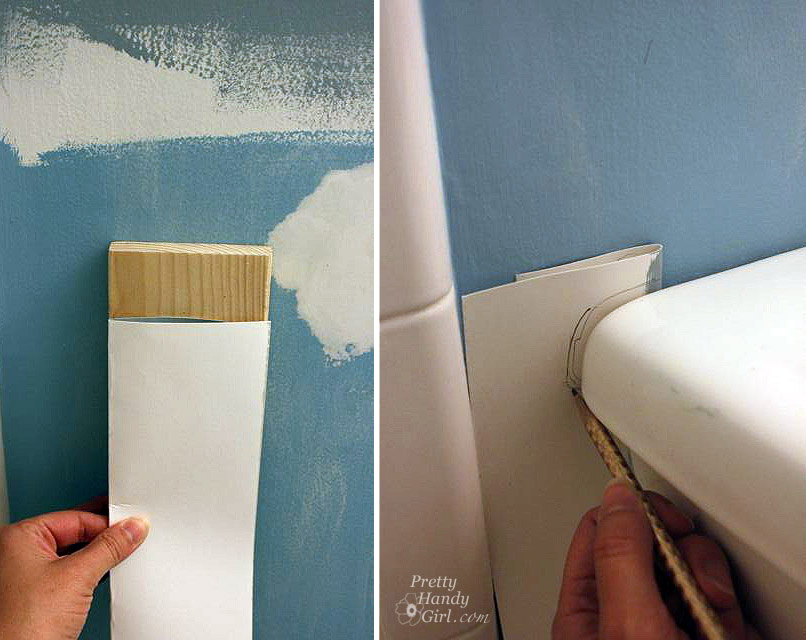
While installing the battens you may run into a few inconveniences. Like, a toilet or something that can’t be moved. To deal with the toilet, I cut a piece of cardstock the same width as my batten. Then I slid it behind the toilet and scribed around the edge of the toilet.

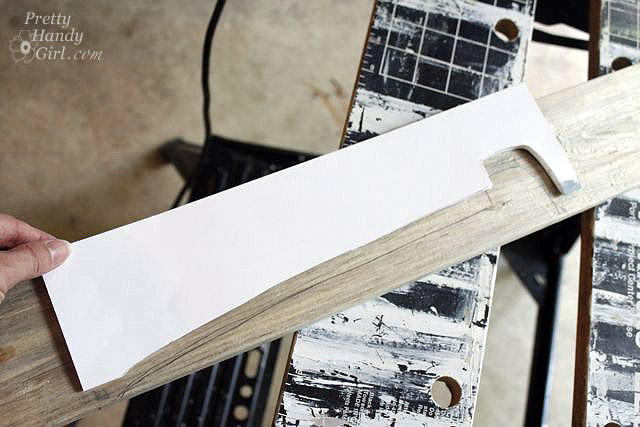
Then I cut along my line and transferred the line to my batten.


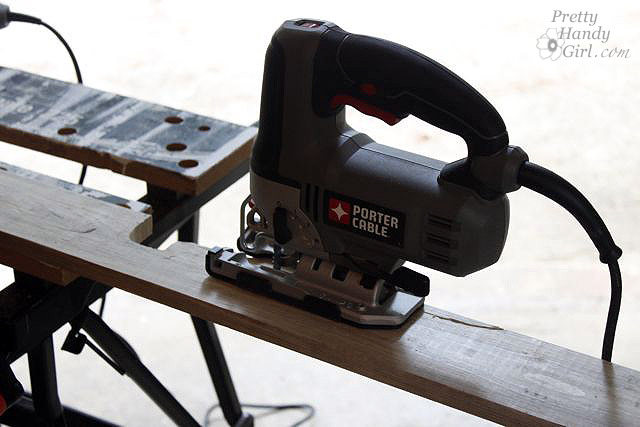
Use a jigsaw to cut out the scribed profile (I tried to use my Dremel Trio to cut out the small section, but it failed miserably. I think the Trio is best used for thin stock like the back of a bookcase.)

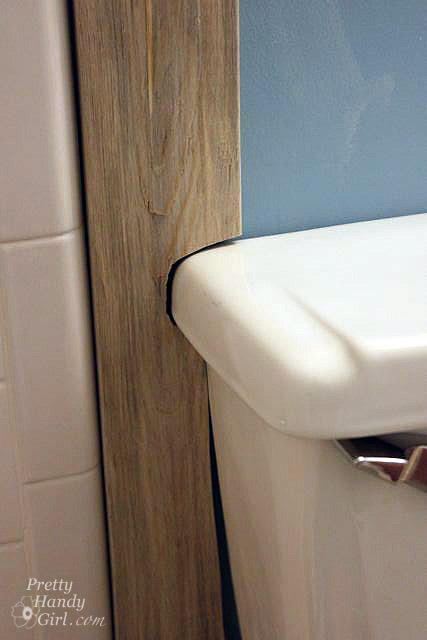
Then you can install your batten around the “inconvenient” object.

By now your room should resemble something like this:

Installing Quarter Round Moulding:

Now comes the step that requires a little more precision. Cutting the quarter round moulding can be a little tricky, but don’t fear I know you can handle it. Remember the old carpenter’s adage, “Measure twice, cut once.”

Well, I admit it, I forgot! Ugh. Even I can make mistakes, so don’t be afraid to mess up once in a while. We all learn from our mistakes:

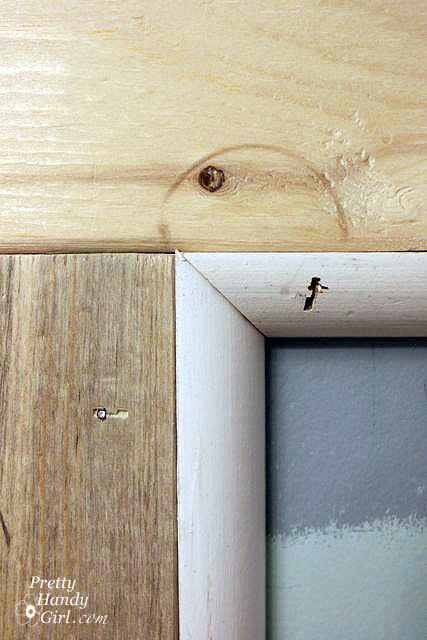
You will need to meaure the width and heights of the rectangle between your battens. Be precise for better accuracy and less caulk later!

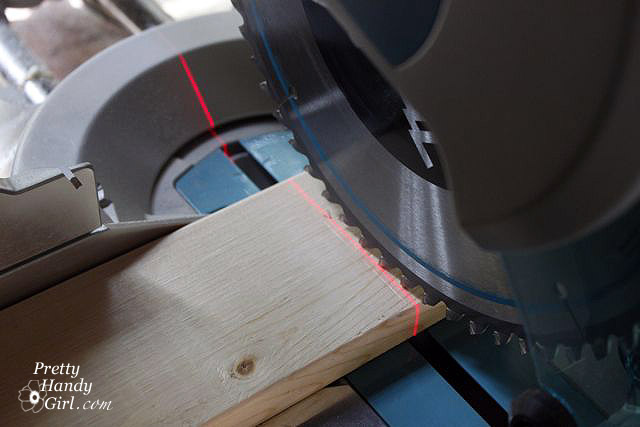
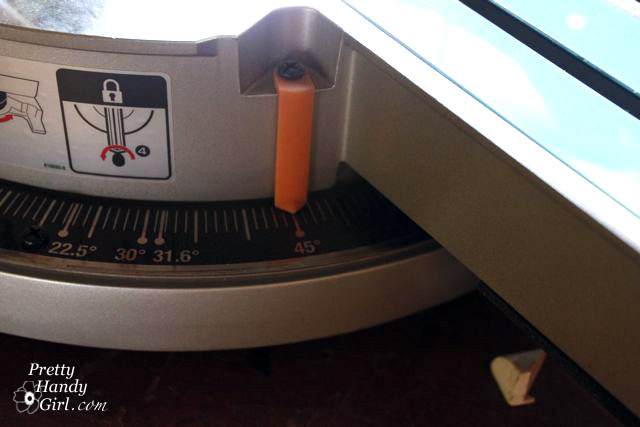
Set your miter saw at a 45 degree angle.


This is what it should look like. The saw should be straight up and down at a 90 degree angle from the saw stand (in other words, no bevel cut).
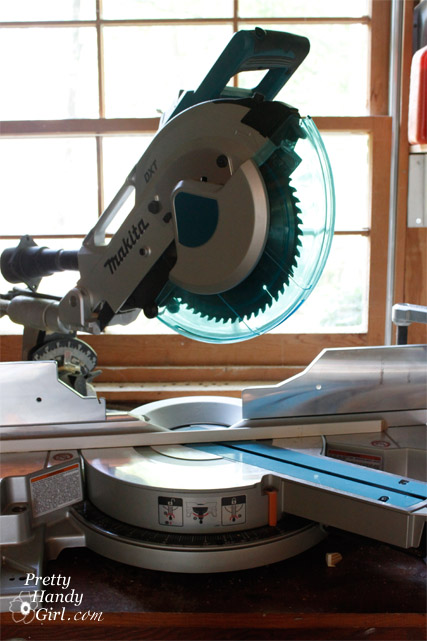


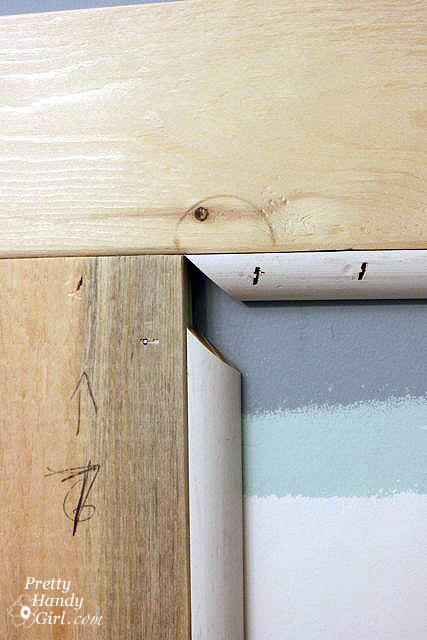
Cut your quarter round so that the longest point on the moulding equals the measurement you took from the rectangle. You may have to face the “round” edge in towards the fence for some cuts. And it might take a few cuts to figure out the angles. But, I know you can do it. Once you have all your quarter round cut and dry fit, you can proceed with the install.

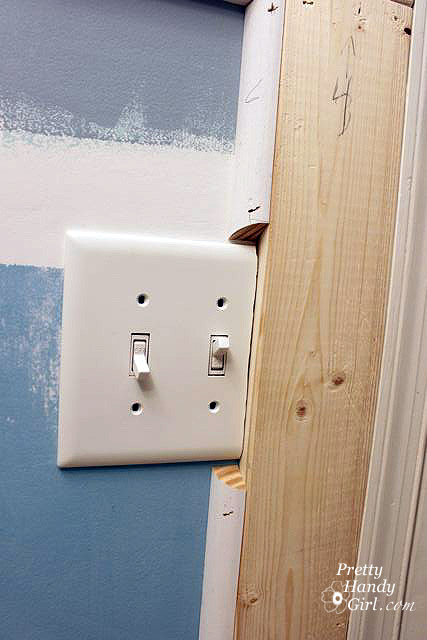
Remember those “inconvenient” objects. End your quarter round right before the toilet.

Add a 30 degree angle when butting up to objects like light switch covers and outlets.

Load the 1.5″ trim nails into your nail gun. Aim your nail gun into the quarter round at an angle so the nail ends up going through the quarter round and into the battens.
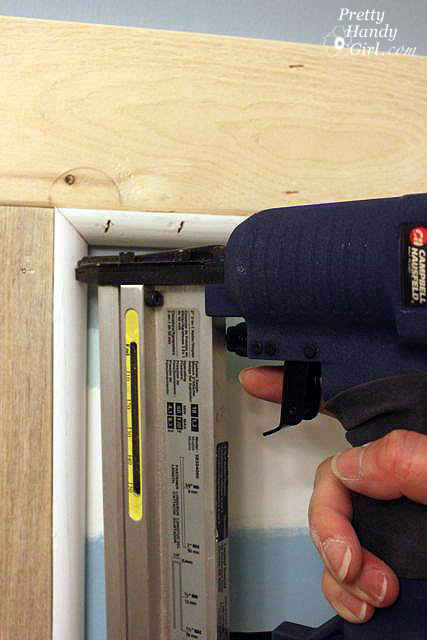

Hey, you are about 80% of the way done with installing the moulding!

Installing the top ledge and decorative trim moulding:

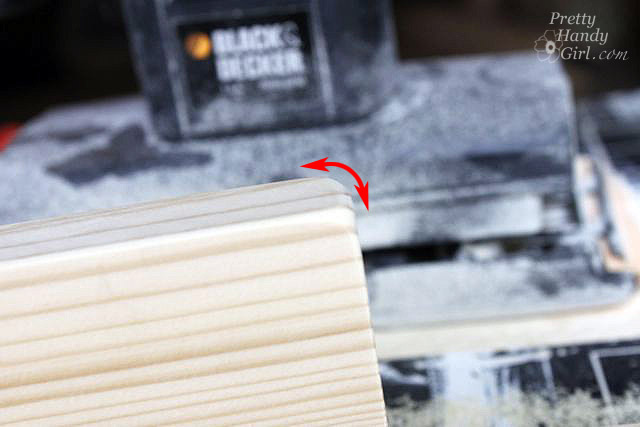
Cut the top ledges to size and sand them down. It is a good idea to round any exposed corners with the sander. This will undoubtedly prevent future dents to the head.

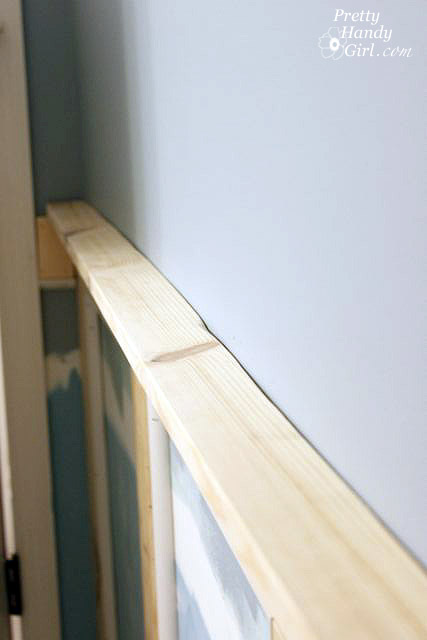
Lay the ledge boards on top of the upper battens. If your walls are uneven, your ledge will likely look like this.

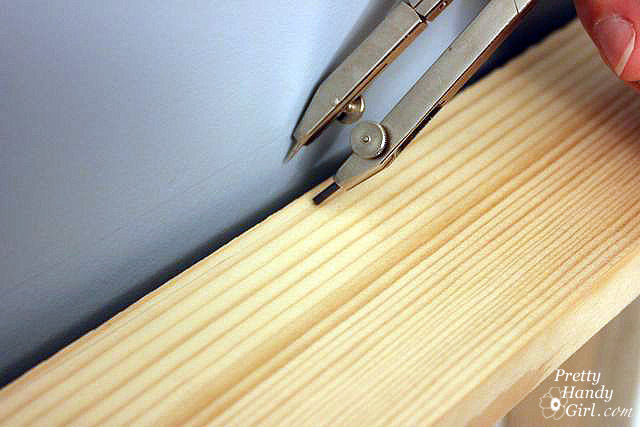
No biggie. Grab your grade school compass. And set the two arms to the width of the widest gap. Then drag your compass along the ledge and the wall.

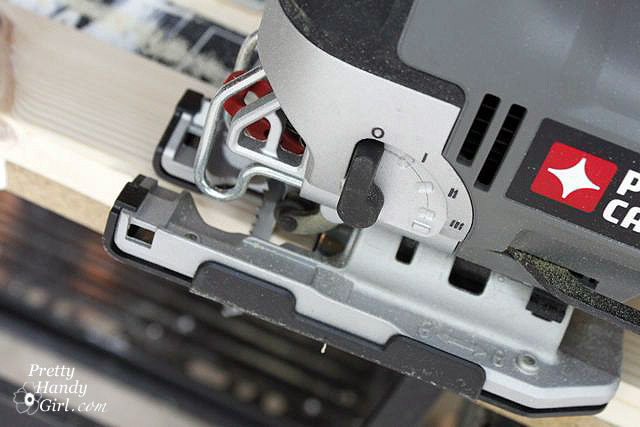
Get out your trusty jigsaw again and cut off that scribed line (have I told you how much I love my Porter Cable Jigsaw?! It pays to buy good quality power tools.)

Ahhh, much better. Any smaller gaps will be filled in with caulk later.

Nail the ledge into the batten below it. You can use construction glue for extra stability. (Yes, it is monkey protection for us.)

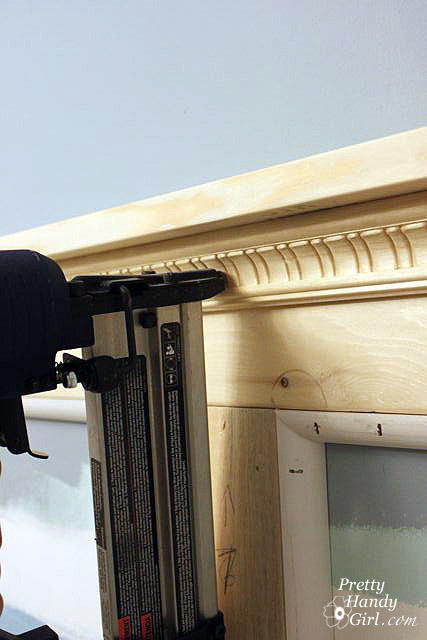
My favorite part of the moulding project is adding a little extra “bling”. I chose this decorative moulding to sit below the ledge and to give it extra support (again I have monkeys!)

Don’t forget to cut a 30 degree angle wherever you cut a batten at that angle.

Nail the decorative moulding onto the batten just below the ledge.

Now doesn’t that look beautiful?!

Fixing a few nail problems:

Remember how I said I make mistakes too? Well, here are two easy mistakes to fix when using a nail gun. When the nail doesn’t go all the way in (this usually happens if you don’t keep pressure on the gun when you squeeze the trigger), simply use a hammer and a nail set to hammer it into the wood.

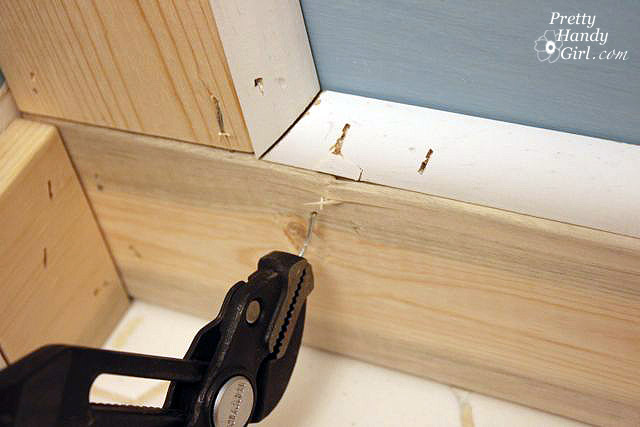
Occasionally a nail may hit something when entering and end up popping out. Grab the end of the nail and pull it all the way through the wood. You may take some wood with it, but you can patch it with wood putty.

I’ll be back to show you how to caulk and paint this beautiful moulding! And then the final reveal of my Boys’ Fishy to Fabulous Bathroom! Finally, a bonus post on creating a branch towel bar.


Photobucket” border=”0″ alt=”Photobucket”>


I promised to show you how I lit my son’s bookcase. It really isn’t anything fancy.

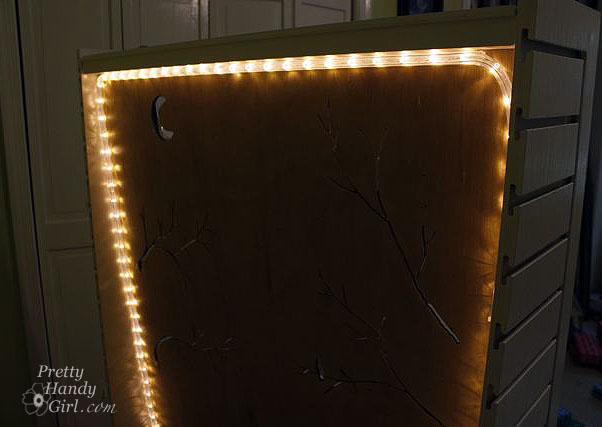
But, a promise is a promise. Here is the view of the back of the bookcase:

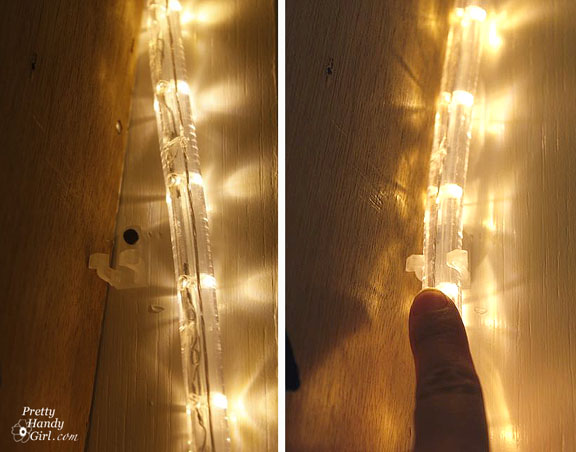
I purchased the LED rope lights at Home Depot. They came with little snap in holders. You simply drive a screw into the mounting hole. Then snap the rope light into the holder.

On the top edge, I used a long channel strip (sold separately near the rope lights. It has a self adhesive backing. Then you firmly press the rope light into the channel. This took some serious strength, but I finally got the length of the rope light inside the channel.

Finally, I plugged the light into a timer.

The lights are set to come on at bedtime and turn off shortly before sunrise.

That’s it! And this is probably the shortest tutorial I ever wrote.

So, I’ll share a few pictures from my sister’s flower garden in California. Check out all the pollen on the back legs of this bee! They are the orange masses hanging from his legs.

The bees were loving the agapanthus as well.

The pink blossoms are from a lemon tree that grows in their back courtyard. Sadly none of them were ripe while I was there. I can only imagine how fresh and sweet lemonade from those fresh picked lemons would taste. Mmmmm!

Be back later this week with more DIY tutorials!

I hope you will take a moment to view how I test drove my Dremel Trio. This is seriously a really fun power tool! Just be sure you are safe so as not to ruin the fun. Eye protection, face mask, and ear plugs. Check.

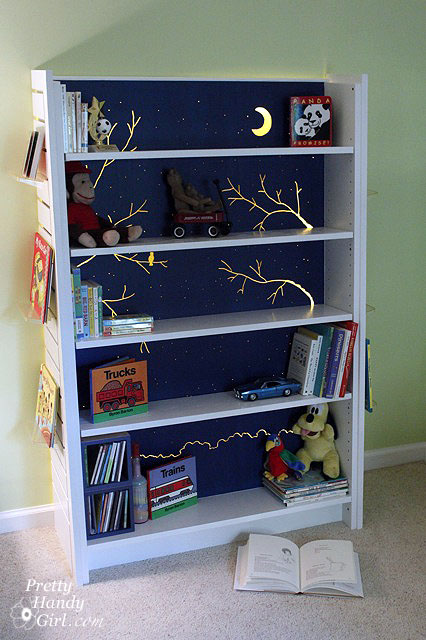
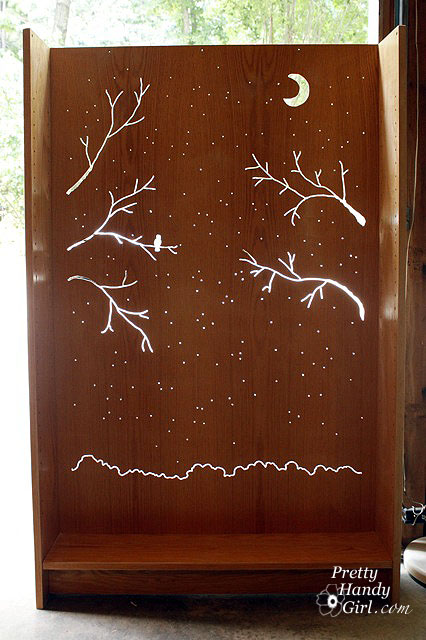
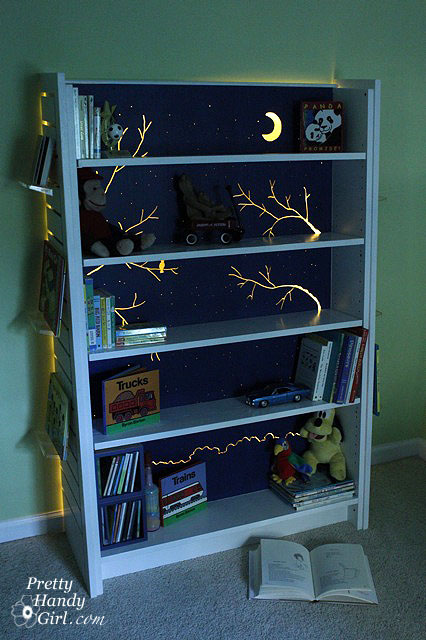
For those of you who like to skip to the end of the book and see the ending, here you go:


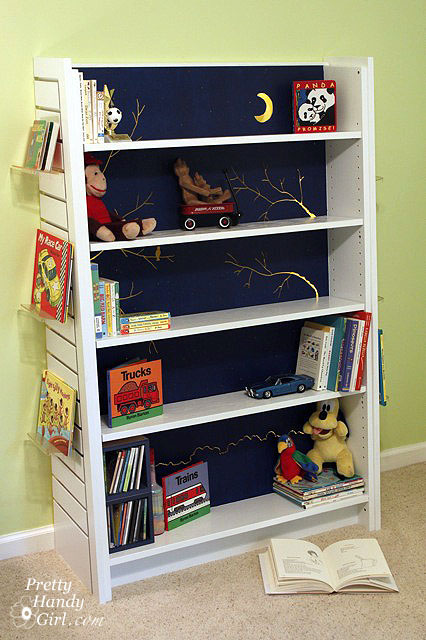
For the rest of you, here is how I created this cut out/back lit bookshelf that started life as a bookshelf from a closing Borders bookstore.


Tutorial for creating a cut out bookcase:
Almost any bookcase will work for this project, but the ones that have a thin wood (can be masonite) backing will work best. Set up a work area that you don’t mind getting dusty and dirty. Remove the shelves from your bookcase.

Cutting the endcap:

Materials:

  • circular saw
  • level
  • clamp
  • scrap wood
  • screws
  • drill

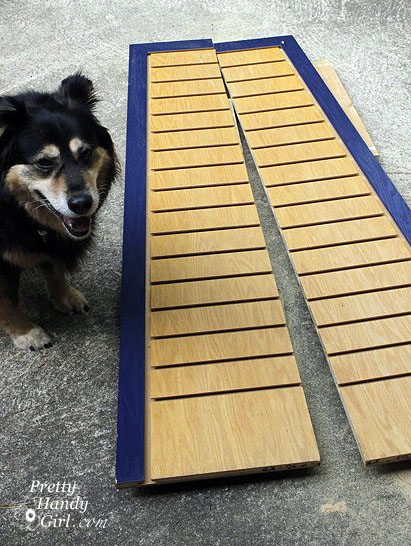
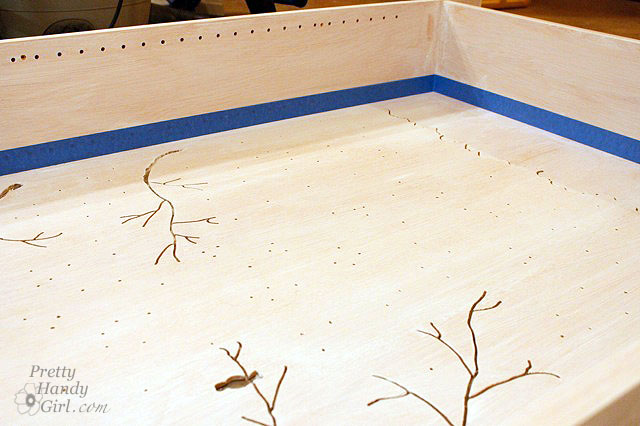
I cut the endcap in half lengthwise so I could use half for each end of my bookshelf, and to position it flush against the wall. To cut a straight line using a circular saw, I clamped one end of a level to the endcap. My level wasn’t long enough, so I drilled a scrap piece of wood on top of the level and into the end cap to support the other end.


I set the circular saw blade just below the depth of the endcap. By resting the endcap on two 2×4″ boards, I was able to creative a gap below the endcap for the sawblade to pass through.Then I ran the circular saw along the level for a straight cut. Straight as an arrow, and it met Pretty Handy Dog’s approval.

Cutting out the backing design and painting:

Materials:

  • Dremel Trio
  • Palm sander
  • Sandpaper (100 grit & 220 grit)
  • Scrap 2×4 lumber
  • Chalk or pencil
  • Wood putty
  • Putty knife
  • Primer
  • Paint (white and navy blue)
  • 3M Clean Edge technology painter’s tape
  • Newspapers
  • 2″ paint brush
  • Small paint roller and tray

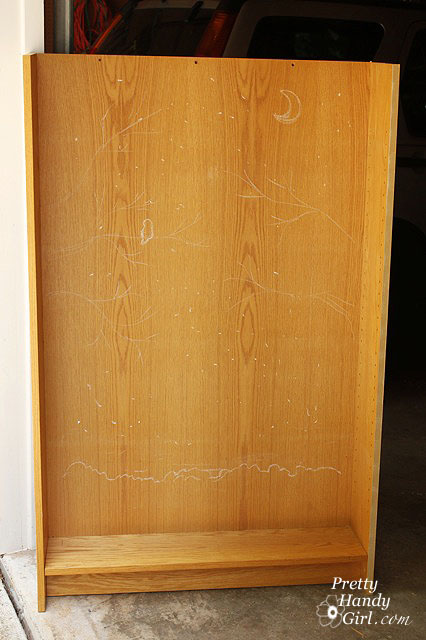
Sketch out the design on your bookshelf (using chalk or pencil) before beginning.

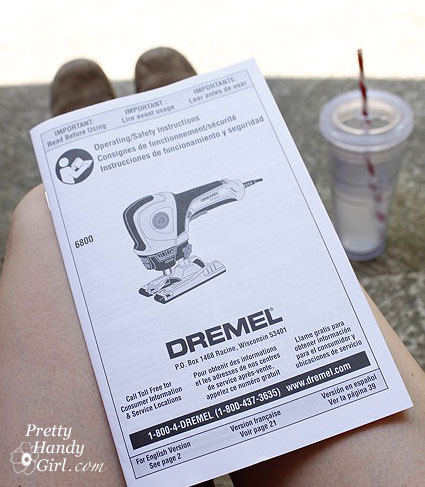
Before using any new power tool, take some time to read through the manual.

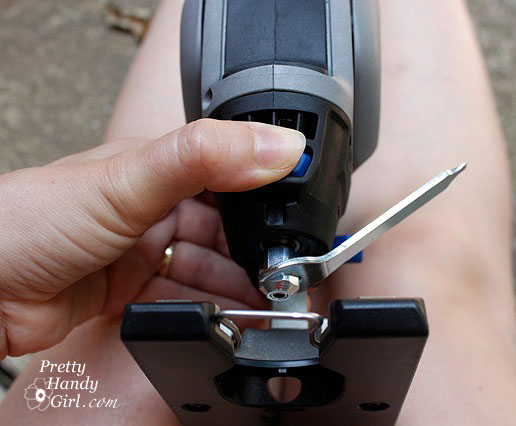
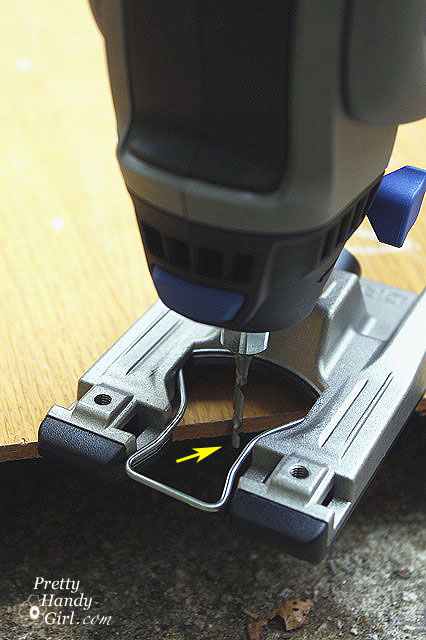
To insert a bit into the Dremel Trio, you push in the blue (shaft lock) button on the front and use the enclosed wrench to loosen the collet nut on the tool.

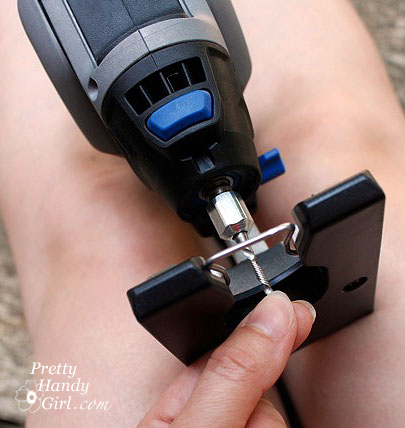
Insert the cutting bit into the Trio. (The trio also comes with a sanding drum bit and a routing bit!)

Tighten the collet nut with the wrench.

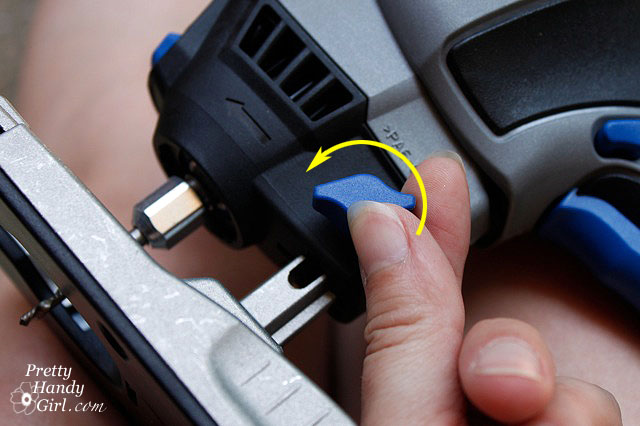
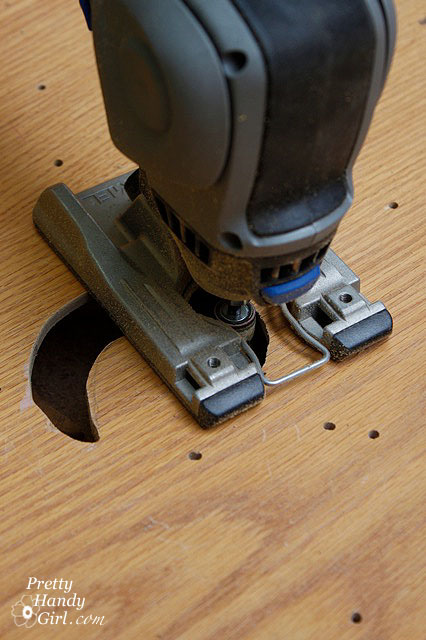
Turn the blue handle on the side of the TRIO to raise or lower the base plate.

Adjust the base plate until the cutting bit extends slightly below the wood backing of your bookcase.

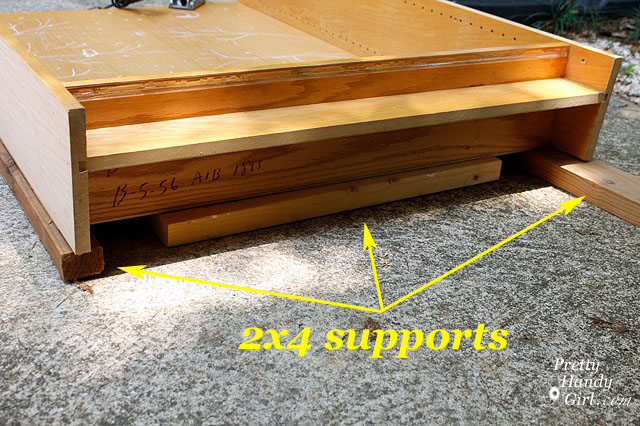
Lay the bookcase down on its back. Position 2×4 boards under the edges of the bookcase (or you will be cutting into concrete. I’m pretty sure the TRIO is not capable of that, but I could be wrong.)

Plug in your Trio and get ready to have some FUN! You may want to practice on a scrap piece of wood before working on your bookcase. The TRIO allows you to change directions quickly and easily. Creating fanciful cuts is a breeze!

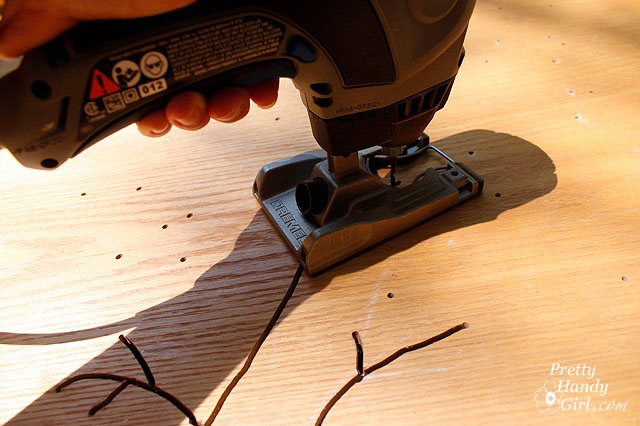
Squeeze the trigger and when the bit reaches full speed you can plunge it into the workpiece. For the pin holes hold the Trio steady, insert the bit and then lift it back out of the same hole.

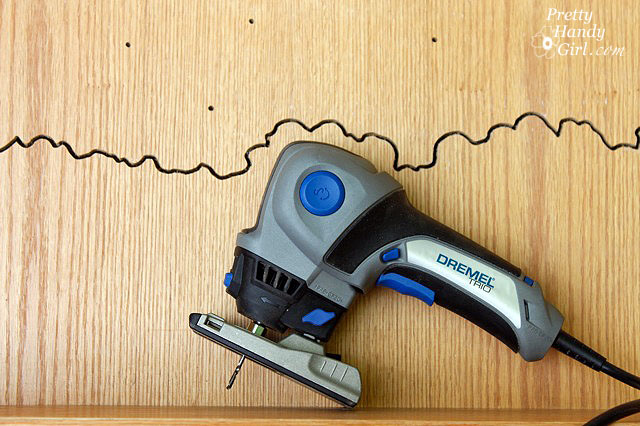
To cut trees and other designs, plunge the TRIO into the wood and then slowly move the tool through the wood to carve your design. Be wary of long “V” shape cuts as they will make the backing weaker.

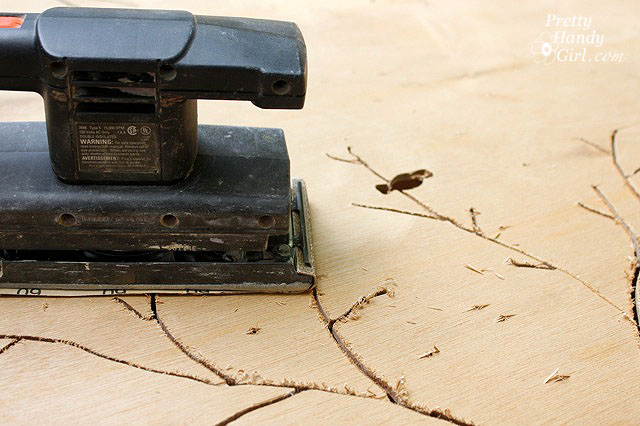
When your design has been completed, use the power sander to sand the back of the bookcase (where the majority of the splintering will have occurred.)

Insert the sanding drum bit into the TRIO and sand any large cut out areas.

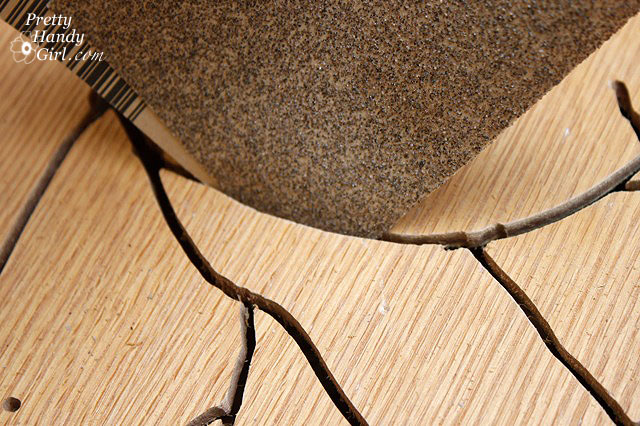
Fold a piece of sandpaper in half and feed it through the thin lines of the branches to sand any rough edges that can’t be reached with the sanding bit.

Set the bookcase upright and inspect the cuts for more splinters. You can preview what your design will look like when lit up. Lookin’ good, huh?!

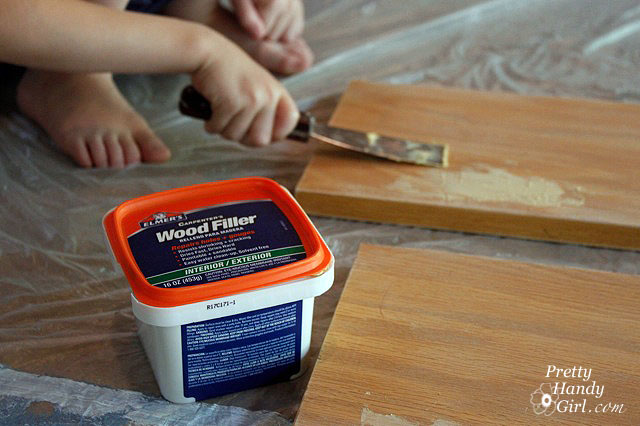
Before sanding the rest of the bookshelf, repair any dents or holes with wood putty. (This is a post I wrote about repairing all types of holes if you need help.)

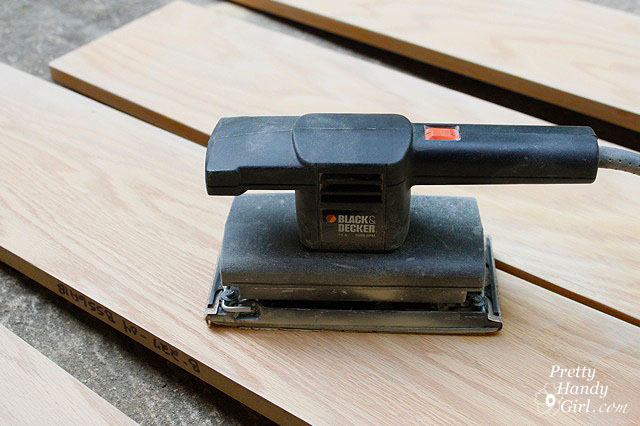
Use the palm sander and a fine grit (220 grit) sandpaper to rough up the rest of the bookshelf.

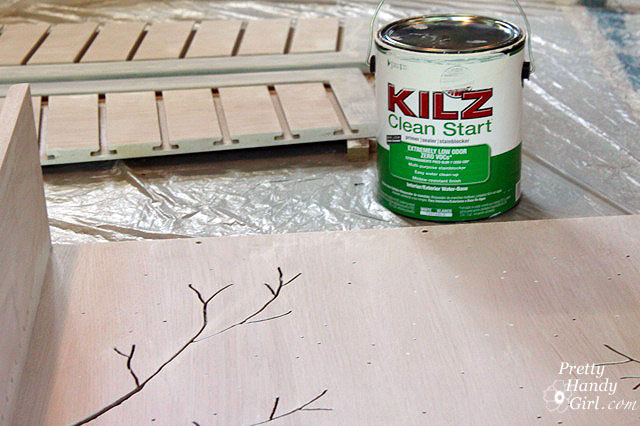
Apply a coat of primer to the bookcase, shelves and sides. (Still working on emptying that can of KILZ Clean Start primer! Love that stuff.

When the primer has dried, mask off the sides of the bookcase where they meet the back.

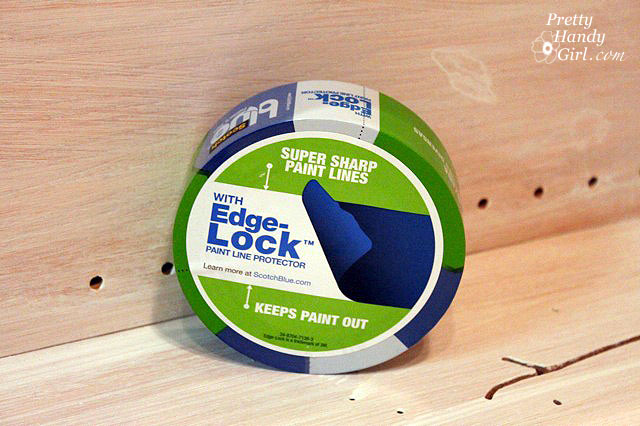
3M sent me this Scotch Blue Painter’s tape with Edge-Lock protector to try. I was skeptical, but when I pulled the tape off it did give me a clean edge. The only place I had a little bit of seepage was in the corners where I didn’t press the tape tightly into the corner. The key to using this tape is to firmly press the edges with your finger to engage the “Edge-Lock” seal. I haven’t tried it for painting walls, but you better believe I have a wall project coming up that I can try it on.

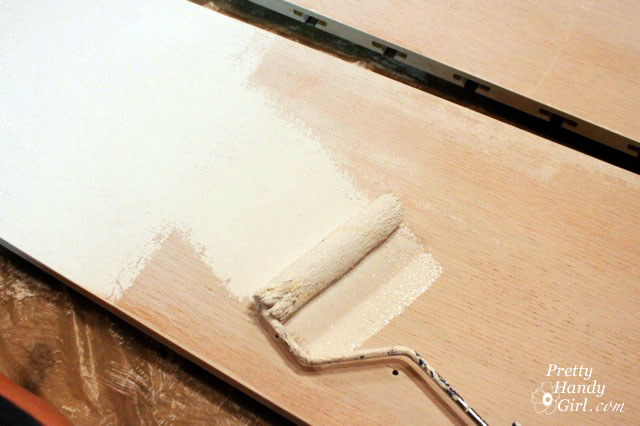
Paint the back of your bookcase. I chose a very dark navy blue. To save paint, I used a medium blue paint for my first coat to darken the back and hopefully save paint.

Then paint one coat of the navy blue.

Follow up with a second coat to eliminate any streaking.

When the navy paint has dried, tape along the edges of the navy blue backing, where it meets the sides. Slip pieces of newspaper underneath to catch any paint splashes. (Will you get a load of my lazy supervisor! You think he’s been working hard in the heat? Uh no, that would be me doing all the work and him snoozing away the day.)

Paint the rest of the bookcase, the sides and the shelves white. I used two coats of Benjamin Moore Impervo Semi-gloss white.


Once the paint has dried completely, re-assemble the bookcase. And screw the end cap halves onto either side of the bookcase.

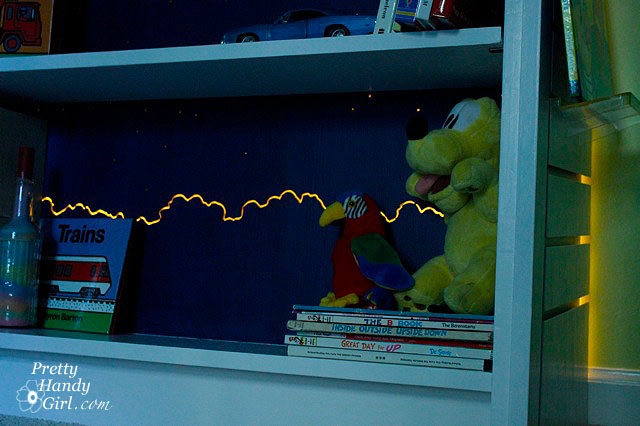
I installed a light rope behind the bookcase (tutorial to come at a later date) and set the lights on a timer. The rope light comes on at dusk and illuminates all the cut outs.

There is a very soft glow emitted from the back of the bookcase.

It provides the perfect amount of light for my son who HAS to have a light on at night.

My only complaint about the rope lights is that they give off a strong plastic odor. But, after a week the smell has dissipated.

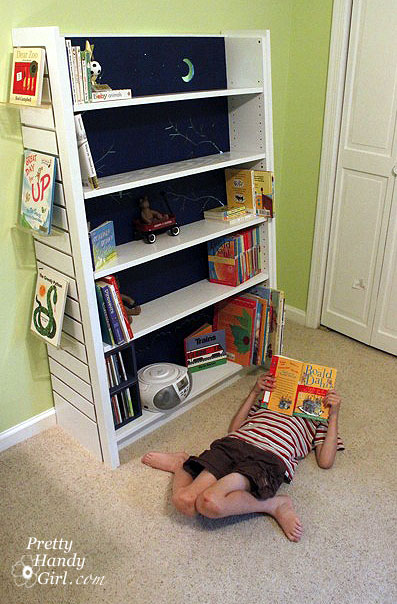
I had the foresight to purchase a few of the clear display stands that slide into the end caps of the bookcase. It makes it easy to display books to pique my son’s reading interests.

Oh look! There he is now! Mission accomplished, reading interest piqued. Yes, I think he is double-jointed and a teacher pointed out that both my son’s sit like that. Must be in the genes.

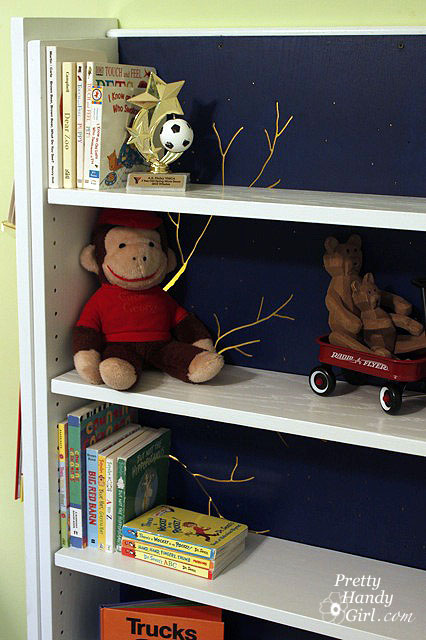
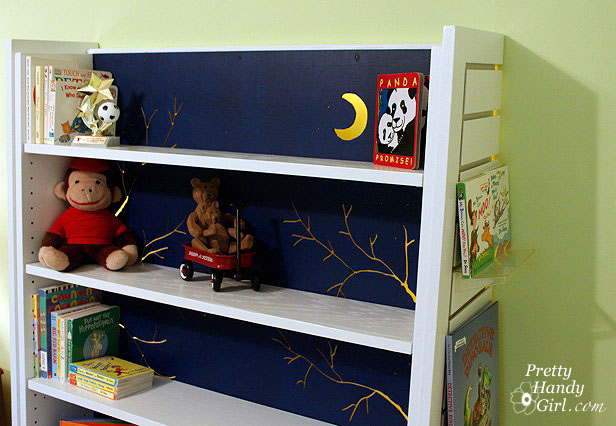
A few more detailed pictures of the bookshelf. This has to be one of my favorite projects I’ve created recently. And it wasn’t very difficult to complete.


I’m stepping out today and making a super sonic trip from North Carolina to Maine for a guest post on my friend Kristi’s blog aptly named: CreativeKristi.com

I will be sharing the tutorial to create a Vintage Hook Frame:

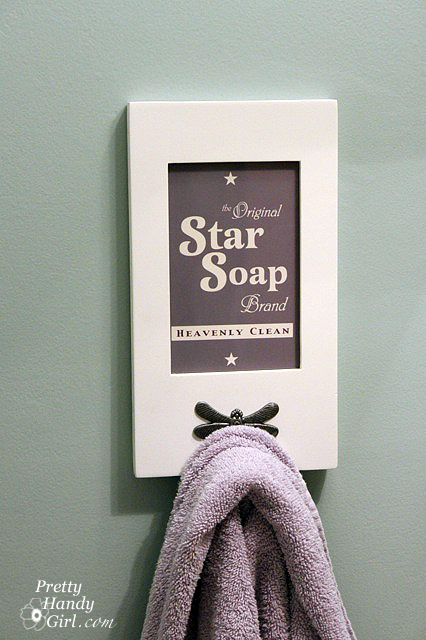
You may remember the hook frame that I hung instead of my towel bar in my bathroom:

Well, I made another one to hold keys. If you want to view the tutorial, head over to Creative Kristi’s! I included a downloadable file for the “You are Home…Relax” sign over there.

And if you would like a version of my Star Soap sign, click HERE.

Pssst, leave Kristi some sweet comments. She’s been super busy preparing to put her house on the market. Did I mention that she’s also a momma to 2 little ones? Yep, she’s pretty busy right now.

She also has a really unique giveaway for a trip to GE Momsperience 2011 in Louisville, KY. Today is the last day to enter, so be sure to put your name in the hat HERE.

After years of painting rooms, I have perfected the process and can tell you that 80% of a professional paint job is in the preparation. Today’s post will be about properly prepping your room before painting. Then I’ll post next week on how to paint your room like a pro.

Start by removing everything from your room that isn’t bolted down to the floor (notice how I said “floor”.) You will be removing anything that is attached to the wall. That includes towel bars, TP holders, pictures, outlet covers and switch plate covers. I will allow you to leave a light fixture if it is a sconce style. But, otherwise, get it out of there, ALL of it! We are doing it we’ve started painting like a pro.

painting like a pro outlets

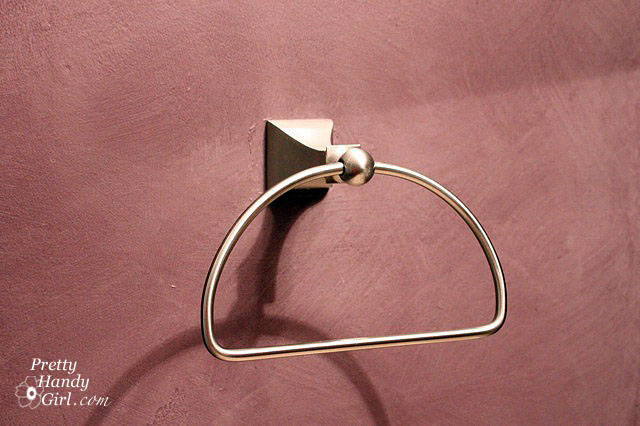
But, how do you remove those toilet paper holders and towel rods if you can’t see the screw?

painting like pro towel rods

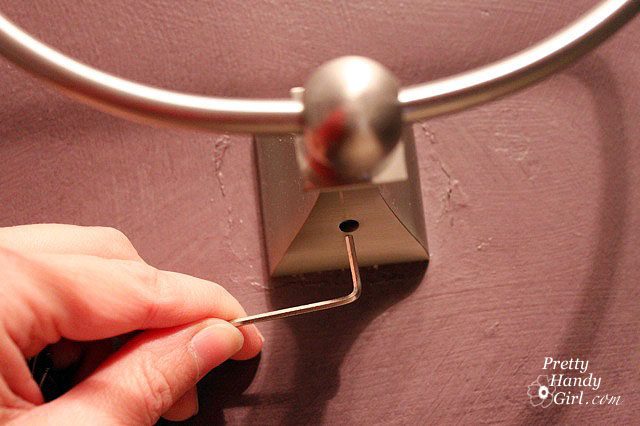
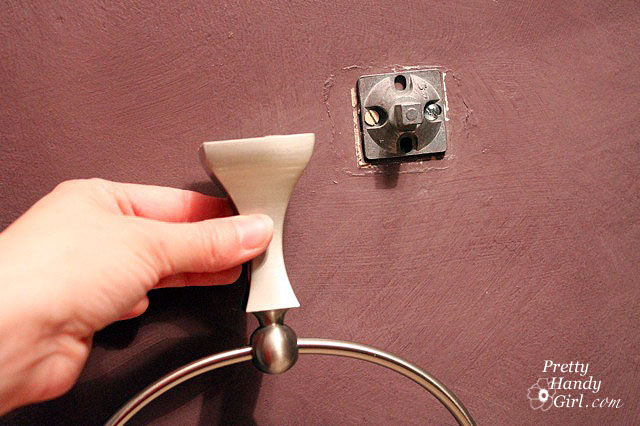
Here is the top secret, hidden location of those wall mounted accessories. Get down on your hands and knees and look up. Underneath there is a teeny tiny hole.

painting like pro diy tip

And inside that hole is usually either a hex screw or a flat head screw. You will need a little hex wrenches or flat head screwdriver to undo the screw. A flashlight may also be helpful. Turn the screw until you can pull the fixture off the mounting bracket.

painting like pro fixtures

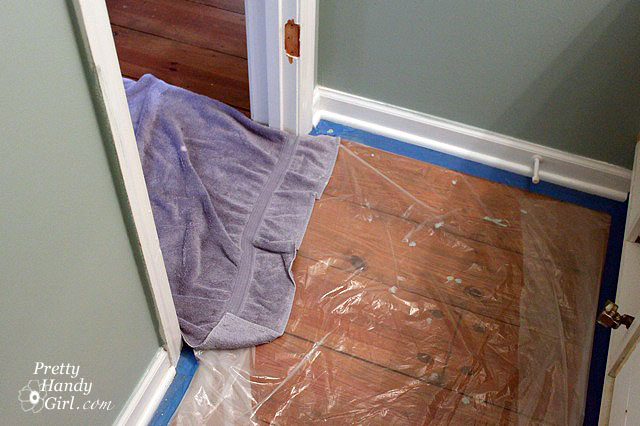
Once your room has been emptied, bring in the tarps, towels, newspapers or plastic. Cover anything that is left in the room. Painter’s drop cloths work the best, but they can be expensive. I usually use plastic drop cloths, then put a folded towel in the entrance of the room to wipe my feet on should I step in any drips.

Even the neatest painter will drip paint! And if you are a klutz like me, you may even step in the paint tray. (Not a good thing.)

pro painting floors

Are you paying attention? This next task is the most important to truly achieve a professional paint job (in my opinion.) Have you assessed the condition of your walls. Do you have any holes or dimples in it?

patch dywall holes for painting

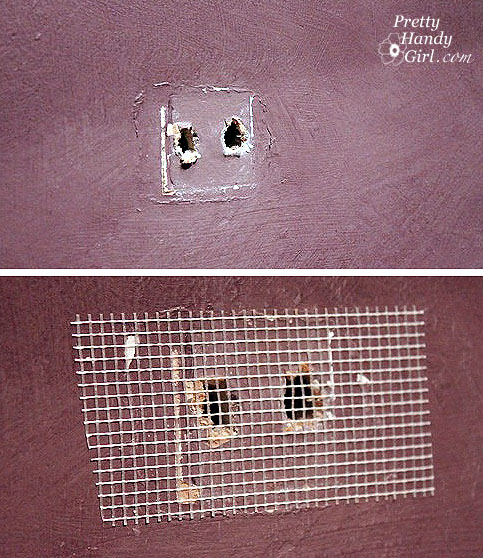
You will need to patch any and all holes (unless it is a picture hanger and you are going to use the same hanger after painting), HERE is the tutorial for patching all types of holes.

Okay, no holes now, but do you really know how smooth your walls are? Well, turn off the lights to find out!

smooth pro painting tip

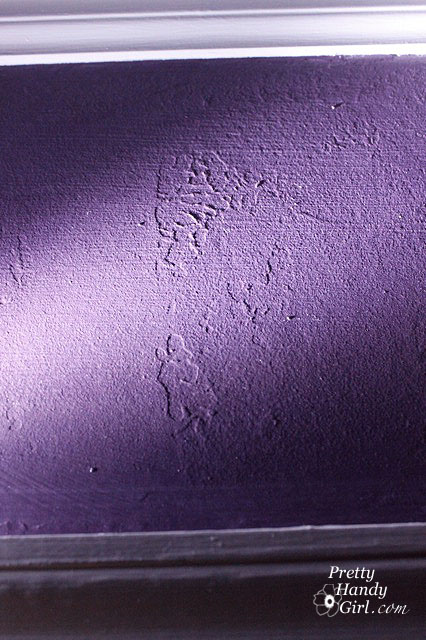
And don’t forget to bring a flashlight. Aim your flashlight parallel to the walls and let the light beam skim the surface. Suddenly you will see all the imperfections. The bigger ones need to have some spackle or joint compound added to smooth them out. Any hills or bumps need to be sanded down.

Soon your walls will look like this!

pro painting tips spackle smooth

Yikes, looks like some kind of pox virus.

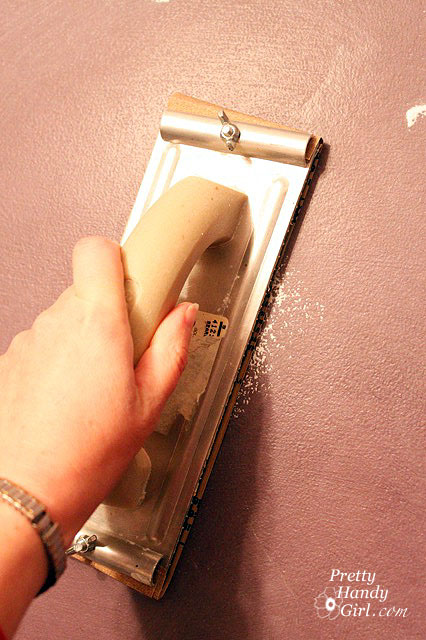
After your spackle or joint compound is dry, be sure to sand it smooth.

pro painting sand smooth

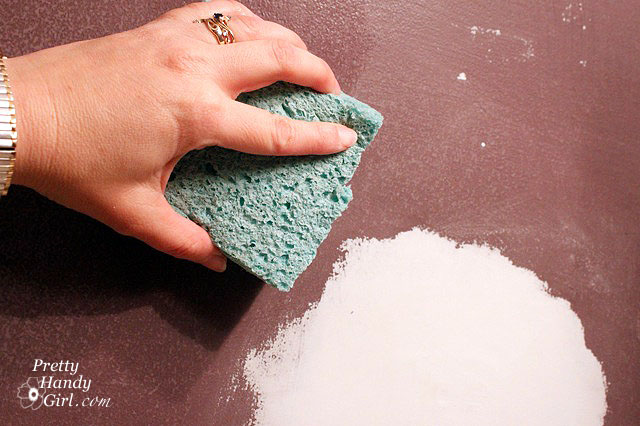
Then use a damp sponge and a pail of fresh water to remove any and all dust. You will probably need to rinse out your sponge frequently. (Especially if you patched as much as I did.)

painting tips clean patches

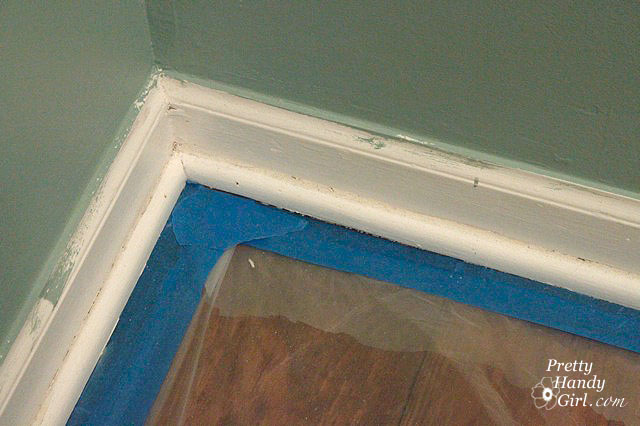
Time to tape!  Start by taping any light fixtures or permanent fixtures in the room. If you are re-painting your entire room (ceilings, trim and doors) I’d wait to tape the molding and door or window trim. For our downstair’s bathroom I knew I was going to repaint the trim too, so I left it exposed to be sure I got the wall color all the way down to the trim and even onto it. Tomorrow I’ll show you why I do this.

painting molding

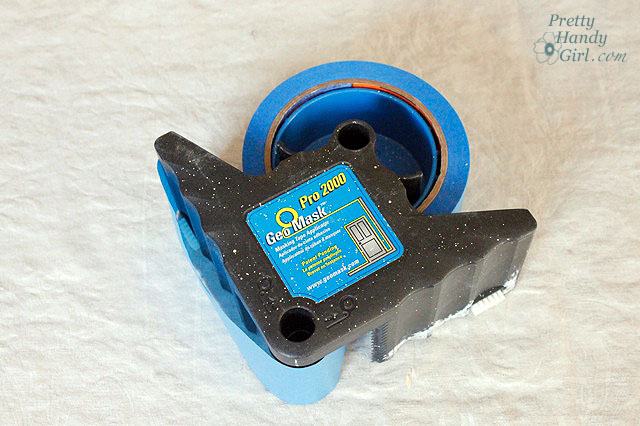
If you don’t need to paint your trim, you can use a handy dandy tape dispenser like the one below, but honestly, I can tape off the trim just as fast by hand (after years of practice).

painters tape tips

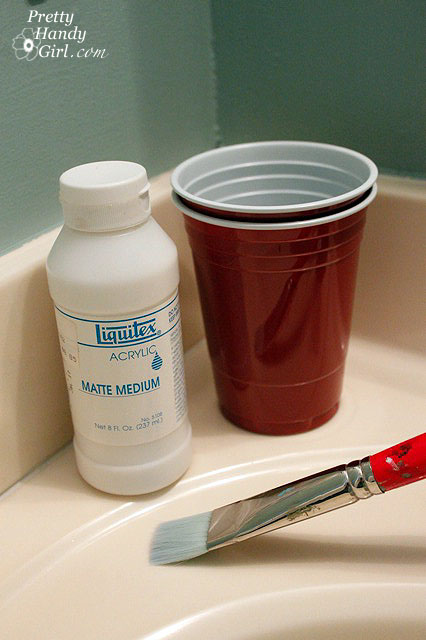
Here is another little pro painting secret, if you want to keep the paint from bleeding under the tape, you can seal it with matte medium (available at artist supply stores.)

painter tape tricks

Simply pour a small amount into a cup and then brush it on the edge of your tape where it meets the surface you are going to paint.

sealing painter tape

This puts an invisible seal over your tape edge. It won’t work ALL of the time, but it will really cut down on any seepage and therefore any touch ups you have to do later. You’re well on your way to painting like a pro!

Other Steps in this Series:

Step 2. paint and sheen

Step 3. painting your room and finishing touches

pretty handy girl painting like a pro