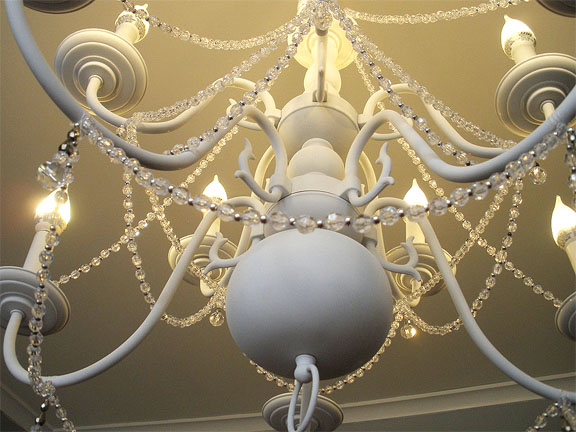
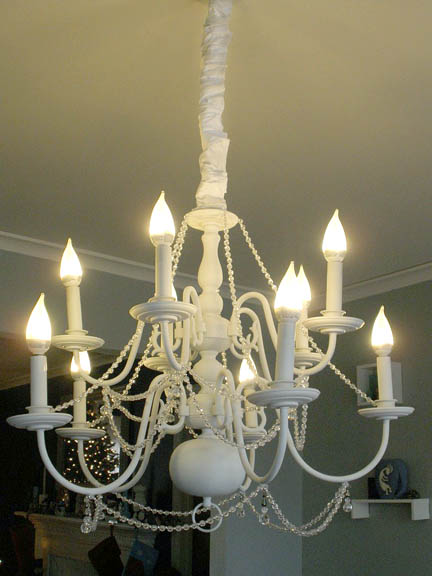
Welcome to our second Wednesday in 2012! Today I have a special guest for you: Bri from The Modern Parsonage is here to show you how she created that truly fabulous chandelier you see up there. But, before we get to the tutorial, let me tell you a little about this handy gal (and her partner in DIY crime!) Bri and her husband moved into a home that was previously a Pastor’s family home. They dove head first into the process of renovating the home to be more modern and fitting for the hip couple of professors that they are.

The Modern Parsonage showcases the renovation process, from idea to finished product, tossing in snapshots of design inspiration and everyday life.You can follow them as they transform their home one room (floor to ceiling) at a time. Check out their Staircase renovation, bathroom update, and installing flooring projects.

Okay, take it away Bri!

Let me begin by saying that I started this project thinking I needed a ton of prep work, money, and time to transform a boring, brass light fixture into a show-stopping (if I do say so myself) chandelier. O ye of little faith, I say to my former self. This is a beginner’s project and requires so little skill that I would go so far as to call it a fool-proof way to jazz up even the most tired light or lamp for significantly less than the cost of a new fixture. (Read: under $75)

Start with a cheap chandelier. I found one on my local Craigslist for $25, but I would recommend scouring your hand-me-down shop of choice since these brass fixtures are often the standard for apartments or new builds.

Next, I did some research online and adopted a few misconstrued beliefs that I will now dispel. First, it is perfectly fine to spray paint the plastic-protected electrical cord that runs up the chain. I was not aware of that and wasted quite a bit of time figuring out creative ways to protect the cord while spraying the chain. Second, either fully remove the plastic “candles” or spray paint them the same color as the fixture. I did not know that these were removable and you can still see the tape lines from where I thought I had to cover parts of the plastic. Learn from my mistakes, people.

After you have chosen a diamond-in-the-rough light, acquire the necessary resources. You will need:

  • A drop cloth
  • A place to hang your light (I hung mine in the basement, but you can just as easily use a tree if the weather is nice)
  • Two cans of the spray paint of your choice (it is always better to have extra on hand because spray paint has tricky drying times and you don’t want to run out in the middle of the project). I used matte white and it was just the cheap Ace Hardware brand.
  • A ventilator or mask. Always necessary when messing about with spray paint.
  • 220 grit Sandpaper
  • Deglosser. (This is only if you want to be super thorough. I wiped my chandelier down with just soap and water and the paint adhesion was still great.)
  • Beading of your choice. I used roughly 750 beads and got them at Michael’s, but it all depends on your taste.
  • White string (I got DandyLine brand and it is super strong).

For the optional chain cover:

  • Fabric of your choice (double the length of chain you want to cover and 7 inches wide).
  • Fabric glue
  • Iron-on Velcro
  • Thread
  • Also, an iron, that’s pretty important.

Now it’s time to get down to brass tacks. Get it? Because it’s a brass light? Anyway, lightly run your sandpaper over the fixture. Do not press too hard or the metal will scratch. The goal here is to rough up the surface so that the paint can form a strong bond. Next, give it a good once over with a damp cloth (soap and water will do, deglosser if you’re thorough) to remove any dust, grease, or grime. Let the light dry completely.

Don your mask. You will look beautiful, I promise, but more importantly, your lungs will thank you. Find a good spot to hang your light and start spraying.

As you can see, I tried to bundle up the electrical cord in the plastic bag, but that caused a lot of problems, including bare spots of brass. I also taped off the tops of the “candles” instead of just removing them and covering the exposed wire. So yeah, just don’t repeat my follies.

Spray painting is best in short, quick bursts. Long, sweeping motions are not your friend. It will take many, many thin coats so don’t be surprised if you have to use the entirety of two cans.

Once you have your desired level of coverage, let the light dry overnight. When the paint is fully cured, the real fun starts – beadwork. This part takes creativity and is really up to you. I did a lot of window-shopping for fancy-pants lights and finally decided I wanted a chandelier adorned with clear beads and small silver accents, embellished with teardrop crystals for extra pizzazz. I would say this is the longest part of the process; it took me about four hours to get all the beads strung and hung on the light.

With the hard part done, re-install or switch out your fixture (remember, black wire connects to black wire and white to white!).

At this point, if you’re happy with your light as is, you’re done! If you’re like me and have an awful chain and unpainted electrical cord, you may want to consider DIYing a chain cover. Much cheaper, totally easy, and no sewing machine required.

Begin with your fabric swatch and fold over about a 1/4 inch on each side, ironing the edges.

Apply a small line of fabric glue inside the seams to create a permanent hem. When the glue dries (15 minutes to a half hour), sew a running stitch on both long seams. I know this sounds complicated, but trust me, if I can do it, so can you. Pass the needle in and out of the fabric down the edges, knotting each end. (It allows you to scrunch the fabric, which is important.) Gently pull the knotted ends and push the fabric together to your desired length.

Once the scrunching is done, grab your iron-on Velcro and press it on. Run the iron over the whole cord cover to ensure a strong bond. Now all you have to do is wrap it around your chandelier chain, making sure the seam is on the least visible side, and admire!

Isn’t that chandelier beautiful?! I know people would pay a lot of money to bring that chic lady home. Thank you so much Bri from the Modern Parsonage for letting us into her home for the tutorial.

Would you like to be a guest on Pretty Handy Girl? Read my open invitation here.

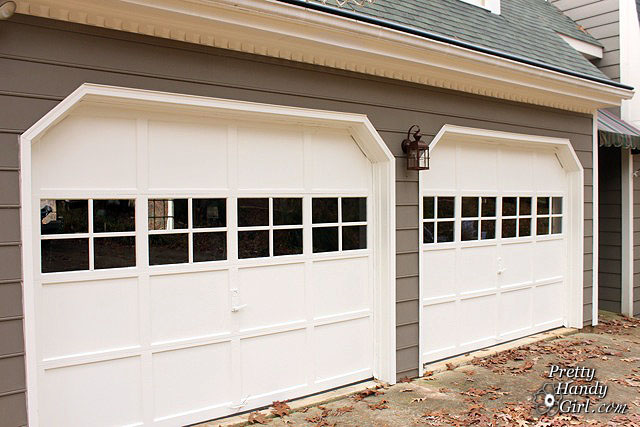
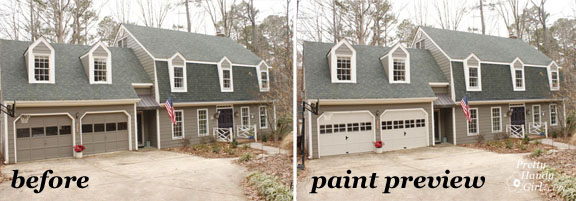
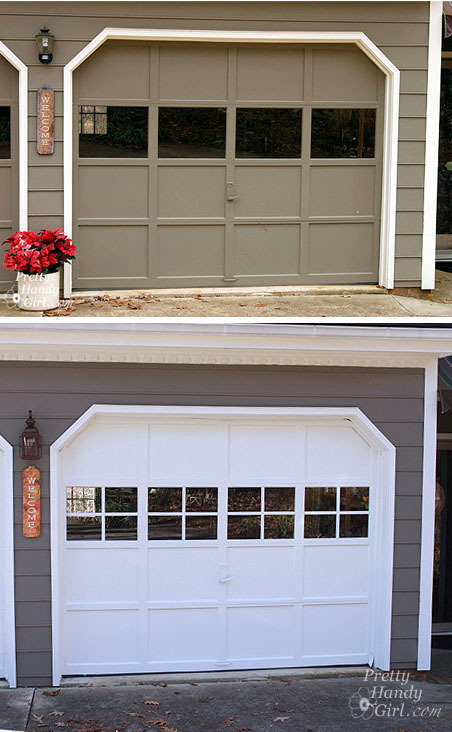
You know that thing about your house that you really want to change, but it takes you a while to mull over how to change it? Well, that thing for me was our garage doors. They are the two giant doormen that greet me at least five times a day as I run errands and taxi my children to and from school. I always thought they could be a little more polished and more inviting. In this mulling over period I dreamt of painting the garage doors and boosting the character factor by adding grilles to the windows. I even created a paint preview to see what it would look like. I fell in love immediately and the hulking gray doors’ fate had been sealed.

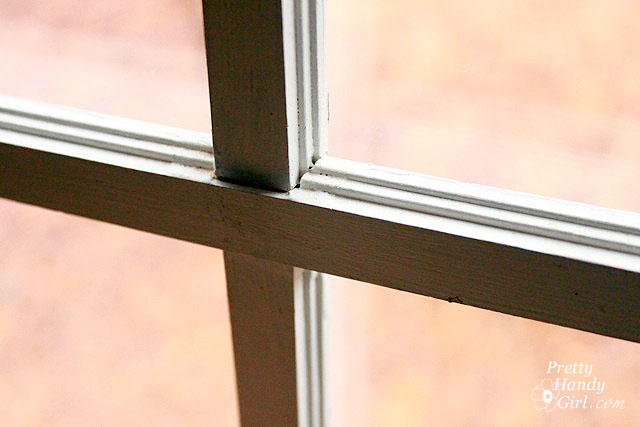
I wasn’t exactly sure how I was going to add the grilles (cross pieces in the windows.) I thought about cutting up paint sticks or just plain strips of square dowels cut to fit, but I REALLY wanted them to look as real as possible and I liked the router profile of the real deal.

A few months later I literally almost tripped on a stack of donated window grilles at my local Habitat for Humanity ReStore. You know, the cheap ones that are pressed up against the window and always fall out. Grrrr!

That was when the “A-ha” moment happened and I figured that I could use them to dress up my garage doors. I carefully measured the panes on the garage then found a set of four grilles that would give me two cross pieces per window! Perfect! And the best part about those grilles is that they only cost $2 a piece. For $8, some paint and glue I was able to transform my garage doors from boring bland to cottage charm!

And here is the tutorial for how to add grilles to plain jane garage door windows!

Materials:

  • Reclaimed grilles from Habitat ReStore
  • Hand saw
  • Pencil
  • Tape measure
  • Paint
  • Loctite Outdoor Sealant Glue
  • Windex
  • Rubbing alcohol
  • 3M painter’s tape
  • Razor blade scraper
  • Paintable flexible caulk
  • Caulk gun
  • Wet rag
  • Gloves

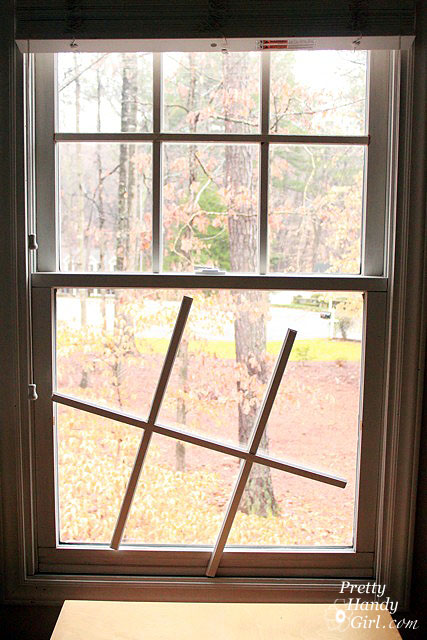
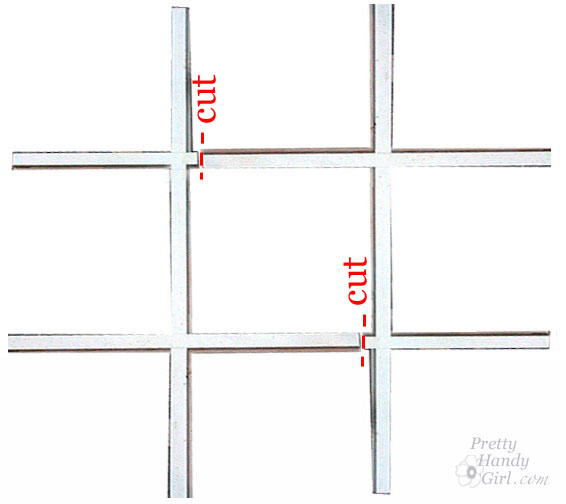
Start by cutting the grilles down to size. This is how I got two crosses from each grille. First, cut the grille into two pieces as shown below:

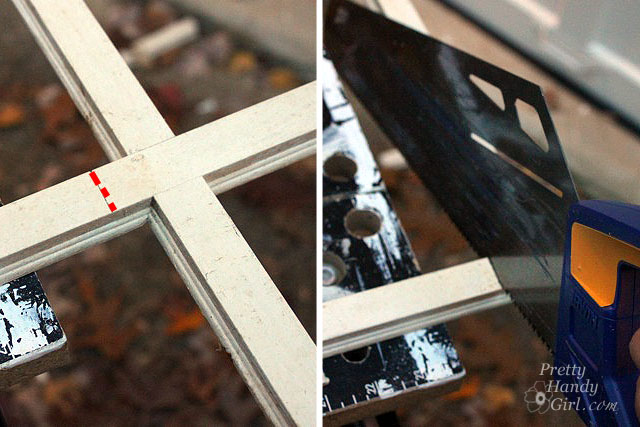
No power tools needed. A handsaw works great.

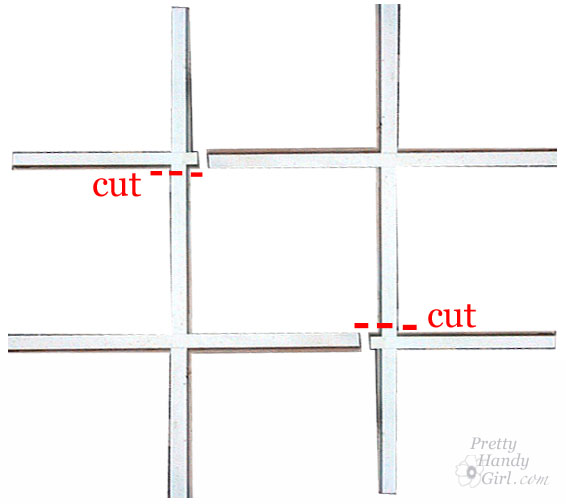
Next, cut off the excess so you are left with two crosses that fit perfectly in the window panes of your garage door.

Test fit the cross. If your measurements are off, no worries, 1/2″ gaps can be filled with caulk.

After cutting all of the cross pieces, clean them off. Lightly sand and paint them the same color as your garage doors.

After the paint is dry, clean the glass with windex and then use rubbing alcohol to remove any dirt and debris from the glass.

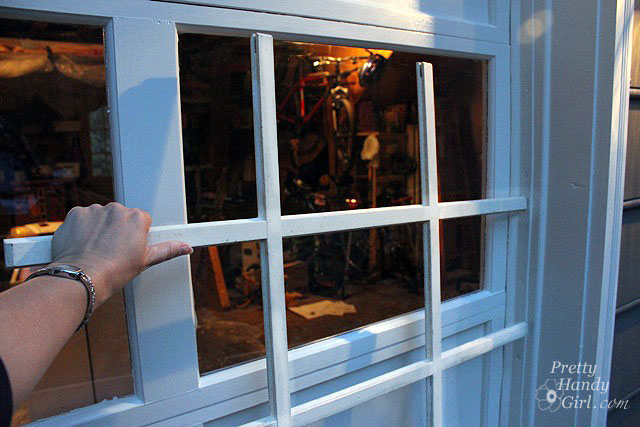
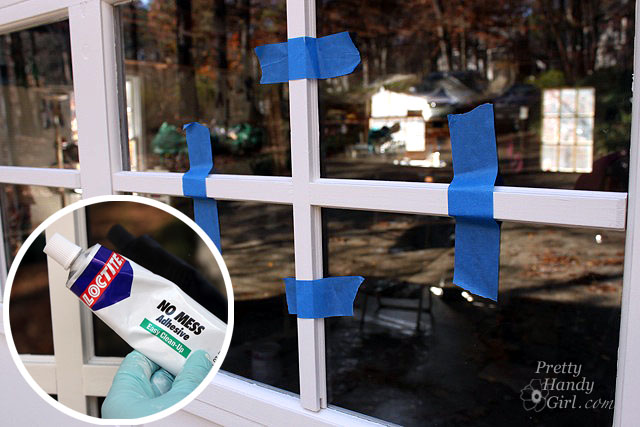
Spread a bead of Loctite Outdoor Adhesive onto the backs of both the vertical and horizontal bars. Center and press the grilles onto the glass. Use painter’s tape to hold them in place.

Wait 24 hours for the glue to harden and dry. Then scrape any excess glue off the glass with a razor blade.

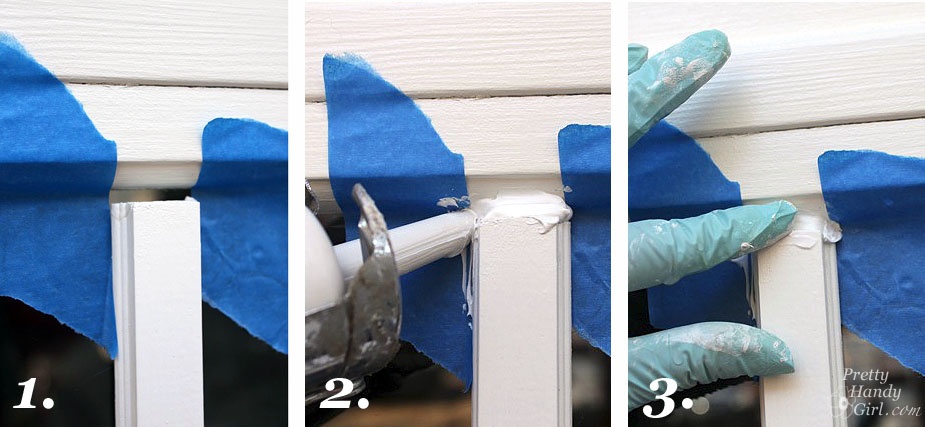
Time to fill in the cracks! Caulk all the seams. For the larger gaps, 1.) Apply painter’s tape on both sides of the void to 2.) keep the caulk off the window and give you a crisp, clean edge. (I’ll have a special caulk gun tutorial for you on Friday!)


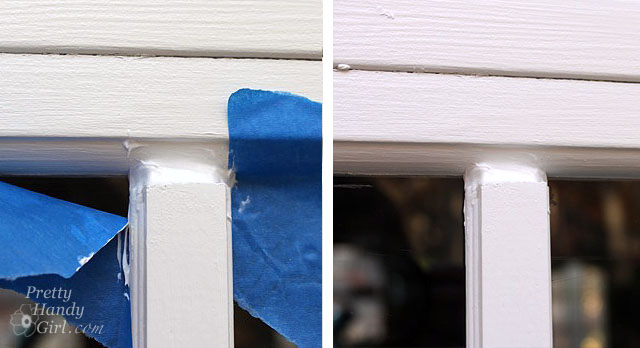
3.) Remove the painter’s tape while the caulk is still wet. Let the caulk dry.


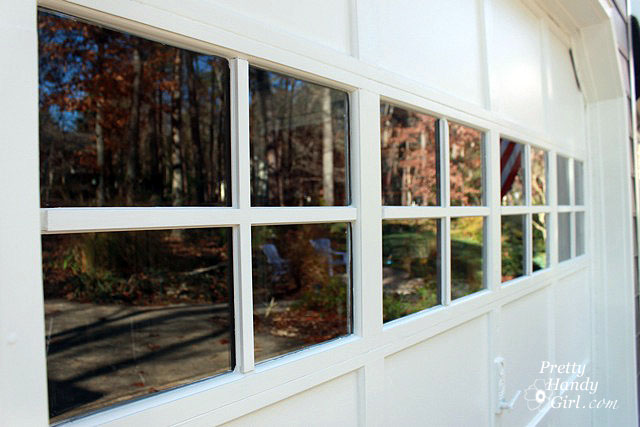
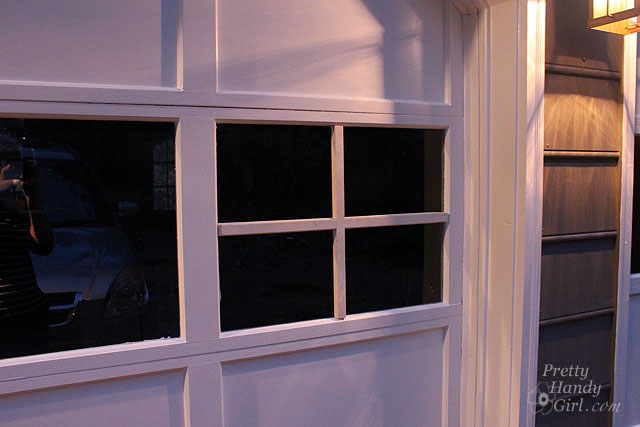
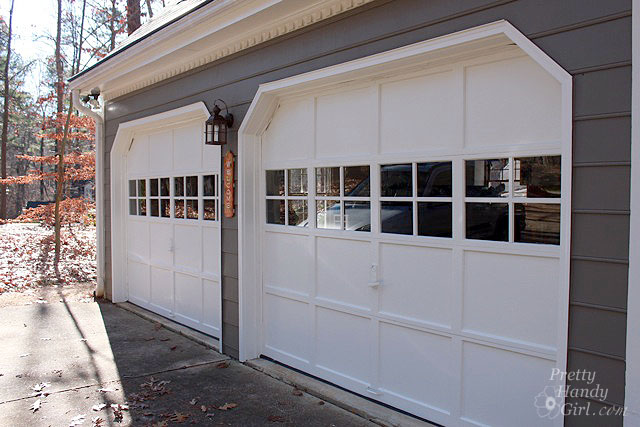
 And you’re done! How is that for adding instant character?!


I could kiss these beauties! They are definitely welcoming doormen now.

Speaking of welcome, I repainted our faded Welcome sign and hung it back up. Are you an eagle eye reader? What else changed in the pictures below? Five things have changed, can you spot them all? I’ll start you off:

  1. Painted doors
  2. Added grilles
  3. Refreshed welcome sign

Okay, one more lookey at my beautiful garage door windows and then you have to leave.

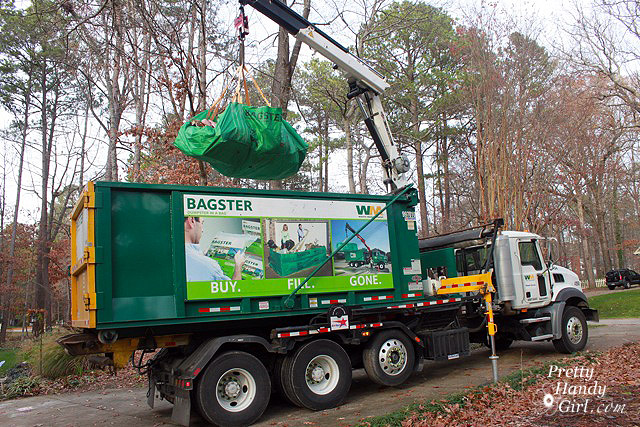
I want to give a big shout out and thank you to Waste Management and The Bagster who helped make my garage makeover a possibility. You can see more of my garage transformation here.
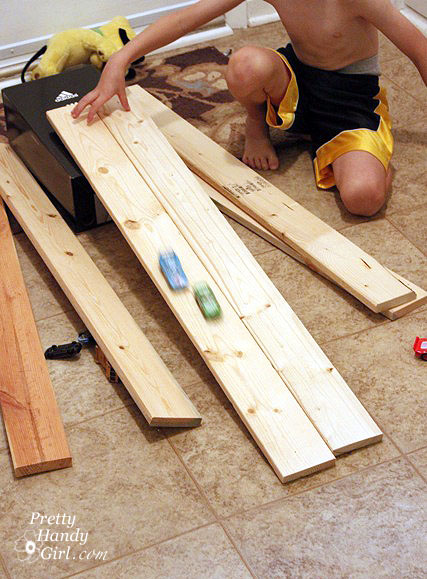

Matchbox Car Racing Ramp

Do you have a little free time over the Christmas break? How about taking some time to make a wooden racing track with your kiddos!

If you have boys, I’m sure you have Hot Wheels cars in your home. They go hand-in-hand. My boys play with their race cars for hours!

They have several of the plastic tracks. And even a curly-Q racing ramp. But, honestly they seem to play with my scrap pieces of wood more than the plastic tracks. Chances are, if you or your spouse build things, you will have all the scraps of wood on hand to make this racing ramp.

My 7 year old and I worked together on this project. (He was my design consultant and he also helped with some of the assembly.) But, imagine the surprise on a child’s face if you made this ramp as a holiday or birthday gift!

Materials:


  • 2 – 1 x 4 x 13″ boards (tower sides)
  • 1- 1 x 4 x 9″ board (tower roof)
  • 2 – 1 x 8 x 33″ boards (ramp sides)
  • 1 – 1 x 6 x 33″ board (ramp)
  • 1 – 3/4″ dowel rod (cut to 12″)
  • 1 – 1/8″ dowel rods
  • 1 – thin rectangular strip for a divider 33″ long
  • 1 5/8″ screws
  • 1″ finish nails
  • 2″  finish nails
  • Gorilla Glue
  • Sandpaper
  • Primer
  • Spray paint
  • ScotchBlue Painter’s Tape
  • X-acto knife
  • Clamps
  • Cordless drill
  • Handsaw or miter saw
  • 3/4″ spade bit
  • 1/8″ drill bit

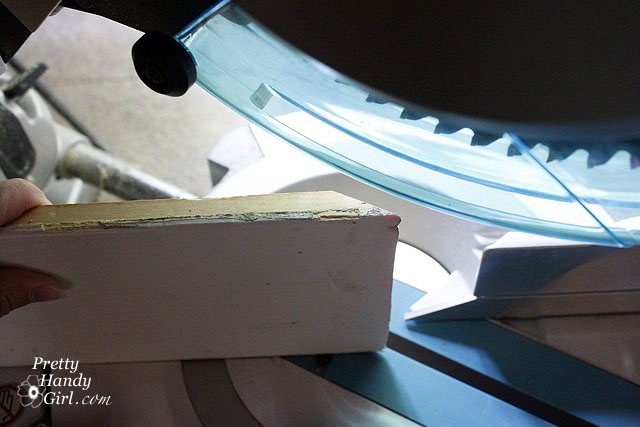
Start by cutting all your boards to length. Grab the ramp board (1 x 6 x 33″) and cut one end of the ramp at a 30˚ angle.

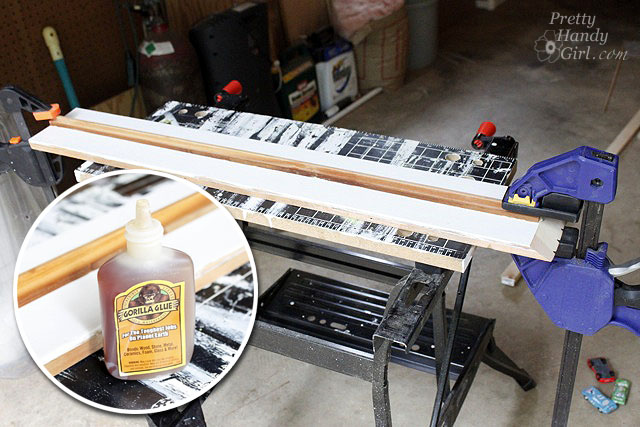
Glue the narrow strip onto the center of your ramp using a small amount of Gorilla Glue.

Clamp the strip and add a few 1″ finish nails to secure the strip.

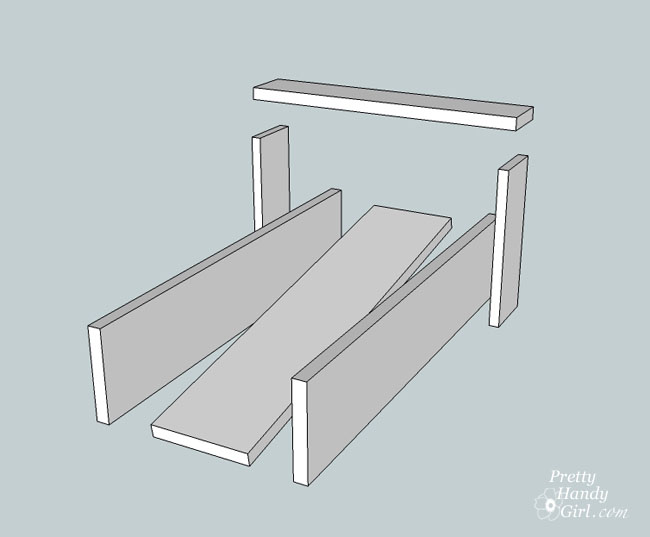
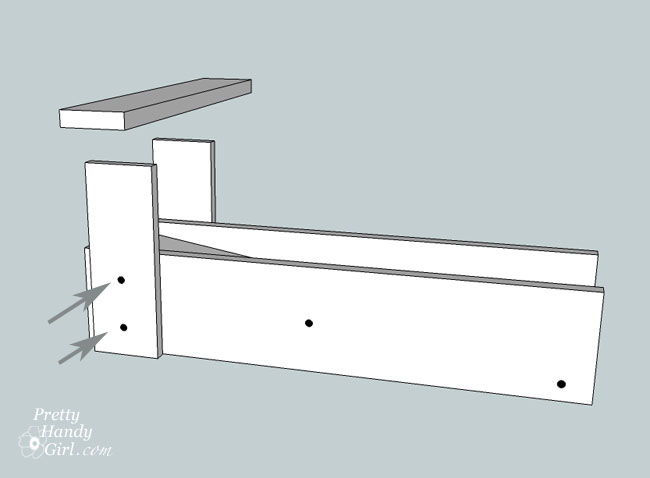
Set up your boards as shown. Tilt the ramp up at the back, the angled cut will rest on the floor (not shown.)

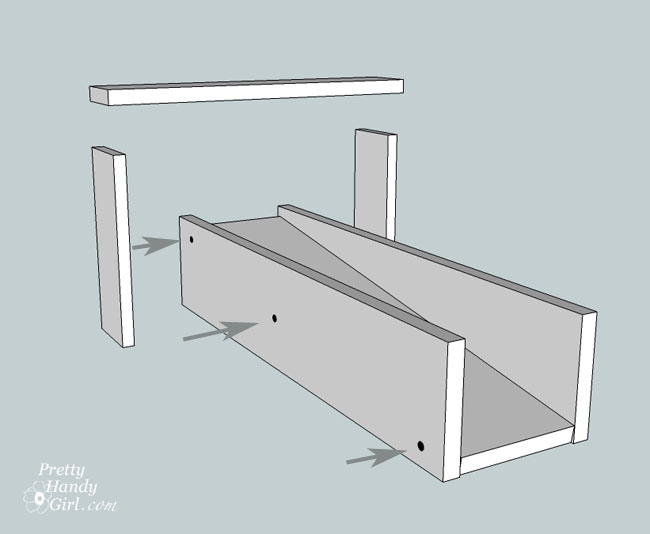
Drive a few screws through the side walls and into the ramp with your drill.

Line up the tower sides approximately 2″ from the back edge of the ramp walls. Then secure them in place with a few more screws.

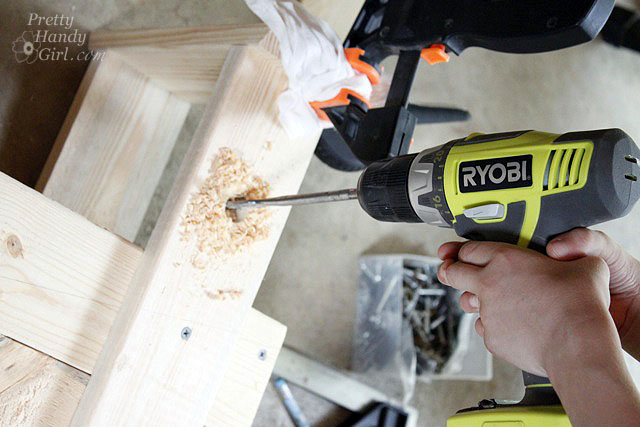
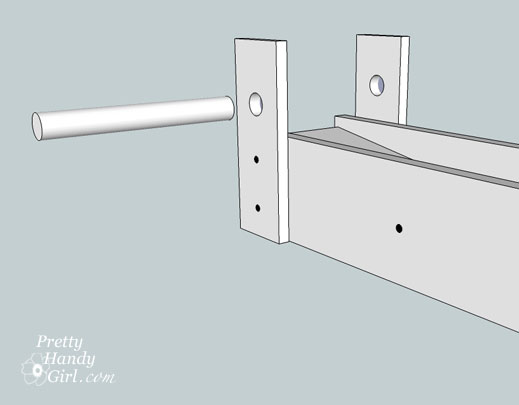
Drill a hole into each tower side large enough for the 3/4″ dowel rod to fit through.

Slide the dowel rod through and center it on the ramp.

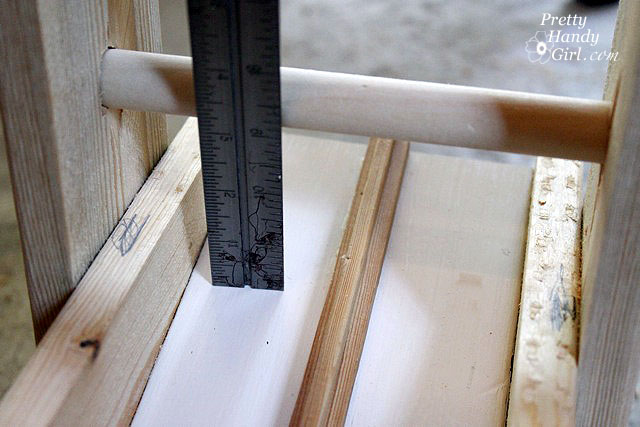
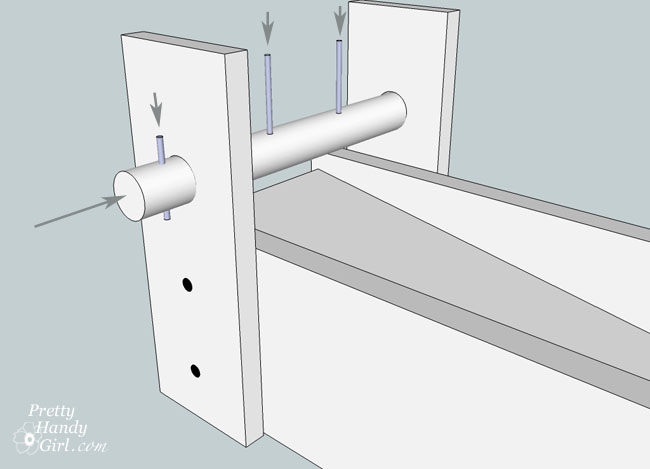
Mark the location of the center of the left and right tracks onto the dowel rod. Measure the distance between the dowel rod and the ramp. Use this measurement to cut 2 pieces of 1/8″ dowel rod 1/2″ longer than that measurement.

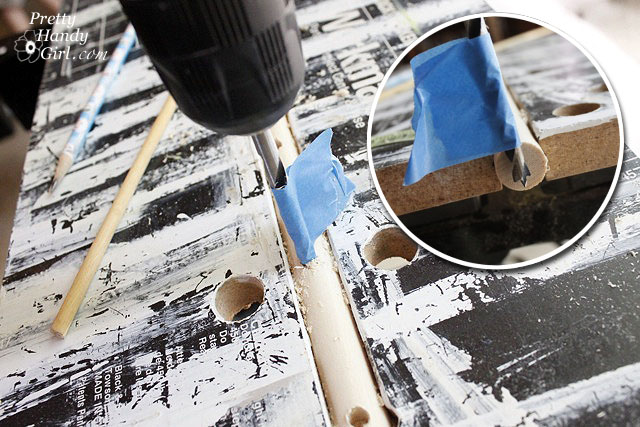
Remove the 3/4″ dowel rod. Drill holes 1/8″ wide halfway through the big dowel rod at the locations you marked for the centers of the tracks.) Wrap a piece of painter’s tape around the drill to indicate a depth 2/3 of the way through the 3/4″ dowel rod. Then don’t let the bit go further than the tape into the rod.

Mark the location where the dowel meets the outside of the tower wall.

Drill a hole all the way through the large dowel rod. Insert the 3/4″ dowel rod through the holes in the tower walls. Glue the 1/8″ cut dowels into the halfway holes. Then cut and glue two more 1/8″ dowels to go through the 3/4″ dowel on the ouside of the tower walls. These will anchor the large dowel rod and keep it from slipping out of alignment.

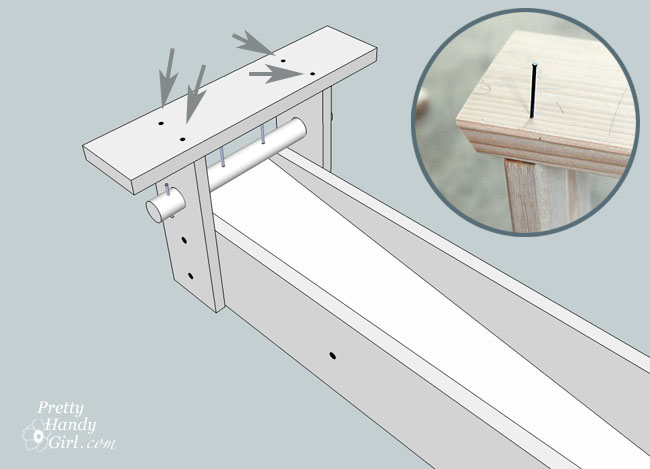
Nail finish nails through the tower roof and into the walls of the tower.


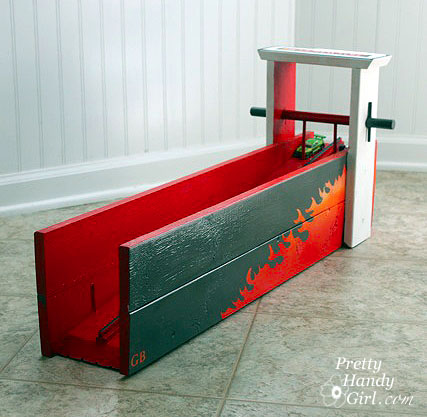
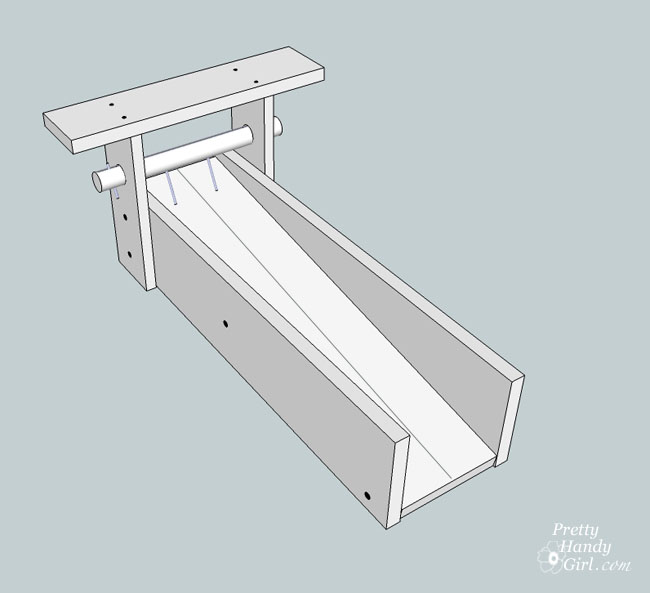
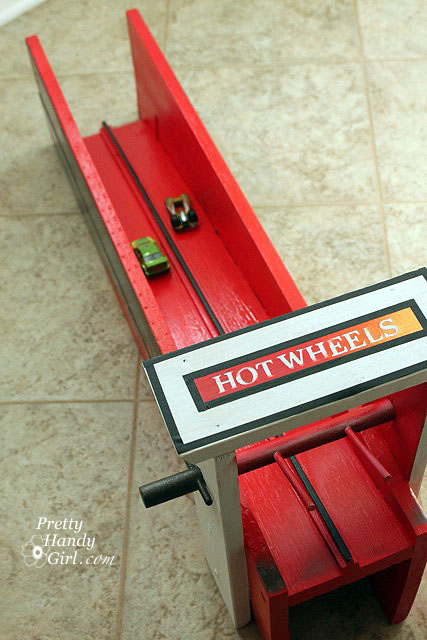
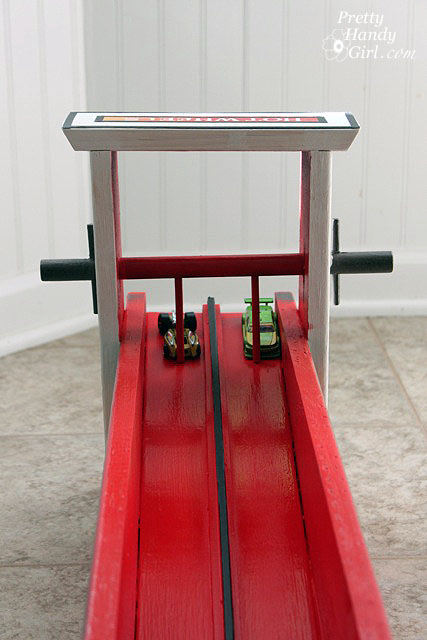
That completes the building portion of this tutorial. Hopefully your ramp resembles this one:


Now it is time to add some pizzazz! Ka-chow!

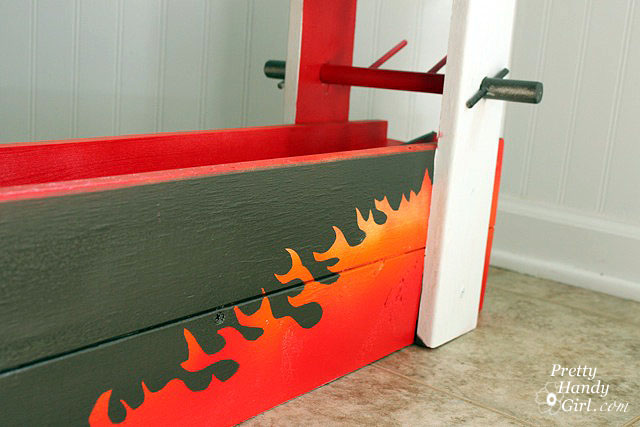
My design consultant demanded fiery red flames and black on his ramp. (And what he wants, he gets!)

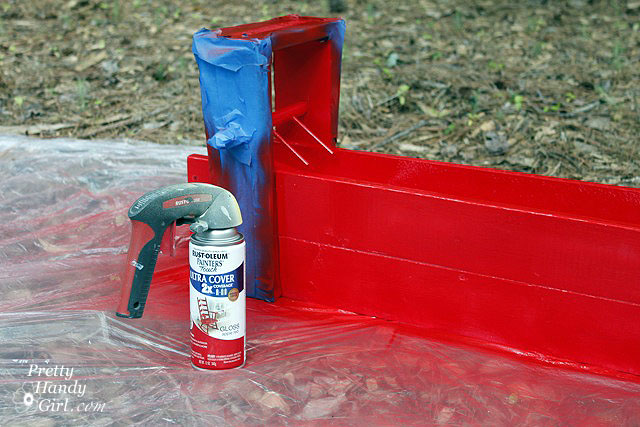
I lightly sanded the wood race track. Added a coat of primer and some red and yellow spray paint.

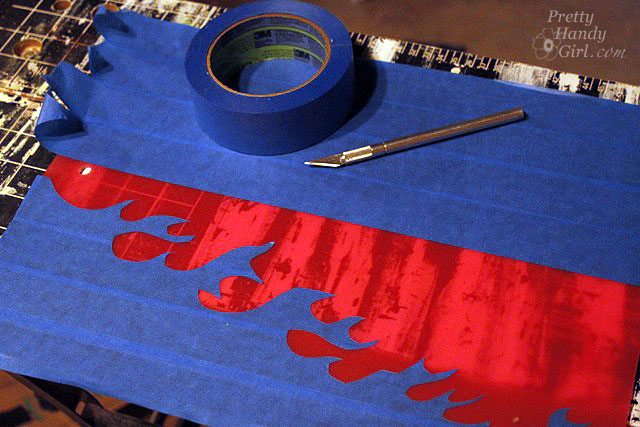
Then I cut out a flame design using ScotchBlue painter’s tape (4 pieces overlapping) and an x-acto knife on a cutting board.

I gently lifted the tape and adhered it to the side walls.

After a coat of metallic hammered metal spray paint, I removed the tape to reveal:

What do you think? Do I have a shot at a job on Orange County Choppers??!! The “logo” on the top was made by pressing letter stickers over the primer, then I taped off around the words and sprayed some red and yellow spray paint. The lines are made with black graphic adhesive lines.

On your marks…get set…

and GO!


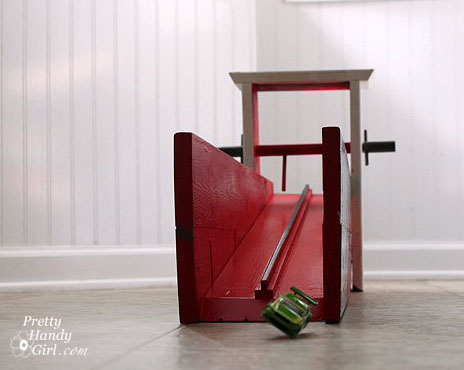
Nice two wheel stunt!

I hope you will make one of these for your little stunt driver.

Chalkboard Tags for Gift Wrap

What is better than a creative gift wrapped package? A creative gift wrapping that can be re-used again and again and again! Chalkboard tags made from foam board are adorable and can be used after the gift has been opened.


Materials:

  • Chalkboard paint
  • Foam board
  • Chalk or chalkboard pen
  • Wrapping paper
  • Ribbon
  • Hole Punch
  • X-acto knife
  • Pencil
  • Ruler

Measure and cut out a 4″ x 6″ rectangle of foam board. The trick to clean cuts in foam board is to use a brand new x-acto blade! It is that simple.


To make perfect diagonal corners, measure 1″ from the corner (across and down) and make  marks. Then draw a diagonal line connecting the two points. Cut off the triangle.

Use the hole punch to put a hole in the middle of the top edge.

Spray paint or paint chalkboard paint onto the foam board. Let it dry.

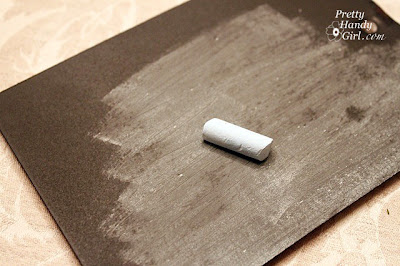
Season the chalkboard rectangle by rubbing chalk all over the board. Then wipe it off. This will eliminate the chalk message “burning” into the chalkboard and will allow the recipient to re-use the board.


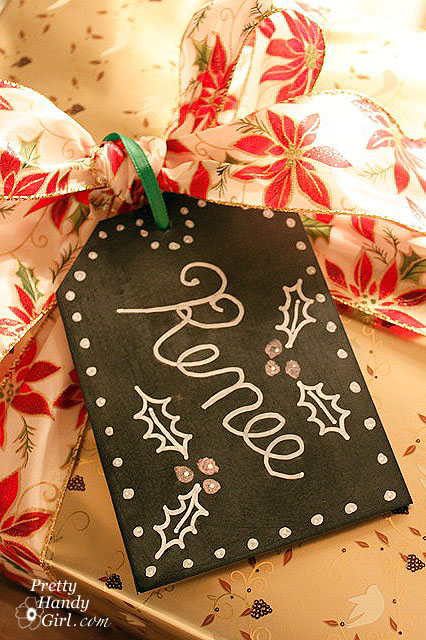
Write a message on the chalkboard tag.


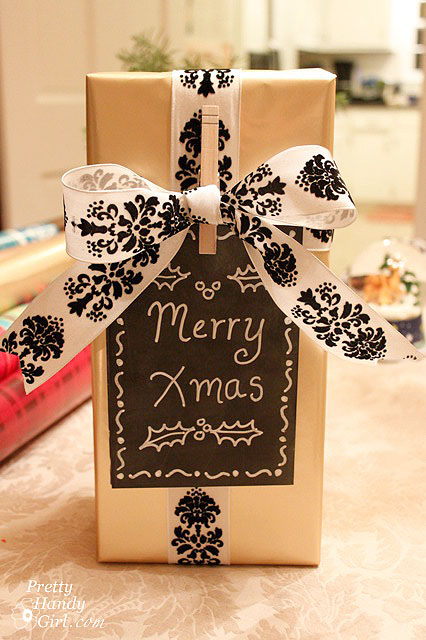
Wrap the present with wrapping paper and a big bow. Attach the tag to the bow.


Now your gift recipient has a cute little re-useable chalkboard tag.


 Merry Christmas, Renee!


Materials:

  • Chalkboard paint
  • Foam core
  • Chalk or chalkboard pen
  • Wrapping paper
  • Ribbon
  • Hole punch
  • X-acto knife
  • Pencil
  • Ruler
  • Clothespin
  • Silver or Gold acrylic paint
  • Paintbrush
  • Hot glue gun (or Elmer’s glue spots)

Follow the instructions above for making a foam core chalkboard. Eliminate the steps on cutting diagonal corners and adding a hole for this one.

Take apart a clothespin and paint both sides using the silver or gold acrylic paint.

Wrap the present with wrapping paper.

Wrap ribbon around the present, but don’t tie a bow. Just make a knot.


Make a separate bow out of the same ribbon and use hot glue (or Elmer’s glue spots) to attach it to the clothespin.


Clip the clothespin over the knotted bow on your package and slide your chalkboard into the clothespin.


“Merry Christmas, Baby!”

Only one more day until Christmas! Better get wrapping people! I’ll have a final wrapping paper tutorial for you tomorrow, I bet you can’t wait!

Today I have a special guest with a special holiday project. Laura is going to show you how to make those adorable tree branch ornaments! But, first, let me tell you a little about Laura.

This is Laura with one of her four fur babies!

Laura writes about making on her blog Laura Makes. She writes about a variety of projects including crafts from knitting to making mosaics (and everything in between), food & drinks (mainly vegetarian), baking, and home improvement projects with a focus on healthy living and environmentally friendly projects. She even faux tiled the concrete floors in her home using soy based concrete stain. The results are nothing short of amazing!

Laura’s Stained Concrete Floors

Will you all please give Laura from Laura Makes a warm welcome!

Every year, I make some percentage of my gifts rather than buy them. At first I started out with grand ambitions and would pick one or two recipients to get a labor-intensive gift like a crocheted afghan. In the last few years, I’ve scaled my efforts back and now make small gifts for multiple recipients. I typically will make a handful of one style of gift to boost my holiday time efficiency.

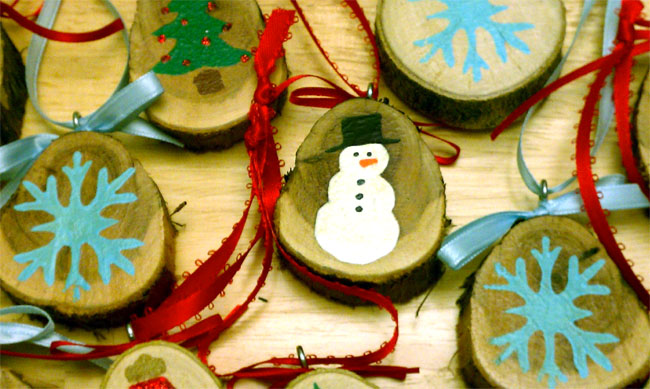
This year I started thinking about what type of ornament I could make from materials I had lying around. I settled on ornaments made from branches we cut off our trees a few years back. Basically, I cut thin slices of the branches, added a painted Christmas design and a ribbon for hanging and they are ready to go!

So you’re probably wondering how you can do this too… Well, you’re in luck because I’m ready to share!

Step 1: Cut your wood slices

Find a branch with a diameter of 2 – 3 inches (or large enough to fit your design) and cut thin slices. I used a reciprocating saw with a 9” wood blade on it to cut slices about an inch thick.  I just have a photo of the saw, but remember to securely clamp your branch before starting to saw it and to wear safety glasses while operating the saw.

Step 2: Sand your wood slices

The reciprocating saw left a rough finish so I used sanding blocks to create a smooth surface. I first used a very coarse grain sandpaper to get the surface level and then a fine grain sandpaper to create a nice finish. The sanding blocks were very handy – I held the block still while moving the wood slice to sand the surface.

Step 3: Drill holes for small eyelets

This is as easy as it sounds. Use a small drill bit to drill a hole in the top of your wood sliced and then screw in a small eyelet. This will allow your gift recipients to hang your ornaments. You can pick up small eyelets at any home improvement store.
Step 4: Create your designs

I like to create my own linocuts (a print-making method) so I decided to create reproducible designs by basically making holiday stamps for my wood slices. You could also simply buy stamps or paint a design if cutting your own stamps isn’t your thing.

I started by drawing my designs on paper – a snowflake, a Christmas light bulb, and a Christmas tree. I traced the outline of my wood slices so that I would be sure to create designs that fit on the slices.
After that, I transferred the design onto my carving blocks.

And then I used my speedball cutter to carve out my designs.

Step 5: Get that design onto your wood slice!

Whether you make your own stamp, buy a stamp, or paint your design free hand, it’s now time to get the design on to your wood slice. Because two of my designs were meant to have two colors, I used a paintbrush to apply my paint to the stamp before stamping the wood slice. Of course, before doing any stamping I first tested my carved stamps to make sure they looked how I expected and also tested the amount of paint that need to be applied.

The snowflake design only used a single color so I used a small brayer instead of a paintbrush to apply the paint.

I found that it worked best to lay the stamp on the table, place the wood slice on top of it, and press down with firm (but not hard) pressure. This helped transfer the paint to the wood even if some small ridges remained after the sanding step.

The trick is getting the right amount of paint on the stamp so I recommend practicing on paper for a while before moving on to the wood slices. If I painted the paint on too thick, I would first lightly place the stamp on paper to absorb some of the extra paint. Of course if you are just painting directly on the slices you can just jump to that step! I made one freehanded design of a snowman for a particular snowman lover in my life.

Step 6: Embellish your designs

Because I felt that my Christmas bulbs and trees turned out a bit plain, I broke out some leftover red glitter glue to embellish them. For the red bulbs, I painted on the red glitter glue. For the trees, I added little dots to signify tree decorations.

Step 7: Seal your ornaments

I wanted to add some sort of sealant coat to my ornaments for protection. I settled on Mod Podge because I had some at home. Experimentation taught me that I couldn’t use a sponge applicator to brush on the Mod Podge or it would smear the paint even though it was dry. Instead, it seemed that using a paint bush to dab the Mod Podge on top of the paint worked the best.  When first applied, it looks somewhat white but it does dry clear.

Before drying:

After drying:

Step 8: Add a way to hang those ornaments

I used ribbon to create a small bow at the top of the ornaments and also to create a loop so that the ornaments can be hung. Hooray! They are complete and ready to be gifted!

Don’t you just love her ornament idea?! I was watching Celebrity Holiday Homes on HGTV last night. And one of the designers who was decorating Jo Dee Messina’s home, glued her family photos to the center of a wood cut out and turned them into ornaments. I bet Laura inspired him!

Thanks for sharing your tutorial with my readers Laura!

Do you want to be a guest on Pretty Handy Girl? Go ahead and submit your idea! I love having people over.