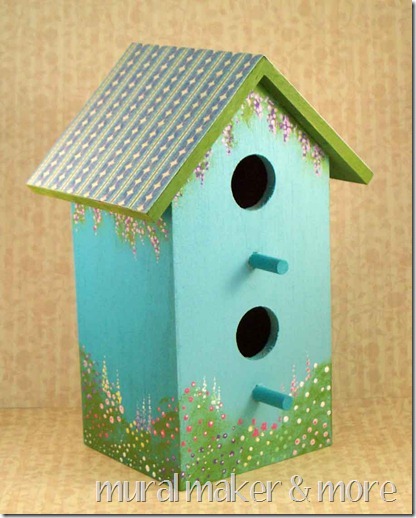
How was your weekend everyone? I had a truly fabulous weekend surrounded by some seriously creative and talented bloggers. I was in Salt Lake City, Utah attending the SNAP 2012 conference. Sadly, there was one blogger who is equally as creative and talented that couldn’t make it this year. (But, we’re going to have to tie her up and make her come next year!) This fabulously talented lady is none other than Colleen also known to the blog world as Mural Maker.

head shot

Colleen and I have never met, but we’ve bonded online because we have similar fine art backgrounds. Colleen is equally willing to share her talents and help empower others to paint just like she does (with step by step photographic tutorials.)

Ooo, ooo, ooo, I think I see her marching up the parade path right now. She has a paint brushes in hand and WOW, look at her toss that spinning artist’s palette in the air like a pizza pie. Now that takes talent! The crowd is excited. The colorful paints are beginning to fly. So, settle back and enjoy the show. Read more

How to Swag a Light Fixture


Do you have a chandelier that is a little “off” in your dining room? Do you curse the electrician that didn’t bother to think about centering a hanging light fixture? Yeah, me too! I  had this problem in our laundry room.

Granted, “most people” don’t hang chandeliers in their laundry room, but I wanted to do it. Except there was one problem. The confounded light fixture box was no where near centered on the room or the washer and dryer. Grrrr. Read more

When last I left you, I was covered in dust and debris from scraping the popcorn ceiling in our laundry room. After a shower and some sleep, I was ready to start another productive day.

First I hired some cheap labor to help me paint the walls. Well, I helped ;-).

The color I used was Benjamin Moore’s Glacier Blue in the Aura Bath & Spa Line of paint (since it is a laundry room.) And every time I walk in the room the color makes me want to sing! Read more

Many of you guessed correctly that I would be scraping my own popcorn ceilings.

It wasn’t hard to do, but it also isn’t for the bad neck or bad back sufferers. Normally I hire out this job — but because our laundry room is so small — it seemed silly to pay someone else to do the work. Now that it is done, I’m really glad I decided to tackle this project. The sense of accomplishment and the resulting smooth ceiling is HUGE!

IMPORTANT NOTE: If you live in a house that was built around 1978, take several small samples of your ceiling and test it for asbestos before you begin. Even though the cutoff date for asbestos in popcorn texture was 1978, the inventory could still be bought from store shelves well into the 1980’s. Do yourself and your family a favor, If you have asbestos popcorn contact a professional who is trained in asbestos removal to handle the job. If you want to learn more, you can read more about our experience with asbestos remediation.


Read more

Installing Your Own Sprinkler System

Last week I shared with you how to grow a better lawn based on what I learned from my education at Pennington Seed. Part of growing a more beautiful lawn is learning how to water it properly. Did you know that the majority of homeowners overwater their lawn and plants? Typically your yard only needs 1 inch of water per week (1/2 inch waterings two times a week) If you install your own sprinkler system with a timer and a rain gauge, you can insure that your lawn and/or landscaping gets just the right amount of water.

When we lived in our old house, Pretty Handsome Guy and I received a quick tutorial on installing a sprinkler system in our yard. Our neighbor — the previous owner of our current home (Yes, it’s complicated like that.) — showed us how to piece together pvc pipes, add spray heads and set up a timer to water our lawn. Now I’m passing this information on to you.

Here is the Pretty Frugal Girl’s method for installing your own sprinkler system! Read more