How to Recover a Butterfly Chair | Pretty Handy Girl

How to Recover a Butterfly Chair | Pretty Handy Girl

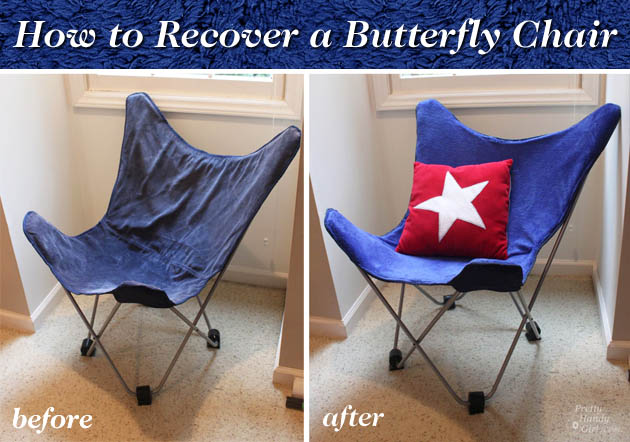
Happy St. Patrick’s Day! Do you have a butterfly chair that is sun-faded or has hideous fabric on it? I bet you thought it was a lost cause, right? Nope! With a sewing machine, some new fabric and a little spare time you can recover that ugly butterfly chair and have a new one. Okay, so I didn’t recover it with green fabric in honor of St. Patrick, but what could be greener than a good old upcycling project! Believe it or not, this was a much easier project than I had anticipated, so don’t get scared by the curves. You can “sew” do this! 😉

How to Recover a Butterfly Chair | Pretty Handy Girl

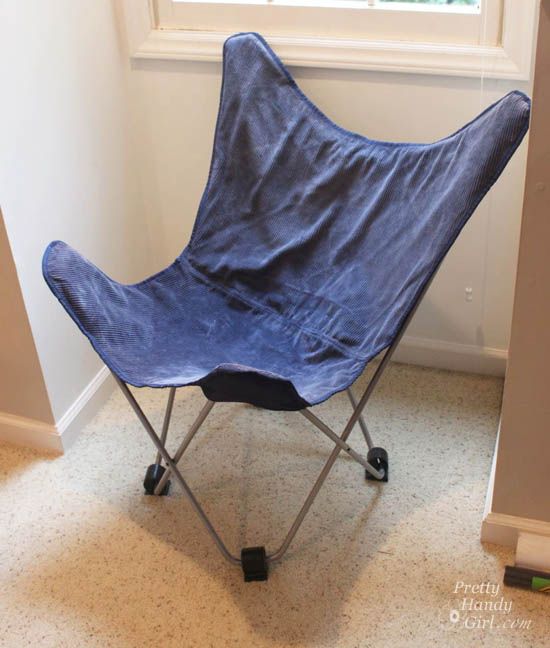
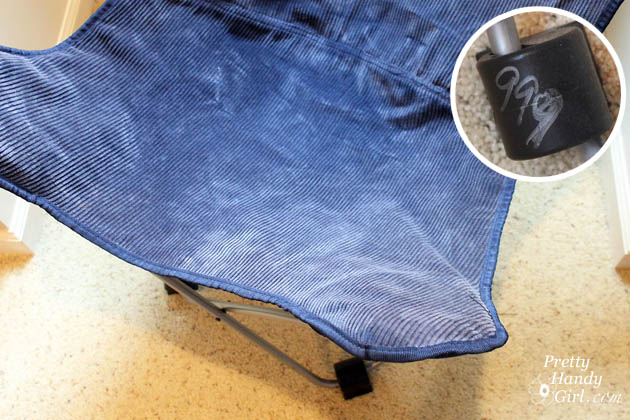
I stumbled upon this chair at Goodwill for $9.99. Normally I wouldn’t spend this much for a sun-faded chair, but because I was working on the school library makeover project — and we needed more comfortable seating — I bought it.  After all, we would have had to pay at least double for another comfy chair.

How to Recover a Butterfly Chair | Pretty Handy Girl

Luckily, I had some soft leftover fleece fabric that I could use to recover the chair. I wish I had measured how much I used, I think it was a little less than 2 yards.

Materials:

  • 2 yards of fabric
  • Coordinating thread
  • Pins
  • Scissors
  • Old butterfly chair + old cover

Instructions:

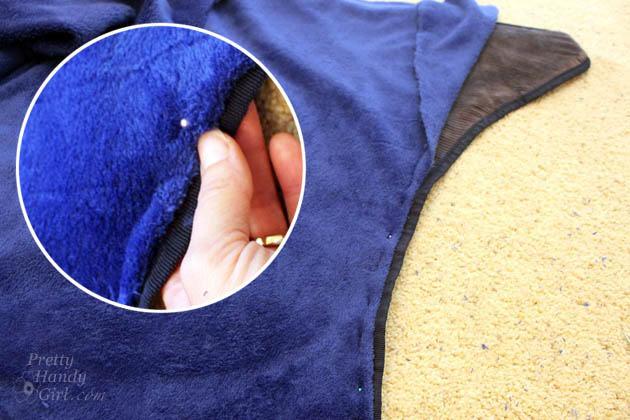
1. Remove the old cover from the butterfly chair frame. Lay it on top of your fabric (both right sides up.) Read more

Unique Wine Rack

Unique Wine Rack

Hi everyone! It’s Jessica from Décor Adventures, back again and ready to show you a furniture makeover project I’m just in love with. This isn’t just any furniture makeover. This is how to turn an old dresser into a rack to hold your favorite reds and whites – wine that is!

One of my favorite things to do is redo furniture. Chairs, mirrors, tables, dressers, you name it. A while back I found this dresser at a thrift shop for only $10 and took it home only to find the drawers didn’t work well at all. I had an idea to ditch the two large drawers and turn this piece into a wine rack. If it doesn’t work for clothes, why not make it work for wine! Here is how to make your own unique wine rack from a dresser.

Materials
Many of these materials are based on how I painted the dresser and how we cut the shelves. We cut them ourselves with a table saw, but if you don’t have one, you can have them cut at the home improvement store or use a circular saw.

  • Dresser with a few drawers removed

Paint:

  • primer, paint, stain, paint brush and roller;
  • Furniture wax or sealant/polycrylic (or whatever you might want to use to finish the dresser)

Racks/Shelves:

  • Two 2’x4’ sheets of ½” MDF
  • Two pieces of quarter round to finish fronts of shelves;
  • Several feet of ½” square wood dowels {they come in 36” pieces}

Tools:

  • Table saw {unless you have the shelves cut to size at the home improvement store};
  • Nail gun
  • nails
  • air compressor
  • Random orbital sander {Optional if you distress the dresser}
  • Miter saw or hand saw

Supplies:

  • Wood glue;
  • 220-300 Sand block or sand paper.

Instructions
These instructions will be in a three sections, so you can easily see how this project comes together. First you will paint or stain your dresser, {or maybe you love it as is and will leave it}, second you will prepare the shelves and put them together to create the wine racks, and last you’ll put the whole dresser together.

Preparing the Dresser
This was a piece I bought at a thrift store and it was already painted but I had to fix it up. The back was not painted and didn’t look very pretty so I ended up painting that too. You can see in this picture how wonky the bottom large drawers were.

Dresser Before Read more

Reusable monthly menu board with magnetic meals - perpetual menu board

Reusable monthly menu board with magnetic meals - perpetual menu board

We were recently in North Carolina visiting with Matt’s family.  While we were there I took the time to visit an old dear friend of mine.  This girl has known me for years!  In fact I just realized it’s been 21 years since I first met her.  Needless to say it’s important to catch up with friends like this whenever you get a chance. While visiting her, I noticed she had an adorable menu board in her kitchen where she keeps track of all of her meals for the month.  Since “What’s for dinner?” is one of Matt’s favorite things to ask me, I knew I had to make one of these menu boards.

Materials:

  • 12×12 Frame
  • Clear Plastic Calendar Page
  • Scrapbook Paper
  • Magnets
  • Dry Erase Marker(s)
  • Printer Paper or Card Stock
  • Printer
  • Laminator or contact paper
  • Sheet Metal
  • Magnetic Paint
  • Tin Snips
  • Safety Glasses
  • Gloves

Instructions:

Start by measuring the inside of the frame.  (In my case that measurement was 12″ by 12″.)  Using a marker, mark a dot 12″ down from the edge onto your sheet metal.  Repeat this on the opposite side.

Reusable monthly menu board with magnetic meals - perpetual menu board

Use a straight edge (or carpenters square) lined up on the dots and draw a line.  This will be where you make your cut.

Read more

I love making unique garden flags. My go-to material for these outdoor accessories are Dollar Tree placemats! You read that right. $1 fabric placemats! But, if you don’t live near a Dollar Tree and you have old placemats, you could upcycle them into a Valentine’s Day garden flag!

A few years ago, I made this Let it Snow flag:

Although it doesn’t seam to convince Mother Nature to bring us some white powder, it has held up nicely in the cold and rain. I’ve since set out to create a garden flag for each season. I have a Fall themed flag and a Summer flag. So, why not a Valentine’s Day flag?!

Start by collecting some supplies. Feel free to substitute what you have on hand.

Materials:

  • Dollar Store placemat
  • Ruler
  • Soap sliver (pencil or disappearing fabric marker)
  • Letter stencils (I chose a set by Martha Stewart Plaid)
  • Round paint brush
  • Tulip Fabric paint (white and black)
  • Tulip glitter fabric paint
  • Tulip glitter transfer sheets
  • Fabric scraps (red, pink and white)
  • Polyester stuffing
  • Scrap fabric, towel or rag (for ironing the glitter iron-ons)
  • White thread
  • Scissors

Begin by ironing the fabric you will be using (including the placemat). Use caution when ironing the placemat, the DollarTree ones I bought are polyester and needed a cooler iron. Read more

All You Need is...Valentine String Art | Pretty Handy Girl

All You Need is...Valentine String Art | Pretty Handy Girl

All you need is some scrap wood, and maybe a little string. And a few nails. And how about a gum wrapper? If you had all those you could be like MacGyver and build some kind of cool device that would catch fire. But, since I had everything except the gum wrapper, I decided to make a Valentine art project. Follow along and I’ll show you how easy it is to make your own heart string art and engraving art for Valentine’s Day. If you need any of the materials, you can pick up most of them at your local Lowe’s Home Improvement store (probably the same place MacGyver shops because they have gum at the registers.)

(I’ve included affiliate links for your convenience. I earn a small percentage from a purchase using these links. There is no additional cost to you. You can read more about affiliate links here.)

Materials:

Instructions:

Start by painting your wood red.

All You Need is...Valentine String Art | Pretty Handy Girl

After the paint has dried, draw a heart with chalk. Read more