How to Make a Chalkboard Surface Desk | Pretty Handy Girl

How to Make a Chalkboard Surface Desk | Pretty Handy Girl

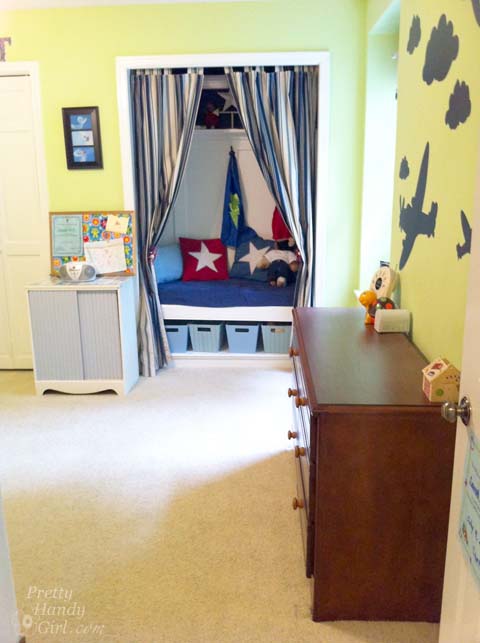
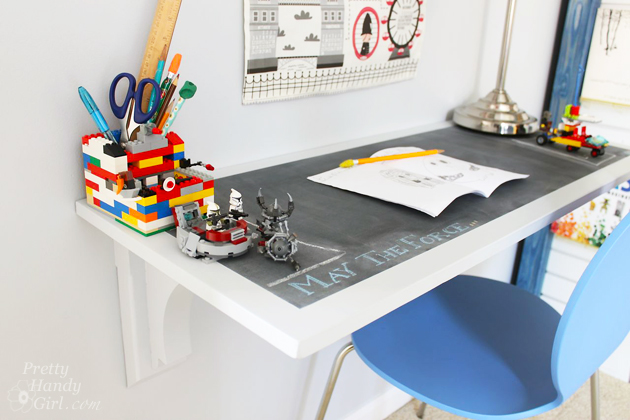
As part of the makeover of my son’s bedroom, I wanted to create a fun chalkboard desk surface for him to write and build legos on. The idea of a chalkboard coated surface came to me when I remembered how much he liked the mini-chalkboard decals that used to be on his room wall.

Creating a chalkboard surface on any desk or flat surface couldn’t be easier with the right tools. Here’s how you can create your own chalkboard desk!

Materials:

  • 3M fine grit sanding block
  • Valspar High-Hiding Primer tinted gray
  • Rustoleum chalkboard paint
  • 2″ paint brush
  • Foam brush
  • Small craft paintbrush
  • Desk surface (I used pre-cut finish grade plywood)
  • ScotchBlue painter’s Tape
  • General Finishes Water-based sealer (or satin Minwax Polycrylic)

Instructions:

Begin by lightly sanding your desktop with the sanding block. Wipe any dust off with a damp rag.

Paint one coat of primer on your desktop surface. (A little note about my primer: I asked the Lowe’s paint department to tint it as dark as they could with black colorant. This helps when you are painting over the primer with a dark color.)

How to Make a Chalkboard Surface Desk | Pretty Handy Girl

After the primer has dried, create a border on your desktop with painter’s tape. Press the edges down firmly with your fingers. Paint one coat of chalkboard paint with the paint brush. Brush the paint in one direction. Let that layer dry. Repeat with a second coat brushing across the original strokes (i.e. vertical then horizontal.) Read more

Spigot Faucet Drawer Knobs Tutorial | Pretty Handy Girl

Spigot Faucet Drawer Knobs Tutorial | Pretty Handy Girl

Remember my son’s dresser that I gave a pop of color? As promised I’m back today to show you how I made the spigot handle drawer knobs. I purchased my vintage spigot handles from Etsy seller, Anything Goes Here. She has some other vintage handles available, so snatch them up quick. The only other materials you need can easily be picked up from the hardware store.

Materials:

Spigot Faucet Drawer Knobs Tutorial | Pretty Handy Girl

  • Spigot faucet handles
  • #8 – 32 Machine screw nuts
  • #8 – 32 x 2″ Threaded machine screws
  • Washers
  • Needle-nosed pliers
  • Phillips head screwdriver

Optional: Clear sealer spray to protect knobs

Instructions:

Making these adorable vintage spigot knobs is an easy project. Line up your parts per handle. You’ll need 1 machine screw, 4 washers, and 3 nuts per handle. Start by threading one washer onto the machine screw. Thread the spigot handle onto the screw. Read more

Easy Added Color to a Dresser | Pretty Handy Girl

Easy Added Color to a Dresser | Pretty Handy Girl

Adding color to dresser drawers is definitely an easy way to add a pop of color to an otherwise boring piece of furniture. Add some new knobs and your dresser will look like a new piece of furniture! (Tutorial for creating custom knobs coming soon.)

You could say that I finally got that Kick in the Pants I needed to start working on my son’s room. One makeover I had in mind was giving his dresser a pop of color.  The top and sides of the dresser were in great shape and it has a tough laminate top. Instead of painting the entire dresser, I decided to paint only the drawers because — knowing my little guy — he would have it scratched up in no time.

Easy Added Color to a Dresser | Pretty Handy Girl

Materials:

Instructions:

Start by removing clothing from the drawers. Then firmly pull the drawers all the way out. Some drawers have a clip at the end, just pull straight toward you. Others may require you to lift up on the front to release the drawers from the track. Mark the inside of the drawer so you know which slot to return it to.

Read more

easy diy yardstick star

Hi there! It’s Melissa from The Happier Homemaker again and I’m excited to share a super easy little DIY decor project with you today!  A few weeks back I was at Lowe’s on a Saturday morning (isn’t that where we all are on the weekends?) While shopping around I saw a bucket of yardsticks in the paint section and had a stroke of inspiration to create this adorable little yardstick star for my mantel! This was one of my favorite types of projects (simple and inexpensive) and I hope you enjoy it as much as I did!

Materials

  • 3 wood yardsticks
  • Saw (I used a circular saw but almost any type will work)
  • Wood Glue
  • Stain

Instructions:

materials yardstick star

Use a saw to cut each of your yardsticks in half at the 18″ line. Set one segment aside so you have 5 total pieces to work with. Read more

Installling Brick Mural Wallpaper | Pretty Handy Girl

Tips for Installing Brick Wallpaper Mural | Pretty Handy Girl

Today I can’t wait to show you how to easily add dimensional interest to a focal wall in your home. Installing a Brick Wall Mural is definitely a DIY project you can tackle if you have a friend or two to help you. When Wallpaper Direct contacted me to offer to let me try some of their products, I was still a bit wary (having stripped my fair share of wallpaper.) But, then I stumbled upon the white brick wallpaper and saw how cool it looked. I decided to give it a try and let them send me a wallpaper mural specifically for my son’s bedroom. But, let’s back up. Remember last week when I admitted to being a procrastinator? Well, this is what I started with:

Back Camera Back Camera

After staring at Nickelodeon green for 6 years, my son and I decided it would be calming to paint the walls a soothing gray. And, I thought it would be really cool to create a loft look by installing a giant wall mural of white brick. (Note: The large mural panels has since been discontinued, but you can purchase white brick wallpaper that looks very similar and may actually be easier to install by yourself.)

I ordered the mural and it arrived safely to our house in a few days. I quickly organized a few friends who had installed wallpaper to help me.

Installling Brick Mural Wallpaper | Pretty Handy Girl

To install a wallpaper mural, you’ll need a few tools.

(I’ve included affiliate links for your convenience. I earn a small percentage from a purchase using these links. There is no additional cost to you. You can read more about affiliate links here.)

Materials:

Prep Work:

Before wallpapering your wall, clean it with a mild cleanser (diluted TSP is wonderful, but you can use regular multi-purpose spray cleaner.) Patch any holes or imperfections with spackle (joint compound). After the compound has dried, lightly sand the wall. Read more