How to Mount Antlers

How to Mount Antlers

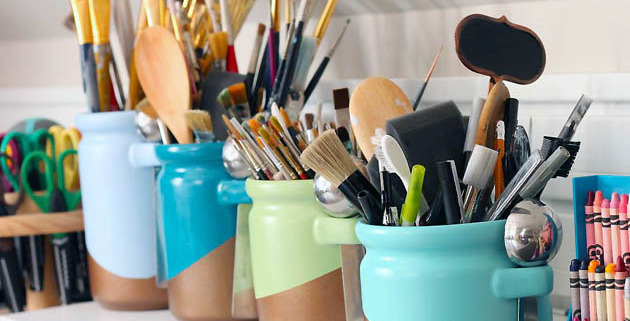
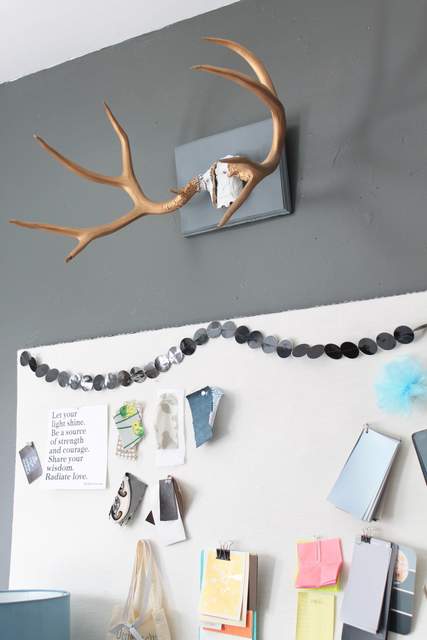
Hello! It’s Jessica from Decor Adventures.  One very popular home decor item that we are going to get pretty handy with this month is antlers. If you love rustic or outdoor style, this project is perfect for you. You’ll see all kinds of animal antlers on walls or holding jewelry or scarves. They can be both functional and practical. Antlers can be found at flea markets or second hand stores if you are lucky. They come in all sizes and shapes, plus you can paint them any color to match your style.

It’s much easier than you think to mount antlers on your own. You don’t need a degree in Taxidermy or any special tools, a drill will do!

Materials

  • Antlers
  • Long bolts
  • Nuts to fit bolts
  • Drill and drill bits
  • Hanging hardware
  • Paint (optional)
  • MDF or wooden board

Instructions

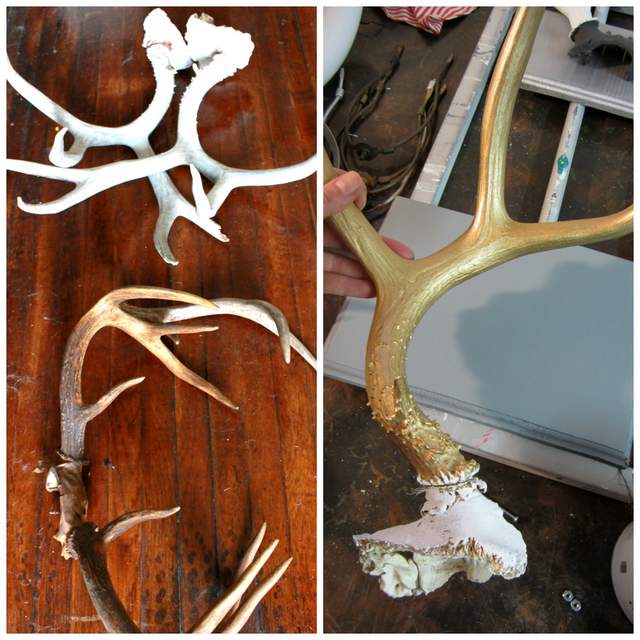
I mounted two sets of antlers that I got at a yard sale. One was a one-piece set and the others were two separate pieces. Most antlers you get will have some of the bone attached to the end of the antler. This is the part you will attach to a board to mount them. If you find them second hand they may already have holes drilled in them from when they were previously mounted.

One set I painted white and the other gold. It’s easy to spray paint antlers, so pick your favorite color or leave them natural if you like.

How ot Mount Antlers1. First, prepare the board you’ll mount the antlers on. These can be found at craft stores or you can cut your own from MDF. It should be slightly larger than the base of the antlers you’ll mount. You can paint the board if you would like. The silver one below already had the mounting holes drilled in it when I took this picture, but you can get an idea of the size board you need.

Read more

Painted Chandelier Sleeves | Pretty Handy Girl

Painted Chandelier Sleeves | Pretty Handy Girl

When you were perusing my holiday tablescape post did you see my fancy copper chandelier sleeves? My chandelier was looking a bit dingy with the aged yellowing sleeves. I decided to spray paint them copper for a new look.

To update chandelier sleeves, you can paint them any color you like.

Simply remove the light bulbs.

Painted Chandelier Sleeves | Pretty Handy Girl

Lift the sleeves off.

Painted Chandelier Sleeves | Pretty Handy Girl

Wash the sleeves off and dry them.

Painted Chandelier Sleeves | Pretty Handy Girl

Then pick your favorite spray paint color and spray paint them. I used Rust-Oleum High Heat Ultra Enamel Spray – Aged Copper to paint mine.

Painted Chandelier Sleeves | Pretty Handy Girl

That update was so easy, I might spray paint them again in a year. I’m thinking light blue or silver next time. What do you think?

PHGFancySign


Pin for later!

See how Pretty Handy Girl updated her dingy, aged yellow chandelier sleeves with copper spray paint! | Lighting DIY | Pretty Handy Girl #prettyhandygirl #DIY #lightingDIY #chandelierDIY

Metallic Color Block Canisters | Pretty Handy Girl

Metallic Color Block Canisters | Pretty Handy Girl

I’m back with another easy Lowe’s Creative Idea this month. When you get tired of your cobalt blue canisters you can easily spray paint them with a metallic color block pattern. That’s exactly what I decided to do with my thrift store canisters.

I’ve been on a major mission to purge things I no longer use or love from my house. I have almost completely filled our dining room with things to donate. I had contemplated donating my cobalt kitchen canisters because the color wasn’t making me happy anymore. But, then I realized that I could give them an entirely new look with some spray paint.

Materials:

Instructions:

Remove the lids, the metal ring, and spoons from your canisters.

Metallic Color Block Canisters | Pretty Handy Girl
(Wood plank photo backdrop courtesy of Leen the Graphics Queen.)

Use a sanding block to lightly rough up the surface of the canisters. Wipe all the sanding dust off with a damp rag.

Metallic Color Block Canisters | Pretty Handy Girl

Spray the outside and base of the canisters with Valspar Premium Primer. Read more

rustic wine bottle centerpiece

Hey everyone!  Jacque here from The DIY Village again to bring you another quick DIY tutorial! A few years ago I was given a really cool set of drinking glasses made out of old wine bottles.  Recently we purchased some new glasses but I wasn’t ready to donate the old glasses quite yet and decided to come up with a way to recycle them and keep them functional in our home.  After some thought, my rustic wine bottle centerpiece was born.

MATERIALS:

  • 1/2″ x 4″ x 4′  Poplar Board – Cut into 2- 5 1/2″ wide pieces
  • 1/2″ x 5 1/2″ x 4′ Poplar Board – Cut in half
  • 12 – 8 Penny Nails (Truss Hanger Nails)
  • 1/8″ Drill Bit
  • Drill
  • 3 1/2″ Hole Saw
  • Clamp
  • Sandpaper
  • Drill Press
  • Straight Edge (Speed Square)
  • Sliding Rule Square
  • Walnut Gel Stain
  • Foam Brush
  • Paper Towels
  • Pencil

Instructions:

measure in

Start by cutting the 5 1/2″ board in half to leave you with  two boards approximately 24″ long.

measure over 7

Measure 3.5″ out from the center line and mark a line with your speed square. Repeat on the opposite side of your center line. Measure 7″ out from the two center lines and make a mark with your speed square. These will be the center points for your four openings.

find center

Use the wine bottle glass as a guide to help center the glass on the board.  Set the sliding rule square and use as a guide so that the glasses will be straight across the rest of the board.  Using a pencil to trace around the outside edge of the glass, repeat for all four holes. Read more

DIY Constellation Wall Art

DIY Constellation Wall Art

Happy New Year! It’s Jessica from Decor Adventures, back with a fun project for your walls this month.  In late November, my husband and I had a baby girl! We are enjoying every minute of her and on the side I’ve been working on decorating her nursery. This idea for constellation wall art is both a way to add art to the walls, and some personalization of her birthday. It’s easy to put together and only requires a few basic supplies.

Materials

  • Picture frame
  • Hardboard to fit inside picture frame
  • Primer
  • White and black paint
  • Drill and drill bits
  • Small nails
  • Embroidery floss in white
  • Computer, internet, printer, paper
  • Hammer
  • Glitter (optional)

DIY Constellation Wall Art

Instructions

1. Paint your picture frame if desired. I used Smitten by Americana Decor chalky paint. I sealed it with 2 coats of polycrylic since chalky paint dries in a matte finish.

2. Prime and paint your hardboard with black paint. You could also use dark blue, since it will represent the night sky. I sprinkled a little bit of black glitter on the wet pant to add some sparkle (optional.)

Paint the nails white. These will be the “stars” in your constellation.

DIY Constellation Wall Art

3. Find an image of the constellation you plan to use and print out an image of it. You can find this with a quick search online, but this is a good resource for pictures. Print it on paper to fit inside your frame. Read more