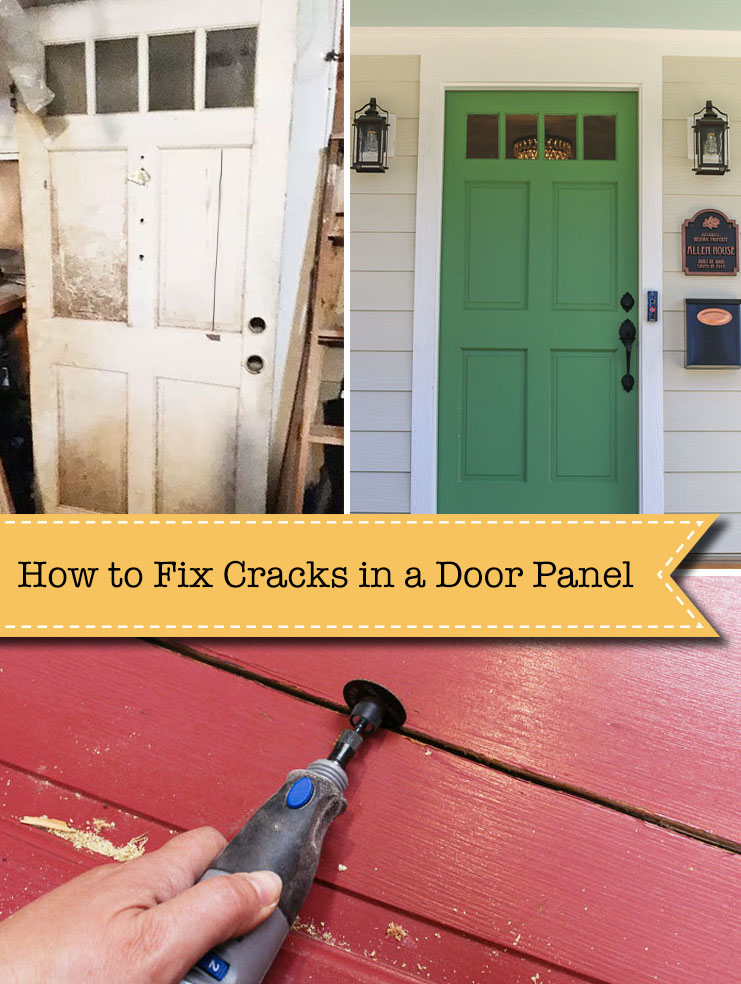
How to Fix Cracks in Door Panels - An Easy RepairHow to Fix Cracks in Door Panels without Taking the Door Apart

Wooden doors will develop cracks over time, especially if the panels aren’t free to expand and contract. Most of the time, years of paint or caulking the seams around the panels will cause the wood to stick and not allow the panel to expand and contract with the weather. The result is a big vertical crack along the wood grain. Today I’m going to show you how to repair the crack without taking the door apart!

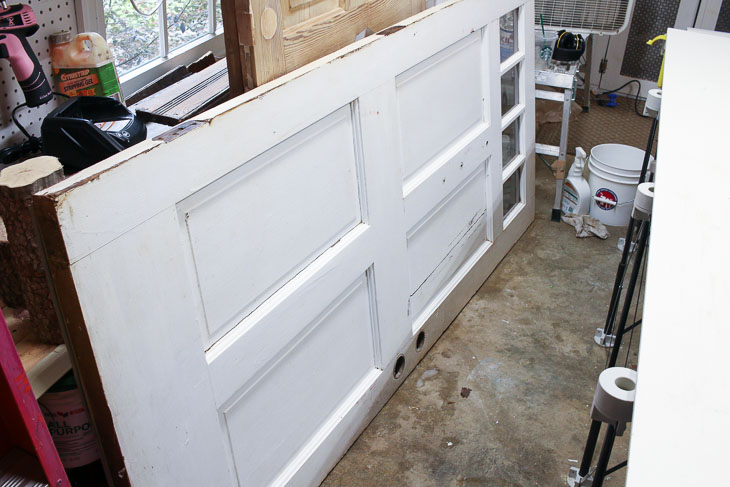
You may remember right before I purchased the Saving Etta house, I discovered a discarded door by the dumpster behind our local grocery store. It had a big crack in the panel and was very dirty. But, otherwise, it appeared to be structurally sound. Pretty Handsome Guy and I salvaged the door on a late night rescue mission, and had a good laugh about it afterwards.

The door sat in the garage until the addition was framed and rough openings were created at the Saving Etta house. With the windows set to arrive, I knew I had to take a day out of my busy schedule to repair the cracked door and prepare it for installation.
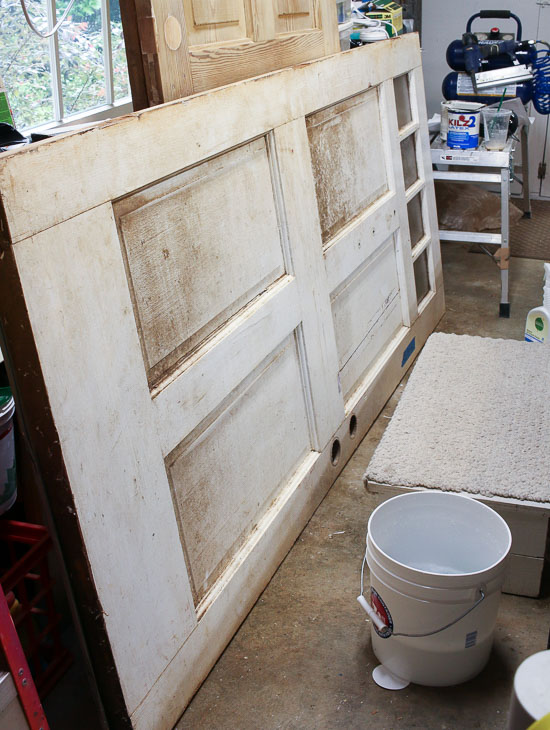
Dirty Front Door found in the Trash

First the door got a good cleaning with soapy water.
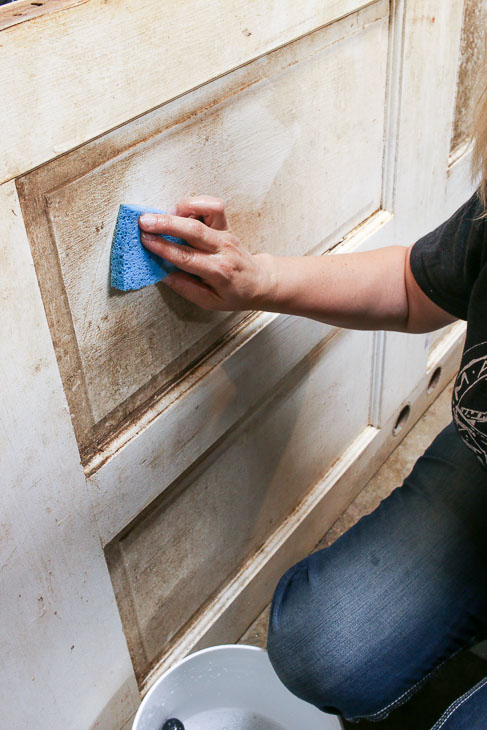
Cleaning Front Door with sponge and soapy water Looking better already!

Cleaned front doo

Now it was time to fix the door. Let’s learn how to repair a cracked door panel without taking the door apart.

Materials:

(I’ve included affiliate links for your convenience. I earn a small percentage from a purchase using these links. There is no additional cost to you. You can read more about affiliate links here.)

Instructions:

Lay the door on a flat surface like a workbench or saw horses.
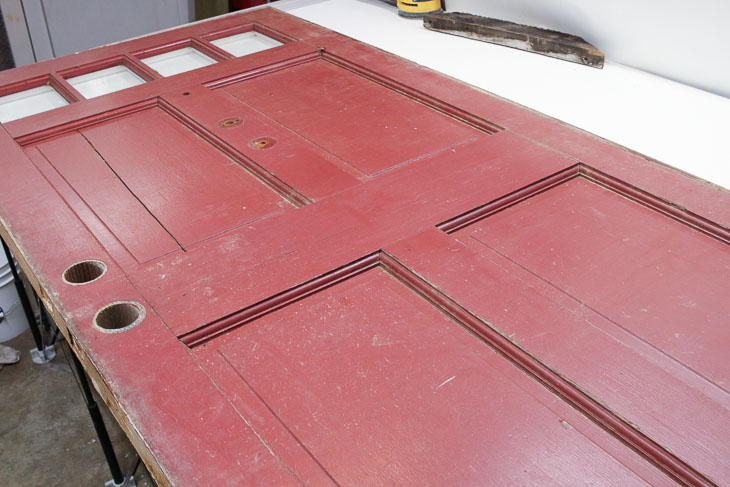
burgundy side of dumpster found door

Using the Dremel with a cut off wheel, clean up the crack and open it to the width of your wood spline.
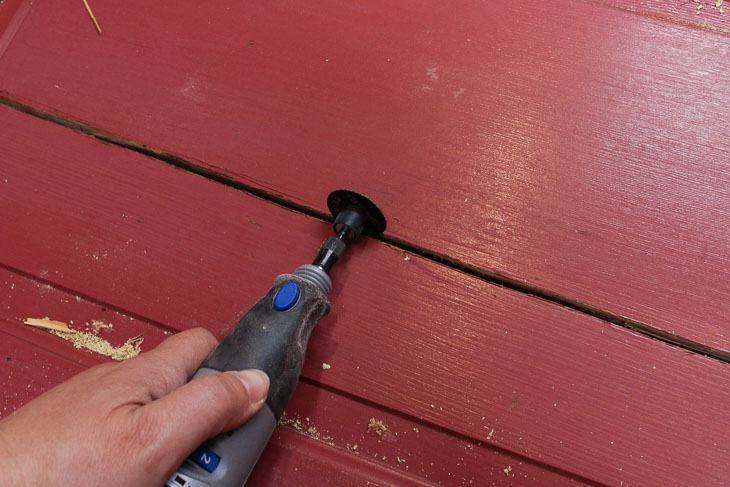
Open door panel crack with dremel cutting wheel

Sand smooth any jagged edges along the crack and any dings on the rest of the door.
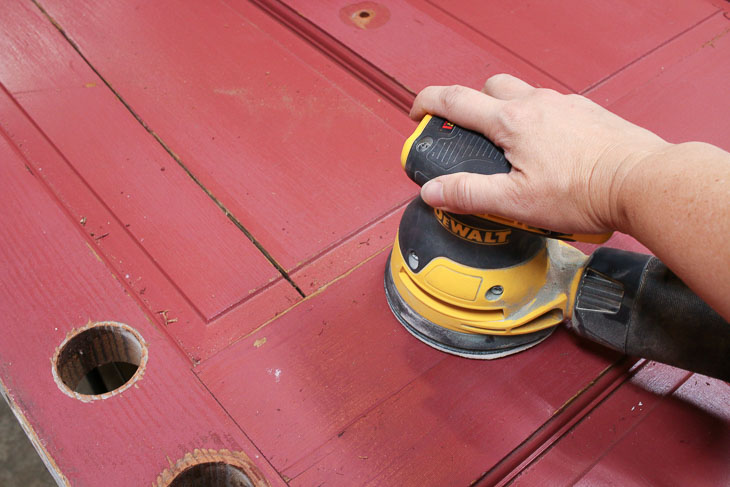
Sanding door smooth

Test fit the spline into the crack. Make any adjustments to the crack as needed or cut a narrower spline on a table saw.
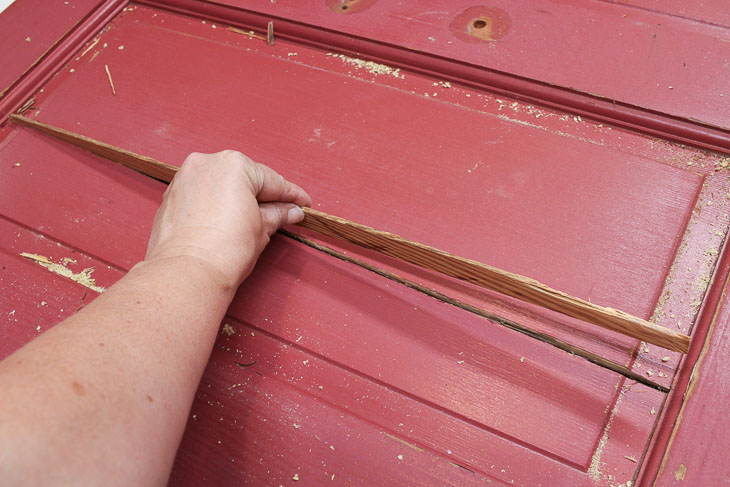
Insert wood spline into door crack

The spline should fit snuggly in the crack.
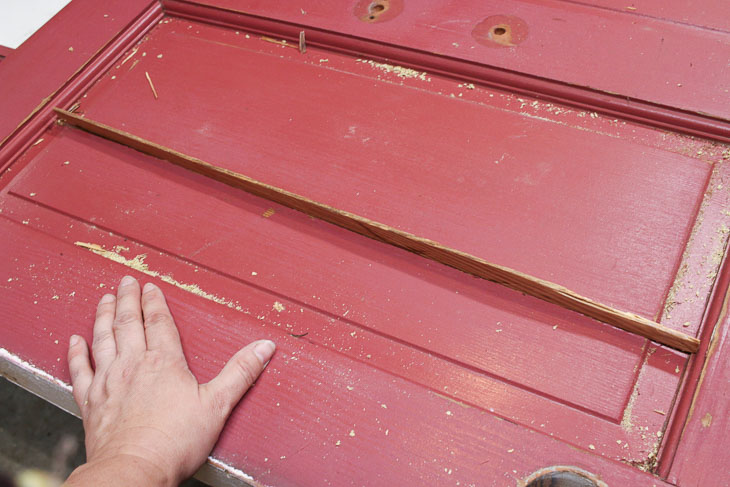
Test fit wood spline in door crack

Remove the spline and apply a liberal amount of wood glue into the crack.
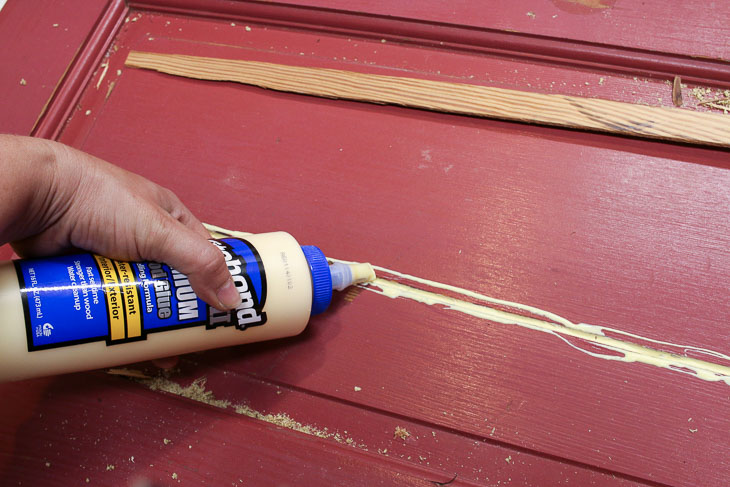
Add lots of wood glue to door crack

Insert the spline and clamp the door until the glue hardens.
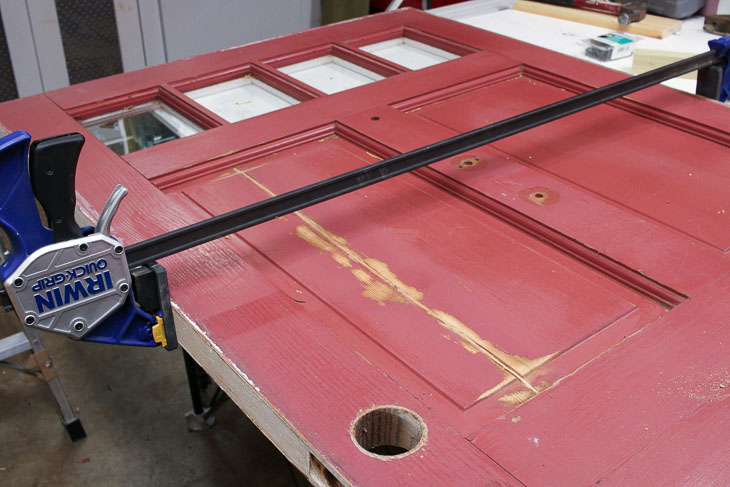
Clamp door repair overnight.

Chisel off the excess spline (you don’t need to get it perfect, but you’ll want to remove as much of the spline that protrudes beyond the door panel.)
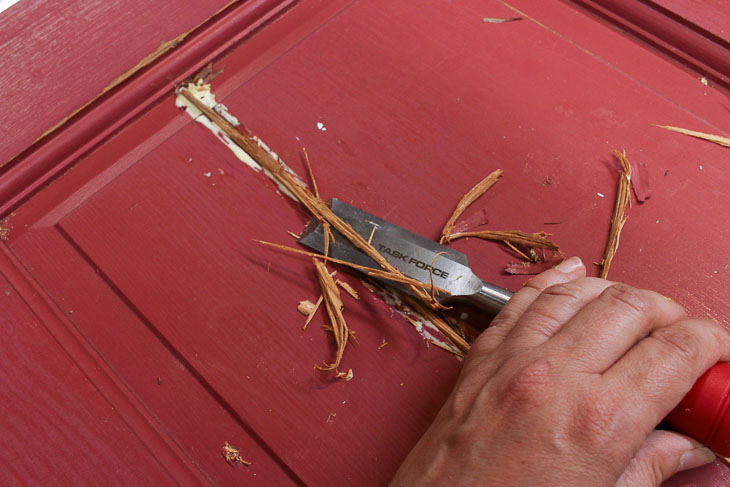
Chisel off excess wood spline

Sand the repaired crack until the spline is even with the rest of the door panel.
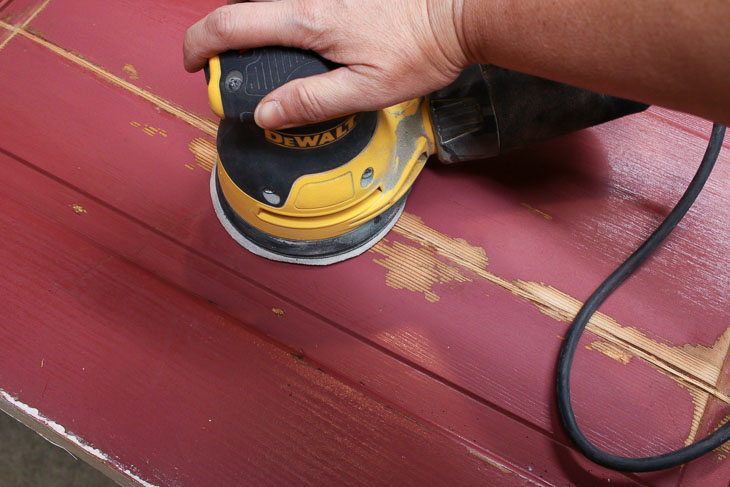
Sand fixed door crack smooth

There will probably still be some minor cracks or voids, but these can be repaired with putty. Mix up a small amount of Durham’s Rock Hard Water Putty (just add water!) Apply along the repaired crack and fill in any small holes or dings on the door. Let the putty cure.
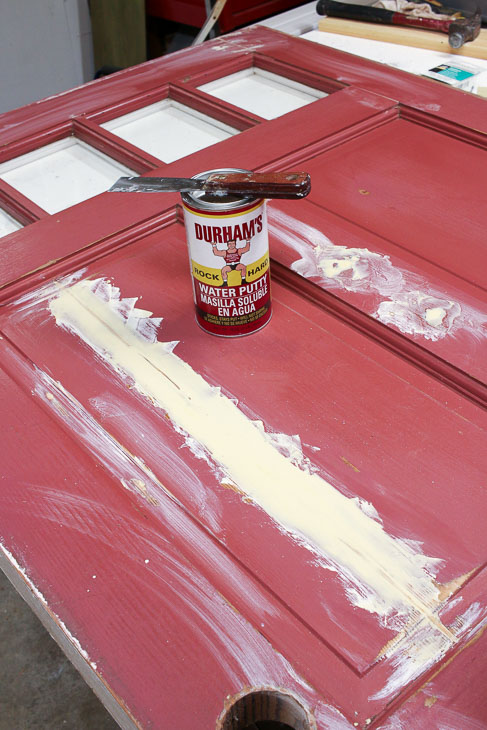
Use Durham wood hardener to smooth imperfections

Flip the door over and repeat the process of removing the excess spline material and adding the wood putty.
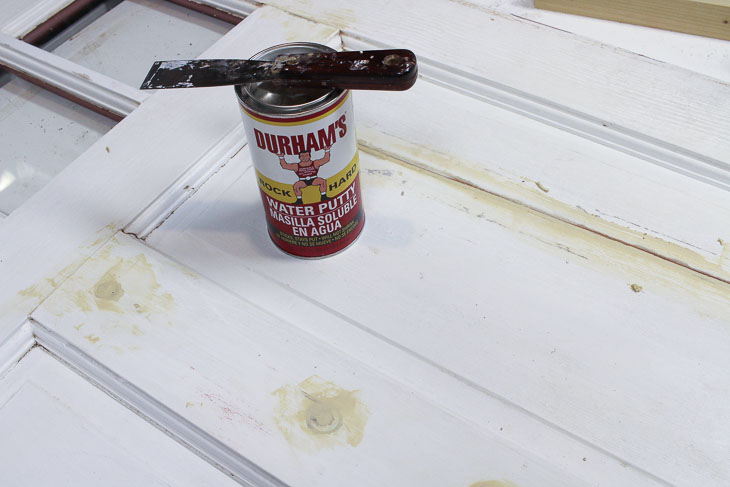
Add Durham Wood Hardener on back side of door repair

After the putty has dried, sand until smooth. Start with a 120 grit sandpaper and work your way up to 220 grit.
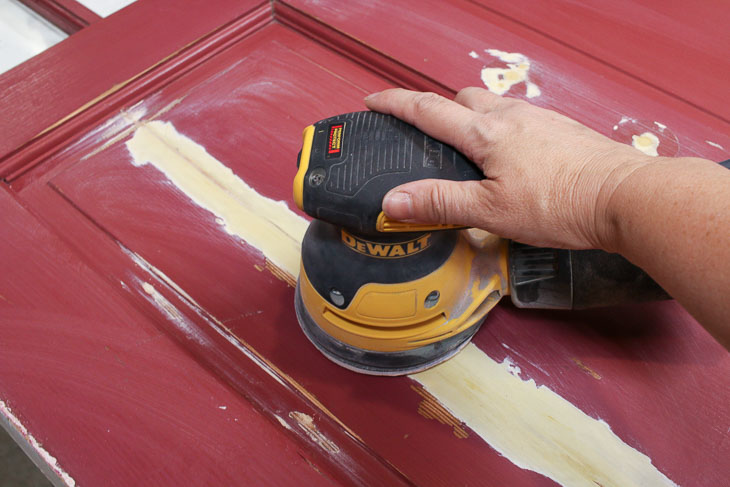
Sand cracked door panel repair smooth

Clean the door of any sanding dust. Tape off the window edges (if applicable). Prime the door on both sides (allowing one side to dry before priming the other side.)
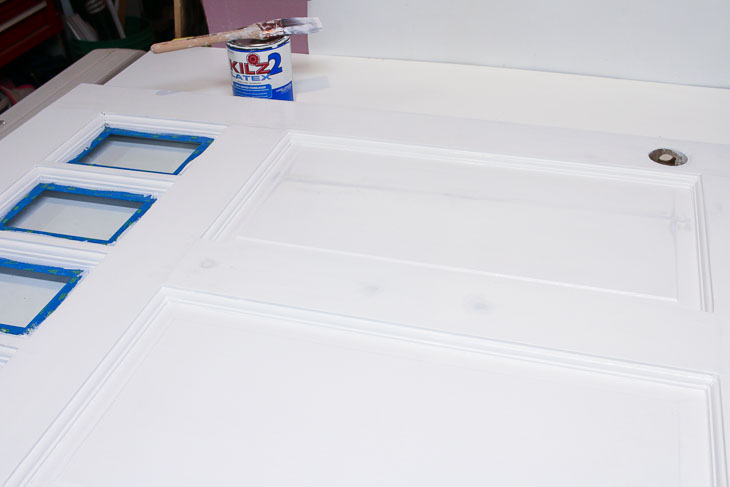
Prime repaired door with KILZ 2 primer

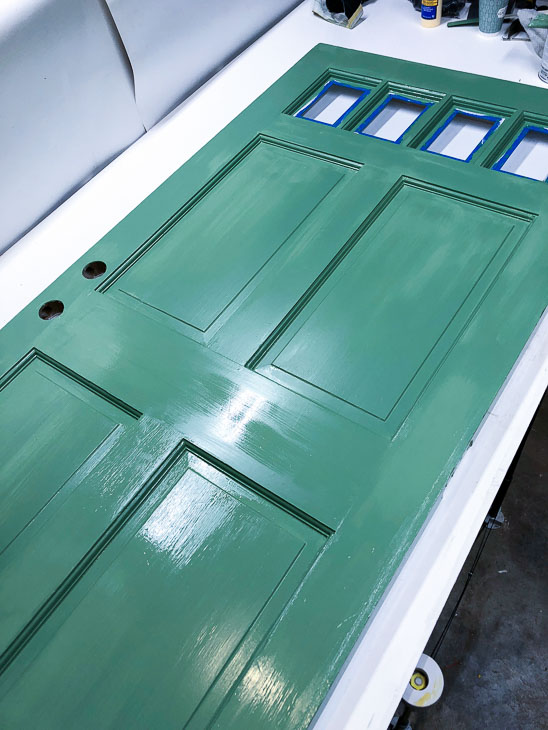
Paint your door any color you like!

Paint repaired door with Magnolia Home Magnolia Green paint

Want to Stain Your Door Instead?

If you prefer the natural wood look on your door, be sure to choose a spline that matches your door’s wood species and skip the wood putty step.

Installing the Door:

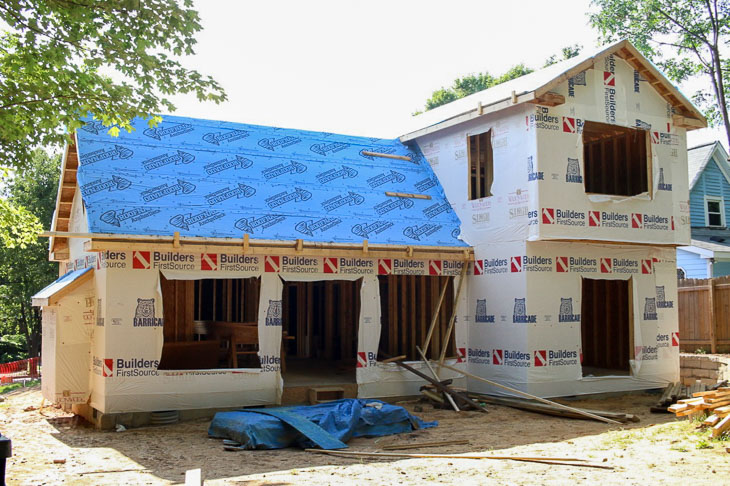
Back at the house, my framers had some fun with the house wrap at the front door.
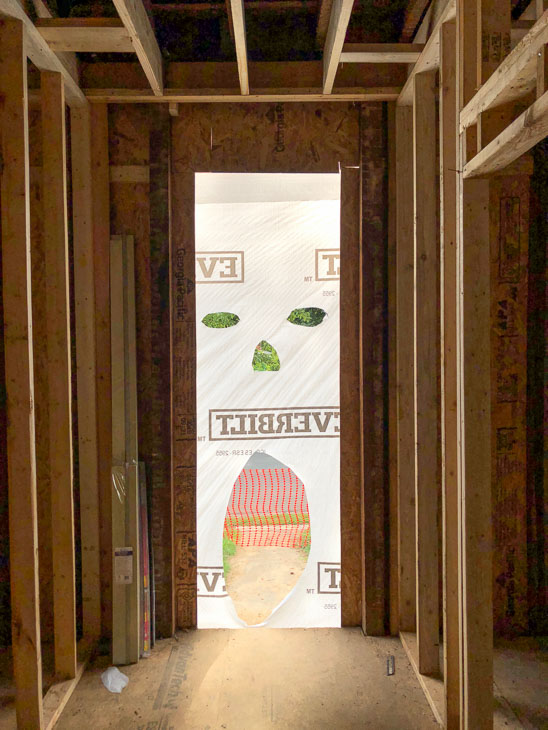
After I added an exterior door frame kit to my repaired door, the framers hung it in the rough opening.
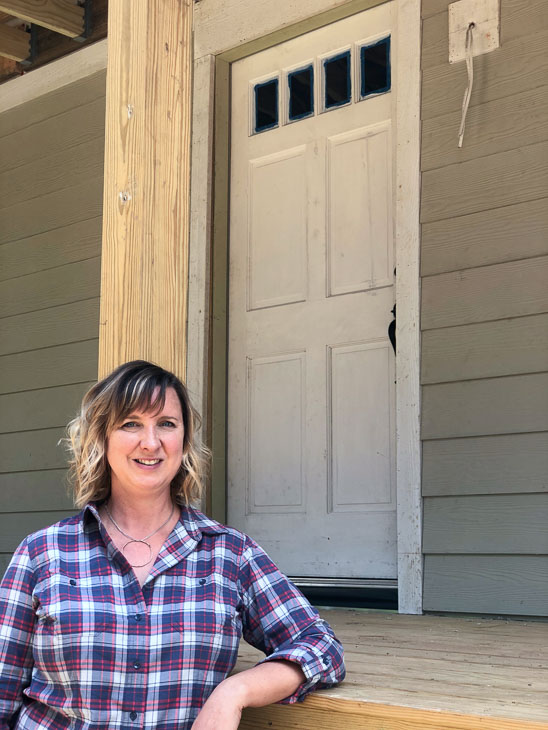
Because I didn’t paint the exterior of the door yet, you can barely see the repair above. But, after a fresh coat of paint, I challenge you to spot the repaired crack!
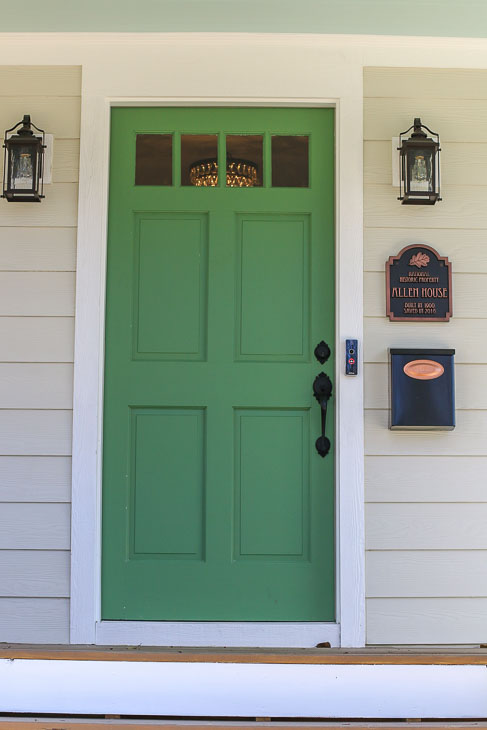
Magnolia Green by Magnolia Paint - with Locally Sown by Magnolia Paint Siding

Do you like the color I painted the door? You might remember my decision making process when selecting the exterior color scheme. Ultimately I chose Magnolia Green and Locally Sown in the Magnolia Paint line.
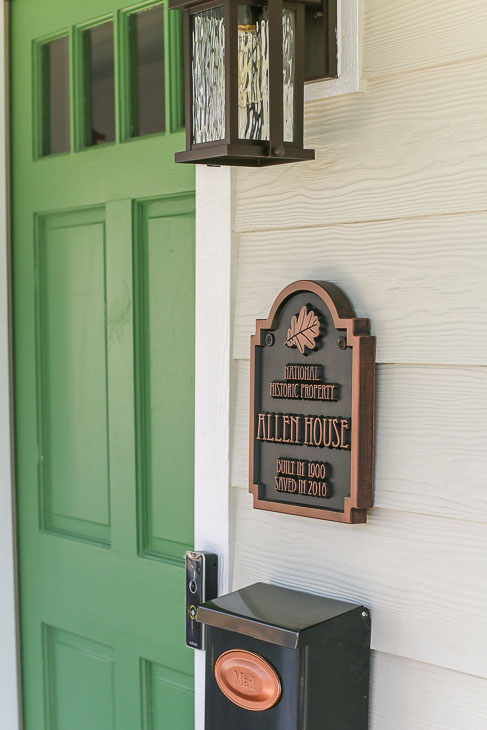
Magnolia Green Door with Locally Sown Magnolia Home Paint on Siding

And just in case you thought I was only good at saving doors, apparently now I’m also a house saver! The Saving Etta house received her plaque denoting her name as it’s registered in the list of National Historic Properties.
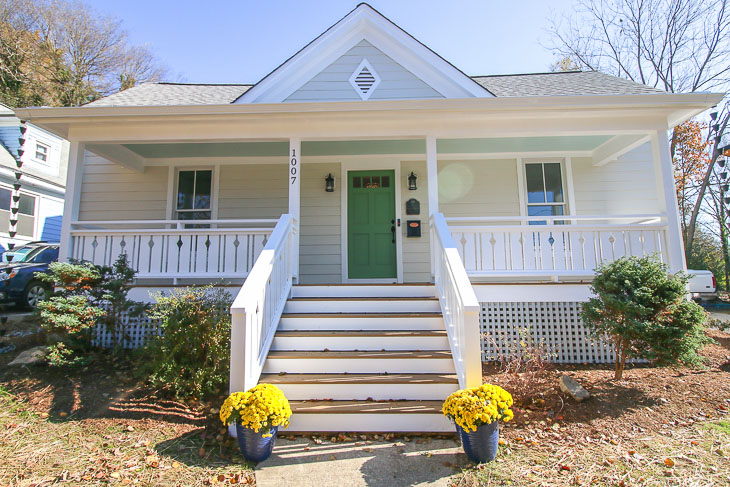
Saving Etta: 1900 Home Saved from Demolition and restored into a beautiful Triple A construction modern farmhouse.

Hopefully she’ll last another one hundred plus years!
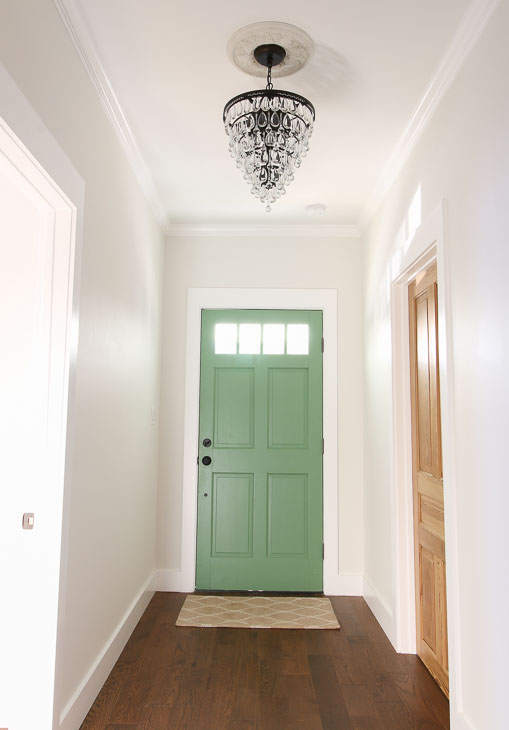
A funny story about the green door: Originally I was going to hang the door with the handle on the opposite side, but made a last minute change. The interior of the door was supposed to get painted gray to match the rest of the doors in the house (minus the salvaged 1900 doors shown above. They were left raw to show off the original wood grain and square peg construction.)
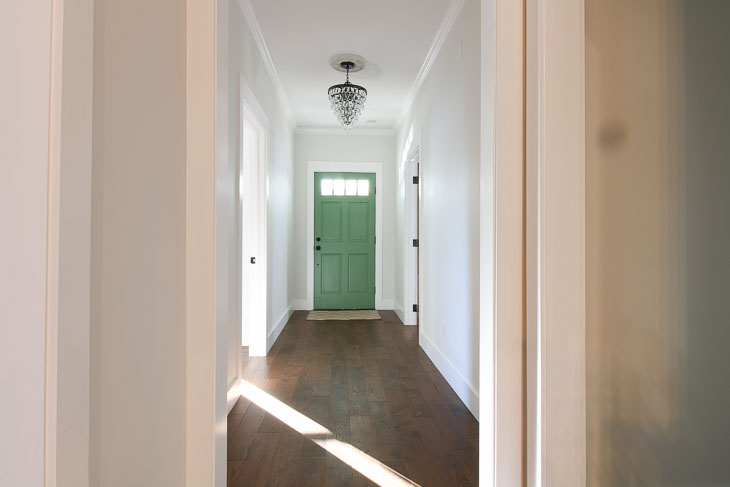
Many of you loved the green color and voted on Instagram to keep the front door green on both sides. Which is why Etta has a green front door inside and out!

Saving Etta: 1900 Home Saved from Demolition and restored into a beautiful Triple A construction modern farmhouse.

What do you think? Do you like the double-sided green door? Do you have a cracked door panel in need of repair? I know you can fix it.

signature

It’s been a decade since we bought our front-loading HE washer and I’ve managed to keep it smelling clean for 10 years! With just three simple steps, you too can banish the funky, mildew, and moldy smelling clothes washer. Here’s How to Keep Your HE Clothes Washer and Laundry Smelling Clean!

How to Keep Your HE Clothes Washer Smelling Clean

How to Keep Your HE Clothes Washer Mold Free for 10+ Years

We all know the HE (High Efficiency) washer uses a lot less water than the old top load clothes washers. And, they cut down on drying times with a super spin cycle that leaves clothes damp not wet. With all those positives, you’d think everyone would be clamoring for an HE washer. Unfortunately, HE washers can start to stink if they grow mold or mildew inside. What would you say if I told you that after 10 years I’ve cleaned the inside of my clothes washer twice? It’s true, the only times I had to clean it was once when the washer sat in our garage for over a month closed up during renovations. And the second time is when we had a house guest who didn’t know to do three things to keep the washer clean and smelling fresh.

Do These 3 Things After Every Load of Laundry:

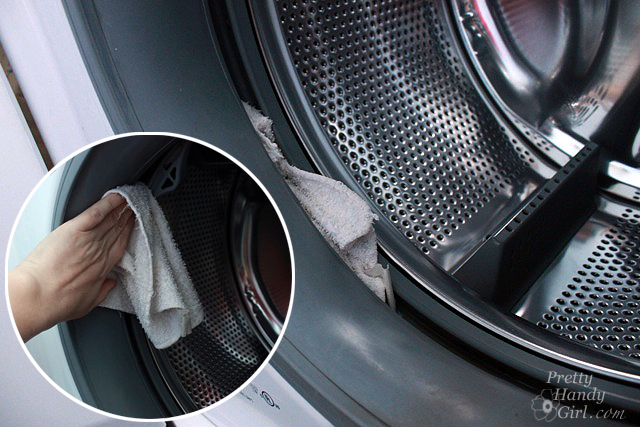
  • Wipe out the gasket
  • Leave door open to dry
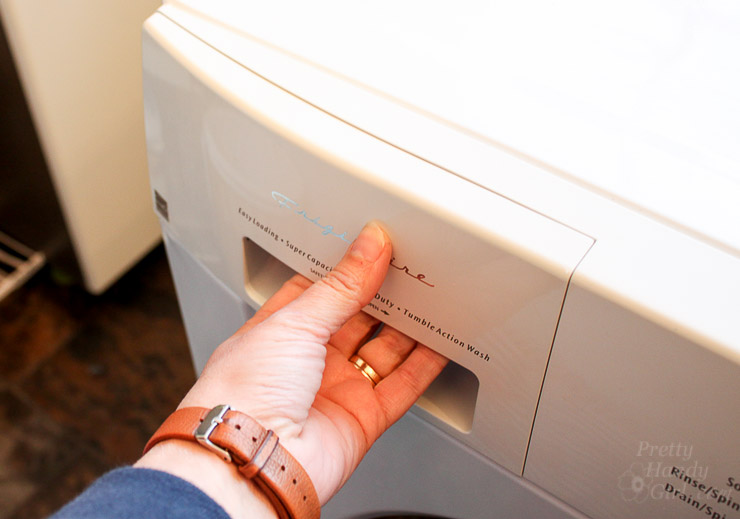
  • Open detergent drawer (or remove to let it drip dry.)

Here’s how to keep your HE front loading washer clean and fresh like the day you bought it:

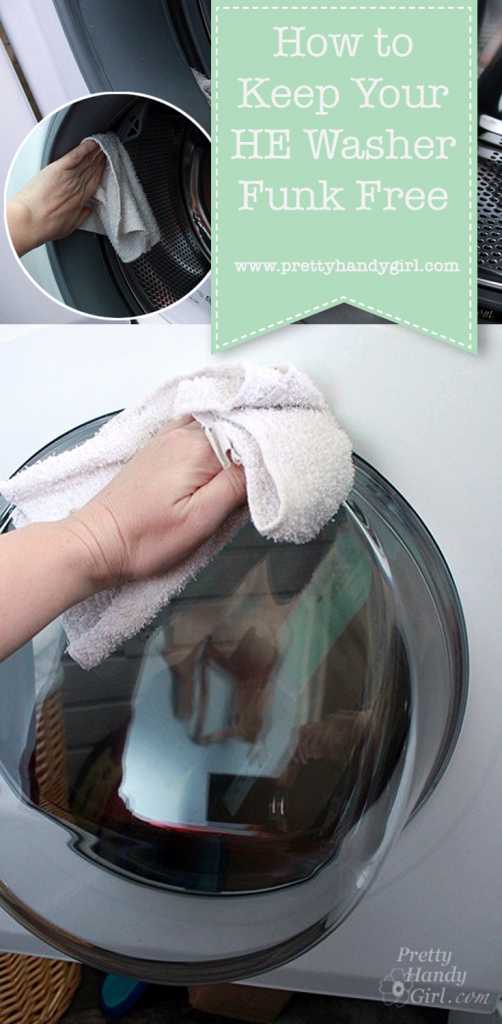
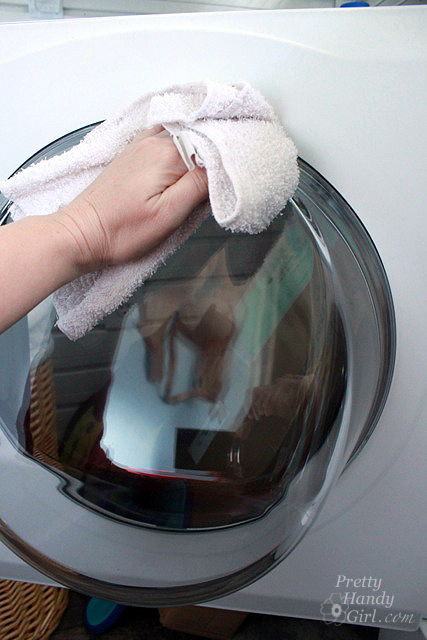
1. ALWAYS wipe the door off after each load.

he washer freshness cleaning window

2. ALWAYS wipe out the gasket (top to bottom) to remove any water and moisture. This is the main area that will get mildewy first. Gently pull the gasket toward you to wipe inside and behind the gasket. Wipe especially well around the drain holes at the bottom.

washing machine clean upkeep rubber seals

3. Leave the door open after your wash is done to thoroughly air out your washer. Obviously if you have a closet instead of a laundry room, this can be a problem. Your best bet will be to invest in a top load HE washer when it comes time to replace your washer. Until then, try your best to keep the washer open about 30 minutes after you’ve washed a load.

he washer airing out to keep clean

4. Open or remove the detergent drawer to allow it to air out.

Pulling Out detergent drawer on clothes washer

If you still have odors or smelly laundry, try some of these remedies:

Visible mildew

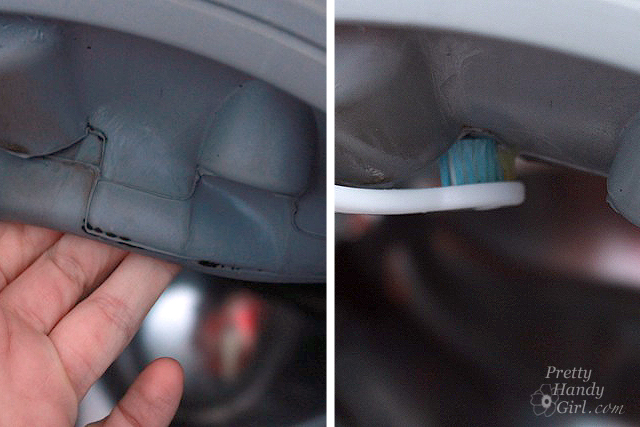
Inspect inside and around the gasket for signs of mildew (usually black spots.)

he washer mildew cleaning bleach, toothbrush and container

Mix a small amount of bleach and water in a container. Dip an old scrub brush or old toothbrush into the mixture. Scrub mildew spots with the brush. Wipe clean with a clean rag dipped in water to remove the bleach mixture. Repeat as necessary. When the mildew has been removed, wipe dry with a clean rag.

smelly washer cleaning using old toothbrush

Smelly Washer:

Does your washer smell like a locker room. To eliminate smells, pour 1/2 cup of baking soda inside the drum. Add a cup of white vinegar into the detergent dispenser.  Press start to run the washer empty on the hot water setting.

If this doesn’t eliminate all the odors, you can run the washer empty again but this time put 1/2 cup of bleach in the detergent dispenser.

Remember to open the washer immediately, wipe out any moisture, and leave the door open to air dry.  (I can’t stress how crucial it is to do this after EVERY LOAD.)

Smelly Clothes:

Do your clothes, or more likely your towels, come out of the washer smelling like a locker room? Believe it or not, you could be using too much detergent. Liquid detergent is often the culprit. Particles from the soap don’t wash out of your clothes completely and bacteria from sweat and more end up sticking to the fabric. Try switching to a powdered detergent or use this DIY laundry detergent which is low sudsing (and also costs pennies). You can also try this Smelly Towel Cleaner (affiliate link) additive to your laundry, that I use when our towels start to get a little funky (especially the dog towels.) It helps get the odor out.

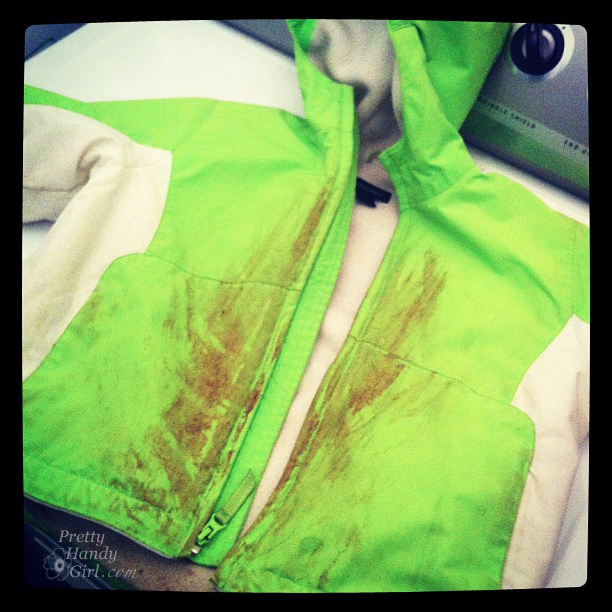
Remember: Never use more detergent than is called for (even if the item you are laundering looks like this jacket.)

super dirty jacket. Clean clothes in he washing machine tips

Speaking of dirty clothes. I must share this hands down BEST Stain Remover recipe with you:

Miracle Stain Remover

I’d love to hear if these tips helped Keep your HE Clothes Washer and Laundry Smelling Clean!

he washing machine cleaning pretty handy girl

Like this post? You’ll definitely want to learn how to prevent dryer fires:

prevent fires replace dryer hose

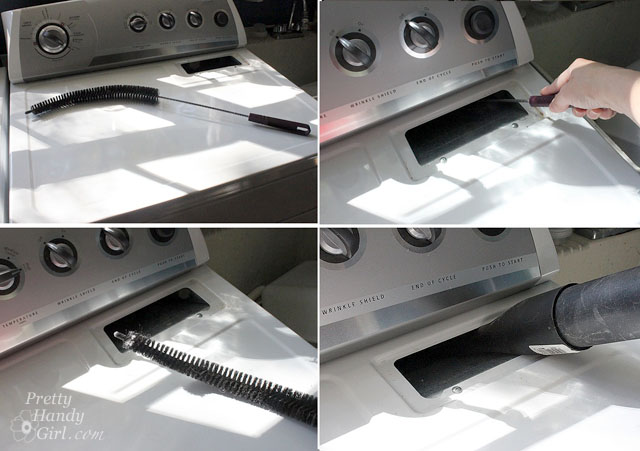
And don’t miss How to Clean Out Your Dryer Ducts to Prevent Fires.

how to clean out your dryer ducts


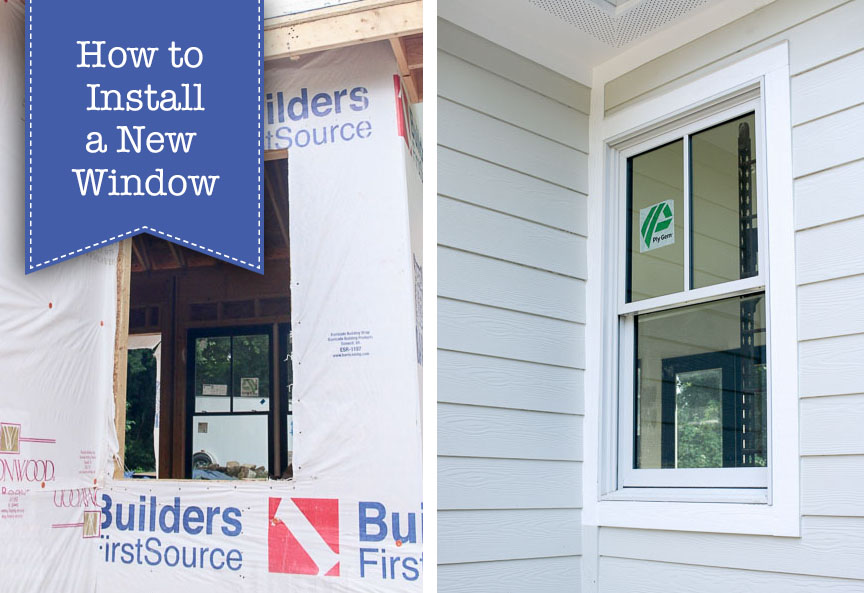
How to Install a New Window

Installing new windows on your home isn’t rocket science, but it is recommended that you have some construction experience before tackling this project. If you have the skills, the install should only take an hour or less. Today I’ll show you How to Install a New Construction Window in your home.

How to Install a New Window

Installing a New Construction Ply Gem Mira Window:

If you read my article on ordering new windows, you’re probably ready to install that new window. Today I’ll take the mystique out of this process. To install new windows (as opposed to replacement windows) you need to start with the correct rough opening. Ply Gem makes it super simple to figure out the rough opening size for your new window with their downloadable window size guides(This is a sponsored post in collaboration with Ply Gem Windows.) 

After your rough openings are cut and ready, it’s time to gather a few supplies.

Materials:

(I’ve included affiliate links for your convenience. I earn a small percentage from a purchase using these links. There is no additional cost to you. You can read more about affiliate links here.)

Instructions:

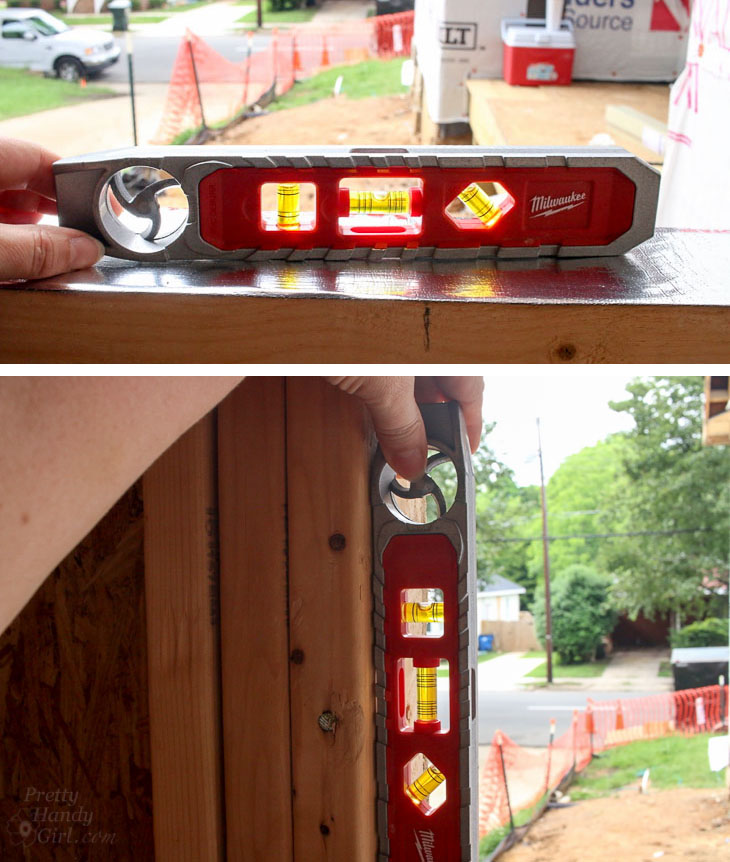
Check that the rough opening is level and plumb. If it isn’t, have some wood shims nearby to help adjust the window after it is set in the opening.

level and plumb rough opening

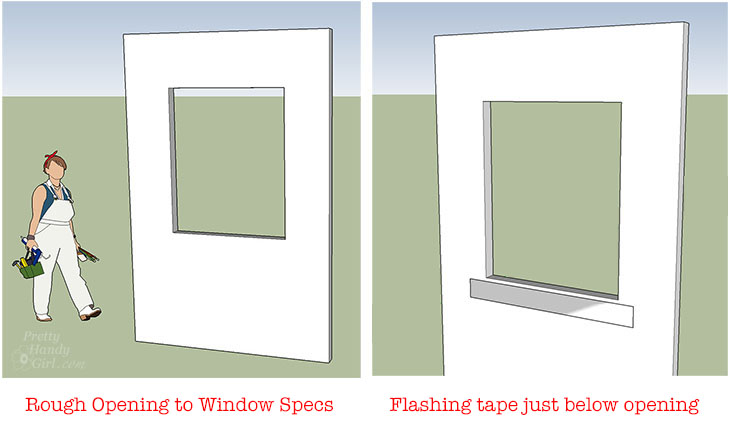
Cut the first piece of flashing tape slightly wider than the window width. Peel off the backing and attach it one inch below the window opening.

window rough opening

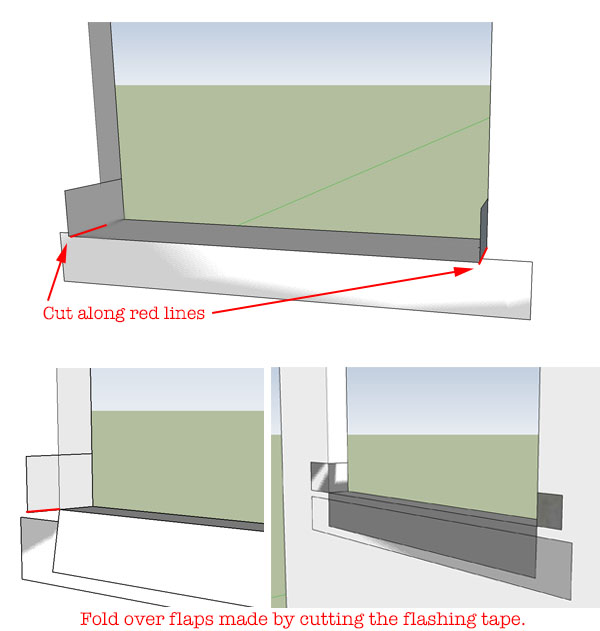
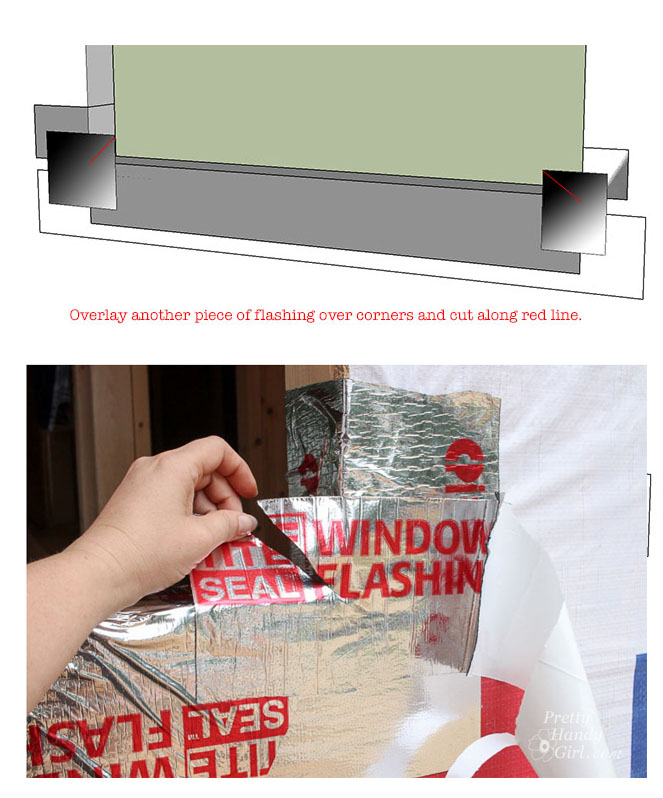
Cut a second piece of flashing tape about 8″ wider than your window opening. Center it on the sill of the window opening. Line up the inside edge of the tape along the inside of the framing (allowing the excess to hang out on the exterior side of the window (as shown below). Press the flashing tape along the sill and up the sides of the window. Cut along the corners of the excess tape. Fold the tape out and down, securing it to the outside of the house sheathing as shown below.

flashing new window for installation

Cut two smaller pieces of flashing tape to cover the corners of the tape you secured above. Cut a slit in the tape where it overlaps the opening. Fold the flaps into the window opening and press your hand firmly on all the tape seams to secure.flashing window around bottom of rough opening Time to install the window! Run a generous bead of silicone along the inside of the nail fin frame.  Be sure to add additional silicone at the diagonal corner seams of the nail fin.
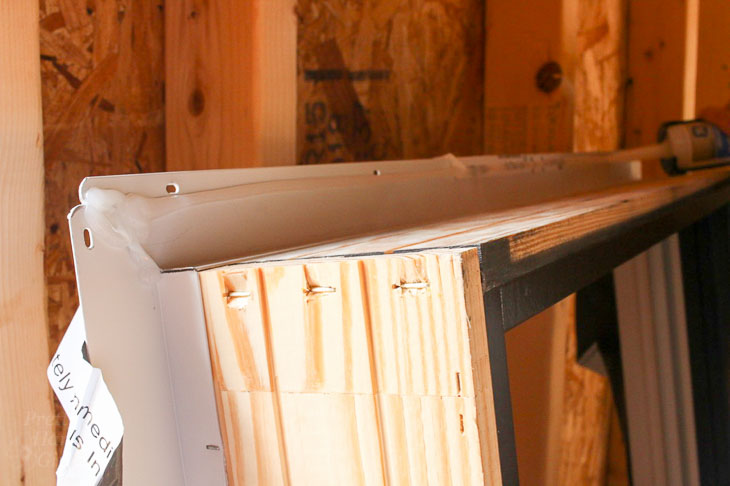
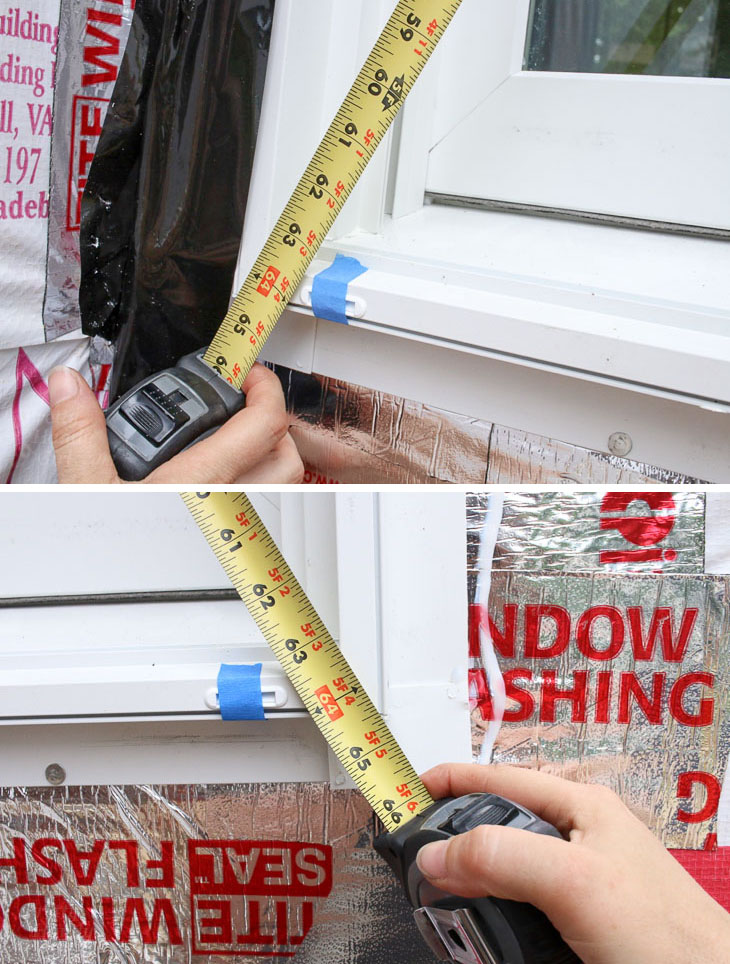
Add clear silicone caulk inside nailing flange of window.

Have an assistant help you lift the window into the rough opening from the exterior of the house. (For upper story windows, you can feed the window out from the inside of the house. Make sure one person is outside to prevent the window from falling.) Check the diagonal measurements of your window to make sure they are the same. This will indicate if your window is square or not.

check window diagonals for plumb and level

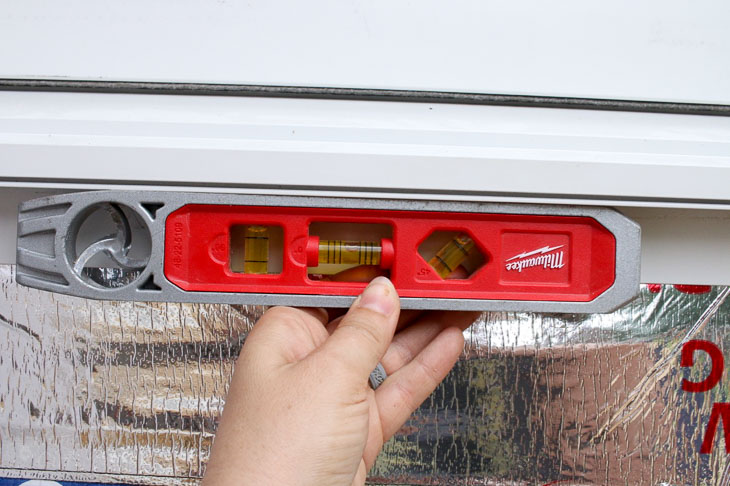
Use your level to check if the window is level and plumb in the opening. If not, make adjustments by inserting shims from the inside of the house.

measure window level during new construction installation

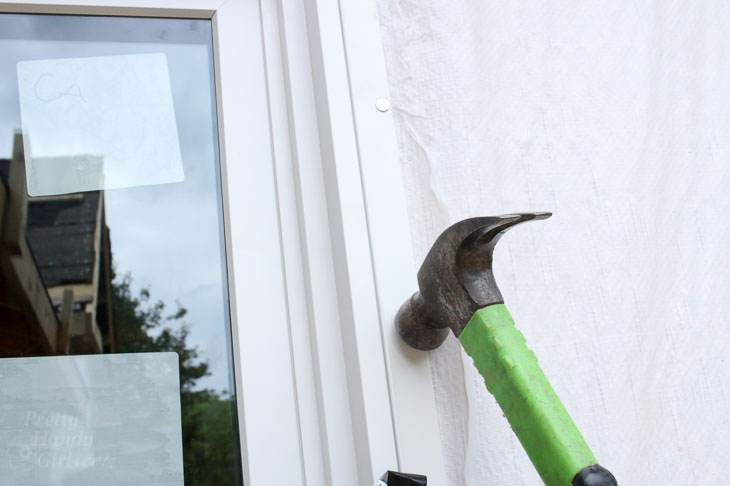
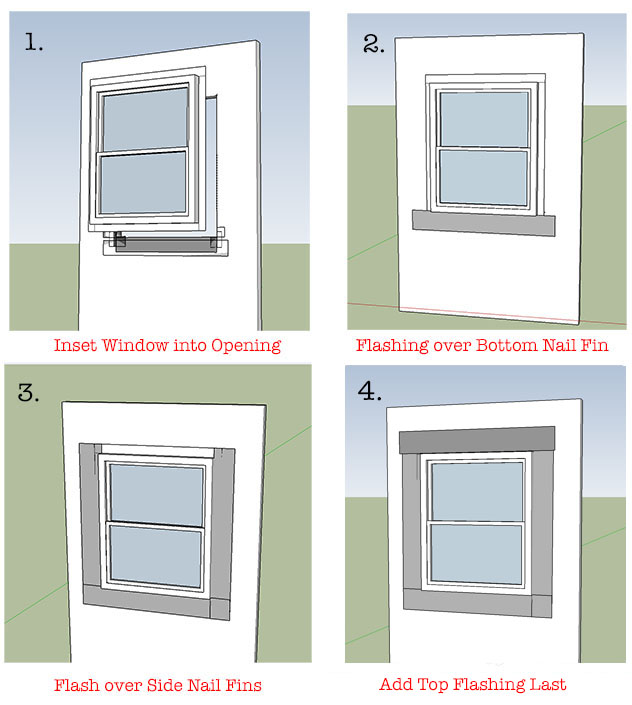
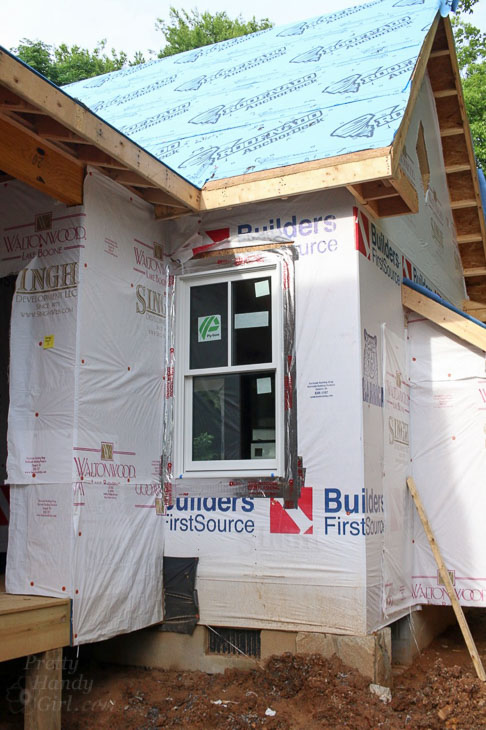
Once the window is square, level, and plumb, secure it to the house sheathing with roofing nails. (For added weather protection, the nail fin should go over the Tyvek house wrap for the sides and bottom. Along the top, lift the house wrap and nail the fin directly to the house sheathing.) The top flap of Tyvek will be secured later.

Nail roofing nails into Plygem window nailing flange window install

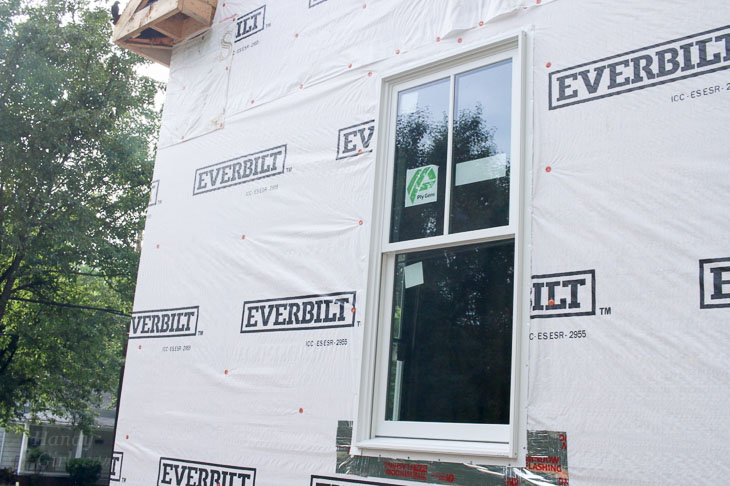
Continue adding nails to every hole in the nail fin. Your window is now securely installed. Time to add the exterior flashing.

two over one window new constructoin

(2.) Cut another piece of flashing slightly wider than the width of the window. Remove the backing and press firmly over the bottom nail fin.

flashing new window

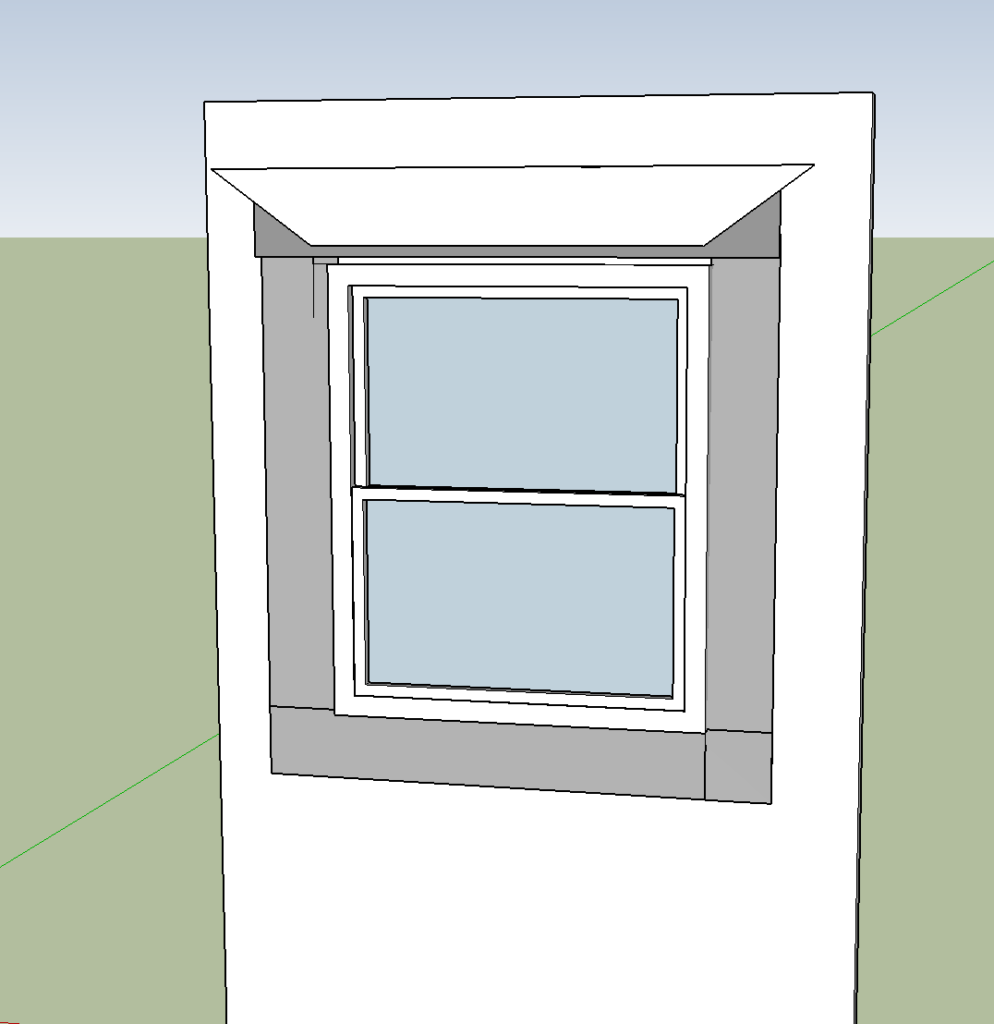
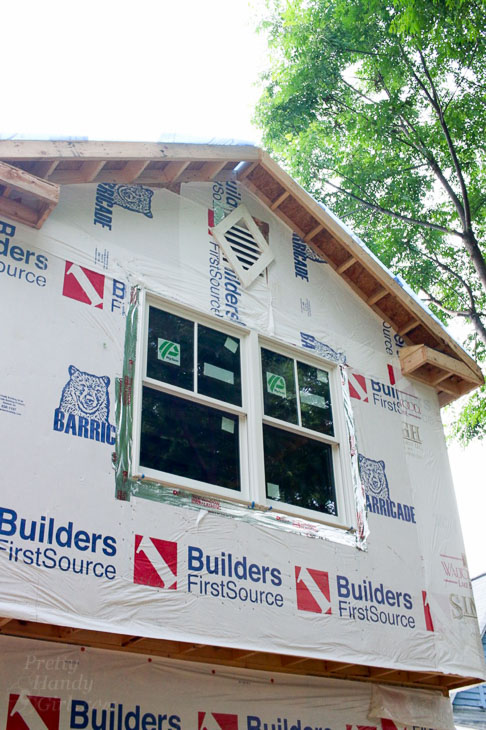
(3.) Cut two pieces of flashing slightly taller than the height of the window. Press the flashing tape over both sides of the nail fin (taking care to overlap it over the bottom piece of flashing.) (4.) Lift the top house wrap flap out of the way. Then add one piece of flashing on the top nail fin (again, take care to overlap the top piece over the side pieces.)

Installed window new construction two panes over one

Let the house wrap flap overlap the top piece of flashing. Secure it in place with a piece of Tyvek tape.

Flap of house wrap overlaps top of window flashing.

Congratulations! Your window is installed and ready for trim and siding.

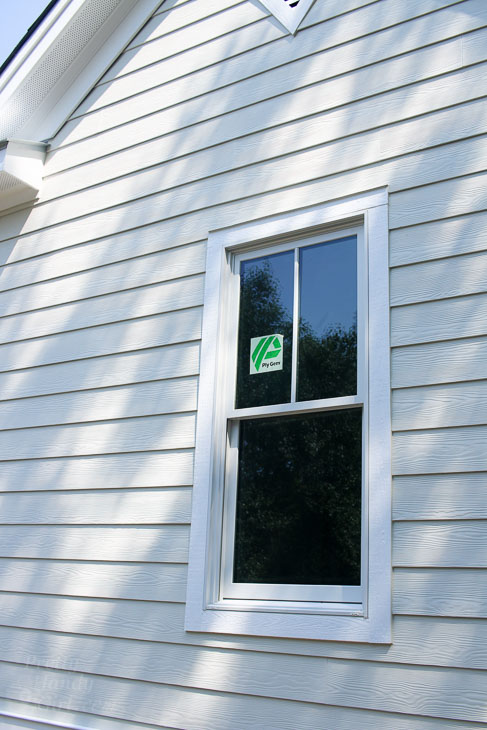
Twin Pygem windows on second story

Tell me the truth, isn’t this one of the most beautiful windows you’ve ever seen? The grilles look great on this 1900 house.

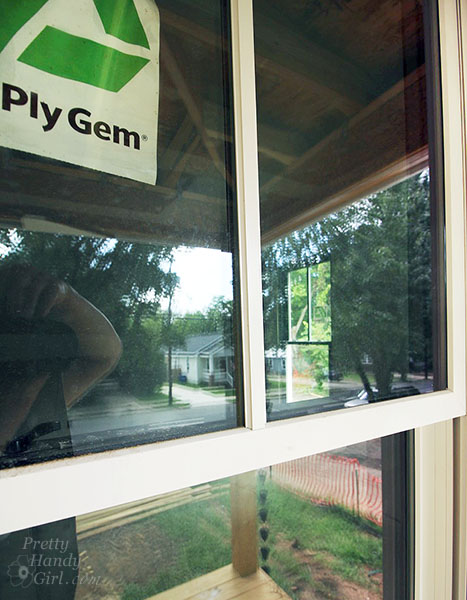
New Plygem Mira Window Installed

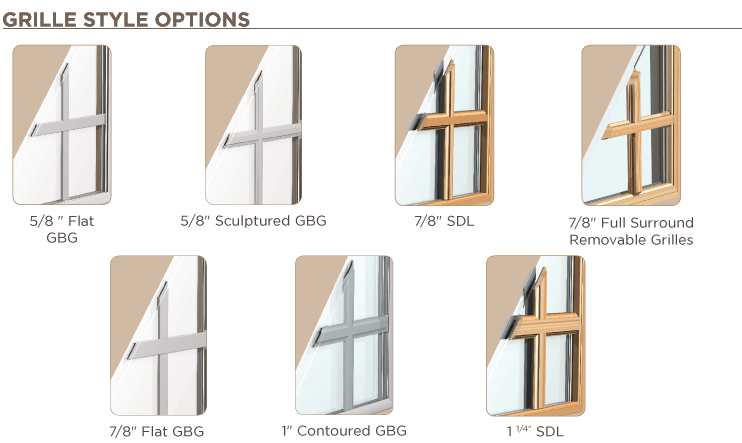
Even up close, they look like true divided light windows. The grilles I chose are the 7/8″ SDL style grilles available on Ply Gem’s Mira Windows.

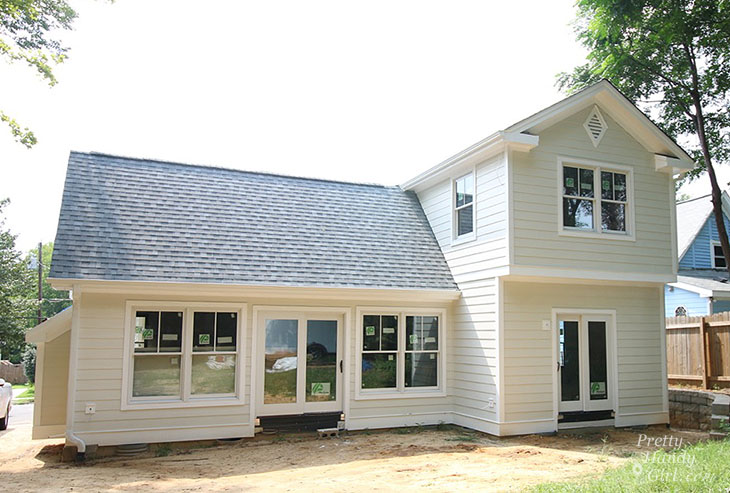
On the back of the house, I installed a bank of windows and sliding glass doors to maximize the view of the big yard. The homeowners will love all the natural light pouring in from their beautiful Plygem Mira Windows.

Plygem Mira doors and windows on cream house

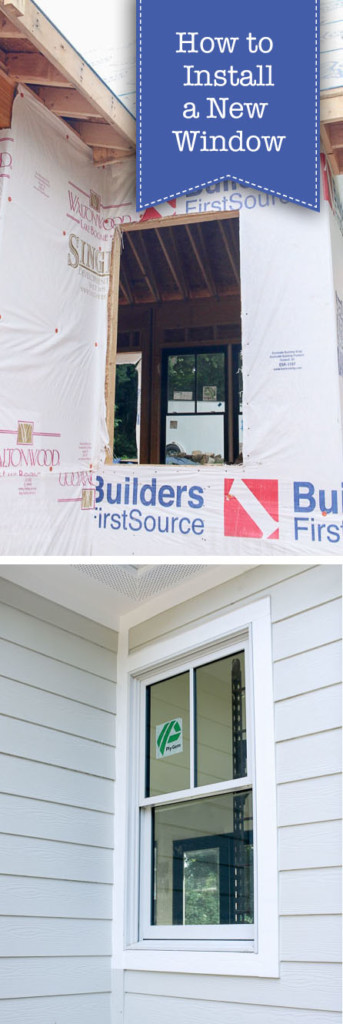
If you like this tutorial, share the knowledge with a friend by pinning this image:

How to Install a New Window

Disclosure: This post is a sponsored post for Ply Gem. It was written as part of their sponsorship of the Saving Etta project. I was not told what to write. All words and opinions are my own. I am very particular about the brands I work with, and only partner with companies that provide quality materials and/or services.

More Window Resources:

How to Add Privacy Film to Any Window

How to Install Traditional Window Trim or How to Install Decorative Window Casing

How to Clean Your Windows Like a Pro

Things to Consider When Choosing New Windows

Stop! Don’t Replace Your Windows Before Reading This

You’ve decided it’s time to replace your windows (or you are building a house and need to order new windows.) Deciding which windows to purchase can be an overwhelming process. I’m here to help.

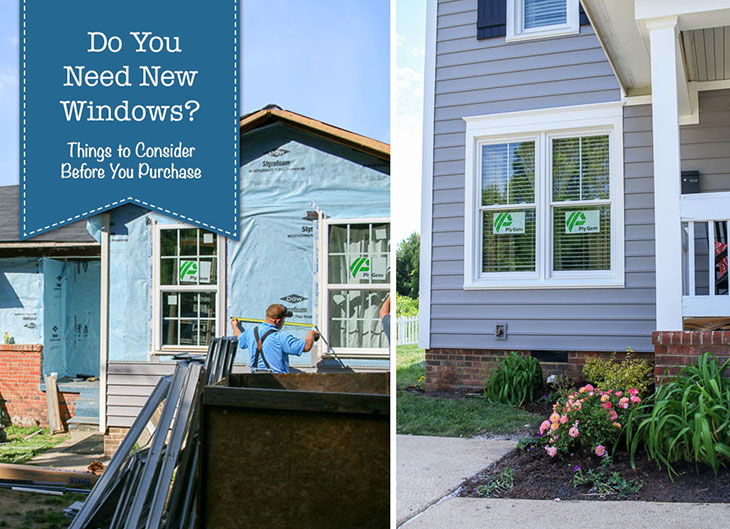
Do You Need New Windows? Things to Consider Before You Buy

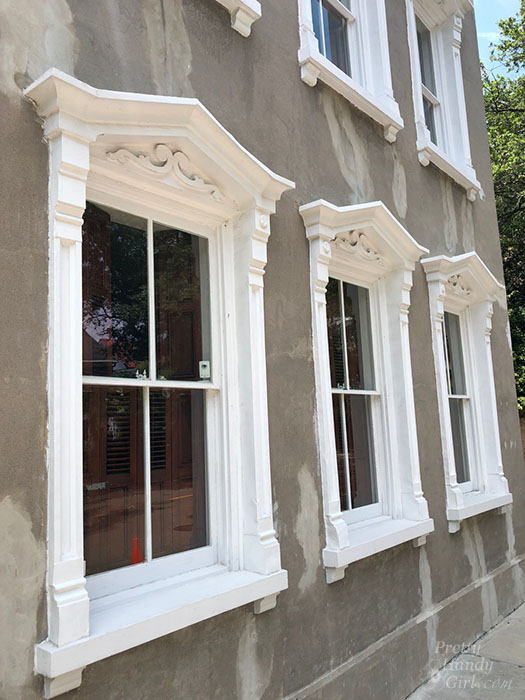
Do I Need New Windows? Recently, I found myself on the path to purchase new windows for the Saving Etta Project and found the options to be numerous and confusing. There are many things to consider when purchasing new windows. Today, I want to discuss them all with you. Before we begin, I have to warn you, I’m a bit of a window snob. To me, nothing is more beautiful than original true divided light window. (Of course, beautiful window trim and pediments help too.) Do I Need New Windows/ But, in today’s quest to be more energy efficient and save money on the electric bill, I completely understand the need for new windows. Many of my neighbors have replaced their windows with retrofit vinyl windows for energy efficiency and for ease of use. I used to think I could spot an inexpensive replacement window a mile away (okay, maybe not that far, but definitely from across the street.) But, my eyes have been opened to the options for replacement windows that look beautiful and stylish. Personally, I have installed Ply Gem windows in my own home, and have been very happy with how they look and operate. Therefore, when Ply Gem reached out to me about being a sponsor for the Saving Etta project, I was familiar with their windows and knew they produce quality windows with attention to detail. The icing on the cake with Ply Gem is their larger philanthropic campaign, the Home for Good project started in 2016 to help raise awareness of the critical need for affordable houseing. In addition to building new homes across the country, the project also helps homeowners stay in their existing homes by providing much needed repairs and renovations to houses in disrepair. Locally, Ply Gem worked with the Habitat for Humanity’s Neighborhood Revitalization program to identify local homeowners who were in need of exterior renovations and repairs. Not only does Ply Gem manufacture top quality windows and many other exterior products, but they give back to communities in need. (You can read more about the Home for Good Project I volunteered with here.) Which is why I agreed to bring Ply Gem on as a Saving Etta sponsor. Regardless of the brand you choose for your new windows, it’s helpful to know some of the terminology and what to consider when it’s time to buy.
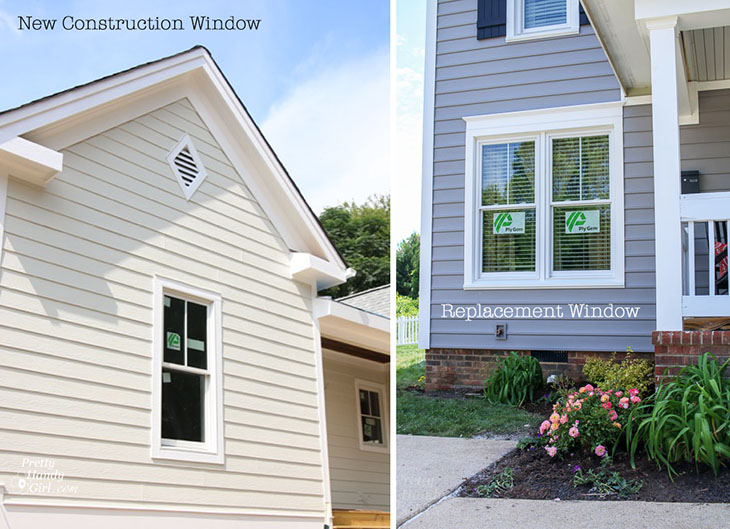
Replacement (retrofit windows) vs. New Construction Windows (full frame windows)

For simplicity, replacement windows are typically installed inside existing window frames. The trim, siding, and window frame are not disturbed during installation (making it a quicker and cheaper way to replace an existing window.) On the flip side, new construction windows are installed directly into a rough opening and secured to the exterior of the house walls. New construction windows have a nail fin frame for securing the window to the outside of the window opening. After installation, the window trim and siding is installed over the nail fin. If you have old windows, you can purchase either retrofit replacement windows or new construction windows. (However, the amount of work needed to install new construction may cost you more money in labor because the house trim, interior window casing, and frame has to be removed first.) Do I Need New Windows - Construction Windows vs. Replacement Window As you can see from the photos above, if you purchase quality windows, you may not be able to tell the difference between new construction or replacement windows. (I’ll show you how to choose better looking replacement windows in a few.)
Cheap vs. Quality Windows:

You’ve heard the saying, “you get what you pay for”, right? If you purchase cheap windows, you may have to replace them in the near future. Quality starts by choosing a window manufacturer that has been making windows for decades. For example, Ply Gem has been making windows for over 70 years!

What I dislike about cheap replacement windows:

  1. Wider window stiles (the vertical frames of the window sashes.) – A wider stile means you may have less glass area translating to less natural light in your house.
  2. Flat grilles inbetween the glass. – Okay, I know they are easy to clean, but they lose the beautiful dimension of true divided light grilles.
  3. Cheap construction. – Some cheap windows have sloppy construction (for example: thick caulked seams on the corners.) Poor quality construction can result in a leak of the gas between the panes as they age. A leak shows up when you experience a permanently fogged window. Other signs of a cheap window, are ones that fail to operate after a few years of use.

Is there an alternative to cheap replacement windows?

YES! You can purchase more attractive and better constructed replacement windows. You also have additional options:
  1. Keep your old windows and install storm windows to improve energy efficiency.
  2. Purchase quality replacement windows like Ply Gem’s 2000 Double Hung, Premium, and Pro Replacement Windows with a wider variety of grilles to choose from.
  3. Purchase a quality new construction window, and consider installing it yourself to offset the cost of higher quality windows and the additional labor.
If you like this last option, consider a new construction window with simulated divided light windows like Ply Gem’s Mira windows (shown below in the SDL styles.) Plygem Mira grill options This is a close up view of the Mira Window grille with the 7/8″ Simulated Divided Light grilles. Do I Need New Windows?
Things to consider when adding a new window:

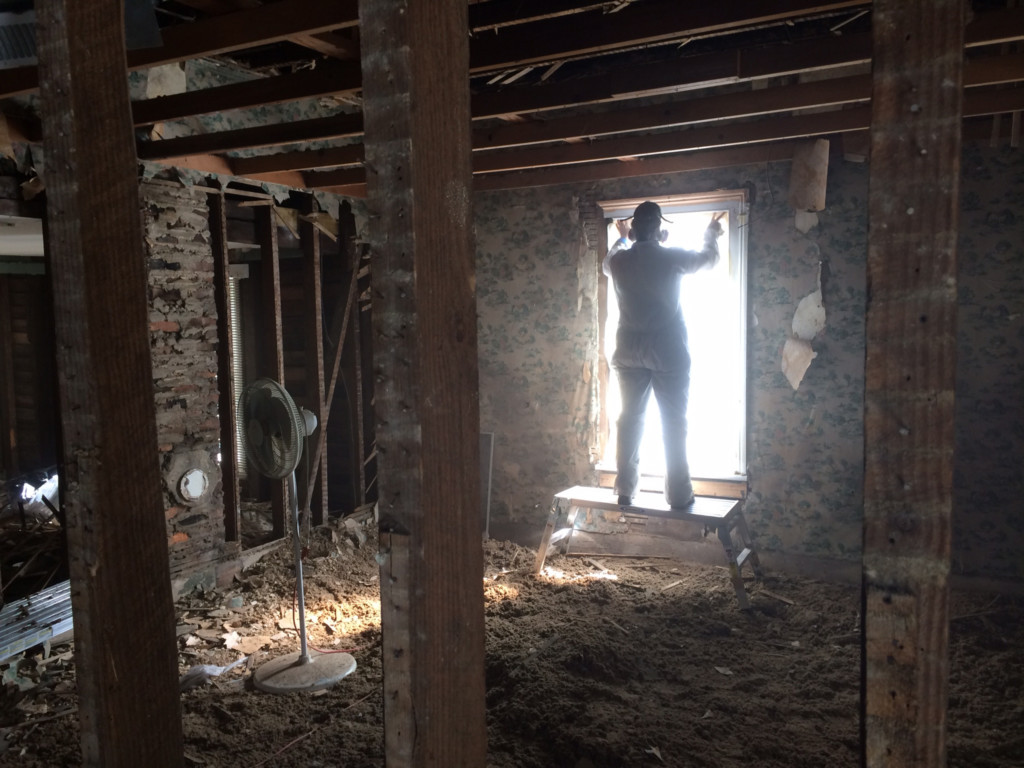
With all these things to consider, you may find the decision making overwhelming. Trust me, I know the feeling! The day I realized I couldn’t save Etta’s old windows, my head was swimming with options. Before you ask why I couldn’t keep them, there were many factors pointing to replacing the original windows:
  1. They were in rough shape and some of the panes had been replaced with plexiglass.
  2. They had lead paint and there were many layers of paint to strip before I could repaint.
  3. They did not have window weights. (They were never built with any. Which meant if you opened the window you had to put a stick underneath to hold it open.)
  4. The last factor was related to the noise level. Etta is on a busy street with a bus route. Traffic noise during rush hour and an occasional rumbling bus going by are everyday occurrences.
As a quality builder, I knew it was best to replace those old windows with new energy efficient, and sound dampening windows. Once I decided between new construction and replacement windows, there were a few other things to consider.

Things you need to consider when ordering new windows:

  1. Are there any building codes to address?
    1. Does the window meet egress standards for a bedroom?
    2. Is the window in a location that requires tempered glass?
    3. How far is the window from the ground? (Does it need to have a safety stop?)
    4. Do you need a permit to replace your windows?
  2. How will the window open?
    1. Double hung
    2. Single hung
    3. Non-opening
    4. Casement opening
  3. Do you need a privacy window?
    1. Frosted
    2. Textured
    3. Integrated blinds
  4. Do you want screens for your window?
  5. Will the style match the rest of your windows or style of the house?
Now that you’ve learned some of the basic terms and considerations, you are ready to seek out a place to order windows. Besides window installation companies, you can get help ordering windows from a general contractor, home improvement store, a building supply warehouse, or from the manufacturer. Be sure to discuss your specific window needs and desires. Don’t be afraid to ask questions. And be wary of any company that takes your money without showing you a sample of the style window you are ordering.

More Window Resources:

How to Install a New Construction Window

How to Add Privacy Film to Any Window

How to Install Traditional Window Trim or How to Install Decorative Window Casing

How to Clean Your Windows Like a Pro

Things to Consider When Choosing New Windows

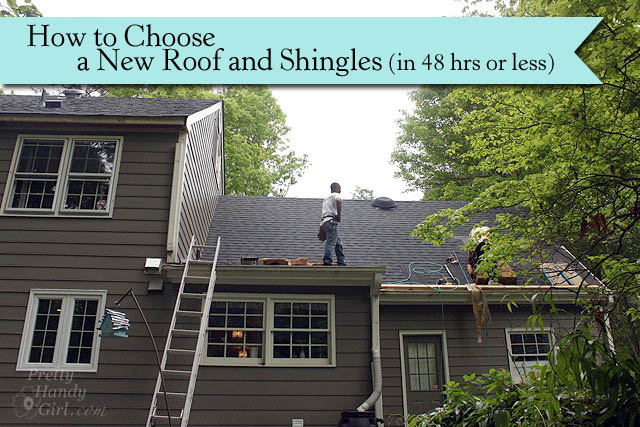
Stop! Don’t Replace Your Windows Before Reading This Disclosure: This post is a sponsored post for Ply Gem. It was written as part of their sponsorship of the Saving Etta project. I was not told what to write. All words and opinions are my own. I am very particular about the brands I work with, and only partner with companies that provide quality materials and/or services.  If you liked this post, you’ll definitely appreciate this article on How to Choose a New Roof:

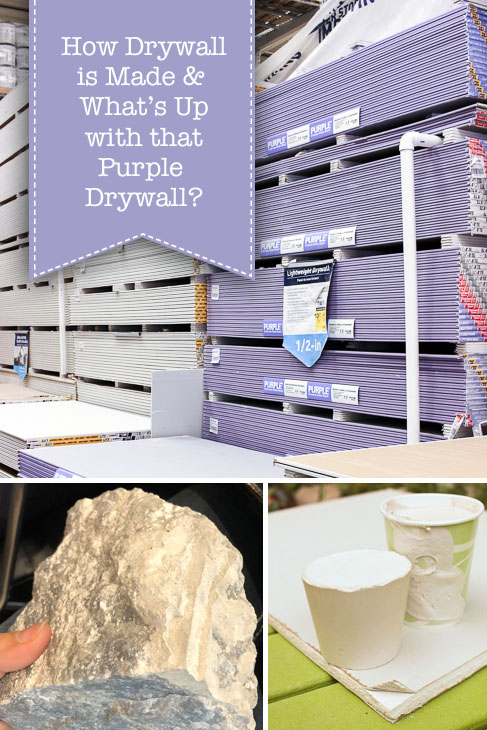
How is Drywall Made and What is Purple Drywall?How is Drywall Made and What is Purple Drywall?

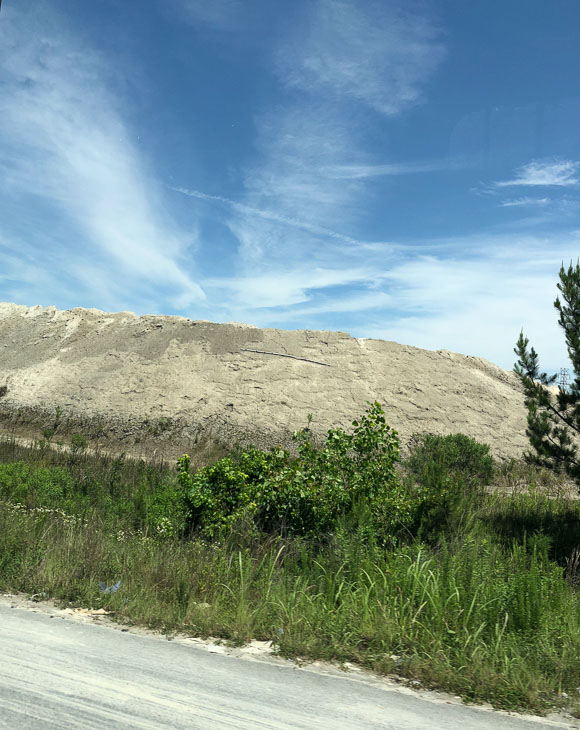
Watching how drywall is made may sound akin to watching paint dry, but let me tell you that couldn’t be further from the truth! It is a very cool process to observe! Plus, I’m about to rock your world by sharing how Purple drywall can change your home for the better. Last month I had the honor of touring one of the National Gypsum manufacturing plants to learn about Purple drywall and how drywall is manufactured. After the experience, I have a whole new appreciation for drywall.

This is a sponsored post for Ask For Purple, a National Gypsum line of products. 

How is Drywall Made and What is Purple Drywall?
I never thought about how drywall is manufactured, and I bet you never did either. But, now that I know, it’s one of the coolest things I’ve watched being made. Drywall starts with a natural product called gypsum.

How is Drywall Made and What is Purple Drywall?
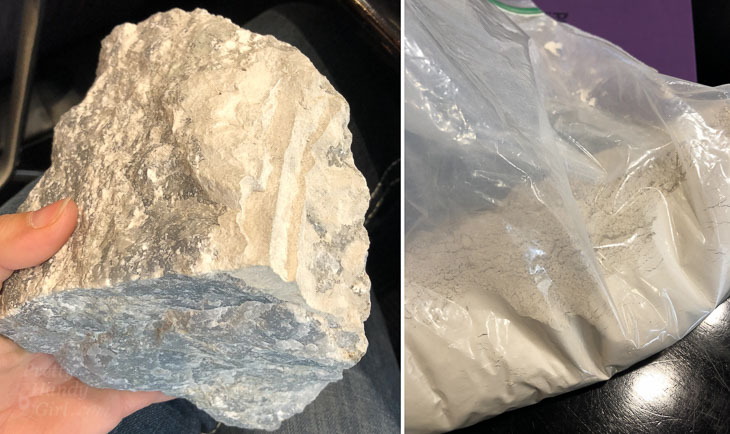
Some gypsum is harvested from quarries, but a large portion is actually a by product from coal burning power plants. Instead of the by product being discarded, National Gypsum uses it in drywall. This is just one way National Gypsum thinks green. They have been using recycled paper for their products since the 1960’s! And there is one more way National Gypsum is working to protect the planet. National Gypsum has developed Purple drywall that is moisture, mold, and mildew resistant. This means less water and mold damage in homes keeping construction debris from landfills. In addition, within the line of Purple drywall products, are sheets that stand up to abuse and impact. This means any home that installs Purple drywall products may never have to replace the drywall. You’ll definitely want to read more about this revolutionary product further down the page. But, first, back to how drywall is made.

How is Drywall Made and What is Purple Drywall?
The rock you see above is gypsum rock. When crushed it turns into a powder. The powder is mixed with water, starch and …

How is Drywall Made and What is Purple Drywall?
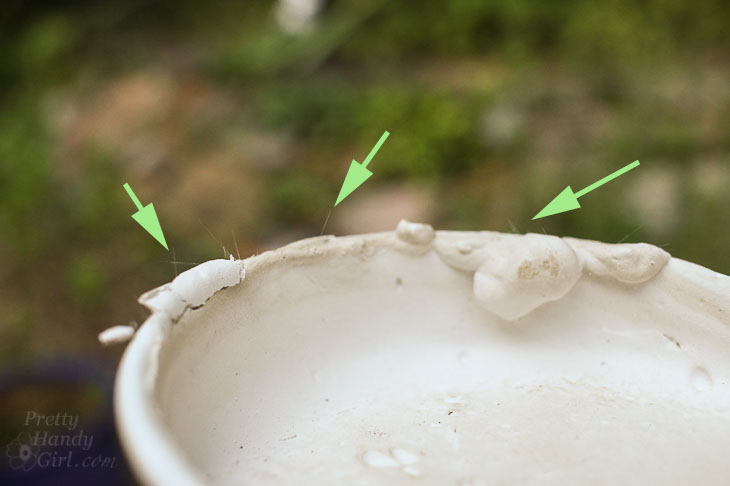
… tiny fiberglass fibers to improve the strength of the core. In the old days, horse hair was used as a strengthener in plaster and other products.

How is Drywall Made and What is Purple Drywall?
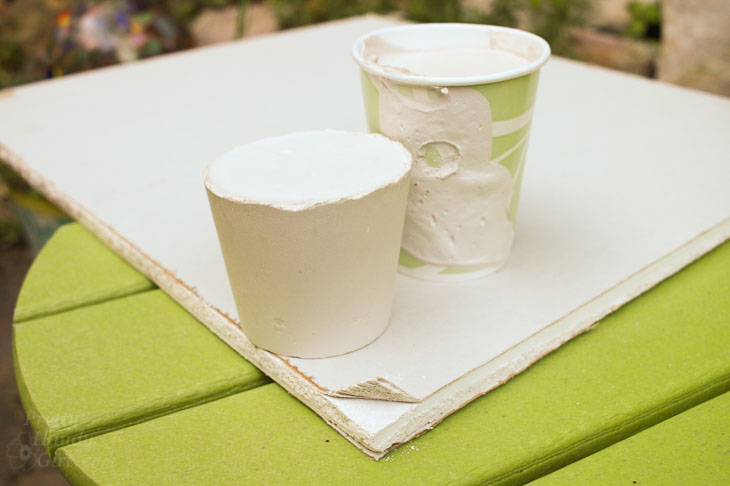
This slurry is pumped out onto a giant conveyor belt where it is sandwiched between two sheets. During the tour, we were handed a fresh cup of slurry as it was pumped out onto the drywall paper. As we walked along the super long conveyor belt, the slurry heated up and solidified within two minutes. (If you’ve ever used plaster of paris, it hardens through a similar chemical reaction.) Once the gypsum is hardened enough, the sheets are flipped over (wall side up to prevent damage) as they head into the heated dryers to fully dry for about 45 minutes.

After the sheets dry and harden, they continue on a series of conveyors until they are eventually cut to final size and banded together with a second sheet of drywall. The finished sheets are stacked up until the stack is complete. Several forklifts run a non-stop choreographed dance back and forth picking up the stacks of drywall and delivering them for storage or shipping. It was a sight to see!

I didn’t take any videos and photos inside the plant, but you can view this How It’s Made video showing the manufacturing process for making drywall.

In the video, you get a feel for the magnitude of the equipment, but I bet you didn’t realize the plant is a mile long! The most incredible thing about the plant tour is how few people work at one time. Less than 15 people work on the floor at a time! Remember when I said the plant was a mile long? The size of the plant and the number of people working in it seems disproportionate. It was impressive to watch the entire process.

What’s with that Purple Drywall?

How is Drywall Made and What is Purple Drywall?
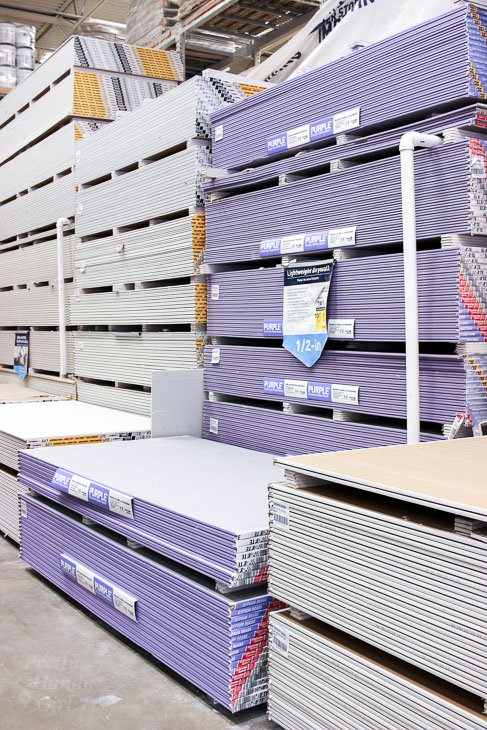
I’m sure you’ve noticed that stack of purple drywall at your local home improvement store. In the past, I looked at it, then reached for the less expensive sheets thinking they were the same. Boy was I wrong! After learning about the difference between Purple XP® drywall and regular, I will be choosing Purple from now on. Why?

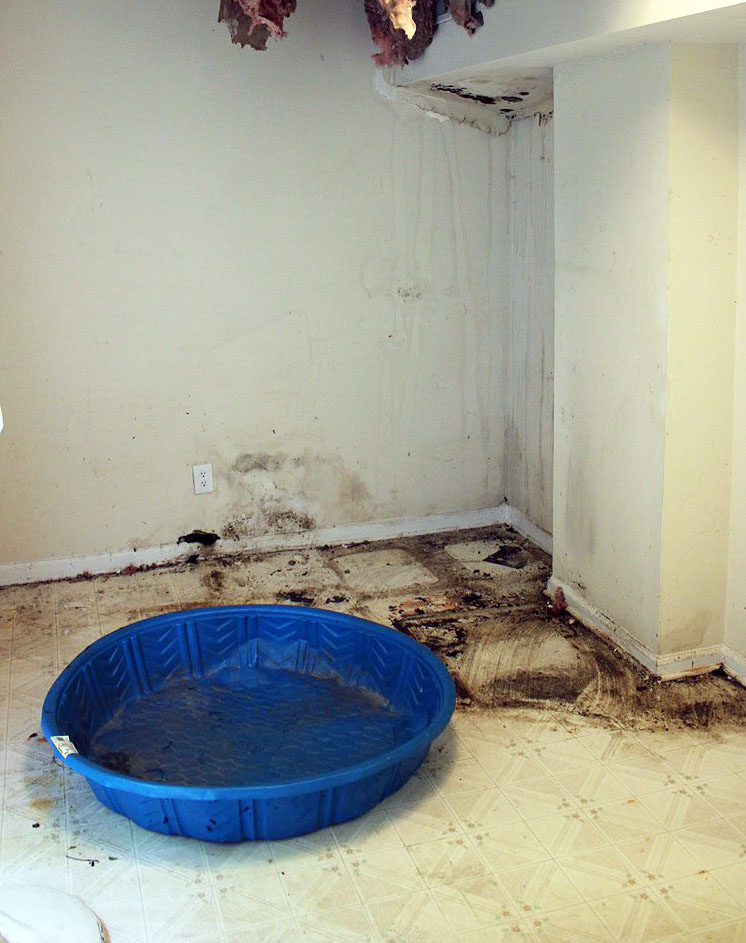
In one picture, this is why:

How is Drywall Made and What is Purple Drywall?
Those black spots on the floor, ceiling, and drywall are black mold. If it was just on the linoleum, it could be cleaned. Once mold grows in drywall the only remedy is to remove and trash it. I don’t even want to think about how many tons of drywall waste goes into the landfill because it got wet or grew mold.

There is a solution to the problem: Purple XP® drywall products! They are moisture, mold, and mildew resistant. It makes sense to spend a few extra dollars to insure your walls will last longer and won’t secretly harbor allergens or harmful mold.

How is Drywall Made and What is Purple Drywall?
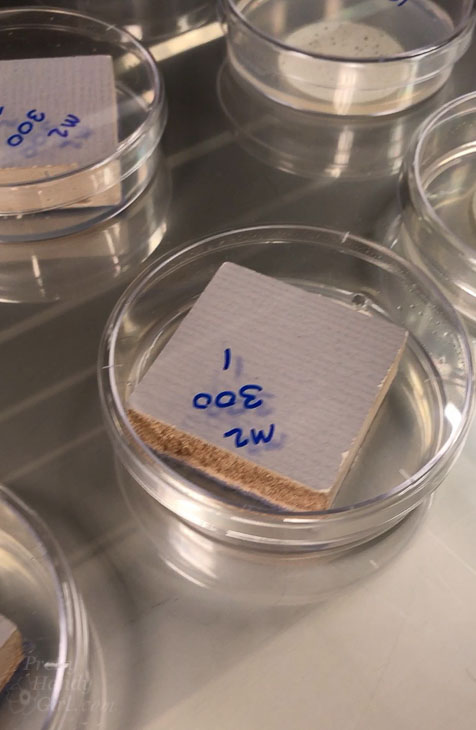
Did you know regular drywall begins growing mold and mildew within 24 hours of water exposure. The Purple drywall will resist moisture and prevent mold growth. I really wish I had known about Purple drywall when we had our kitchen leak. Had I learned about Purple drywall before that experience I would have insisted on Purple for the new drywall installed in the kitchen and laundry room.

Luckily we learn from our mistakes and I’ll be ordering a fair amount of Purple drywall for Etta (in full disclosure, National Gypsum will supply a portion of the drywall for my project as a Saving Etta sponsor.)

How is Drywall Made and What is Purple Drywall?
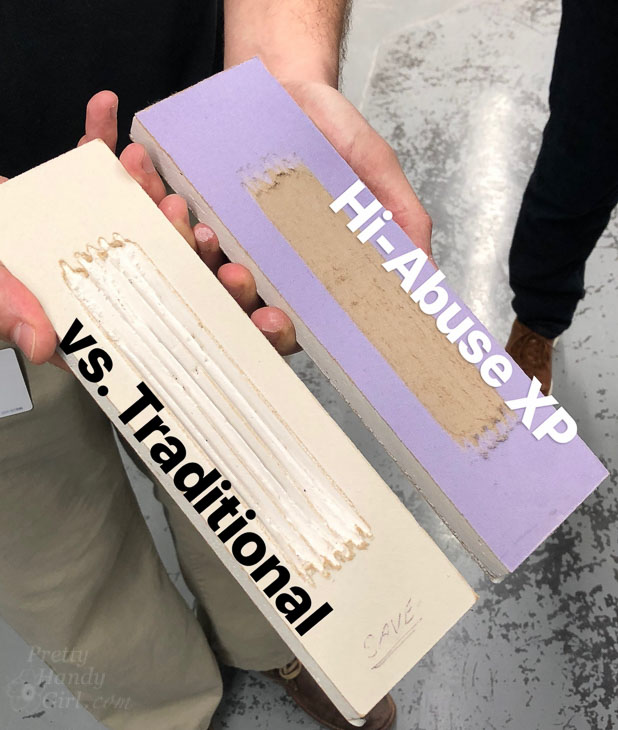
Moisture, mold, and mildew-resistance only scratches the surface (pun intended). What if I told you there was a drywall that resists dings, scratches, and daily abuse?

How is Drywall Made and What is Purple Drywall?
What you see above is the Hi-Abuse XP® drywall after being put to the test on a wire abrasion machine. The same machine dug deep into the traditional drywall. Amazing, right! This is a game changer for those of us living with little wall destroying monsters (I mean lovable children.)

For those larger wall destroying monsters (think teenagers, college students, and frat houses), there’s a drywall for them too! Wall-punching party animals meet Hi-Impact XP®!

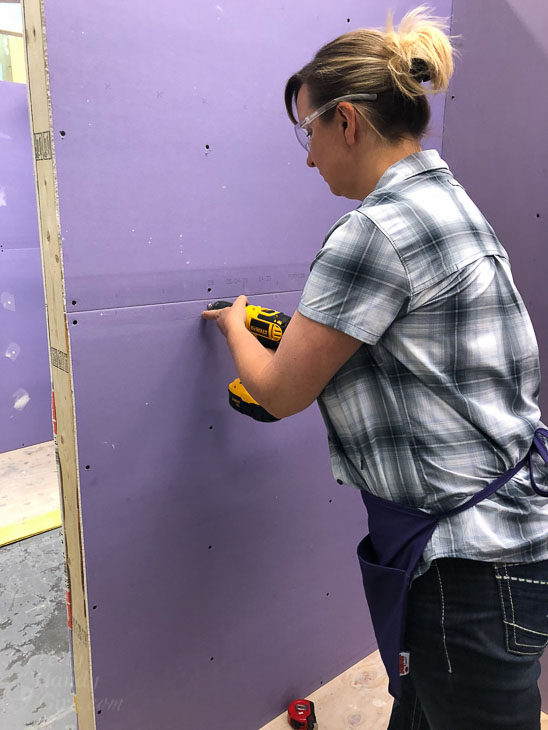
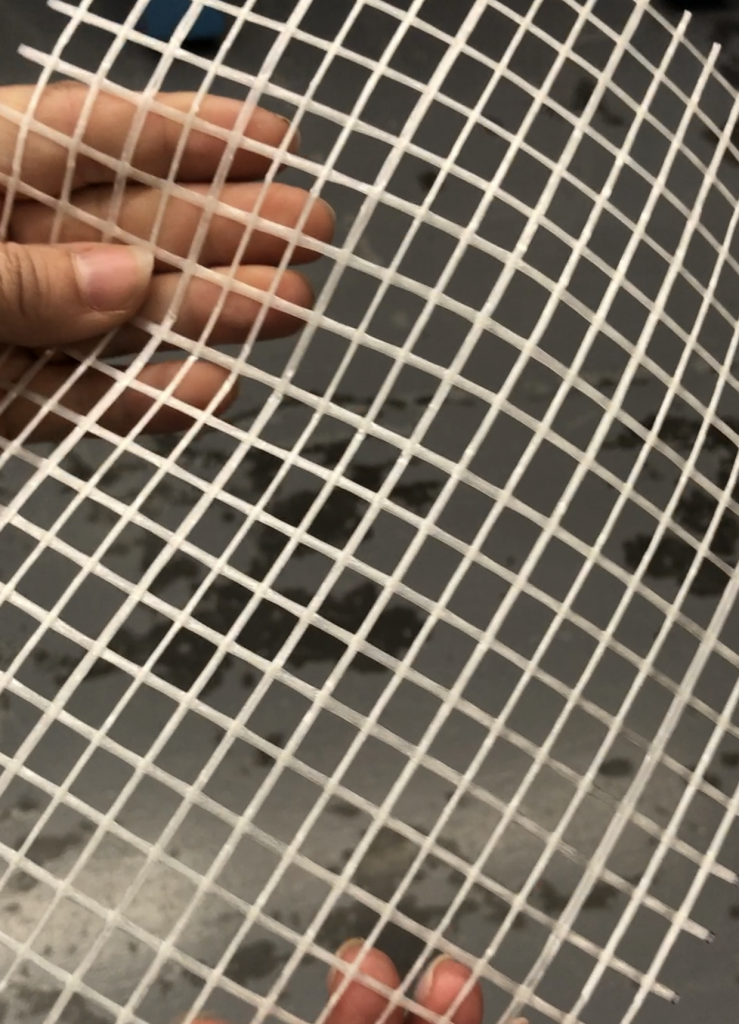
The Hi-Impact XP drywall has webbing integrated into the drywall sheets that holds firm against just about anything. This is a game changer for many locations. Think about gyms, ski lodges, garages, and more. Any space that gets daily abuse can benefit from this wall board.

How is Drywall Made and What is Purple Drywall?
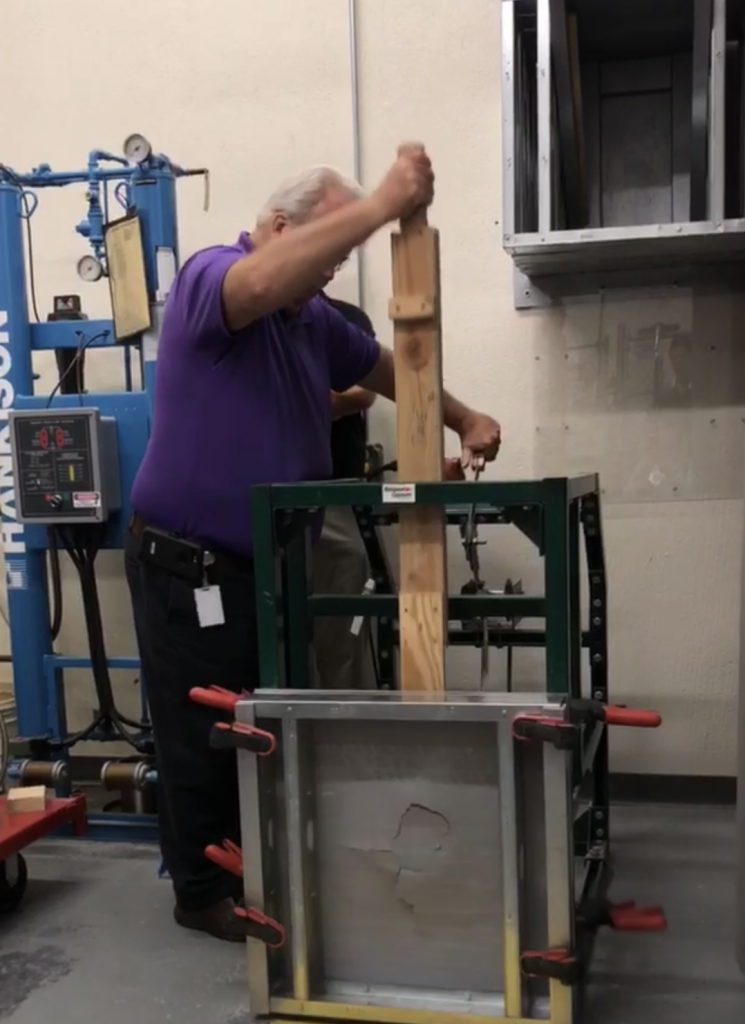
The folks at National Gypsum showed us a test where they released a 150 lb. dead weight against the Hi-Impact XP. The drywall cracked, but the weighted hammer could not break through. Anyone who has patched holes in drywall can tell you it’s a lot easier to repair a dent in drywall than a hole.

How is Drywall Made and What is Purple Drywall?
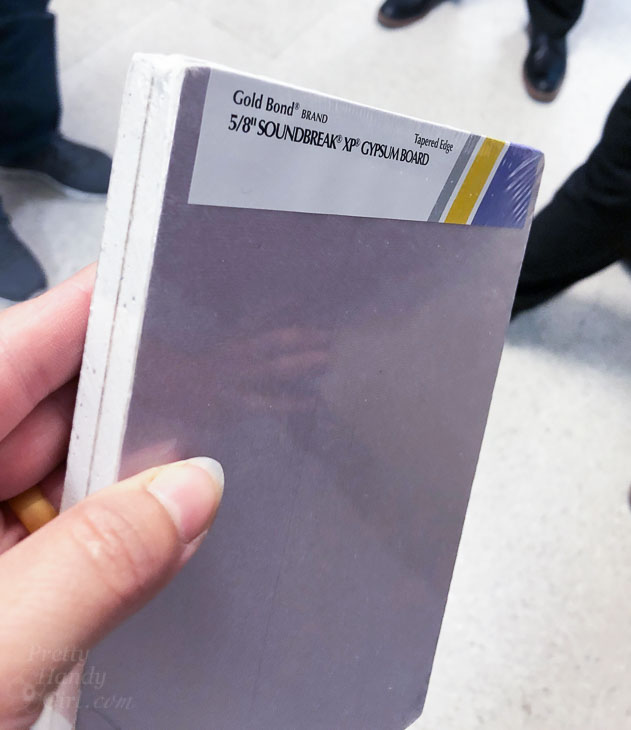
Finally, I’m super amped (another pun intended) to introduce you to SoundBreak XP! This is the drywall I wish they had when I lived in an old Philadelphia apartment building where I could hear every word spoken in the next apartment. In the summer I used to go nuts listening to the whomp, whomp, whomp sounds of an unbalanced ceiling fan in the next room as I tried to fall asleep. To everyone who ever wanted to reach through a wall and strangle your neighbor, I introduce to you SoundBreak XP®:

How is Drywall Made and What is Purple Drywall?
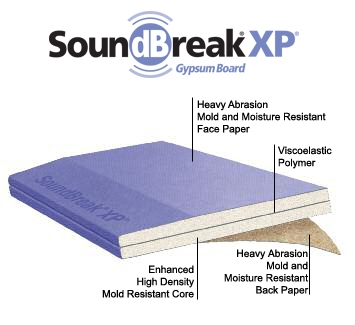
See those two layers? There is a viscoelastic membrane that separates the two and does an amazing job at blocking noise.

How is Drywall Made and What is Purple Drywall?
For those of you that are near tears right now because you don’t want to replace your drywall, dry those eyes. Here’s your hero:

SoundBreak XP Retrofit® is designed to be added on top of your existing walls. At only 5/16″ thick, it’s easy to secure to your existing drywall (after removing switch and outlet covers) and reduce noise immediately. I would have invested in this product for certain back in my apartment dwelling days.

I hope you learned more about Purple drywall and have the information to make informed choices during your next remodel or if you are investing in a new house. By the way, should you need help figuring out how much drywall you’ll need for that project, the AskForPURPLE site has a Material calculator to help you figure out how much drywall you need.

How is Drywall Made and What is Purple Drywall?

Disclosure: This is a sponsored post for National Gypsum and Ask for Purple. I was compensated for my time and travel. I was not told what to say, all opinions are my own. As always I only work with brands that I would use myself.

If you liked this post, you might also like:

How is Drywall Made and What is Purple Drywall?

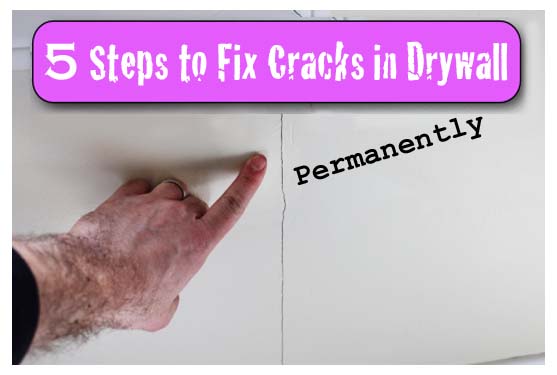
5 Steps to Fix Cracks in Drywall


How to Patch a Hole in Drywall | Pretty Handy Girl

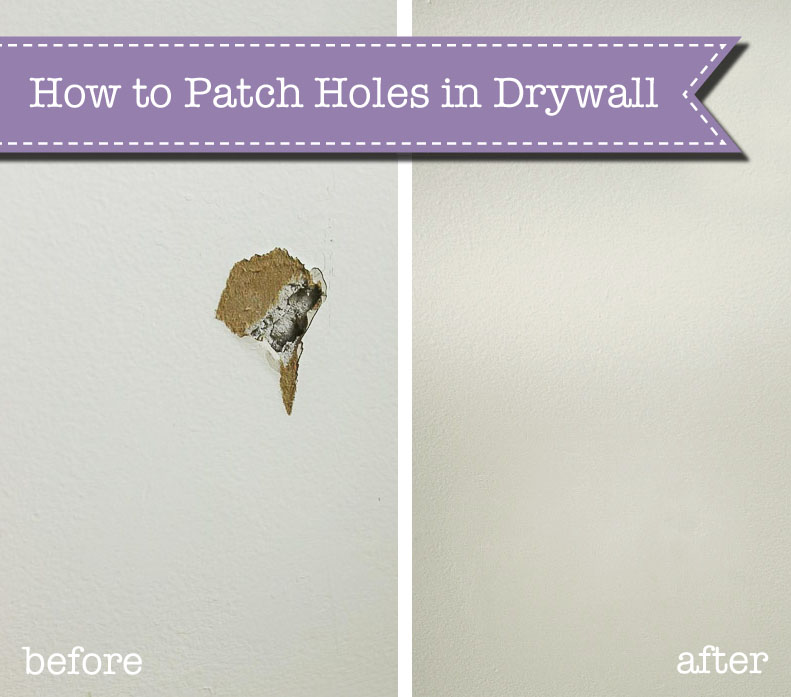
How to Patch Holes in Drywall