Saving Etta exterior color decisionsExterior Paint Color Scheme at Saving Etta

Things are moving along on the house. I know I owe you another Saving Etta chapter. Please know it’s on my to do list. The past two weeks have been absolutely insane. My electrician, plumber, and HVAC contractors have been putting in lots of hours in the 95 F degree heat to get everything installed and ready for the rough in inspection. I’ve spent numerous hours up and down the ladders helping my electrician with marking light locations and nailing nail plates. As things progress, I am forced to make decisions quickly. Right now it’s time to get the siding up on the house — which means it will be time to choose the exterior color paint scheme for Etta. I can’t believe she will be beautiful again soon.

I’m extremely excited to be working with Magnolia Paint by KILZ as a Saving Etta sponsor. I had the opportunity to meet Chip & Joanna Gaines and try their new paint line last February in Waco, Texas. While there, I fell in love with the Magnolia chalk style paint. It’s thick, smooth, and has great coverage. I can’t wait to use it again on a small project (when I have more free time.)

At the Magnolia Home paint event, I enjoyed talking to one of the KILZ chemical scientists about my favorite interior wall paints and what I look for in a quality paint. I was pleased to find out that the Magnolia Paint Interior Paint offers the same Low-VOC, thick stain coverage, and durability I demand in paint. I’ve been itching to really put these paints to the test, and now I can because I have a whole house interior to paint!

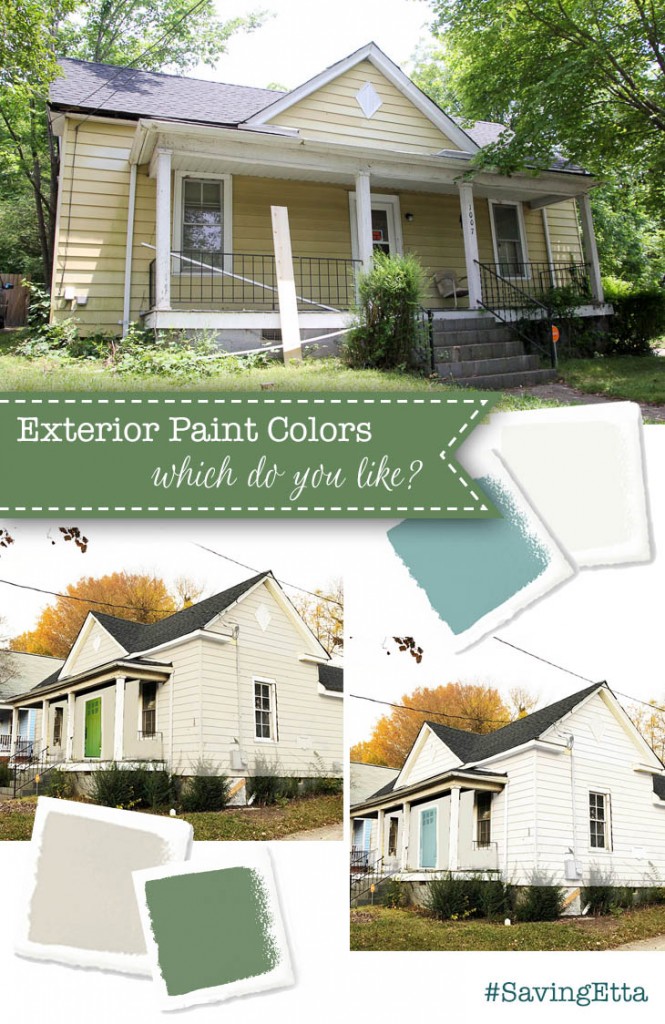
Truth be told, the exterior house colors were ones I’ve been thinking about for a long time. But, I wanted to share with you some of the Photoshop sketches I created for the house so you can let me know your favorites.

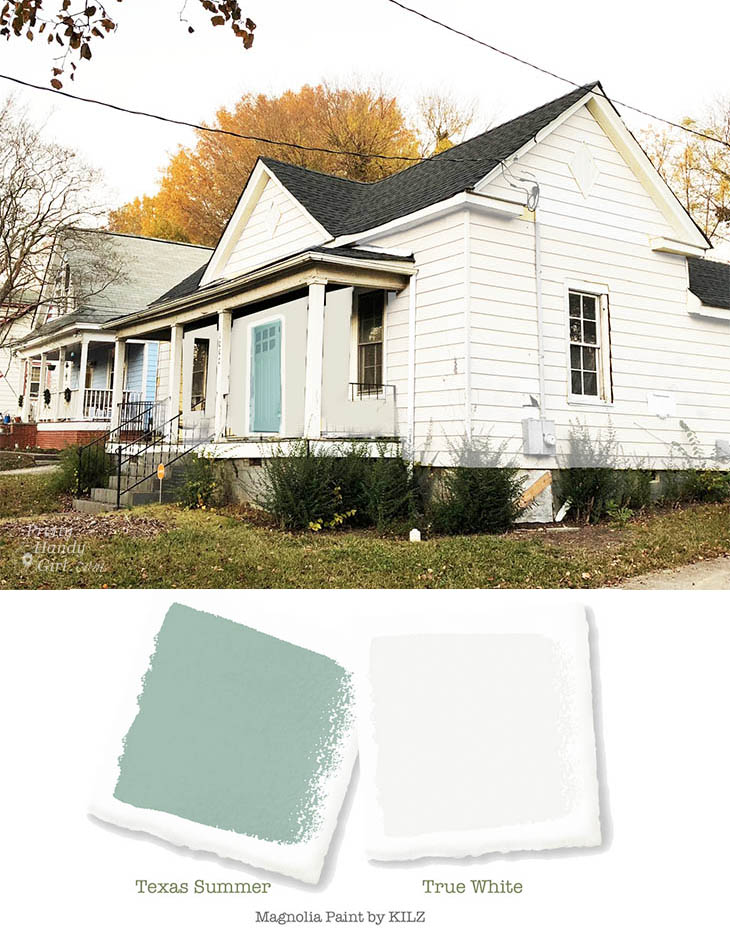
I am very partial to the simple white house with a light blue door. Although this is my favorite combo, there is a real rivalry between NC State (Red & White colors) and University of North Carolina (Carolina Blue & White) in our area. In other words, this color scheme would appeal to a UNC fan, but an NC State fan would never be caught dead owning a house with a light blue door. So, I’m leaning toward some other color schemes:

I have always wanted to use orange as a front door color. I love fall colors and this Work Worn Wood paint color has me dreaming of fall again (especially since it’s been in the mid-90’s all week.) Of course, I also like the color because of the orange leaves in the photo. So, I’m wondering if an orange door would still look fabulous in the winter and summer. What do you think?

Navy has had a huge resurgence in home design. I’ve seen some amazing houses painted a dark navy with white trim. This is a color combination I wanted to try for Etta, but ultimately my realtor talked me out of it. She likes the color combo, but said the dark colors fade faster. Ultimately I’m trying to provide a low maintenance house for whoever buys Etta, so I chose to stick with light colored siding and reverse the palette by painting the front door navy. What are your thoughts on this combo?

My final options are inspired by nature. Painting a front door green is suppose to be good luck (at least that’s what I’ve heard.) Regarding the siding choice, I bought some samples and painted swatches of Locally Sown, Blanched and One Horn White on foam board to see how they look on a larger scale. Blanched was a little creamy for what I wanted.  One Horn White had a hint of a green undertone (it would be pretty, but I wanted something more neutral for the siding with a green door.) Ultimately, I really like Locally Sown. It’s a very light neutral warm gray (almost white) color.

Right I’m leaning toward Locally Sown siding and True White trim colors. Any front door color would look great with these:

Magnolia Home paint Locally Sown and True White

These are the options I mocked up. What do you think? Are there any combinations that appealed to you? Any others I should consider?

signature

Disclosure: Magnolia Home Paint by KILZ is a Saving Etta material sponsor. I’m honored to work with them on this project. All words and opinions are my own. I have not been told what to say. As always I am very particular about the sponsors I work with and you will be told if you are reading a post that has been sponsored or in which materials were provided. 

If you liked this post, you’ll love learning about color compliments and choosing paint colors:

How to Choose Color Harmonies | Pretty Handy Girl

How to Choose Color Harmonies


how-to-pick-paint-colors

How to Pick Paint Colors


My Home Paint Colors | Pretty Handy Girl

Paint Colors in My Home

How to Repair Your Dishwasher - Control Panel Replacement

How to Repair a Dishwasher: Control Panel

The holidays are here and your kitchen will surely be getting a work out! Now is NOT the time for your dishwasher to break. Recently we found ourselves with a non-functional dishwasher. The control panel buttons stopped working and nothing I did would start it working again. You may recall that I fixed our grill igniter a few months ago by ordering the parts from Sears Parts Direct. As smoothly as that repair went, I knew exactly where to turn to order parts for our dishwasher. Once again I’ve partnered with Sears Parts Direct to bring you this tutorial for Repairing Your Dishwasher – Replacing the Control Panel.

How to Repair a Dishwasher - Control Panel Replacement

Before we start, let’s talk real quick about how much you think it would cost to hire a repairman to come fix your dishwasher. If the average appliance repair person charges $75 per hour, the initial diagnosis visit fee would be $75. When the repair person diagnoses the issue as the control panel, he or she will have to order the part and come back a second time. Automatically you are in for $150 for the two visits. Now, factor in the cost of the part ($125 – $200 depending on any mark up that may be added.) In the end you are looking at repair costs in the range of $300 or more.

At this point many homeowners will make the decision to buy a new dishwasher instead of paying $300. But, what if I told you that you can repair your own dishwasher for only the cost of the part?  You are probably excited to hear that, and are ready to get fixin’.

Diagnosing the Problem:

To diagnose the problem, visit the Sears Parts Direct Repair Center and answer a few questions about your dishwasher problems. You can also view these 5 Easy Dishwasher repairs to see if the symptoms match your problem. You may end up with a few suggested fixes, but hopefully you can narrow down the issue with some logic. For our dishwasher, I knew it was likely a control panel problem since the buttons had been acting up a few weeks before it stopped working all together.

To order the part for your dishwasher, locate the model number. (Hint: It’s usually located inside the door.) If you have any problems locating the model number, Sears Parts Direct has some recommendations. Write down the model number and head over to Sears Parts Direct to order your part.

How to Repair a Dishwasher

After entering the model number, you’ll get a list of parts for your dishwasher. Locate the control panel and order it. The panel will usually arrive in a week. Hopefully you can suffer through hand washing dishes for a few days. (Don’t complain too much, I suffered through it for 4 months when we were without a kitchen.)

How to Replace Your Dishwasher Control Panel:

Preparation: Hooray, you have the part in hand. Now send the spouse away with the kids and tell them you need complete concentration for 2 hours while you repair your dishwasher! (Truth: It’s going to take you less than 10 minutes! So enjoy the rest of your hour and 50 minutes by binge watching Grace & Frankie on Netflix.)

Materials:

How to Repair a Dishwasher

Instructions:

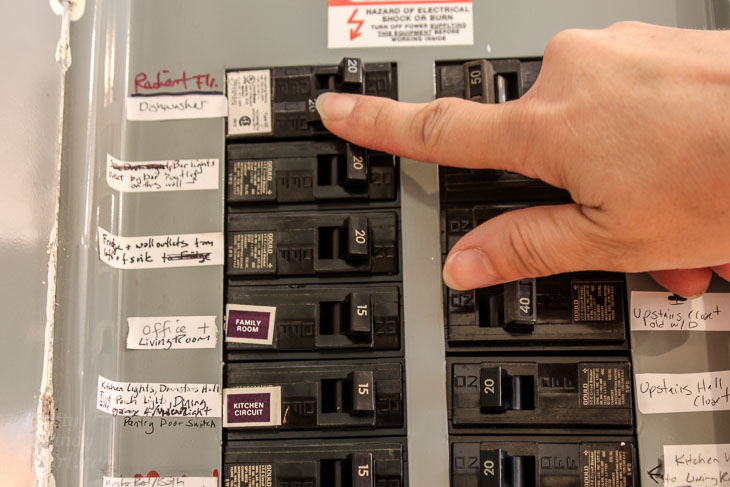
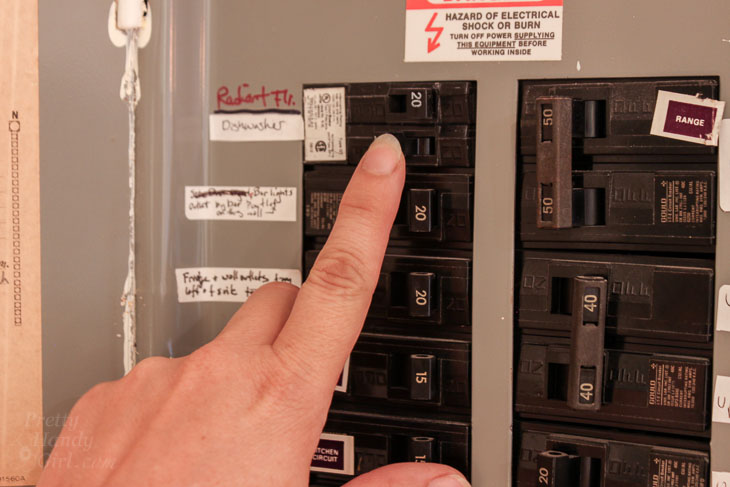
Always start by turning off the circuit breaker for your dishwasher.

How to Repair a Dishwasher

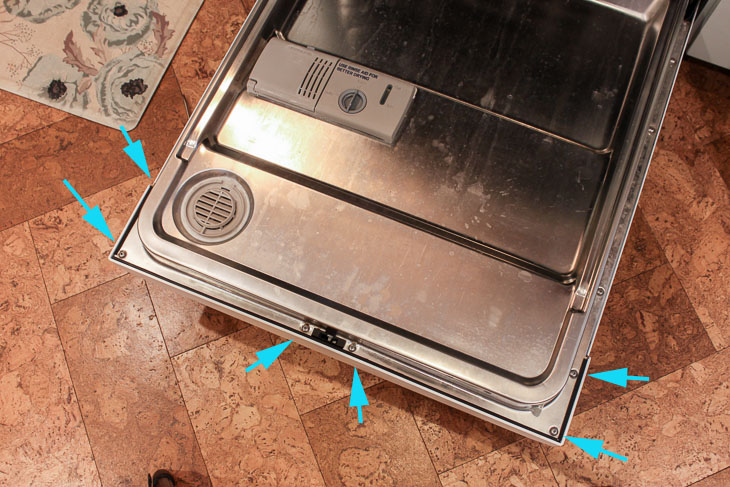
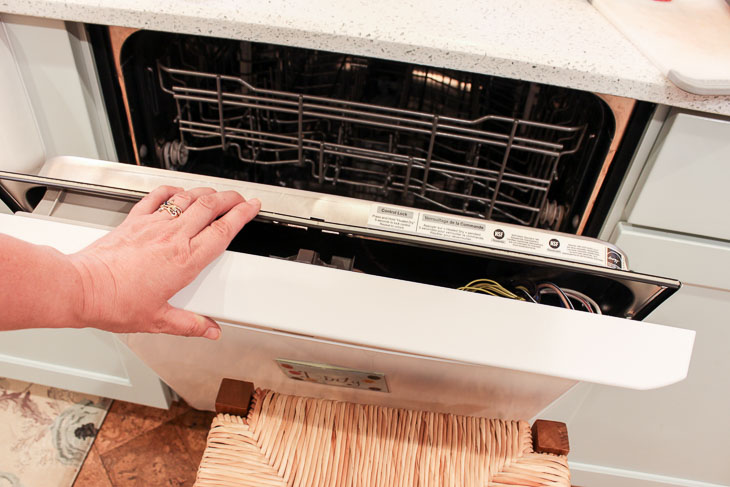
Open your dishwasher and locate the torx screws securing the door panel.

How to Repair a Dishwasher

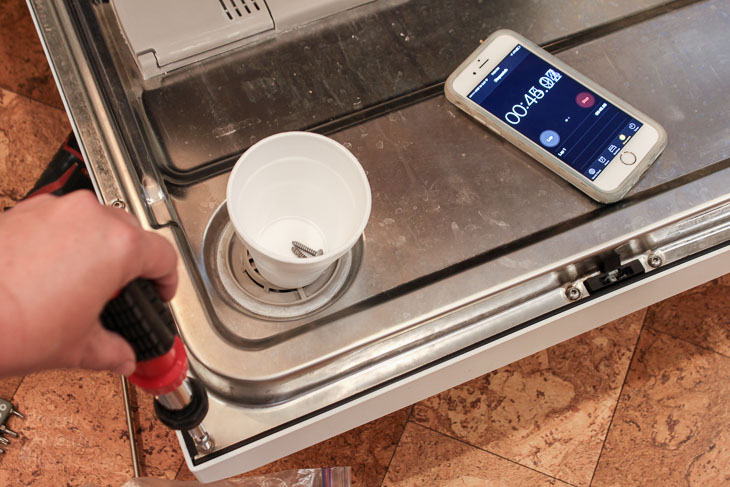
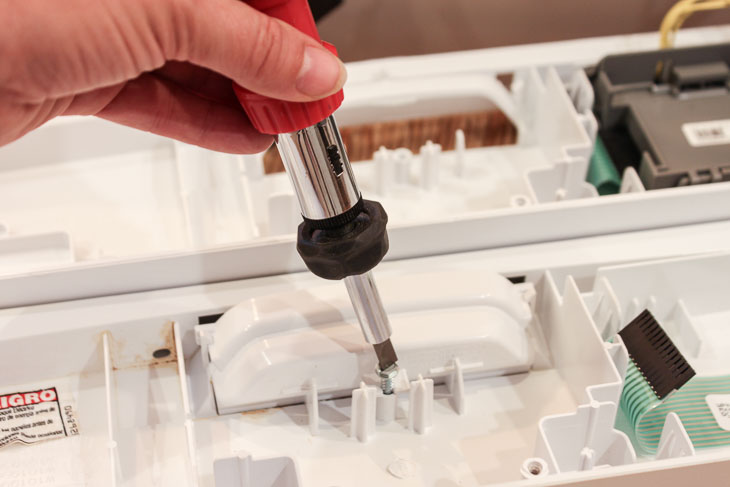
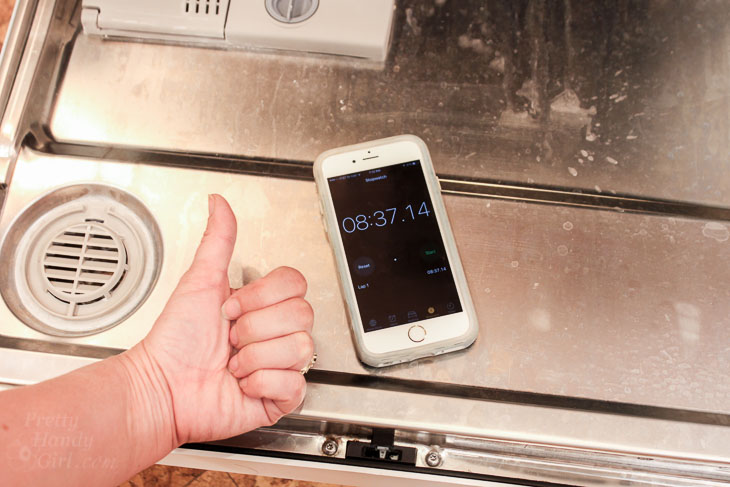
Remove the screws using a torx head screwdriver. Place the screws in a cup or bowl to prevent from losing them. (Yes, I started a timer to show you how long this repair will actually take.)

How to Repair a Dishwasher

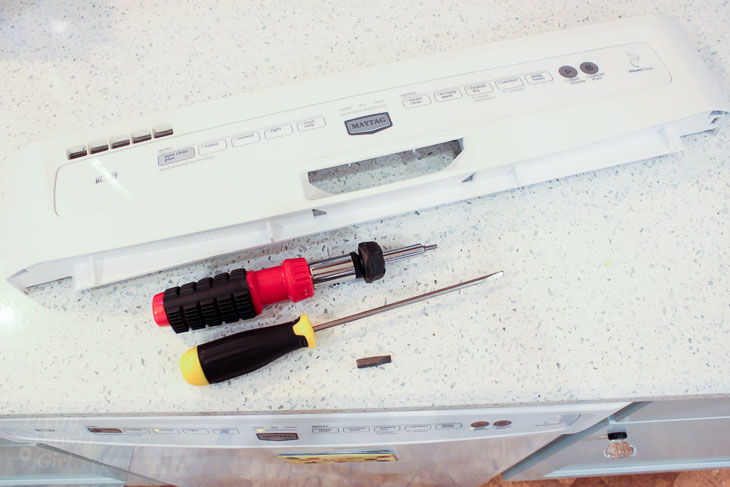
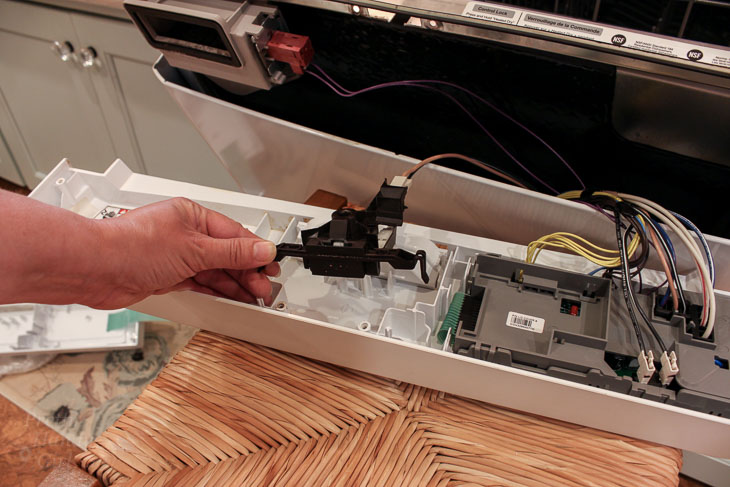
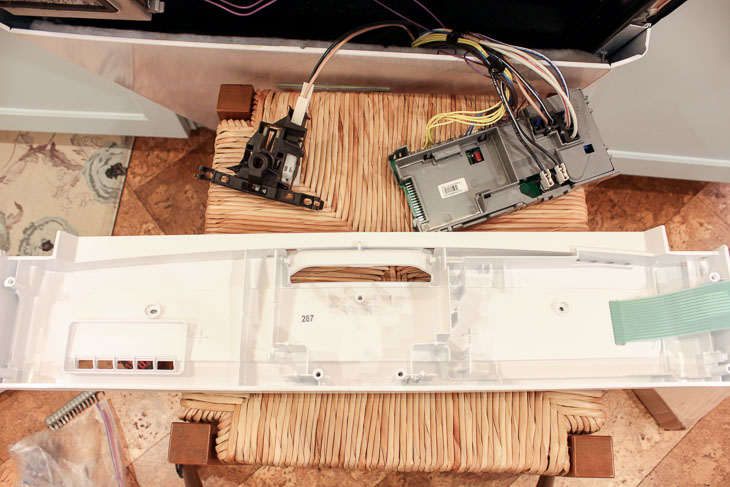
For simplicity, you may be able to remove only the control panel and set it on a stool while keeping all the parts wired.

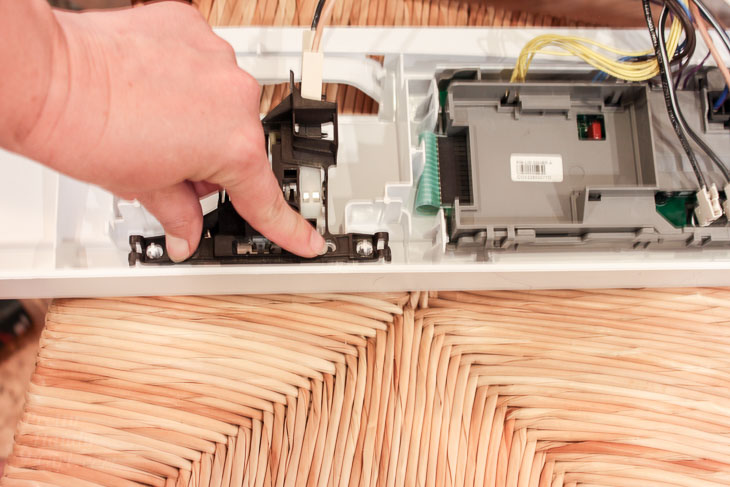
Remove the door latch wiring by lifting it off one side at a time.

How to Repair a Dishwasher

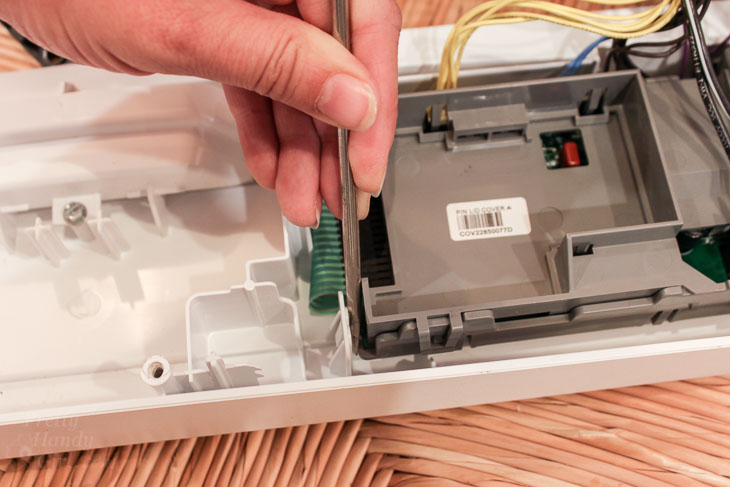
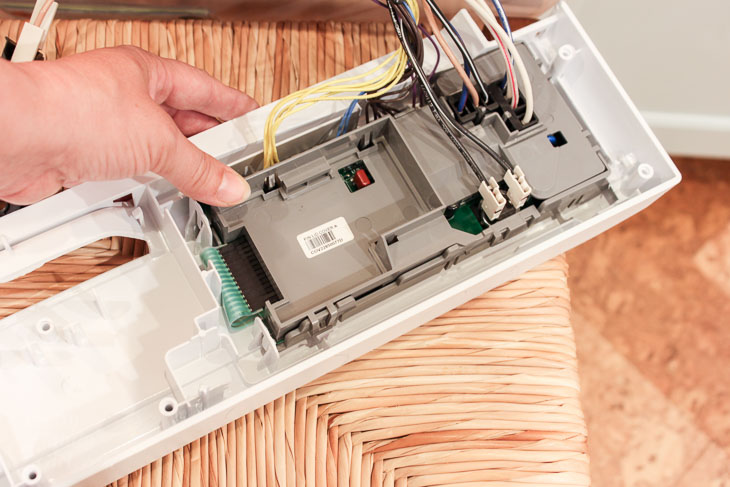
Use a flathead screwdriver to gently release the electronic control board.

How to Repair a Dishwasher

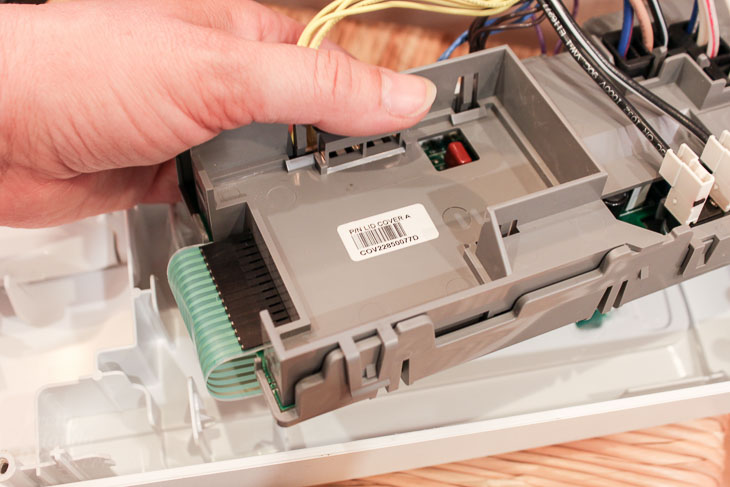
Lift the control board off the control panel.

How to Repair a Dishwasher

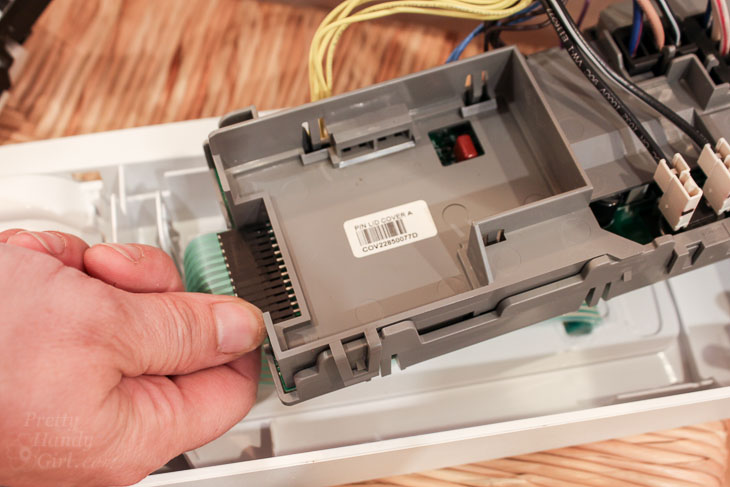
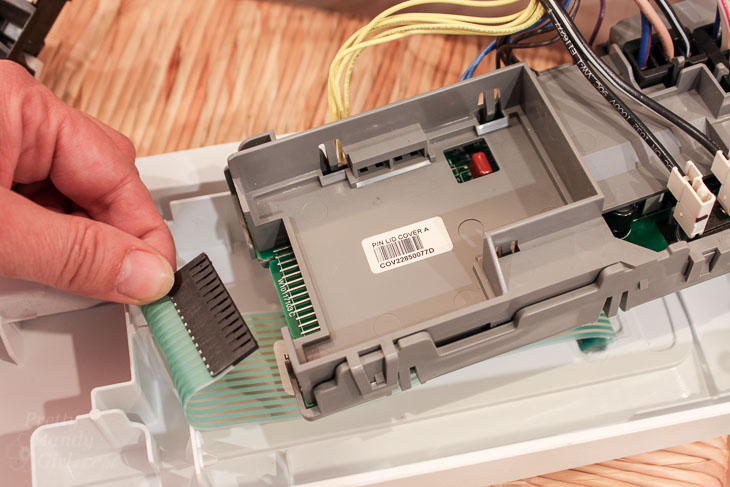
Gently disconnect the control board from the control panel by sliding off the ribbon wiring.

How to Repair a Dishwasher

You might need to wiggle it back and forth a few time to release.

How to Repair a Dishwasher

Check for any other parts that need to be removed from the control panel (like the handle) and remove them.

How to Repair a Dishwasher

Set the new control panel in place of the old panel on the stool.

How to Repair a Dishwasher

Work in the reverse order of the parts removed. Add the handle onto the new control panel.

How to Repair a Dishwasher

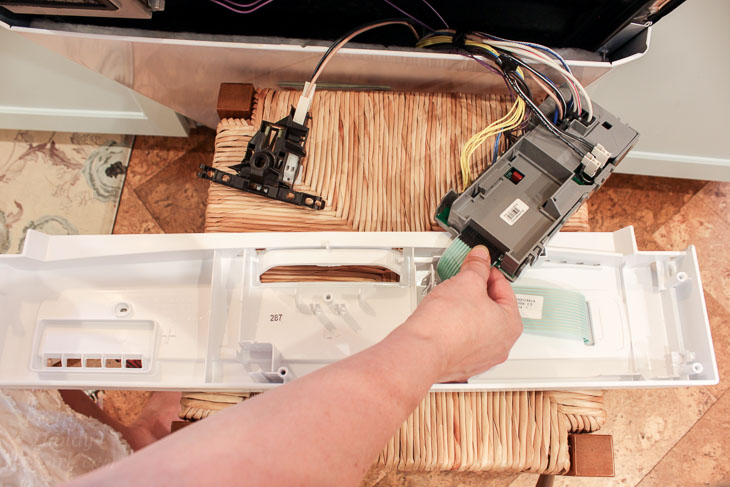
Attach the ribbon wiring from the new control panel to the electronic control board.

How to Repair a Dishwasher

Press the control board into place in the new control panel.

How to Repair a Dishwasher

Reset the door latch wiring in place.

How to Repair a Dishwasher

Set the new control panel onto the door.

How to Repair a Dishwasher

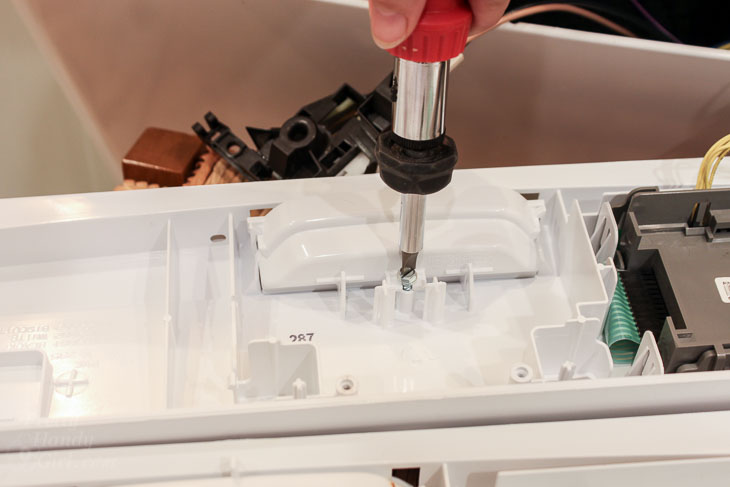
Drive the torx screws in place to secure the new control panel. And, BADABOOM, you are done! Let’s check that timer please: 8 minutes and 37 seconds!

How to Repair a Dishwasher

Go ahead and turn the power back on for your dishwasher.

How to Repair a Dishwasher

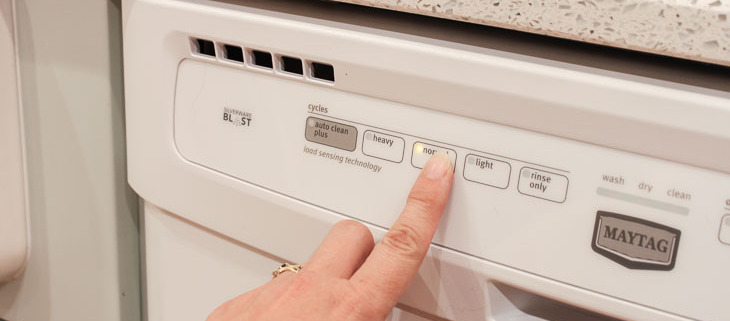
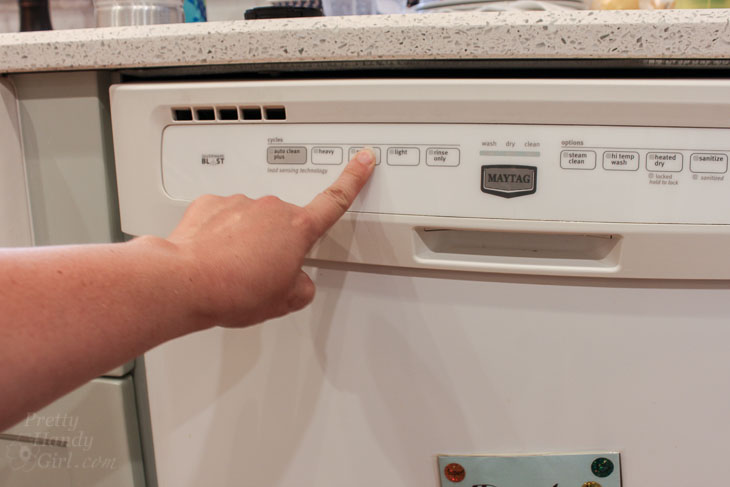
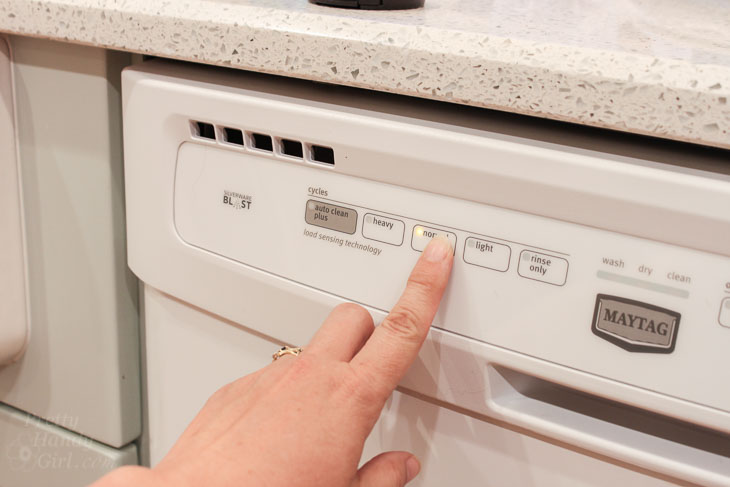
Check the buttons to see if it works. YES! We have a working dishwasher again.

How to Repair a Dishwasher

Didn’t that take a lot less time than you originally thought? Plus you are richer because you didn’t have to pay a repair person or replace your dishwasher! What are you going to do with that money you saved? Why not go ahead and buy yourself that present you really want.

Now that your dishwasher is working, did you know there is a right way to load your dishwasher? Or that there are items you should NEVER wash in your dishwasher?

If you haven’t already, you really need to check out SearsPartsDirect.com to find that part to fix all your broken appliances and more! Follow Sears Parts Direct on Facebook, Twitter, or YouTube to see a variety of repair articles and videos.

How to Repair a Dishwasher

I’m ready for the holiday baking rush now that our dishwasher is working, how about you? I’m also feeling relieved knowing that when my Mom visits for Christmas, she won’t feel guilty about our broken dishwasher and try to wash all our dishes by hand. Moms will always be moms, won’t they?!

Have a Happy Holiday y’all! I’m off to clean the baseboards around our dishwasher. I’m so embarrassed to see dirt and dog hair in that photo above. Ack!

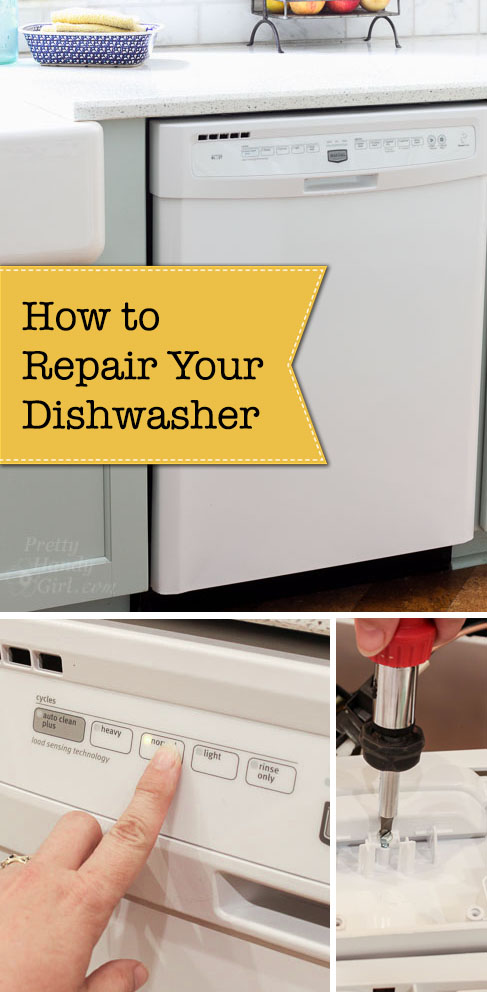
Save your friends $$$ on dishwasher repairs by pinning this image:

How to Repair a Dishwasher

signature

Disclosure: This is a sponsored post for Sears Parts Direct. I was not told what to write. All opinions are my own. I was compensated for my time and efforts to create this tutorial. I am very particular about the brands I represent. Because I value your trust, you will always be notified when you are reading a sponsored post on PrettyHandyGirl.com.

Is Your House Making You Sick? Top Tips to Improve Air Quality

Is Your House Making You Sick? Top Tips to Improve Air Quality

Top Tips for Improving Your Indoor Air Quality

Have you ever asked yourself if those persistent cold and allergy symptoms could be caused by your house? Sick houses and the horror stories of chronic health symptoms are all over the news. If you’ve ever wondered if your house is making you sick, today I’ll be addressing some of the top reasons a house may be unhealthy. Plus, I’ll share some simple ways to improve your indoor air quality to help keep you and your family healthy. As someone who has lived through a mold infestation, and suffers from allergy symptoms, I can attest that having clean indoor air is important to maintaining good health.

Don’t let this topic stress you out, I have 19 Tips for Improving Your Indoor Air Quality. And because Broan believes as strongly as I do about helping you have a healthy home, they have sponsored this article.

1. Control Dust: Dust and vacuum regularly. Use a vacuum with a HEPA filter to prevent dirt from blowing back into the air. Vacuuming regularly is the key to controlling allergy and asthma triggers (especially dust mites and pet dander.)
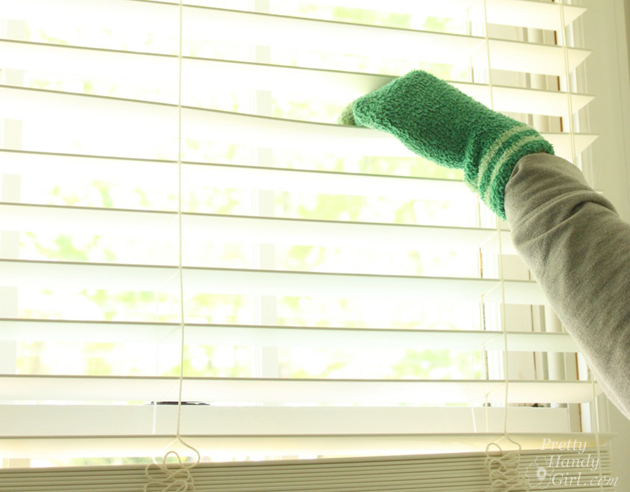
10 Places You Probably Forgot to Dust | Pretty Handy Girl

Use damp rags or microfiber cloths to trap dust. Feather dusters will just move particles around. You might be surprised by the 10 places you probably forget to dust!
10 Places You Probably Forget to Dust
2. Mop It Up. Have you ever mopped your kitchen or bathroom right after vacuuming? If you have, you can attest to the amount of dirt left behind that the vacuum didn’t get. It’s best to mop your hard surface floors after vacuuming to get any remaining dirt.

3. Stop Dirt in their Tracks. Speaking of dirt, if you put floor mats by each exterior door, you should be able to cut down on excess dirt and mud in your home. If you detest the utilitarian rubber mats, you can stencil a plain inexpensive mat using this tutorial. To save time on floor cleaning, encourage your family members to go shoeless in the house. You may even be surprised if your guests automatically remove their shoes when they see your’s lined up by the door.

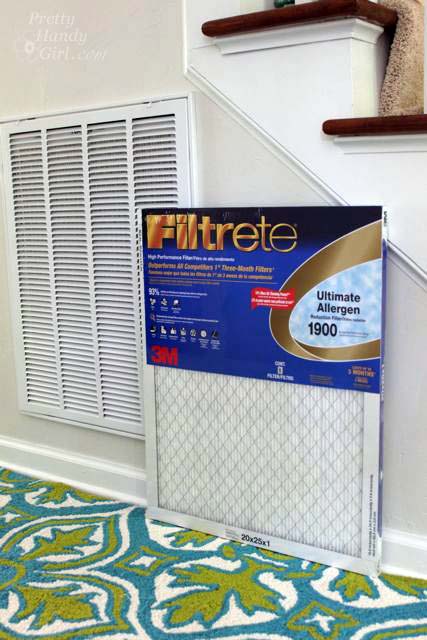
4. Change your Filters. When was the last time you changed your air filter? An air filter is important for trapping dust, germs and allergens. But, it also keeps your furnace and A/C running efficiently. House heating and cooling filters should be changed at least every three months. If you have allergy sufferers in your house, try changing them more frequently. As a busy mom, I know it’s hard to remember to change your air filters, here are some tips for remembering to changer filters.
5. Green Clean. I’ve convinced you to up your cleaning game, but before you start spraying that store bought cleanser or spray, check the label! Do you recognize the ingredients? Is one of them “fragrance”? Most fragrances added to cleaners are made from chemicals that don’t have to be divulged because they are “trade secrets.” You have a right to know what you are spraying in your house, so boycott store bought cleaners and make your own cleaners.
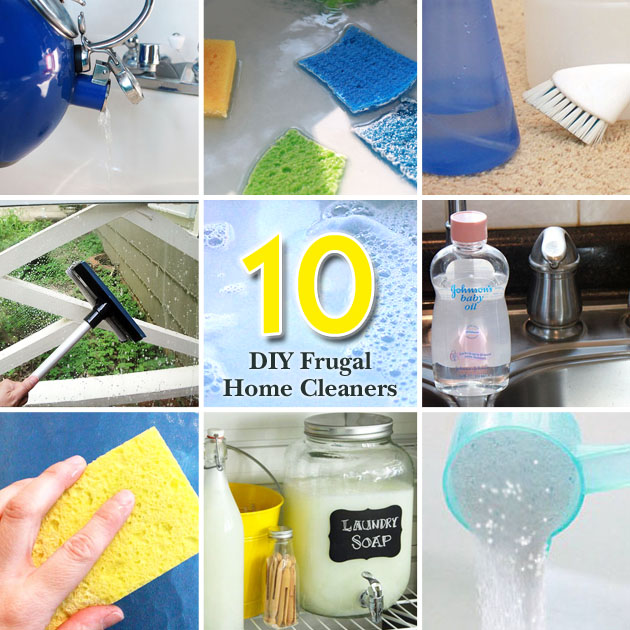
10 DIY Frugal Cleaners | Pretty Handy Girl

6. Go Odor Free. Similar to cleansers with chemicals, Store bought fragrances, air fresheners and perfumes can contribute to chemical pollution in your home. Although they are pretty, petroleum based wax candles can also contribute to unhealthy air. Instead opt for chemical-free room fresheners. Boil water with natural ingredients like lemon, orange, cinnamon, vanilla, etc. Make your own DIY Room Spray with natural ingredients. If you like a scented room, use essential oils in a diffuser or rub a drop on a light bulb.

DIY Scented Room Spray | Pretty Handy Girl

7. Look for Low-VOC products.

Speaking of chemicals, I know you’ve heard of VOC’s (Volatile Organic Compounds) but do you know where they lurk? VOC’s are found in many household products:

  • paints, stains and varnishes
  • solvents
  • cleaning and disinfecting products
  • room sprays and other manufactured air fresheners
  • personal care products and cosmetics
  • pesticides
  • permanent markers
  • glues and adhesives
  • building materials and furnishings (composite wood products that use glues)
  • textiles
  • carpets
  • vinyl
  • sealing caulks
  • dry-cleaned clothing
  • and more

Consider using Low or Zero-VOC paints.  Ask about chemical treatments (like fire retardants, stain guards, or mold inhibitors) on household purchases like bedding, carpets, building materials, etc. Research and educate yourself about where VOC’s are found and look for alternatives.

8. Aerosol. Although ozone depleting aerosols have been eliminated since the 70’s, today’s aerosols contain VOCs and other harmful chemicals like hydrocarbons and compressed gasses. In fact, aerosol sprays can contain VOCs that contribute to  ground level ozone pollution that has a direct correlation to increased asthma cases. Choose non-aerosol products or use aerosols sparingly. If you need to spray an aerosol can, open windows or use aerosols in a ventilated space.

9. Fresh Air. Energy efficient homes are built air tight, which can translate to great energy savings, but sometimes it means your home doesn’t get enough fresh air. On a nice day, open the windows. Let that stale air out.

If you are still struggling to achieve healthy indoor air, you might want to consider a whole house fresh air system from Broan.

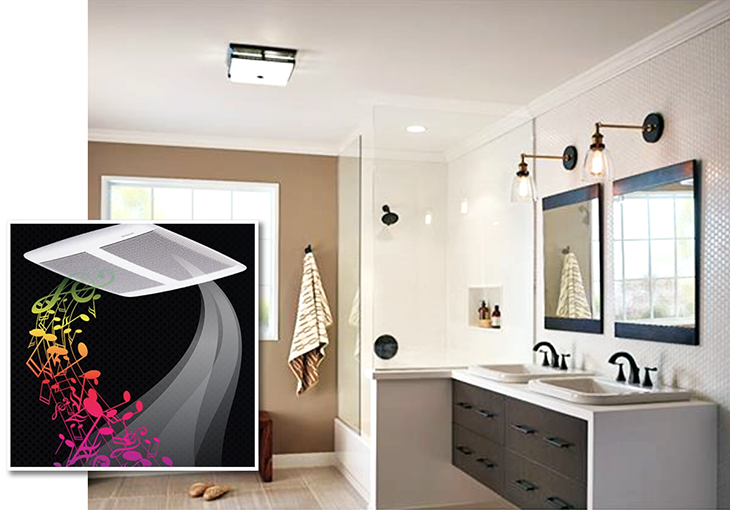
10. Exhaust Humidity. Always run the bathroom exhaust fan during and after a shower. An exhaust fan is instrumental in deterring mold from growing in your bathroom or on your towels. If your exhaust fan is old, noisy, or leaves windows and mirror fogged, you are due for a new one. Today’s exhaust fans from Broan will surprise you with their quiet fans; humidity and moisture sensors; ability play music via an internal bluetooth speaker and a variety of styles including decorative dual purpose exhaust fan and light fixtures. Regardless of how new your bath ventilation fan is, remember to clean the cover regularly.
11. Remove Cooking Vapors. Did you know that you should turn on your kitchen range hood a few minutes before you start cooking and leave it on fifteen minutes after you finish? A range hood will reduce cooking odors and remove excess heat and humidity from your home. Make sure you know how to properly clean and maintain your range hood.

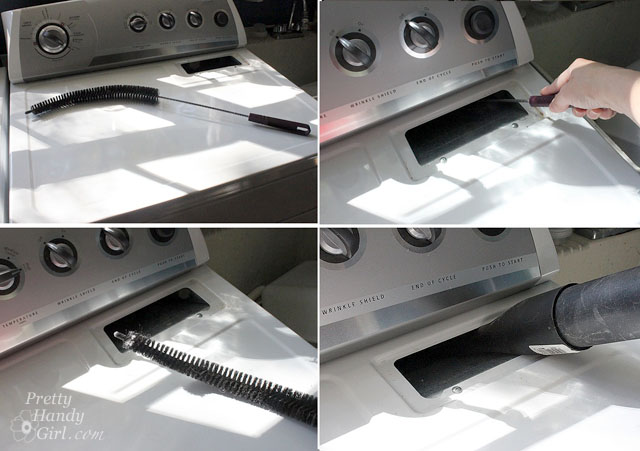
12. Dryer Vents. Check that your dryer duct is clear and that it vents properly outside the house. You’ll want to know how to clean your dryer duct to prevent fires and reduce humidity in your house. When cleaning the vent, investigate how long the vent is and where it exhausts. Dryer vents that exhaust into (and across) an unconditioned space can fill with moisture. As enough condensation builds up, it can prevent proper exhaust or worse case cause a leak. The maximum allowable length of a dryer exhaust is 25′ for an electric dryer, but frankly I’d aim for much less to improve your dryer’s efficiency and allow for easier cleaning of your dryer duct. A handyman or general contractor should be able to offer solutions for shortening your dryer exhaust vent if it is too long.
13. Humidity Levels. Keep a gauge of the humidity level in your home. A digital thermometer with humidity gauge (affiliate link) can be purchased for under $10 from Amazon. The optimal healthy range of humidity should be between 30% – 50%. Any level above 50% can contribute to a growing mold and/or dust mite population. Running an air conditioner in the summer will help control humidity. Be forewarned, if you use a window unit, empty the drip pans regularly. If you have a whole house air conditioner, check that the drip line on the unit is clear (dripping water coming out of the tube or hose is a good sign.) As tempting as it is to save energy by not running the heat or air conditioner, forced air units are helpful for filtering the air in your home.

14. Musty Odors. Don’t ignore musty odors or what you might consider a minor leak. Always investigate the source. Slow or small leaks that happen over time can cause major damage in your walls and attic. Black mold and toxic mold could be growing without your knowledge. If you do discover evidence of a leak, call in a contractor to make repairs or a professional to remediate the mold. The best source for a reputable mold remediation company could be as close as a call to your insurance agent or in your Better Business Bureau reviews. If you do hire a specialist to remove mold, get at least three quotes from different companies.  Ask each bidding company about the procedures they use to protect spores from spreading in your home. You may find this additional information on water leaks, mold, and mildew helpful.

15. Test Your Home. ALWAYS have your house tested for asbestos and lead paint, especially before undertaking any renovations. Hiring a contractor to renovate? Demand that they test for asbestos or lead. You can test for lead with these lead paint test swabs (affiliate link). It is unlawful for a seller to sell a house without disclosing the presence of lead or asbestos materials in the home. However, some sellers may not know if the harmful materials are present, or will choose not to disclose the information.
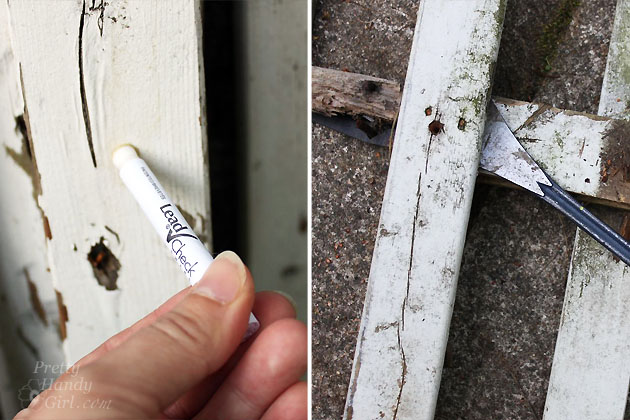
Lead check picket fence paint

16. Test for Radon. When purchasing a house, insist on a radon test. Radon is an odorless gas emitted from natural rock like uranium and granite. Radon exposure can lead to lung cancer.

17. Carbon Monoxide. Install Carbon Monoxide detectors in your home. Install them on each level of your home at or below 5 feet from the ground. CO detectors should be installed close to sleeping areas so an alarm will wake your family. And always install a Carbon Monoxide near the attached garage door. Always test your carbon monoxide and smoke detectors at least twice a year and change the batteries every six months. Learn more about carbon monoxide and how you can protect your family in this article.

18. Houseplants. Buy a green plant to help filter your air. Houseplants act as natural air filters (in addition to looking pretty). Do not overwater your plant or you could inadvertently grow mold. If you have pets or children, talk to a local nursery to find plants that aren’t toxic.
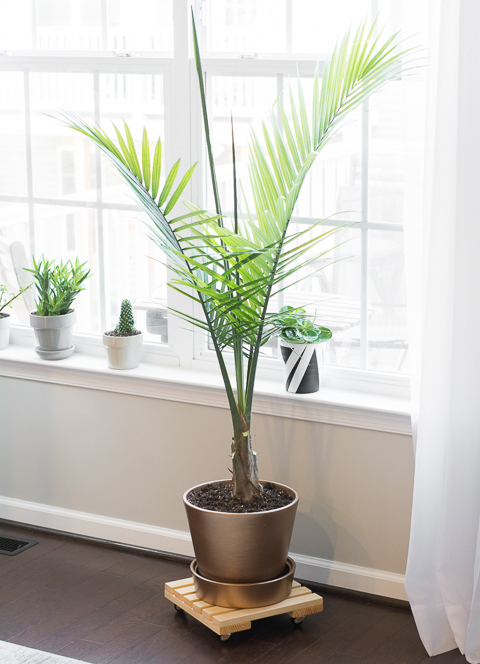
DIY-Rolling-Plant-Caddy-by-Brittany-Goldwyn-8

19. Smoking. It goes without saying that smoking indoors is extremely harmful to your indoor air quality. Second hand smoke in the home can be damaging to everyone’s health, not just the smoker. It’s important to note that children are especially vulnerable because of their smaller lung capacity.

I hope these Tips for Improving Your Indoor Air Quality help you breathe easier. For more detailed information, the EPA has a list of Frequently Asked Questions about  Indoor Air Quality.

Pin this image to share with a friend:
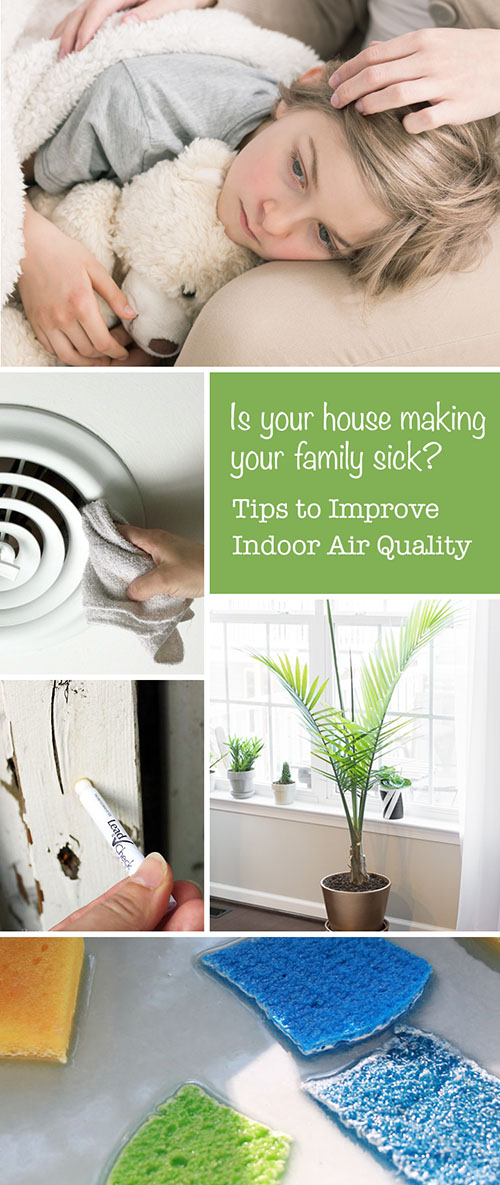
Is Your House Making You Sick? Top Tips to Improve Air Quality

Disclosure: This is a sponsored post for Broan. I was not told what to write. All opinions are my own. I was compensated for my time and efforts to create this tutorial. As always, I am very particular about the brands I represent and you will always be notified when you are reading a sponsored post on PrettyHandyGirl.com.

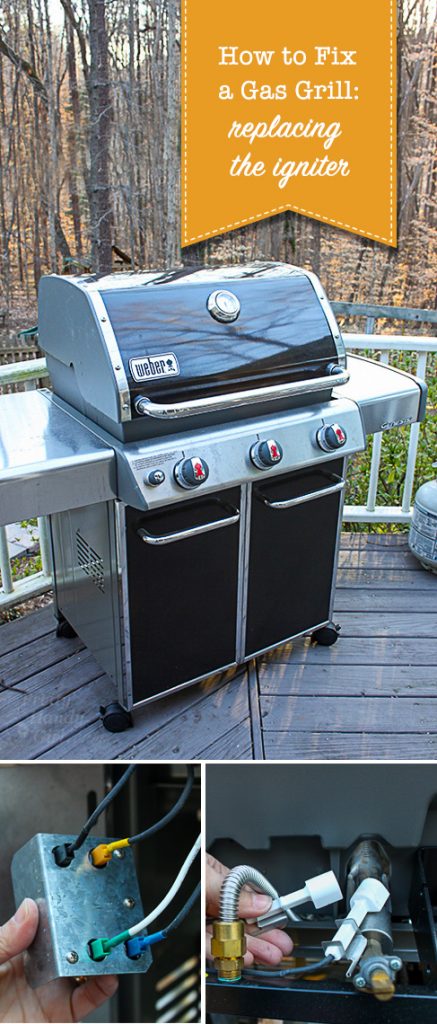
How to Replace Your Grill Ignitor

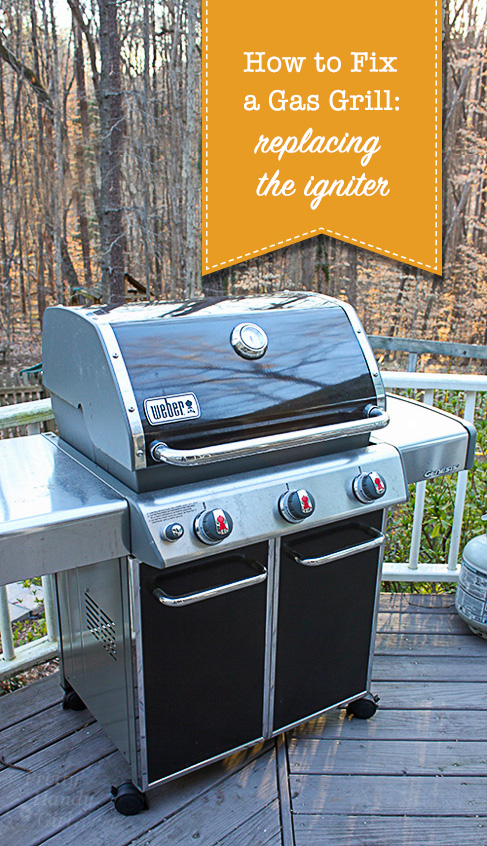
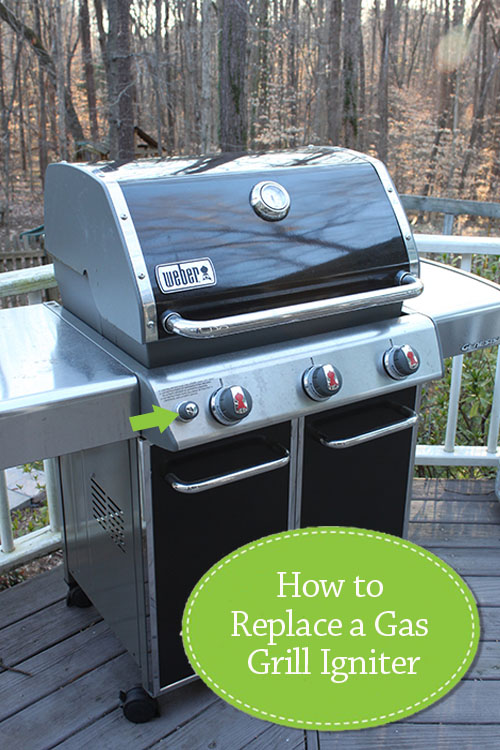
Fix Your Gas Grill Igniter How to Replace a Gas Grill Igniter

Nothing beats using a gas grill to make a quick, delicious dinner! However, when the electric igniter no longer works, you may be tempted to throw up your hands and buy a new grill (or cook inside forever more.) WHOA! Before you go to extremes, I’ll show you how easy it is to Replace a Grill Igniter.

Recently I’ve been ordering parts from SearsPartsDirect.com to fix all our broken appliances. When Sears Parts Direct approached me about writing this sponsored post, I naturally replied “Yes, of course I’d love to share my source for appliance parts!” And, I want you all to know my secret for saving money on appliance fixes. With this legal explanation out of the way, let me show you how easy it is to replace that grill igniter that is no longer working.

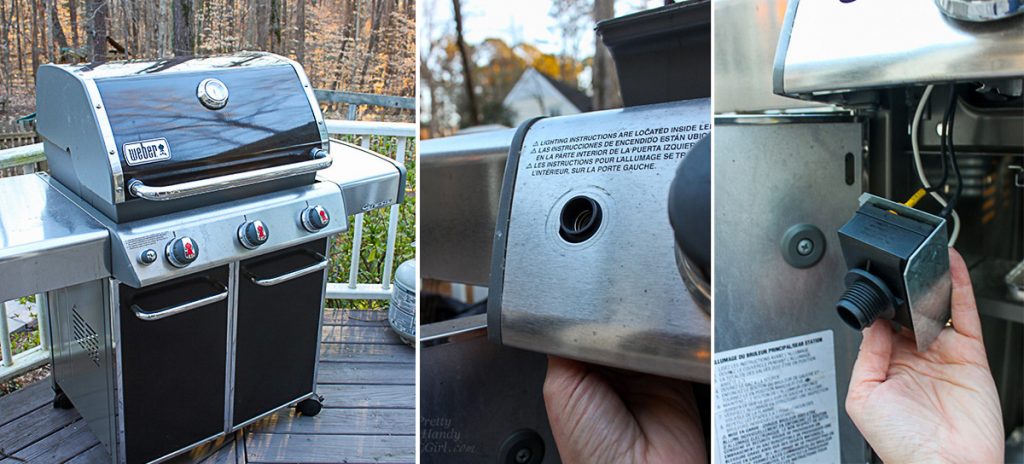
(Note: The grill I’ll be repairing is the Weber Genesis 310 model. But, Sears Parts Direct sells parts for all major grill manufacturers and the instructions are similar for replacing the igniter on other models. Be sure to check your owner’s manual for accurate replacement instructions.)

Materials:

Weber grill igniter parts

(I’ve included affiliate links for your convenience. I earn a small percentage from a purchase using these links. There is no additional cost to you. You can read more about affiliate links here.)

Optional: 

How to Replace a Grill Igniter Instructions:

Make sure the gas is turned off, your grill is turned off, and it is cool before proceeding.

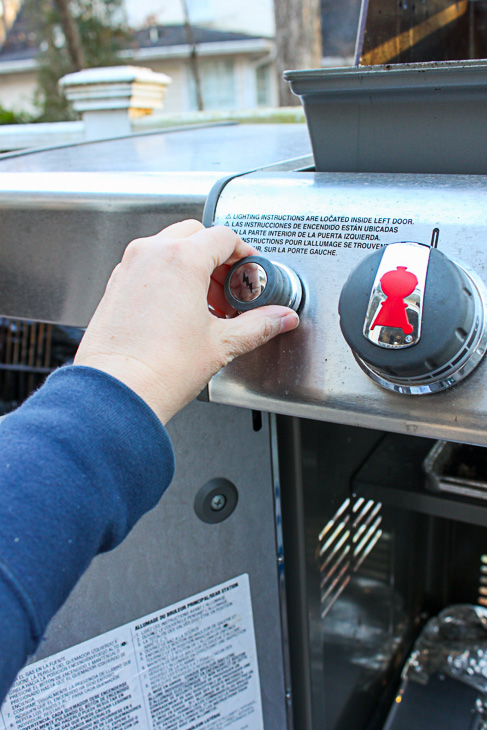
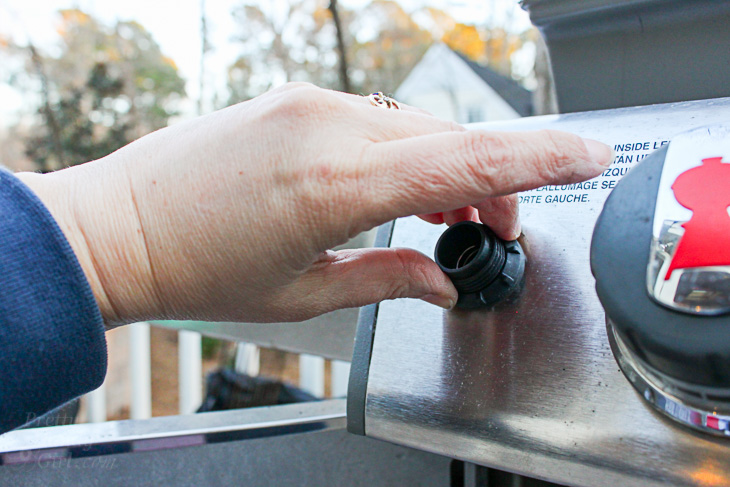
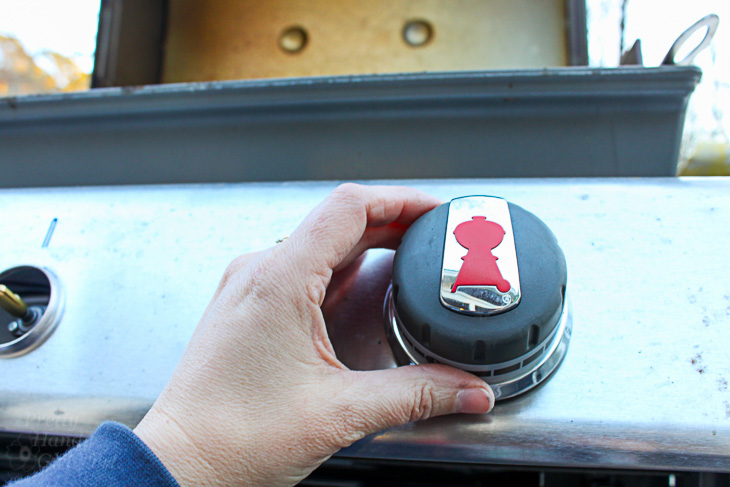
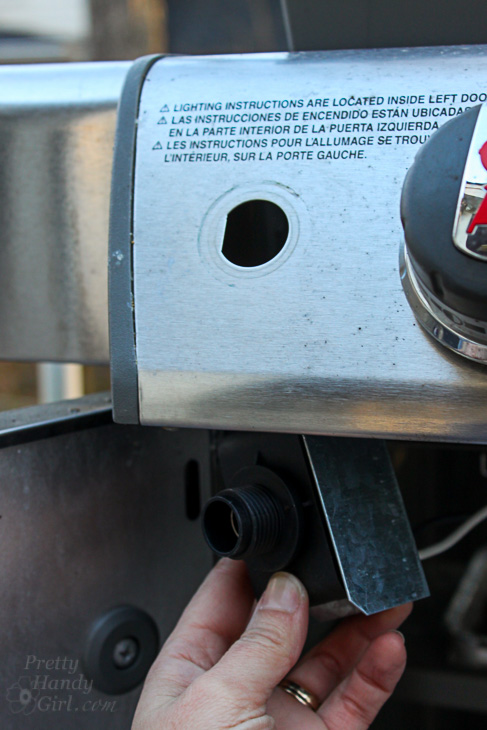
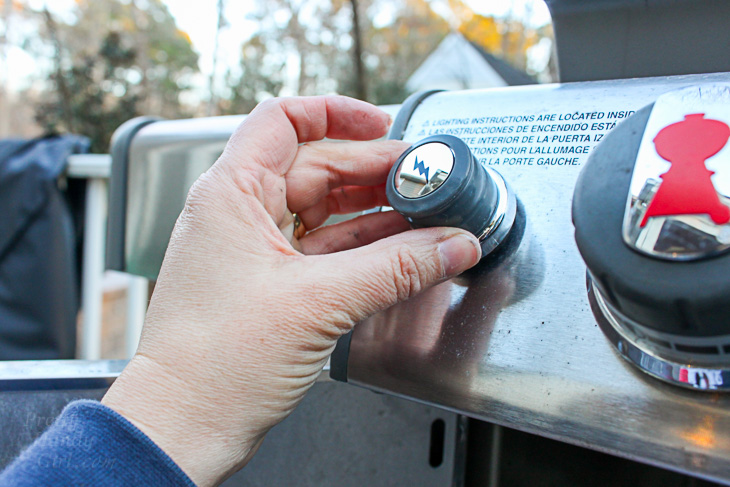
Before you go to the effort of replacing the igniter module and wires, check the battery inside the igniter button. Remove the igniter button by turning the cover counter-clockwise.

How to Replace a Grill Igniter

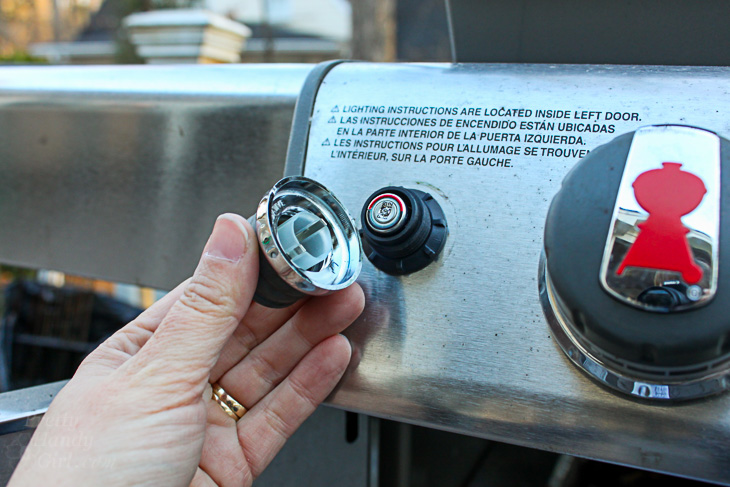
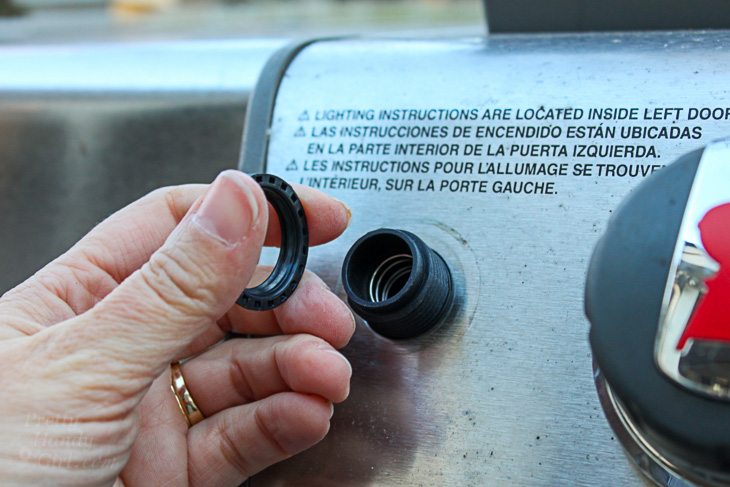
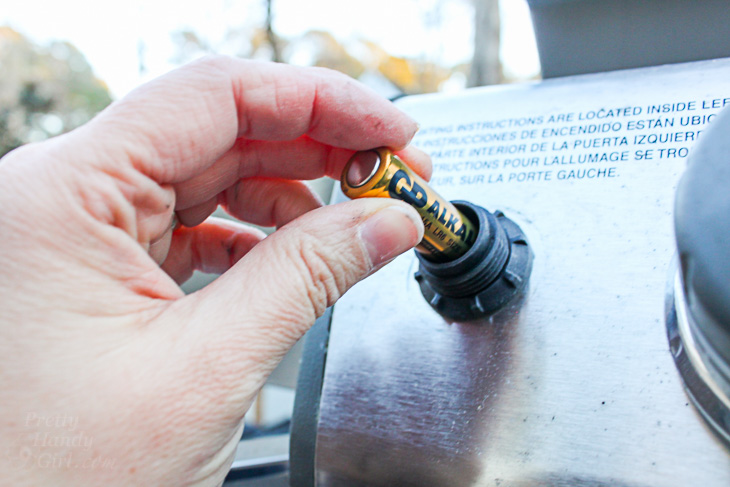
Lift off the igniter button cover to expose the battery.

How to Replace a Grill Igniter

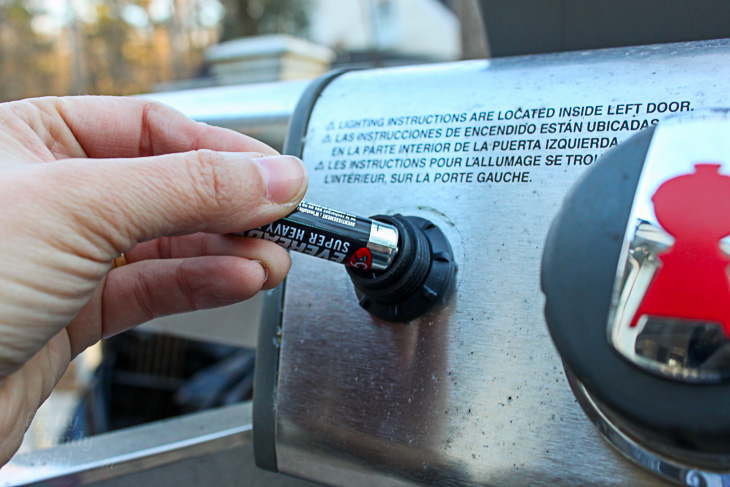
Pull out the AA battery. Replace with a brand new AA battery and replace the cover. Check to see if your grill will light. If yes, great! If no, keep reading.

How to Replace a Grill Igniter

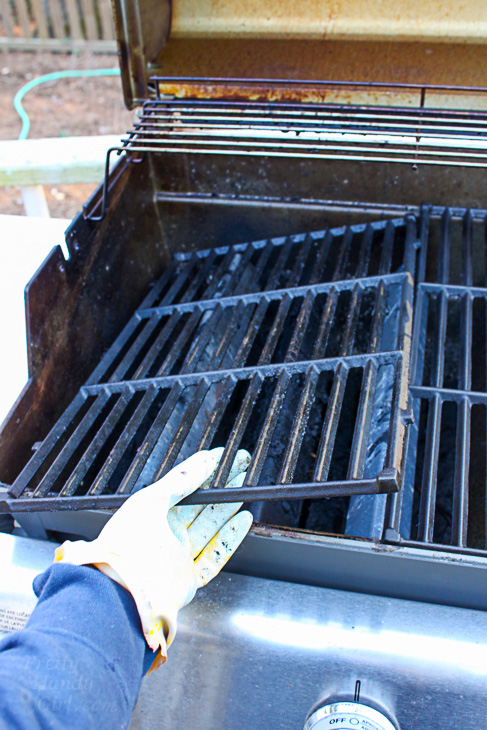
Put on your rubber gloves and remove the cooking grates and place them on newspaper or plastic to protect the surface from grease.

How to Replace a Grill Igniter

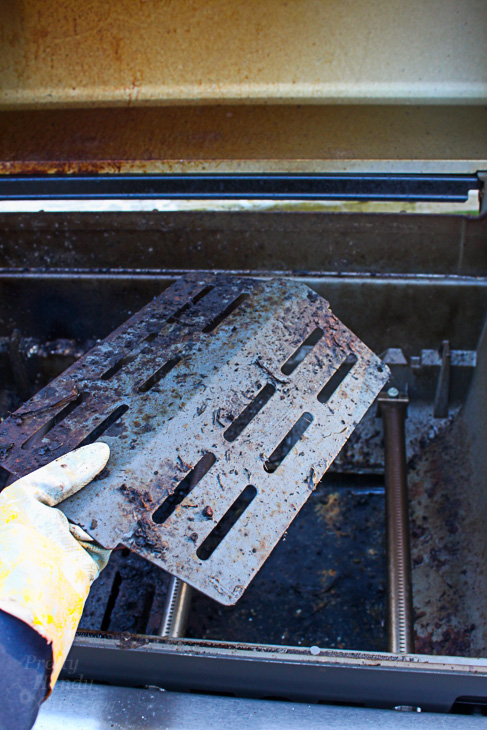
Remove the heat deflectors.

How to Replace a Grill Igniter

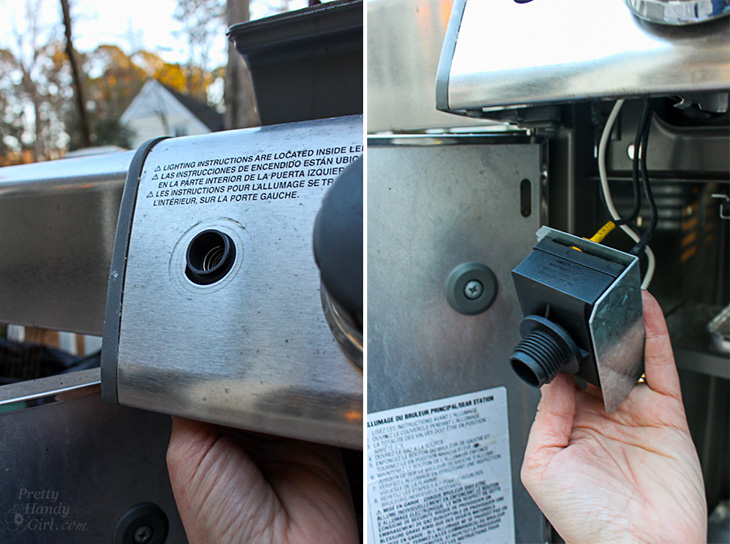
Remove the igniter retention nut by turning it counter-clockwise.

How to Replace a Grill Igniter

Set the retention nut aside where you won’t lose it.

How to Replace a Grill Igniter

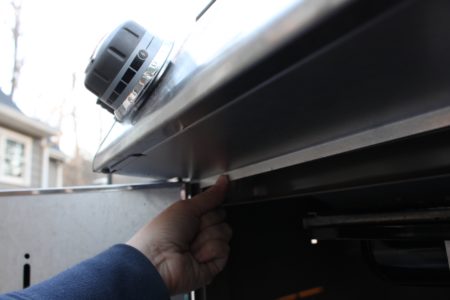
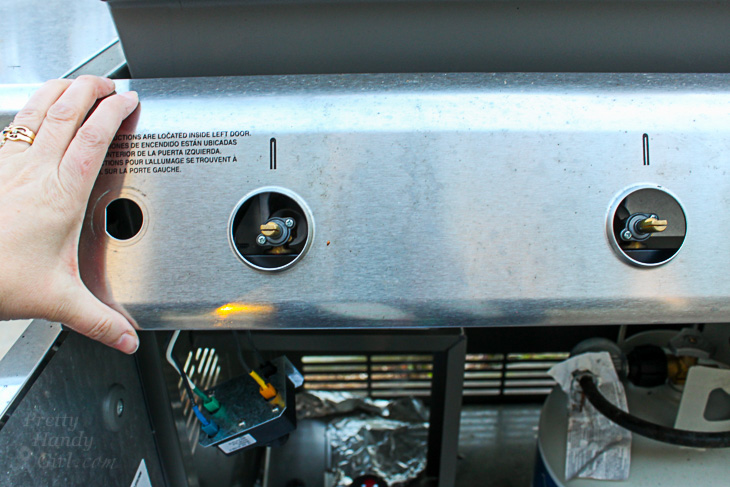
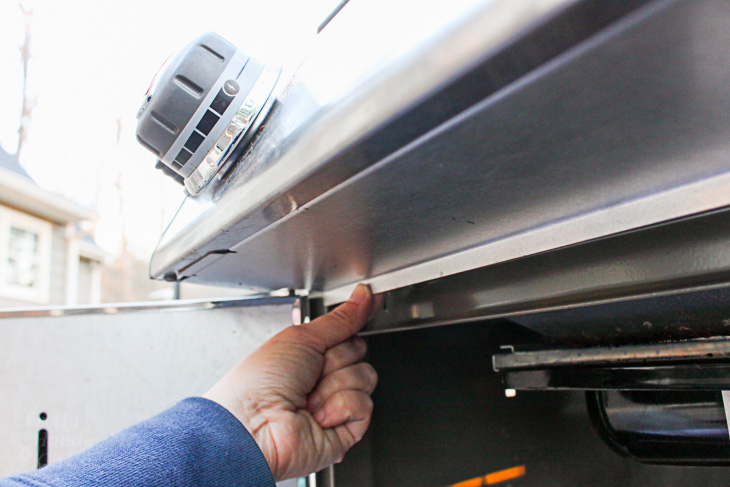
Remove the screws for the wind deflector that are underneath the control panel. There are two screws that need to be removed, one on the far right and one on the far left.

How to Replace a Grill Igniter

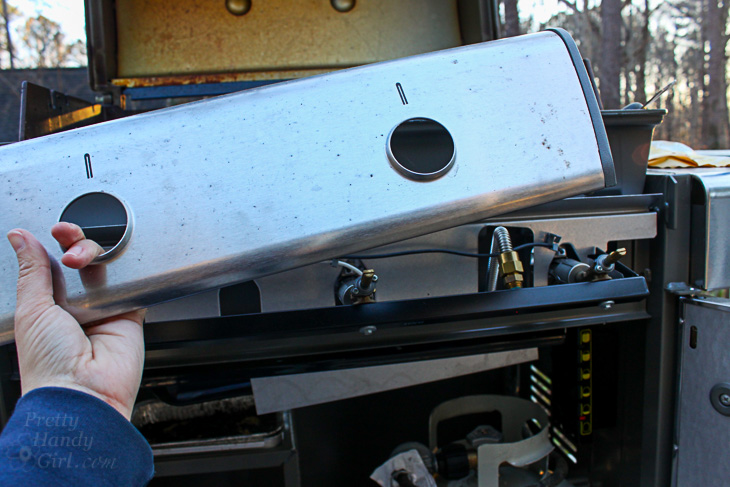
Remove the wind deflector. You’ll need to tilt the back of it down and then slide it out toward the back to remove.

How to Replace a Grill Igniter

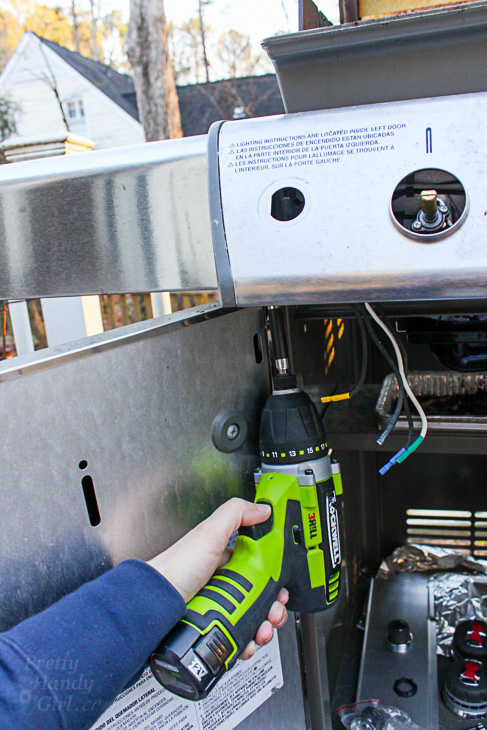
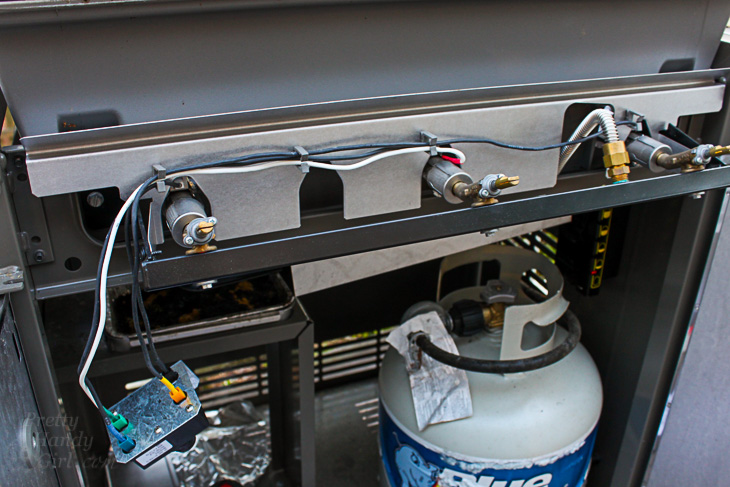
Remove the igniter module by reaching underneath the control panel and gently lowering module.

How to Replace a Grill Igniter

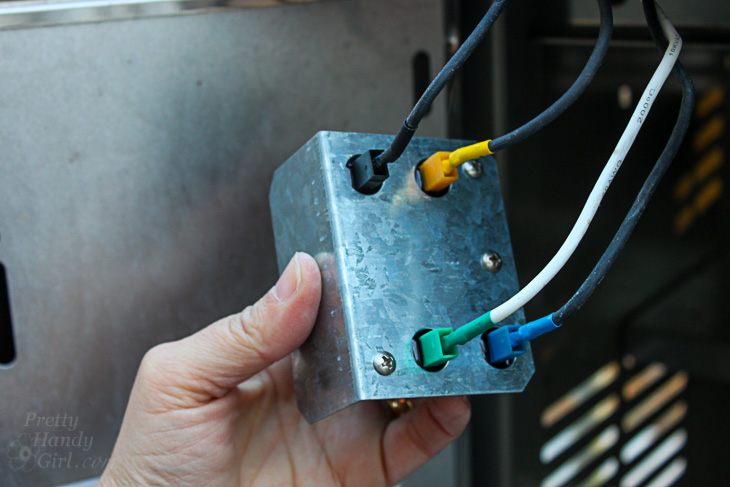
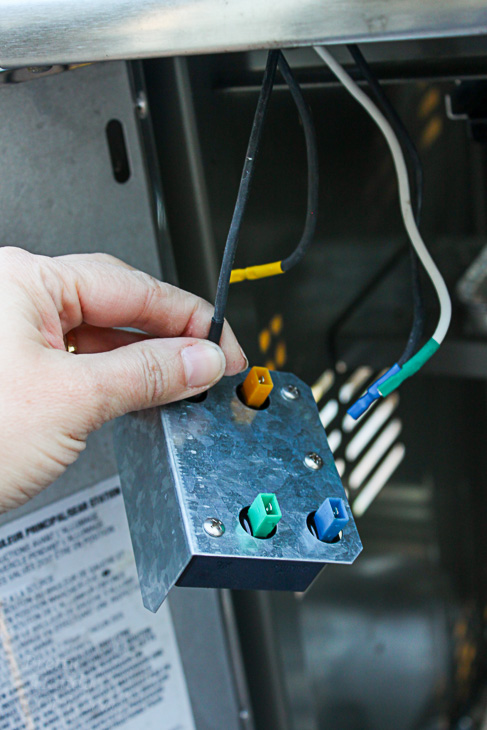
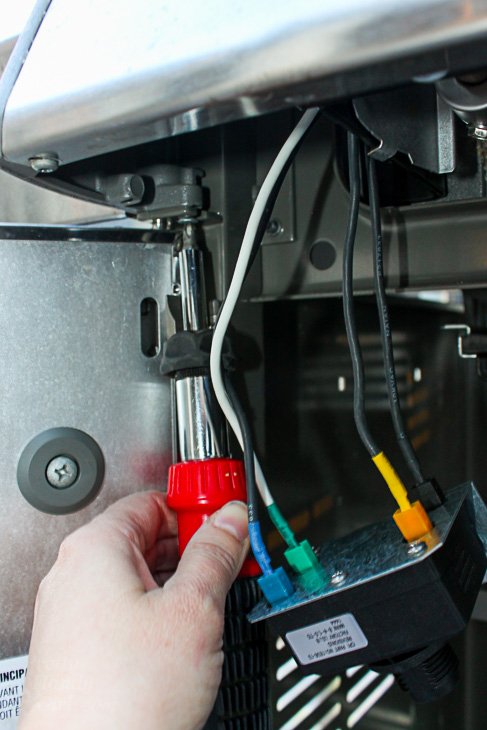
There are wires connected to the back of the igniter module. Make a note of where each wire goes so you will be able to connect the new module properly when the time comes. Let the module hang to the side while you remove the control panel.

How to Replace a Grill Igniter

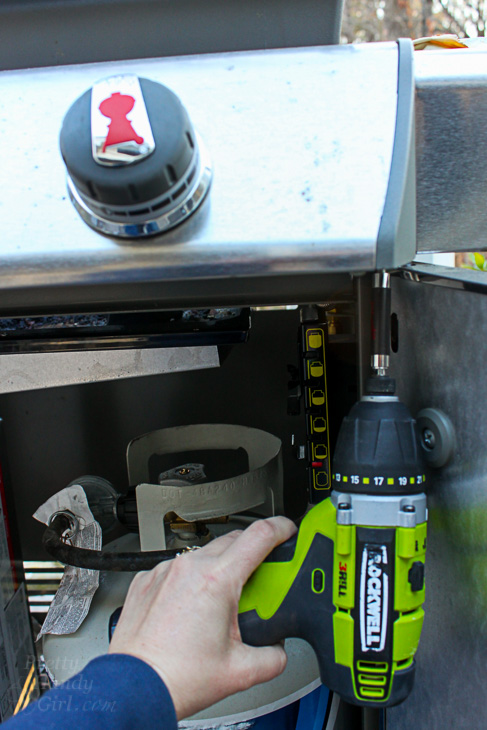
Remove the screws underneath the control panel that are holding it on. These are inside a bracket just above the door hinge.

How to Replace a Grill Igniter

Unplug the wires from the back of the igniter module.

How to Replace a Grill Igniter

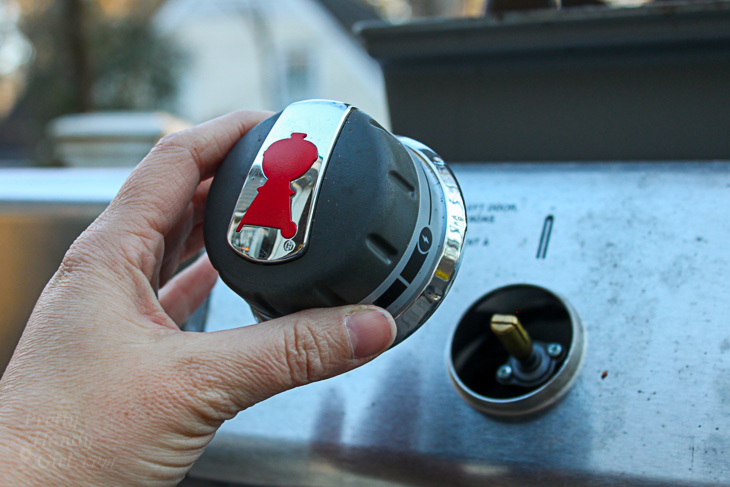
Remove the control knobs on the front of the control panel by firmly lifting them straight off.

How to Replace a Grill Igniter

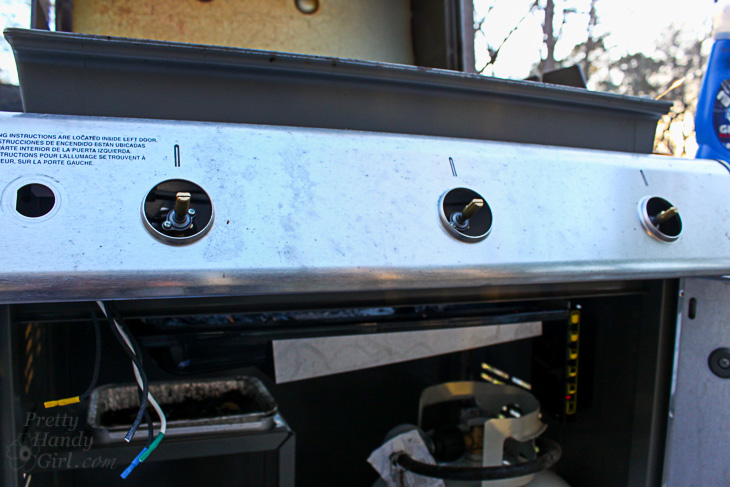
Remove all three control knobs from the control panel.

How to Replace a Grill Igniter

Lift the control panel off the grill and set aside.

How to Replace a Grill Igniter

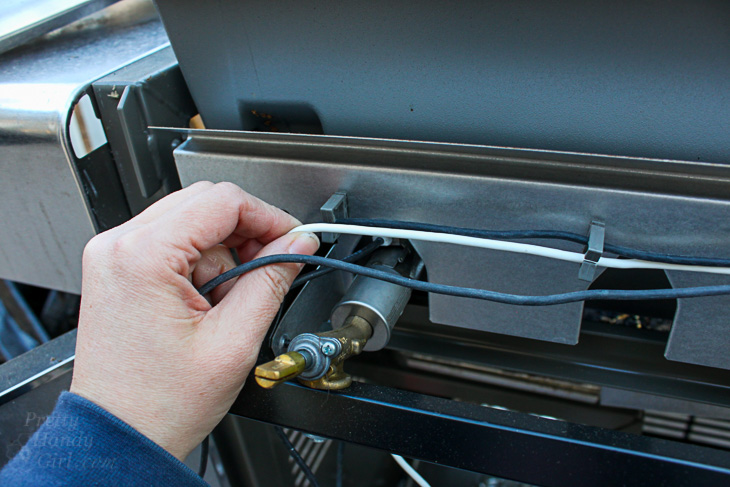
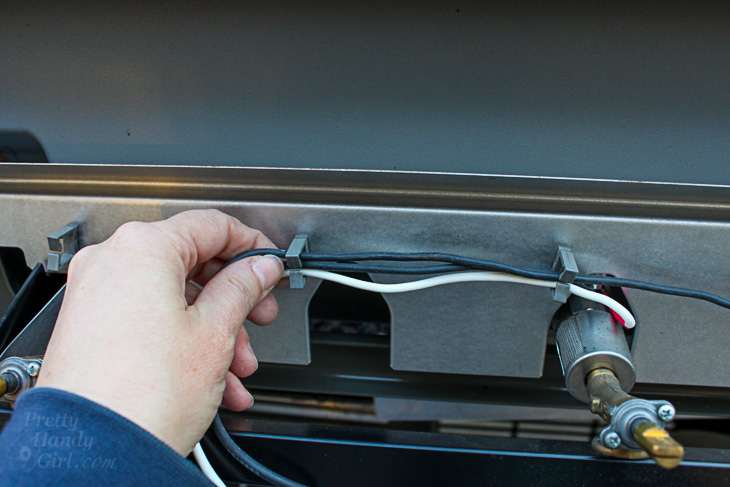
Remove the igniter wires from the wire clips.

How to Replace a Grill Igniter

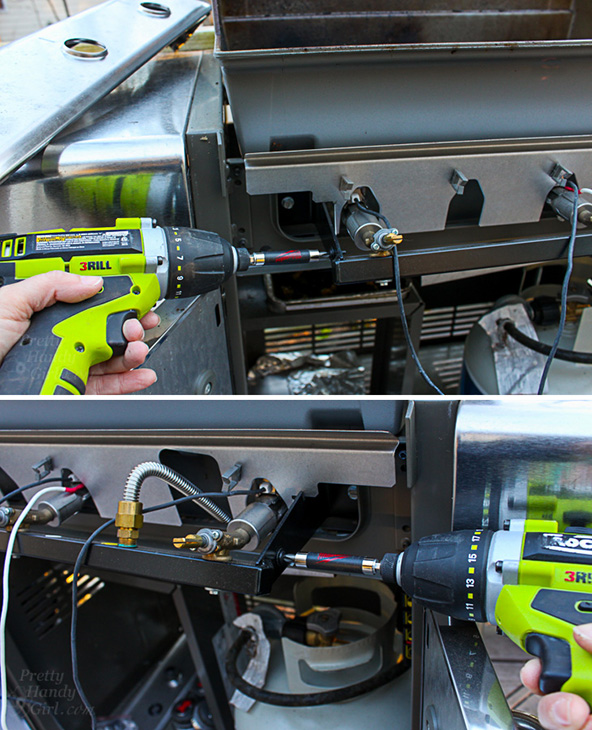
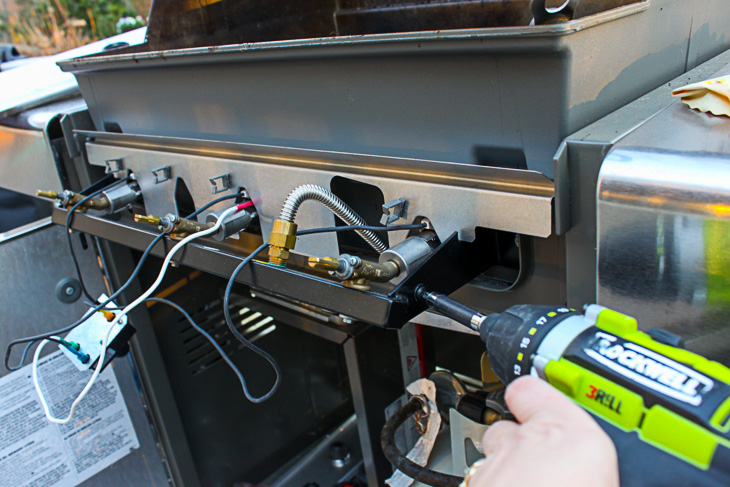
Remove the two screws on either side of the manifold that hold the heat shield in place.

How to Replace a Grill Igniter

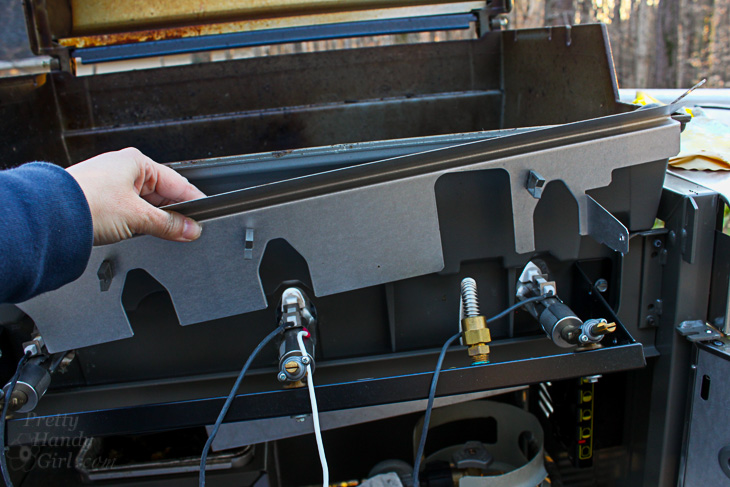
Lift the heat shield up and set it aside.

How to Replace a Grill Igniter

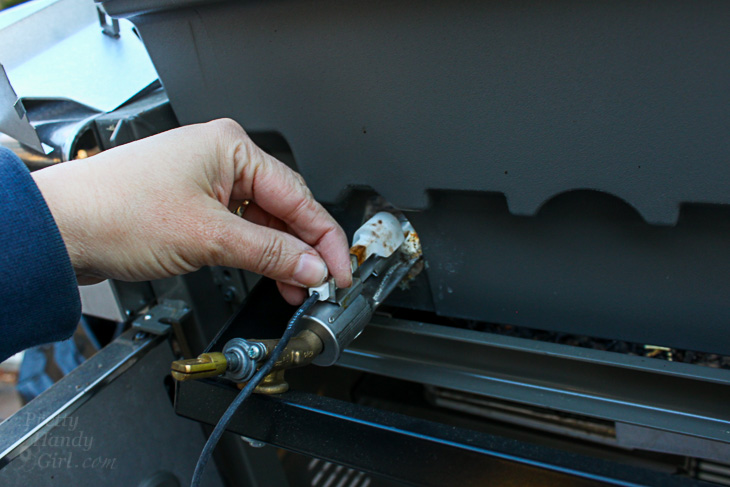
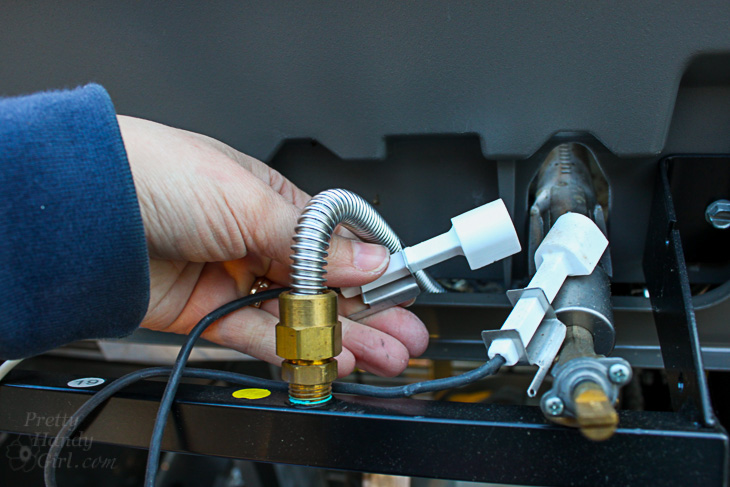
Remove the old ceramic igniter assemblies from each burner.

How to Replace a Grill Igniter

Replace with the new ceramic igniter assembly (pay attention to the length of the wires, installing the longest wire igniter on the right side.) Make sure you hear an audible click when inserting the assembly onto the burner tube.

How to Replace a Grill Igniter

Replace the heat shield and screws you removed.

How to Replace a Grill Igniter

Gently press the wires into the clips on the heat shield.

How to Replace a Grill Igniter

Plug the igniter wires into the igniter module.

How to Replace a Grill Igniter

Replace the control panel.

How to Replace a Grill Igniter

Replace the screws to secure the control panel.

How to Replace a Grill Igniter

Replace all three control knobs.

How to Replace a Grill Igniter

Lift the igniter module back in place.

How to Replace a Grill Igniter

Reattach the igniter button retention nut to hold the module in place.

How to Replace a Grill Igniter

Insert a brand new AA battery.

How to Replace a Grill Igniter

Replace the igniter button cover.

How to Replace a Grill Igniter

Replace the wind deflector and the screws to hold it in place.

How to replace grill ignitor image grill

Replace the heat deflectors and the grates.

How to Replace a Grill Igniter

Fire up that grill to make sure it lights. Then make some amazing grilled corn pesto pizza. . .

How to Replace a Grill Igniter

. . . some grilled fruit kabobs,

How to Replace a Grill Igniter

. . . or a variety of other grilling favorite recipes!

Is there something else on your grill that needs repairing? Check out Sear’s Parts Direct to find help with your most common grill repair issues.

What appliance have you been putting off fixing? You really need to check out SearsPartsDirect.com to find that part to make it work again! Also, be sure to follow Sears Parts Direct on Facebook, Twitter, or YouTube to see a variety of repair articles and videos.

Share with a friend, pin this image:
Fix Your Gas Grill Igniter - Pin me!How to Replace a Grill Igniter

Disclosure: This is a sponsored post for Sears Parts Direct. I was not told what to write. All opinions are my own. I was compensated for my time and efforts to create this tutorial. I am very particular about the brands I represent. Because I value your trust, you will always be notified when you are reading a sponsored post on PrettyHandyGirl.com.
How to Replace Refrigerator Water Filters in Less than 2 Minutes
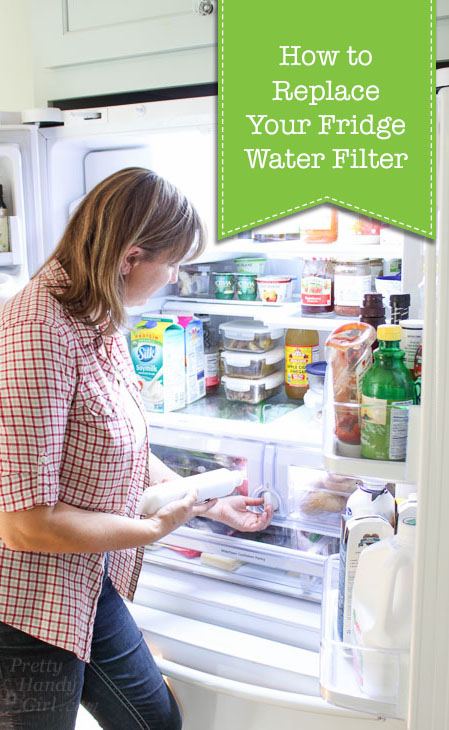
how to replace refrigerator water filtersHow to Replace Refrigerator Water Filters

You just got a new refrigerator (or maybe you’ve owned this one for several months.) Is it time to replace your refrigerator water filter? Great, all you need is a new water filter and two minutes and I’ll show you How to Replace Your Refrigerator Water Filter.

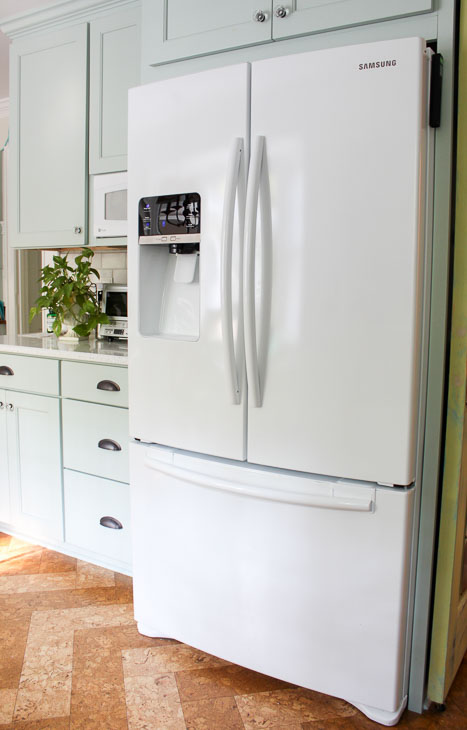
White refrigerator

Recently I’ve been ordering all my appliance parts from SearsPartsDirect.com to fix broken appliances. When Sears Parts Direct approached me about writing this sponsored post, I naturally replied “Yes, of course I’d love to share my source for appliance parts!” But, I was also surprised to learn that I could purchase air and water filters from Sears Parts Direct as well.

Ordering Replacement Water Filters for Refrigerators:

Ordering water filters for your fridge is super easy at SearsPartsDirect.com:

How to Replace Refrigerator Water Filters in Less than 2 Minutes
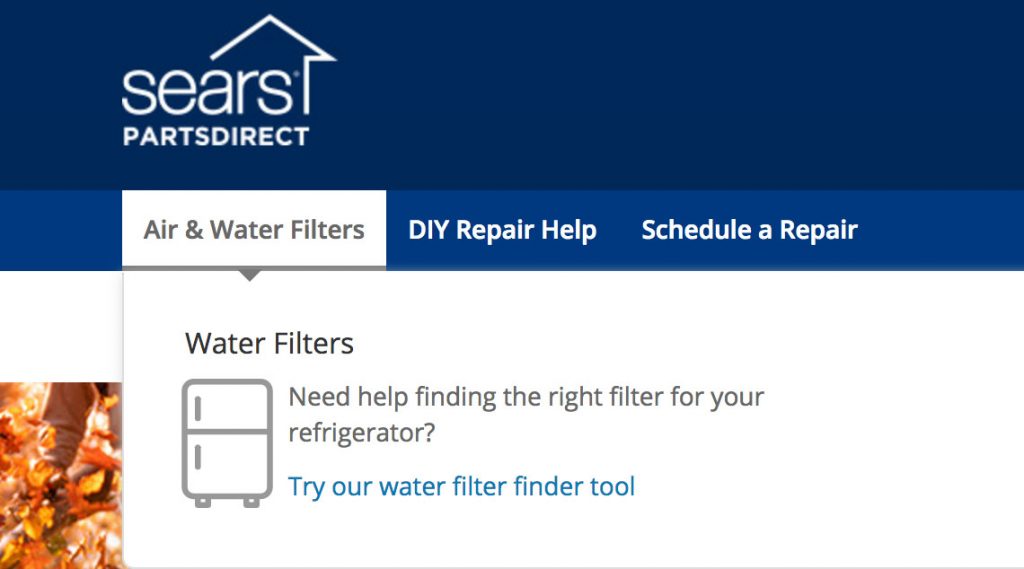
Navigate to the “Air & Water Filter” tab and enter either your refrigerator model number or the water filter part number.  If you get stuck, use the live chat to reach someone who can help you find the exact filter for your fridge.How to Replace Refrigerator Water Filters in Less than 2 Minutes
Did you know you can have filters shipped to you so you never run out? Plus you can earn $10 in Shop Your Way points just for joining the Automatic Reorder Program (look for the reorder buttons after you place the filter in your cart.)

Once your filter arrives, you can get started replacing your old refrigerator water filter.

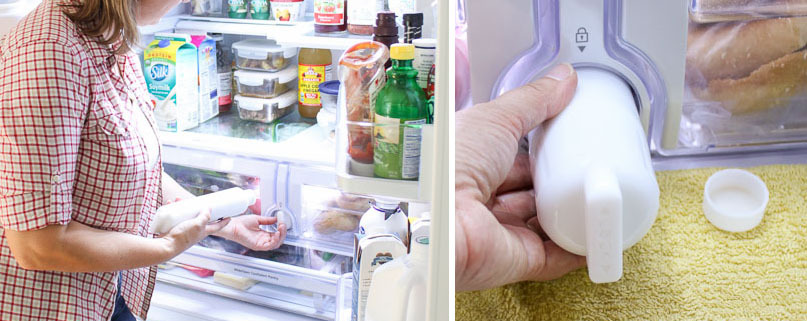
Woman replacing water filter in fridge

Replacing Refrigerator Water Filters:

Replacing your water filter regularly will help keep drinking water clean and ready to drink.

Materials:

  • Water Filter
  • Washcloth

Instructions:

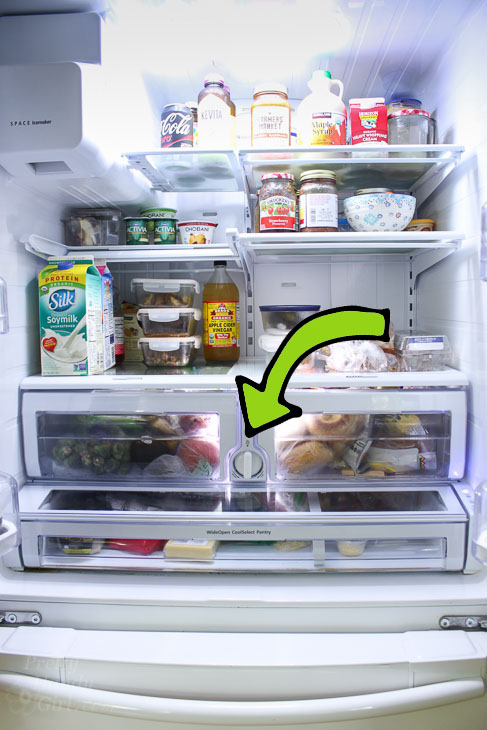
Locate your water filter cartridge. It could be between the drawers; in a corner inside your refrigerator, or in the baseboard on the exterior of your refrigerator.

Locate Water Filter

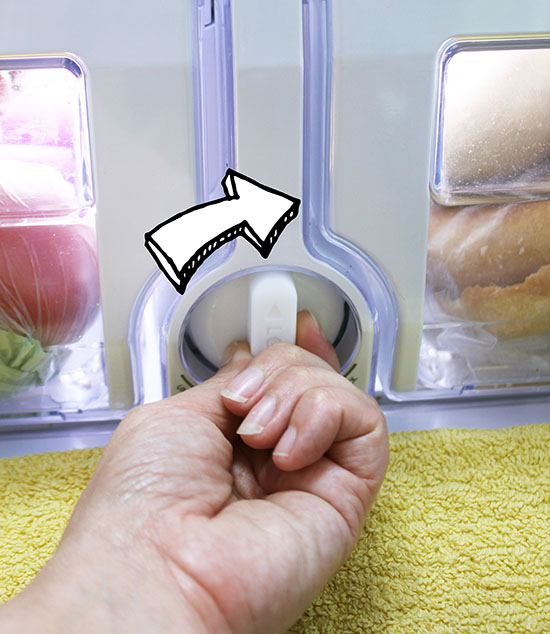
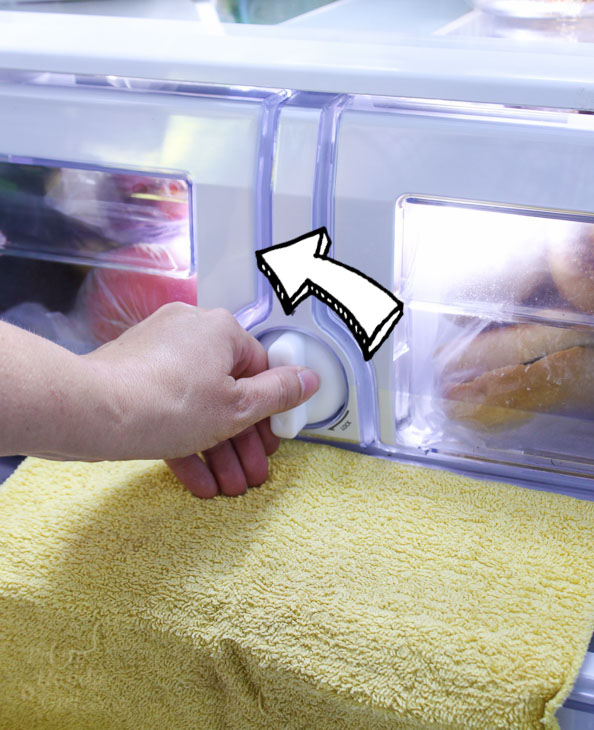
Place a washcloth or rag under the filter. This will catch any water drips making clean up easier. Turn the water filter counter clockwise. Some water filters will come out in a quarter turn, others may come out in a half turn.

turn water filter counter clockwise to remove

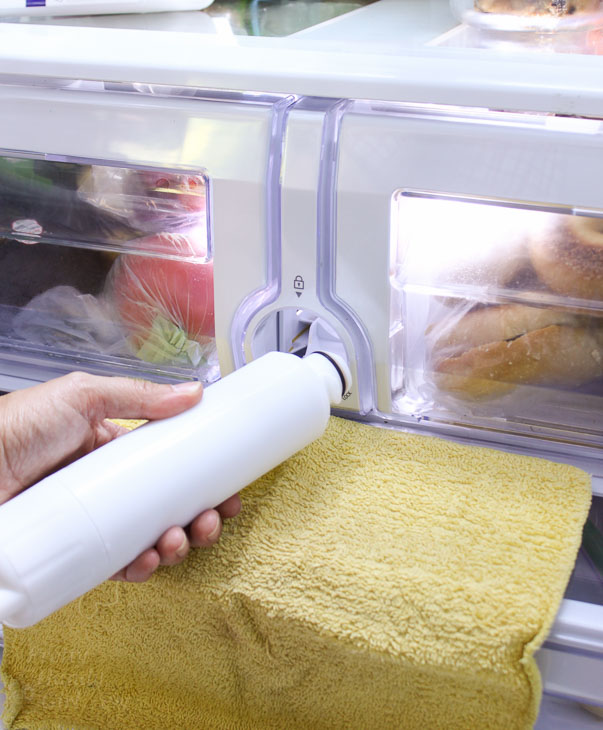
Pull the old water filter out.

Remove old water filter

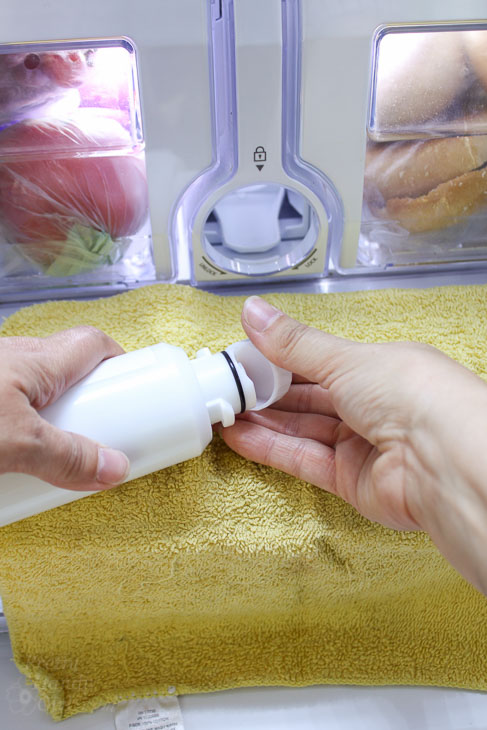
Remove the cap on your new water filter.

Remove new filter cap

Press it firmly back into your refrigerator . . .

Press new filter in firmly

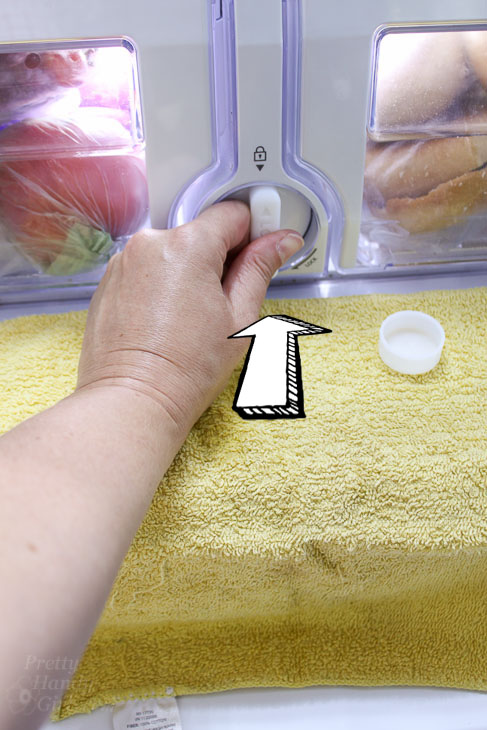
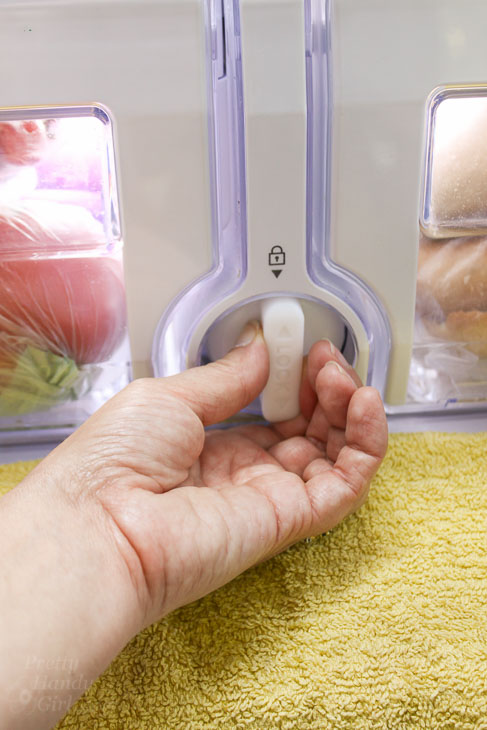
. . . and turn clockwise to install the new filter.

turn clockwise to replace water filter

Make sure to line up the arrows with the lock symbol (if you have one on your refrigerator.)

Align arrow with lock

Be sure to reset the water filter alert on your refrigerator and enjoy several more months of clean drinking water and ice.

alarm button for water filter

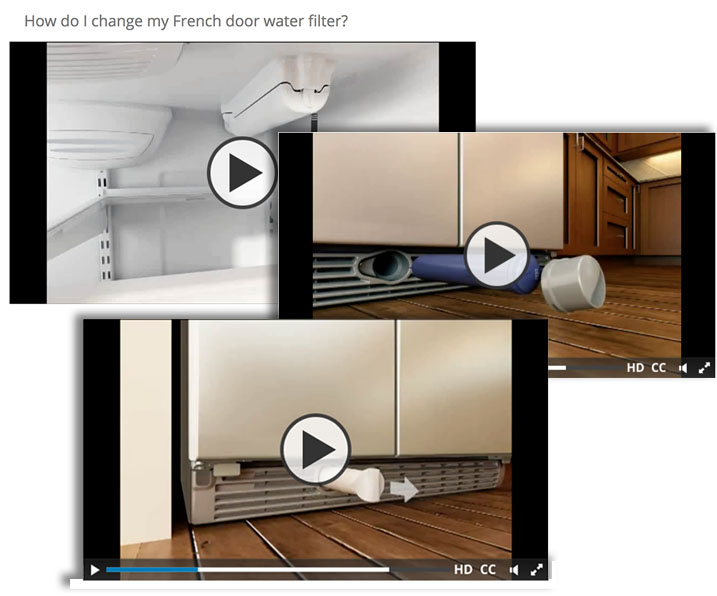
That was easy wasn’t it? If you want to see a video tutorial, Sears Parts Direct has a few videos showing how to replace three popular water filter types.How to Replace Refrigerator Water Filters in Less than 2 Minutes Videos
If you haven’t already, you need to check out Sears Parts Direct’s YouTube channel. With over 500 videos, this is the most comprehensive appliance repair resource I’ve ever seen! You can also get more tutorials in the Repair Center. Have a question? You can also talk to Sears Parts Direct on Facebook and Twitter.

Disclosure: This is a sponsored post for Sears Parts Direct. I was not told what to write. All opinions are my own. I was compensated for my time and efforts to create this tutorial. I am very particular about the brands I represent. Because I value your trust, you will always be notified when you are reading a sponsored post on PrettyHandyGirl.com. 

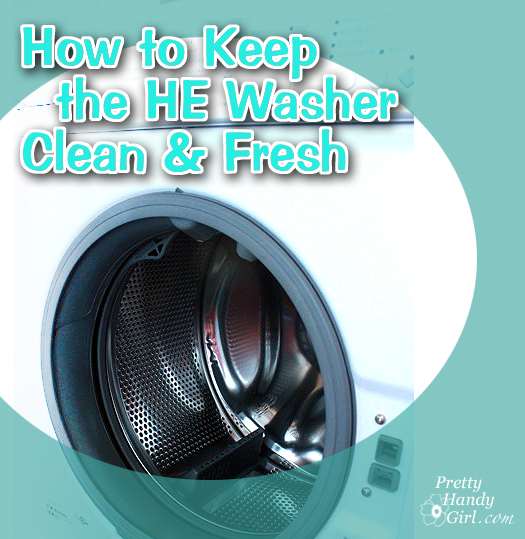
Want more appliance maintenance tips? You’re going to want to learn How to Keep Your HE Clothes Washer from getting smelly.

keep HE Clothes Washer CLean

Or Learn How to Refinish Your Scratched Appliances!

How to Refinish Rusted & Scratched Appliances | Pretty Handy Girl