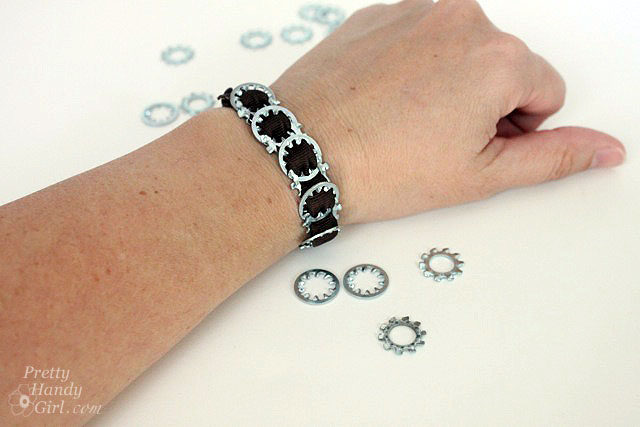
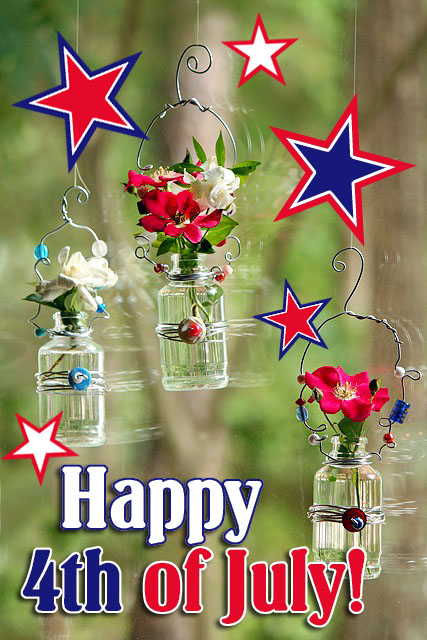
Happy Independence Day America!

A few weeks ago I attended a birthday party for my niece at The Scrap Exchange in Durham. My kids had to drag me kicking and screaming out of there because I was in creative nirvana. There were all kinds of little gems of creativity. Bottlecaps, rolls of paper, extra tiles, scraps of fabric, stencils, etc. It was like being a kid in a candy store! One of the many things that caught my eye were these little glass vases. I brought a few of them to the register and the lady asked if I really only wanted three of them. Then she explained that they cost $1 each or $10 for the whole case!

So, I bought the whole case (it was a no brainer.)

But, what the heck would I do with 48 teeny glass bottles? I ended up using some to make these beauties. Read more

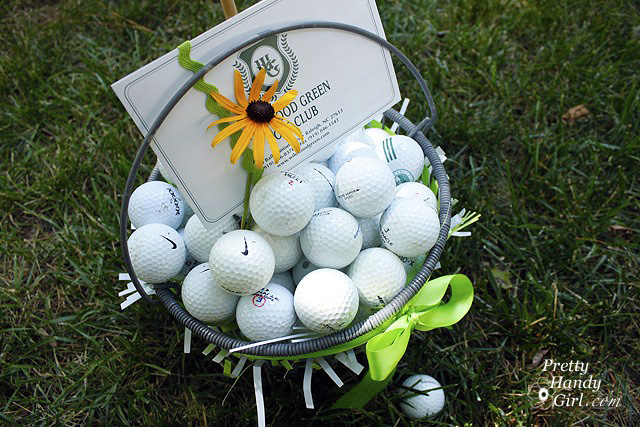
June is upon us, and that means that Father’s Day is just around the corner! Do you want to be the “birdie” of your hubby’s eye? Or maybe you want to give Dad a present that is above “par”! Well, I have a gift basket idea that is sure to be a “hole-in-one”! A golf gift basket! What could be better!

Instead of just presenting him with a gift certificate, why not have some fun and make him a golf themed basket as well. Read more

With a tweet and a whistle and a song in her heart, our next DIY Talent Parade participant is gliding….wait, no make that flying down the street! Whoa, well, I’m sure you’ve guessed by now that this talented gal is part avian. That’s right, I have the beautiful and exotic (because she’s from the Netherlands,) Marianne also known to her readers as Songbird.

Marianne, is truly a sweet and graceful creature. And she loves to surround herself with beauty wherever she nests. I secretly dream of flying across the ocean to be a guest in her home one day.

Her home is purely dreamy!

At Songbird Blog, you can learn all types of romantic decorating and decor tips. In addition to her top 7 tips for spraypainting.

Well, she’s swooping down with some beautiful silver strands flying behind her, so focus your attention skyward. Read more

How was your weekend everyone? I had a truly fabulous weekend surrounded by some seriously creative and talented bloggers. I was in Salt Lake City, Utah attending the SNAP 2012 conference. Sadly, there was one blogger who is equally as creative and talented that couldn’t make it this year. (But, we’re going to have to tie her up and make her come next year!) This fabulously talented lady is none other than Colleen also known to the blog world as Mural Maker.

head shot

Colleen and I have never met, but we’ve bonded online because we have similar fine art backgrounds. Colleen is equally willing to share her talents and help empower others to paint just like she does (with step by step photographic tutorials.)

Ooo, ooo, ooo, I think I see her marching up the parade path right now. She has a paint brushes in hand and WOW, look at her toss that spinning artist’s palette in the air like a pizza pie. Now that takes talent! The crowd is excited. The colorful paints are beginning to fly. So, settle back and enjoy the show. Read more

Matchbox Car Racing Ramp

Do you have a little free time over the Christmas break? How about taking some time to make a wooden racing track with your kiddos!

If you have boys, I’m sure you have Hot Wheels cars in your home. They go hand-in-hand. My boys play with their race cars for hours!

They have several of the plastic tracks. And even a curly-Q racing ramp. But, honestly they seem to play with my scrap pieces of wood more than the plastic tracks. Chances are, if you or your spouse build things, you will have all the scraps of wood on hand to make this racing ramp.

My 7 year old and I worked together on this project. (He was my design consultant and he also helped with some of the assembly.) But, imagine the surprise on a child’s face if you made this ramp as a holiday or birthday gift!

Materials:


  • 2 – 1 x 4 x 13″ boards (tower sides)
  • 1- 1 x 4 x 9″ board (tower roof)
  • 2 – 1 x 8 x 33″ boards (ramp sides)
  • 1 – 1 x 6 x 33″ board (ramp)
  • 1 – 3/4″ dowel rod (cut to 12″)
  • 1 – 1/8″ dowel rods
  • 1 – thin rectangular strip for a divider 33″ long
  • 1 5/8″ screws
  • 1″ finish nails
  • 2″  finish nails
  • Gorilla Glue
  • Sandpaper
  • Primer
  • Spray paint
  • ScotchBlue Painter’s Tape
  • X-acto knife
  • Clamps
  • Cordless drill
  • Handsaw or miter saw
  • 3/4″ spade bit
  • 1/8″ drill bit

Start by cutting all your boards to length. Grab the ramp board (1 x 6 x 33″) and cut one end of the ramp at a 30Ëš angle.

Glue the narrow strip onto the center of your ramp using a small amount of Gorilla Glue.

Clamp the strip and add a few 1″ finish nails to secure the strip.

Set up your boards as shown. Tilt the ramp up at the back, the angled cut will rest on the floor (not shown.)

Drive a few screws through the side walls and into the ramp with your drill.

Line up the tower sides approximately 2″ from the back edge of the ramp walls. Then secure them in place with a few more screws.

Drill a hole into each tower side large enough for the 3/4″ dowel rod to fit through.

Slide the dowel rod through and center it on the ramp.

Mark the location of the center of the left and right tracks onto the dowel rod. Measure the distance between the dowel rod and the ramp. Use this measurement to cut 2 pieces of 1/8″ dowel rod 1/2″ longer than that measurement.

Remove the 3/4″ dowel rod. Drill holes 1/8″ wide halfway through the big dowel rod at the locations you marked for the centers of the tracks.) Wrap a piece of painter’s tape around the drill to indicate a depth 2/3 of the way through the 3/4″ dowel rod. Then don’t let the bit go further than the tape into the rod.

Mark the location where the dowel meets the outside of the tower wall.

Drill a hole all the way through the large dowel rod. Insert the 3/4″ dowel rod through the holes in the tower walls. Glue the 1/8″ cut dowels into the halfway holes. Then cut and glue two more 1/8″ dowels to go through the 3/4″ dowel on the ouside of the tower walls. These will anchor the large dowel rod and keep it from slipping out of alignment.

Nail finish nails through the tower roof and into the walls of the tower.


That completes the building portion of this tutorial. Hopefully your ramp resembles this one:


Now it is time to add some pizzazz! Ka-chow!

My design consultant demanded fiery red flames and black on his ramp. (And what he wants, he gets!)

I lightly sanded the wood race track. Added a coat of primer and some red and yellow spray paint.

Then I cut out a flame design using ScotchBlue painter’s tape (4 pieces overlapping) and an x-acto knife on a cutting board.

I gently lifted the tape and adhered it to the side walls.

After a coat of metallic hammered metal spray paint, I removed the tape to reveal:

What do you think? Do I have a shot at a job on Orange County Choppers??!! The “logo” on the top was made by pressing letter stickers over the primer, then I taped off around the words and sprayed some red and yellow spray paint. The lines are made with black graphic adhesive lines.

On your marks…get set…

and GO!


Nice two wheel stunt!

I hope you will make one of these for your little stunt driver.