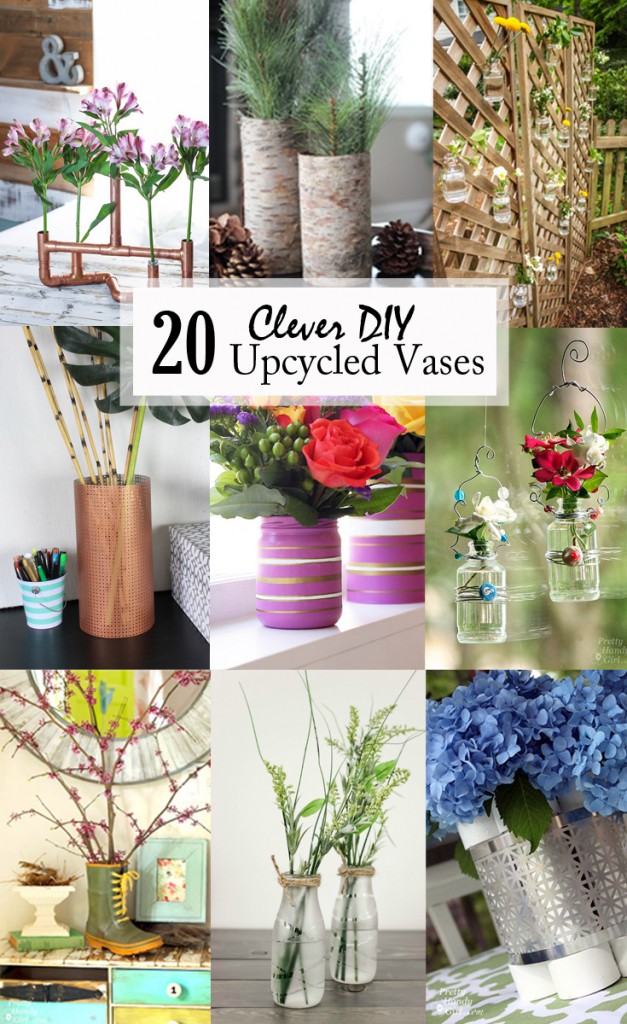
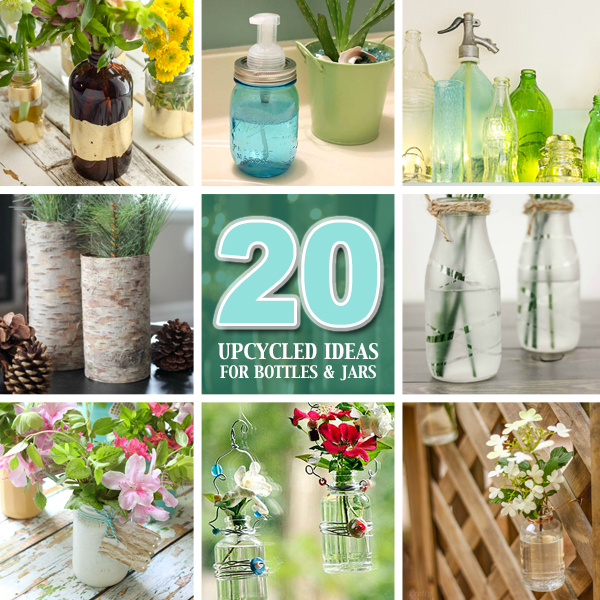
20 clever diy upcycled vases social media image

20 Clever DIY Upcycled Vases

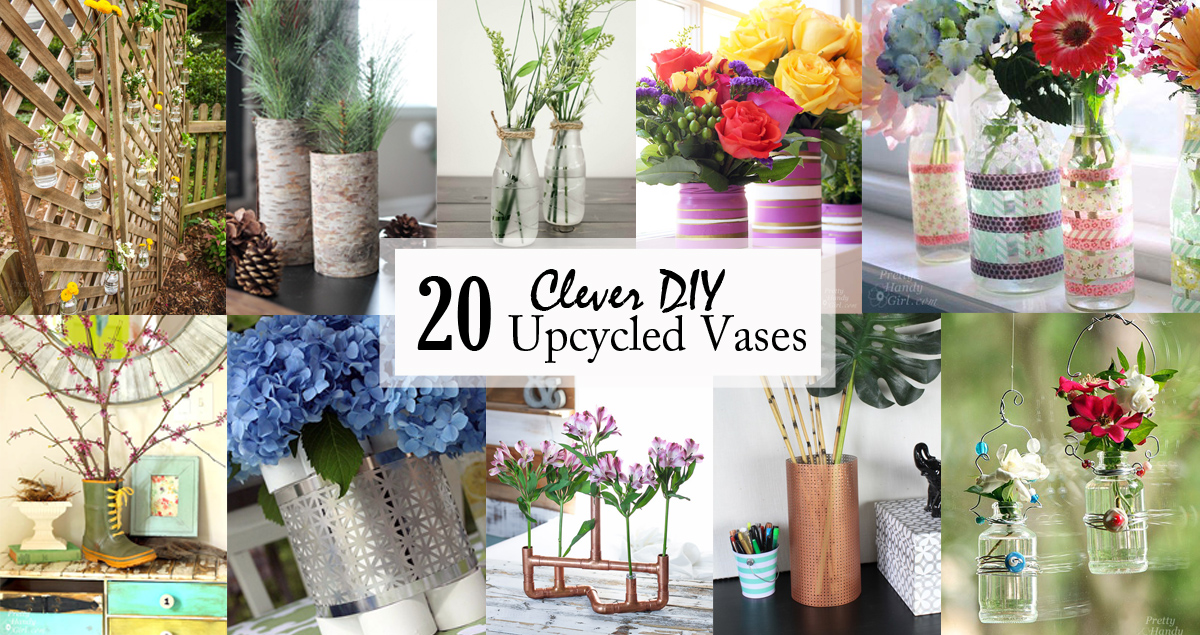
Vases are beautiful and one of those home decor items that can be used in many different ways. They can sit empty on a shelf adding to the style of the room, hold beautiful flower arrangements, or be given as loving gifts.  These clever upcycled vases show only a few creative ways you can make a vase from items you already own, can be found in your recycling bin, or at local yard sales. I hope one of these many ideas inspire you to think outside the bottle ;-).

DIY aluminum sheet metal vase

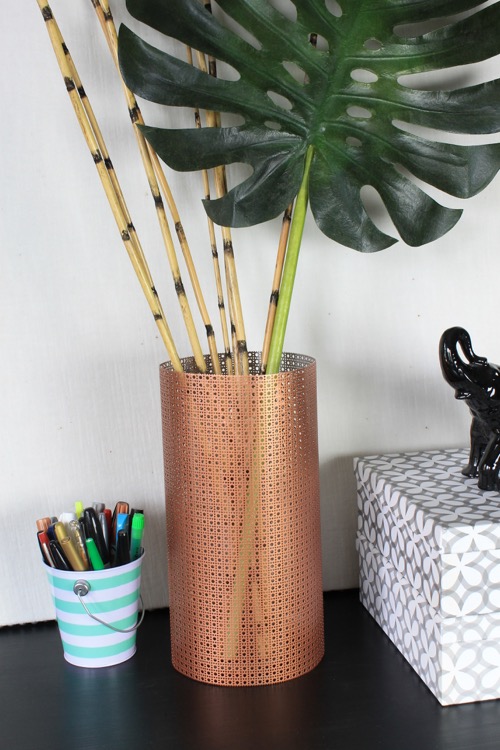
Can you believe this DIY Sheet Metal Vase is made from a decorative aluminum sheet found at your local hardware or craft store?


test tube wall mounted vase

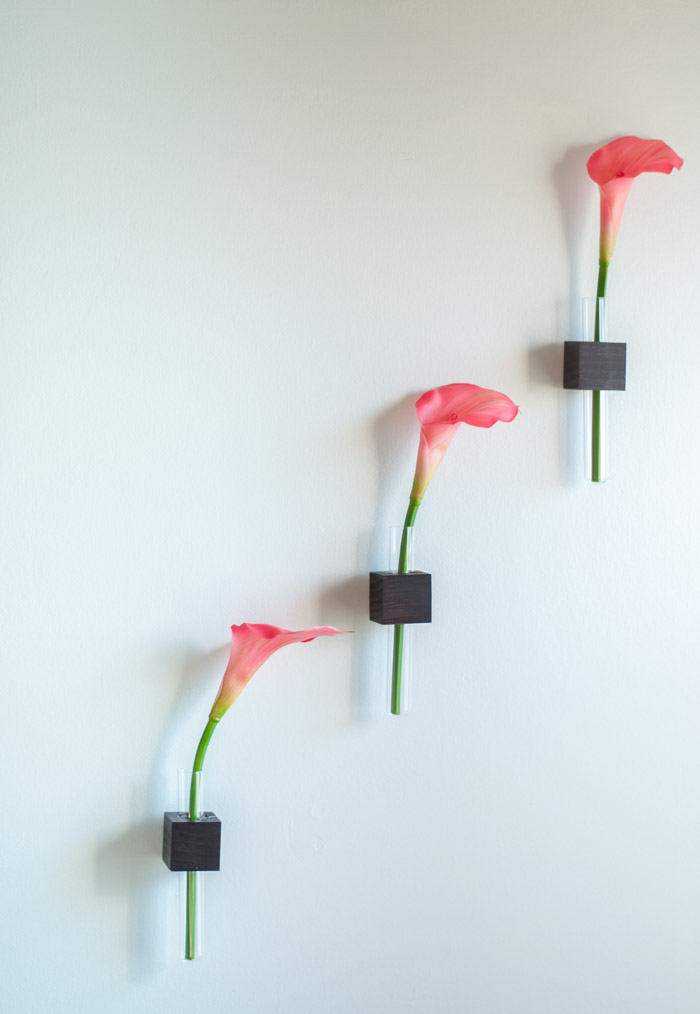
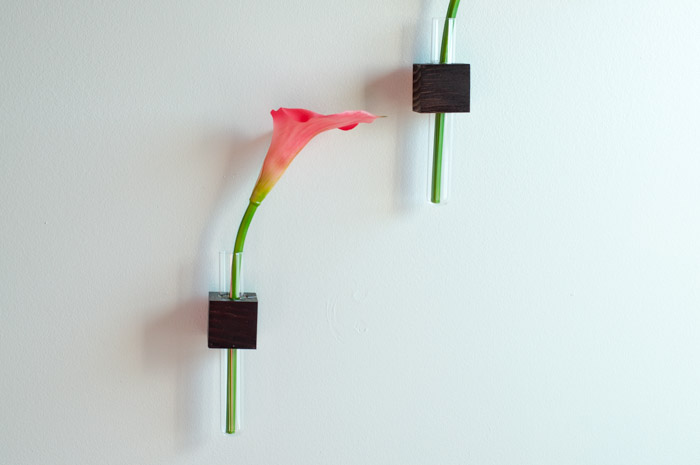
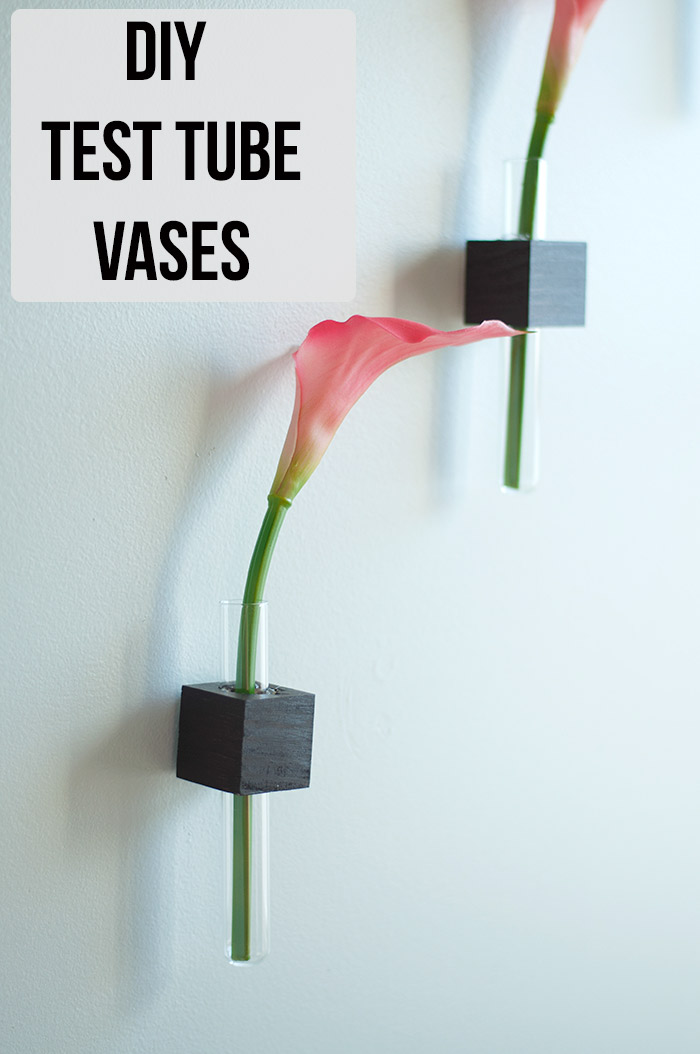
These DIY Wall-Mounted Test Tube vases look really cute on the wall and can be used in any room.


Make these sweet personalized gifts by wrapping Pounded Flower Artwork around a jar. It would make a great gift!
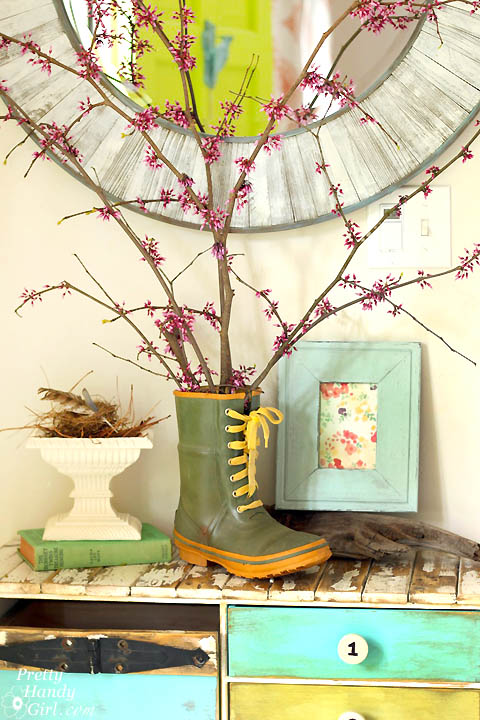
 

Simply slip a Mason Jar into a Boot to create this fun and quirky vase.
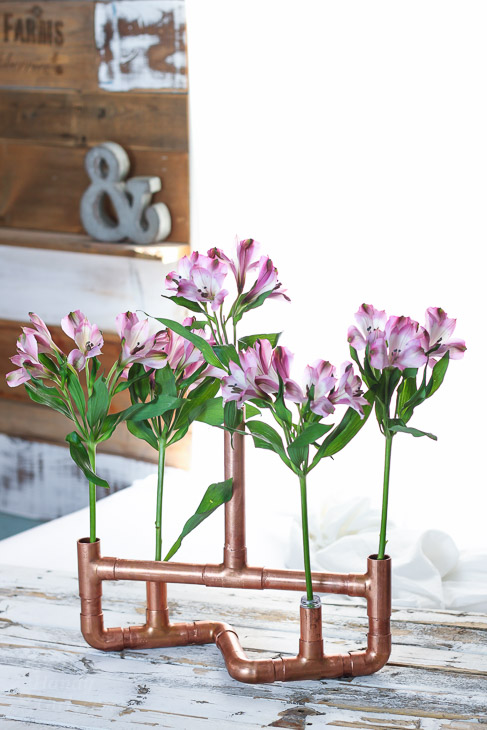
 

Practice your soldering skills to create this unique and pretty Copper Pipe Flower holder.
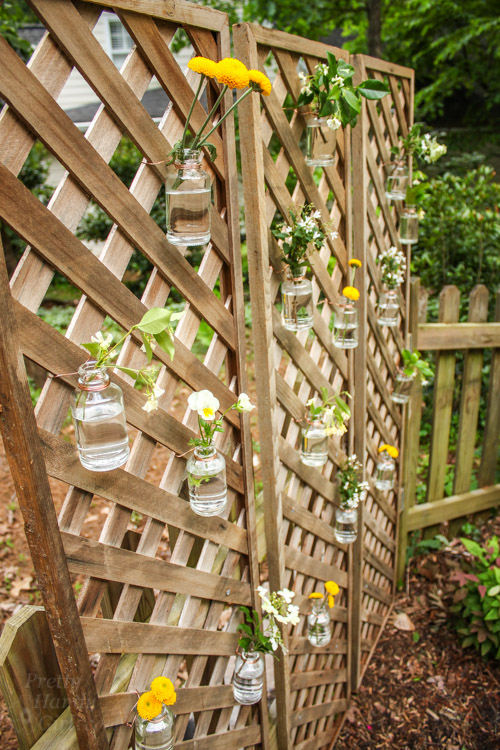
 

Decorate lattice and add some privacy to your yard with these gorgeous Glass Jar and Copper Wire vases.
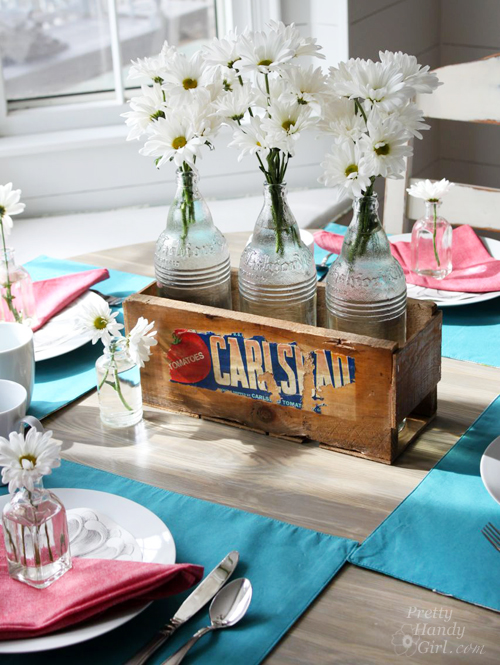
 

No power tools? No problem! Create this gorgeous Produce Crate Centerpiece to hold your flowers using only hand tools.
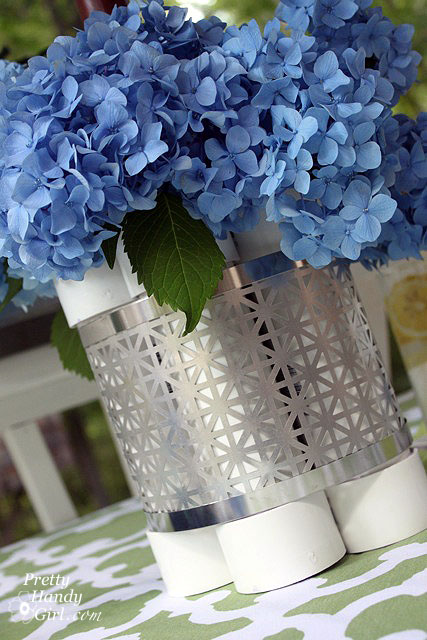
 

Create this Outdoor Patio Living Flower Centerpiece vase using PVC pipe and decorative tin.
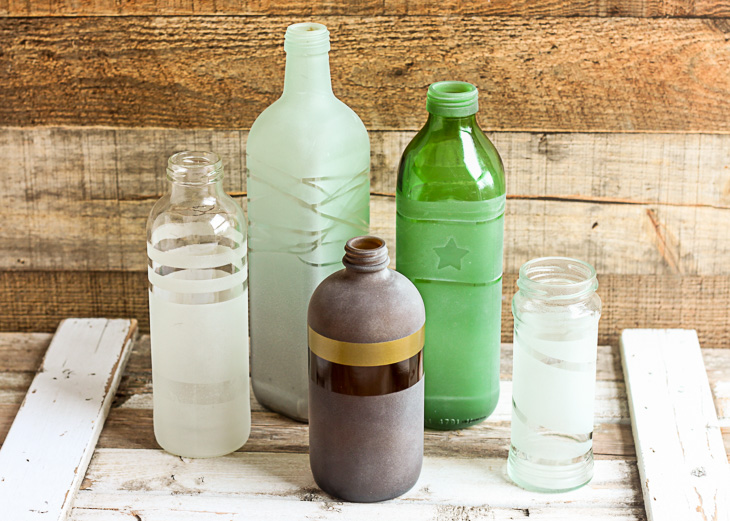
 

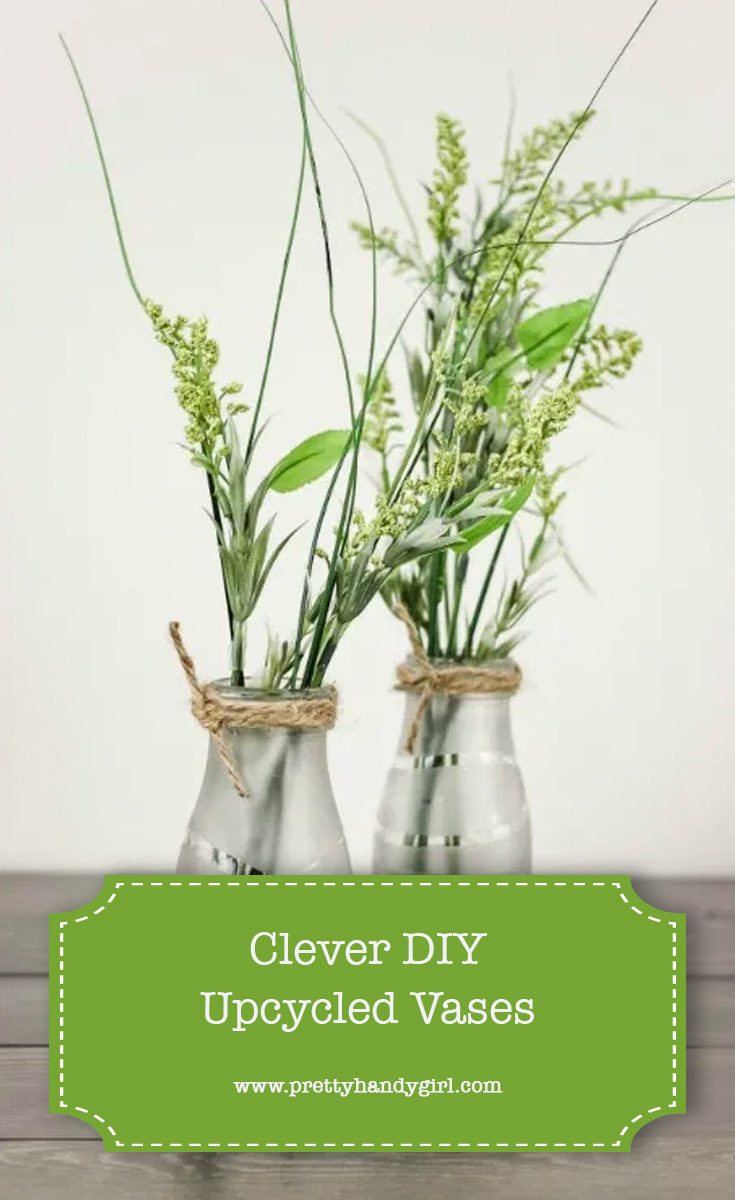
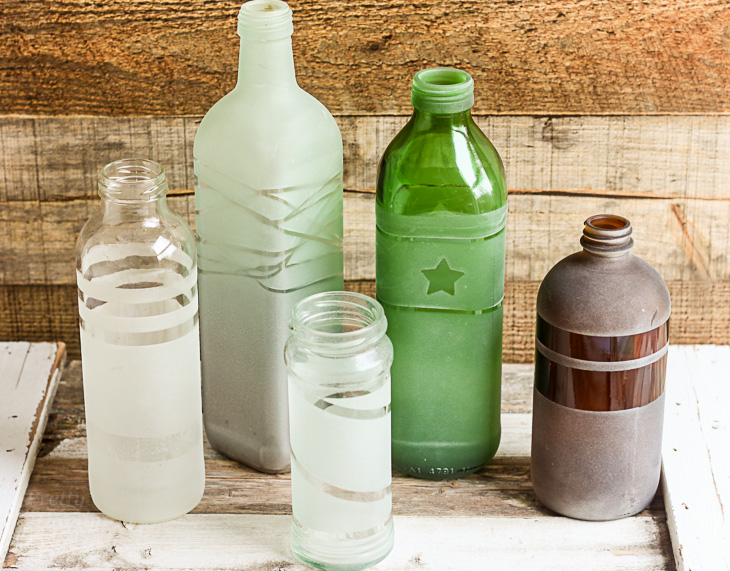
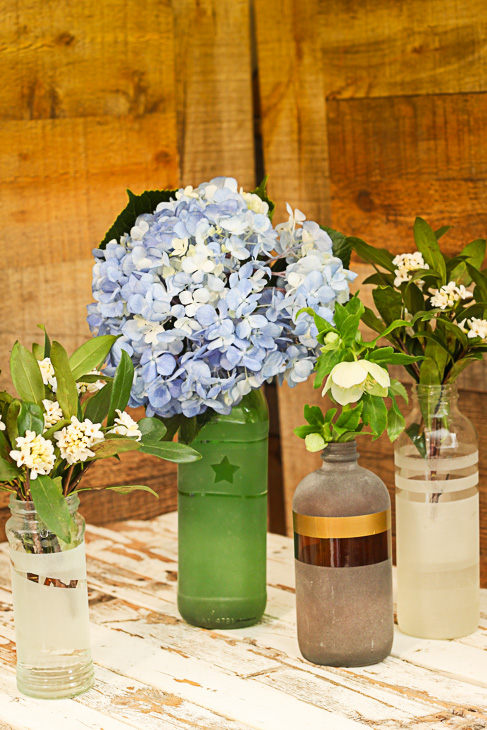
Check your recycle bin for bottles and make these Frosted Glass Vases for your springtime flowers or to give as a pretty gift.
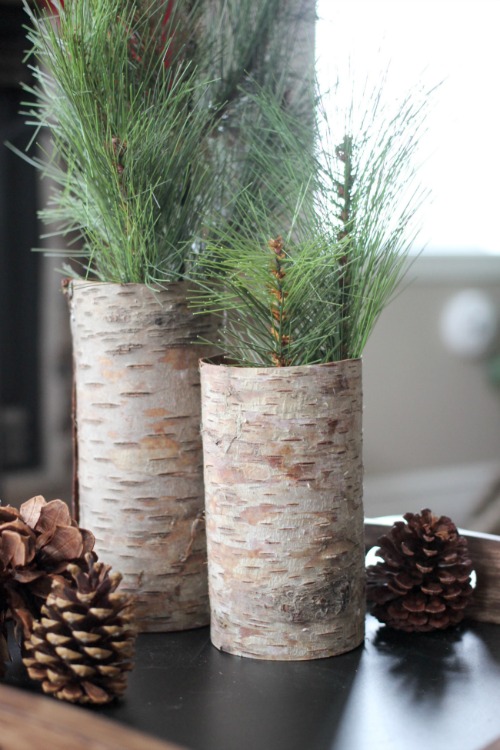
 

Use some beautiful pieces of tree bark to make these beautiful Rustic Birch Bark Vases that can be used year-round.
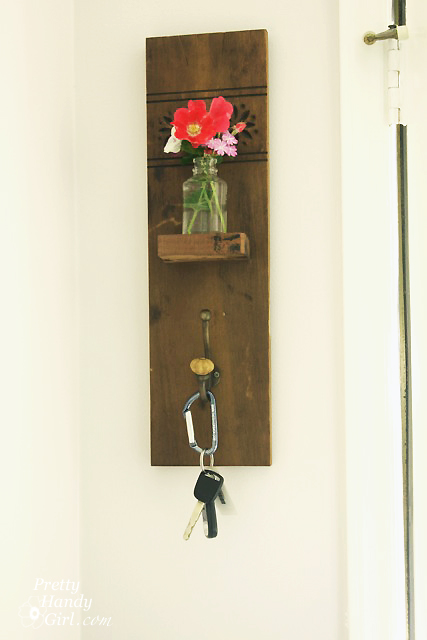
 

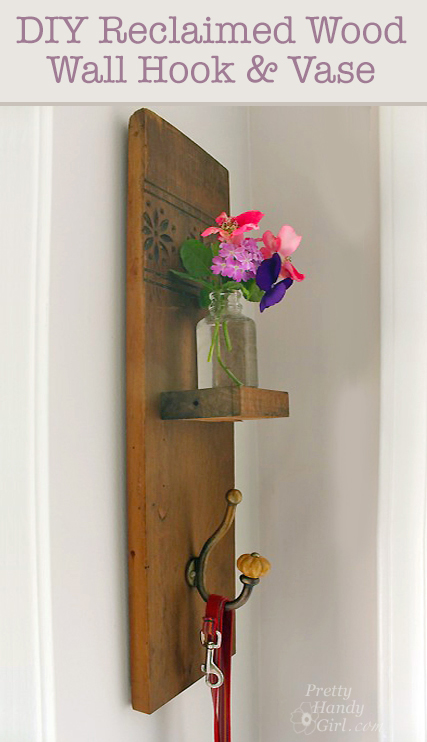
Make this functional and pretty Reclaimed Wood Hook and Vase to decorate your entryway.
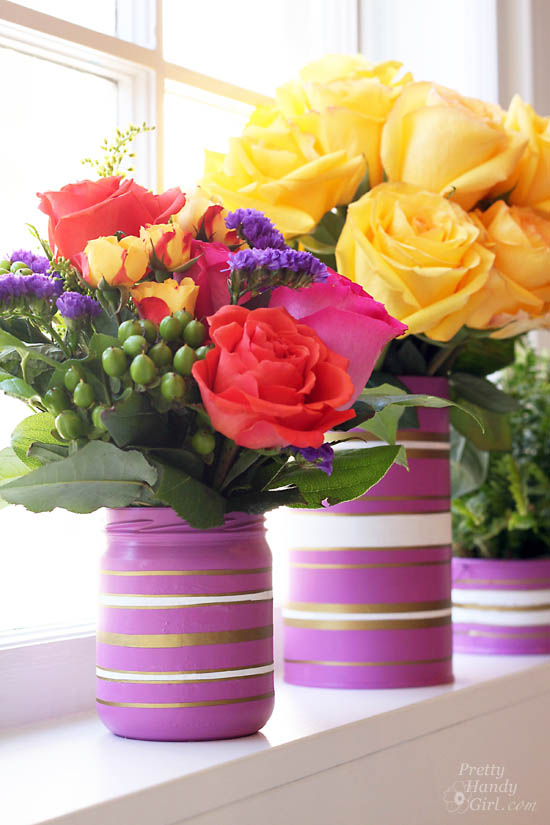
 

These Simple Bright Colored Vases can be made using recyclables, some paint and tape, and look absolutely gorgeous holding a variety of flowers.
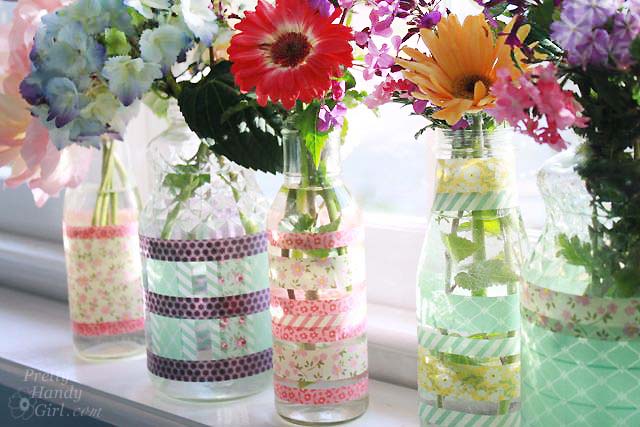
 

Beautiful Simple Springtime Flower Striped Vases are created just using some decorative washi tape. They make great gifts!
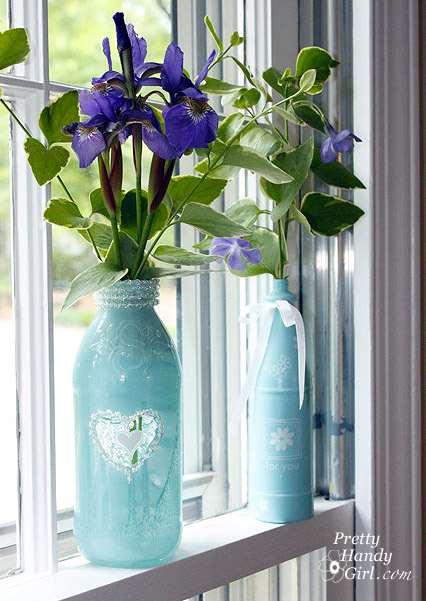
 

You’ll just need a couple supplies to create beautiful Spray Painted Glass Jars and Bottles.
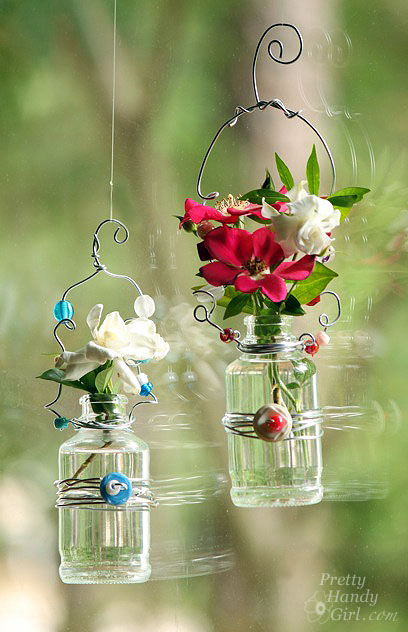
 

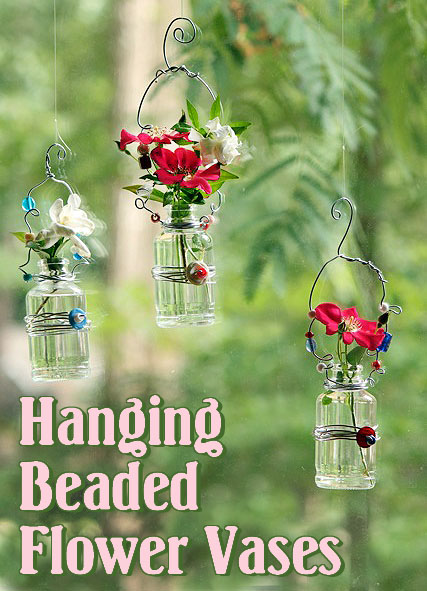
Use some small glass bottles to make these pretty Hanging Beaded Glass Flower Vases to hang near a window.
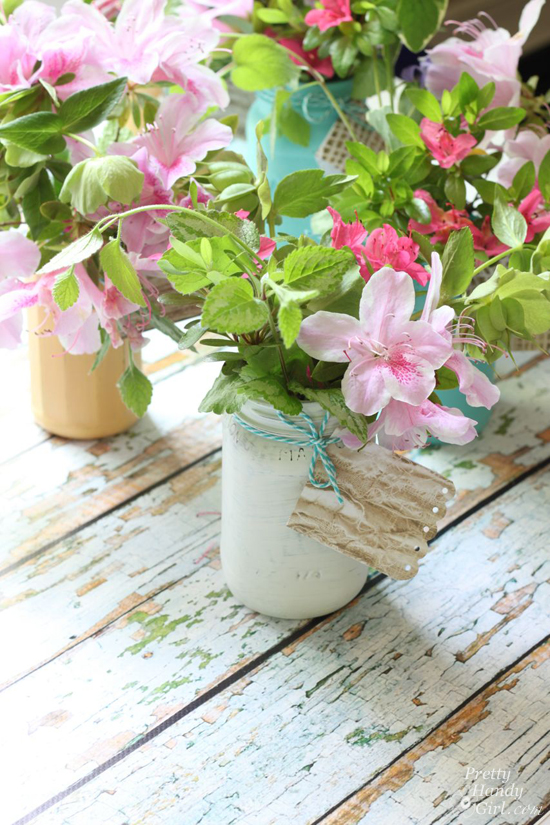
 

Paint some jars, fill them with flowers and show your teachers some love any day of the year with these Painted Vases.
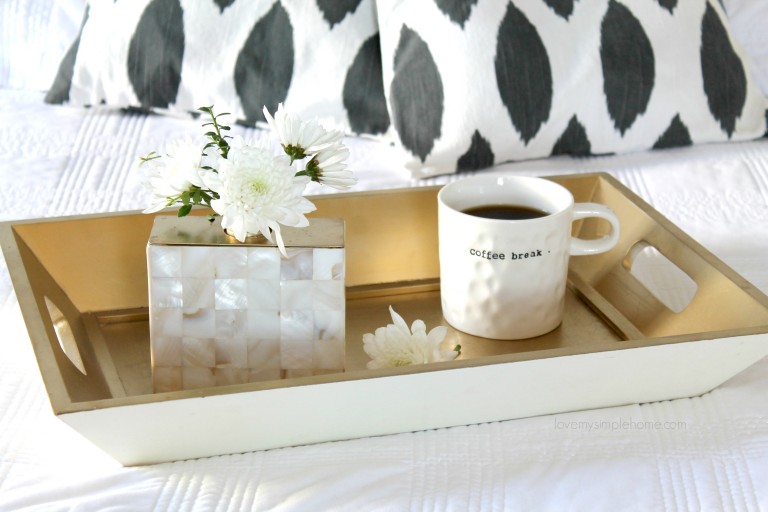
 

Would you believe you can turn a soap dispenser into a vase like this unique Mother-of-Pearl flower vase.
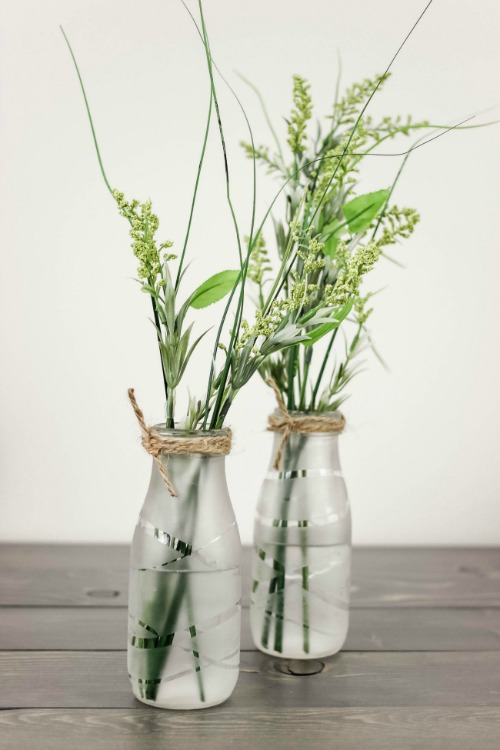
 

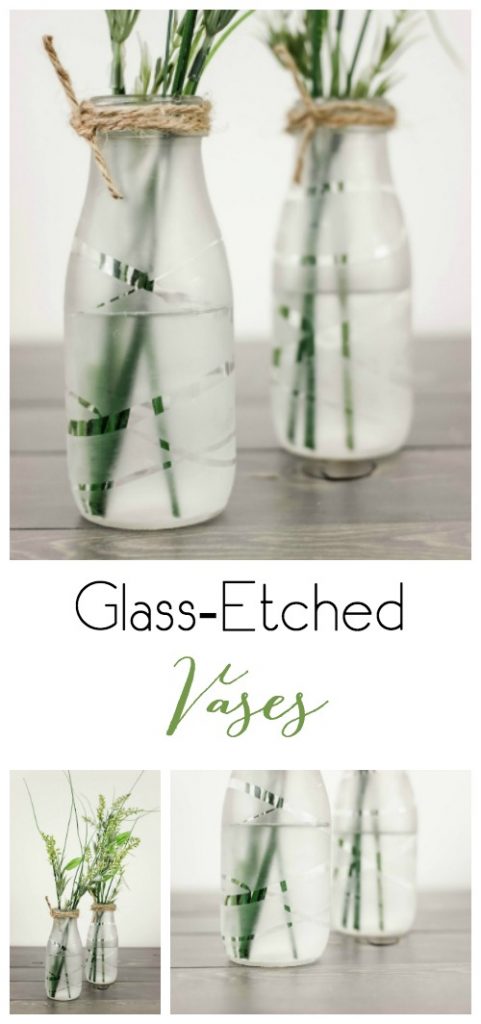
Use old milk bottles to create these modern DIY Glass-Etched Vases.
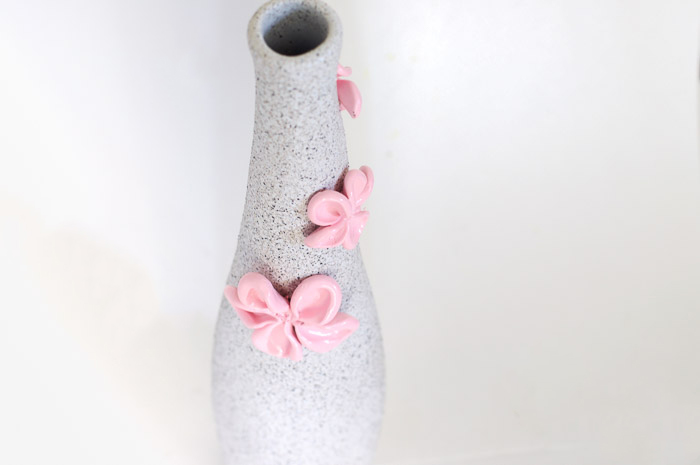
 

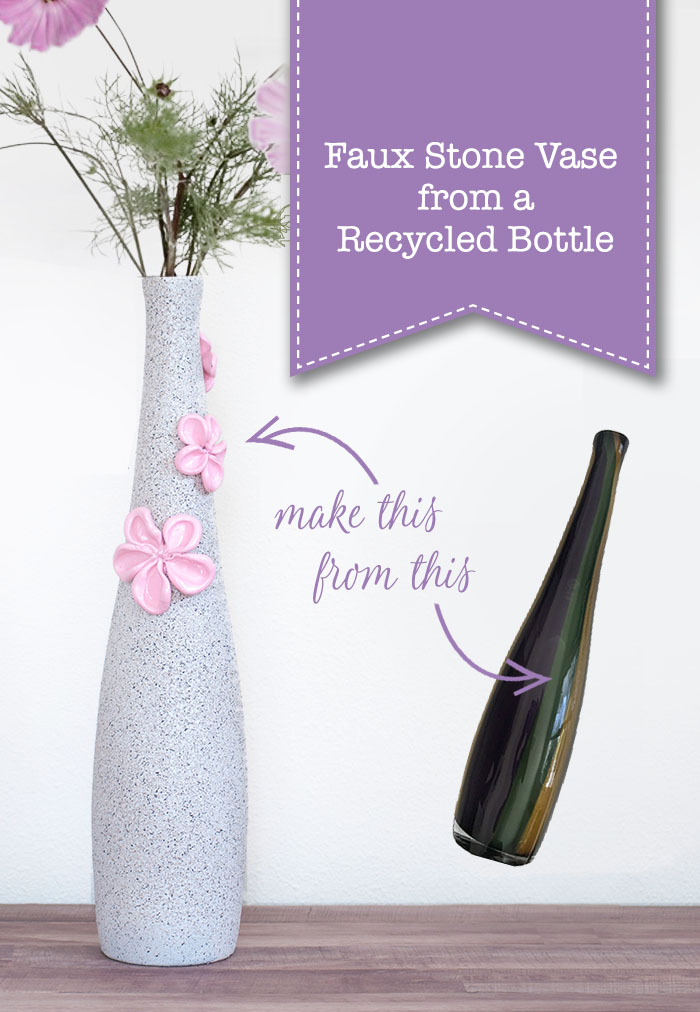
Turn an old glass bottle into this fun textured Faux Stone Vase. 
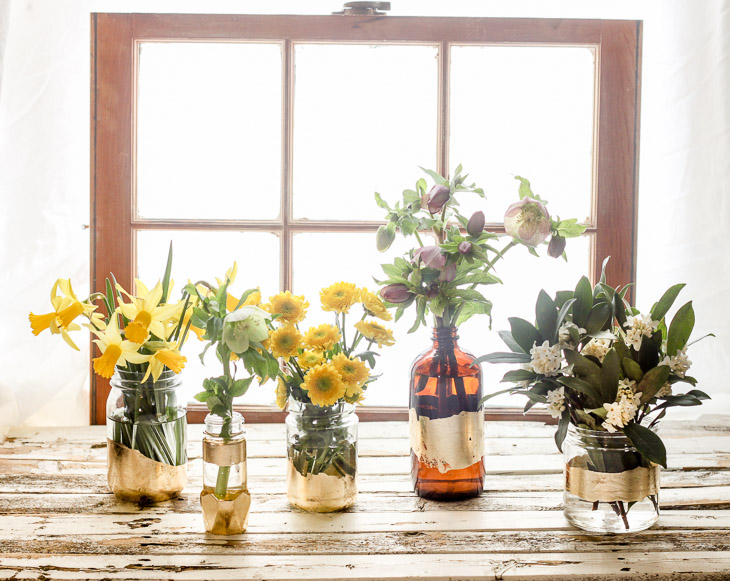
 

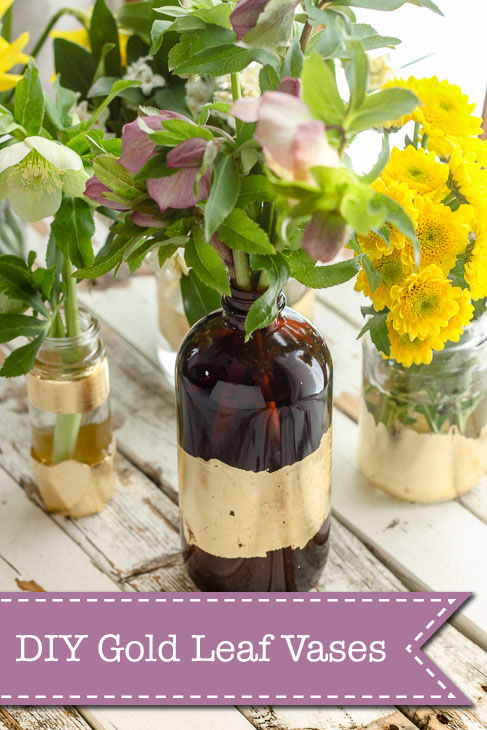
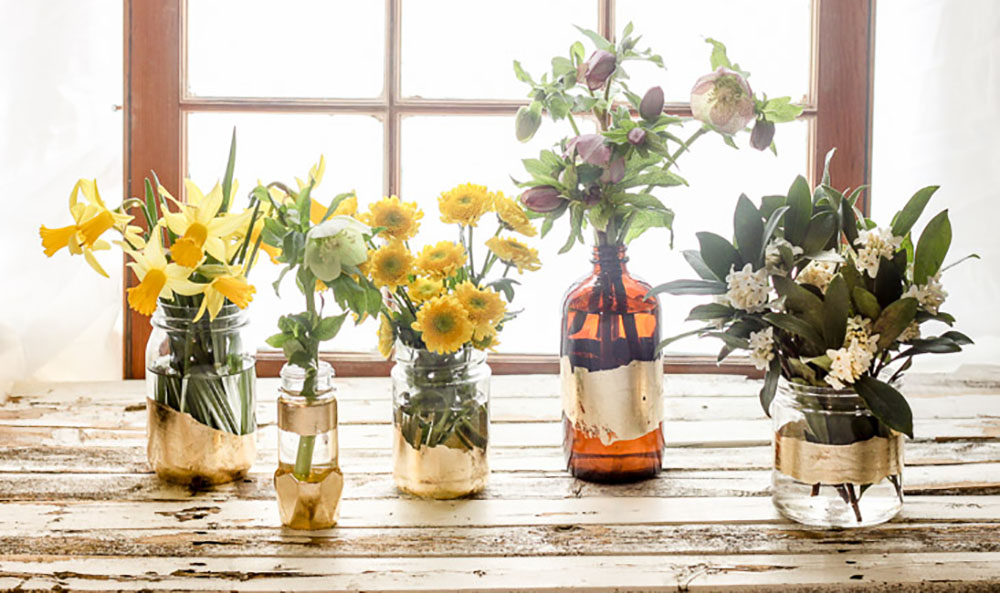
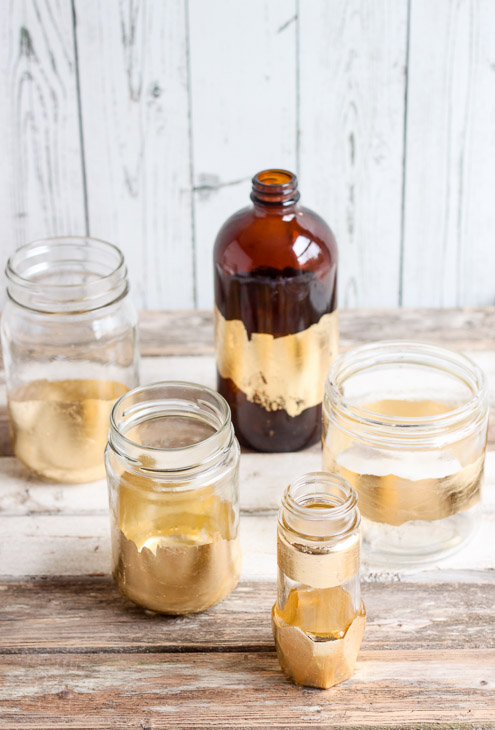
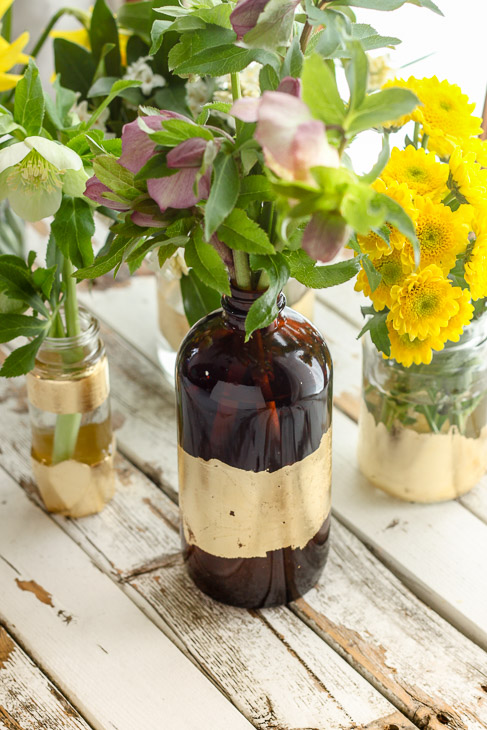
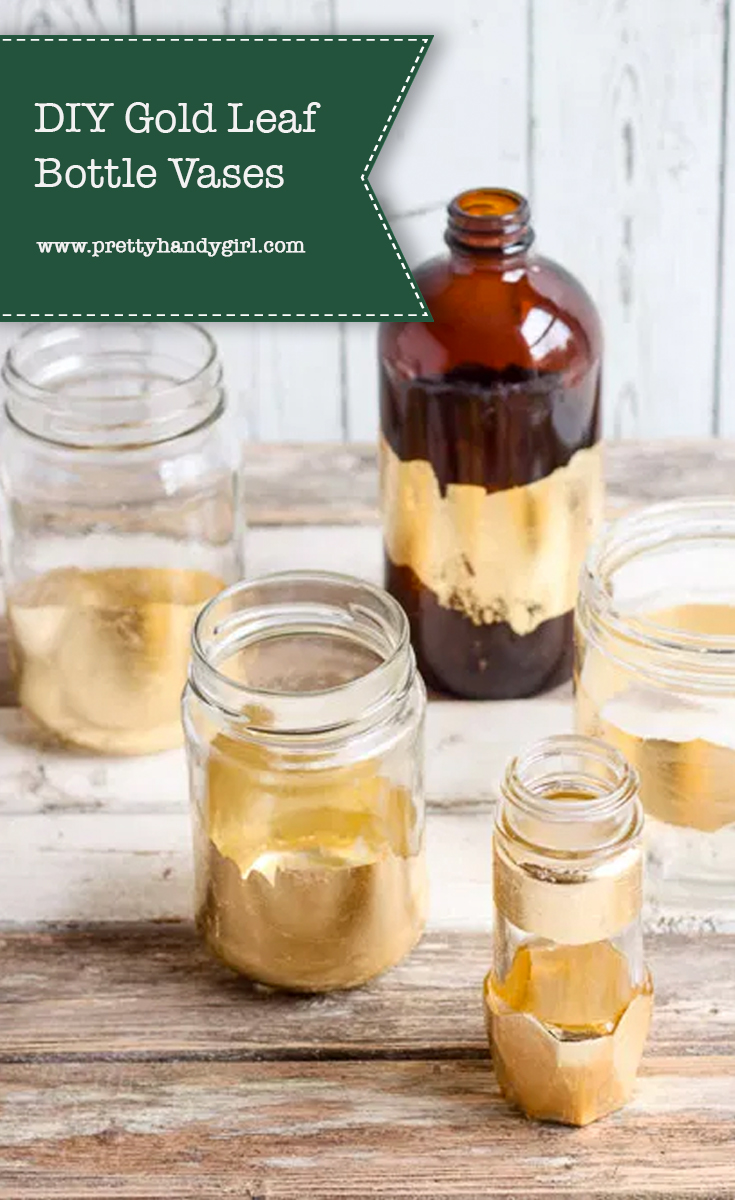
Still have some recycled bottles left? Make these super simple (but super elegant) Gold Leaf Bottle Vases to display or give as gifts.

What do you think? I hope these 20 DIY Upcycled Vases collection inspired you to use something old to make something new and beautiful. All of these make great home decor items or gifts to others to show how much you appreciate them. Enjoy, and get out there and create something!

If you liked this collection, please pin this image to Pinterest:

20 clever diy upcycled vases pinterest image

Happy upcycling.

~Read more of Sheri’s posts~


Other posts you may like:

12 Inexpensive Ways to Decorate Your Bathroomways to decorate your bathroom

Decorating Ideas for an Outdoor Garden Partygarden outdoor party ideas
 

Pin for later!

Clever DIY Upcycled Vases | Pretty Handy Girl

easy DIY test tube vases on the wall

DIY test tube vases on the wallDIY Wall Mounted Test Tube Vases
Happy Valentine’s Day! Hi all, I’m back again from Anika’s DIY Life. I am sharing this super easy and quick tutorial to make DIY wall mounted test tube vases. The best part is they look really cute on the wall and can be displayed in any room!

Personally, I hung mine in the guest bathroom that is currently being updating. These simple vases bring in much needed color and also ties in with the dark vanity.

Materials:

(I’ve included affiliate links for your convenience. I earn a small percentage from a purchase using these links. There is no additional cost to you. You can read more about affiliate links here.)

Instructions:

Step 1 – Measure and mark 1 ½” on a 2″ x 2″ board. (2″ lumber is actually 1 ½”. To cut out a cube, you need to cut at 1 ½”.) Find the center (at 3/4″) and mark the location for the hole.

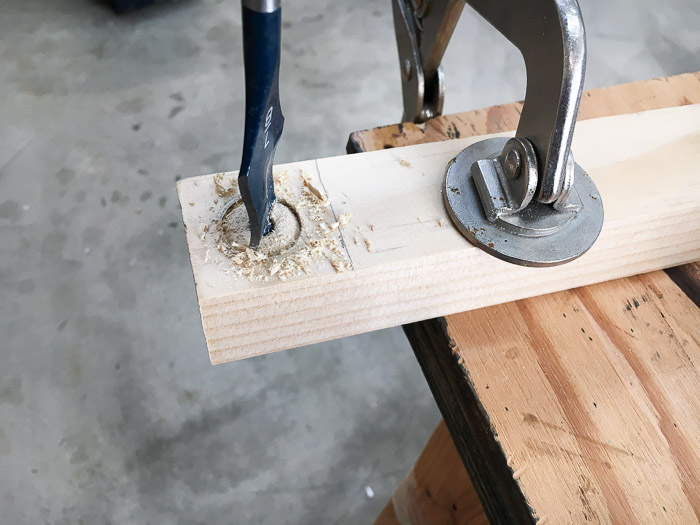
Step 2 – Clamp the 2″ x 2″ to the workbench and use a 7/8″ drill bit to bore a hole through the board.

Tip: You may need to make a small pilot hole first with a small drill bit to keep the spade bit from wandering.

Drilling hole for test tube

Step 3 – Once the hole is drilled, cut your board at the marked location using a miter saw or hand saw.

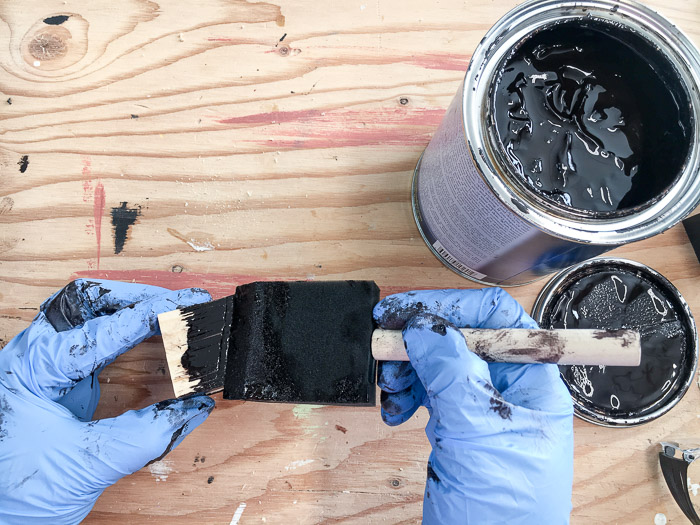
Step 4 – Paint or stain the cubes in the color of your choice. (I used a Java colored gel stain to match my bathroom vanity.) If you would like to use fresh flowers and water in these test tubes, be sure to add a durable coat of polyurethane on the cubes to protect from splashes.

staining the cubes for the test tube vase

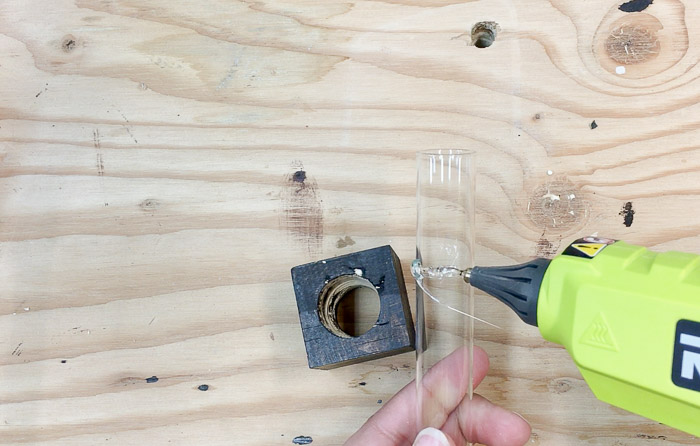
Step 5 – Add a line of hot glue about 2″ down from the top rim of the test tube. Place the test tube inside the cube to glue it in place.

attaching the test tube to the vase

Step 6 – Trim mounting strips to size if they are longer than the cubes. Mount the vases on the wall using 3M Command Strips (removes without damaging walls when you are ready for a change) and add your favorite real or artificial flowers. These vases are very light so the strips work great! Even if you are using fresh flowers, the command strips make it easy to take them off the wall and dump out the water.

easy DIY test tube vases on the wall

I decided to add 3 of these on the bathroom wall. They are so easy and quick to make. You should make as many as you like to fill an entire wall or gift to friends!

DIY test tube vases on the wall

Don’t they look pretty? Come follow along with the bathroom remodel on my blog as I share all the little and big projects that went into it!

If you love easy scrap wood projects, I have a whole bunch of them on my blog. Be sure to check them out!

~See more of Anika’s tutorials~

Also, you might love these simple and creative flower vase projects Brittany created:

These hanging beaded vases are my favorite!

DIY Reclaimed Wall Hook & Vase | Pretty Handy Girl

DIY Reclaimed Wood Wall Vase

Make a Faux Stone Vase from a Recycled Bottle | Pretty Handy Girl

Make a Faux Stone Vase from a Recycled Bottle | Pretty Handy Girl

Hey, guys!! It’s Anika from Anika’s DIY Life back again with a quick and easy project. I hoard glass bottles and vases.  My garage has an entire shelf full of bottles and I love giving them fun updates like this 5 minute marbled vase and the upcycled spice bottle “wind-chime”.  Recently I turned my attention to this bottle vase and decide to make a Faux Stone Vase from a Recycled Bottle.

A quick and easy updated to an old glass vase using stone spray paint and clay flowers

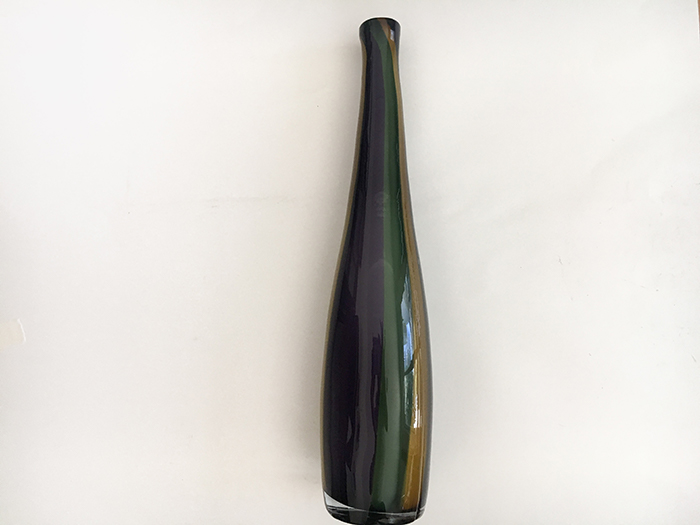
I bought the bottle vase at a yard sale about 8 years ago for $0.50. At the time, it “kind of” fit in with my decor, but over time it started to look out of place and needed an update. Nothing a little bit of spray paint and clay flowers can’t fix. Want to see how to create your own Faux Stone Vase from a Recycled Bottle with 3-D Clay Flowers?

Materials:

(I’ve included affiliate links for your convenience. I earn a small percentage from a purchase using these links. There is no additional cost to you. You can read more about affiliate links here.)

Instructions:

Step 1 – Use rubbing alcohol or lemon oil to remove any sticker residue. Clean the vase well with soapy warm water to remove any old dirt and grime.

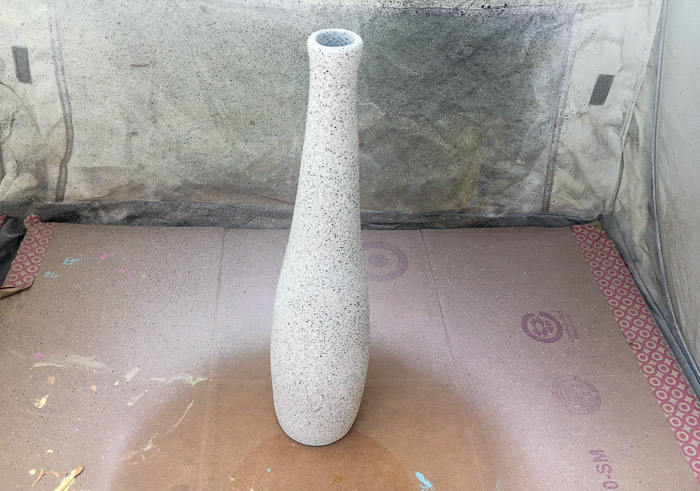
Step 2 – Give the bottle a couple coats of spray primer. Allow to dry.  Coat the bottle with a few layers of stone spray paint. (Tip: when using the stone spray paint, use quick short bursts. This gives the best coverage and texture.)

Recycled glass vase with stone spray paint and clay flowers

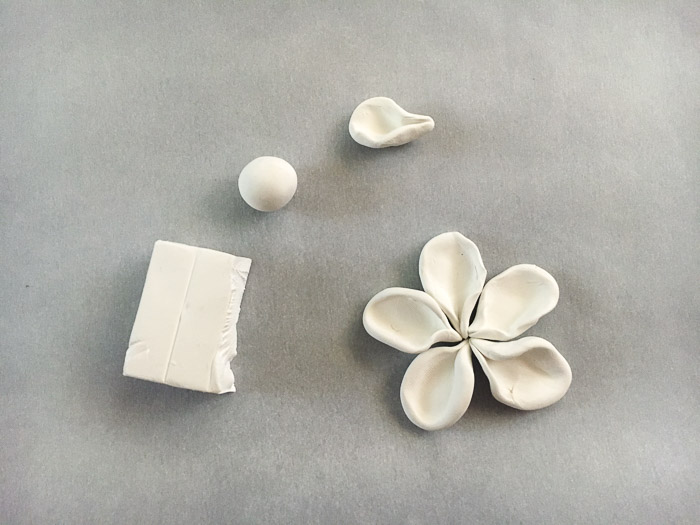
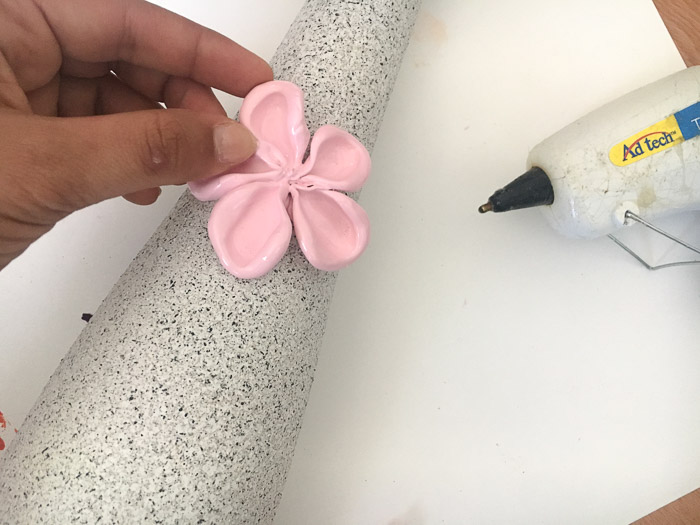
Step 3 – Mold the oven bake clay into flower shapes. You can make flower petals by rolling a ball, then press it between your fingers into shape.

Recycled glass vase with stone spray paint and clay flowers

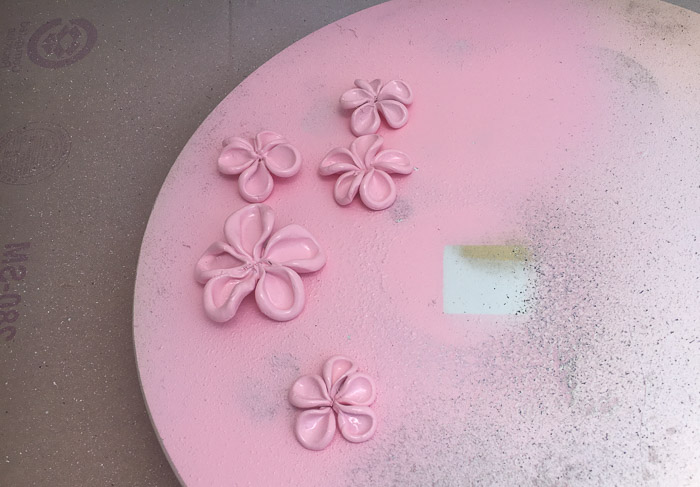
Step 4 – Bake flower petals in the oven per manufacturer instructions. After they cool, spray paint them to your desired color (or leave them the color of your clay.)

Recycled glass vase with stone spray paint and clay flowers

Step 5 – Glue the flowers onto the vase using hot glue.

Recycled glass vase with stone spray paint and clay flowers

What do you think of the Faux Stone Vase from aRecycled Bottle? That’s a big change. I love the texture of stone and the chic vibe of the pink flowers!

Recycled glass vase with stone spray paint and clay flowers

If you like hoarding recycled glass jars and bottles, you’ll love these 20 upcycled bottle and jar ideas:
20 Upcycled Ideas for Recycled Glass Jars and Bottles | Pretty Handy Girl

Until next time,

Read More of Anika’s Tutorials ~


Frosted Vases from the Recycling Bin | Pretty Handy Girl

Frosted Vases from the Recycling Bin | Pretty Handy Girl

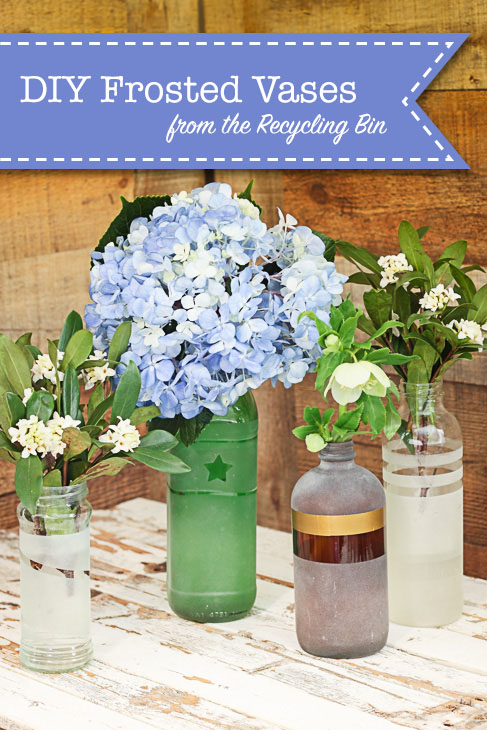
I love a good upcycle project, especially when it involves recycled bottles and jars. Now that Spring is here, I love cutting fresh flowers from the yard to give to friends and family. Giving flowers in a handmade vase is always a nice way to show someone they are appreciated. With that in mind, today I have a tutorial to make these adorable Frosted Glass Vases from the Recycling Bin!

Frosted Vases from the Recycling Bin | Pretty Handy Girl

Ready to get started? Here’s a few things you’ll need.

Materials:

(I’ve included affiliate links for your convenience. I earn a small percentage from a purchase using these links. There is no additional cost to you. You can read more about affiliate links here.)

Optional: 

Preparing Recycled Jars and Bottles:

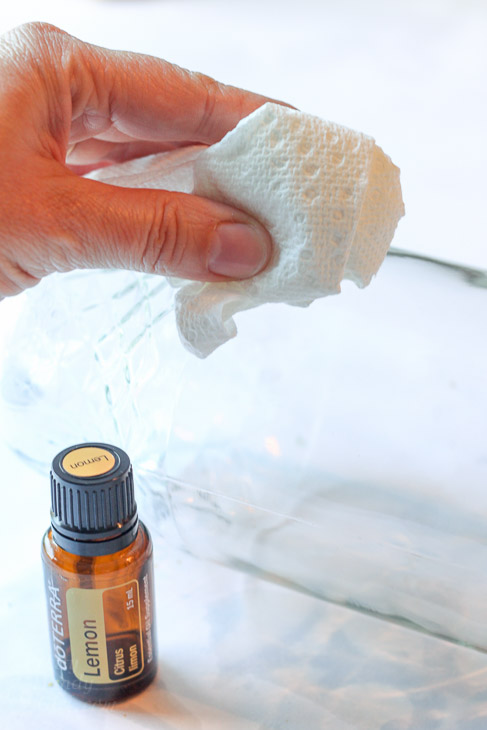
Clean out your bottles and jars with soap and water. Soak them to remove the labels. Any gummy label residue can be removed with Lemon Essential oil (my favorite non-toxic glue residue remover).

DIY Gold Leaf Vases from Recycled Bottles | Pretty Handy Girl

The lemon oil works faster and doesn’t leave any toxic or drying chemicals on your skin. But, if you don’t have any lemon essential oil on hand, use Goo Gone or rubbing alcohol (be sure to wear gloves or wash your hands immediately after use.)

DIY Gold Leaf Vases from Recycled Bottles | Pretty Handy Girl

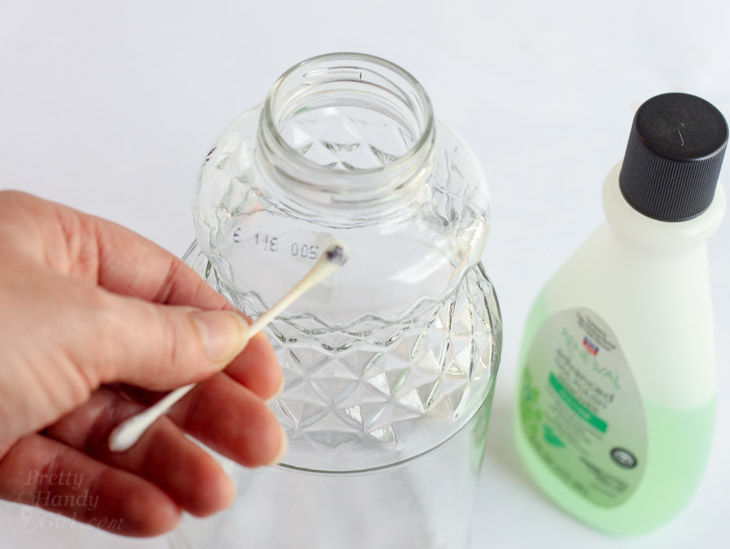
If there are any date stamps on your bottle, you can remove it with a Q-tip and Acetone based Nail Polish.

Instructions:

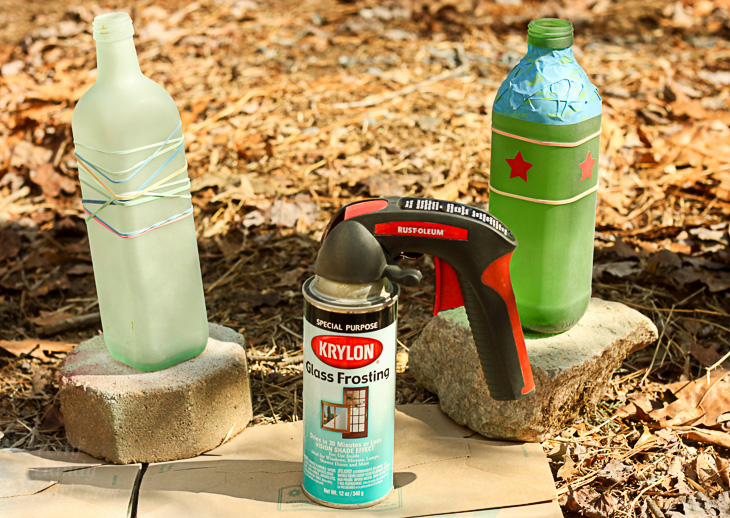
Wrap your bottle with rubber bands, painter’s tape or stickers. Anywhere that is covered on your bottle will remain clear.

Frosted Vases from the Recycling Bin | Pretty Handy Girl

Spray a light coat of Glass Frosting spray paint on your bottles. Let dry and repeat with one to two more coats.

Frosted Vases from the Recycling Bin | Pretty Handy Girl

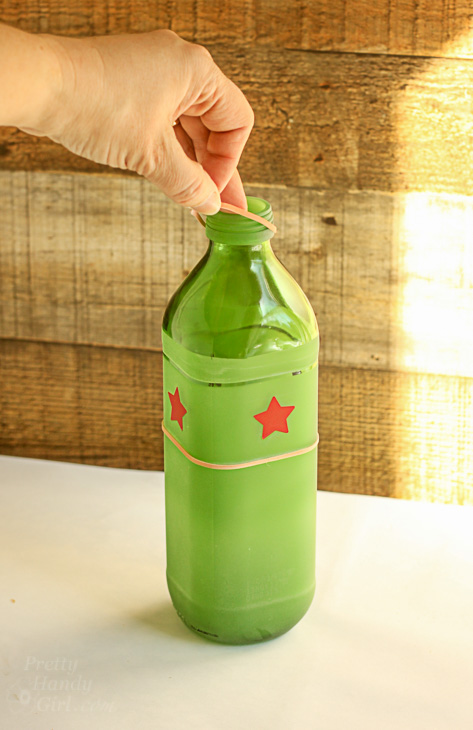
After the spray frosting has thoroughly dried, remove the stickers, tape or rubber bands to reveal your design.

Frosted Vases from the Recycling Bin | Pretty Handy Girl

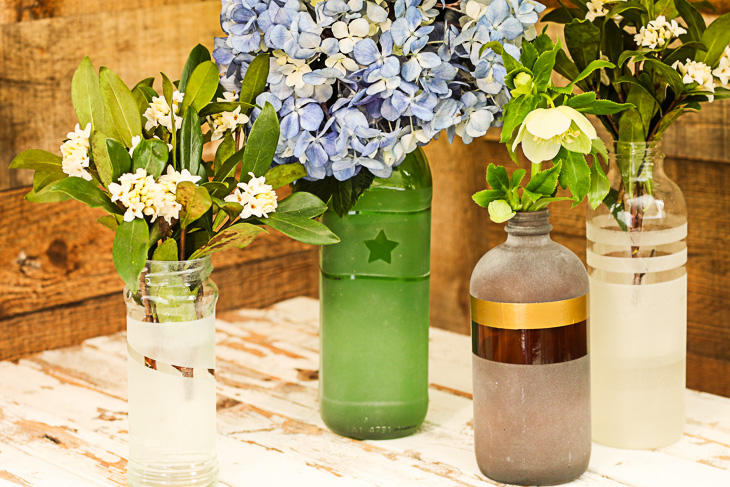
Aren’t these beautiful Frosted Glass Vases from the Recycling Bin? It’s lots of fun to play with different patterns and textures on your bottles.

Frosted Vases from the Recycling Bin | Pretty Handy Girl

You can also add washi tape to your frosted vases for more variety.

Frosted Vases from the Recycling Bin | Pretty Handy Girl
Fill the vases with water and flowers and you are ready to give them as gifts.

Unfortunately the frosted glass vases aren’t dishwasher proof. Frankly even a light washing will probably remove the glass frosting. But, they make quick and easy gift vases to make in a few minutes for next to nothing. If you want a more permanently frosted vase, try these DIY Glass Etched Vases:

Upcycle some old milk bottles or glass containers into these beautiful and chic Glass Etched Vases!

Want to try another easy upcycled craft? You’ll love these easy DIY Gold Leaf Vases:

DIY Gold Leaf Vases from Recycled Bottles | Pretty Handy Girl

Enjoy and be sure to raid your recycling bin more often!

DIY Gold Leaf Vases from Recycled Bottles | Pretty Handy Girl

DIY Gold Leaf Vases from Recycled Bottles | Pretty Handy Girl

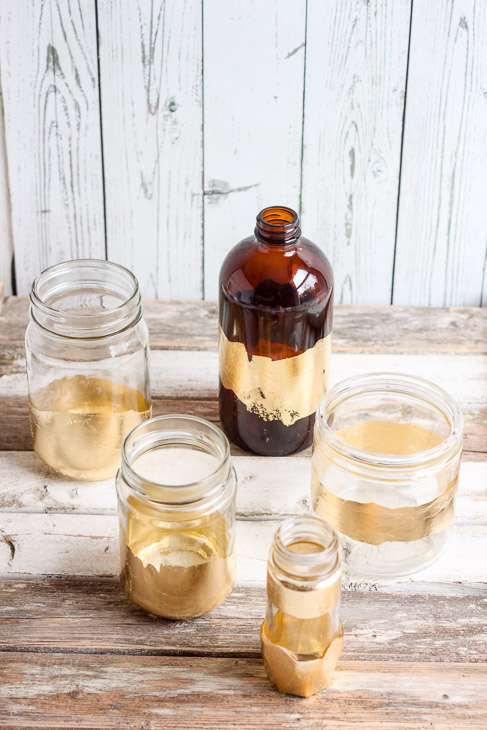
Remember when you were a child and you would pick wildflowers and present them proudly to your mom in a soda bottle? The simplicity of a fresh picked bouquet and the opulence of real gold leaf makes these DIY Gold Leaf Vases the perfect gift for anyone! I like to keep recycled bottles on hand to dress up and use for vases. Teachers, my hairdresser, a friend. . . no one is exempt from receiving a pick me up bouquet.

Make a dozen of these beautiful gold leaf vases and keep them on hand for a quick gift or to display your own horticultural achievements!

DIY Gold Leaf Vases from Recycled Bottles | Pretty Handy Girl

Ready to make a few DIY Gold Leaf Vases in minutes? Let’s get leafin’.

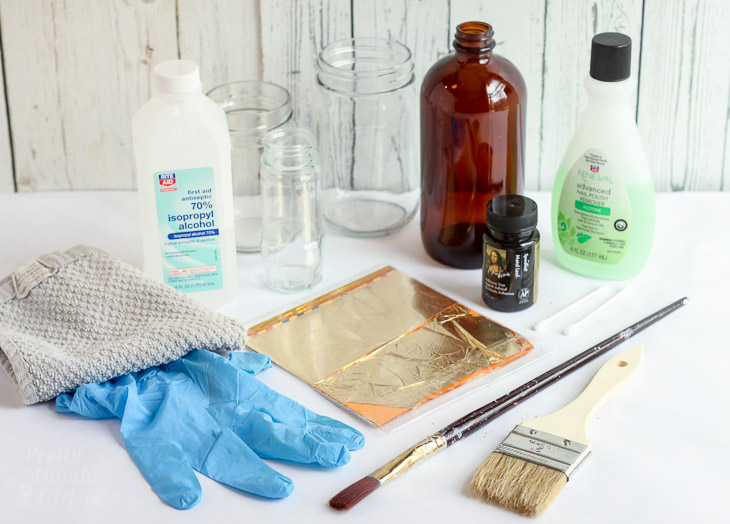
Materials:

(I’ve included affiliate links for your convenience. I earn a small percentage from a purchase using these links. There is no additional cost to you. You can read more about affiliate links here.)

DIY Gold Leaf Vases from Recycled Bottles | Pretty Handy Girl

Optional:

Preparing Recycled Jars and Bottles:

Clean out your bottles and jars with soap and water. Soak them to remove the labels. Any gummy label residue can be removed with Lemon Essential oil (my favorite non-toxic glue residue remover).

DIY Gold Leaf Vases from Recycled Bottles | Pretty Handy Girl

The lemon oil works faster and doesn’t leave any toxic or drying chemicals on your skin. But, if you don’t have any lemon essential oil on hand, use Goo Gone or rubbing alcohol (be sure to wear gloves or wash your hands immediately after use.)

DIY Gold Leaf Vases from Recycled Bottles | Pretty Handy Girl

If there are any date stamps on your bottle, you can remove it with a Q-tip and Acetone based Nail Polish. I can’t help laughing every time I use this trick because I learned it from the Lego Movie! Anyone else remember the Fleece Crested Sceptre of Q-tip and The Pole-Ish Remover of Ni-Eel?

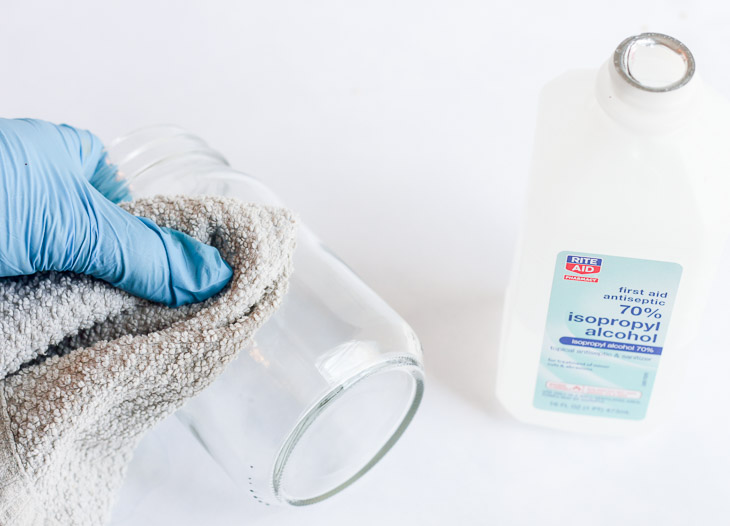
Clean your bottle or jar really well with rubbing alcohol.

DIY Gold Leaf Vases from Recycled Bottles | Pretty Handy Girl

Instructions:

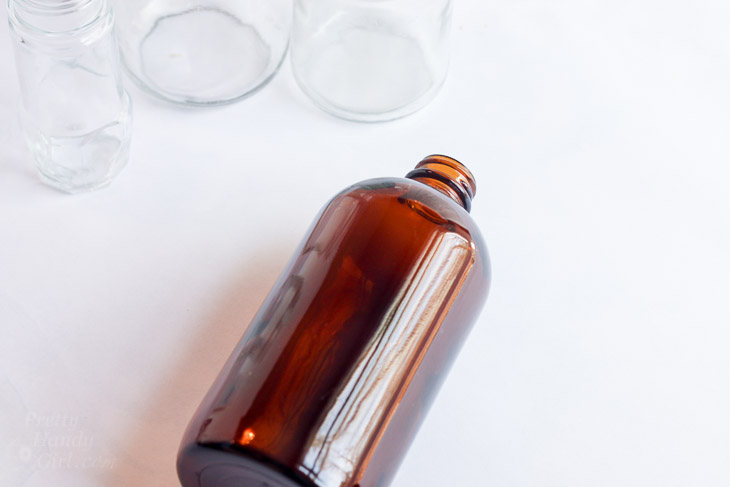
Lay your clean glass bottle on a covered work surface (you will make a mess.)

DIY Gold Leaf Vases from Recycled Bottles | Pretty Handy Girl

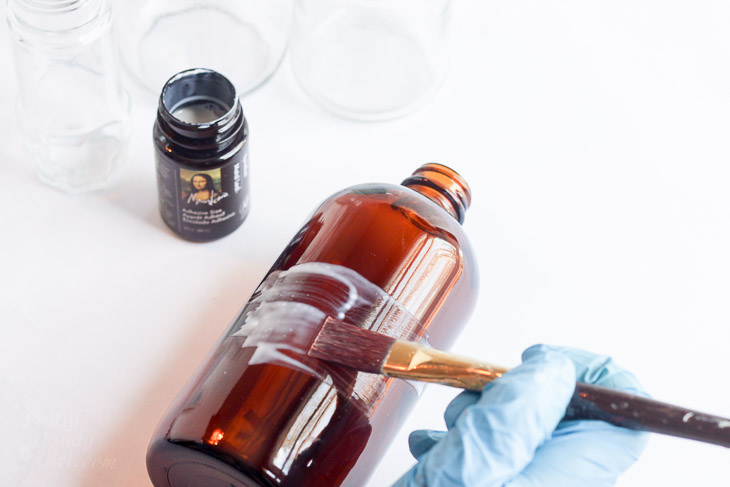
Paint the adhesive sizing onto your glass bottle. Anywhere the adhesive lays gold will stick, so decide if you want to be random or use clean lines.

DIY Gold Leaf Vases from Recycled Bottles | Pretty Handy Girl

Allow the adhesive to dry (you can use a hair dryer to speed the process and prevent the adhesive from running and dripping.)

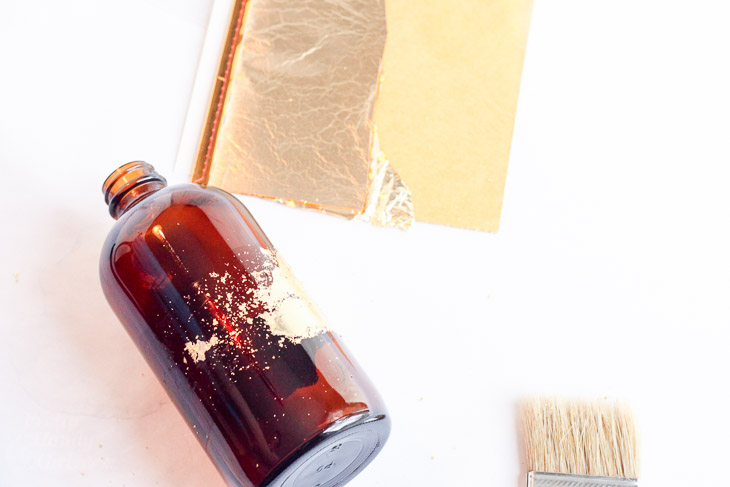
Carefully lift up pieces of the gold leaf and lay them flat on top of your glass bottle. Pat the leaf into the adhesive.

DIY Gold Leaf Vases from Recycled Bottles | Pretty Handy Girl

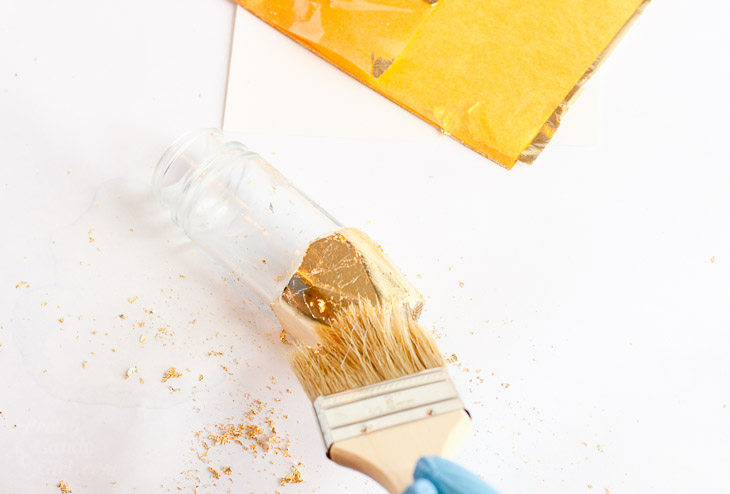
Use your brush to dust off any excess gold leaf. Continue adding gold leaf until all the adhesive is covered.

DIY Gold Leaf Vases from Recycled Bottles | Pretty Handy Girl

Wipe off any excess gold leaf flakes with a dry rag and you are done!

DIY Gold Leaf Vases from Recycled Bottles | Pretty Handy Girl

Here’s a quick video to show you how the gold leafing process works.

Fill your new gold leaf vases with flowers and enjoy!

DIY Gold Leaf Vases from Recycled Bottles | Pretty Handy Girl

Or give them to someone special.

DIY Gold Leaf Vases from Recycled Bottles | Pretty Handy Girl

Leave me a comment to let me know how you like this project. Or let me know if you have another way to upcycle glass jars and bottles.


Pin for later!

DIY Gold Leaf Bottle Vases | Pretty Handy Girl