Make a Tray from a Cabinet Door | Pretty Handy Girl

Make a Tray from a Cabinet Door | Pretty Handy Girl

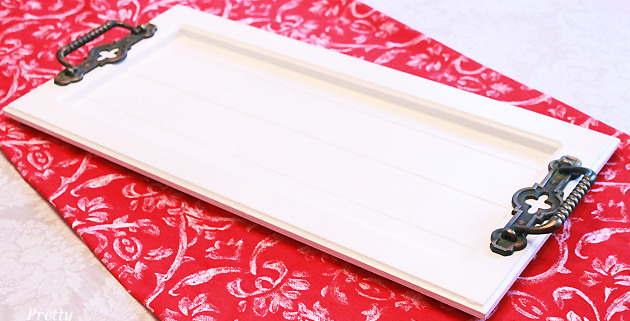
One of my favorite places to thrift shop is the Habitat ReStore. I mean, where else can you find cool $2 cabinet doors?

Make a Tray from a Cabinet Door | Pretty Handy Girl

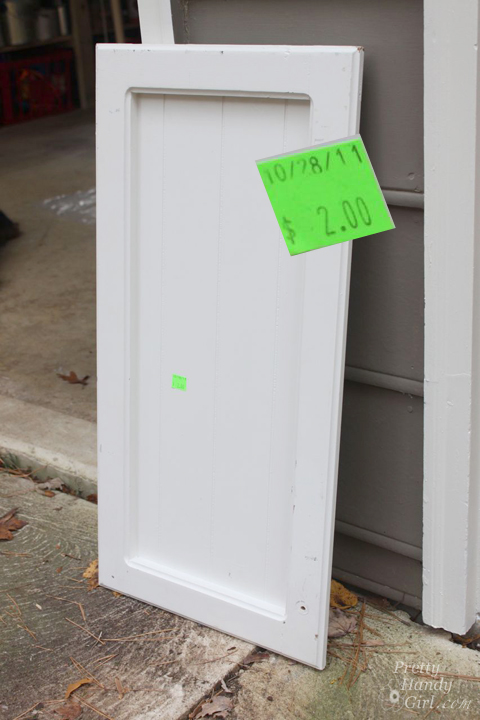
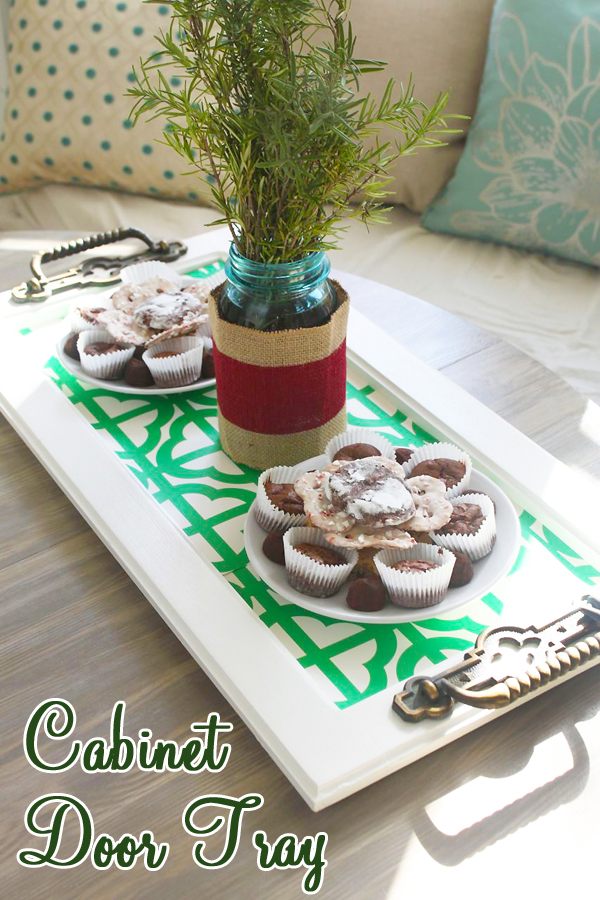
This fine cast off door is just screaming to be upcycled into a beautiful tray. Especially when the same thrifting adventure yielded VERY COOL door hardware! Simply combine the two and you have yourself a unique serving tray to give as a gift (or keep for yourself.)

Make a Tray from a Cabinet Door | Pretty Handy Girl

Materials:

  • Cabinet door
  • Door handle or cabinet handle
  • Wood putty
  • Putty knife
  • Ruler
  • Pencil
  • Drill
  • Drill bits
  • Screwdriver bit
  • Rubber bumpers

Optional: Rub n’ Buff Gold Leaf

The steps are super simple. Read more

Easy Wooden Chalkboard Sign | Pretty Handy Girl

Easy Wooden Chalkboard Sign | Pretty Handy Girl

Do you keep scraps of wood and say to yourself, “I might need that for something someday.” Well, today is your someday! Grab a scrap (or ask Lowe’s for their scraps) and create this super easy wooden chalkboard sign.

When you’re done, you can turn it into a sign that displays your favorite quote; a plaque welcoming friends; or you could create a fun Christmas Countdown sign!

Easy Wooden Chalkboard Sign | Pretty Handy Girl

Materials:

Easy Wooden Chalkboard Sign | Pretty Handy Girl

  • Scrap wood (3/4″ thickness works the best)
  • Chalkboard spray paint
  • Painter’s Tape
  • Red paint (I used Miss Mustard Seed Tricycle Milk Paint)
  • White paint pen
  • Chalk
  • Pencil
  • Eye hooks
  • Drill
  • Drill bit slightly smaller than the eye bolts
  • Ribbon
  • Pencil
  • Safety glasses


Instructions: Read more

Spoon Tealight Candle Holder

Spoon-Tealight-Candle-Holder-Feature

Jacque and I are so excited to be contributing in Brittany’s Trés Frugal- 30 DIY Gift Ideas!  We’re no strangers to DIY gift ideas!  In fact for as long as I can remember, my family has taken part in a Make-a-Gift tradition.  Each year we have to come up with some creative DIY gifts to give to family members.  It’s one of my favorite traditions!

With the holidays closing in on us, who couldn’t use some quick and budget friendly gift ideas? So today, we’re sharing a quick look at how to make a DIY tealight candle holder!

Spoon Tealight Candle Holder

Reclaimed wood seems to be the perfect material to make DIY gifts out of.  We have made a few different custom wall hangings using various types of reclaimed wood and love the rustic look.  We found out that a family friend was replacing some of his older barn boards and were lucky enough to snag a few for our stash!  Barn wood and pallet wood are great options for this project, but don’t rule out other sources of lumber.  We’ve actually used old decking boards for tons of projects.  If you can’t find any wood to reclaim, take a peek at Brittany’s tutorial on how to make new wood look old, weathered, and rustic.

Materials List:

  • Weathered Piece of Wood
  • 3 Spoons
  • 3 – 1 ” Wood Screws
  • D-Ring Wall Hanger (with screws)
  • 3 Tealights

Tool List:

  • Nail Set
  • Hammer
  • Drill
  • 1/8″ Drill Bit

Instructions: Read more

DIY Book with Storage Inside | Pretty Handy Girl

Book with Hidden Storage | Pretty Handy Girl

Do you remember when you were a kid and you wanted a super secret place to hide things from your sibling? Having a secret book with a hidden storage compartment would have been perfect! Even as an adult, it’s nice to have a spot where you can hide something personal, valuable or sweet (think dark chocolate!) 😉

This DIY Decorative Hidden Storage Book is a relatively easy project, but it takes a little patience and a very sharp X-acto knife (so have a few fresh blades to replace when your blade dulls.)

Materials:

Materials


  • Fat book (shop Goodwill or repurpose an old book you already own)
  • X-acto knife
  • 4-5 New X-acto blades
  • Ruler with a metal edge
  • Self-healing cutting board
  • Paint brush
  • Mod Podge
  • Gold craft paint (optional)
  • 3 Sheets of scrapbook paper (2 the same design and 1 coordinating design)
  • Scotch tape
  • Rubber cement
  • Wax paper (cereal box bags work great)
  • Cup to mix mod podge in
  • Weights or heavy objects
  • Ribbon


Instructions: Read more

swatches

Over a month ago I was contacted by La-Z-Boy and asked if I’d like to participate in their La-Z-Boy Design Dash. The idea was to visit my local showroom and design a sofa. Then I’d meet my sofa in High Point, NC and design a room around that sofa. The concept sounded like fun. And the idea of getting away for a few days for some R&R sounded great! Little did I know, that there would be very little rest or relaxation involved.

A week later I received instructions to go to the local La-Z-Boy showroom and design my sofa. As I approached the showroom I was hesitant. I remember the vision of my grandfather’s old slouchy recliner. I was suddenly filled with trepidation. How could I “design” a sofa with flabby rolls of corduroy? I grabbed the door and opened it, and what lay inside literally shattered any preconceived notions I had of La-Z-Boy!

I was stopped immediately by what I saw.

colorful-chair   medallion-chair cannonball-arm

I had a breathtaking reaction to this chair:

my-chair-colors-pillows

Everywhere I looked there was more beautiful upholstered furniture. Read more