Rustic Wood Cake Stand | Pretty Handy Girl

Rustic Wood Cake Stand | Pretty Handy Girl

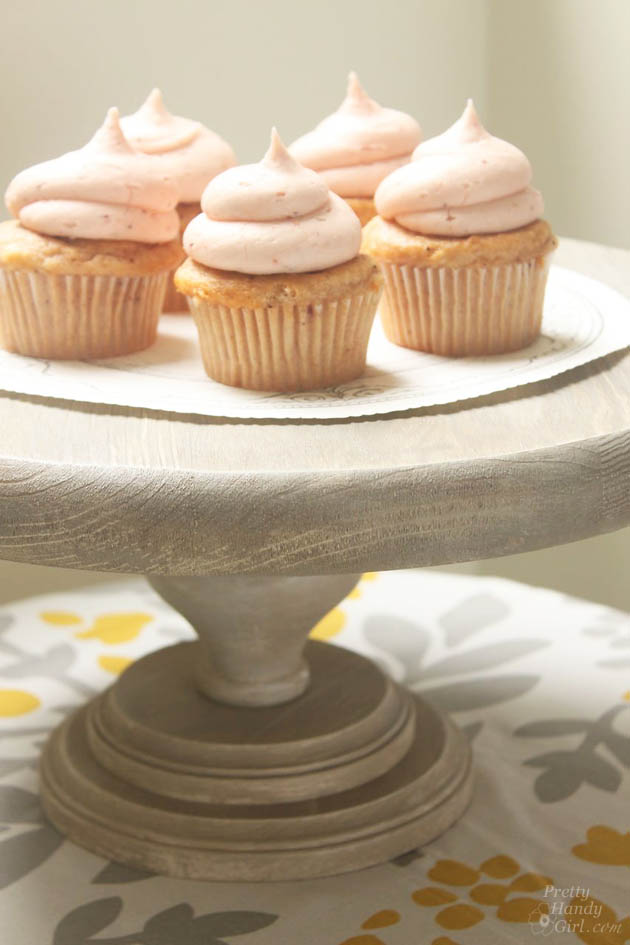
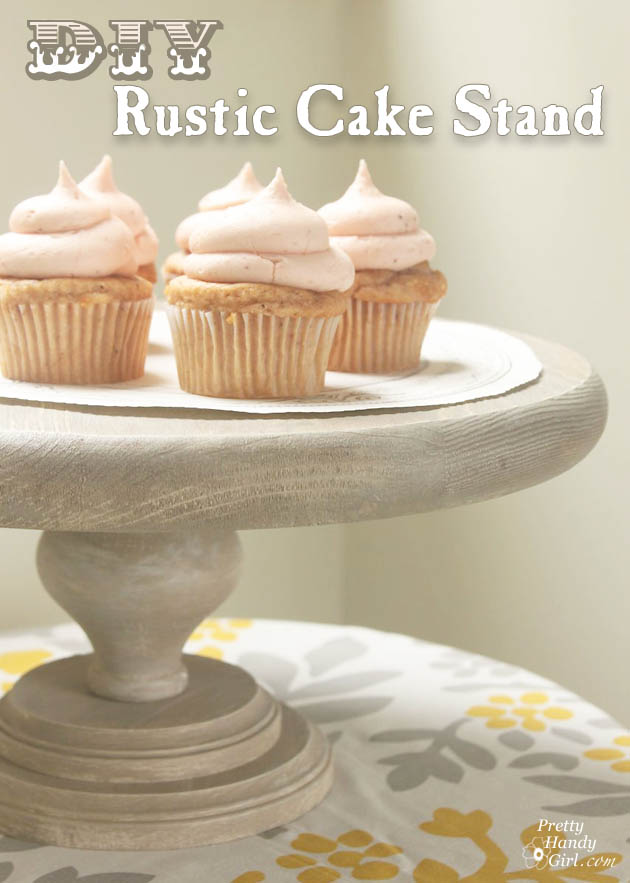
Day two has arrived and I have ANOTHER fabulous Très Frugal DIY gift idea for you. Honestly, this is one of my favorites. And I owe it all to this little picture from my Instagram friend, Kennesha. She blogs over at Restoration House and has an amazing sense of style!

After seeing her rustic cake stand that she wanted to DIY, my creative wheels began to burn rubber.

I simply picked up a few wood discs and a furniture leg to create a unique cake stand. Here’s the tutorial:

Rustic Wood Cake Stand | Pretty Handy Girl

Materials:

  • 15″ Wood Disc from Lowe’s
  • 5″ and 7″ Wood plaques (from Michaels)
  • Turned furniture leg (from Lowe’s)
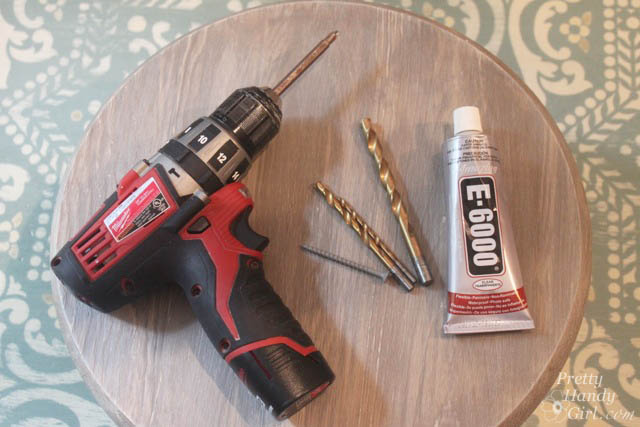
  • E-6000 glue (or wood glue)
  • 1 – 2.5″ wood screw
  • 3M Sandpaper block
  • Drill
  • Drill bit slightly smaller than the screw
  • Drill bit slightly smaller than the furniture leg bolt
  • Philips head screwdriver bit
  • Food safe sealer (Behandla cutting board sealer found at IKEA)

Optional: Paint & Glazes (all available at Lowe’s):

  • Valspar 6006-1A Woodrow Wilson Putty
  • Valspar 6007-2A Arid Plains
  • Valspar 6005-1A Asiago
  • Valspar clear mixing glaze
  • Dry brush paint brush
  • Paint brush

Not optional: Cake or Cupcakes!!!! (kidding of course) Read more

feathered_nest_christmas_tree

I know what you’re about to say…”What?! It’s not time for Christmas decorations!” Well, I received an email from Michaels asking if I’d like to participate in the Michaels Dream Tree Challenge. If you saw last year’s contestants and the resulting dream trees, you’ll completely understand why I was excited to be asked to join in this year. Plus, I’ve been working feverishly on the Très Frugal month of DIY Gift Ideas and having some Christmas décor set up has put me in the mood (and provides for a festive backdrop for photography!)

Once I received my pre-lit tree and the gift card to pay for my tree decorations, I hit up my local Michaels retail store. I really had no idea what theme I wanted to create, but I did know I wanted to be frugal and make my gift card stretch as far as possible.

As luck would have it, there were lots of Fall berries on clearance. Can you tell the difference between fall red berries and Christmas red berries?  Read more

Painted Lampshade & a Quick Guest Room Makeover | Pretty Handy Girl

Painted Lampshade & a Quick Guest Room Makeover | Pretty Handy Girl

My mom was coming to visit his month. Since she’s a repeat guest, I wanted to give the guest room a little mini makeover for her. With the addition of some new pillows, curtains and a painted lampshade I gave it a new look in an afternoon.

Here’s the before:

GuestBed

And the after: Read more

DIY jewelry organizer | Pretty Handy Girl

Hey there! I’m so excited to be here today and share with you a super easy way to keep your jewelry organized.  I have three little boys, the youngest of which is two and he thinks it’s great fun to ransack my jewelry box now that he’s tall enough to reach it.  I realized I needed to move my storage up onto the wall pronto! I’d love to show you how to make this super easy rustic wood organizer!

Materials

  • scrap wood (I used a 30″ long piece of 1 by 3 board leftover from a previous project)
  • circular saw
  • safety glasses
  • wood glue
  • finishing nails
  • hammer
  • medium grit sandpaper
  • wood conditioner
  • wood stain/polyurethane
  • drill
  • knobs of your choosing with coordinating washer and nut (3)
  • drill bit (width depends on the width of your knob screws)
  • small glass kitchen bowls (I purchased a 4 pack at the dollar store)
  • white spray paint/primer
  • hot glue gun and glue
  • large D-Ring hangars (1-2)

Instructions

Cut your wood into two 15″ long pieces using a circular saw (be sure to wear your protective glasses!)

jewelry organizer wood

Apply wood glue to the long edge of one of your pieces-be sure to apply it towards the back edge and use only a thin line as it expands as it dries. Read more

Video Tutorial: How to Paint a Giant Abstract Ocean Painting

As promised, I created a tutorial to show you how you too can paint a giant abstract ocean painting. The easiest way for me to show you how was to share the video of the process. If you are viewing this post in your email, you will need to click on the link to view the video.

Materials: Read more