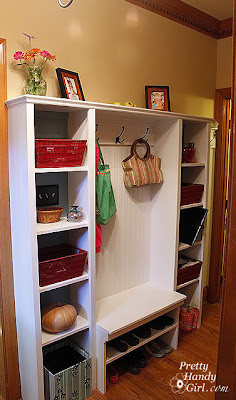
After working on this tutorial for what seems like days, I finally have the Hallway Storage tutorial for you!

Thank you all for being so patient. We’ve had a busy week at the Pretty Handsome Home. Lots of wood rot and drainage problems being addressed, plus an emergency trip to the pediatric dentist. (Warning: Look away if a chipped tooth and bloody lip might make you faint.)

Luckily, all is moving in a positive direction right now (teeth and home repairs).

Materials (to the best of my recollection):

2 – 1 x 10″ x 12′ pine boards (and had Lowe’s cut them in half leaving us with 4 – 1×10″ x 6’s)
3 – 1 x 10″ x 8′ pine boards
1 – 1 x 15″ x 8′ pine board (had Lowe’s rip it to 13″ wide)
1 – 1 x 15″ x 4′ pine board
2 – 4′ x 8′ pre-primed masonite bead board sheets (cut to size by Lowe’s)
1 box of 2″ screws
1 box of finish nails (used 1 1/4″ finish nails in my pneumatic nailer)
6 – 1″ x 2″ x 8′ pine edging strips
1 – 8′ piece of decorative shelf moulding
1 – 8′ piece of trim moulding for the top shelf
Primer
Paint (white for unit, aqua color for behind cube towers)
Caulk
Wood putty
Sandpaper
Triple Coat Hooks (eBay)
Baskets (Home Goods)

Checking out with our 3 helpers leading the way.
I hope they have their allowance to pay for all this!

Building the cube towers:

I mentioned that the hall storage cube towers were built using Ana White’s Land of Nod cube tower knockoff plans. Ana’s towers are 17″ wide by 13″ deep and 70″ tall. We shrank Renee’s to 15″ wide and 10″ deep to accommodate her narrow hallway. And we eliminated the top and bottom shelf and legs. So, if you want the tutorial for the towers, head over to Ana’s site.

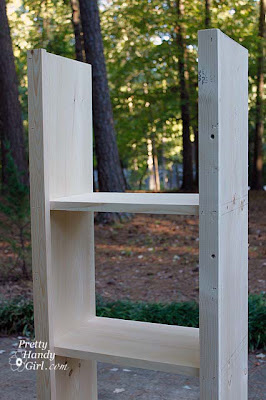
Here are two pictures of the towers after construction (before priming and painting):

Look at my Pretty Pregnant Girlfriend sanding and priming her new towers!
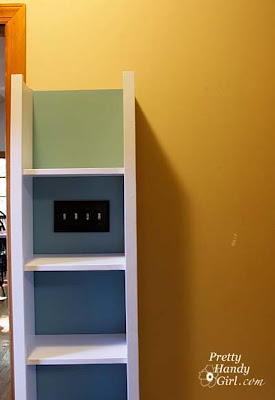
We took the towers inside to make sure they would fit. While they were in Rene’s house, I traced the profile of the baseboards onto each tower. You can see how to trace profiles in this older post. Plus, we marked where the towers would fit against the wall (so Renee could see where to paint the wall.)
See, perfectly traced profile!
I used my jigsaw to cut out the profile on each side of the towers. I LOVE my new jigsaw. This machine really cuts through material like ‘butta’ (unlike my previous one, cough, cough Black&Decker.)Words of Wisdom: if you are going to buy a power tool, buy a tool that will work well and for years to come. (Yes, I learned this the hard way!)

Building the shoe storage bench:

Our space dictated a narrow and shallow bench so as not to impede the traffic flow in Rene’s hallway.

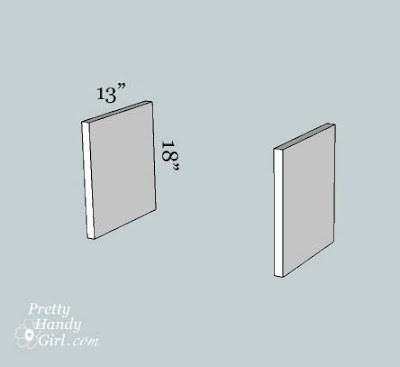
We started with two 1″ x 13″ x 18″ boards. 
Then cut one 1″ x 30″ x 13″ board for the center shelf.
After drawing level lines where the shelf would rest, we pre-drilled our holes.
Then drove the screws in to secure the shelf
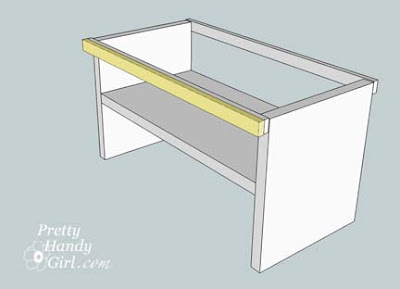
We cut 3 -1″ x 2″ boards to 30″ lengths, then secured one to the top of the bench using finish nails. (I used my pneumatic brad nailer, but you can use a hammer and nails if you wish.)
 
And then added another one to the backside top of the bench.

Next I nailed the third board on top of the front side so I had a double thickness of 1″ x 2″ boards.

 This gave me enough depth to support the bench and attach a piece of

decorative shelf moulding below them (also cut to 30″ wide).

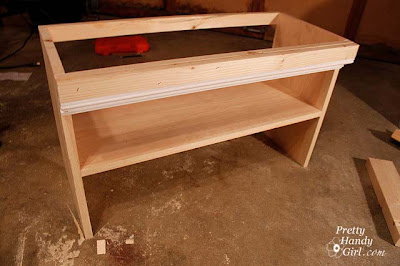
Here is a close up of how the trim moulding and 1″ x 2″ boards are stacked.

Finally we cut a board for the bench top: 1″ x 15″ x 30″. And our bench is essentially finished! (We left the top off until after the bench was attached to the cube towers and the wall.)


Installing the towers and bench:

After the towers and the bench were primed and painted with two coats of paint, we transported them back over to Renee’s house.

Renee had pre-painted the wall a pretty turquoise color at the back of the towers.

Now it was time to go stud hunting finding. I rely on two techniques for finding studs (and neither of them requires going to a singles bar!) First, I used my electronic stud finder. It takes some patience, but it gives me a good idea where the studs might be. To use the stud finder, I squeeze the buttons on the side of the gadget. Then s-l-o-w-l-y move the finder left and right over a 1-2 foot wall section. The light comes on when it detects something solid behind the drywall. Then I made a mark in the middle of the “lit” area.

Next I use the knocking technique. It almost helps to close your eyes for this. I will knock along the wall moving left and right. I’m listening for the knock to get higher pitch and sharper where the stud is. I can also feel less give in the drywall and it almost starts to hurt my knuckle because I’m knocking against a hard area where the stud is. You will most likely need a little practice to get a feel for finding the studs while knocking. Anyway, this gives me the idea where the studs are.

I’ve heard of using a third technique. Once you think you  have located the stud. You can take a quilting pin and insert in into your drywall. If it goes in about half an inch and stops you have located a stud. If the pin can be inserted all the way to its head, you have hollow wall behind the pin.

Now that we had located the studs in the wall, we checked them by measuring between the studs. They are normally 16″ from stud to stud. And there should be a stud around the door and window frames.

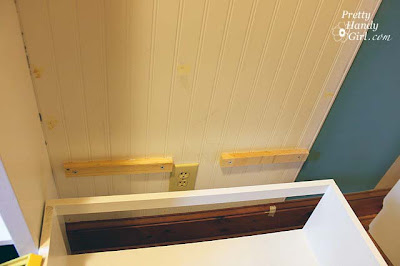
So, the studs have been found and marked. Next we cut four 15″ lengths of the 1″ x 2″ boards and painted them the same color as the turquoise wall. These will be our cleats for attaching our towers to the wall.

Then pre-drilled holes on the cleat where at least one stud is. Lined the cleat up with the top edges of our cube tower. Then drove the screws through the 1″ x 2″ cleat. The second hole was not into a stud. We decided not to use a wall anchor because there was enough strength from the one stud and drywall.

 
We repeated this for a second cleat under the bottom shelf of the tower. I apologize I don’t have a picture of this, but at this point we nailed through the top side of the bottom shelf and into the cleat to secure it to our wall. The top cleat was left as is for now.
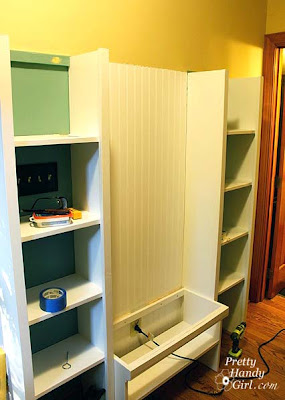
Working from left to right on this unit, we nailed our 30″ x 60″ pre-cut (thank you Mr. Lowe’s Home Improvement) bead board to the wall.

Cutting a Hole for an Outlet:

Here is an easy trick for marking where to cut a hole in your bead board. In our case, we had to cut a hole for an outlet. 1. Take the cover off your outlet. Use bright red or dark lipstick and rub it on your outlet. 2. Set your bead board in place on the wall and press in where the outlet it. When you remove it, you will have the outline of your outlets. 3. Use your outlet cover and line it up with the outlet. 4. Then trace around the cover.

We cut our hole slightly smaller than the outlet cover. After you put the cover back on, wipe off the lipstick.

Then, we installed two more cleats though the bead board and at the same height of the bench. Sliding the bench back against the cleats, I used a few finish nails to nail the back of the bench to the cleats.

Before we put the bench lid on, we installed the second cube tower using two more pre-painted cleats in the same manner as the first tower. Then nailed through the sides of the bench and into the towers on each side.

Finally, we lined up the top of the bench and nailed it down into the wall cleats and into the bench sides and front.

The next step was to nail a 1″ x 10″ x 60″ board to the top of the towers and nailed down into the wall cleats to secure it to the wall. We added some decorative trim to the top board.

We cut a 1″ x 3″ x 30″ strip of wood to mount the coat hooks on. We also cut some more decorative shelf molding and attached it just under the top shelf and above the 1″ x 3″ hook board. Next we eyeballed our hooks and screwed them into the 1″ x 3″ boards.

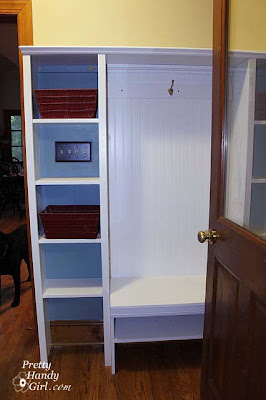
To finish the built-in unit we caulked all our seams and filled the nail holes with putty. More details on this final step can be viewed in this post. Then covered the dried caulk and putty with paint.

And we were done!

Approximately $300 (including the baskets & hooks) and 3 days of work produced this fabulous organizing built-in hall storage unit! You can see some of the close-up pictures in this previous post.

What do you think? Not too hard to create, was it? A little over a weekend and Renee had a storage system for her entry hallway. I can’t tell you how much our mudroom bench has saved my sanity

I am a lucky gal to have a very wonderful friend in my life.

 This is my good friend Renee
Isn’t she beautiful? I wish I could have her hair and smile.  Renee has been a motivational force in my life. She talked me into doing my first triathlon two years ago. She was also a motivator for this blog! (So you should definitely thank her for that.) But, overall, she is just a fabulous friend who I enjoy spending time with.

A few months ago Renee called me with some super exciting news. She was pregnant with her second child. This was a much anticipated pregnancy and the phrase, “Good things come to those who wait” enters my thoughts when I think about how long she and her husband Toby have wanted this baby.

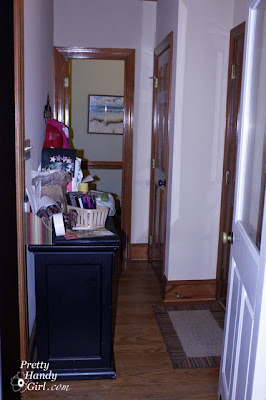
I wanted to do something very special for my good friend. Especially something to help with those pesky pregnancy nesting tendencies.  I knew that she had been struggling with storage solutions for the hallway between her garage and kitchen. This was her catch-all location and it was a narrow 38″ wide hallway I might add.

Plus, there are six doorways coming off this hall. Yup, talk about a challenge! This hall has access to a bathroom, a storage closet, the garage, the bonus room, the back deck and the kitchen.

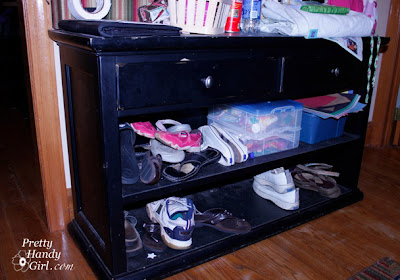
Smack dab in the center of this hallway was a console unit that she bought in an effort to get some storage and organization. Well, needless-to-say, it wasn’t working for her.

She bought this console off of Craig’s List to help organize the hallway.

Renee, really needed a highly functioning location to store anything and everything that didn’t need to come into her home.

Initially I drew up some quick sketches and showed them to her and her hubby. They both liked the idea, so the next step was to take some measurements and tape out our plans.

We taped the outline of two storage towers, a bench with storage underneath, and coat hooks. (Do you like our hanging coats? The vertical strips of tape.)

Plus, we taped the footprint of the unit. It was very important to keep the shelves as shallow as possible, so as not to impede the traffic flow.

Renee was tasked with buying some baskets to use on the storage towers and picking out a paint color for the back of the towers. She knew she wanted bead board behind the coat storage and she wanted black coat hooks. Buying triple hooks allowed her to maximize the amount of coats and bags that could be hung.

Then we got to work. (Yes, I said we! Renee helped with all the steps, because she wanted to learn some new DIY skills. I think she learned a lot on this project!)

We used Ana White’s blog (previously Knockoff Wood) plans for the storage towers, but altered them to fit our size requirements. The tutorial for the rest of the storage unit that we built is here. In the meantime, I hope you will enjoy these after pictures!

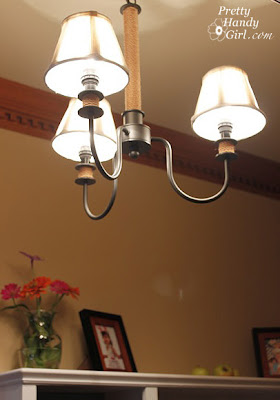
First off, you might notice that the before pictures weren’t just cluttered. The lighting in their hallway was pretty dismal. Thanks mostly to a builder grade flush mount light fixture and one CFL bulb. But, we fixed that too.

So, do you recognize that chandelier?! My twitter followers saw the picture here. $10 at the Habitat ReStore! What a steal!

A pretty place for flowers and pictures on top of the unit.
Coats and bags have plenty of hanging space.
The cranberry red baskets allow each family member a place to put their things.
Plenty of shoe storage for the whole family.

Here is the tutorial for that cute little blue striped storage box above. Its purpose is to halt all the junk mail. Renee can flip through the mail and put the junk mail in there to be recycled.

So, what did we do with that big console? 
 

It is sitting happily around the corner in her large kitchen. Renee bought some storage bins that we used in the lower half for more storage.

Now Renee’s daughter has plenty of access to her arts and craft supplies.
And, because who doesn’t love a really amazing before and after!
Before:
After:

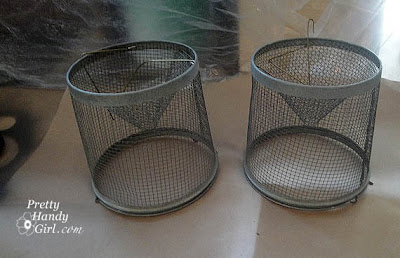
On our last trip to the beach, I stopped in a hole-in-the-wall thrift shop. The store was musty, dirty and reeked of old cigarette butts. I’m still not sure why I was drawn into this store. But low and behold, this is what I found!

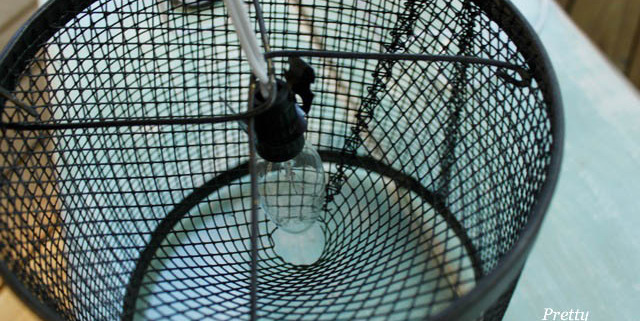
The owner told me it was a minnow trap. Duh, of course it is! Actually, I’m not a fisherperson, so I never would have guessed that.

What I did see was two pendant lamps for my screened porch. I have been trying to decorate it for a year, but I have been unable to find some inexpensive porch furniture. Regardless, I am aiming for a breezy ocean theme, so these would fit in perfectly!

I separated the trap into two pieces. Then cleaned them with a damp rag.

To create the light kit frame, I used these tools:

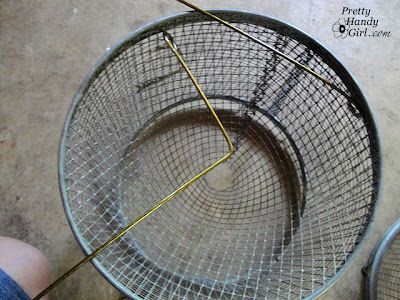
I bent a small hook in the clothes hanger with the needle-nosed pliers. Then fed the end of the coat hanger through one top edge of the minnow trap.


Using my pliers, I pinched the hook shut.

If you pretend that the first hook was attached at 12 o’ clock, then you want to attach the second hook at 3 o’clock.

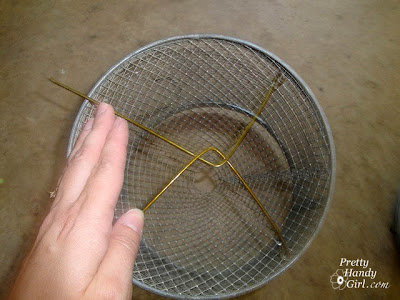
Using my pliers again, I bent both wires near the center into a 90 degree “L” shape.


Next, I wove the other L hook (over and then under) the first hanger and bent the wires until they overlapped at 6 o’ clock and the second one at 9 o’ clock. I played with the wires until I was able to create a small hole in the center.

I ended up with this on both traps (now looking more like lamp shades):


I sprayed my two lamp shades with an automotive primer (I read somewhere that it has better adhesion to metal) and followed up with 2 – 3 coats of Oil Rubbed Bronze spray paint.

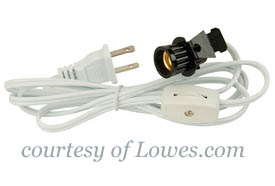
For the light sockets, I purchased 2 candelabra base kits from Lowe’s.

I simply inserted the socket and light bulb underneath the coat hangers. Then bent the coat hangers while making sure to get the light kit centered in the shade.

When I got everything centered, I fed the unattached ends of the coat hangers through the shade and hooked it around securing it to the wire shade.

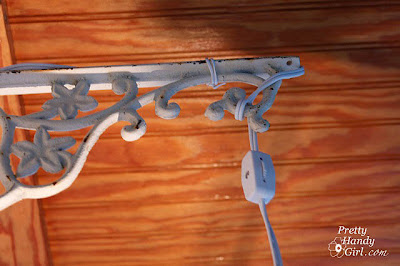
Then all I had to do was screw in these cool iron shelf brackets into the wall on my porch and feed the wires of my lamps through and use a twisty tie to secure it.

Now we have some unique mood lighting on our porch!


Do you like? Would you have known that they were minnow traps?

Too bad the weather is turning cool again. Maybe I can find some deals on porch furniture now!

Copy Me Challenge

DIY Glass Window Shelves

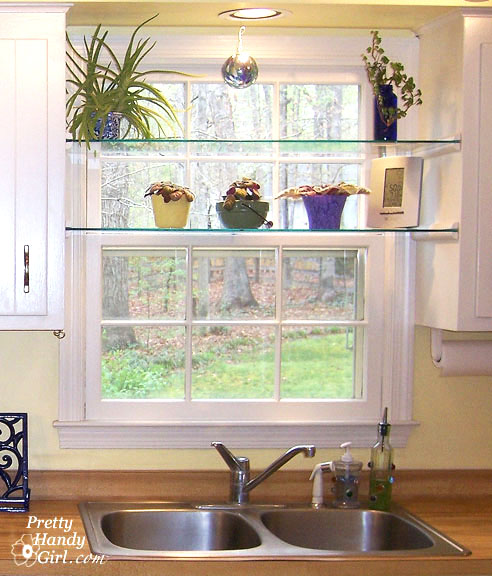
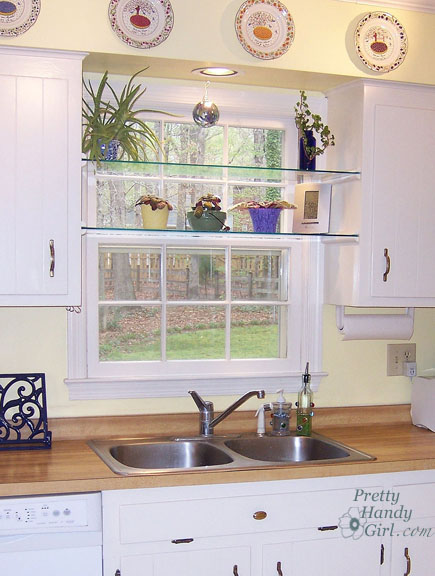
I love african violets! They can be fickle, but once they have the right amount of light, and slightly damp soil, they will happily put on a show for you. My violets used to perch on the kitchen window sill, but occasionally they would take a suicidal nose dive into the sink. To save them from inevitable death one day, I installed two glass shelves over the sink.

DIY Glass Window Shelves

Would you like to install your own glass shelves between two kitchen cabinets? It is a relatively easy project, but does require two sets of hands for one step. The directions below will take you through the step-by-step process for installing 2 glass shelves.

DIY Glass Window Shelves Materials:

(I’ve included affiliate links for your convenience. I earn a small percentage from a purchase using these links. There is no additional cost to you. You can read more about affiliate links here.)

3/16 inch tempered glass
quarter round moulding
paint (to match your kitchen cabinets)
medium size paint brush
painters tape
hammer
level
drill w/ bits
finish nails 1.25″ long
nail set
wood putty or caulk
flat toothpick or wood shim

DIY Glass Window Shelves Instructions:

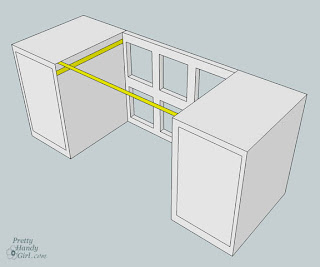
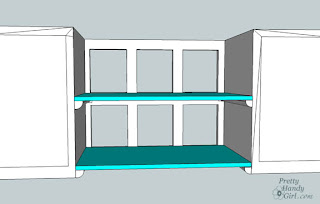
1. First measure your window width and subtracted 0.25″ from the measurement.) Then measure the depth of your kitchen cabinets to the window frame (or tile, whatever sticks out the furthest).

DIY Glass Window Shelves

Take those measurements to a glass manufacturer and have them cut two pieces of 3/16″ tempered glass. Make sure that the edges will be smooth. And, definitely ask for the tempered glass. (My shelves never broke, but I banged them occasionally while being overzealous about washing dishes.)

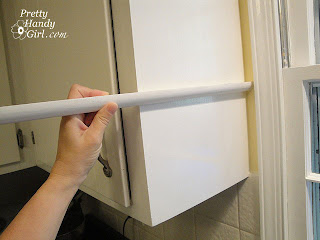
2. Using the measurement you took for the depth of your cabinets, cut 8 lengths of quarter round (four for each glass shelf you are hanging.)

DIY Glass Window Shelves

3. Prime and then paint the quarter round to match your cabinets.

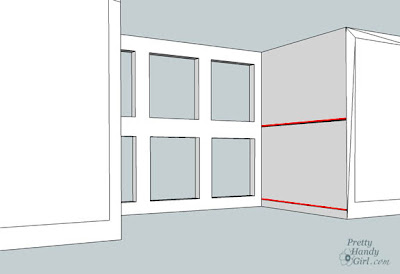
4. Determine the height where you want your glass shelves to be. (I put each shelf at the same height as my window grill pieces.) Use a level and draw lines on your cabinet on one side of the window.

DIY Glass Window Shelves

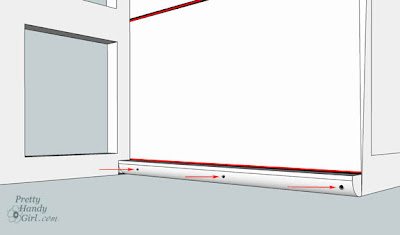
5. Pre-drill three holes (the size of your finish nails) into your quarter round.

DIY Glass Window Shelves

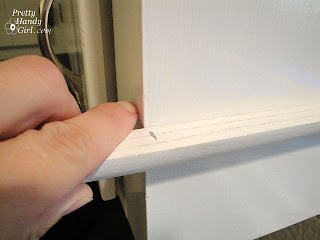
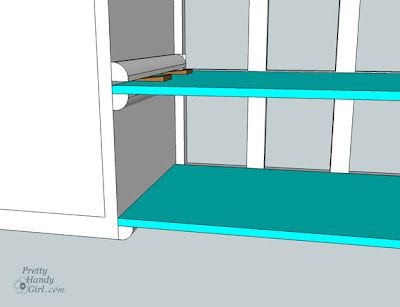
6. Using a piece of painters tape, attach once piece of the quarter round to your cabinet. This is your shelf support piece, so make sure that the flat edge is facing up. Gently nail the finish nails through the predrilled holes and into the cabinet. Repeat this step for your other shelf support (on the same side.)

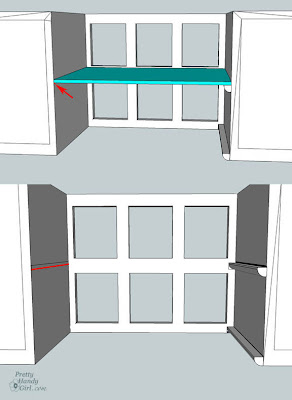
7. Rest one glass shelf on one piece of the installed quarter round. You will need an assistant to help hold the glass shelf up as you level it.

DIY Glass Window Shelves

8. Make a mark on the under side of your glass.

DIY Glass Window Shelves

9. Double check that the mark is level (from front to back), and line your next piece of quarter round below the line. Repeat steps 5 & 6 above until you have the four shelf supports installed.

10. Gently rest your glass shelves on the supports.

DIY Glass Window Shelves

11. Pre-drill holes in your four remaining quarter round strips.

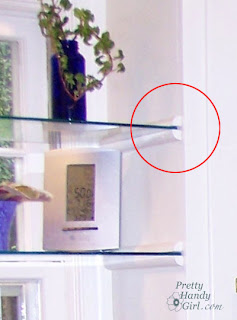
12. Set wood shims (or toothpicks) on top of the glass shelves and up against the cabinets on both ends. Rest your quarter round strips on top of the shims. This should give you a slight space between the glass and the quarter round. Now, tape the quarter round pieces in place and REMOVE BOTH glass shelves and the shims.

DIY Glass Window Shelves

13. Nail your quarter round pieces in place. Use a nail set to countersink (set the nail below the wood surface) all your nails. Fill the nail holes with wood putty or caulk and touch it up with your paint.

14. When the paint has dried, slide in your shelves. The shelves should slide in easily and should not be tight.

DIY Glass Window Shelves

15. Put some plants or other accessories on your new shelves! And enjoy.

DIY Glass Window Shelves

Robin over at TheTshirtDiaries is a gal after my own heart.

She has thrown down a challenge to anyone willing to close up their pocketbooks this month (well, at least for spending on arts and crafts and DIY projects), and use what you have in your home, workshop, craft room or wherever you create. The challenge is called Stashbusting September and you can read more about it here.

She also has a link party called Upcycled Awesome every Wednesday. I hope you hop over to check out some of the fantastic ideas she and other bloggers have shared.

I am always up for a challenge, so I jumped in with both feet ready to complete some projects and do it without spending a dime!

 Obviously toe-less shoes are not safe in the workshop, unless you want to be,
ummm toe-less!

So, what about you? Up to the challenge? I hope you step up to the plate and try your hand at re-using and making-do with what you have on hand! Altogether now: Hey ho, let’s go!

Here is one of the projects that has been sitting around waiting to be given a new life. An old ladder that I picked up from The Habitat for Humanity ReStore (visit this post for more details).

$15 dollars was a little more than I wanted to pay, but Habitat for Humanity is one of my favorite charities, so I don’t mind spending a little more when the money goes to people who need housing.

I actually made this ladder into two separate items. I’ll show you the results of the other half when I finish that project.

Tools Needed:

  • Safety Goggles (Definitely wear your safety goggles when using a pry bar!)
  • Hammer
  • Sand paper or sanding block
  • Pry Bar
  • Drill
  • Screws
  • Piece of L-shaped moulding

I used the chisel end on my pry bar to loosen the rivets. Some of those rivets were hanging in there and weren’t ready to come out yet. But, I showed them who’s boss. That would be me, the woman in a skirt and toe-less sandals!

Then used the claw end of a hammer to to remove it the rest of the way.

After removing the brace and top rivets, the ladder’s front and back were free from each other forever. I wiped the whole ladder down with a damp cloth and then lightly sanded it to remove any splinters.

I played around with the back of the ladder in our dining room…

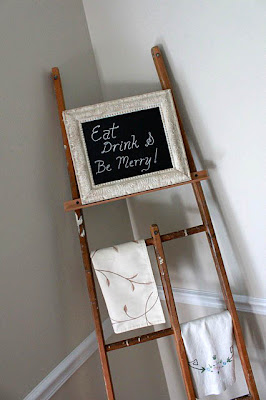
…but ultimately decided I wanted to use it as an easel.

I have a decent scrap pile with leftover boards and trim pieces. A little scrap of L shaped moulding was exactly what I needed.

I measured how high I wanted the moulding to be and then marked where my screws would go.

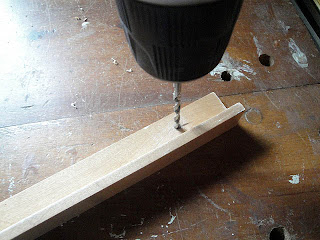
 I predrilled the holes.
 Leveled the moulding and screwed it into the ladder.
 Instant easel!
 
Love it!  Especially those paint splotches.
 It looks great next to our repainted Craig’s List buffet and hutch.
Plus, I can change out the artwork on a whim.

I hope this has inspired you to do some Stashbusting this month. Check out what some other Stashbusting bloggers are doing this month: HERE!