scrap_wood_christmas_tree

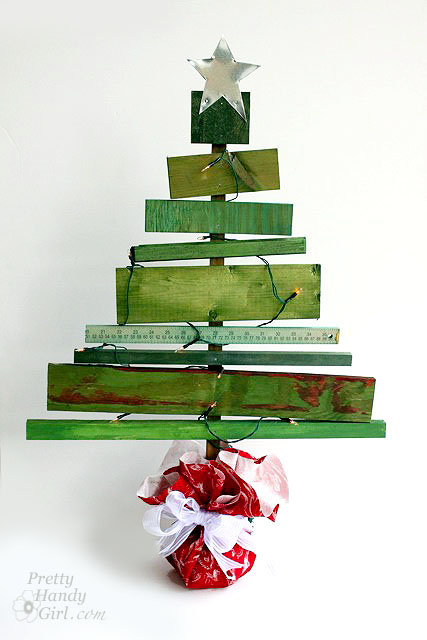
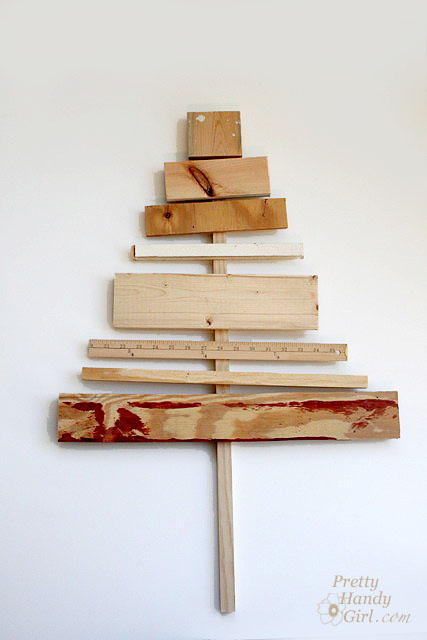
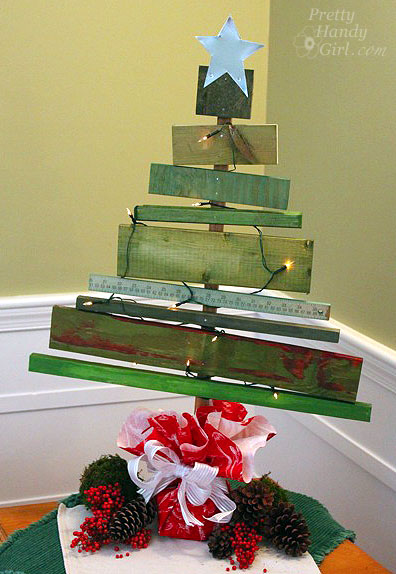
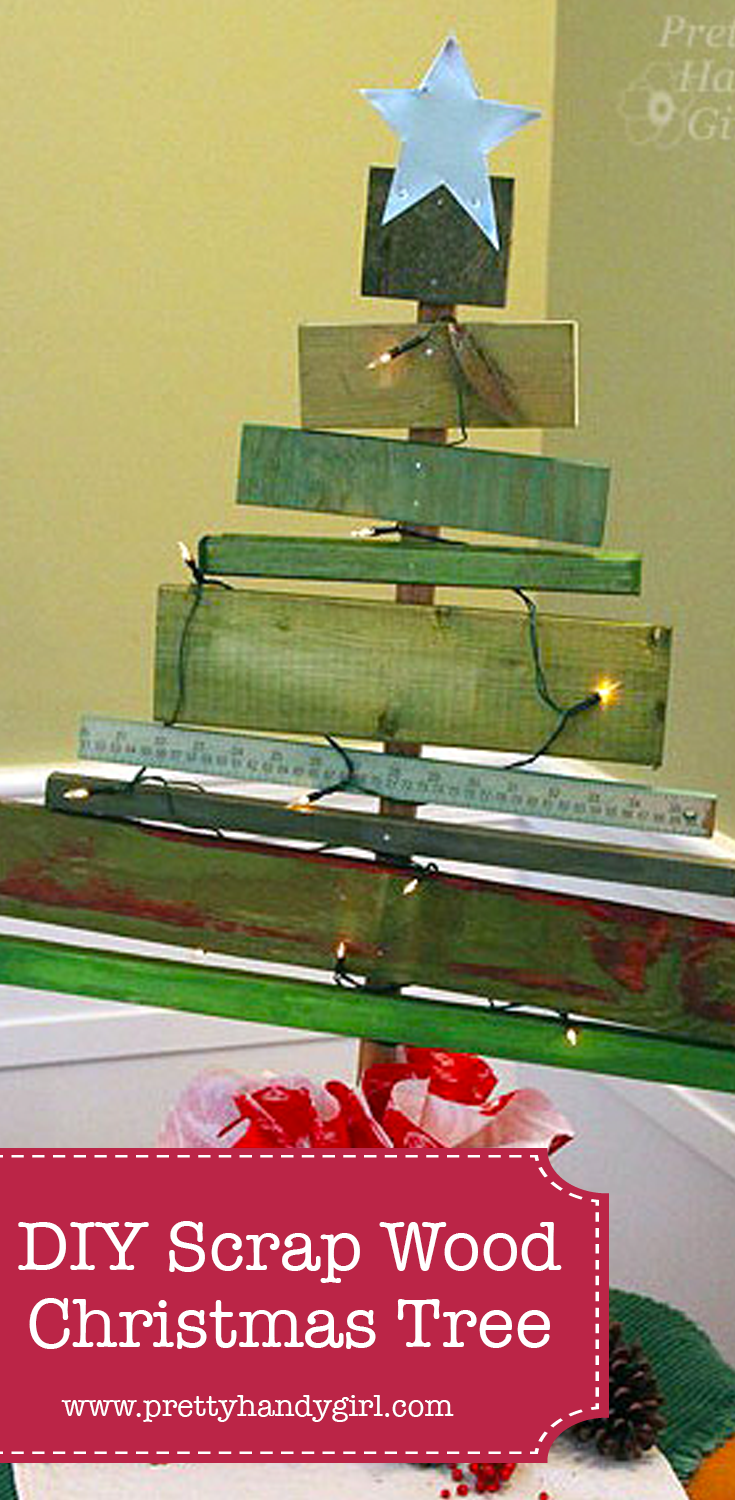
Holiday decorating is in full swing in my house. We bought our tree today and Pretty Handsome Guy and the boys decorated it today while I worked on the cute little scrap wood Christmas tree above.

When I saw the scrap wood DIY Christmas Tree made by Creative Chaos, I fell in love and knew I had to make one too.
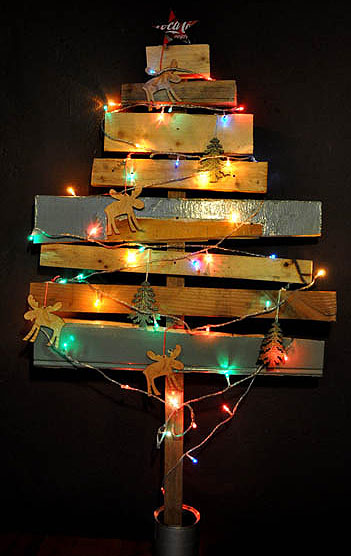
Having an ever growing scrap wood pile also helped convince me to make it.

I decided to try dyeing the wood scraps! You read that correctly, dye the wood. Did you know that you can use RIT dye to color more than just fabric?! Check out the RIT Dye website to learn more about all the techniques and materials you can dye. You will be amazed! Plus, RIT created a RIT Formula Guide that will give you 500 formulas to mix your own custom colors!

Seriously, that is an amazing array of colors!

Building the scrap wood tree is a super easy project that doesn’t take much skill. There is a fair amount of waiting time (waiting for the wood to soak up the dye and waiting for concrete to harden) but I’m sure you can find something more productive to do than watching cement dry.

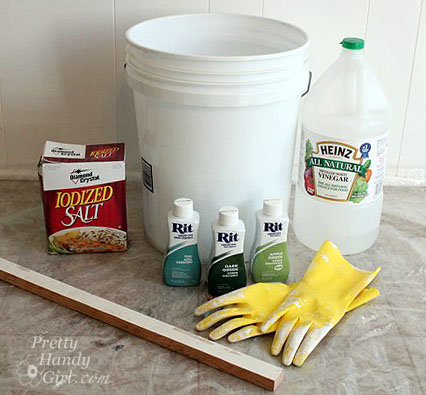
Materials:

(I’ve included affiliate links for your convenience. I earn a small percentage from a purchase using these links. There is no additional cost to you. You can read more about affiliate links here.)

Cut your wood scraps to create a triangular form when stacked on top of one another. Cut one long strip to use as the tree trunk.
Dyeing the Wood:

Lay out three 5 gallon buckets (or mix the colors one at a time and use the same bucket.) Set out the dye colors (dark green, apple green & teal) and salt or vinegar onto a plastic sheet. RIT Dye works best when mixed with hot water. Our water heater is set on a safe hot temperature so as not to burn our boys’ hands. Therefore, I decided to add a little bit of boiling water to my mixture to increase the temperature.
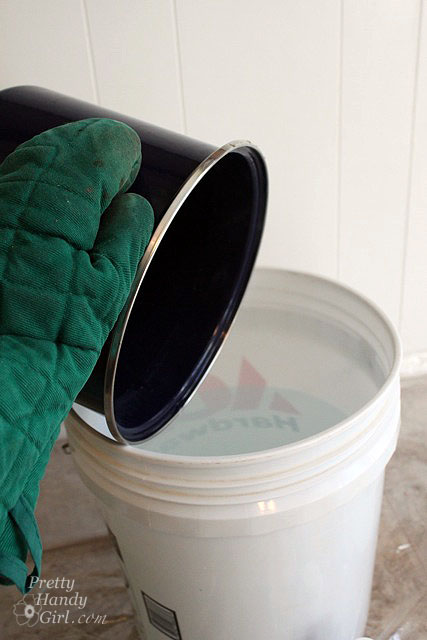
Follow the directions on the RIT container. I added 1/2  bottle of RIT Dye to 3 gallons of water (1/2 gallon of which was the boiling water.) Then mix in 1 cup of vinegar (or salt) in each bucket. (I tried both and didn’t notice any major differences between using salt or vinegar, so you can use either for dyeing wood.)
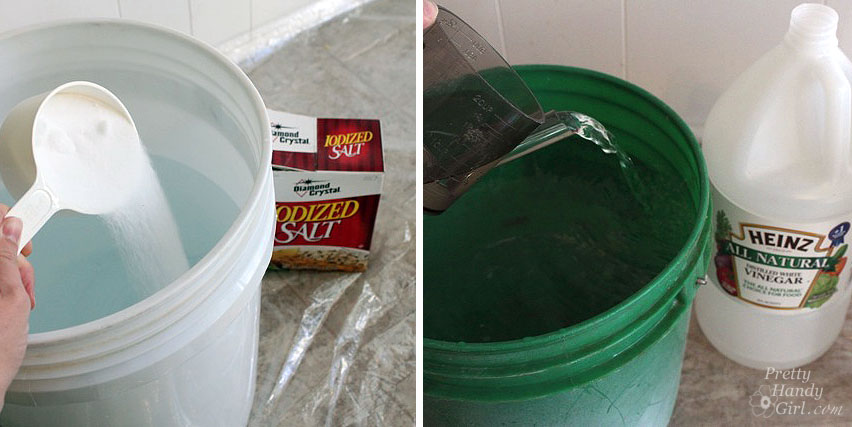
Put on rubber gloves. Stir until the dye is well mixed.
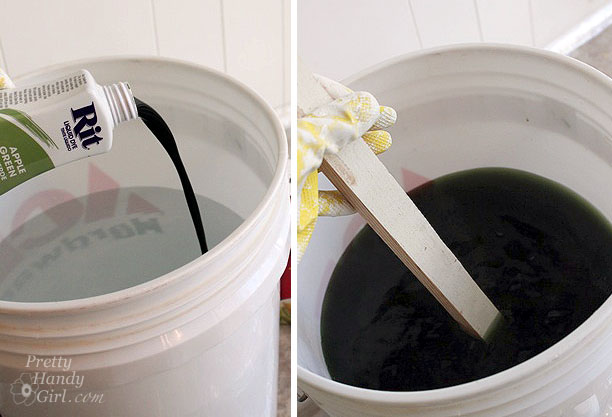
Split up your wood and dip each into the desired color. Because the wood will float, you may need to clamp a piece of wood to hold your larger scraps below the liquid. Then flip the wood to dye both ends of the scrap. The smaller pieces can be floated right side down for color absorption on the side you’ll see.
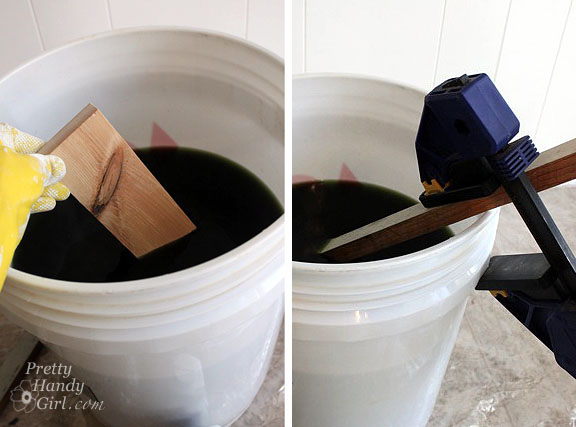
After 30 minutes remove the wood and let it dry. (Look at that scrumptious color! And the cool thing is that the grain still shows through.)

While you are waiting for the dye to dry. Stain the tree trunk strip by dipping a paper towel into Minwax Early American stain and rubbing it on the wood. Alternatively, you could stain the trunk with RIT Dye in a brown color.

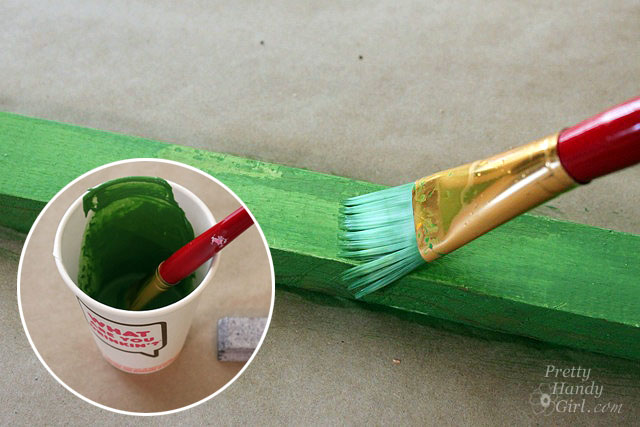
*A note about pre-painted or sealed scraps. The wood needs to be unpainted, unsealed, or unstained in order to accept the RIT dye color. I tried dyeing these two strips and obviously it didn’t work too well.

No worries though, I mixed up some green acrylic paint and some water and then painted them separately.

Building the Tree:

Position the scraps in the desired location on the trunk.

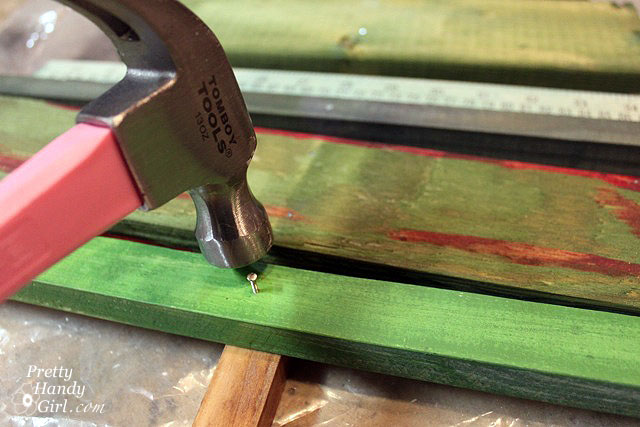
Gently hammer the scraps to the trunk strip with brad nails. Make sure the nails will go through the scrap and about halfway through the trunk.

Making the Cement Base:

*If you want to stake your tree in the ground, feel free to skip this step.

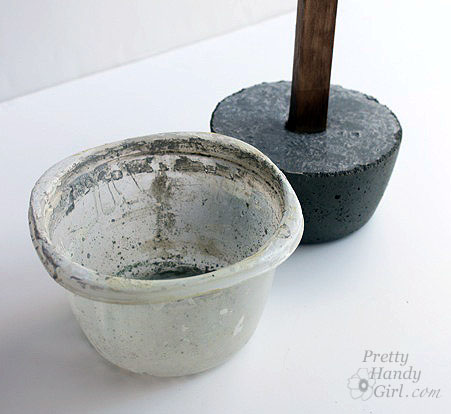
Wash out the plastic container. Fill the container with cement mixture from the stepping stones kit. Follow the directions on the package. (I ended up using only half the kit, so I halved the directions.) Slowly add water and stir the cement mixture until it is thick and heavy, but not crumbly.
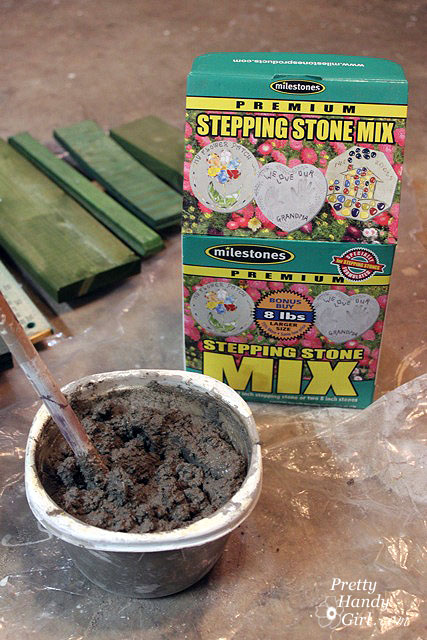
When you have the right consistency, gently bang the container on the ground to get some of the air bubbles out and to level the top. Slide the tree trunk stake into the cement.

Level the tree from side to side and front to back. Then secure the tree with clamps (or other props) while it dries overnight.

In the morning, squeeze the sides of the container to release the cement base. Remove the container and brush off any cement crumbs from the base.
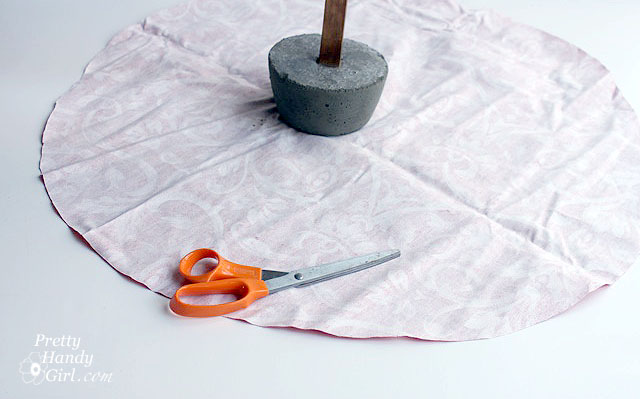
Cut a piece of fabric in a circle large enough to cover the base.
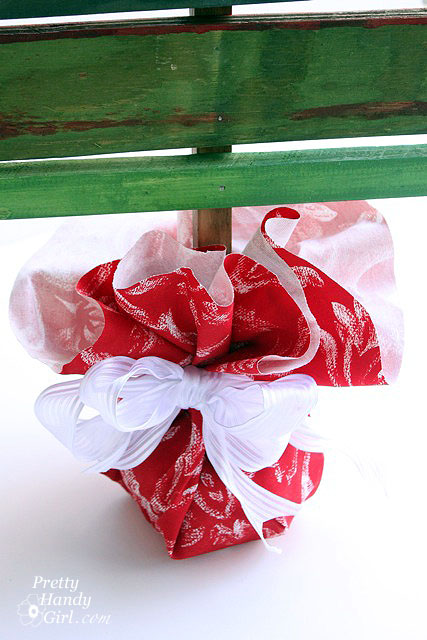
Gather the fabric up and tie it with a ribbon to secure it in place.
 

Adding the Star:

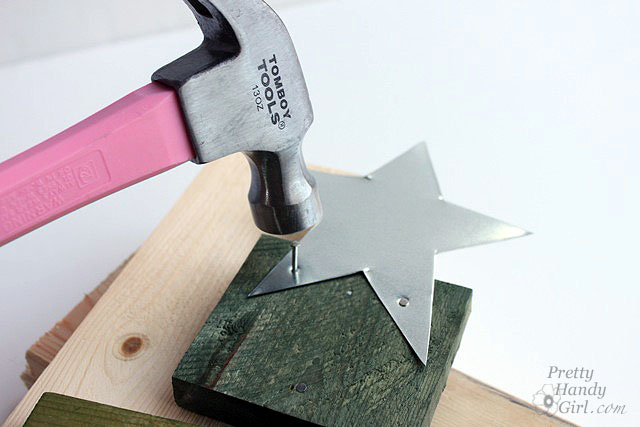
Trace a star shape onto a scrap of sheet metal (duct material) or a metal can. Cut out the shape using tin snips. Wear gloves to protect your hands from the sharp edges.
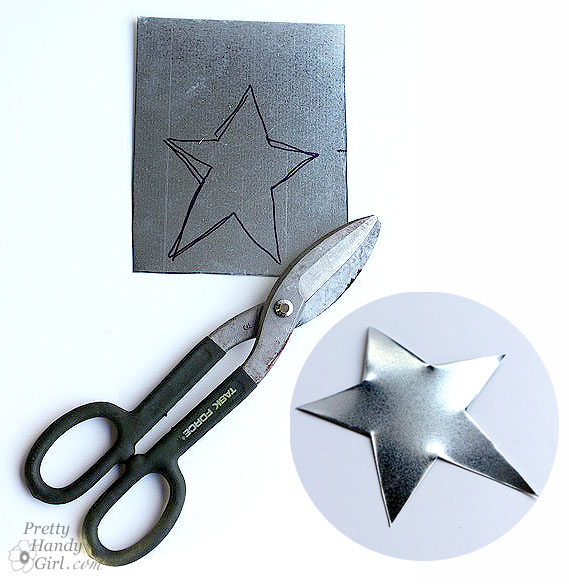
Position the star so it overlaps the top piece of scrap wood on the tree. Hammer two brad nails through the star and into the wood.
Decorate your tree with some holiday lights. (I found a set of battery powered LED lights at Target. They aren’t as bright, but it eliminates having to plug in a light cord and having a tripping hazard.)
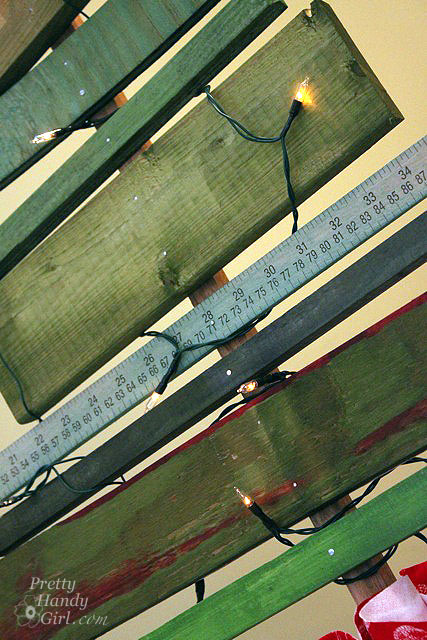
I like the variety in color I got from using the three different colors of RIT dye. I am really loving my little table top tree. He kind of reminds me of a Charlie Brown Christmas tree, but I’m not sure why.

I have to tell you that I was so excited when I saw the color of the Teal RIT Dye, that I couldn’t resist throwing some old scarves into the bucket with the wood.
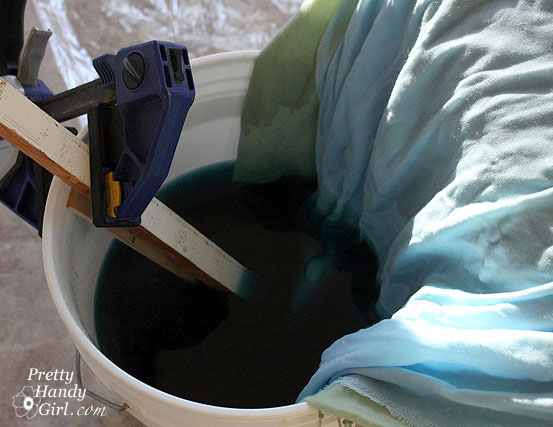
I had two scarves, one was light green and the other light blue. The green one never accepted the dye even after an hour of soaking. Obviously, the scarf was made of polyester, which will not accept dye. The light blue one came out beautifully. I attempted to recreate an ombré technique as described on the RIT Dye website, but didn’t read the directions until after the scarf had been sitting still in the dye for about 10 minutes. This gave me a sharp dye line, but it isn’t really noticeable when wearing it.  Next time I’ll know to keep dipping and moving the fabric.
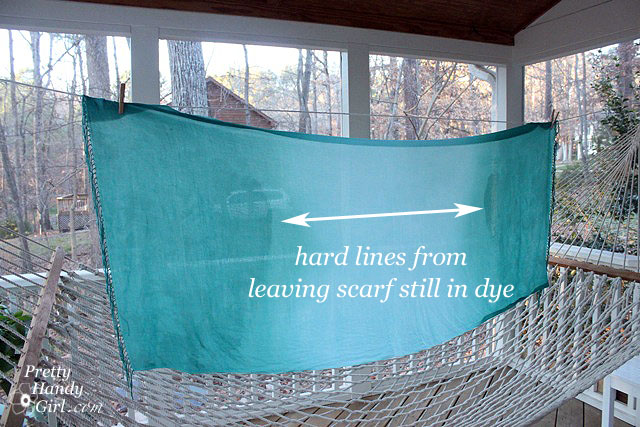
This forgotten scarf has now been relegated to my wear almost everyday scarves!



Disclosure: This post has been sponsored by RIT Dye. I was sent several bottles of RIT Dye and paid a small fee in return for writing a post about my experience using their product. The ideas and opinions are strictly my own. I will never let any compensation (monetary or free product) keep me from giving you (the reader) a straight up and honest review.

Pin for later!
Pottery_barn_like_organizational_box

I love a challenge. If you hold an object up to me and ask me how it can be transformed, I can usually name a few different things. So, when the Elmer’s #Look4Less Challenge was introduced, I jumped at the opportunity!

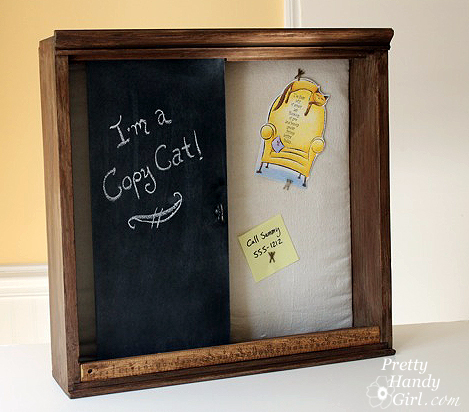
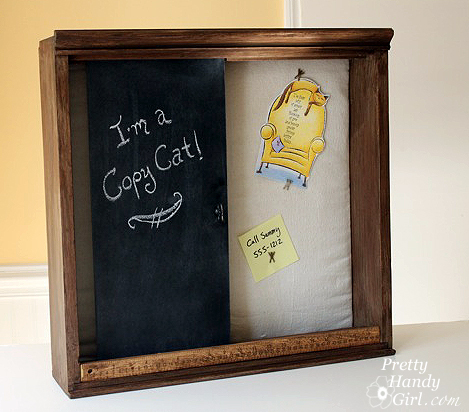
For this challenge I chose to recreate Pottery Barn’s Sliding Chalkboard Wall Organizer. I loved the idea of a sliding board and a bulletin board in the back. But, I especially loved the rustic wood look.

However, I wasn’t crazy about the price. (Obviously that didn’t stop the item from selling out!) So, if you want one for yourself, I’ll save you $100 and show you how to make your own!

My version cost approximately $30 (cost estimate based on materials used. If I used a 1/2 can of spray paint I calculated half the cost.) Personally, I spent about $10 out of pocket on this project because I had a lot of the supplies already. Plus, Elmer’s was kind enough to sent me some of the materials to make the project (shown as links below.)

Be sure to read the end of this post to learn how you can win your own Elmer’s materials!

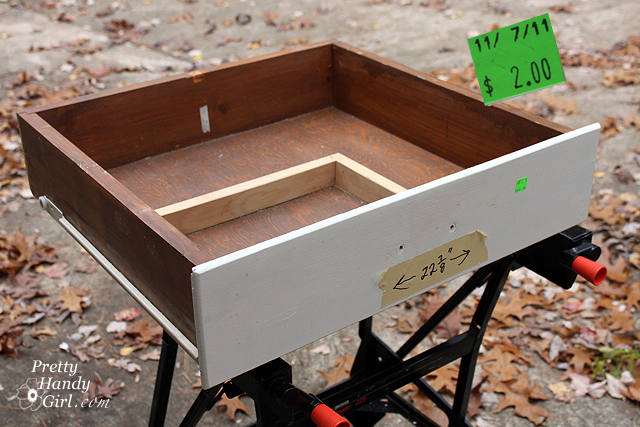
In addition to the new art supplies, I bought an old drawer to use for the structure of my organization unit. I paid — are you ready for this — two dollars at our local Habitat ReStore! Seriously, only $2 for the main component of my wall organizer unit.

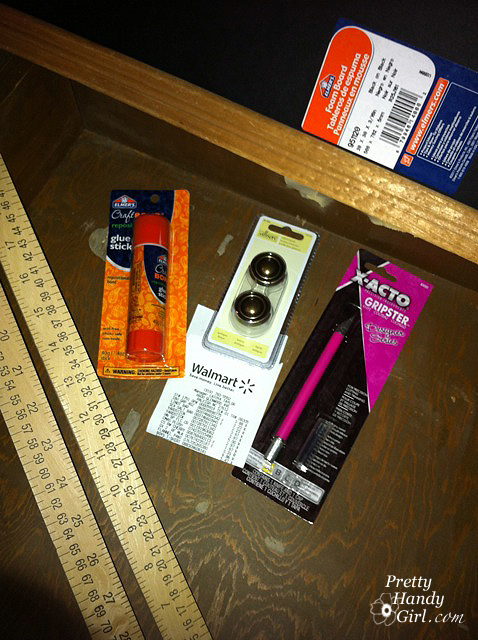
Here is a list of the rest of the supplies I used:


  • Krylon chalkboard spray paint
  • Drawer
  • Damp rag
  • Painter’s drop cloth
  • Batting
  • Wooden ruler
  • 1 Knob
  • Washers
  • Rustoleum brown spray primer
  • Behr glazing liquid
  • Valspar mocha glaze
  • Acrylic or latex paint (dark brown tester sample)
  • Acrylic or latex paint (light tan tester sample)
  • Wood putty
  • Saw
  • Hammer
  • Drill and drill bits
  • Handsaw
  • Brad nails
  • Finish Nail
  • Construction glue
  • Clamps
  • Pencil
  • Trim molding
  • 1″ x 1″ wood strips (or square dowels)
  • Duct tape

Prepping the drawer:

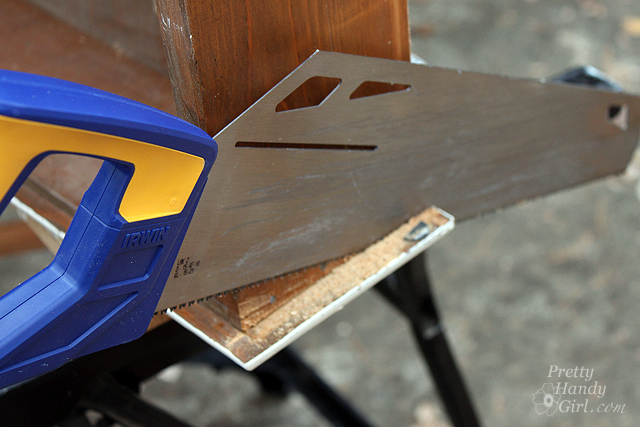
Remove any hardware from the drawer. Use a handsaw to trim off the sides of the face of the drawer. You want the sides to be flush with the sides of the drawer. The top and bottom of the face can extend beyond the drawer.

Orient the drawer so the face is now the bottom of the wall organizational unit. The rear panel of the drawer is now the top of the unit.

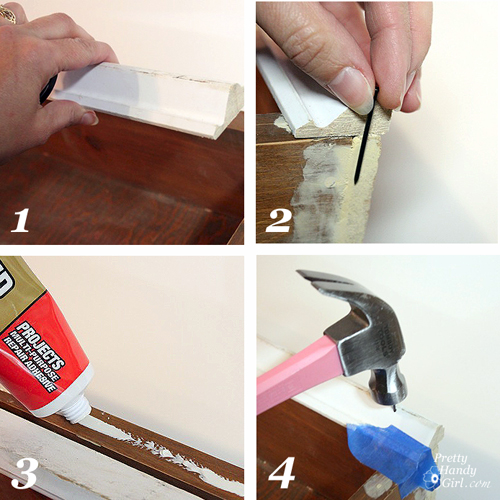
Add decorative trim molding to the top as shown:

  1. Cut decorative trim molding to the width of the top of the unit/drawer. (Check with your local Habitat Restore for inexpensive trim.)
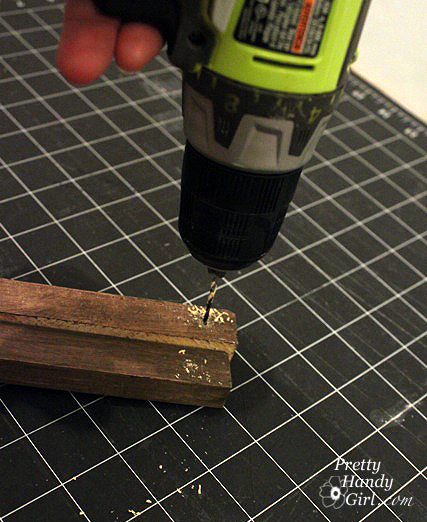
  2. Choose a finish nail that is long enough to go through the molding and into the drawer. Drill a few pilot holes into the molding (to avoid splitting the wood when you hammer a nail into it.)
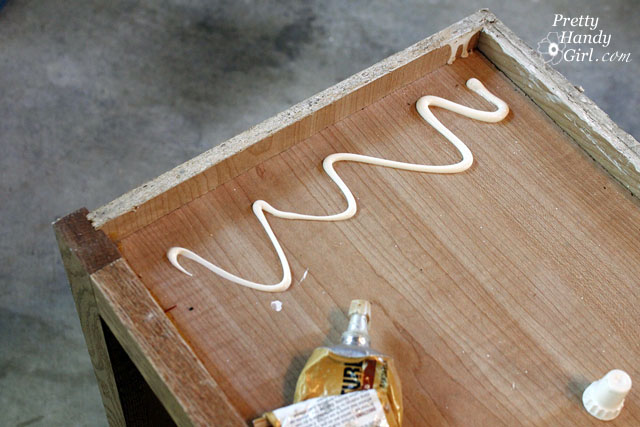
  3. Run a bead of construction glue on the top of the drawer. Lay the molding on top of the glue.
  4. Use finish nails to hammer through the pilot holes and attach the molding to the drawer.

Wipe off the drawer/unit with a wet rag.


Faux painting the unit:

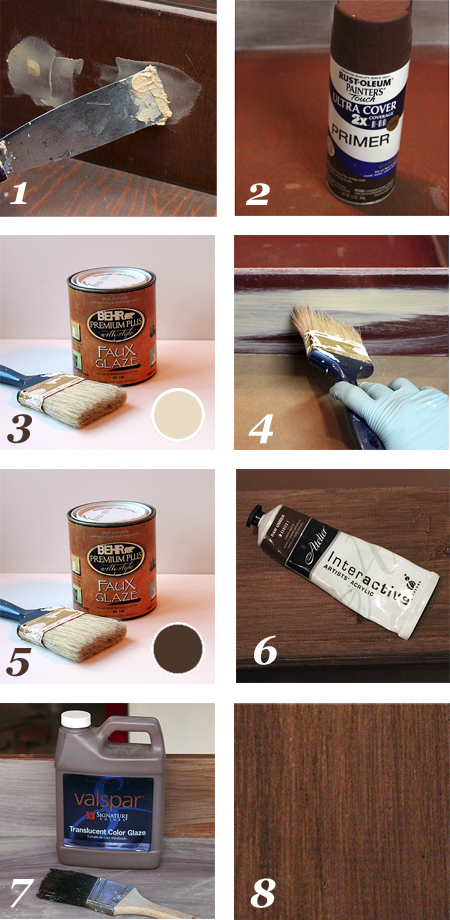
If you are dealing with a mixture of wood finishes (some paint, some stain), you will want to prime and paint your unit. I decided to give mine a faux rustic wood treatment (because I love that rustic wood look!) Here are the basic steps:

  1. Use wood putty to fill any holes or cracks. After the putty has dried, sand it smooth. Wipe off any dust from the wood using a damp rag.
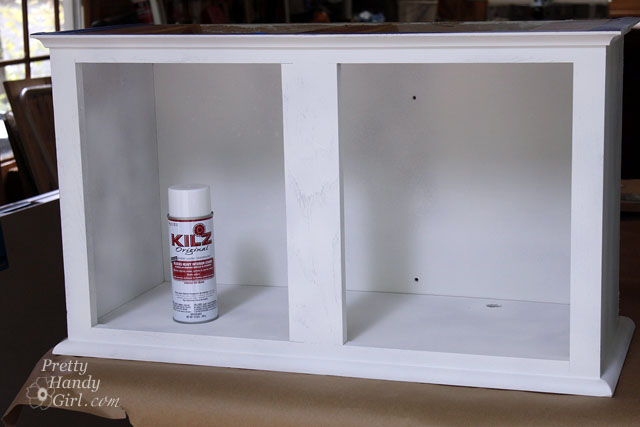
  2. Prime the entire box (minus the back) with Rustoleum brown primer.
  3. Mix 1 part glaze to 2 parts light tan paint.
  4. Brush the mixture onto the unit using a tattered paint brush. Keep the strokes in long lines to mimic wood grain.
  5. Let that layer dry. Mix 1 part glaze to 2 parts dark brown paint.
  6. Brush it on the unit using the same technique as step 4.
  7. Finish up by brushing a coat of Vaspar Mocha glaze over the entire unit.


Creating the bulletin board:

After the glaze has dried, cut a piece of Elmer’s White Foam Board the dimensions of the inside of the drawer/unit.

Cut a piece of batting the same size as the foam board.

Cut a piece of painters’ drop cloth 2-3″ wider (on all sides) than the foam board.

Layer the drop cloth, then the batting and top it with the foam board.

Wrap the edges of the drop cloth around the foam board and secure it with duct tape.

Add a few Elmer’s CraftBond Glue Spots Pop-up Medium to the back side of the foam board and press the board into the back of the unit. Instant bulletin board!


Adding a graphic letter to the bulletin board:

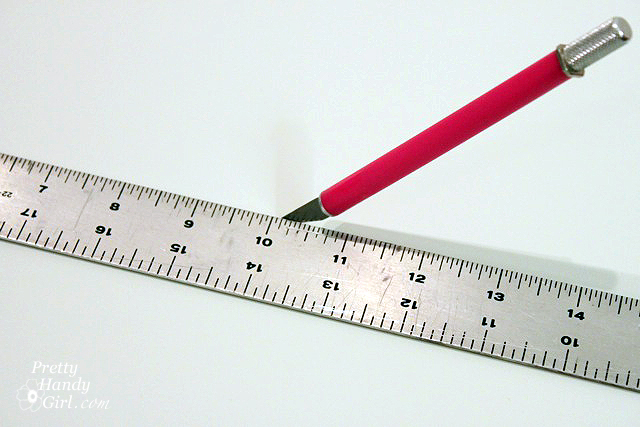
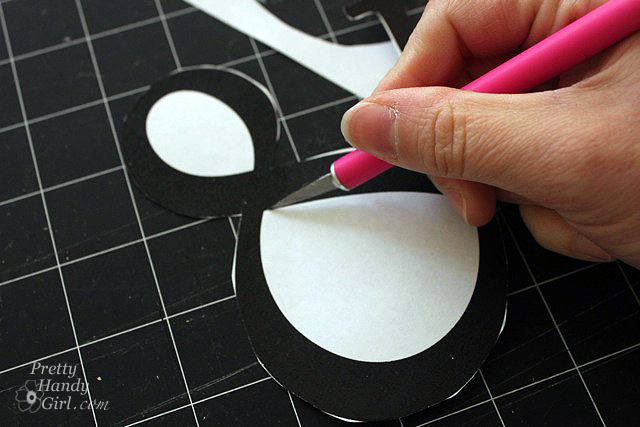
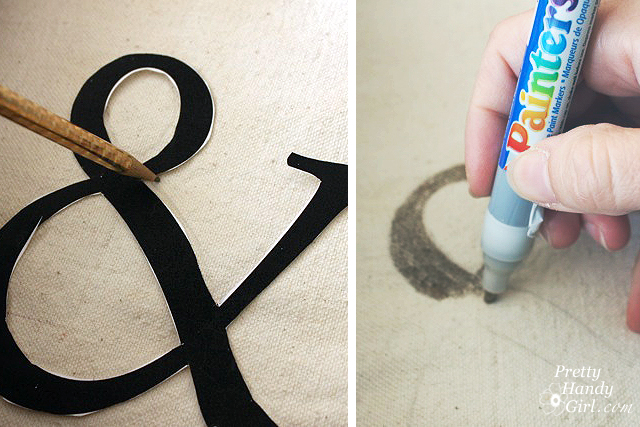
Print out a large letter, number or symbol. Cut out around the shape using an x-acto knife.

Position the cut out onto the bulletin board and trace around the edges lightly with pencil.Use an Elmer’s Painters gold paint marker to color inside the pencil tracing.


Creating the sliding chalkboard:

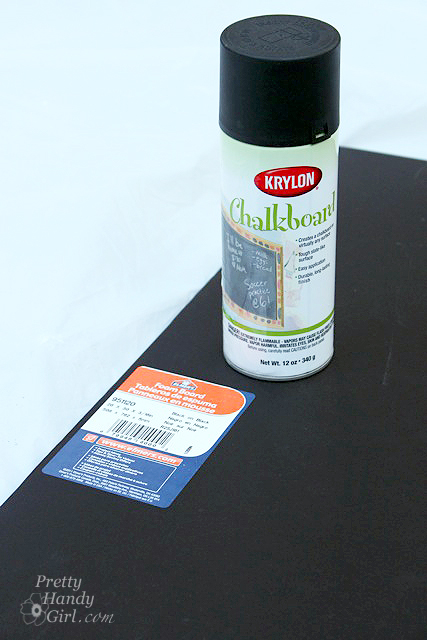
Cut the Elmer’s Black Foam Board the height of the interior of the drawer/unit and about 1/3 the width.

Spray the black foam board with the chalk paint. Add 1-2 more light coats per the directions on the can.

Measure the interior width at the top and bottom of the organizational unit. Cut two 1″ x 1″ strips of wood (or square dowels) for the top and 2 strips for the bottom. Drill a hole in each end of the strips.

Measure out 1″ from the bulletin board, on the bottom of the unit. Mark this location. Repeat for the top . Run a bead of construction glue onto the bottom of the wood strip and then adhere it to the bottom of the unit at the 1″ measurement mark.

Hammer brad nails into the predrilled holes. Repeat for the top of the cubby. (Two 1″ square strips are shown, but only install the back ones at this time.)

If the chalkboard paint has dried, rub a piece of chalk all over the board to season it. Wipe it clean with a dry cloth.

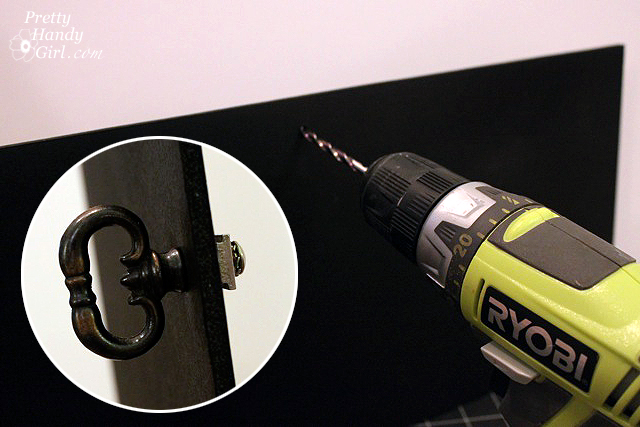
Drill a hole into the chalkboard where you want the handle. Feed the handle through. Add washers to the backside of the chalkboard if you need to take up some of the slack on the screw.

Insert the chalkboard into the wall unit and rest it against the first strip. Add the second strip in front of the chalkboard and attach it the same way you did above.

Be sure that the wood strips are not too snug against the chalkboard. The board should have enough freedom to slide back and forth freely.


Finishing touches:

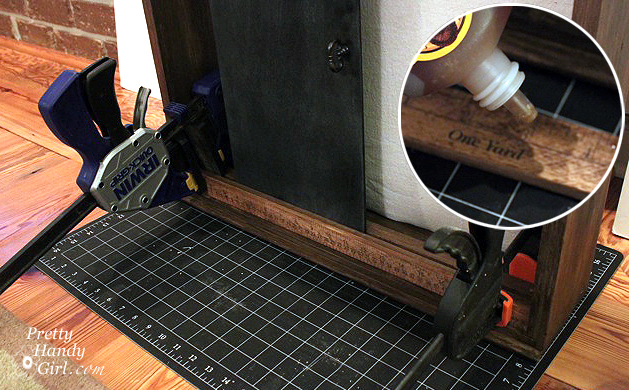
If you want to give your ruler some age, rub a walnut stain onto the wood. Let it dry. Glue the wooden ruler to the front of the wood strip on the bottom using construction glue.

Clamp the ruler in place and let it dry overnight.

Add your pushpins and a message to the chalkboard and enjoy your efforts! You just saved yourself $100!!! Woot!

If you want instructions for hanging the unit, check out this post on hanging objects on the wall (the right way) the first time.

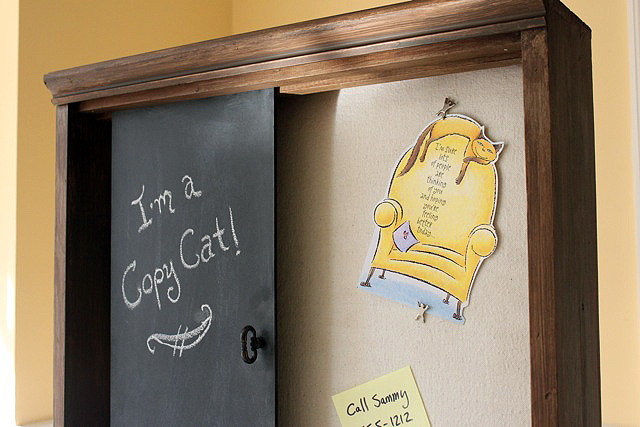
I’m pretty pleased with my Pottery Barn copy cat. Not to be mean or anything, but I like mine better because of the ruler,

the decorative crown molding,

and most of all for the price!!!


Do you like my Pottery Barn knock off? Or does it still look like an old discarded drawer to you?


Disclaimer: This project has been compensated as part of a social shopper insights study for Elmer’s #gluenglitter #collectivebias #CBias. I was paid a small fee and sent some Elmer’s products. However, the ideas and opinions expressed in this post are solely mine.

Sharing with Sawdust and Paper Scraps – Build{hers} Link Party

Did you like this post? Want to be notified when there are more fantastic tutorials by Pretty Handy Girl? Sign up to receive emails in your inbox:

Enter your email address:

Delivered by FeedBurner

Or follow me on Twitter or Facebook so you can be the first to know!


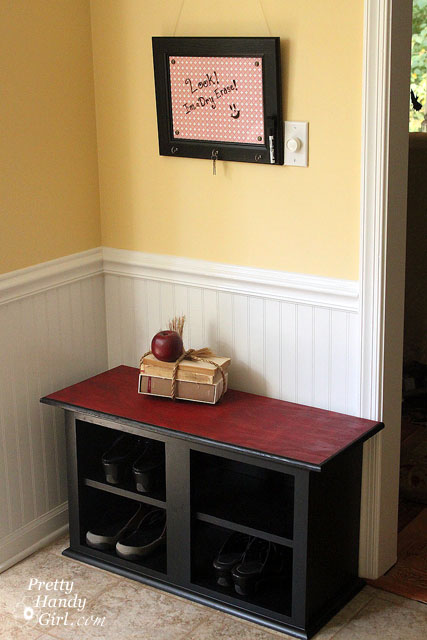
shoe storage bench

We had a great turnout at the Habitat ReStore demonstration on Saturday! Thank you to everyone who showed up. It was nice meeting some new friends. There will be another talk at 1 pm on Saturday, December 10th at the Cary, NC Habitat ReStore! I hope you can make it, because I’ll be showing how to turn some common ReStore items into holiday gifts and décor.

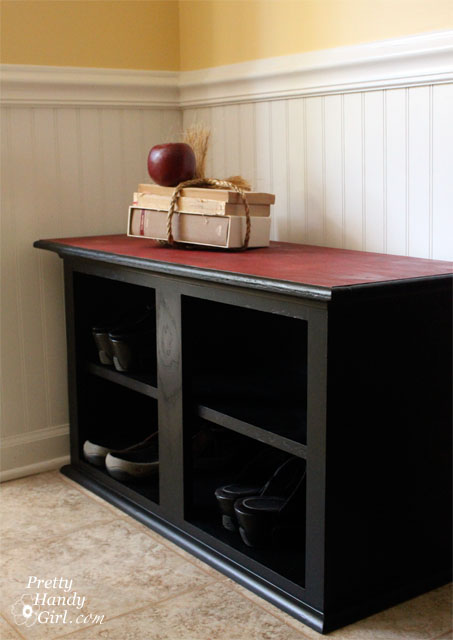
And now for the tutorial that you really wanted to see — but couldn’t make it to see — making a shoe storage bench out of an kitchen wall cabinet!

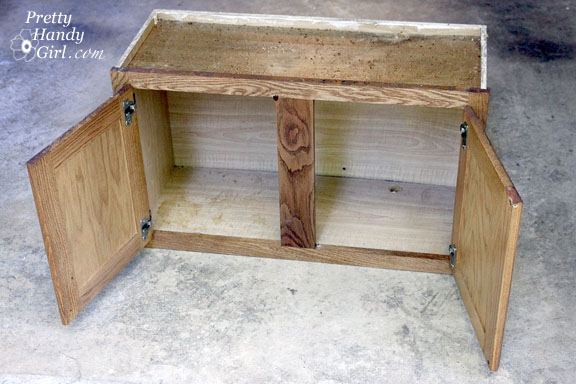
Wall cabinets that fit over your fridge or stove work really well for this shoe storage bench project. Ideally the cabinet will be 18″ in height (standard seat height). If it is shorter, you can build a base for your bench to raise it up a little.

It is more than likely that these cabinets will be coated with about 5 lbs. of grease. But, have not fear, I found THE BEST cleaner for removing grease. Hot water and ammonia! You must work in a well ventilated area when working with ammonia. Sponge on the ammonia and hot water concoction and wait about 10 minutes. Wipe off the cabinet and repeat until clean.

Materials:

  • Ammonia, hot water and a sponge or rag (to clean off grease)
  • Screwdriver
  • Hammer
  • Nail set
  • Miter saw
  • Pencil
  • Level
  • Tape measure
  • Wood putty
  • Sandpaper
  • Construction or thick wood glue
  • Primer
  • Paint
  • Paint brush
  • 2″ finish nails
  • 1 and 1/4″ finish nails
  • Quarter round moulding for base of cabinet
  • Cove moulding for top of cabinet
  • 1″ thick board (cut to fit inside cabinet dimensions)
  • 1×4″ pine firring strips
  • Plywood or pine board cut to fit 3″ wider and 1.5″ deer than finished dimensions of the cabinet (after moulding is added.)
  • Optional: Thin plywood to use as a filler strip


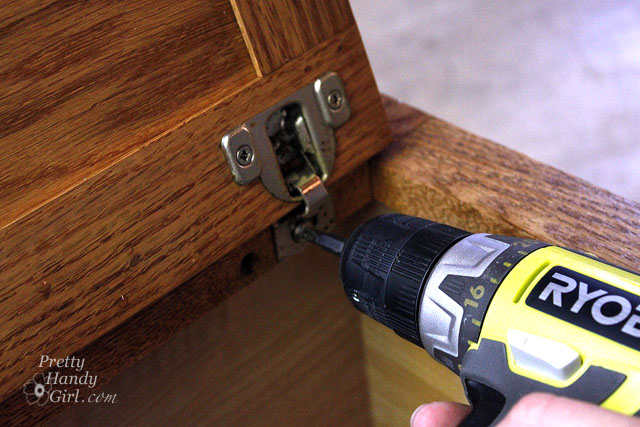
Remove all the hardware and the doors. Remove any nails that are poking out or hammer them flush with the wood.

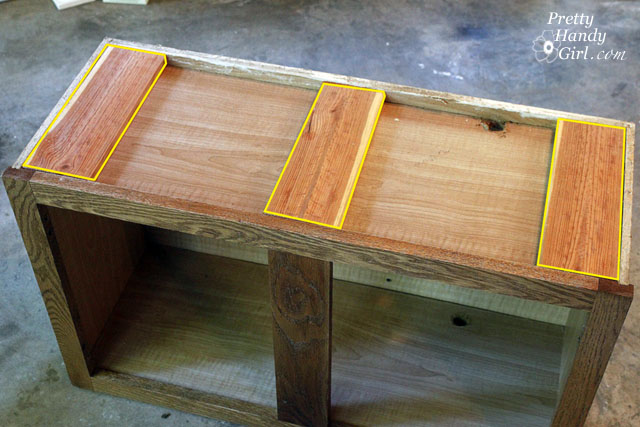
Measure the inside depth of the top of your cabinet.

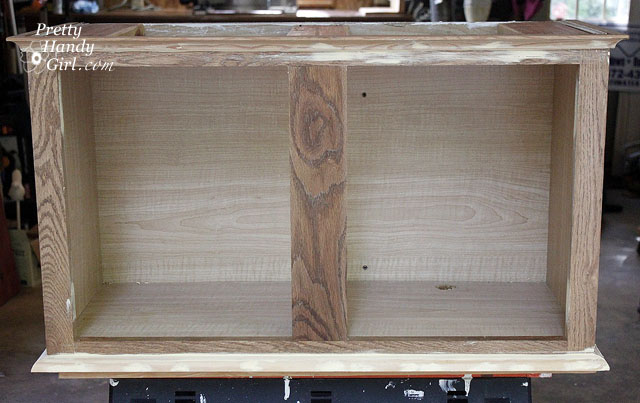
Cut three 1×4″ boards to sit on top of the cabinet and use for the bench support and to give your nails something to grip when attaching the bench top. (Without these supports it would be very difficult to nail or screw into the particle board cabinet without it flaking and chipping.)

Use thick construction glue to attach the boards. (Glues that have a toothpaste consistency.)

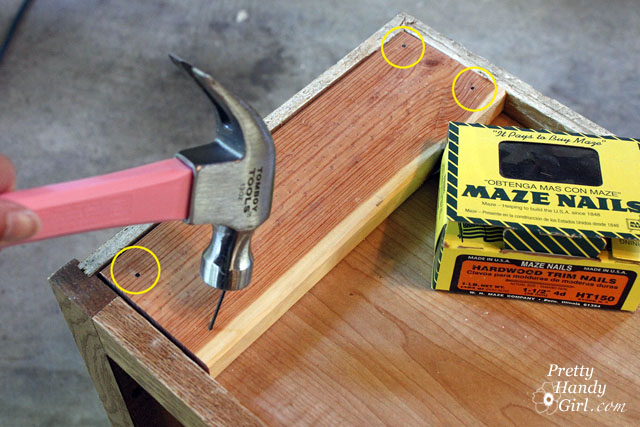
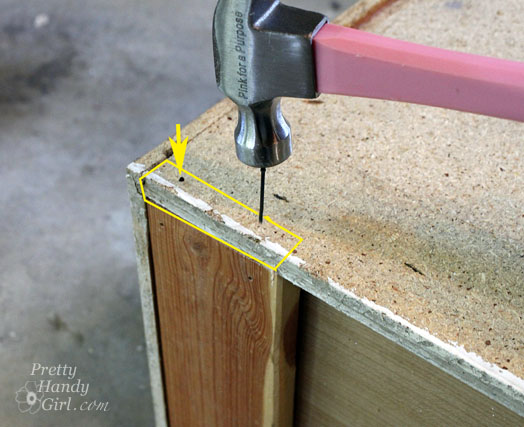
Nail finish nails into the boards at an angle to secure them.

For good measure, nail two more finish nails through the back of the cabinet and into the ends of the support boards.

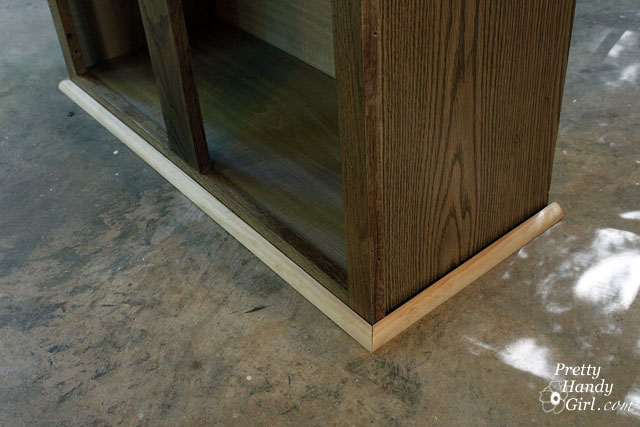
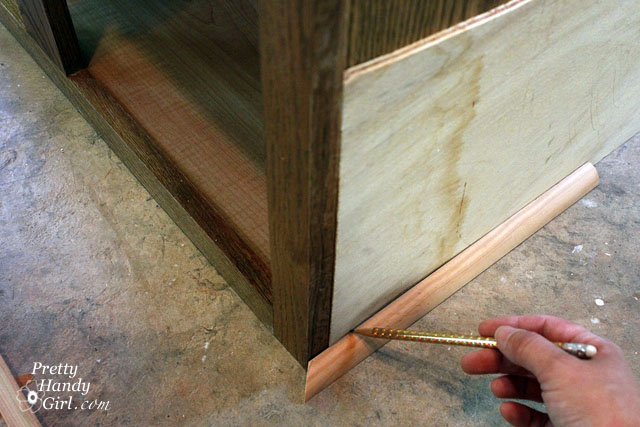
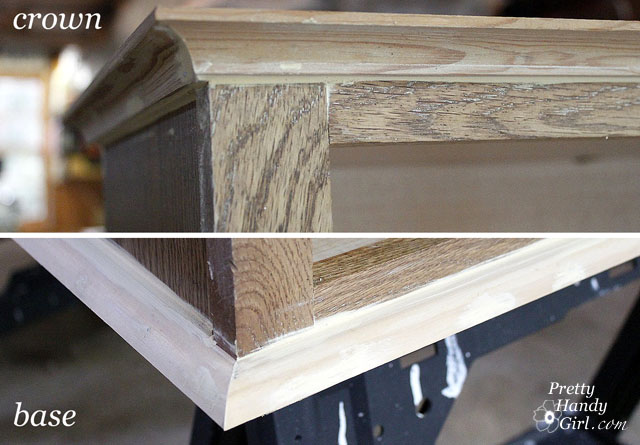
Measure your cabinet sides and front. Cut quarter round (convex shape) for the base of your cabinet and cove moulding (concave shape) for the top of your cabinet.

Here is a close up of the moulding I used for the base and crown of the cabinet.

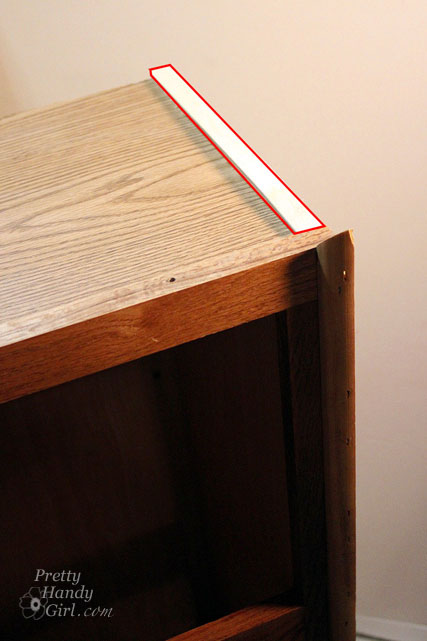
If the face frame of your cabinet juts out past the side, you’ll have a gap (see below). No worries, we can fix that!

Slip a piece of thin plywood to fit behind the quarter round (and cove moulding). Draw a line at the top of your quarter round (and bottom of the cove moulding). Cut the plywood piece with a jig saw.

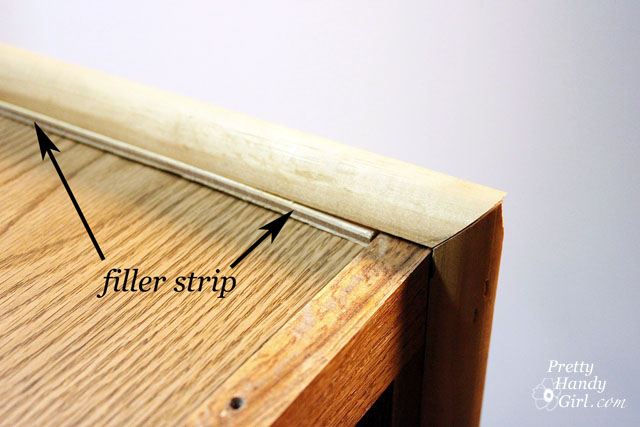
Glue the thin plywood strip onto the cabinet.

Rest your moulding on top of the filler strip.

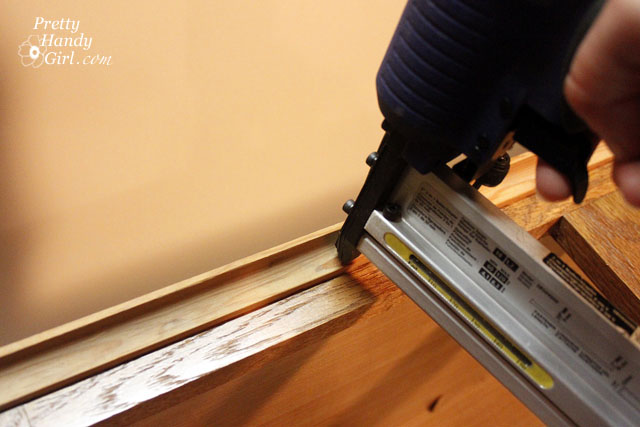
Predrill holes in your trim moulding, then hammer finish nails to secure the trim. If you are using a finish nailer to secure the moulding pieces, you won’t need to pre-drill.

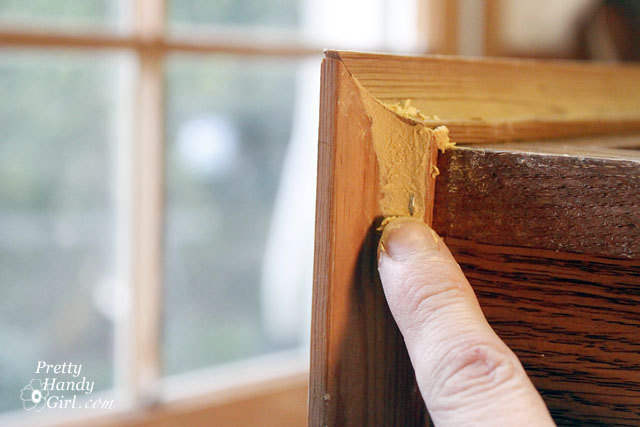
Fill any nail holes or cracks with wood putty.

Fill the seams of the filler strips with wood putty too.

Allow the wood putty to dry and then sand it smooth.

Your cabinet should look something like this:

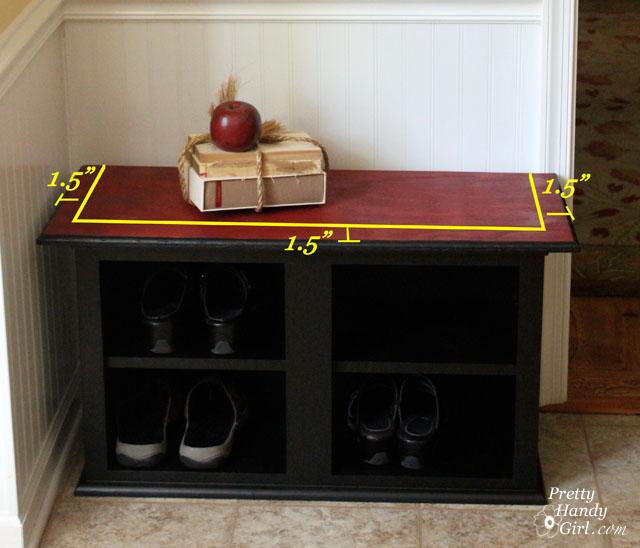
For the top of your bench, cut a piece of wood that is 3″ wider and 1.5″ deeper than the top dimensions of the cabinet (be sure to measure to the edge of the crown moulding.) Sand it smooth. Stain or paint the bench top.


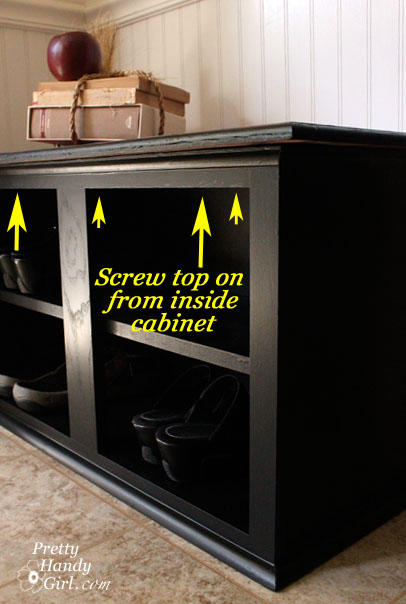
At this point, you can attach your bench top by screwing a few screws from inside the cabinet up through the support pieces and into the bench top.

*For demonstration purposes, the video will show how I attached the bench top with glue and finish nails from the top: Add some construction glue to the wood supports. Then, nail the top into the three support boards on top of the cabinet. Fill the holes left by the nails. And touch up the spots with stain or paint. Either way will work, but the screws from below will save you the work of adding wood putty and/or touching up the nail holes.

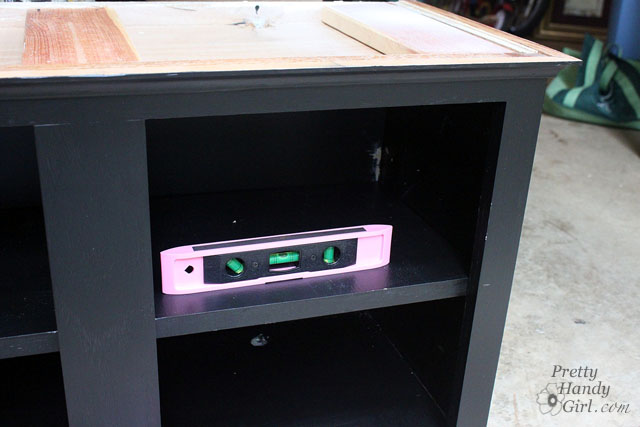
To install the shelf, level the board you cut to fit inside the cabinet (or shall I call it a bench since we are almost done!)


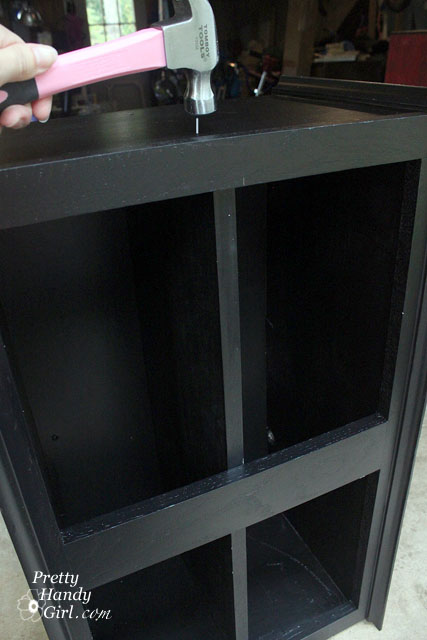
Use either “L” brackets inside the cabinet to hold the shelf or hammer nails from the side and into the ends of the shelf to secure it. Luckily shoes aren’t super heavy, so you can get away with using finish nails to hold the shelf in place.


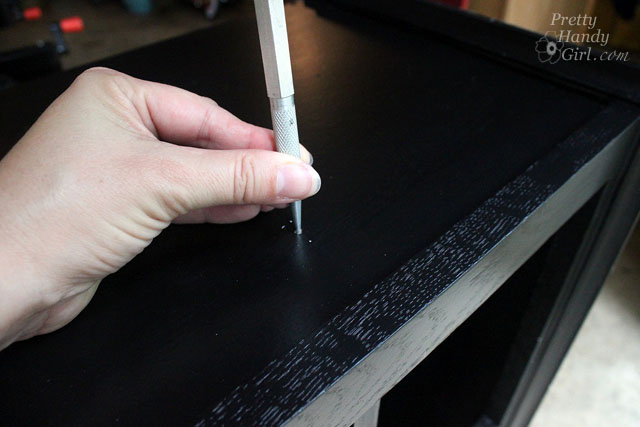
Use a nail set to sink the nail below the wood surface.


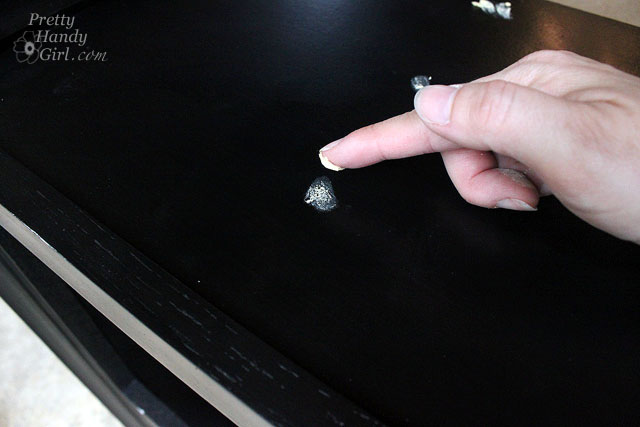
Add a small amount of wood putty to the nail hole.


Gently sand the cabinet and shelf to scuff up the surface and give it a “tooth” for the primer to adhere to. Prime the cabinet and bench.


Paint the cabinet, shelf and bench.


Protect your bench with a few coats of polyurethane and you are done!


Room for about 8 pairs of shoes! If you wanted a larger bench or more storage, you could attach two cabinets side by side.


Here is the video from my Habitat ReStore talk. (I apologize about some of the background noise.)

By the way, thanks to my sponsors Bogs Footwear (boots) and Tomboy Tools (tool belt.) I need to lower that belt a little ;-). I was rushing in and just buckled it on me without adjusting it.


Sharing this tutorial with Home Stories A2Z Tutorials and Tips Link Party and The Shabby Creek Cottage’s Transformation Thursday

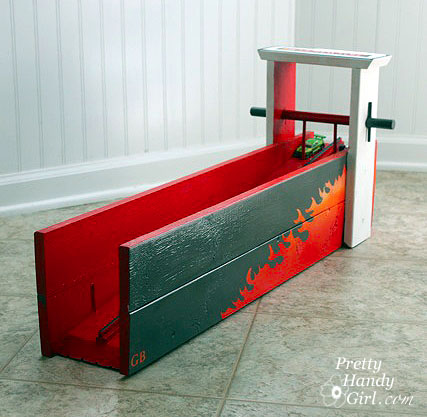
Matchbox racing ramp with flames

Hey y’all! I’ve been hopping all over town lately. Home Depot and Lowe’s have become my second home. So, if you see me in one of those stores will you send me home? I HAVE to finish my garage renovation sooner rather than later!

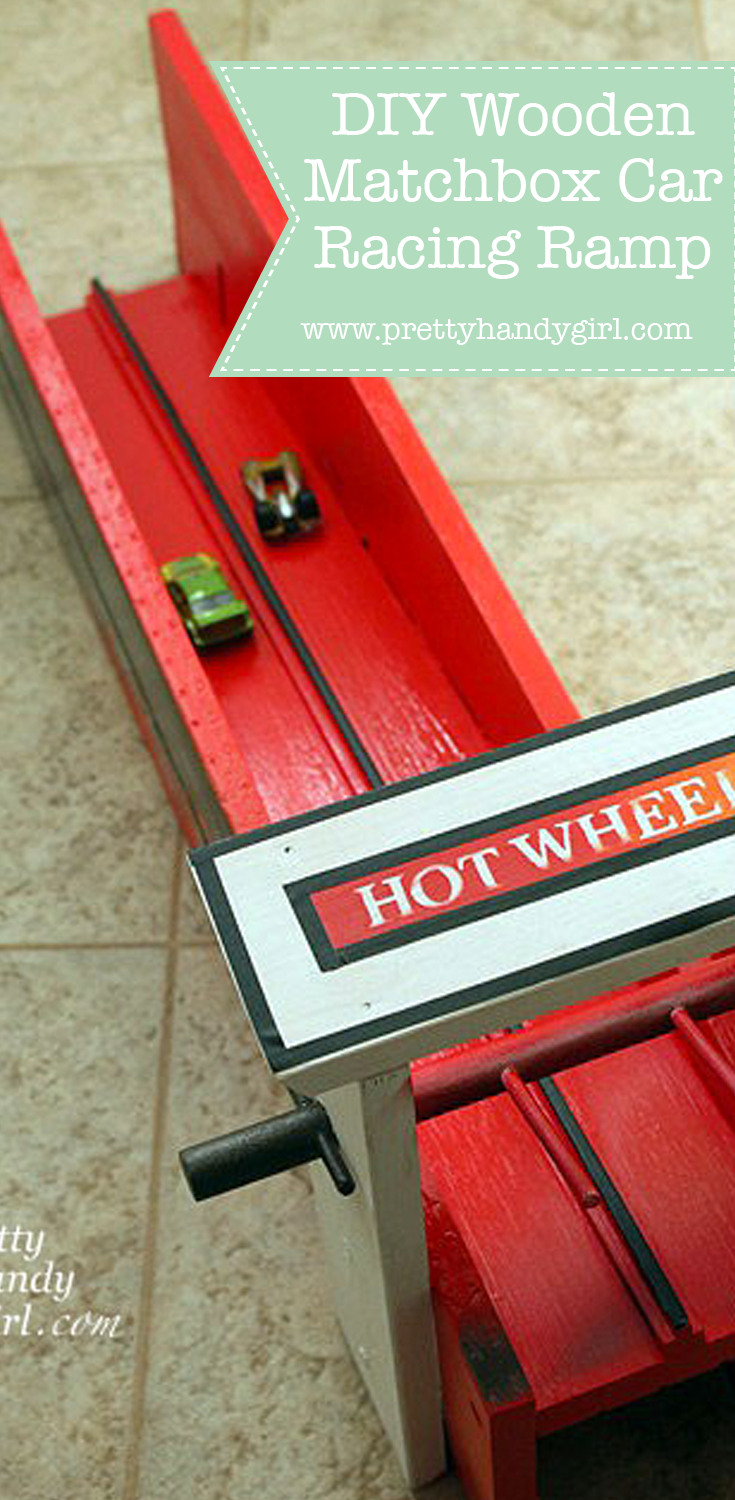
Today I have a tutorial for making a matchbox race track for those little car enthusiasts in your family! Now, don’t close this window because you think you couldn’t make it. I bet you can. There really aren’t any super complicated wood-working skills involved in this build. In fact, my 7 year old was responsible for the majority of the design.

I created this project and tutorial for my friend, Beckie at Infarrantly Creative. She is hosting a Pennywise Presents series full of inexpensive gifts you can make. Some fabulous bloggers have shared their amazing gift ideas!

So head over to Infarrantly Creative to learn how to make a Matchbox Cars Track.

See you tomorrow for another Tool Tutorial Friday!

Tool Tutorial Friday

Wheeee!

Pretty Handy Girl Signature

Pin for later!

red matchbox toy ramp

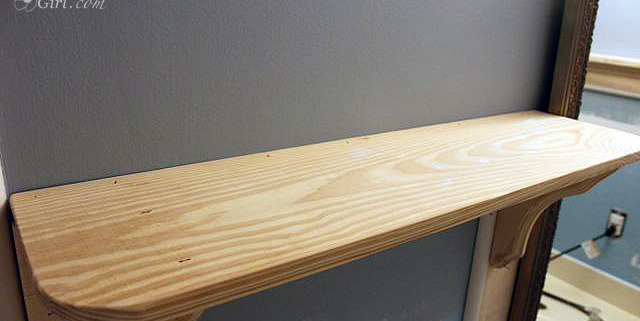
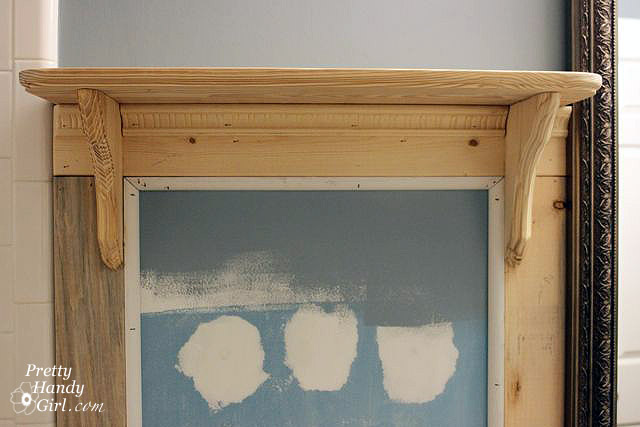
Thank you for all the kind comments about my boys’ bathroom. One of my favorite changes in the room was the addition of the built-in decorative shelf. It was fairly easy to build and install. I used a router to give the shelf a decorative edge, but it isn’t necessary if you don’t have a router (or are afraid to use one.)

Materials:

  • 1x 8″ Pine board (cut to length for your shelf)
  • 2 Wooden shelf brackets (with included mounting screw)
  • Sandpaper
  • Construction adhesive
  • Finish nails or nailgun
  • Hammer
  • Primer
  • Paint
  • Brush
  • Router and bit (optional)

Instructions:

Cut your shelf board down to size. If you want to add some pizzazz, use a router to give your shelf a decorative edge.

Sand any rough edges down with sandpaper.

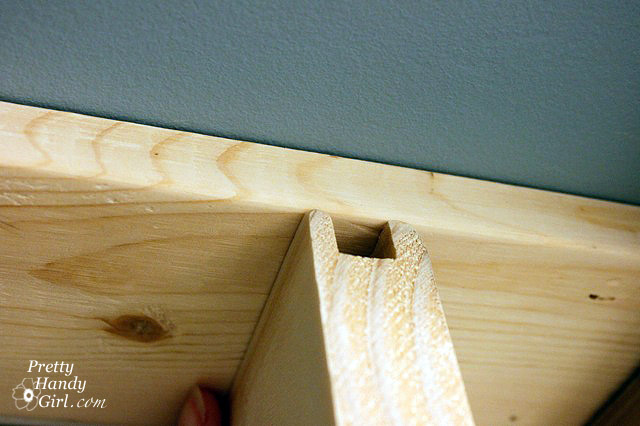
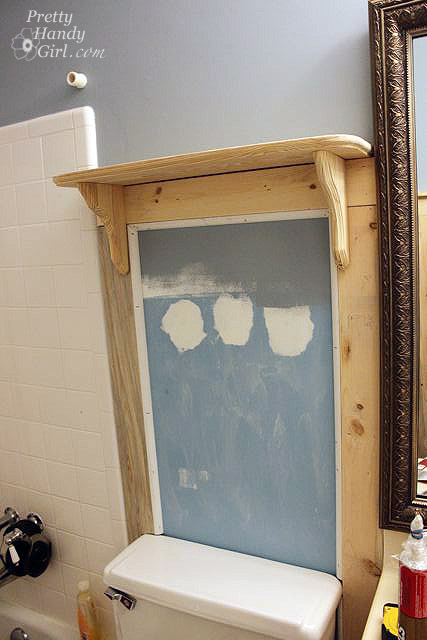
Set the shelf aside and get the shelf brackets. Line up the top of the shelf bracket with the top of the board and batten moulding.

Insert the mounting screw into your shelf bracket and press it into the board and batten where you wish to install the shelf.

Remove the screw and drive it into the board and batten where you left the mark. Slip the bracket over the screw. Adjust the depth of the screw until the bracket fits snug against the board and batten.

Squeeze some construction glue onto the back of the bracket and then slip it back onto the screw. Insert two finish nails through the bracket and into the board to further secure the bracket.

Repeat the installation steps for the other bracket. Lay the shelf on top to check the fit. Little gaps are okay because you can always caulk them later.

Remove the shelf. Squeeze a bead of construction glue on top of the board and then reposition the shelf on top of the board and shelf brackets.

Nail finish nails through the top of the shelf and into the board and the top of the shelf brackets.

Your shelf is now attached.

If you want, you can add decorative moulding underneath your shelf at the top of the board. I cut the edge of the decorative moulding at a 30 degree angle.

The moulding was cut at a straight 90 degree angle between the two brackets.

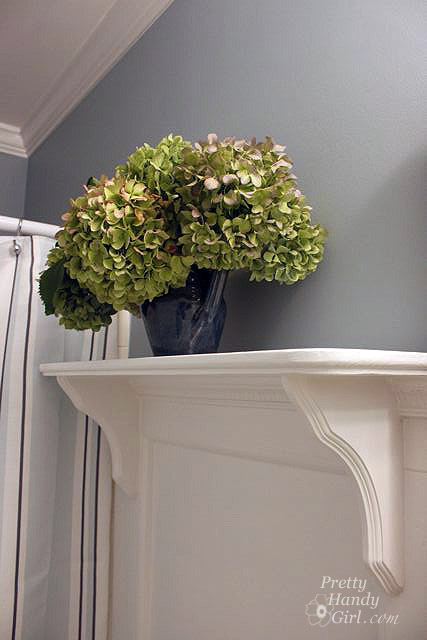
Caulk, prime and paint your shelf. Then wait about 3 days before resting anything on the shelf to avoid it sticking to the newly painted shelf.

But, then you need to put some pretties on that shelf and admire your handywork!

And now the moment that you have all been waiting for! We have a winner of the MirrorMate giveaway! I really wish I had more than one. But, don’t forget you can still get a 10% discount. Simply use: PHGBlog at checkout. Hurry because it expires on Sept. 27th 2011.
Let’s give a big “Congratulations!” to Diana C. who was chosen at random to win the MirrorMate frame credit!


Diana said: “What a great and easy way to update a bathroom mirror! I liked MirrorMate on FB … and my favorite frame is the simple, yet elegant look of the Chelsea Espresso frame!” Nice choice Diana, I hope you send me before and after pictures of your mirror.

Ta ta for now, I’ll be back soon with another fabulous giveaway!


Â