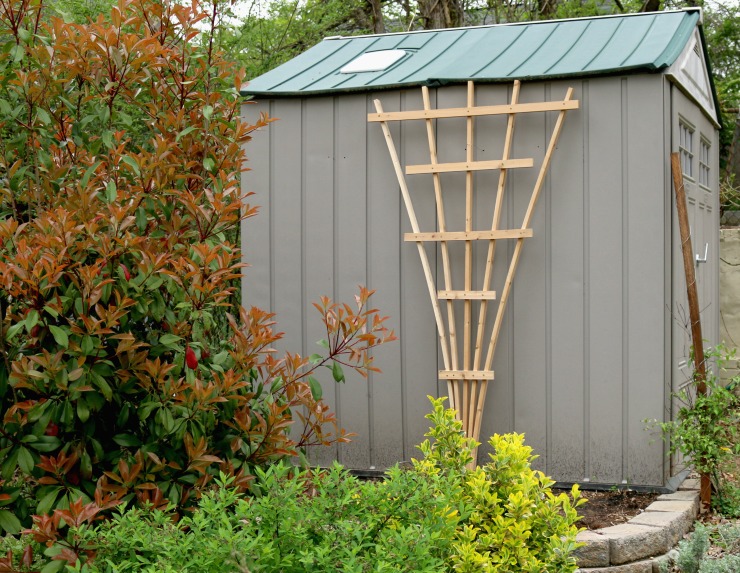
Every spring I find myself making a new fan trellis to replace my worn, weathered and rotting trellis that was left out over winter. This year, I am going to use the right materials (cedar and exterior screws) to allow me more than one season’s use of my trellis. This is an easy project that doesn’t require too much time, tools or money. And the best part is, you can make it exactly the size and shape that is right for your space. Follow along and you’ll be ready to plant cucumbers, clematis, or (my personal favorite) hops!
Materials:
6 – Cedar 1x2s (8 feet for a large trellis)
2 – Galvanized bolts long enough to fit through 5 of the 1x2s stacked together. (4 inches should work. Mine were too short so I had to improvise and counter sink the heads.
25 – 1 ½ inch exterior screws
Drill
Tape measure
Pencil
Screwdriver or impact driver
Miter saw or hand saw
Optional: Clamp (nice to have but not totally necessary)
Instructions:
A note about lumber used for this project. It is important to use cedar because cedar resists weather and insects. You could use pressure treated lumber, but it is treated with chemicals so you may not want to use pressure treated lumber if you are growing vegetables.
Step 1: Cut your vertical 1x2s
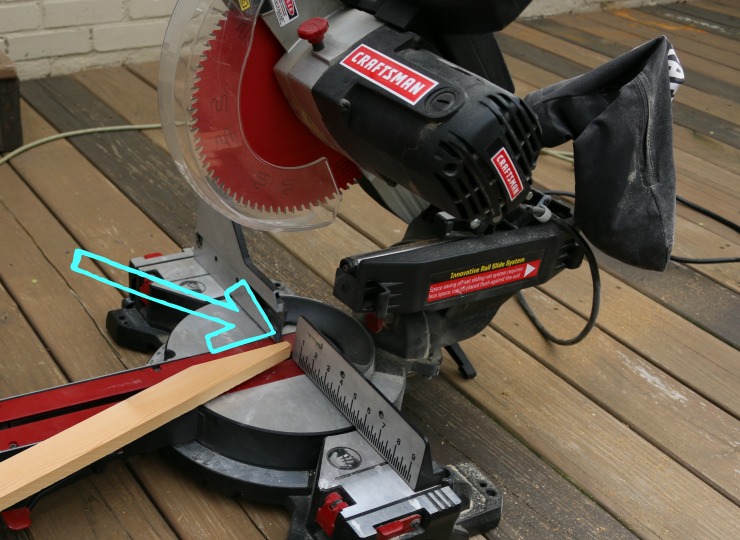
Cut four of your cedar 1x2s to six feet long. I like to leave the center 1×2 two feet longer than the rest of the pieces and cut it into a point (as shown below) so that I can drive it into the ground with a rubber mallet. Cut your middle 1×2 to eight feet long, unless you are not sinking your trellis into the ground. In this case, cut the fifth 1×2 to six feet long also.
Step 2- Secure the 1x2s
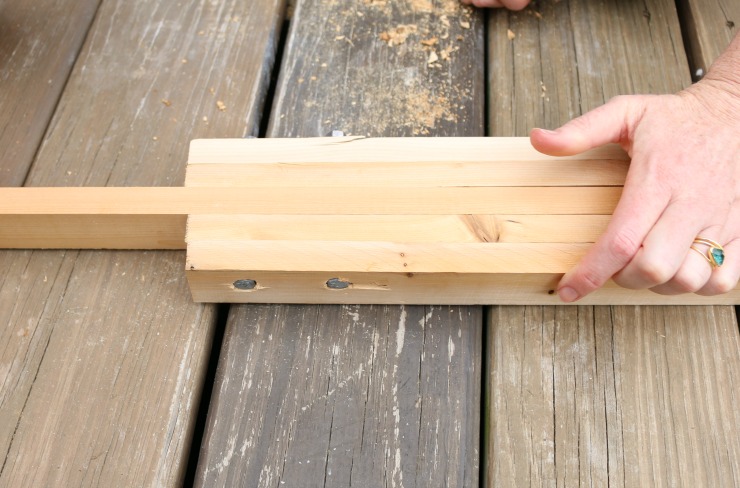
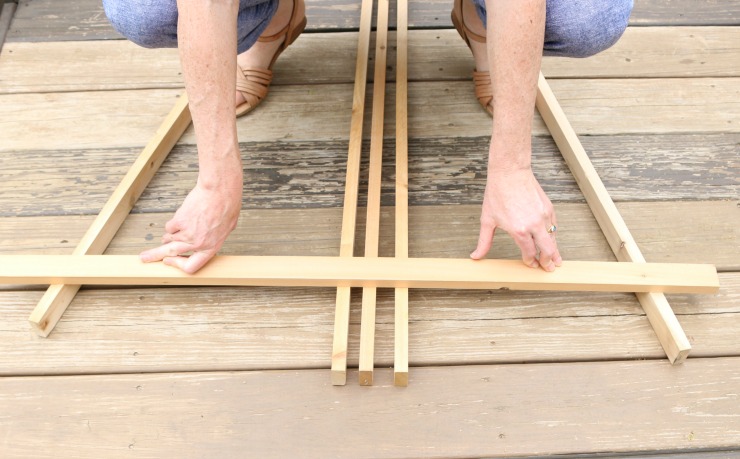
Stack the five vertical pieces making sure they are equal at the top. The middle piece (if longer) will stick out at the bottom as shown below.
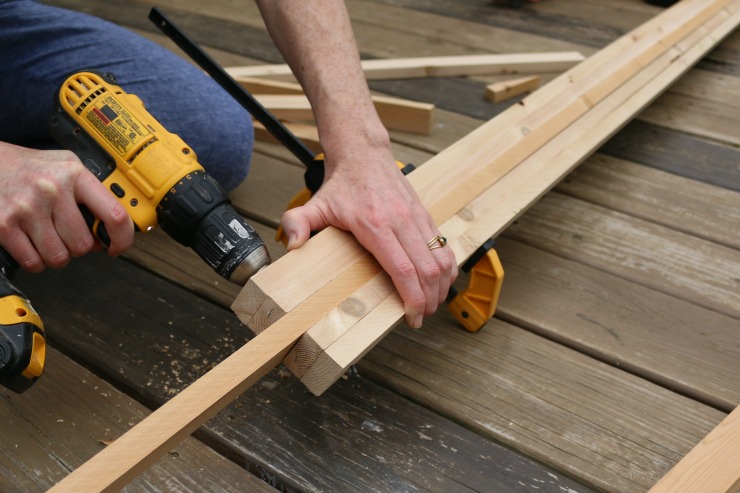
Clamp the 1x2s at the bottom and drill two pilot holes about two inches apart. Push the galvanized bolts through the stack and tighten the nuts. (You may notice my bolts were a little short, so I had to counter sink them. Get longer bolts and you won’t have to do this.)
Step 3- Create the fan
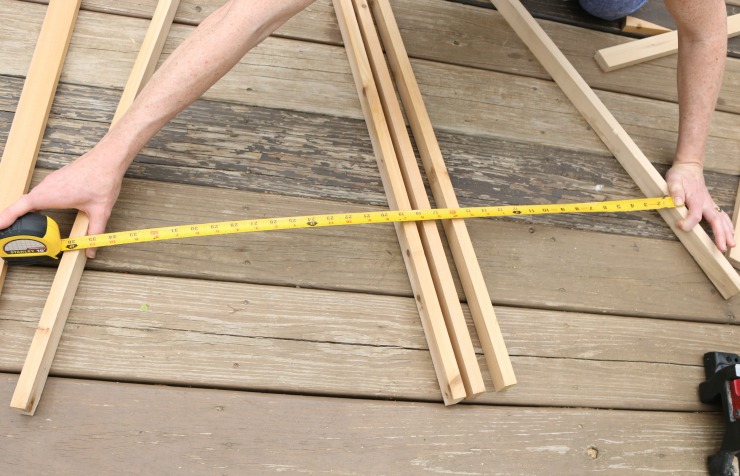
With the five 1x2s secured at the bottom, fan out the outer pieces at the top to the distance you prefer.
Add 6 inches to this measurement. Cut one of the remaining 1×2 to this measurement.
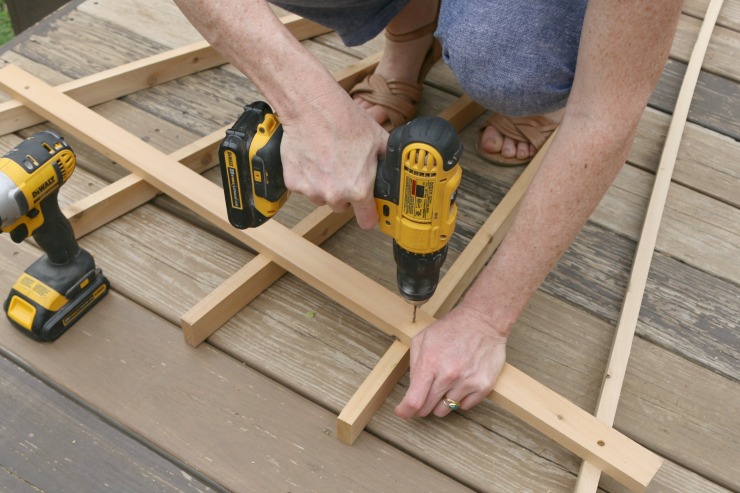
Using your feet to keep the outside pieces fanned out, drill pilot holes, and attach the cut piece near the top of the outer 1x2s. This will hold the trellis shape while you measure and eventually attach the rest of the horizontal trellis pieces.
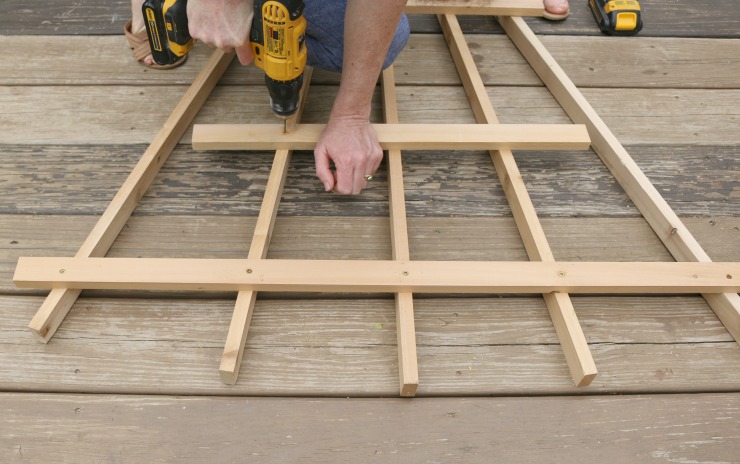
Now determine where to place the other vertical 1x2s. Feel free to skip measuring and eyeball the sizes and spacing. Nothing needs to be exact with this project, that’s what makes it fun! Cut your horizontal pieces and attach the vertical supports by pre-drilling and securing with the screws.
When you are done, your trellis will look something like this:
If you made your trellis to stake into the ground, pound the long, pointed piece of your trellis into the earth with a rubber mallet. For added stability, you can wrap a wire loop around one of the top supports and attach to the wall.
I wish I had an after picture of a beautiful vine covering my ugly shed, but that will have to wait a few months. Happy building and planting!
Hi! I’m Lara, the creator of The Unprofessional blog and YouTube channel. I am an aspiring handy-woman with little to no experience building, tiling, landscaping, demolishing, and what have you. I’ve drilled holes in the wrong places, cut on the wrong lines and stripped more screws than I care to count. And yet, I’m on my way to customizing my home, project by project. I believe you can do pretty much anything with a few good tools, a stack of wood and a half-baked
idea.
I like to find challenges and solve them with my miter saw. When my 3-year-old son complained that he couldn’t reach the picnic table, I designed an easy-to-build folding booster seat perfect for camping trips and beer gardens. When the low ceilings in my cape cod wouldn’t accommodate a bulky barn door, I found an alternative approach to turn any interior door into a space-saving barn door. I love to share these solutions with others in hopes that the empowerment and love of power
tools spreads.
https://prettyhandygirl.com/wp-content/uploads/2019/04/Trellis-by-shed.jpg573740Lara the Unprofessionalhttps://prettyhandygirl.com/wp-content/uploads/2021/07/PHG-logo-tagline-2020-1030x211-R.jpgLara the Unprofessional2019-04-24 07:00:352019-06-20 19:07:26Quick and Easy DIY Fan Trellis
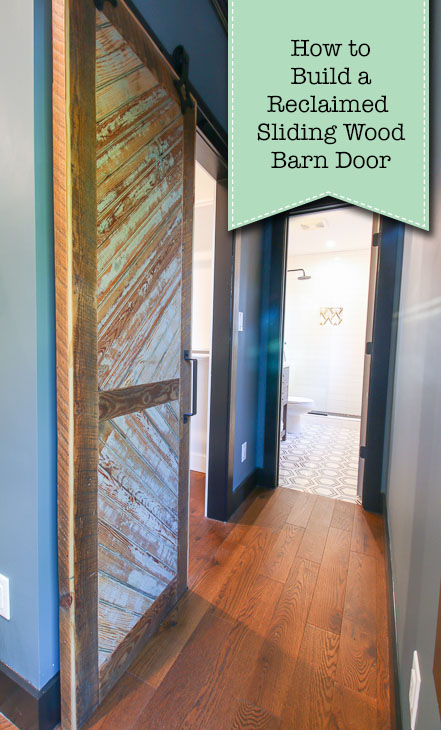
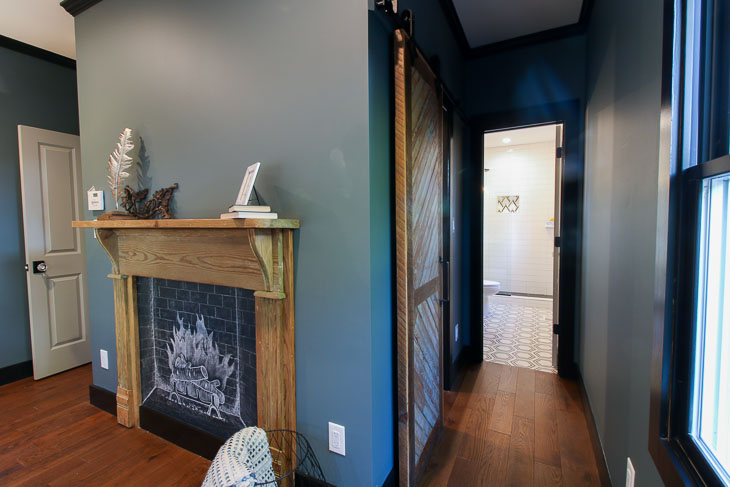
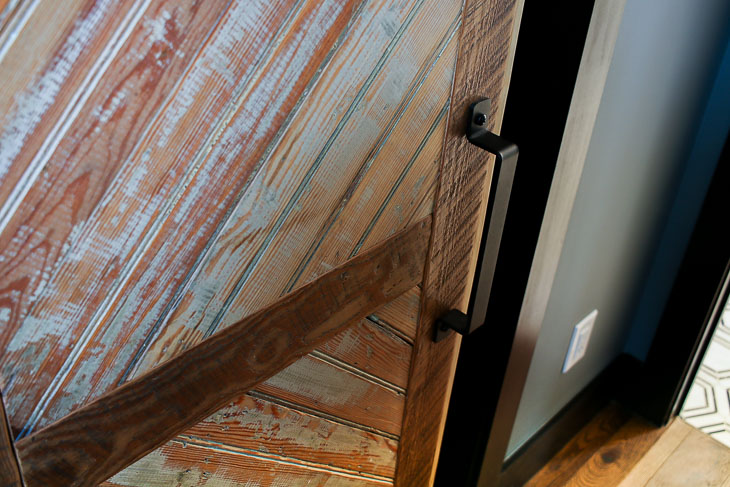
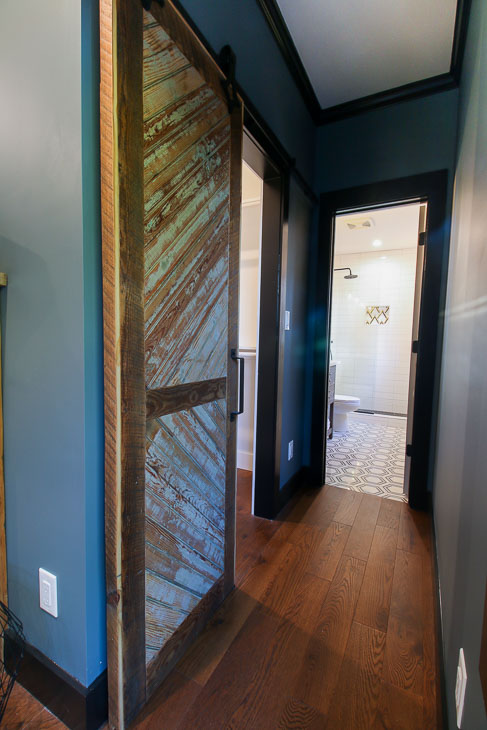
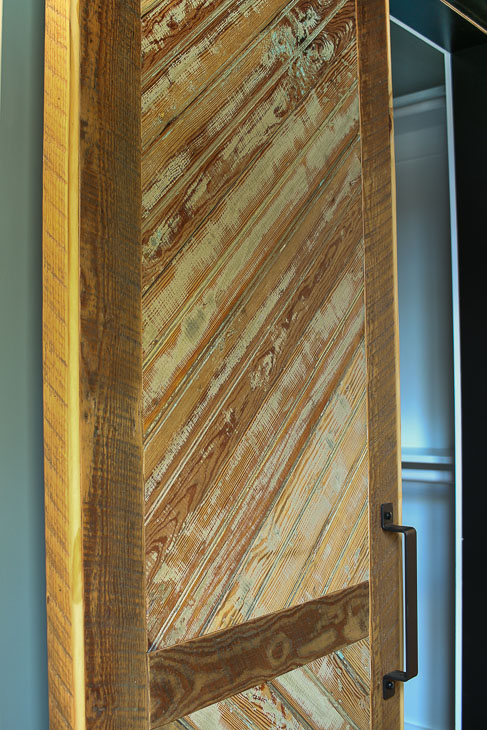
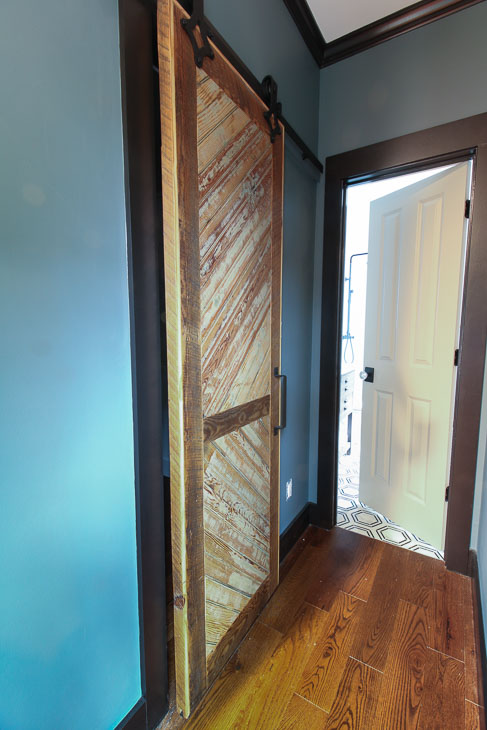
Earlier this week when I showed you the master bedroom in the Saving Etta house, you probably noticed the sliding barn door. I am in love with that door and especially excited that I was able to salvage the old beadboard and repurpose it as cladding on the barn door. Now it’s time to show you How to Build a Reclaimed Wood Sliding Barn Door. Let’s get building!
Notes about Materials:
To build your custom barn door you’re going to need to purchase a 4×8 sheet of plywood. The plywood will offer strength and rigidity and will add some thickness to the barn door. You don’t need to buy the finish grade plywood, instead purchase the cheapest plywood you can find because it will be covered up. One side will get a sheet of masonite bead board, and the other will be clad with the reclaimed lumber. And the sides will get trimmed out to hide the layers. So, as long as your plywood isn’t warped, it won’t matter how it looks. For my door I used 3/4″ plywood, but it was heavy. You may want to use 1/2″ plywood instead, but be sure to check the thickness requirements for your barn door track and hardware. This will ultimately dictate your width and weight!
Stripping Paint and Lead Paint Warning:
When you are using reclaimed wood, always test any paint with an instant lead check swab. Or treat it like it is lead paint. Because of the age of the bead board, I’m pretty sure my wood had lead paint. Before stripping lead paint, you definitely need to wear a dust mask or respirator and gloves. Eye protection is a good idea. And since my HEPA vacuum is loud, I wear hearing protection too.
Put down a plastic sheet under your work area and onto the floor. Make sure the sheet extends enough in each direction to catch any wayward paint chips.
The one thing you never want to do with lead paint is create airborne particles. This means you never want to dry sand it or use power tools to remove the paint. In the video, I’ll show you how I prefer to remove lead paint. In the past, I have used a chemical stripper like CitriStrip (although, the CitriStrip has a lot fewer chemicals than other strippers, it still makes a gooey mess). Instead, I found this ProScraper tool on Amazon and thanks to the recommendation of my friend at The Craftsman’s Blog, this is my new go to tool for paint stripping.
To use the ProScraper, clamp your wood to the table top. Use the ProScraper tool attached to a HEPA vacuum hose. While the vacuum is on, use firm pressure and pull the ProScraper towards you. It will take several passes to remove all the paint. Especially if your wood is old like mine and has over 100 years of paint layers on it.
After you finish scraping, be sure to vacuum up any paint chips and dust around your work area. Use a disposable damp rag to clean off the wood and remove any remaining dust.
When you are finished, place the damp rag and any other disposables into the center of the plastic sheet. Carefully gather the plastic sheet in towards its center. Deposit the plastic sheet and trash in a sealed plastic trash bag. Clean your work area to remove any remaining paint dust.
Tools & Materials:
(I’ve included affiliate links for your convenience. I earn a small percentage from a purchase using these links. There is no additional cost to you. You can read more about affiliate links here.)
4×8 sheet of plywood
4×8 sheet of masonite bead board
Reclaimed bead board, siding, or other lumber
ProScraper (paint scraper that attaches to vacuum cleaner)
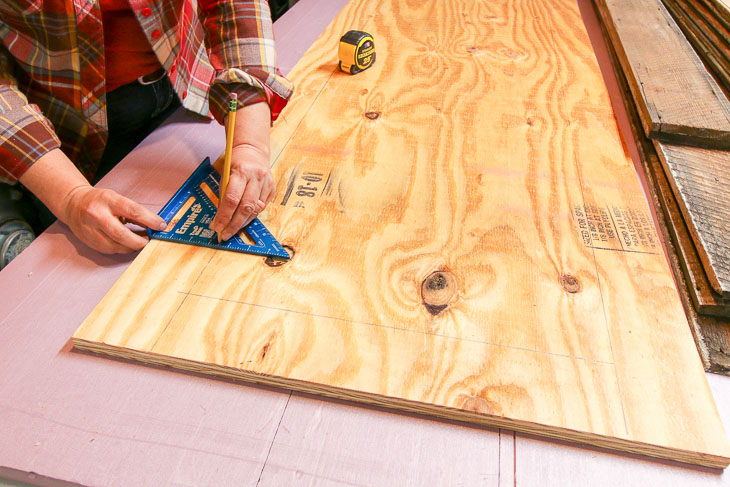
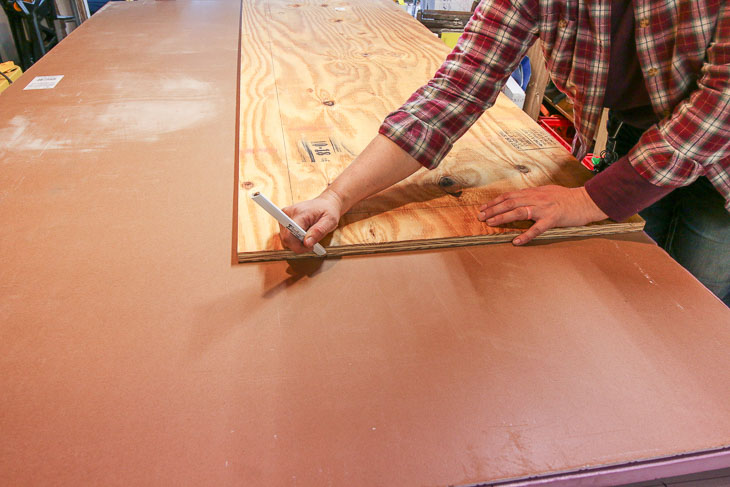
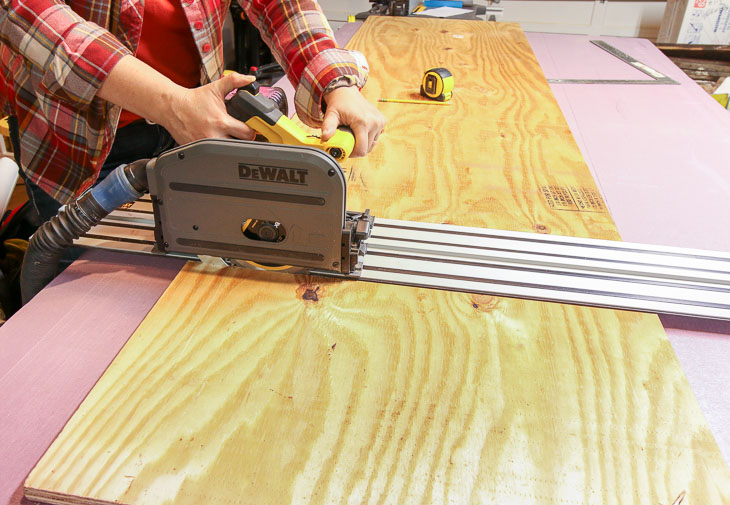
Time to cut your materials. Measure and mark the size of your door on the plywood and masonite beadboard sheet. (Be sure to add two inches to your door opening so the barn door will cover the opening.)
Cut your wood with a circular saw, or if you have one, use a track saw! I’ve found this battery-powered track saw by DeWalt to be invaluable for cutting down large sheets. Because it runs on batteries I can even bring it with me to the store and cut the materials in the parking lot if necessary!
The hanging hardware for my barn door has a small bar that mounts on the floor. I needed to cut a groove into the bottom of my door to accept the bar and keep it from swinging back and forth when opening or closing.
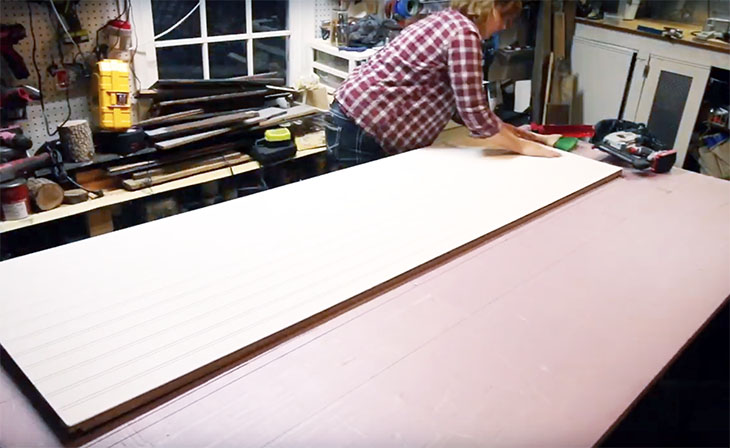
Add a fair amount of construction adhesive to one side of your plywood door. Then lay the masonite beadboard sheet onto the plywood and press firmly into the glue. Drive a few brad nails into the masonite to keep it in place as the glue cures.
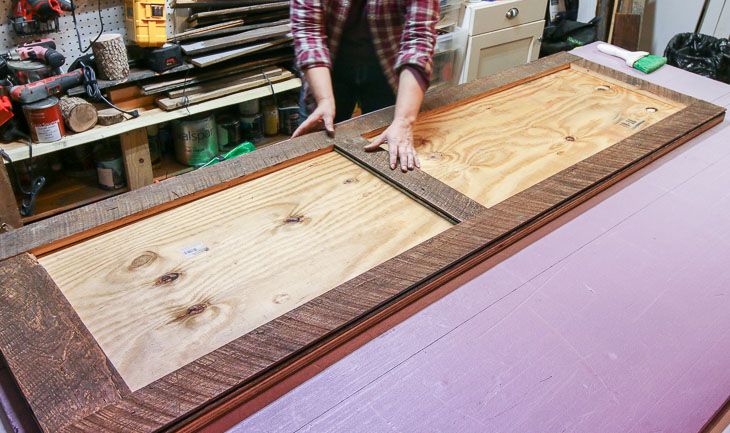
Flip your door over and start laying out the border design. Did you know these are the back sides of the beadboard? So pretty!
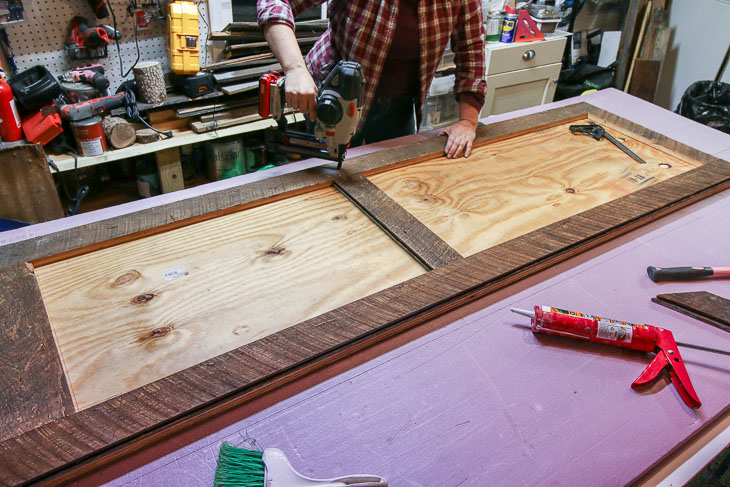
Apply construction adhesive under the border pieces and set them in place. Then add some brad nails to hold it until the glue cures.
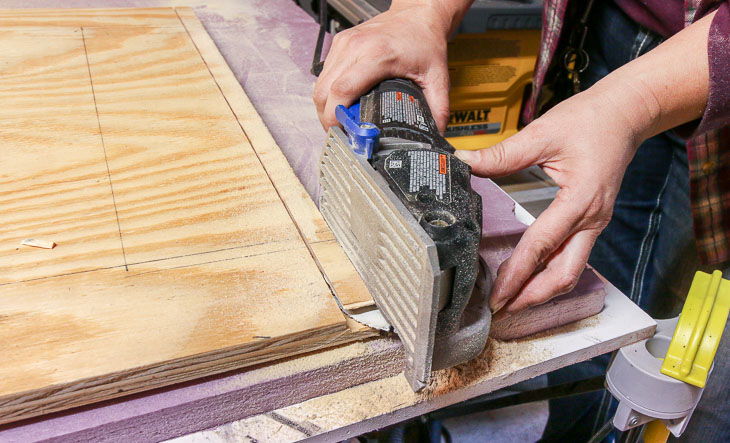
I decided to sand the border pieces to remove any rough edges and splinters, but made sure not to sand too much or I’d lose the dark weathered look.
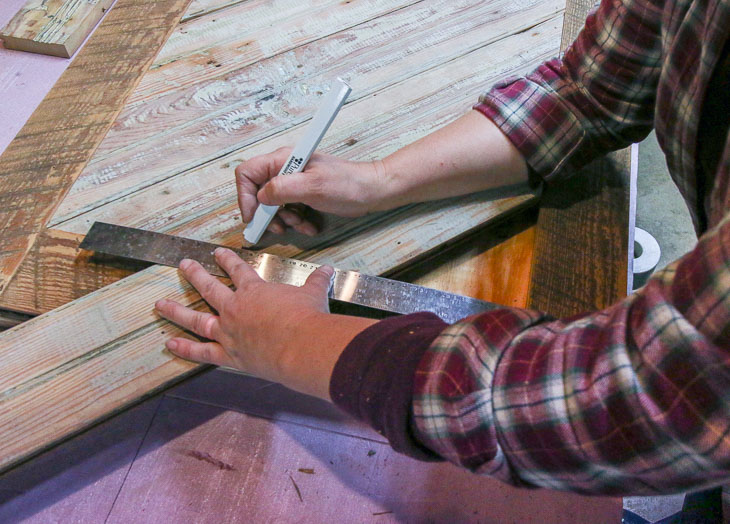
To cut the interior beadboard pieces, cut one end of the boards at a 45˚ angle. Then set them into the border frame. Using a ruler and pencil, mark where to cut the other side.
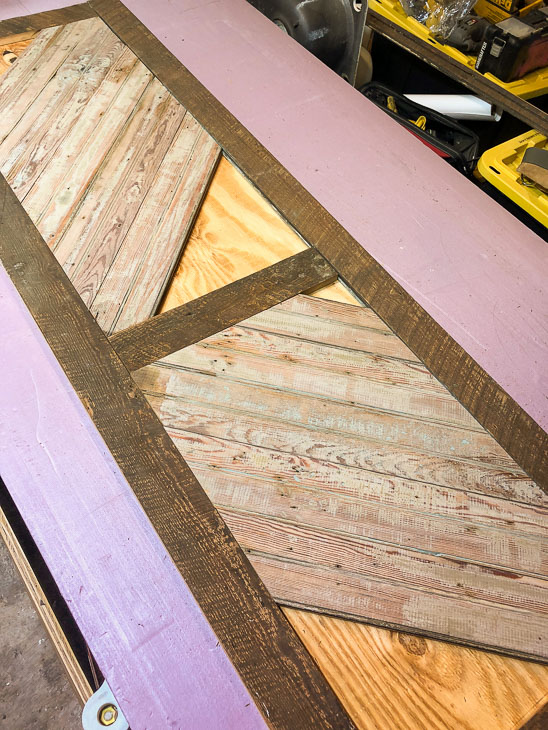
Test the fit of your bead board. Continue marking and cutting all the bead board pieces. Make sure they all fit before moving on.
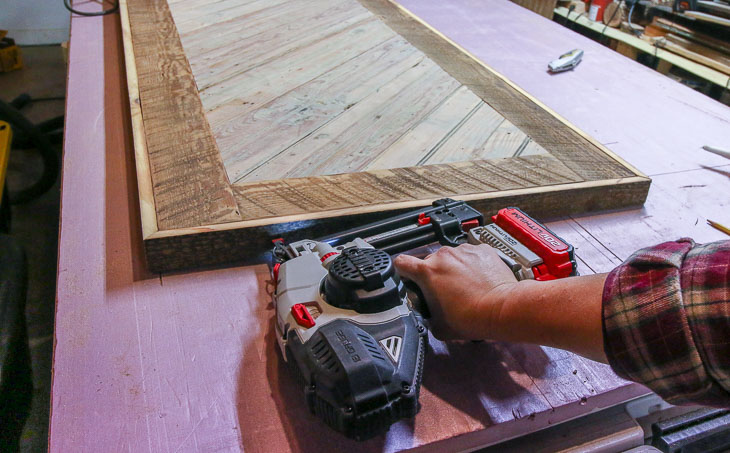
Secure all the interior pieces with construction adhesive and brad nails. You might find your last piece isn’t as wide as your boards, cut this piece on a band saw or jig saw if necessary and fit in place.
To hide the plywood, rip pieces of bead board or use flat trim to finish the edges of your door.
Use a polycrylic or water-based top coat to seal the door (and prevent exposure to any lead paint left on the door). I prefer the General Finishes High Performance Flat top coat. What I like about it is it has no sheen. The top coat protects the wood while letting the beauty of the grain show, and there’s no shine to detract from the wood.
https://prettyhandygirl.com/wp-content/uploads/2019/04/how-to-build-reclaimed-wood-barn-door-feature.jpg353730Brittany Baileyhttps://prettyhandygirl.com/wp-content/uploads/2021/07/PHG-logo-tagline-2020-1030x211-R.jpgBrittany Bailey2019-04-05 10:00:002020-09-08 16:49:55How to Build a Reclaimed Wood Sliding Barn Door
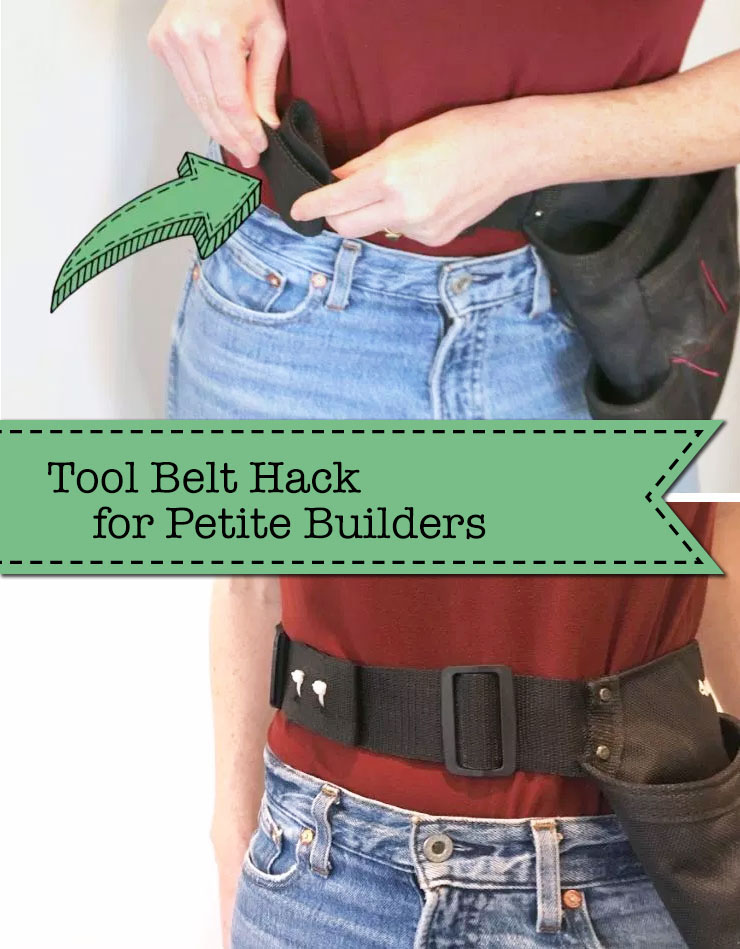
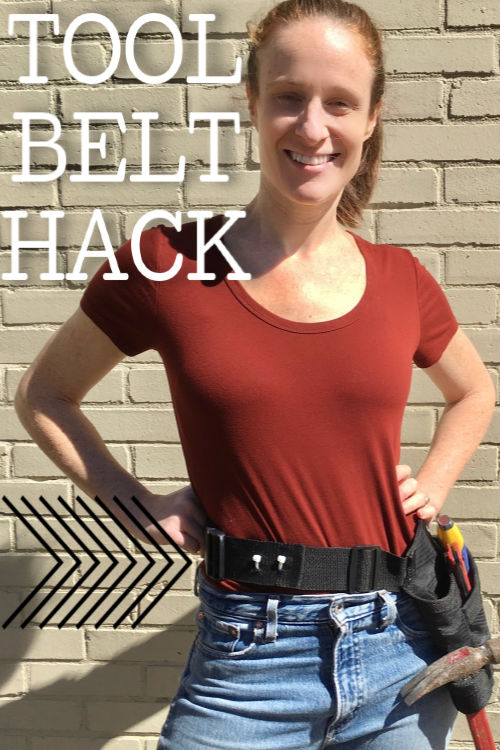
If you are serious about DIYing, then a tool belt is a necessity. Unfortunately, tool belts are not exactly one-size-fits-all. If you are on the puny side of the size spectrum, you will be hard-pressed to find a belt that hangs where it is suppose to; around your waist, not sagging on your hips.
There are options out there, but talk about pink tax! Tool belts for women are rare and run $40 or more for almost the same belt, just a little smaller. You can buy belts for kids, but often they aren’t made to withstand the abuse a true DIYer will put a tool belt through. Instead, I prefer the cheap $15 Home Depot canvas variety that can withstand drywall mud and being left out in the rain from time to time.
The solution to the tool belt conundrum for petite builders
Use two zip ties, a couple of spring clamps, and a drill to hack your tool belt in less than a half hour.
Step 1:
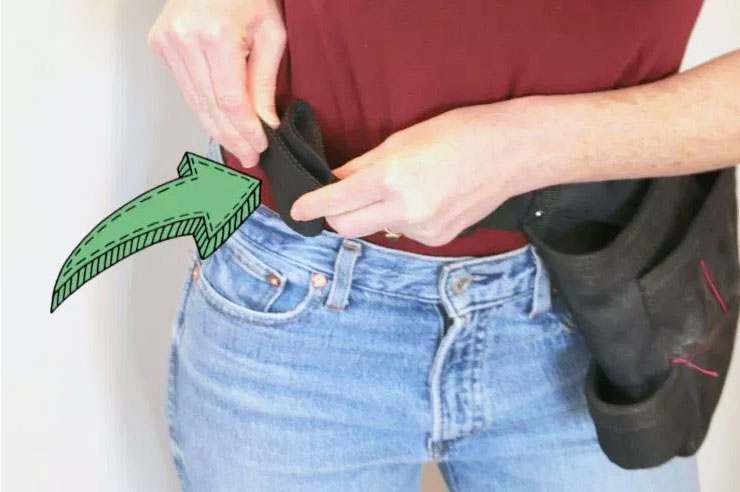
Put your tool belt on at the smallest setting and determine how much tighter you need it to be. With the belt on and fastened, double the canvas over and secure it with a spring clamp.
Remove the belt and attach it to a piece of scrap wood (using another spring clamp being careful not to lose your sizing). With a white crayon, draw two sets of dots on the portion that is folded over. Make your dots approximately ¾ of an inch apart.
Step 2:
Clamp the scrap wood and belt to a secure surface like a work bench so the doubled over canvas belt can’t move. Select a very sharp 7/32 or 1/4 drill bit and drill through the white dots. It’s ok if it frays a little, but the holes must go all the way through into to the wood behind it.
Step 3:
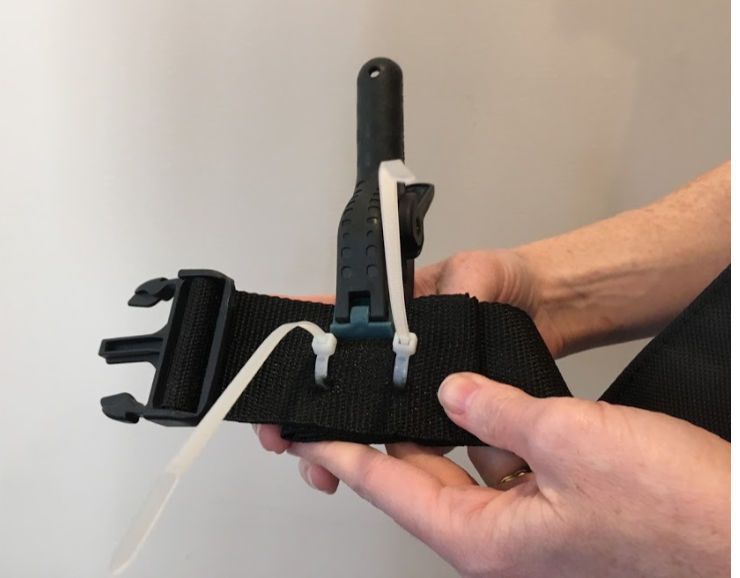
Remove the wood from behind the belt but keep one of the spring clamps attached to the doubled canvas to keep the holes aligned. Thread a zip tie through two of the holes. Make sure the square fastener of the zip tie is on the outside of the belt, not the part that touches your waist.
Add a zip tie to both sets of holes. Tighten the zip ties enough to hold the belt fold, but not so much that it cinches the webbing.
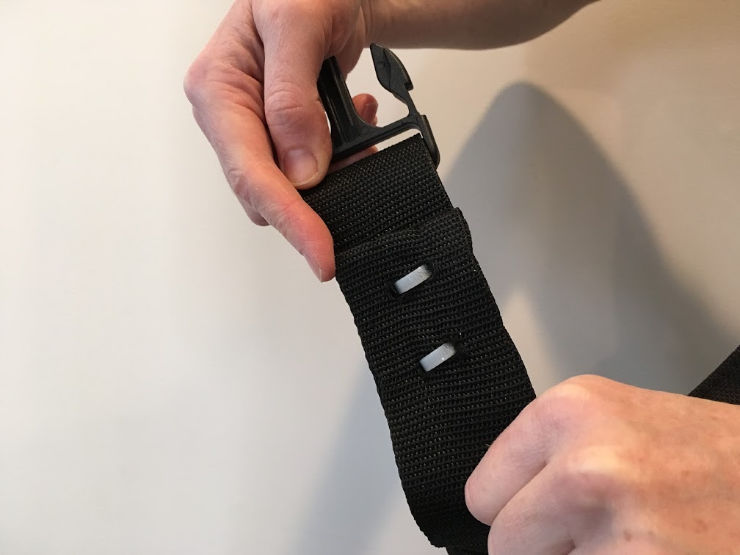
The back side of your tool belt should look like this:
Cut the extra zip tie ends and you’re done. Go ahead and fill your belt with tools and get building!
Help a fellow petite builder by pinning this image:
Hi! I’m Lara, the creator of The Unprofessional blog and YouTube channel. I am an aspiring handy-woman with little to no experience building, tiling, landscaping, demolishing, and what have you. I’ve drilled holes in the wrong places, cut on the wrong lines and stripped more screws than I care to count. And yet, I’m on my way to customizing my home, project by project. I believe you can do pretty much anything with a few good tools, a stack of wood and a half-baked
idea.
I like to find challenges and solve them with my miter saw. When my 3-year-old son complained that he couldn’t reach the picnic table, I designed an easy-to-build folding booster seat perfect for camping trips and beer gardens. When the low ceilings in my cape cod wouldn’t accommodate a bulky barn door, I found an alternative approach to turn any interior door into a space-saving barn door. I love to share these solutions with others in hopes that the empowerment and love of power
tools spreads.
https://prettyhandygirl.com/wp-content/uploads/2019/03/tool-belt-hack-for-petite-builders-preview.jpg492740Lara the Unprofessionalhttps://prettyhandygirl.com/wp-content/uploads/2021/07/PHG-logo-tagline-2020-1030x211-R.jpgLara the Unprofessional2019-03-20 07:00:572019-03-23 11:52:44Tool Belt Hack for Petite Builders or Kids
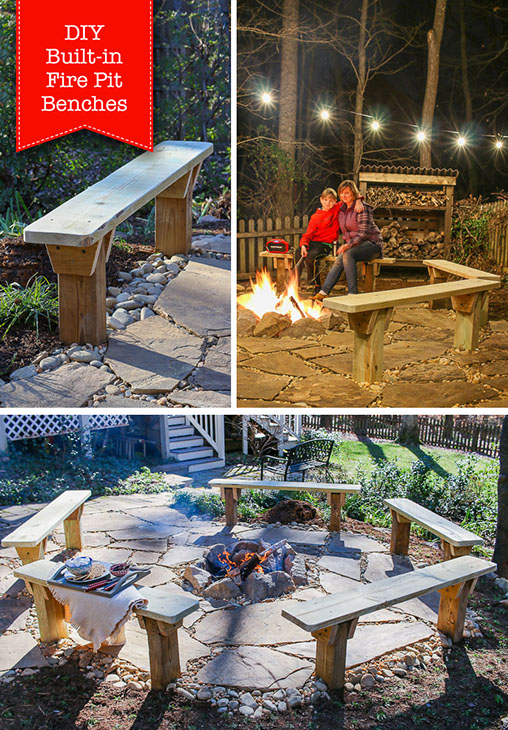
These simple DIY built-in fire pit benches are a simple and attractive design. The lumber costs are low and the skills required are minimal — a winning combination in my book! Just think, you could have these permanent benches built around your fire pit by the end of the weekend.
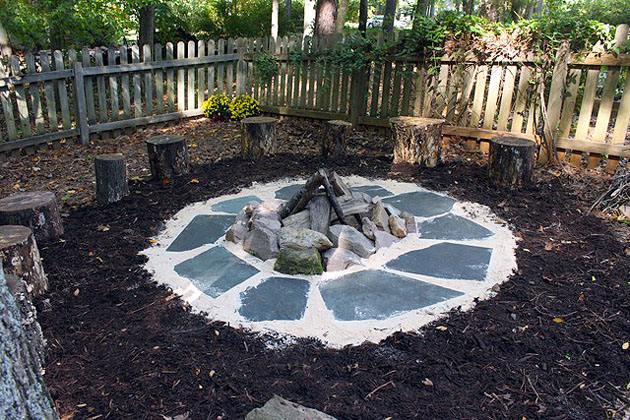
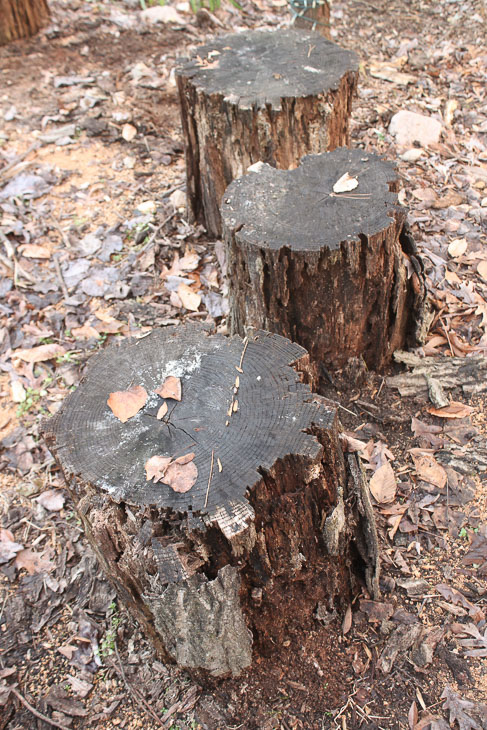
Years ago, I created a very simple (and inexpensive) fire pit using some stumps from a tree we had to have taken down. I simply asked the tree guys to cut the tree into 18″ stumps.
Having fire pit get togethers with friends and family is one of our favorite activities. During these gatherings, our meal planning is usually nothing fancy. Most of the time it consists of hot dogs, salad, s’mores, and good conversation over a warm fire. Unfortunately, after a few years, our stump seats rotted out. For the past year or more we haven’t had any friends over for a fire pit outing because I was afraid the stumps might disintegrate the minute someone sat down. That would be awkward, right?
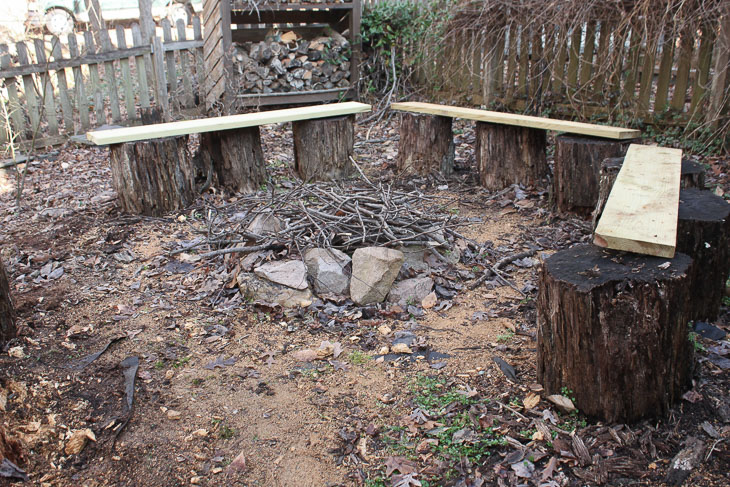
I toyed with the idea of buying more permanent seating, but all the options were expensive (especially when trying to provide seating for 12-15 people.) As luck would have it, after finishing all the construction on the Saving Etta project, I had some leftover lumber (a few pressure treated 2x10s, 2x6s, and 4×6 posts. On the day before the open house, I threw the lumber into my truck and hauled it home thinking I might be able to build benches for around our fire pit. (Note to self, 2x10s placed on top of rotting stumps is no more attractive than rotting stumps.)
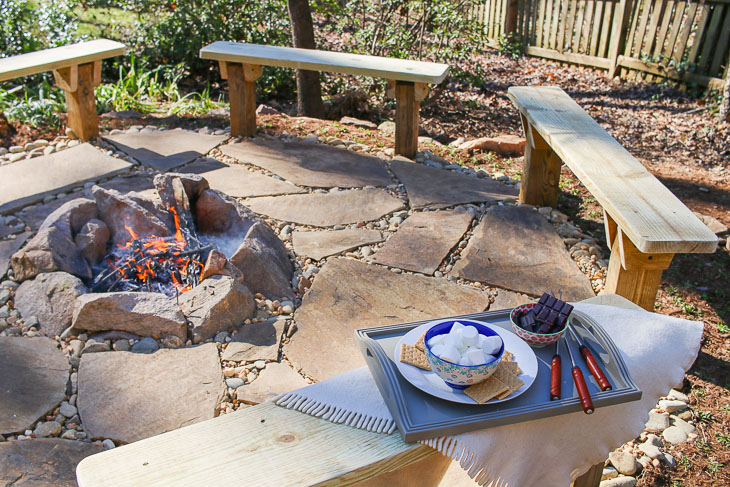
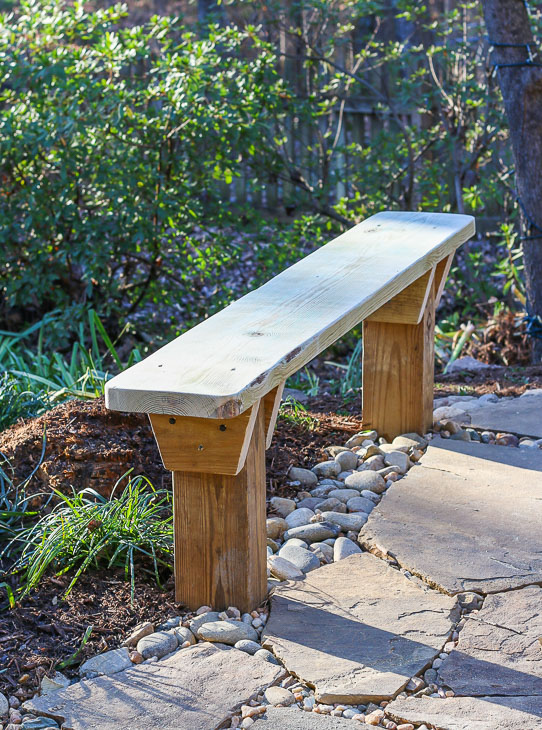
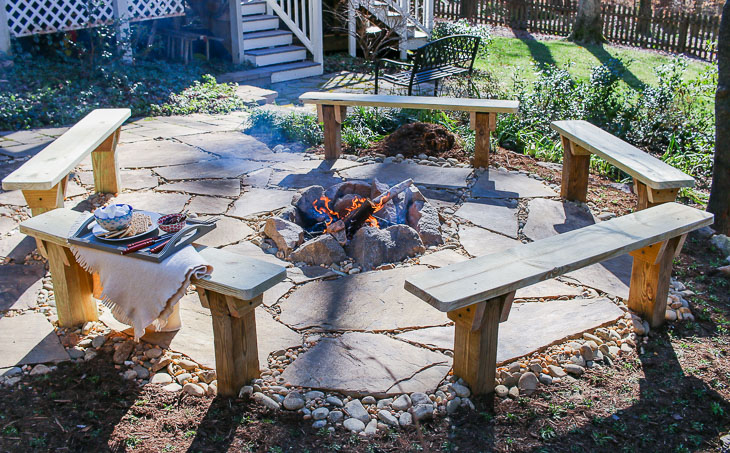
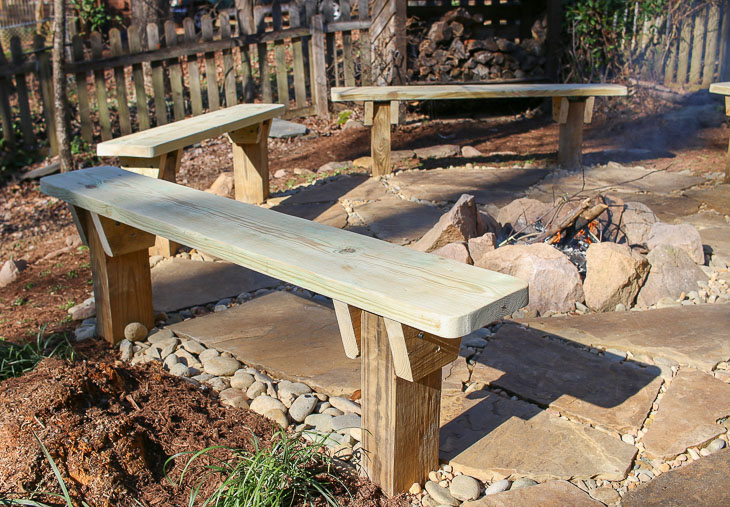
After a few days (and several cold days where you couldn’t drag me outside), I finished building five built-in fire pit benches and couldn’t be more thrilled with the results. Why don’t you join me and see how this rotten fire pit got it’s groove back with new seating and a new low maintenance stone surround.
Trust me, it is the same fire pit area you see above. Amazing transformation, right?!
DIY Built-In Fire Pit Benches Materials:
(I’ve included affiliate links for your convenience. I earn a small percentage from a purchase using these links. There is no additional cost to you. You can read more about affiliate links here.)
1 – 2″ x 10″ pressure treated lumber (purchase length for your bench seat)
1 – 2″ x 6″x 4′ pressure treated lumber
Scrap 2″ x 4″ lumber (or other lumber to brace posts while concrete cures)
Quikrete
Drainage rock
The All Battery Challenge:
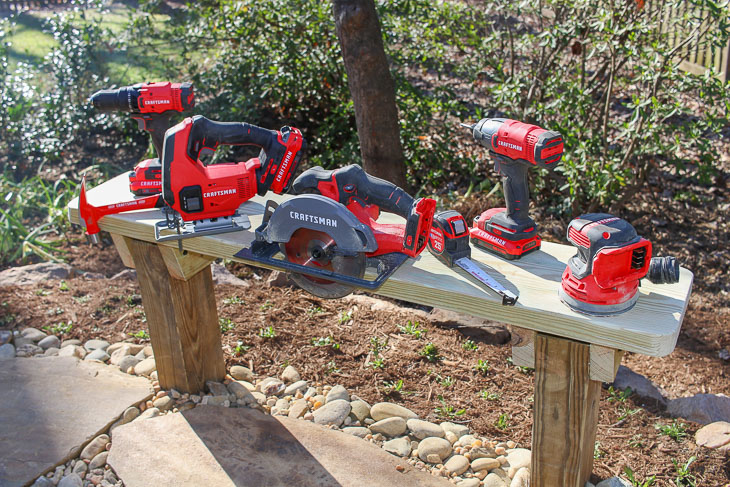
The folks at Craftsman sent me all the battery-powered tools used in this project. This is a sponsored post for Craftsman, so I decided to really challenge myself by only using the Craftsman V20 battery-powered tools and forgo dragging an extension cord out to the job site. (I also vowed not to cheat and use any of my corded power tools in my workshop.) Want to see if these tools lived up to the challenge?
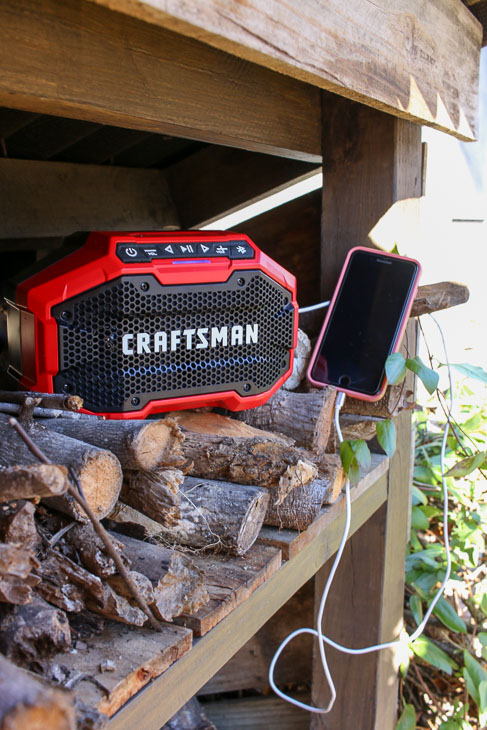
I can’t forget this Craftsman Cordless V20 blue tooth speaker that doubles as a USB charger when my phone battery get low while jamming out. Hard work is always easier with some rockin’ tunes.
DIY Built-In Fire Pit Benches Video Tutorial:
Some people learn best by watching others, I get that. Which is why I made this tutorial video for you! Feel free to watch the video below to learn how to make the built-in fire pit benches. I will include the step-by-step tutorial below with a little more detailed instruction. Let’s get building!
Site Preparation:
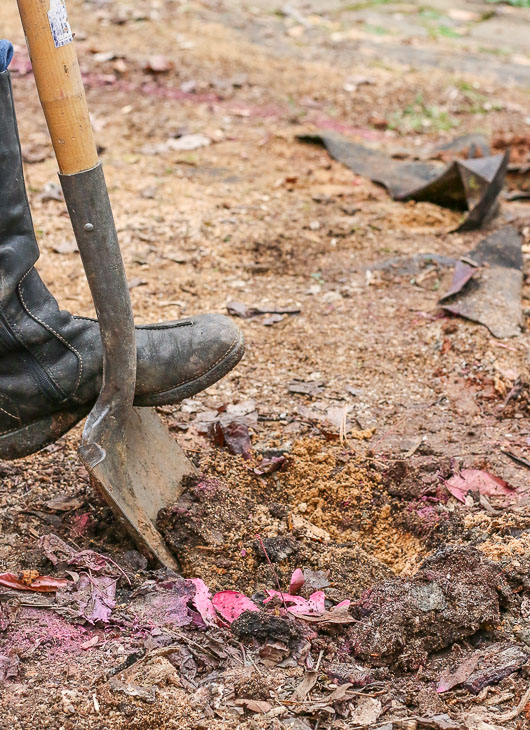
Before building your fire pit benches, clear your build area. It took me a bit of physics ingenuity to clear out the old rotting stump seats from our fire pit area. (Definitely watch the video to see my magnificent solution for lifting the stumps into the wheelbarrow. They may have been rotting, but they were still very heavy.)
After the area is cleared, drive a stake into the center of your fire pit area.
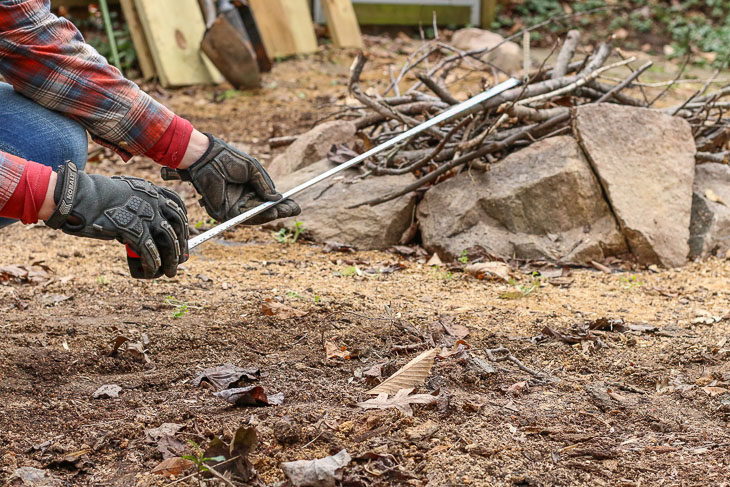
Measure out 5’ from your fire pit center (or the distance you want your benches to sit.)
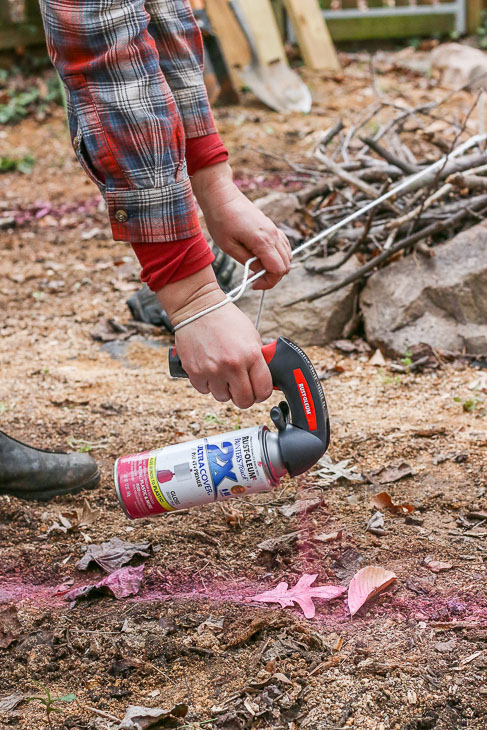
Attach the string to the stake. Make a loop big enough to fit your hand through at the 5 foot mark. Insert your hand into the loop and use a can of spray paint to trace a circle around the fire ring.
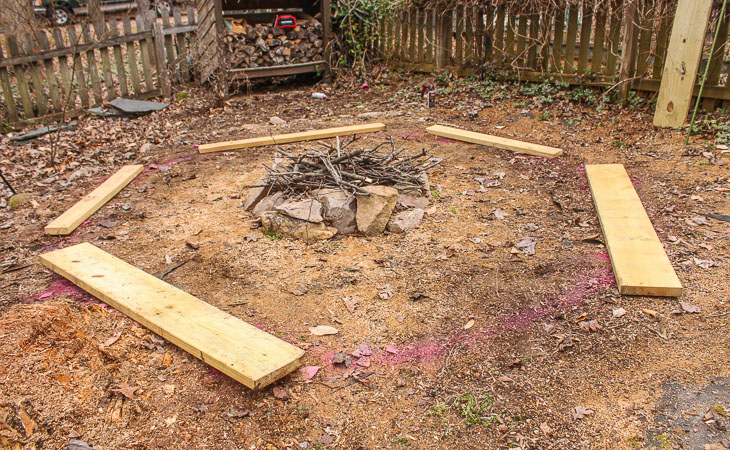
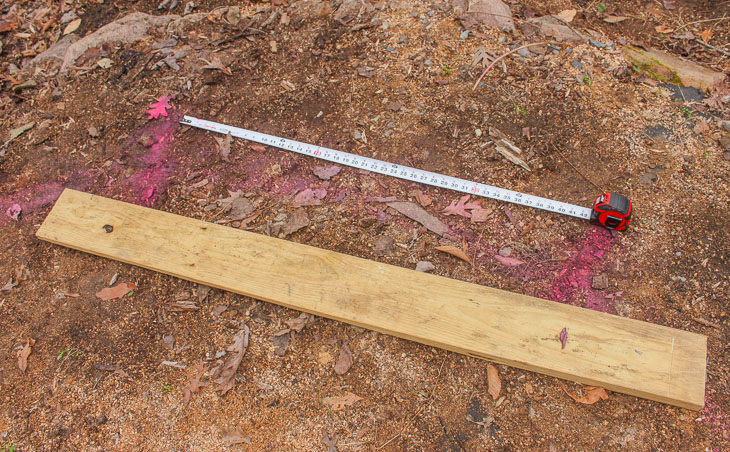
Cut your 2×10 pressure treated lumber to the size you want your bench tops. (Personally, I chose alternating 4’ and 5’ benches for our fire pit. The 5′ benches can accommodate three adults each or more little ones. These five benches will accommodate 13 adults comfortably and probably more people if we squeeze kids on some of the benches.)
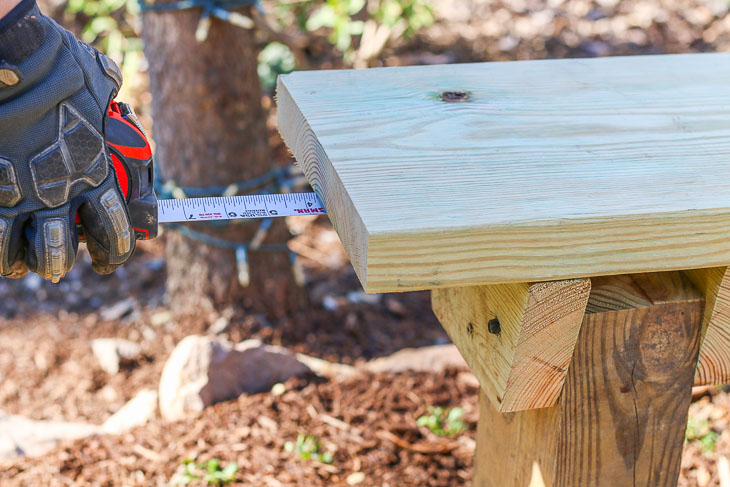
Lay out where your benches will sit and mark the locations for the support posts. I suggest centering the support posts 18” narrower than the bench seats. (Nine inches in from each side.)
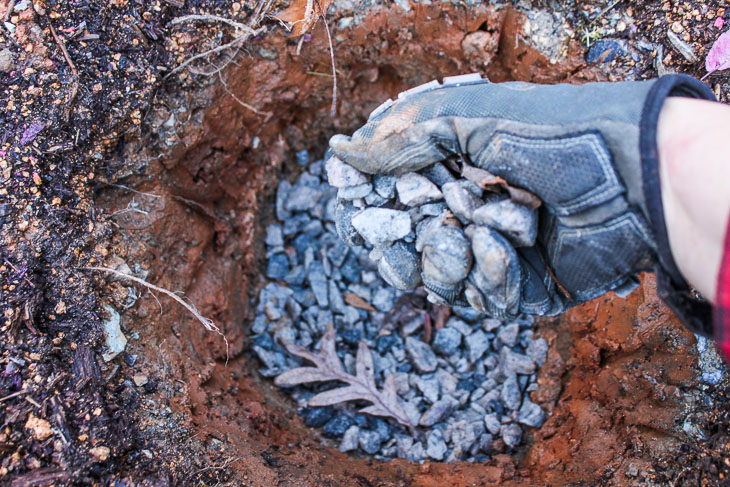
Set a 1-2″ layer of drainage rock into the base of your hole. Drainage rock provides a sturdy base for your post, but it also allows water to seep away from the post.
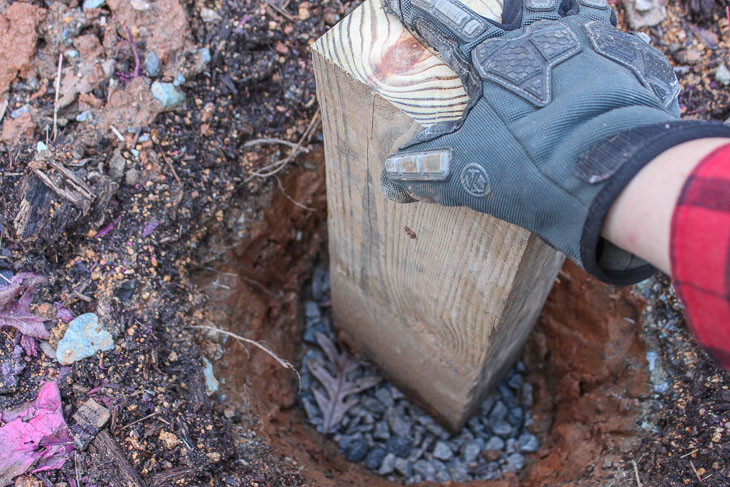
Use your post to tamp the gravel down and create a firm base.
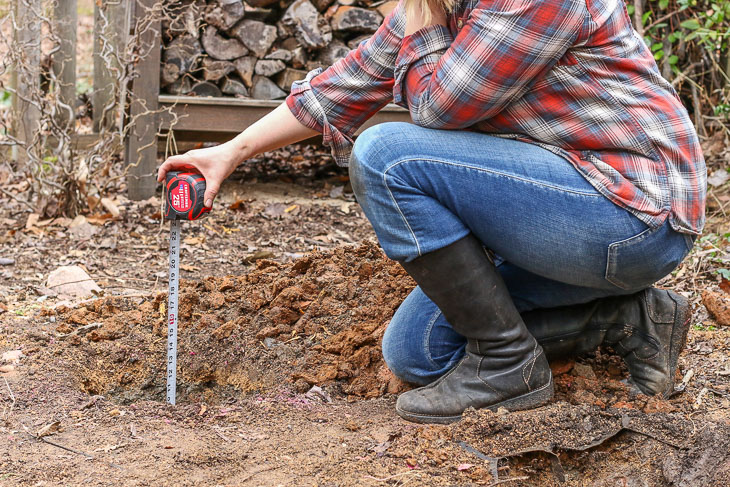
Measure the depth of your hole. Add 16 ½” to your hole depth and cut your posts to this length. (Hole Depth + 16.5″ = support post length.) This should give you an 18″ bench height, which is standard chair height.
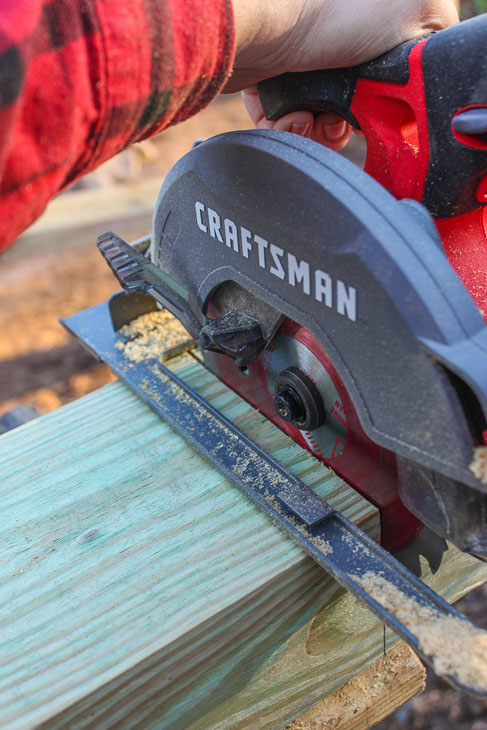
I had my doubts that this battery-powered saw could cut through all the pressure treated 4×6’s. But, with a fully charged battery and a steady feed, they cut through each post! (Tip: If your saw isn’t cutting through the lumber, swap out your battery for one with a full charge.)
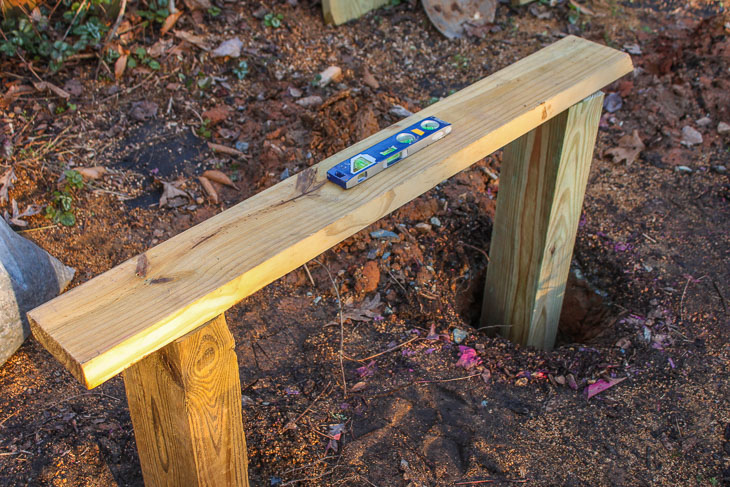
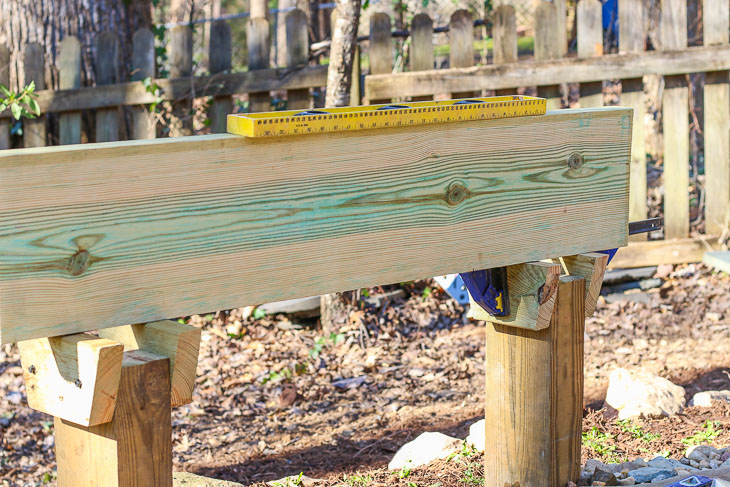
Place your first post in the hole. Then set your bench seat on top of the post. Level the bench seat and measure the distance between the bottom of the bench seat and the bottom of your hole to determine the length of your other support post.
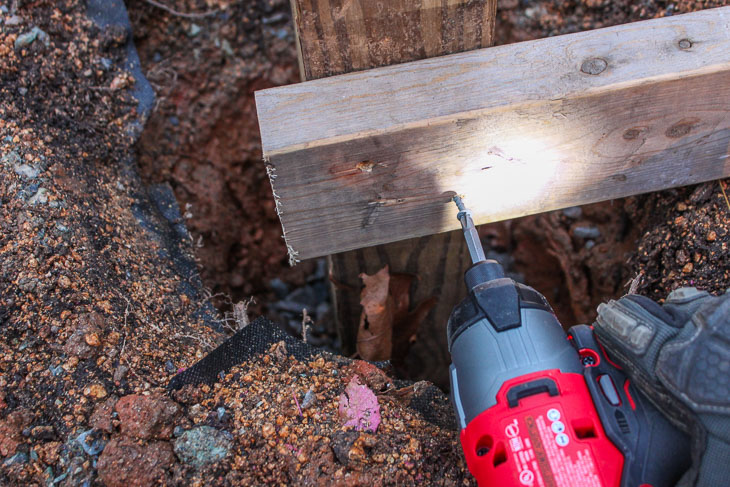
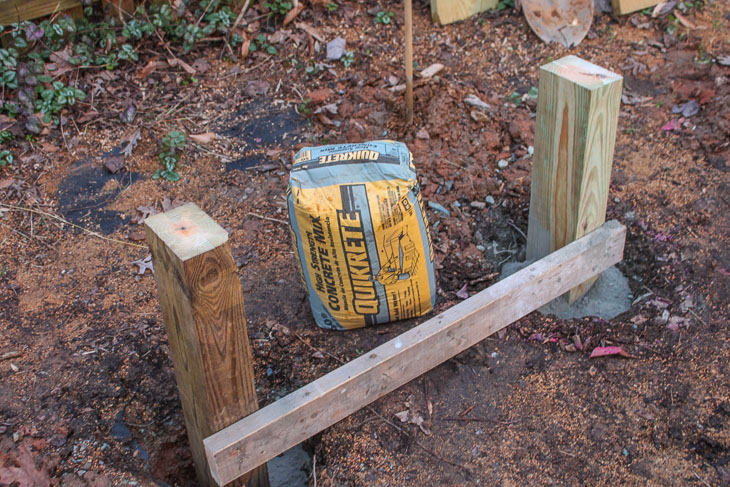
Set the second support post into the hole and check to make sure it is level with the first support post. Add or remove drainage gravel until the bench seat is leveled. Line up the two support posts so they are even and plumb in both directions. Secure a scrap 2×4 between the posts to hold them in place while adding the concrete mix.
Follow the directions on your concrete mix. Fill the holes with the mix and add the water. Allow the posts to set overnight.
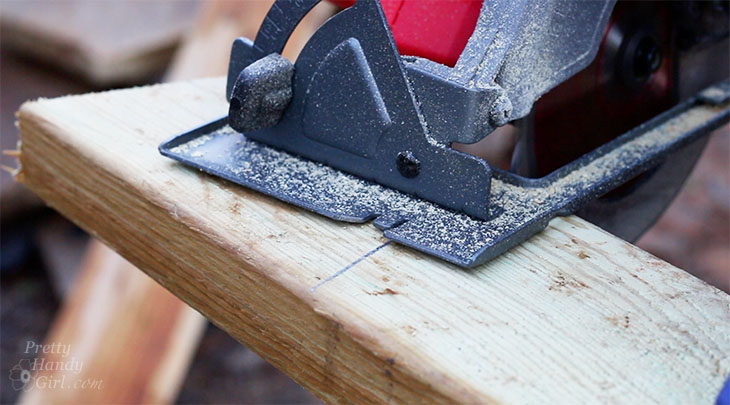
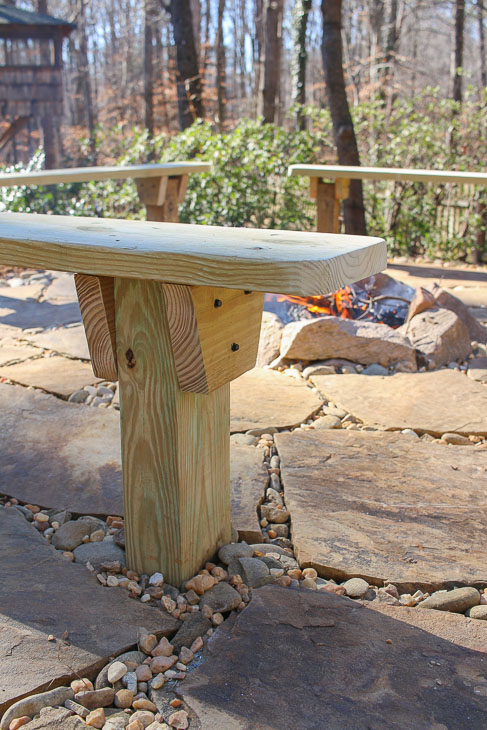
To cut the bench support pieces, trace a trapezoid shape onto a 2×6. The narrowest part of your trapezoid should be the width of your posts and the widest part of your trapezoid should be 1” narrower than your bench depth.
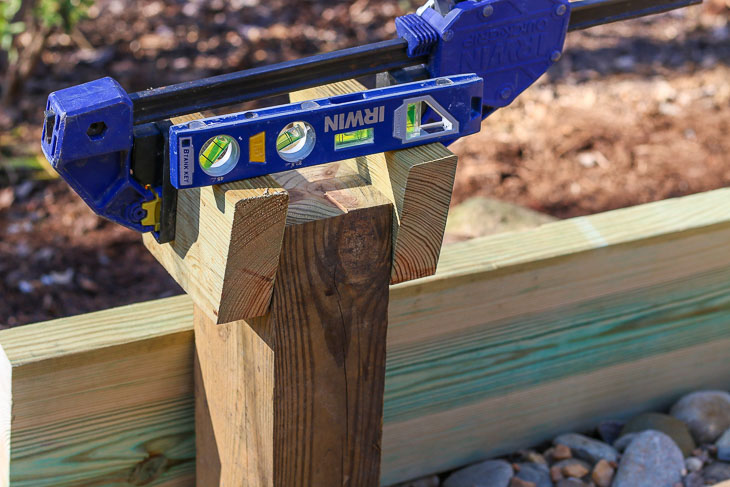
Each support post gets two trapezoid support pieces sandwiched onto either side. Use a clamp to hold the supports while you level them side to side and front to back.
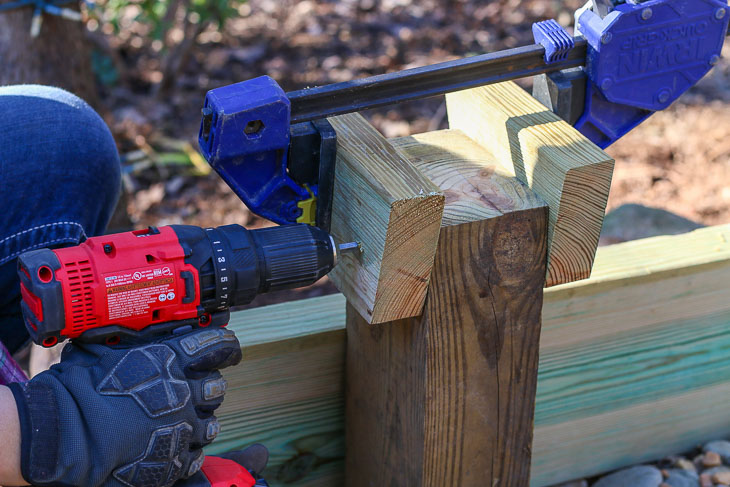
Then drill three pilot holes into each support piece.
Drive ⅜” lag screws or structural wood screws into the pilot holes.
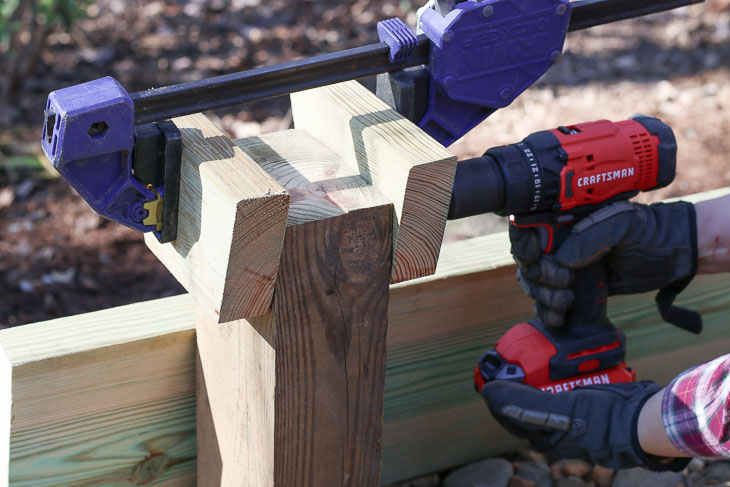
Clamp the other support trapezoid pieces to the second post. Check to make sure the top of the supports are level with the first supports. Make any adjustment, then drill pilot holes and drive structural wood screws through the trapezoids (like you did on the first post.)
Center your bench top side to side and front to back on top of the support posts.
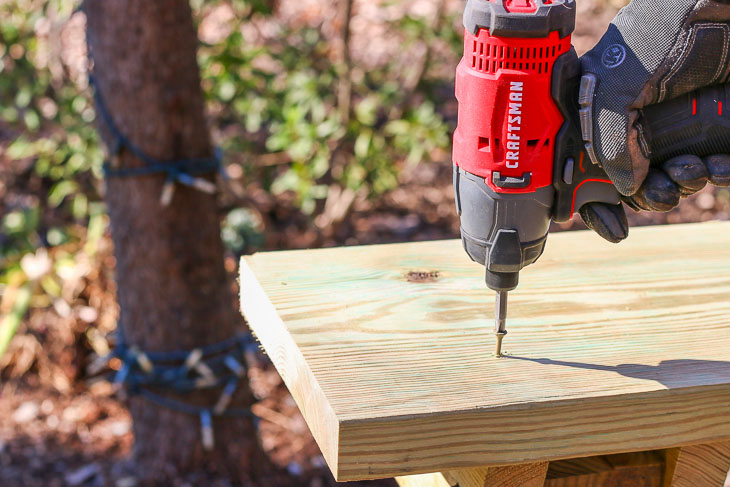
Drive 2 ½” wood screws through the bench top and into the support pieces. Two screws on each side of the seat should be sufficient.
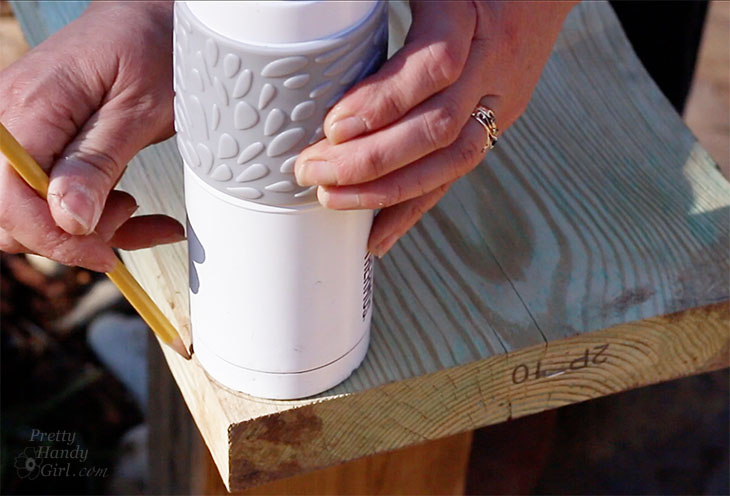
Using a circular object (like a glass or water bottle) trace a curve onto each corner of your bench seat. Use a jigsaw to cut along the lines and round off the sharp corners.
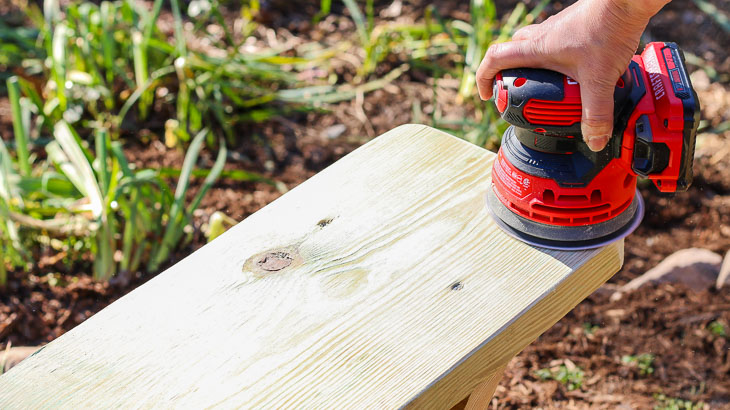
Sand all surfaces and edges smooth on your bench. Wipe off with a damp rag and finish your benches with paint, stain, or a sealant.
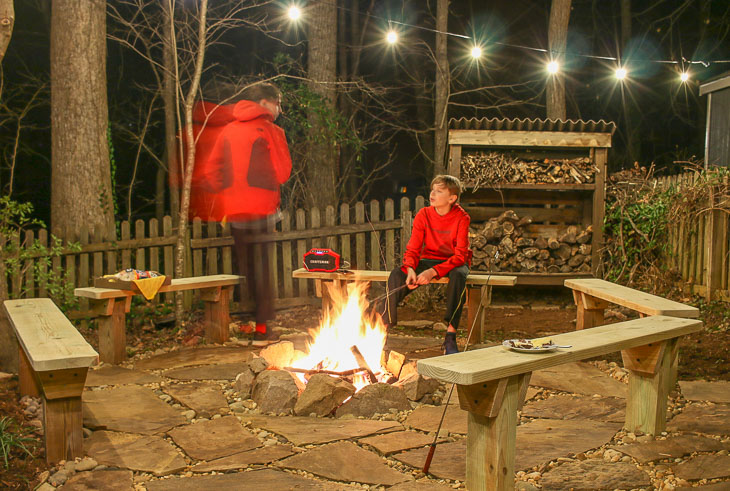
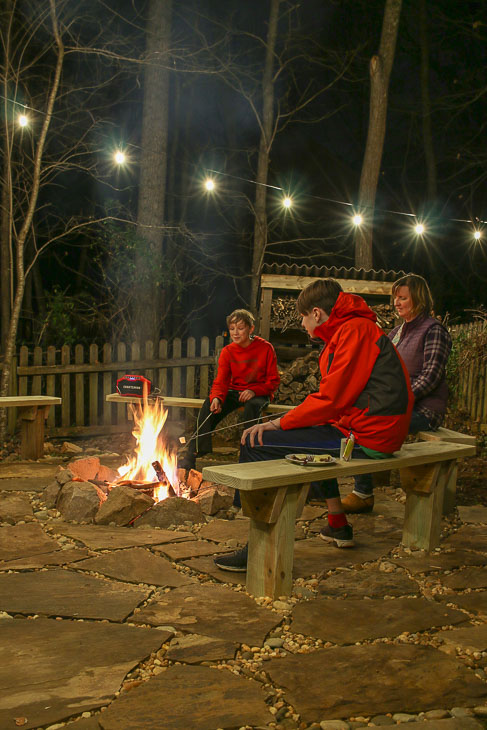
These benches are sure to last much longer than my rotting stumps. It’s time to call the family out and enjoy some s’mores by the fire!
Want a peek into my real life struggles? This was my goal: Take a nice family photo of my boys happily enjoying roasting marshmallows.
Result 1: One boy who can not sit still.
Result 2: If you put sticks in boys’ hands you can expect a wild rumpus.
Result 3: Bribe boys with one more marshmallow if they sit still for 2 seconds. Success!
We are loving the new built-in fire pit benches. I can’t wait to invite the first group of friends over.
I bought a new bag of marshmallows and chocolate just for the occasion!
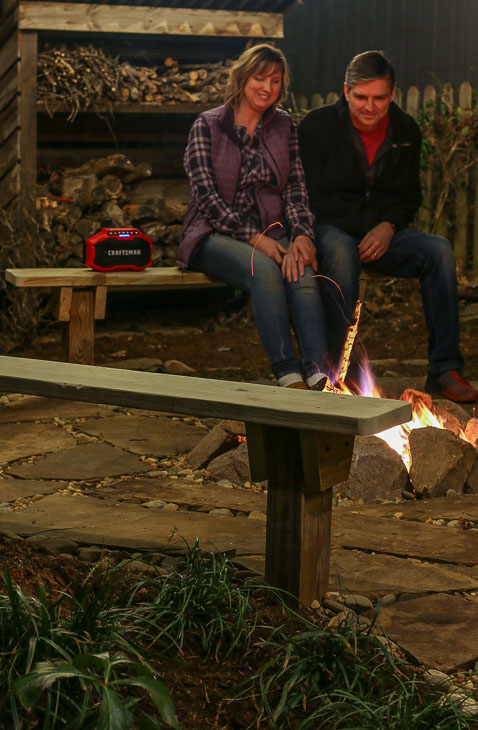
Of course, the fire pit area is also nice for just two people. Pretty Handsome Guy and I had a little wine and marshmallows after the boys went to bed. You can’t get a more frugal date night.
I hope you liked this tutorial. I’d love to hear from you in the comments below, especially if you have questions or build these benches for yourself!
Disclosure: This is a sponsored post for Craftsman. I was not told what to write. All words and ideas are my own. I am very particular about the brands I work with, and only partner with companies that provide quality materials and/or services.
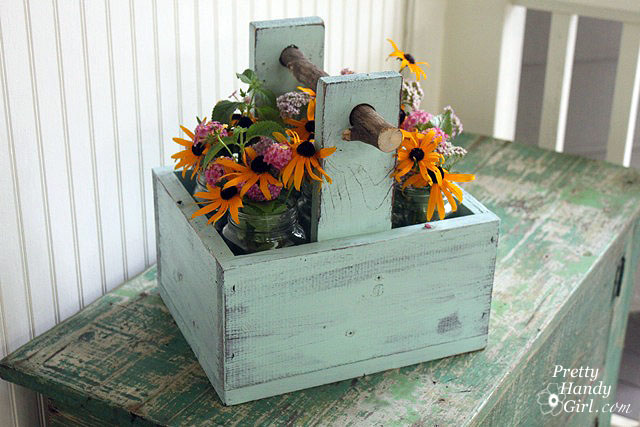
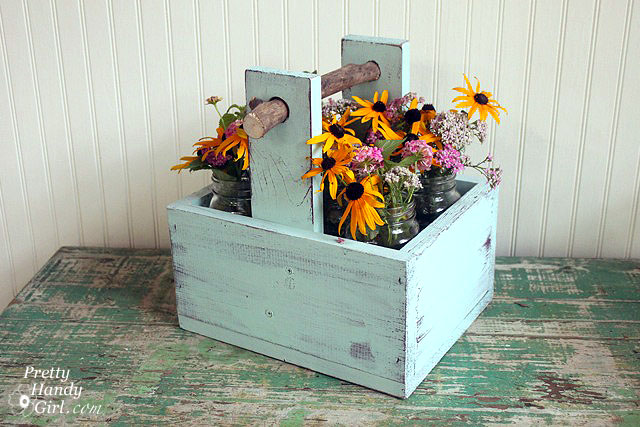
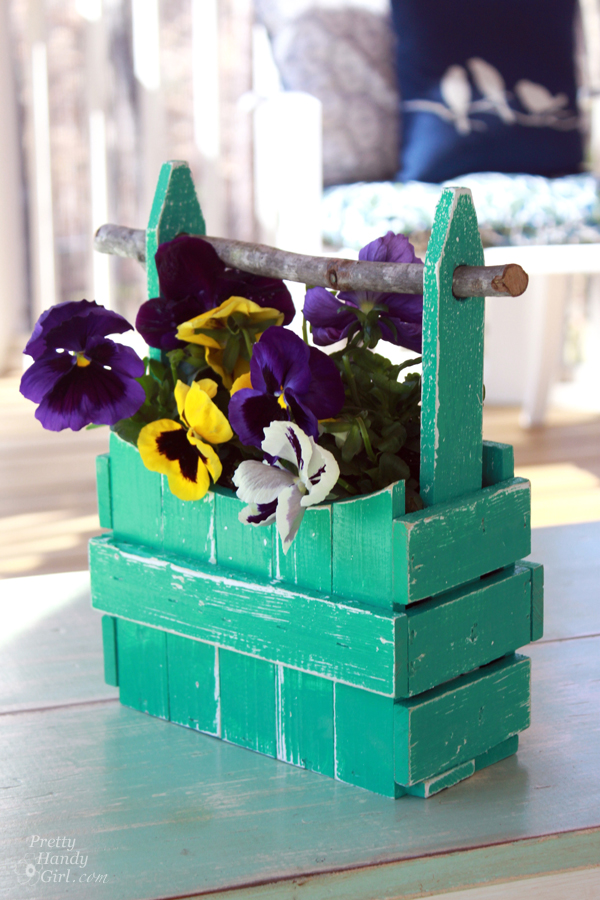
Spring is right around the corner and I’m itching to cut some fresh flowers to bring inside. I love displaying them in jars placed inside rustic wooden caddies. Making a little caddy or tote out of salvage wood and branches can be an easy beginner DIY project. But, it’s also satisfying for experienced woodworkers looking to use up some old scraps or upcycle an old wooden box. Here’s how to elevate a simple wooden box into something more quirky and special by adding a branch handle.
Materials:
(I’ve included affiliate links for your convenience. I earn a small percentage from a purchase using these links. There is no additional cost to you. You can read more about affiliate links here.)
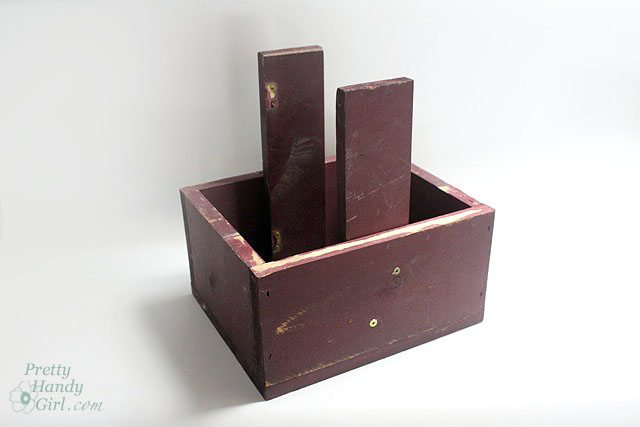
I happened to be browsing through a yard sale and spotted a sad little box begging for me to buy it and give it a new life:
How could I say no! It was only $3. I couldn’t leave it at the yard sale in its sad burgundy dust-covered state. I brought it home so it could sit in my garage collecting more dust. (This happens more often than I’d like to admit. It’s a sickness I have.)
Using the pry bar and pliers, I pulled off the lid of the box and removed any nails.
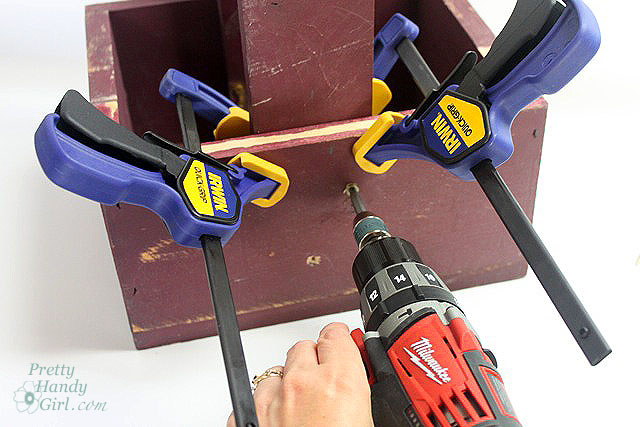
Cut upper handle supports out of 1×3 or other scraps. Clamp them inside the box.
Pre-drill holes and drive wood screws through the sides of the box and into the vertical supports.
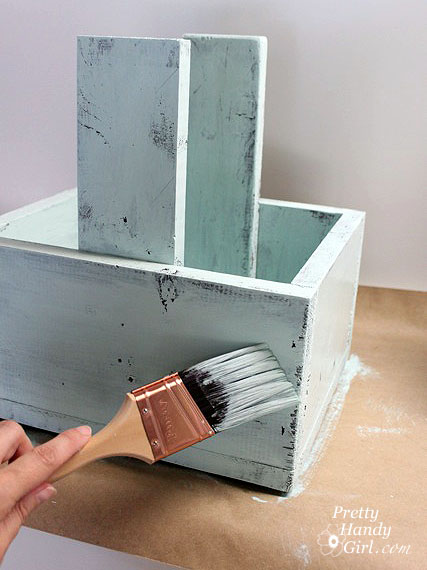
Now it the time to finish the wooden caddy using your choice of paint or stain. (I like to create a rustic look using a relatively dry brush and by letting some of the wood grain show through your brush stokes.)
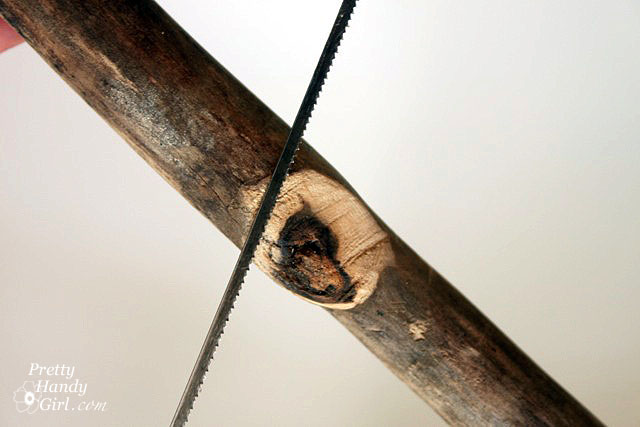
While the paint is drying, use a hack or coping saw to remove any bumps or burrs from your branch.
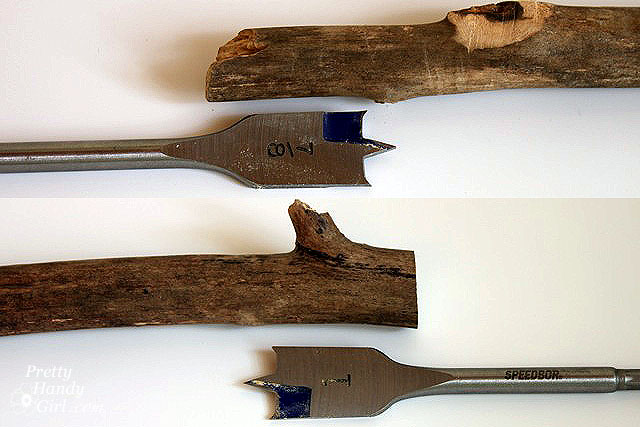
Measure the ends of your branch and select the spade bits that are closest in diameter to your branch (you want the holes to be equal to or wider than the branch.)
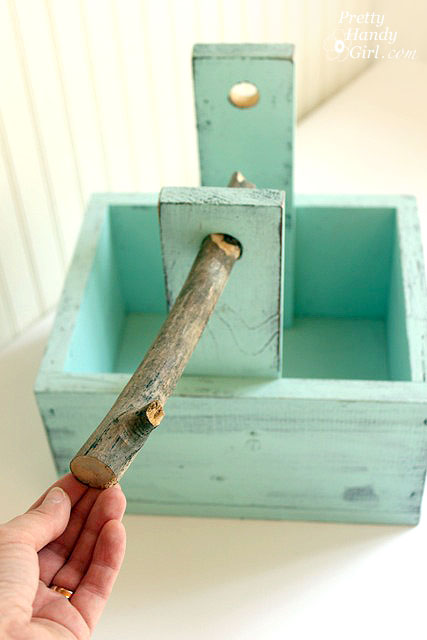
Drill a hole into each side of the vertical handle supports.
Insert the branch into the side of the caddy. You might have to experiment with which direction to install the branch.
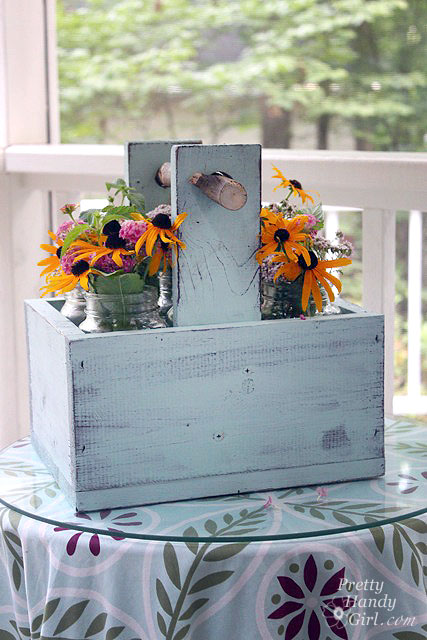
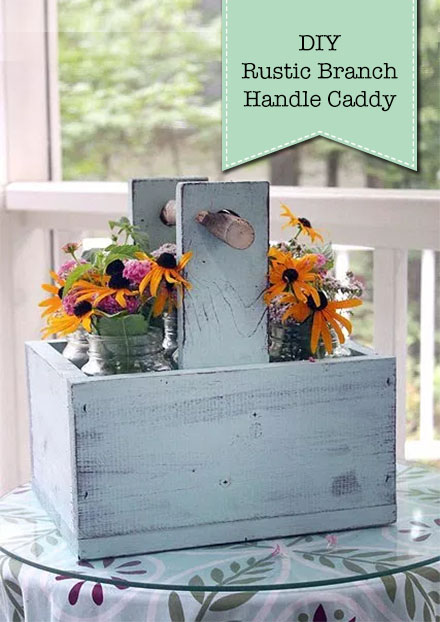
Fill some jars with flowers and set them inside the crate.
Set it out in a prominent spot in your home.
Enjoy your shabby chic crate, caddy, tool box, or whatever you like to call it.
Personally I can’t get enough of this branch handle:
I’m curious, would you have bought that little dusty box too?!
If you liked this tutorial, you’ll love these other easy DIY Projects:




 Hi! I’m Lara, the creator of The Unprofessional blog and YouTube channel. I am an aspiring handy-woman with little to no experience building, tiling, landscaping, demolishing, and what have you. I’ve drilled holes in the wrong places, cut on the wrong lines and stripped more screws than I care to count. And yet, I’m on my way to customizing my home, project by project. I believe you can do pretty much anything with a few good tools, a stack of wood and a half-baked


 Tool Belt Hack for Petite Builders or Kids








 Rustic Wooden Caddy with a Branch Handle