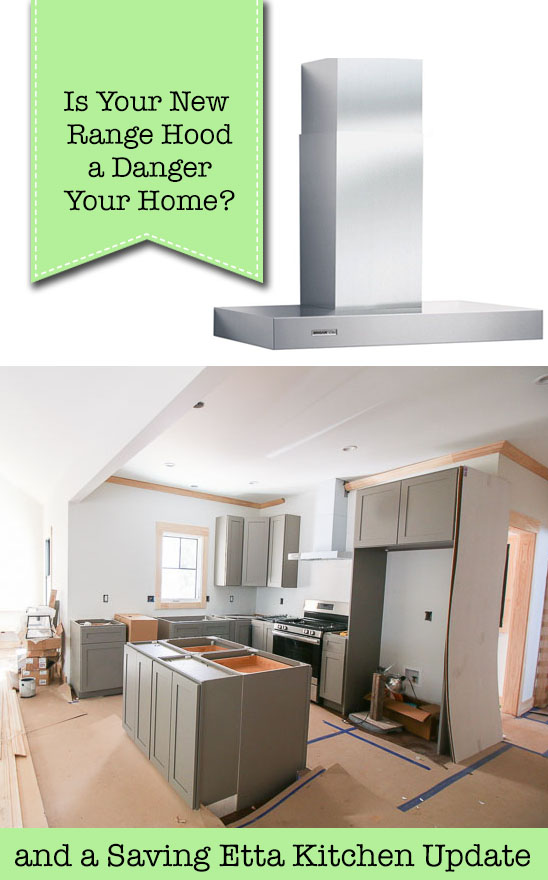
Is Your New Range Hood a Danger to Your House?Saving Etta: Kitchen Update & Installing the Range Hood

This kitchen was a big deal for me. It was one of those projects I knew would make or break this house. It was also the first time I’ve taken the reins on kitchen design and installed cabinets. As the project was in the home stretch, I spent many hours and late nights working on the kitchen. Today I’m thrilled to give you another update on the kitchen and show you the installation of the range hood (complete with all the mishaps involved). Speaking of mishaps, I have some tips to help you avoid a potentially dangerous and costly mistake when selecting a range hood.

Before we begin, I’d like to say thank you to all my wonderful sponsors on the Saving Etta project. I could not have saved Etta without their help. When you are looking for products that last and perform well, you can rest assured that I hand-selected these sponsors to represent the Saving Etta project.

Saving Etta sponsors

Where It Started:

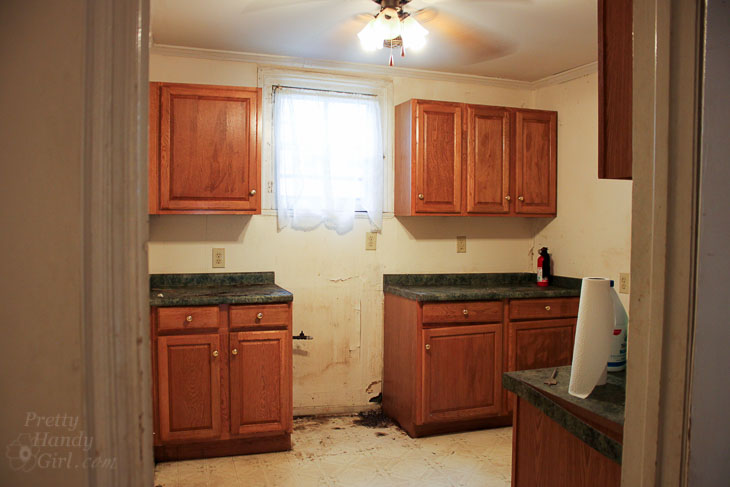
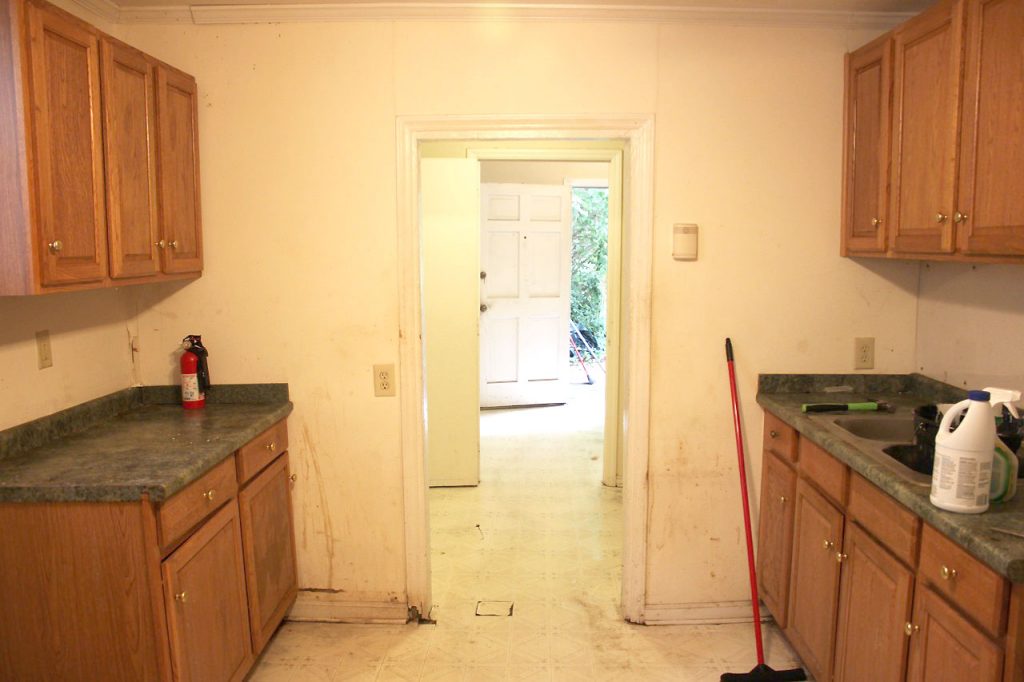
If you’ve been along for the entire Saving Etta journey, you may remember the kitchen in the house when I bought it. Then again, you might be like me and need a little memory refresher once in a while. Here’s the kitchen before:

kitchen with cabinets

Saving Etta - The Story of Saving a House Built in 1900 | Pretty Handy Girl

There were only a few base cabinets and five upper cabinets. Lucky thing because it made demolition of the kitchen easier. The first week after purchasing the property, I hauled all the cabinets to the dumpster and started peeling away the layers in the kitchen. It was a lot of work, but so much fun seeing through the decades and discovering old bead board beneath.

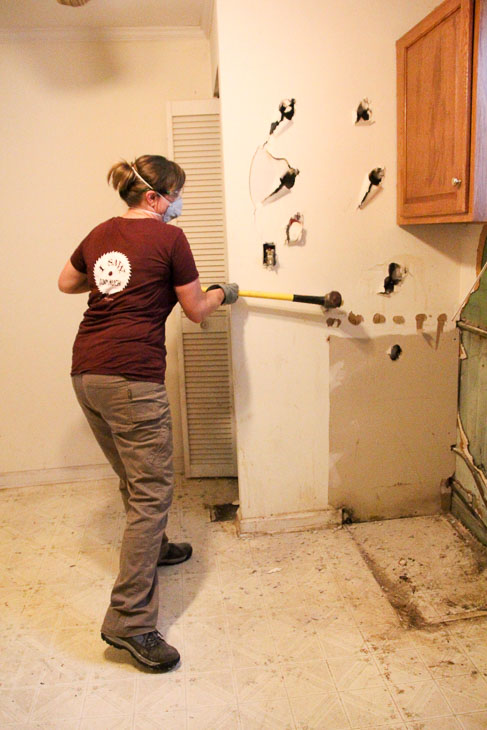
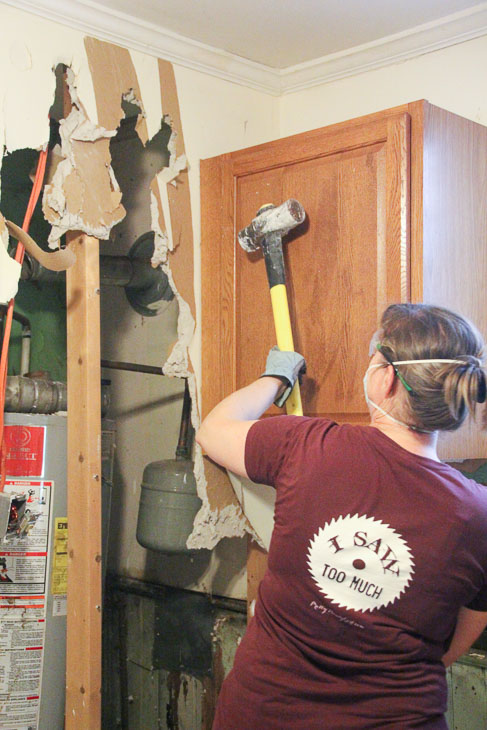
The water heater was walled into a little closet in the corner of the kitchen. It was a blast taking a sledge hammer to the wall. Who needs therapy when you can release pent up frustration through demolition?

Unfortunately it wasn’t enjoyable getting the water heater out. My plumber had a tough time removing the water heater from the house!

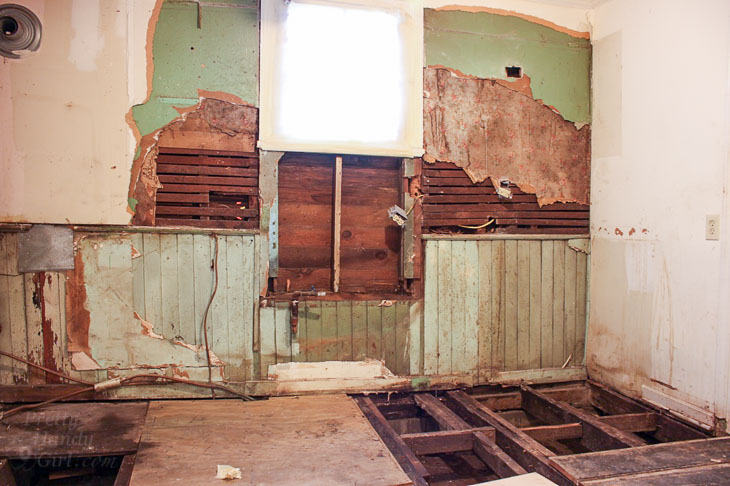
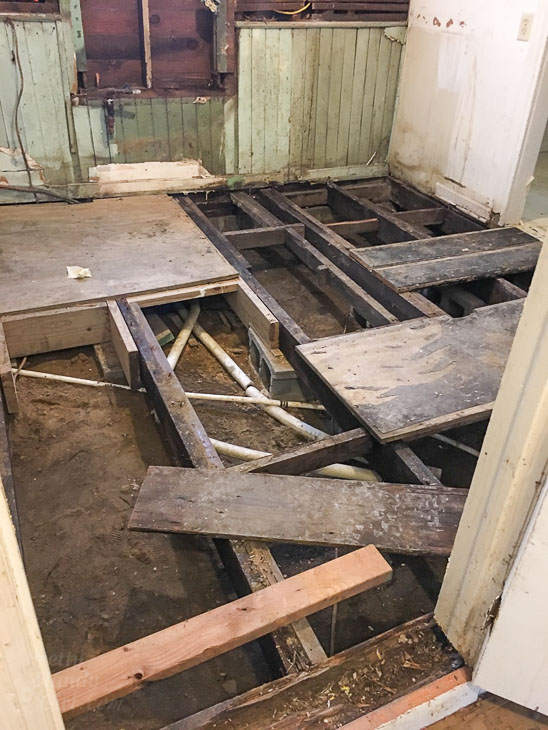
You might remember asbestos tiles were discovered on the floor and they had to be removed. What was left was a maze of floor joists and pipes where the floor used to be.

I originally hoped to save this room from demolition because it was part of the 1900 structure, but after assessing the lack of crawlspace and a severed structural beam with my architect, we decided it had to be removed.

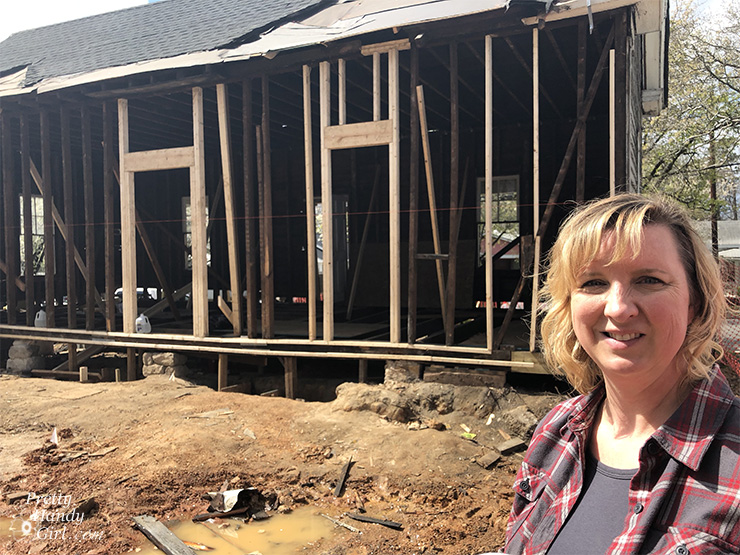
The picture below is shortly after demolition. The doorway on the right is where the original kitchen entrance was. But, it had been walled off a long time ago to provide space for the refrigerator.

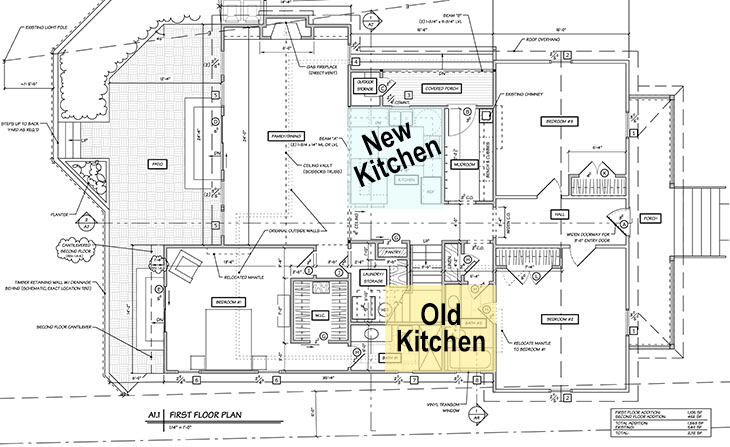
The new kitchen was moved to the other side of the house, as shown in the plans below:

Saving Etta First Floor Blueprints - Kitchen Location

Obviously, after demo, a lot of progress happened to get us to the new kitchen installation. If you want to read the previous updates, here’s what you missed:

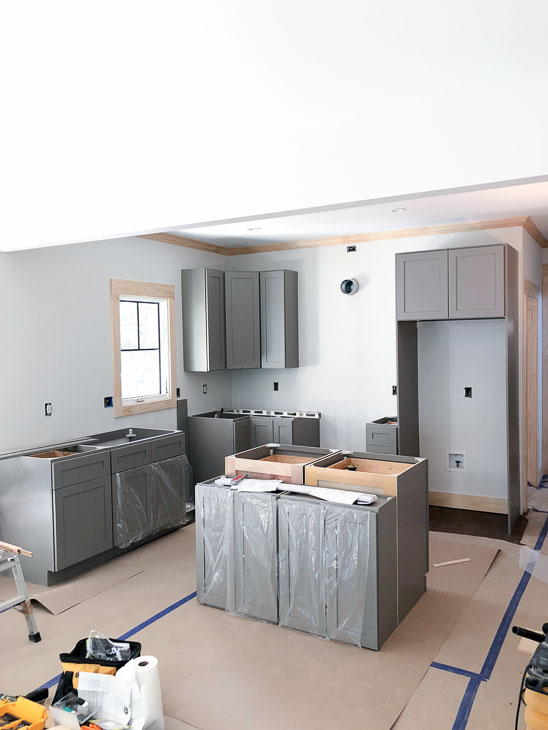
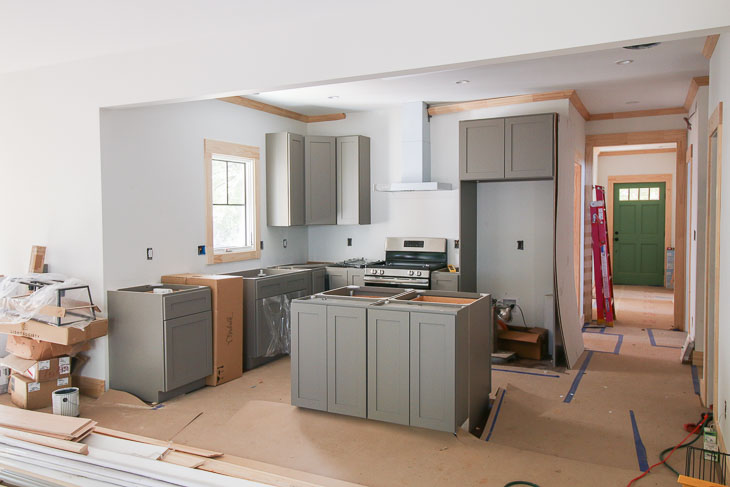
Now that you’re up to speed, this is where we left off (right after installing the kitchen cabinets.)

(I’ve included affiliate links for your convenience. I earn a small percentage from a purchase using these links. There is no additional cost to you. You can read more about affiliate links here.)

To protect the wood floors, we laid Surface Shield Builder Boards on the floor. They worked perfectly to protect the floor from spills, dropped tools, and lots of tracked in mud and dirt. It’s amazing how much dirt got tracked into the house. But, when the ground is scraped clean of any landscaping, things are bound to get messy. I eventually purchased two dirt trapper rubber mats and put them by each entrance. This helped limit much of the dirt from coming inside.

Selecting the Range Hood:

Choosing a range hood for the kitchen proved to be difficult because I liked so many of the Broan options. (Broan is one of the Saving Etta sponsors and provided the range hood for this project.)

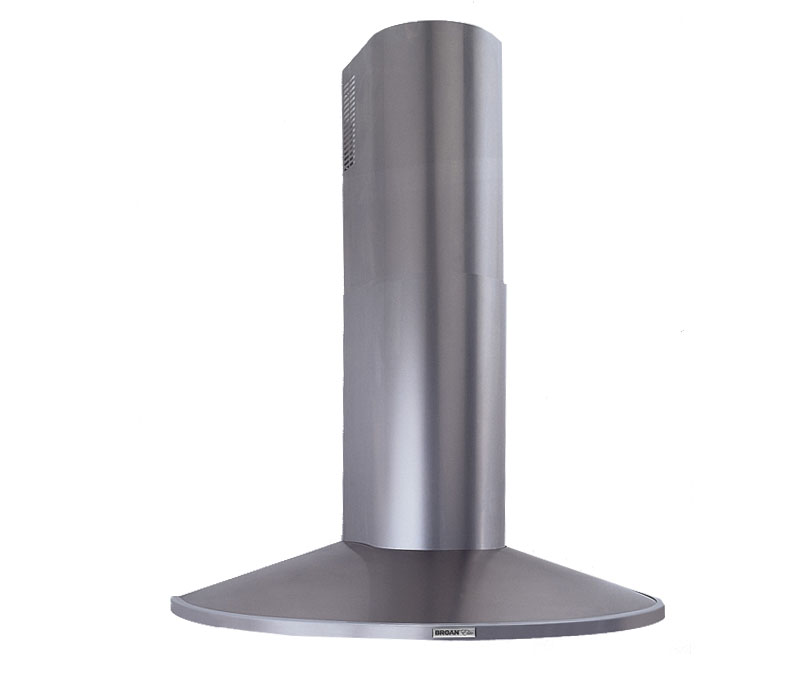
The first hood I fell for was the Broan RM519004 Stainless Steel range hood. It’s sleek and modern, with a beautiful curved shape.

BROAN RM519004 Stainless Steel range hood

The style definitely appealed to me because it was different, but the width of the hood is 36″. I was concerned it might look too big in a small kitchen. Ultimately, I think the hood would have worked, but I had already moved on. (I will keep this range hood in mind for future kitchen renovations, because I still think it looks kind of sexy.)

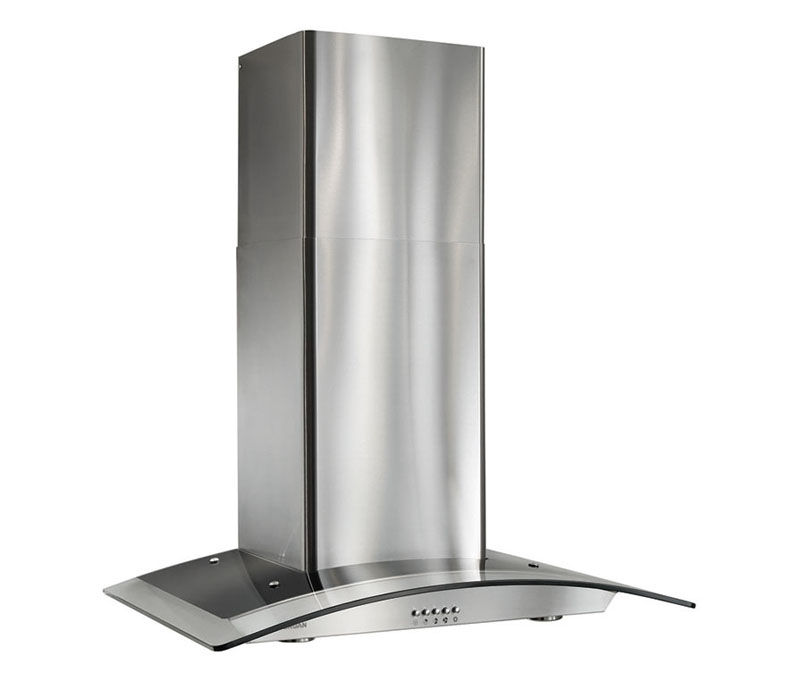
Next I stumbled upon the the B5630SS Broan range hood. It had some curves, but more of a box shape. And the glass hood added some elegance.

Bo

Ultimately I decided against this range hood because I worried the glass would show dust or grease between cleanings. In hindsight, I’m glad I didn’t choose this range hood, because I would have been hit with an unexpected expense. Right before installing the new range hood, my mechanical contractor asked how many CFMs the range hood pulled. “CF-what?,” I said.

What is CFM and Do You Need Make Up Air for Your Range Hood?

CFM is short for cubic feet per minute and it describes the amount of air flow an exhaust fan can pull. Believe it or not, this is one of the most important specifications (besides dimensions) you need to know when considering a range hood. One would think the higher the CFM the better, because it sucks up more cooking odors and steam, right? Not necessarily. Typically 200-300 CFM is adequate for a range hood in a residential kitchen. If you have a commercial stove, or the range hood is mounted further away from the stove top, you may need something stronger. If you need a range hood with a stronger fan (over 400 CFM), you’re required to install a make up air device with an automatic damper. This will add to your expense and requires a licensed HVAC contractor to install it.

For reference, this is the code for exhaust hoods in residential construction:

International Residential Code: M1503.4: “Exhaust hood systems capable of exhausting in excess of 400 cfm shall be provided with makeup air at a rate approximately equal to the exhaust air rate. Such makeup air systems shall be equipped with a means of closure and shall be automatically controlled to start and operate simultaneously with the exhaust system.”

What happens if I don’t add make up air for my range hood?

Stronger exhaust fans can depressurize a house. Resulting in doors slamming shut, air pulled from any cracks or openings in the building envelope, or noise. Some unsuspecting homeowners have turned on their exhaust fan to find it pulls ashes from their chimney. If you don’t have make up air it could create a dangerous back draft situation in the home. This is why it’s important to know what the CFM is for the range hood you want to install. (This article does a good job of explaining the issues with stronger range hoods.)

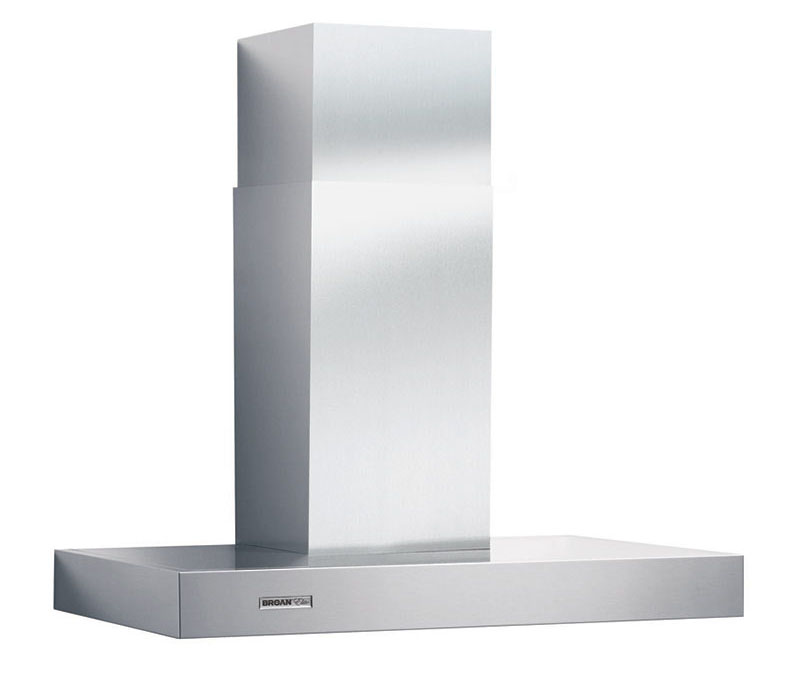
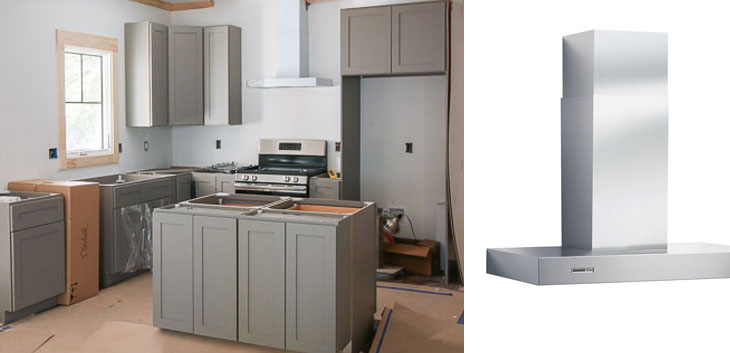
Luckily the range hood I chose for the Saving Etta kitchen was under the 400 CFM limit. This is the beauty I ordered, a sleek Broan modern stainless steel hood with a square chimney.

BROAN RM533004 Range Hood

No glass to clean and the width is 30″. Plus, the CFM is 370, sufficiently low enough to not need make up air, but strong enough to exhaust cooking steam and odors. This made me happy, especially after all the make up air vents we had to install in the laundry room.)

Installing the Range Hood:

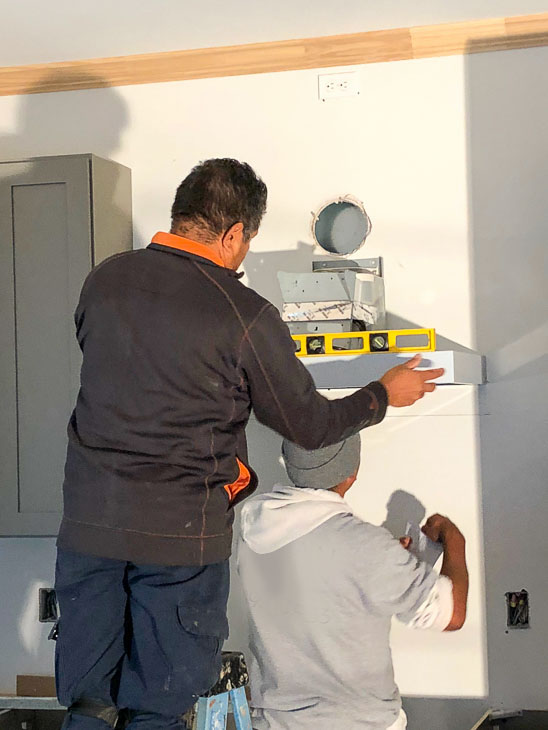
As with many installs at the house, I had to pick and choose which ones to assign to my subcontractors. The range hood was already slated to be installed by my mechanical contractors, so I let them take over installation. I was busy working on another project, but when I came into the kitchen I knew I had to step in and “help.” As before, things were not going smoothly. The first indication that the install may get screwed up was when I found the instructions folded up in the bottom of the product box. I pulled them out and quickly scanned the directions. The second clue was when I found a bracket in the box as well. The guys were trying to figure out how to attach the chimney to the wall (had I not arrived when I did, I’m sure they would have finagled some unattractive solution.) Without an invitation, I took over the role of supervisor and pointed out how the chimney needed to attach to the wall via the bracket in the box. I’m not sure if the guys were relieved or annoyed, but they put up with my directions (thank goodness!)

About Working with Contractors:

Before we go on, I want to point out the fact that these were the so called “professionals”. But, obviously they didn’t know how to install this particular range hood. I chalk this up to lack of experience with this model, not necessarily lack of experience as a mechanical contractor. BUT, they should have been reading the instructions. I want to leave you with this important message:

When you hire a professional, make sure you read the instructions for how the project should be completed. Do your homework and research online so you understand the steps in the project. Speak up if you see something amiss. Just because someone is a professional doesn’t mean they won’t make mistakes.

At the end of the day, the contractors go home. If something is installed incorrectly you’ll be the one who has to live with it. And, unless you are working with stellar contractors, it might be difficult to get them back to your house. (Then again, stellar contractors are oftentimes extremely busy. You’ll need to wait to get back on their schedule.)

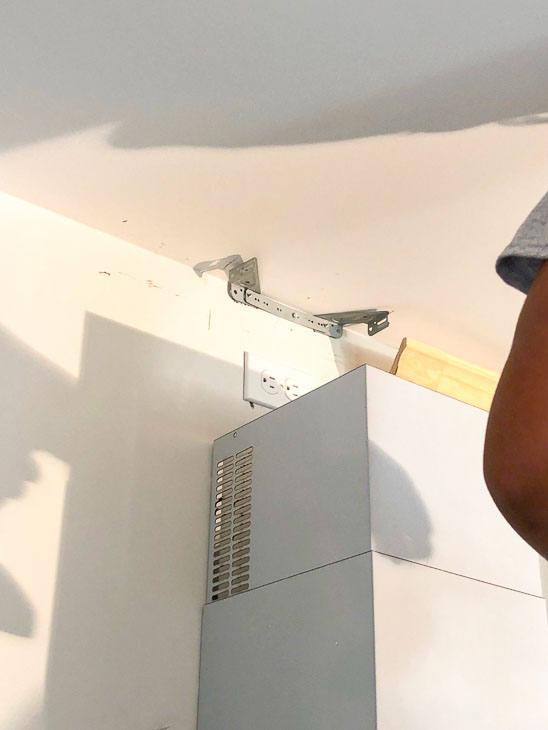
We worked together to hang the range hood chimney. The guys had already hooked up the ductwork and painted mastic over the seams (also required by code). The fan motor was plugged into the outlet above the duct.

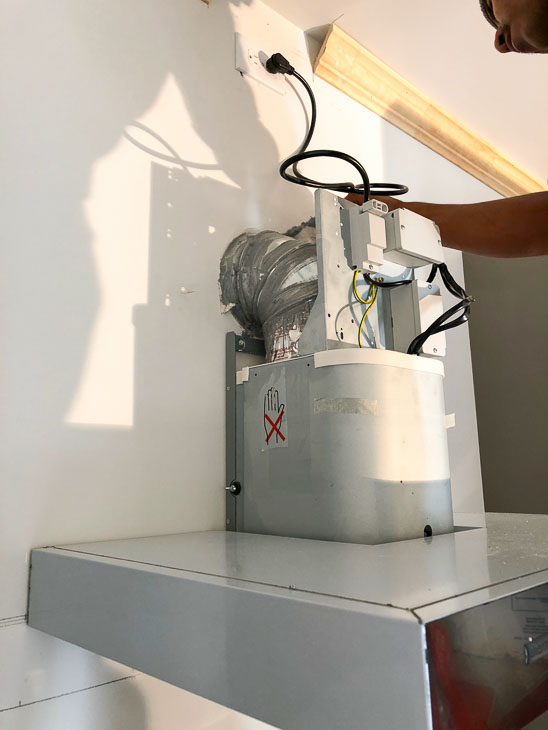
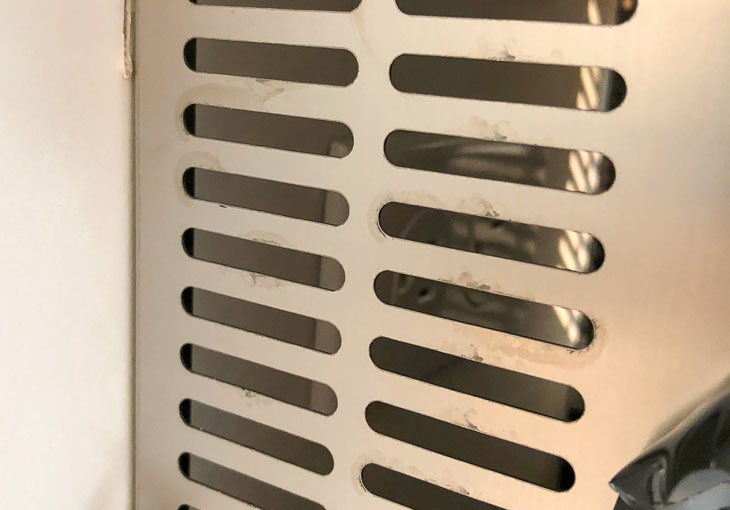
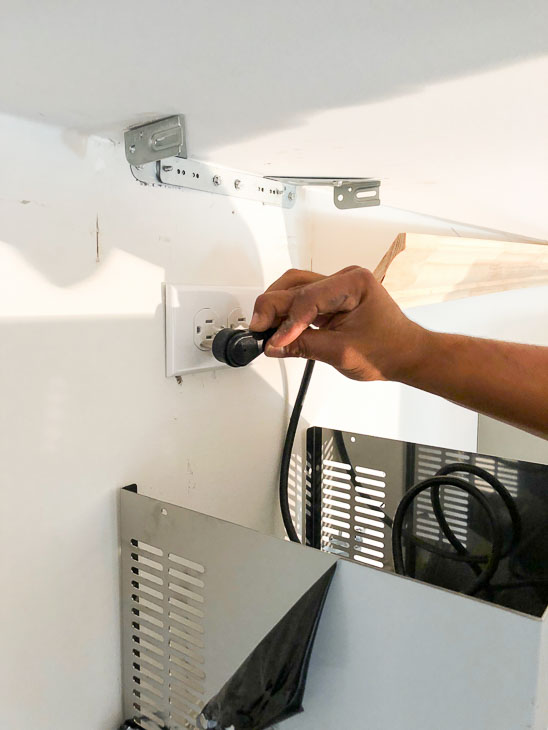
The hanging bracket was attached to the wall, and then the upper chimney was slid into place over the bracket. Securing the chimney to the bracket was a little tricky because the hole on the chimney has to line up with holes on the bracket. Plus, it was difficult maneuvering a drill against the ceiling. Ultimately, the chimney and range hood were installed. The power was turned on to the hood and…NOTHING! We scratched our heads until I climbed back onto a step ladder and peeked into the chimney. See the problem?

Doh! Somewhere along the way we unplugged the fan and forgot to plug it back in. Luckily we all had a collective laugh about it and then slid the chimney back down to plug it in, then re-attached the chimney to the bracket. My words of wisdom: “Always make sure it’s plugged in!” LOL.

We left the protective film on the range hood, and I’m glad I did because it was easier to clean and protect while tiling. Stay tuned for more updates and the kitchen reveal soon! Next up is tiling the backsplash.

kitchen cabinets installed

Disclosure: This is a sponsored post for Broan. I was compensated for my time and efforts to promote the Broan products. However, all ideas and opinions are my own. I will always let you know when you are reading a sponsored post. You should also note that I’m very particular about the brands I work with.

How to Build a Window Pane Lattice Privacy Fence and Gate

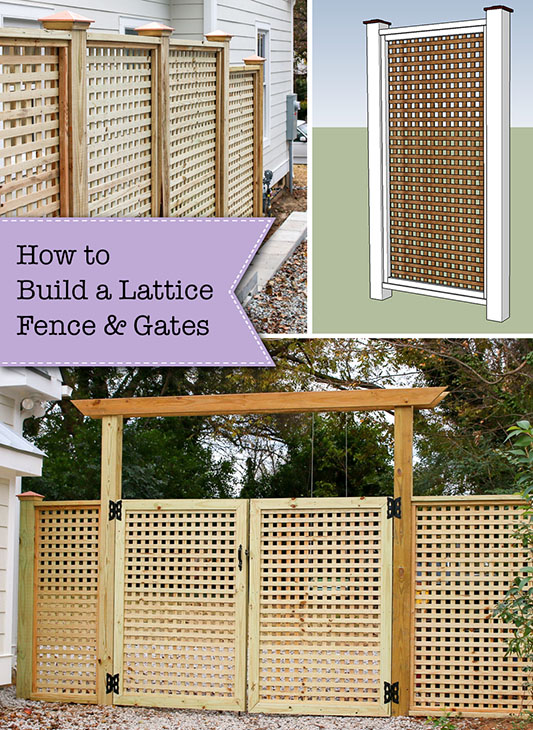
How to Build a Window Pane Lattice Privacy Fence and Gate

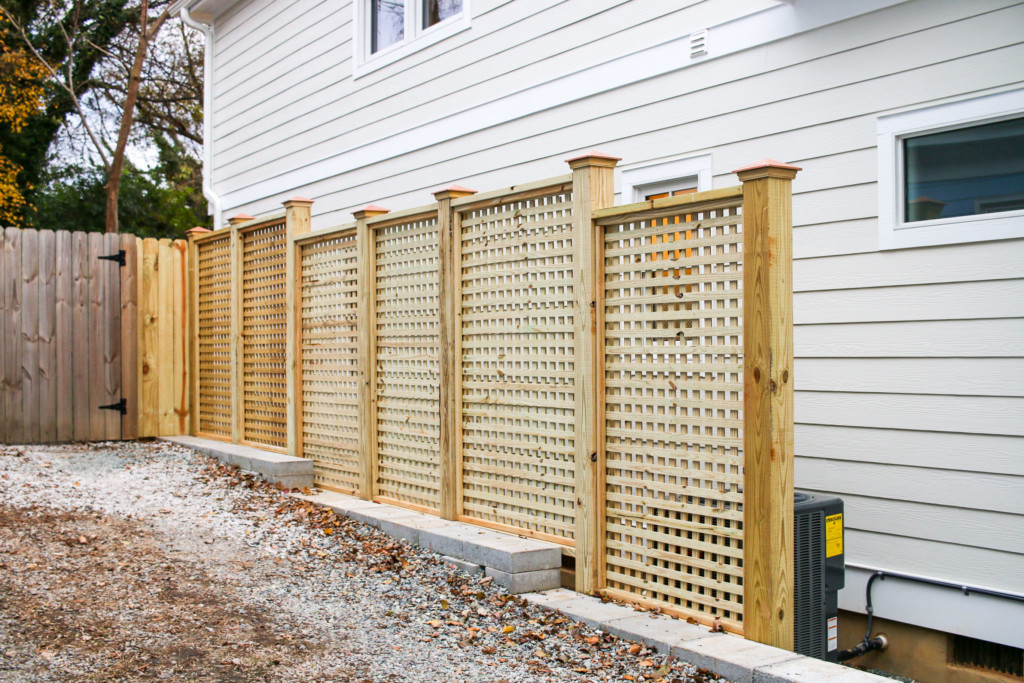
I should probably re-name this post How to Build a Window Pane Lattice Semi-Privacy Fence. But, honestly it’s only semi-private because the lots in downtown Raleigh are so close together and the next door neighbor’s driveway is against the privacy fence. All they have to do is lean against the fence and peek through to eliminate the “privacy” function. But, if we’re going to be honest here, their six foot picket privacy fence has cracks in it where the picket wood has shrunk. And, yes, you can see through their privacy fence too. But, in a suburban neighborhood, this fence would block the view from the road or a distance.

When I was considering fencing options for the Saving Etta project, I wanted to create a beautiful fence that was attractive to look at but also gives some privacy and security.

How to Build a Window Pane Lattice Privacy Fence and Gate

Why I chose to use a window pane lattice fence:

  1. I love the look. It’s a mixture of cottage and modern. And it’s perfect for a modern farmhouse style house.
  2. The new owners can train a flowering vine to grow up the lattice and create more privacy.
  3. It’s neighborly being able to see and talk to your neighbors next door. It fosters community!

As we drew closer to the holidays, I knew I had to push the accelerator on all the remaining projects at the Saving Etta project. Therefore, I did not build this fence, I hired a fence contractor to build it. But, I did design the fence and shared my design idea with the contractor. I took some inspiration from my Pergola with Trellis Screens.

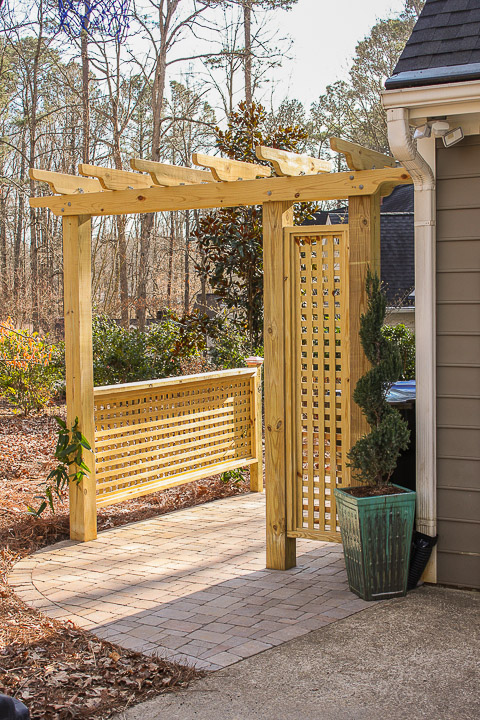
Build a Pergola with Trellis to Screen Your Trash Cans | Pretty Handy Girl

The following tutorial is a basic construction guide for How to Build a Window Pane Lattice Privacy Fence and Gate. I didn’t oversee the construction, so I’m going to make some suggested fasteners, but ultimately you should gauge the strength of your fasteners especially when building the gate. If your gate is wider, you may need an additional cross or diagonal brace.

Tools & Materials:

(I’ve included affiliate links for your convenience. I earn a small percentage from a purchase using these links. There is no additional cost to you. You can read more about affiliate links here.)

Before we get started, I want to express a huge thank you to Wood It’s Real for being a Saving Etta sponsor. As you might remember, they sponsored the side porch and the front flat sawn balluster project. And now, I have the honor of sharing yet another Wood It’s Real Sponsored project. Let’s learn How to Build Window Pane Lattice Privacy Fence and Gate using beautiful Southern Yellow Pine.

Wood It's Real Website

This build will take at least two days. Digging the post holes, setting the posts, and pouring the concrete for the posts can be completed on day one. But, you’ll want to wait overnight for the concrete to set up before building the fence panels. For more information on setting fence posts, you might find this tutorial by Quikrete helpful.

Before building your fence, be sure to research your local building codes; know if you have to meet any setback limits, and find out if you have any restrictive covenants for your neighborhood.

Building a Window Pane Lattice Fence:

How to Build a Window Pane Lattice Privacy Fence and Gate

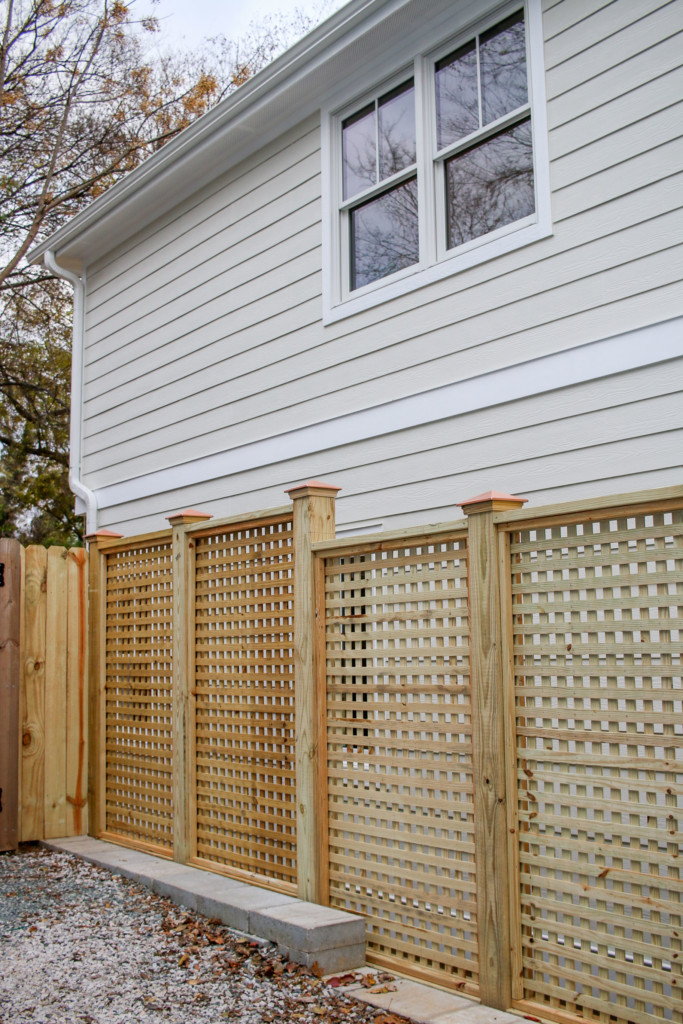
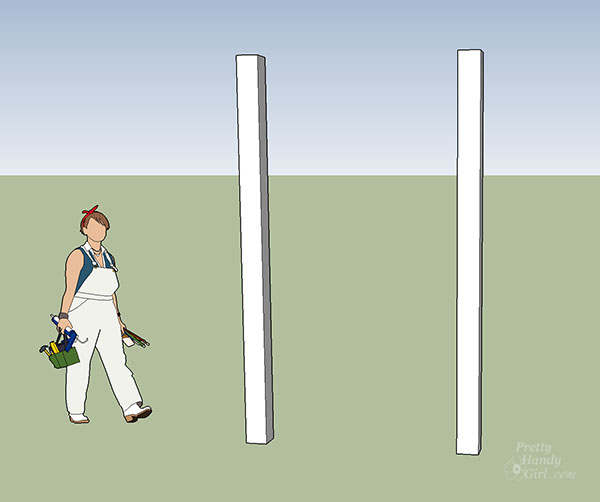
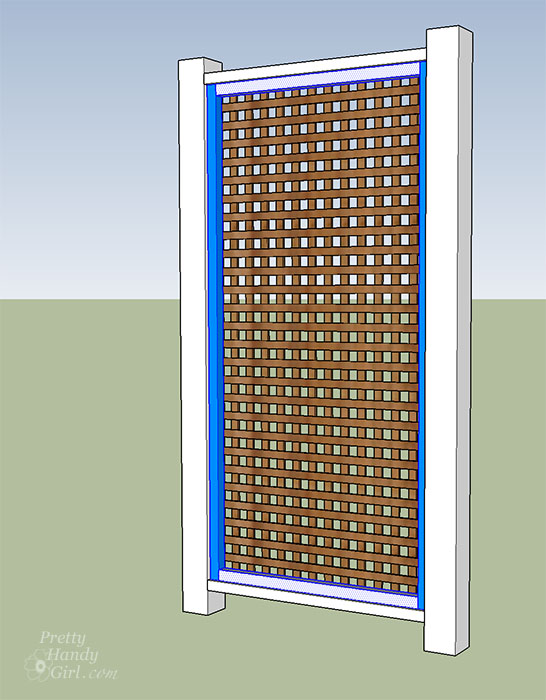
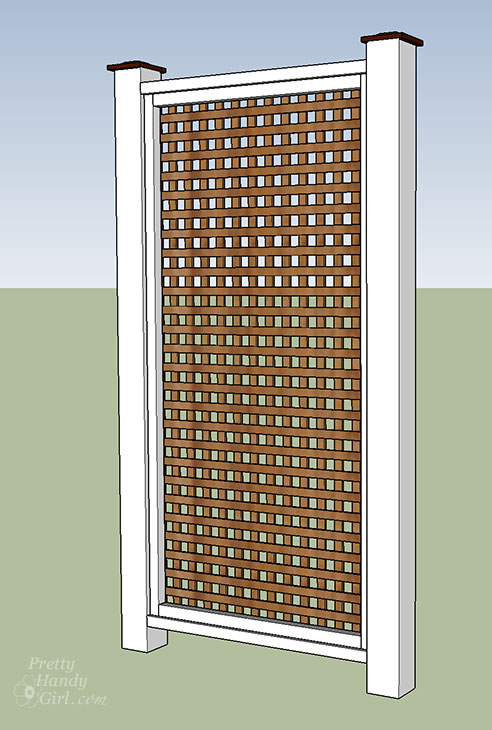
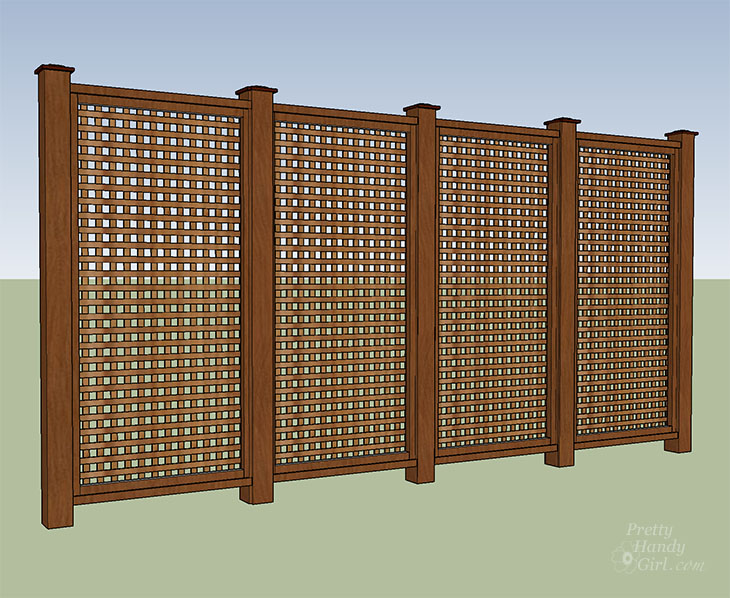
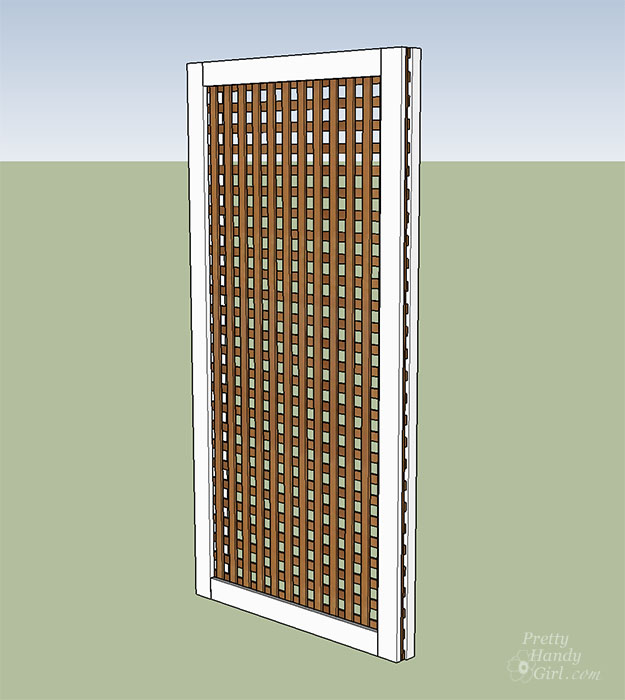
To create the tall privacy fence, we used one 4′ x 8′ lattice sheet vertically between the posts. Therefore, our posts were set four feet apart. After your 6×6 fence posts are set in the ground, you can start building your lattice fence sections between the posts.

set fence posts

Instructions:

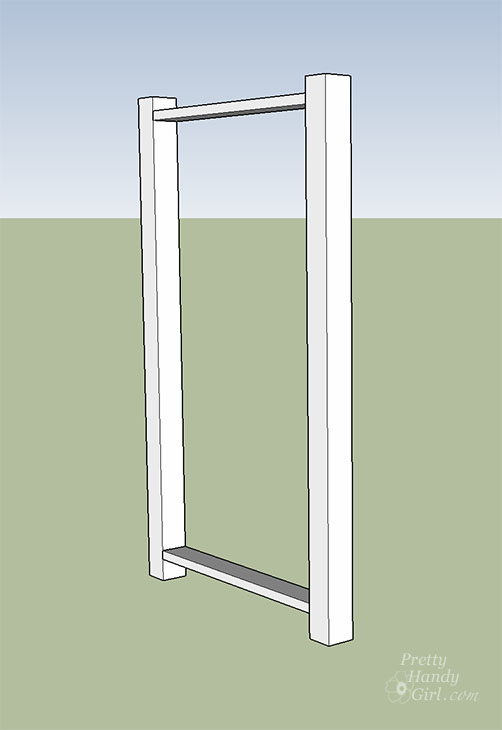
Measure and cut two 2×6 pieces of pressure treated lumber to fit between the top and bottom of the posts. Level and secure to the 6×6 posts using exterior grade wood screws.

secure-2x4 horizontal lumber

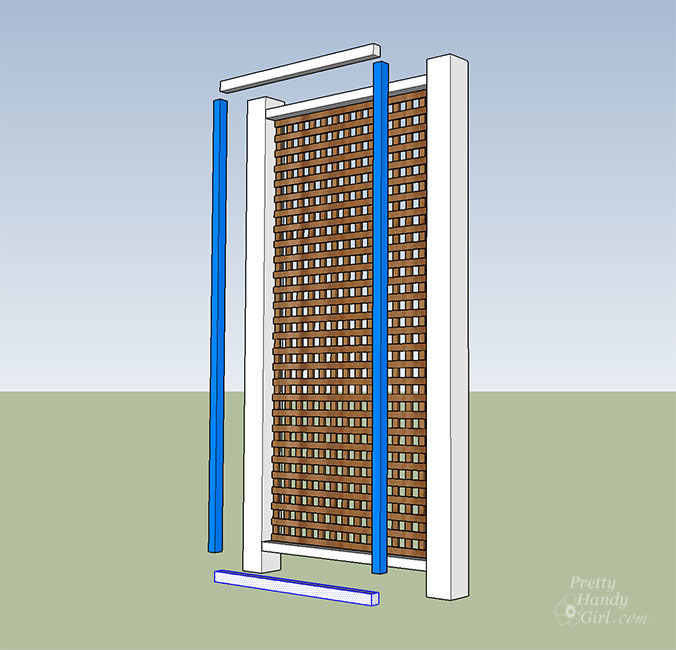
Center your 4×8 lattice panel in the center of the 6×6 posts. Cut 2×2 lumber to create a frame to support the lattice.

add 2x2 frame to secure lattice

Secure the 2×2 frame to the inside of the 6×6 posts and the 2×6 horizontal lumber. You can use wood screws or 2″ finish nails to secure the 2×2 frame. Add another 2×2 frame to the other side of your lattice.

secured-lattice fence section

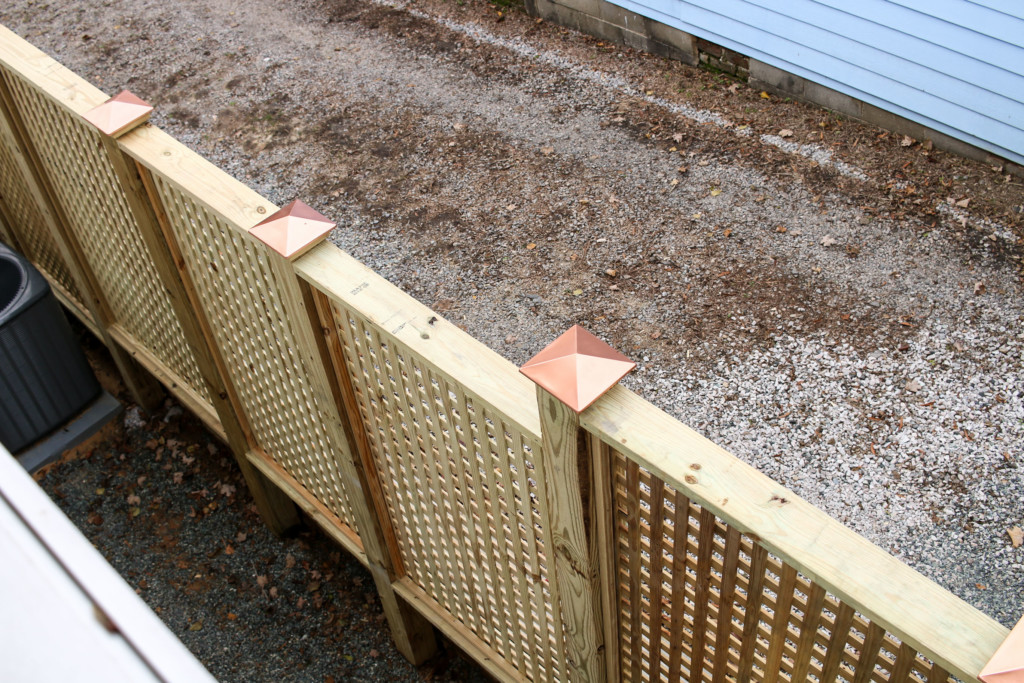
Add post caps to the top of your fence to protect the posts from rot (and to make your fence look pretty.)

add post caps

How to Build a Window Pane Lattice Privacy Fence and Gate

Repeat the steps above to create as many window pane lattice fence sections as you desire.

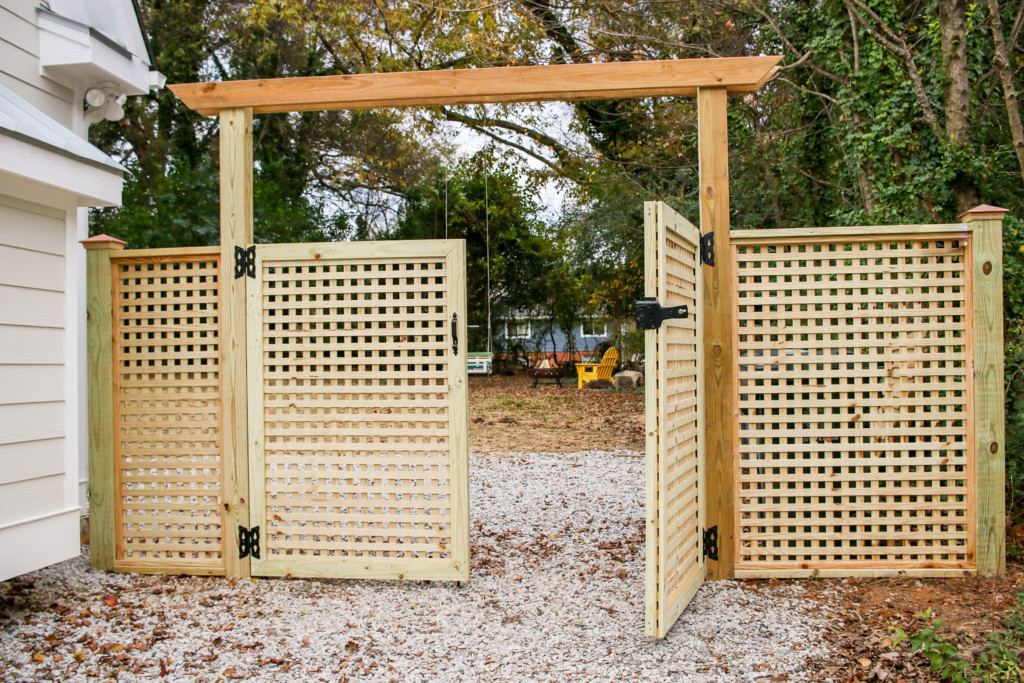
completed window pane lattice privacy fence

How to Build a Window Pane Lattice Privacy Fence and Gate
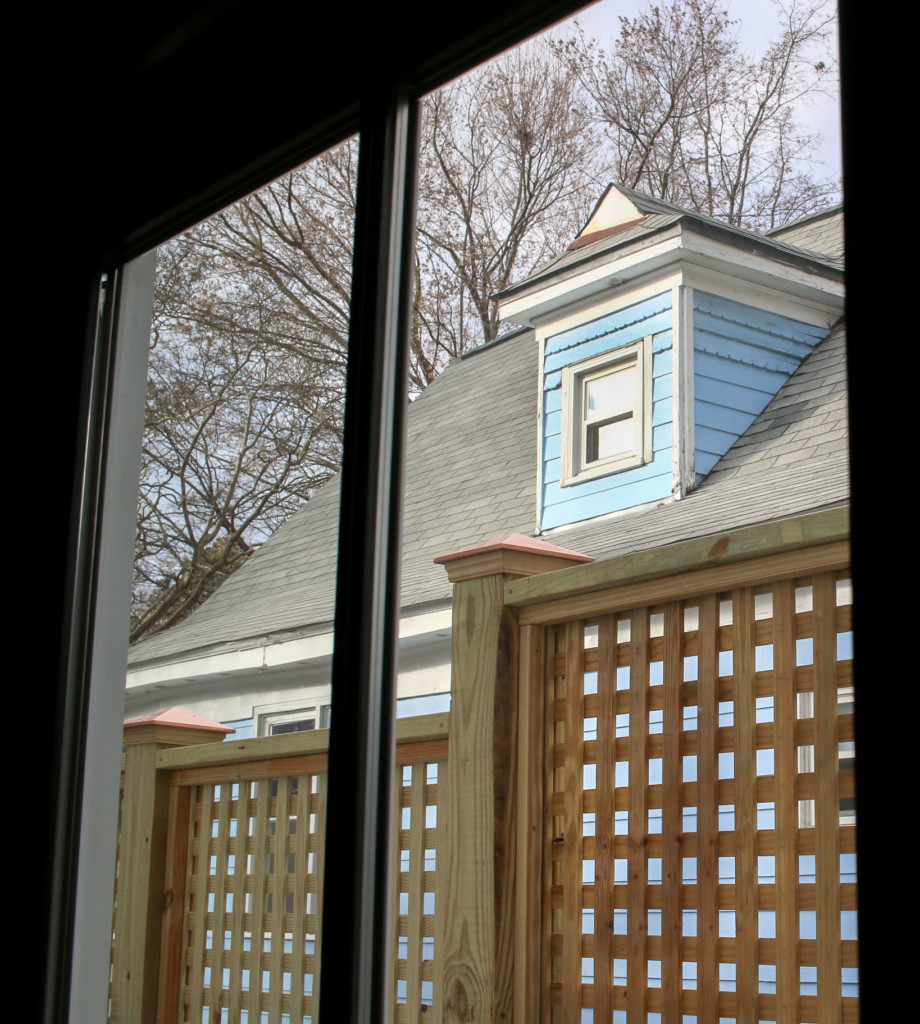
Depending on the angle of sight, you can see some shapes through the fence. This is the view from the bathroom window. I’ll be sharing how I added complete privacy to this window in a later blog post.

How to Build a Window Pane Lattice Privacy Fence and Gate

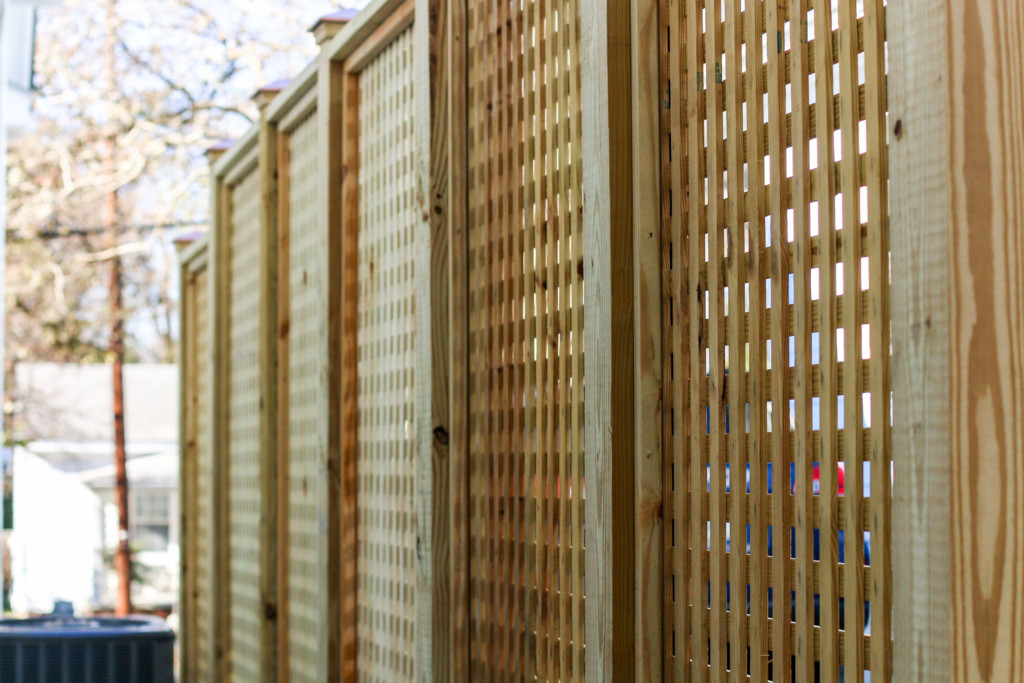
From the bedroom you can barely see the neighbor’s car through the fence.

How to Build a Window Pane Lattice Privacy Fence and Gate

How to Build a Window Pane Lattice Gate:

How to Build a Window Pane Lattice Privacy Fence and Gate

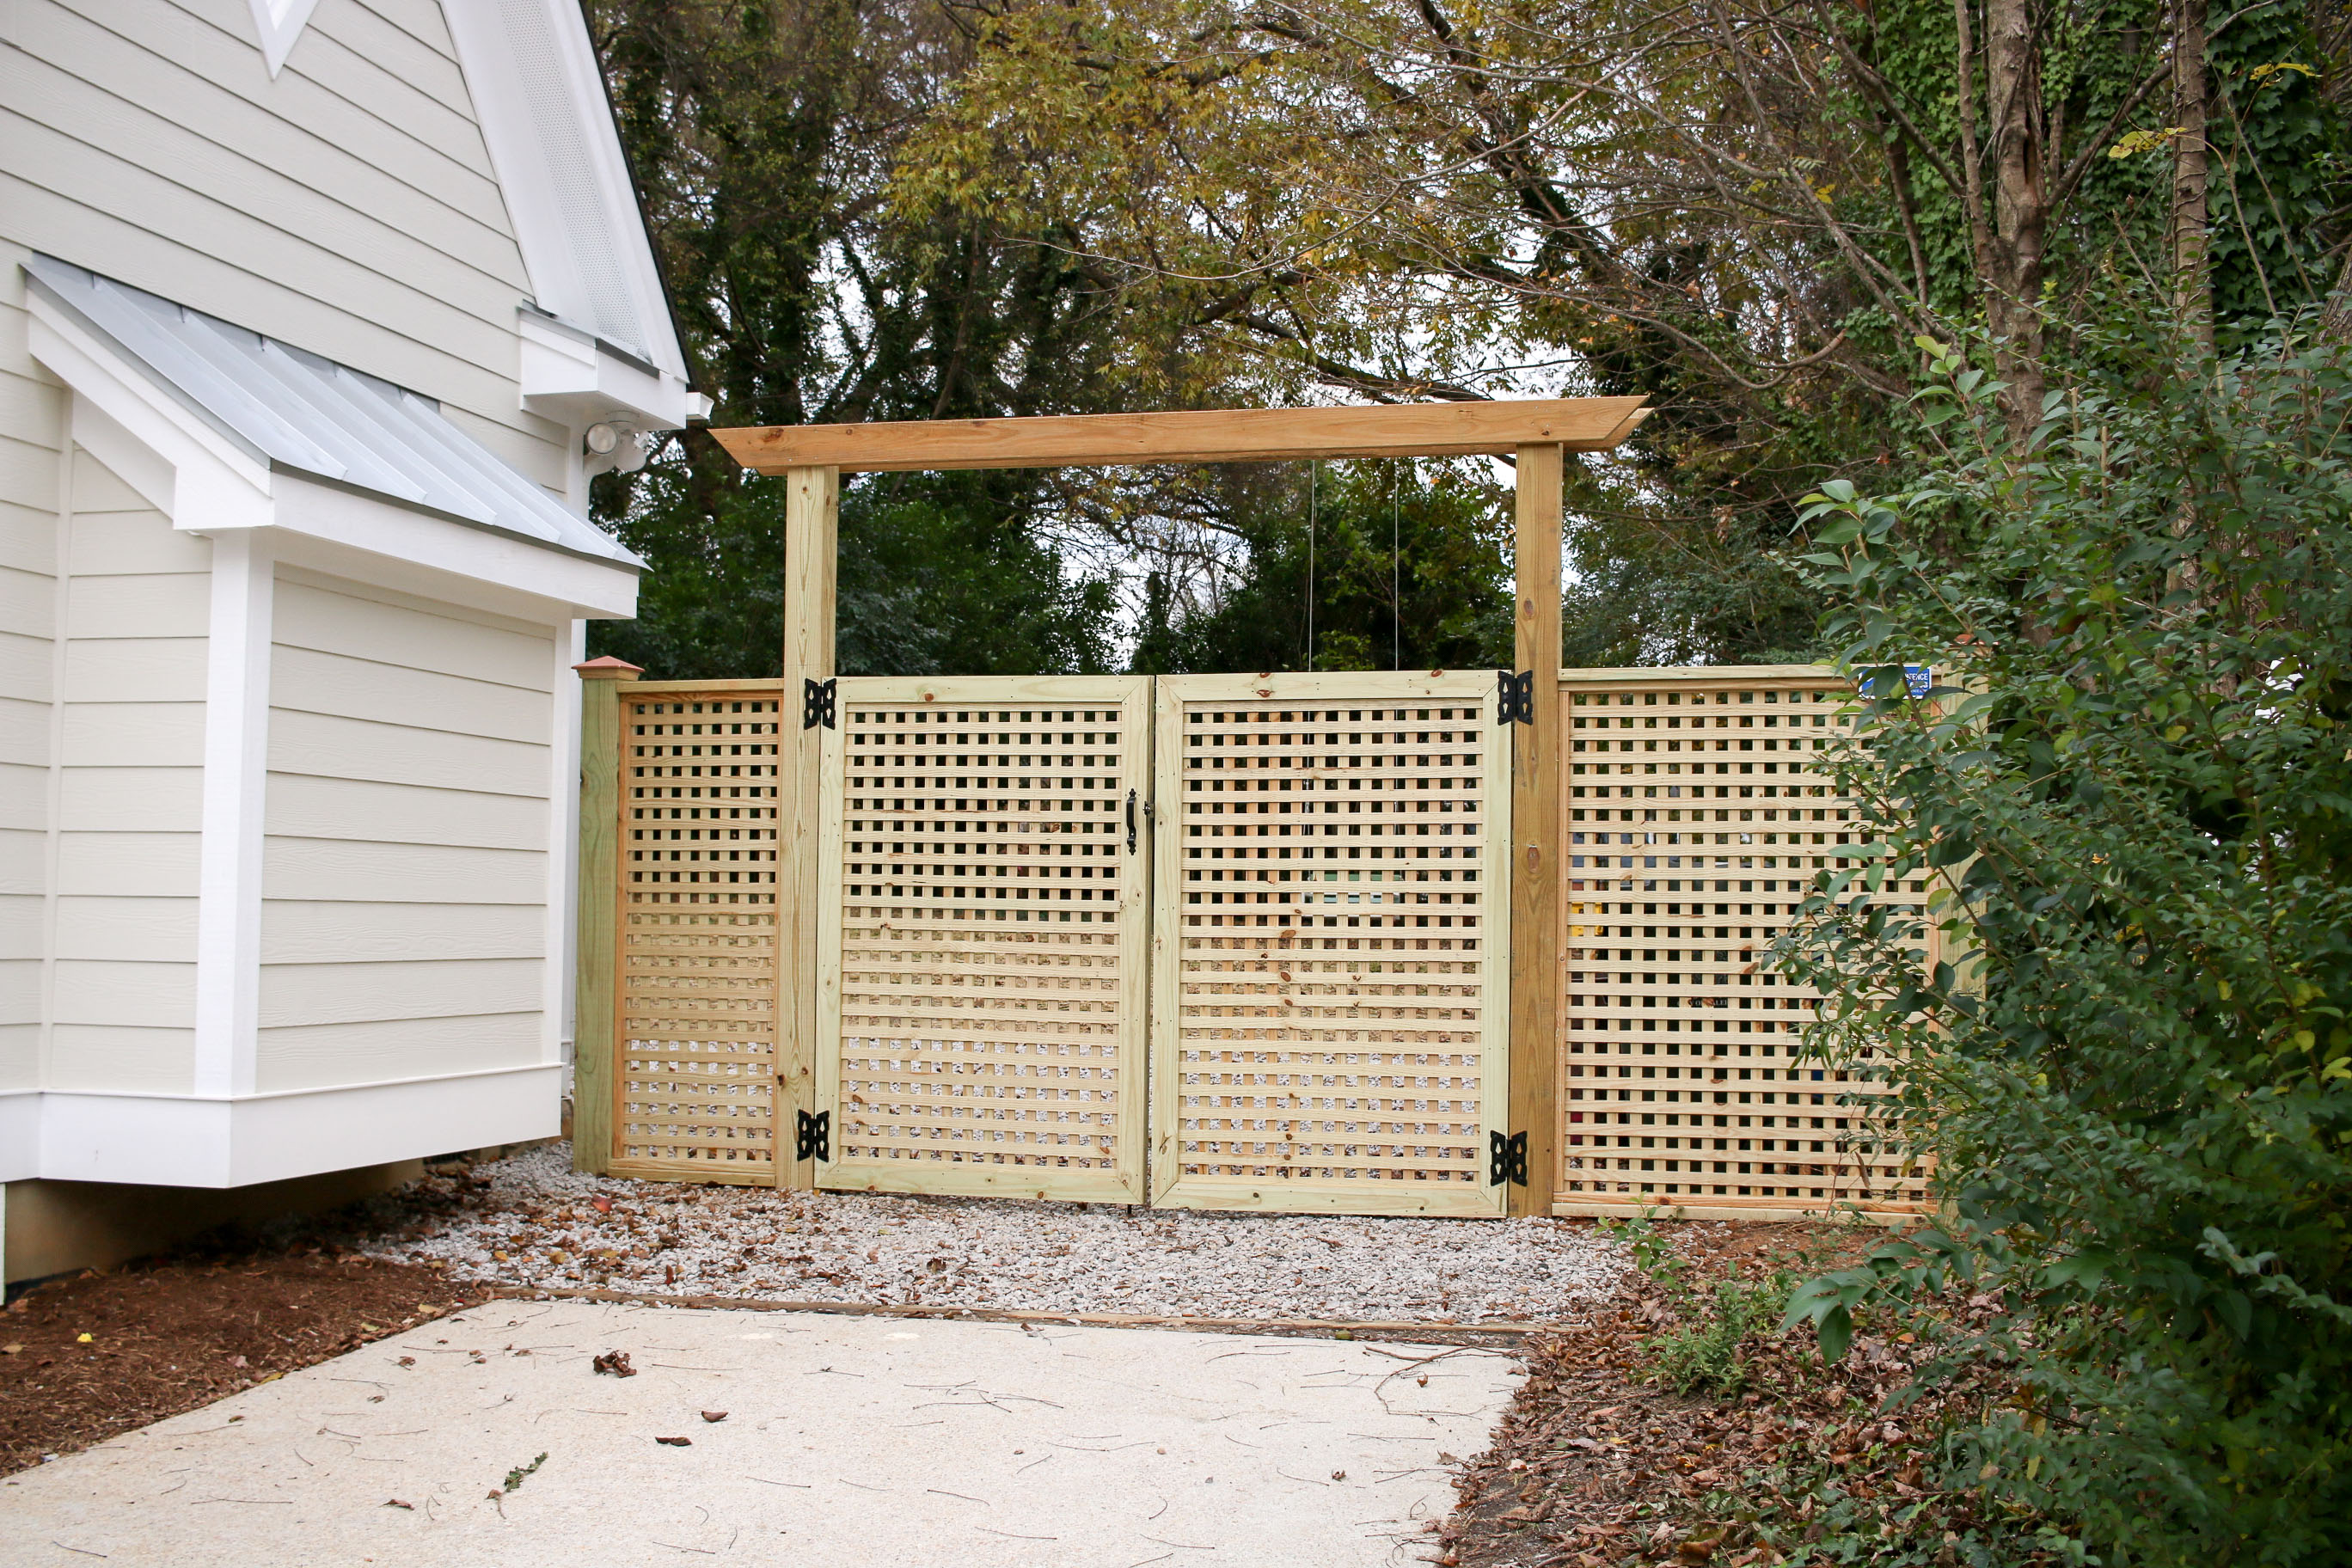
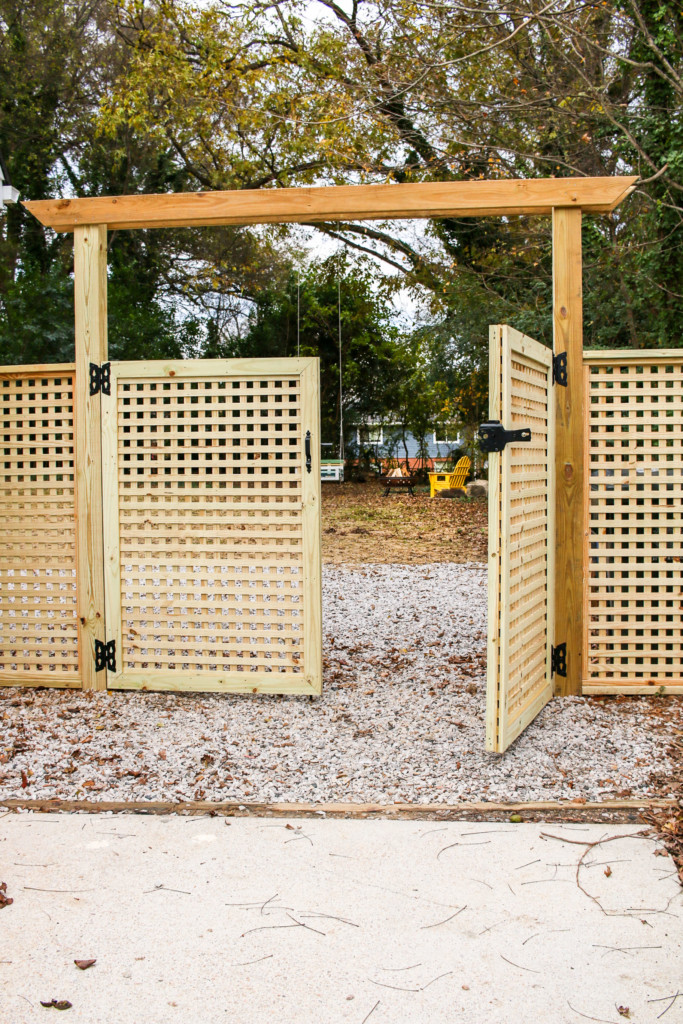
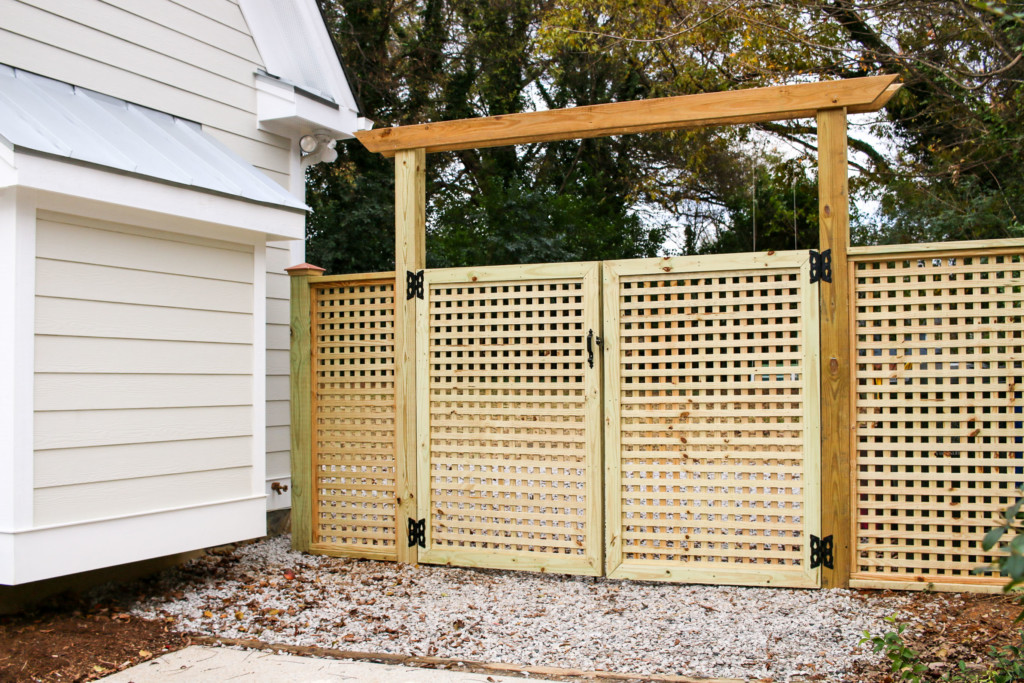
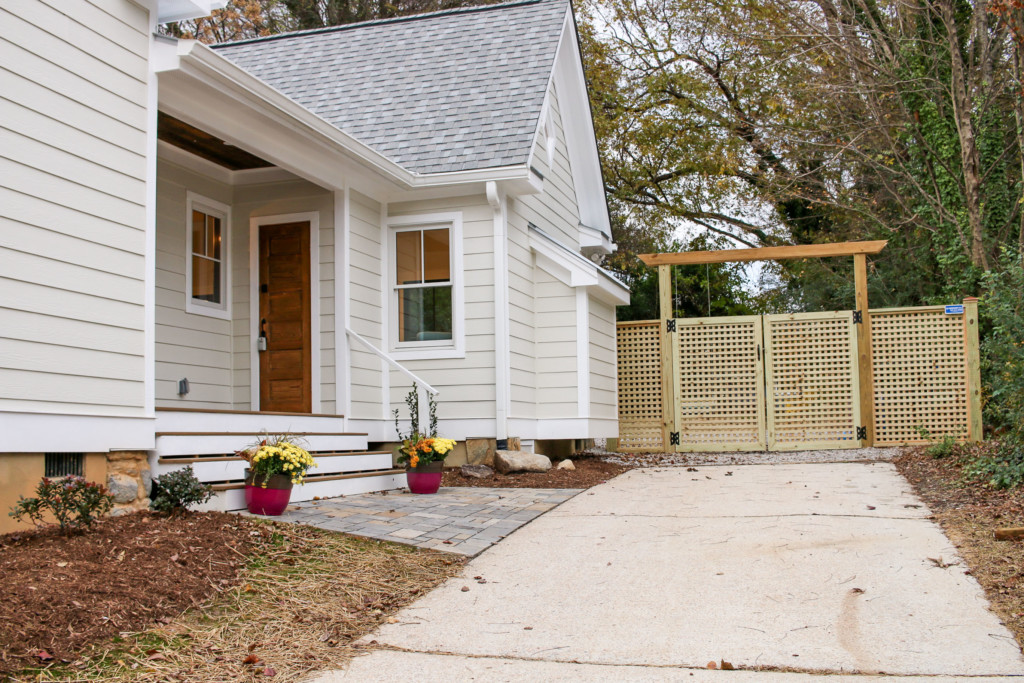
To match the window pane lattice fence, I challenged my fence contractor to build matching lattice gates at the end of the driveway. I wanted the opening to be wide enough to drive a car through (should they want to park in the back of the house or get a delivery of mulch or other landscaping materials.)

Instructions:

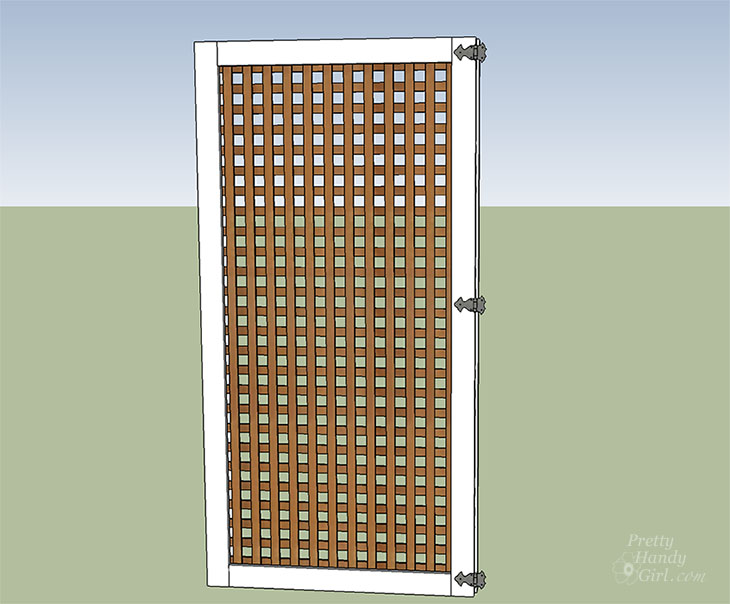
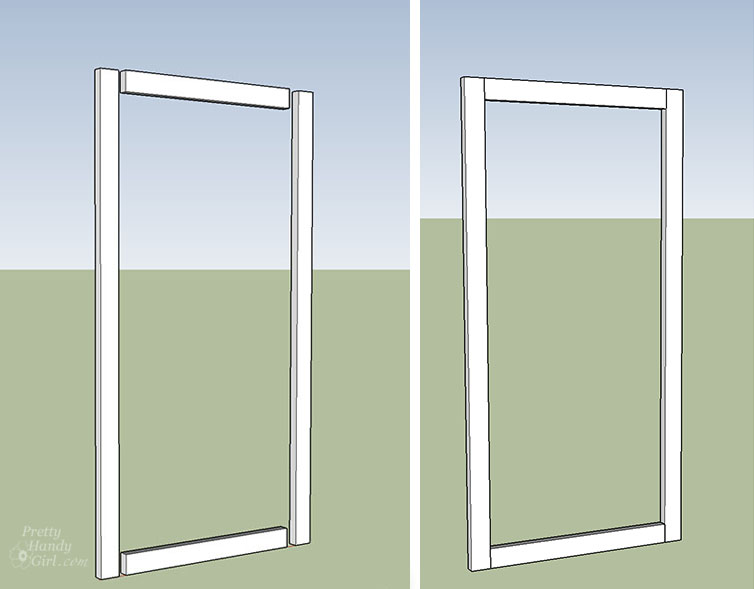
Measure and cut your 2×4 pressure treated lumber. For a 4′ x 8′ gate, cut the vertical pieces exactly 8′ in length. The top and bottom pieces should be cut 41″ long. Secure the frame with pocket hole screws in the corners of the frame. (Click here to learn how to use a pocket hole jig.)

build 2x4 frame for gate

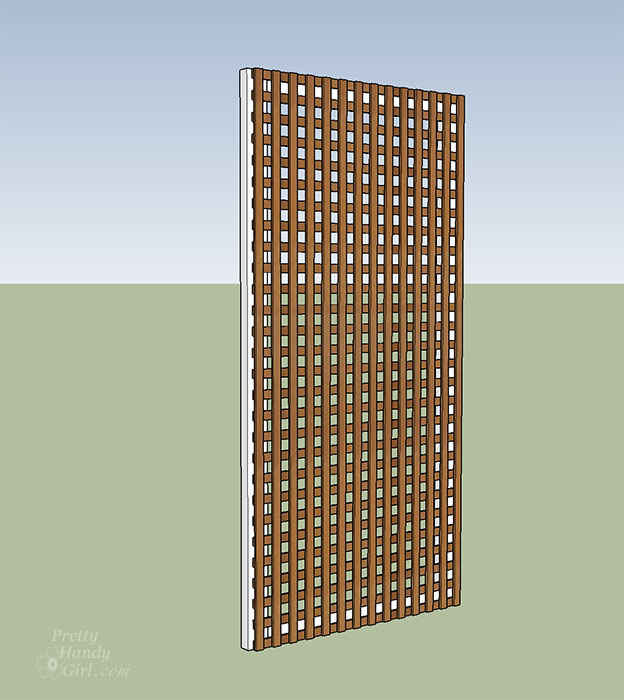
Lay the 4×8 lattice panel on top of the 2×4 frame. Tack the lattice in place using 1 ½” finish nails.

add lattice panel to 2x4 frame

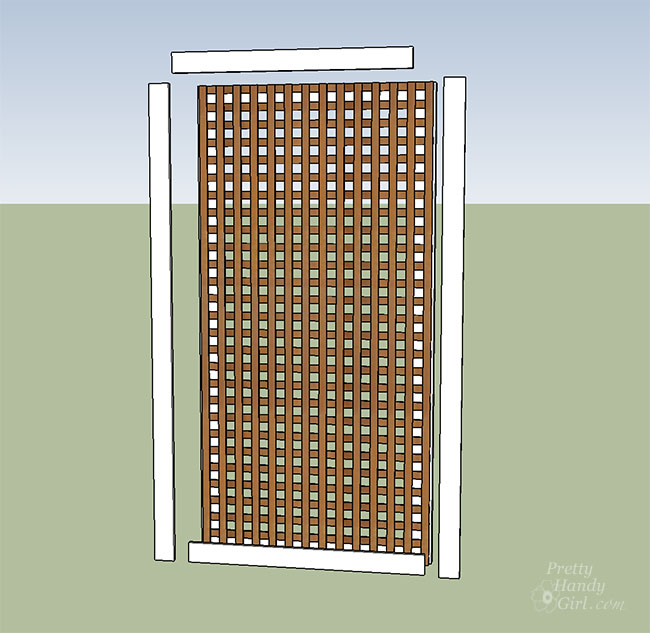
Measure and cut your 1×4 lumber using the same measurements as the 2×4’s.

cut 1x4 frame to size

Secure the 1×4 boards to the lattice and the 2×4’s using 2 ½” exterior wood screws. (The lattice will be sandwiched in the middle and the screws should extend through the 1×4’s and the lattice and into the 2×4 frame.)

sandwich lattice between 1x4 and 2x4 frames

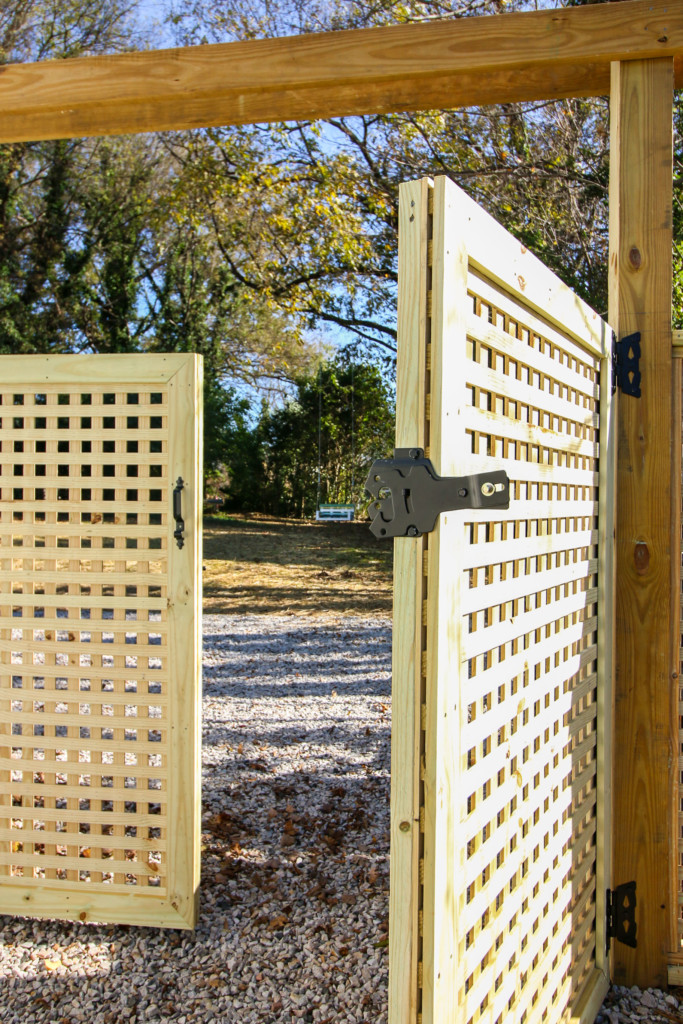
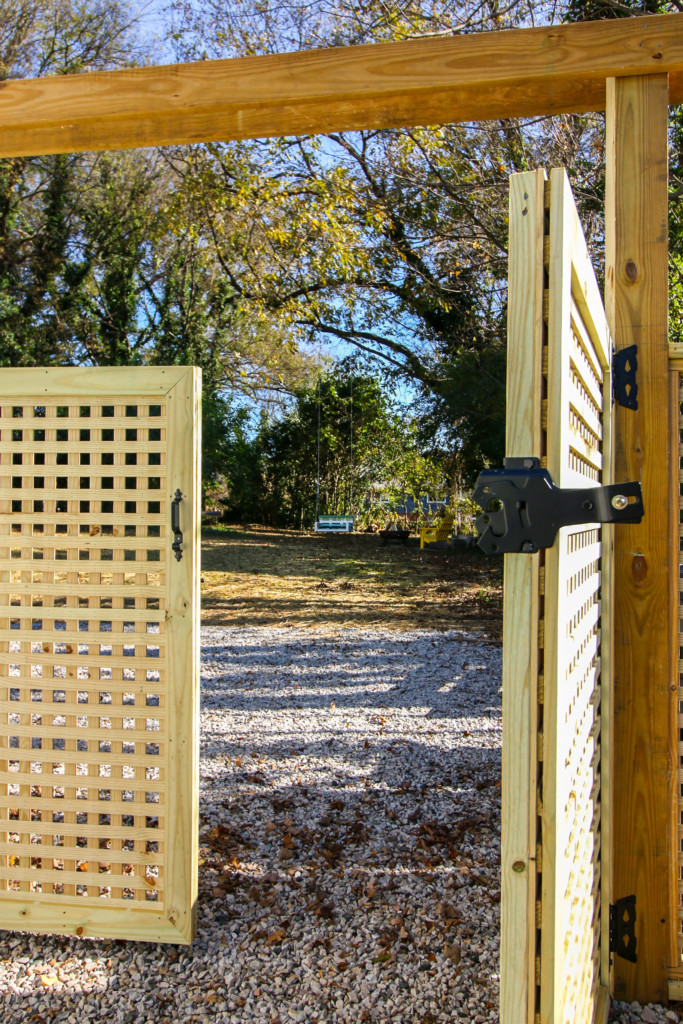
Your gate construction is complete. Add hinges and gate hardware and secure to a 6×6 post.

add gate hinges

These gates are rock solid and shouldn’t sag over time. The lattice keeps the gate square.

How to Build a Window Pane Lattice Privacy Fence and Gate

For a decorative touch, we added two 2×6 pieces of lumber across the two gate posts to create a pergola. The new owners can put a potted vine next to each post and allow the vines to grow up and over the pergola.

How to Build a Window Pane Lattice Privacy Fence and Gate

A metal drop rod is secured to the left side gate for stability and to keep both gates from swinging in when latching.

How to Build a Window Pane Lattice Privacy Fence and Gate

The window pane lattice provides plenty of privacy from the road. But, it also allows the homeowners a view to see if anyone is coming up the driveway.

How to Build a Window Pane Lattice Privacy Fence and Gate

What do you think? Do you like the window pane lattice fence and gates? Would you leave it natural or stain it?

How to Build a Window Pane Lattice Privacy Fence and Gate

Disclosure: This post is a sponsored post for Wood It’s Real. It was written as part of their sponsorship of the Saving Etta project. I was not told what to write. All words and opinions are my own. I am very particular about the brands I work with, and only partner with companies that provide quality materials and/or services.

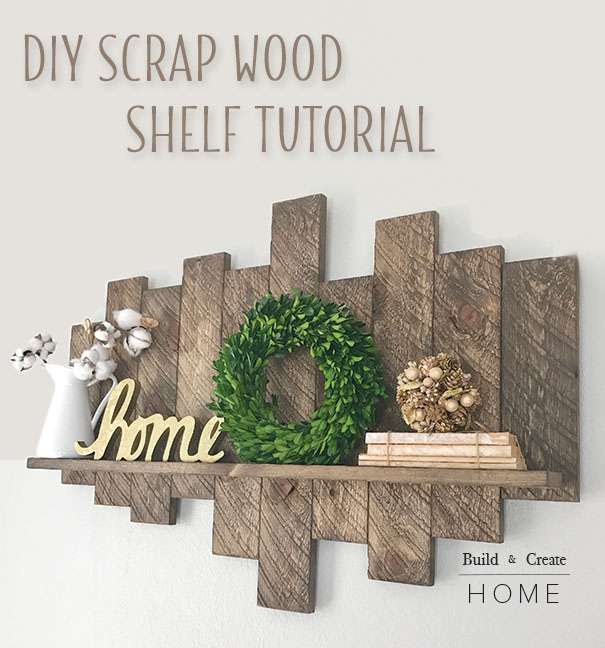
DIY Scrap Wood Shelf TutorialDIY Scrap Wood Shelf Tutorial

Aloha, Pretty Handy Girl friends! I’m Charlee from Build and Create Home, and today I have a great beginner woodworking project for you!

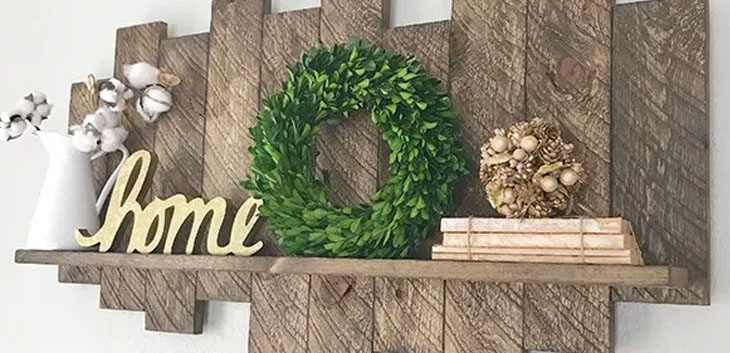
This scrap wood shelf is a great way to fill up a wall space and also display some of your smaller decor and trinkets. Not to mention use up some of your wood scraps!

Materials:

(I’ve included affiliate links for your convenience. I earn a small percentage from a purchase using these links. There is no additional cost to you. You can read more about affiliate links here.)

Optional: Stain if desired

* If you don’t have any scrap wood, you can use the Ghostwood lumber purchased from Home Depot. It comes pre-aged like barn wood and has a textured front. I didn’t have to stain mine at all. Use what you have on hand if you like, or buy your own.

Instructions:

Step 1 – Cut your Lumber

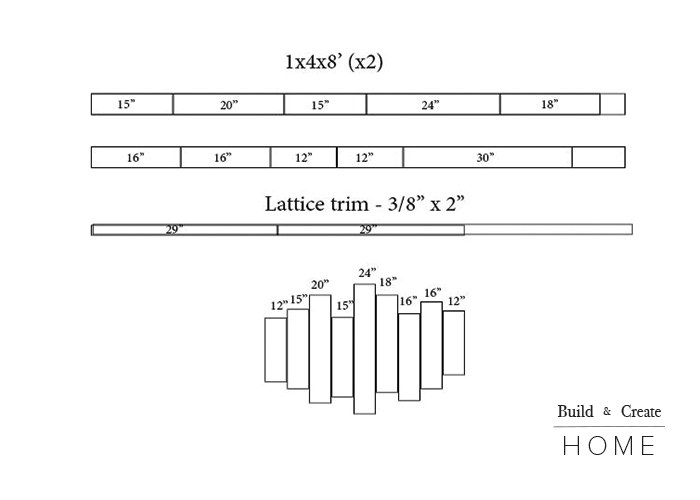
Cut all your pieces according to the sketch below. Sand any rough edges or sides.

Next lay out your pattern. See the sketch above to see how I laid out my wood slats. You don’t have to follow this pattern, feel free to make your’s different. However, it is nice having some variation in heights, as opposed to all the same or symmetrical patterns.

Step 2 – Attach Lattice

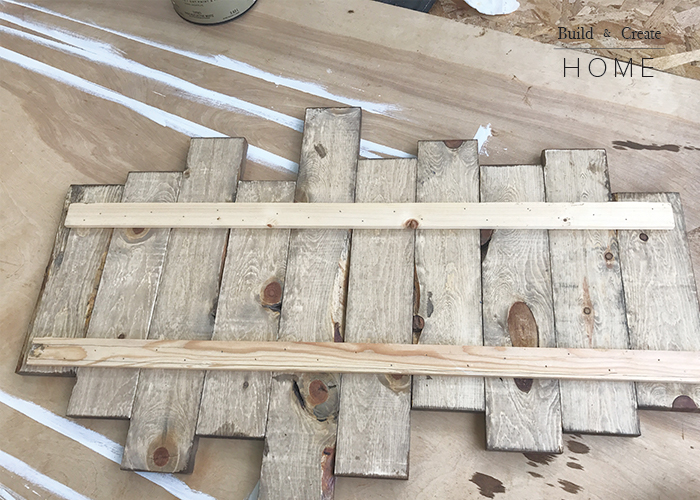
Once you have your pattern decided, you will need to flip the slats over with the back side facing up. Be sure to reverse your pattern completely and not just flip each piece over in the same place, or your pattern will be backwards!

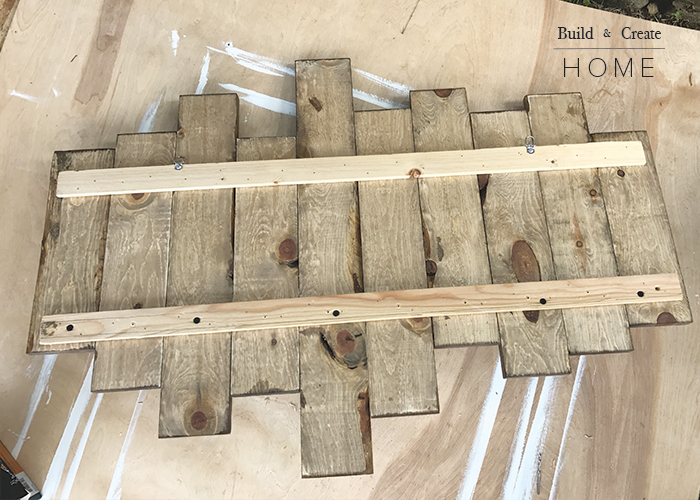
Lay the two lattice pieces across the back of your slats. Use wood glue and a brad nailer to attach the lattice to the backs of the slats. (If you don’t have a brad nailer, use a drill and screws to attach.) If using screws, be sure to drill pilot holes first. This will keep the lattice from splitting since it’s so thin. Drill at least one hole per board, but I’d recommend adding two on a few of your boards to keep them from shifting.

Finally, drive the 3/4″ screws through the holes you drilled.

Step 3 – Attach the Shelf

Now that your slat design is complete, it’s time to attach the shelf! Work on a table or workbench for this next step.

Decide how high you want your shelf to sit on the slats. Measure and mark how far up from the bottom your shelf will rest. (Repeat on several slats.)

Flip over the slats to the backside. Using the measurements you just took, draw a line across the back. (This will make it easier for you to drill your holes and actually catch the shelf.)

Clamp the shelf to the front. It’s much easier to hang your piece over the edge of the table or workbench while attaching the shelf.

Drill pilot holes through the slats on the line you drew as a guide. Drive the 1 ¼” screws through the pilot holes. This should secure your shelf to the slat pattern. Repeat with as many screws as necessary to create a sturdy shelf.

Step 4 – Add Hanging Hardware

Attach your D-rings to the back of your slat shelf. It’s easiest to attach to the lattice, assuming you secured it level with your slats.

You are done! Step back and admire the DIY Scrap Wood Shelf you made! It was a simple build using only a few tools, right?!

I also made a fun version of this shelf using pipes as towel bar/ coffee mug rack. You can see it on my Instagram account!

Aloha,

~ See More of Charlee’s Tutorials ~

Charlee Build Create Home Headshot


Aloha! My name is Charlee, and I’m a woodworker and DIY’er, currently living on the island of Oahu.

I started my blog Attempting Aloha in 2010 when we purchased our home here in Hawaii. It started as just a craft blog, but with our home renovations, I learned a lot about woodworking and fell in love with power tools and building things.

We moved to Italy for a few years in 2013, and my focus switched to learning a new language and helping my kids as they trudged through public Italian school. Consequently, I took a short hiatus from blogging.

Now we’re back in Hawaii and I decided to start a fresh blog, which is how Build and Create Home was born. If it’s a home project, I’ve done it! Everything from small beginner woodworking projects to laying 1400 square feet of tile. Or designing and building my butler’s pantry from the ground up! I’m a firm believer that woodworking only takes a few tools and a little bit of confidence. Anyone can do it, and I’m happy to help you get started. I’m most active on Instagram, but you can also catch me on Facebook, too.


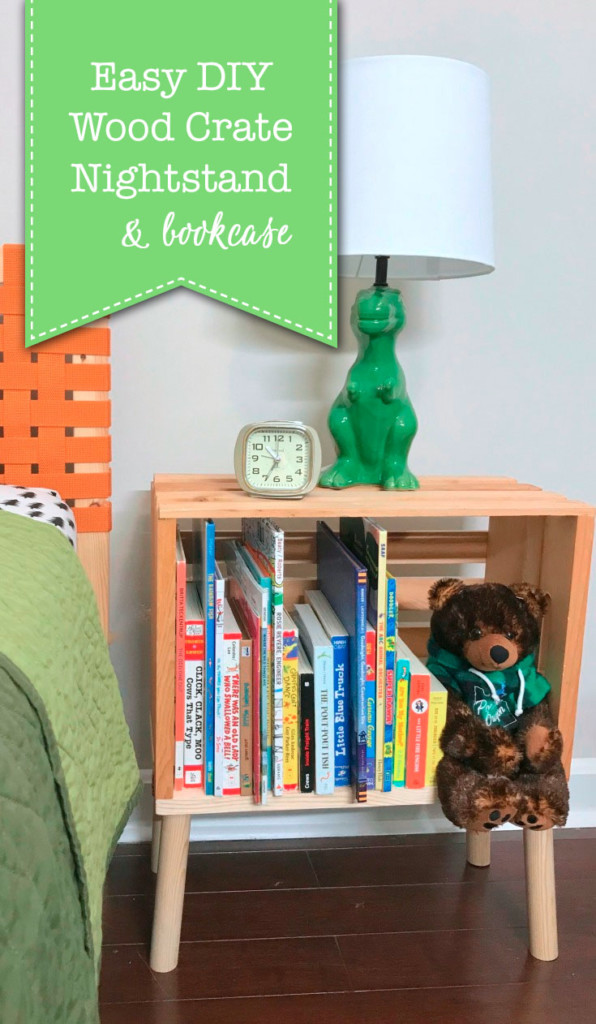
Easy Wood Crate Nightstand (and Bookshelf)

wood crate nightstandEasy Wood Crate Nightstand (and Bookshelf)

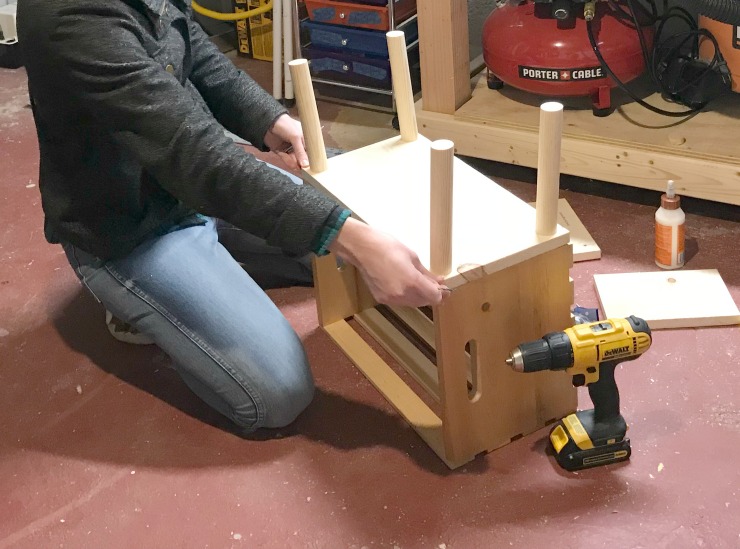
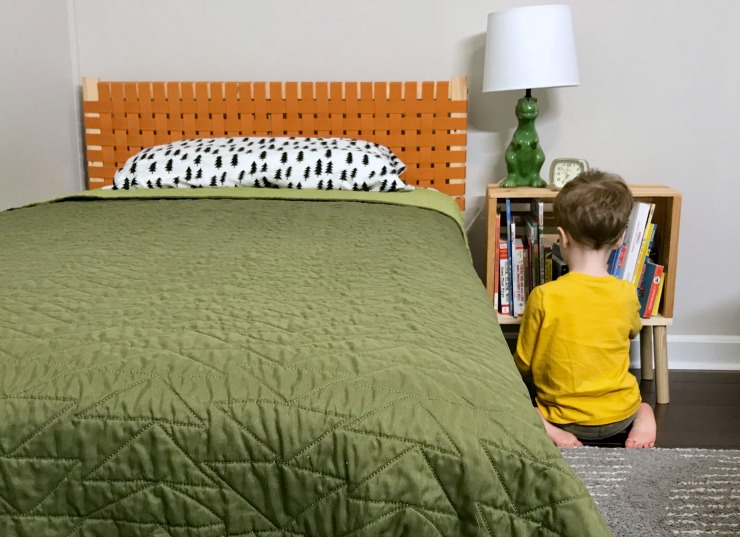
I’ve been using a wood crate as a nightstand for my son since he moved to his big-boy bed two years ago.  Last week, I decided it was time to attach legs and turn this simple crate into a legit nightstand.  I’m a big believer in low-cost, DIY furniture for young kids for all of the obvious reasons; they use anything and everything as race car tracks, and they seem to have magical powers that turn normal stickers into super adhesive, impossible-to-remove furniture tattoos.  A cheap wood crate is the perfect price point for a 4-year-old’s nightstand in my opinion.  Because this nightstand is made from a wood crate, it has the added benefit of doubling as a bookshelf.  Below is a quick tutorial to show you how to make your own Easy Wood Crate Nightstand and Bookshelf! You can also watch the step-by-step video.

Materials:

(I’ve included affiliate links for your convenience. I earn a small percentage from a purchase using these links. There is no additional cost to you. You can read more about affiliate links here.)

Alternatively, get the materials below to make your own legs.

Materials to make your own legs:

Instructions:

If you want to simplify the process, purchase pre-made furniture legs and skip ahead to step 2.

I decided to make my own legs because I had a leftover closet rod that needed to be used.  After completing this project, I decided not to recommend making your own legs for a few reasons:

  1. It is the most difficult part of the build and needs to be more precise than wood crate furniture should require.
  2. Legs and angled plates aren’t very expensive.
  3. The metal plates allow you to screw and unscrew your legs.  I glued mine for added sturdiness, which means I can’t adjust them.

With that said, making your own legs is cheap and absolutely possible. If you’re up for the challenge, here’s how to make them.

Step 1: How to make your own furniture legs

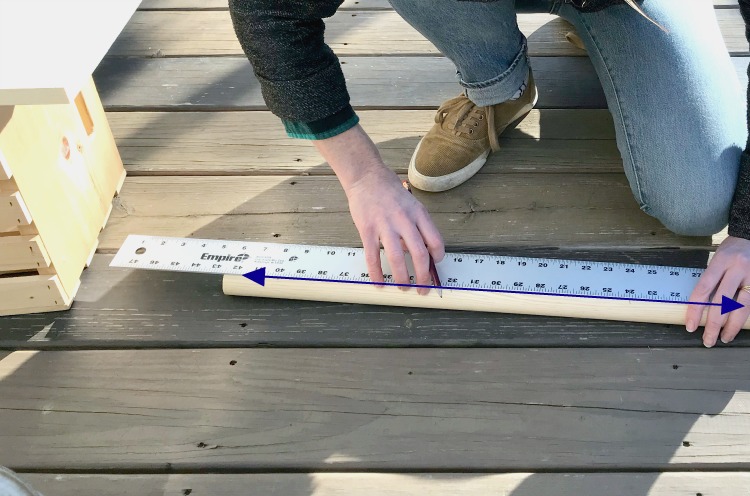
Draw a straight line lengthwise down the center of your dowel.  This will make it easier to line up your bevel cuts on your miter saw.

.

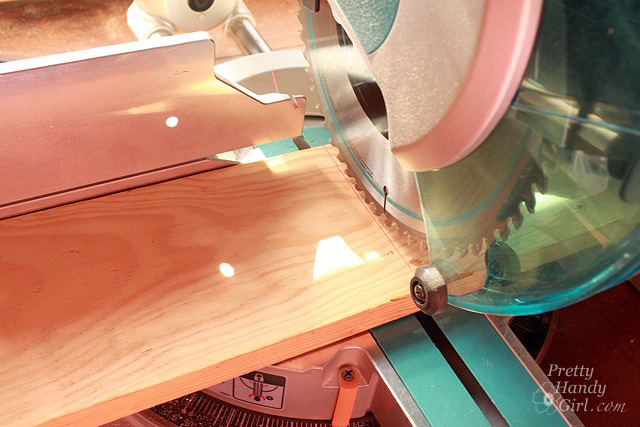
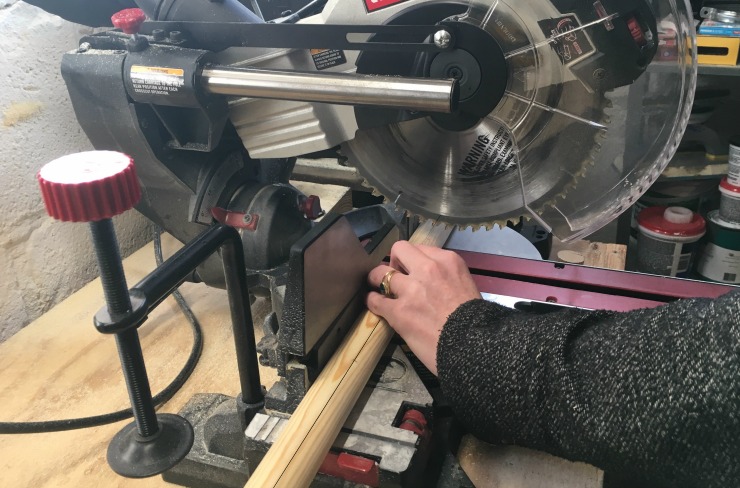
Measure and mark 8 inches (or the height you choose) on all four legs. Set your miter saw bevel scale to 10˚ for a slightly angled look.  New to using a miter saw? Check out this Miter Saw Tool Tutorial. To ensure the legs stand flat, make your cuts as exact as possible.  Keep the line you drew facing up as you slide the dowel into place for each cut.  This is important to ensure the legs stand flat.

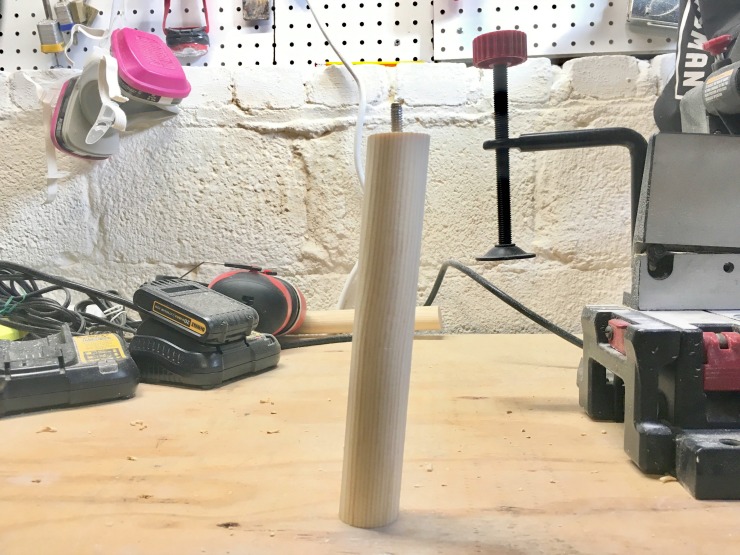
Once the legs are cut, stand them up and drill into the tops at a 90˚ angle as best you can. Use pliers to screw in the hanger bolts.

When you are done, all four legs should look like this:

Step 2: Crate Deconstruction

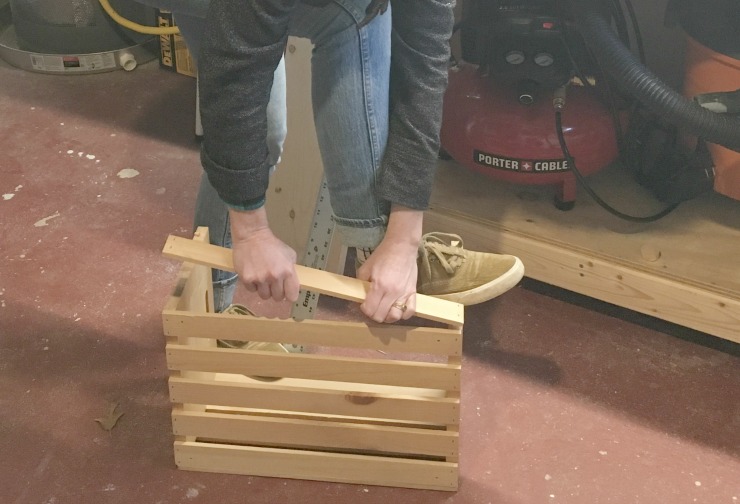
Remove the slats from one of the long sides of the crate to prepare it to become the bottom of your nightstand. Most crate slats are stapled on. Simply set the crate on the ground, put your foot on top, and pull those babies off.  It’s easy and you’ll feel super strong!

Step 3: Attaching the Furniture Legs

Measure the width of your crate from side to side (18 inches is fairly standard for the width.) Cut your 1 x 10 to fit the bottom of the crate.

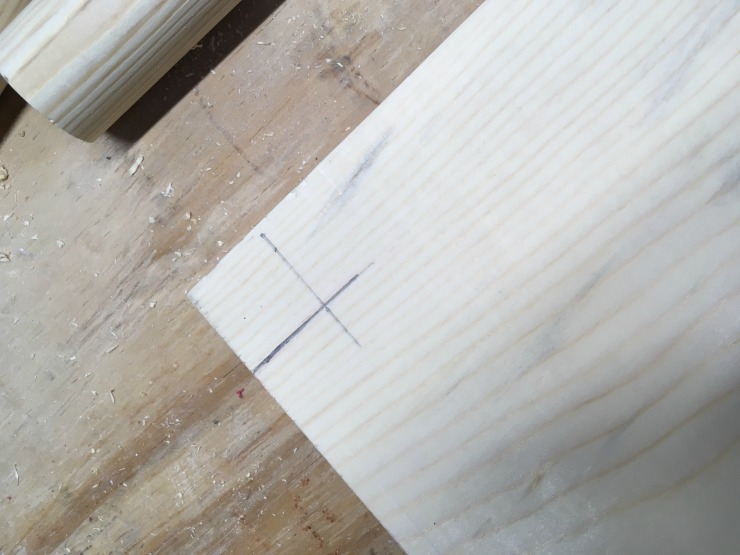
Attach the legs to the 1 x 10.  If you bought legs and angled plates, this is easy.  Just follow the instructions on the kit.  If you made your own like I did, measure 1 inch x 1 inch from each corner.

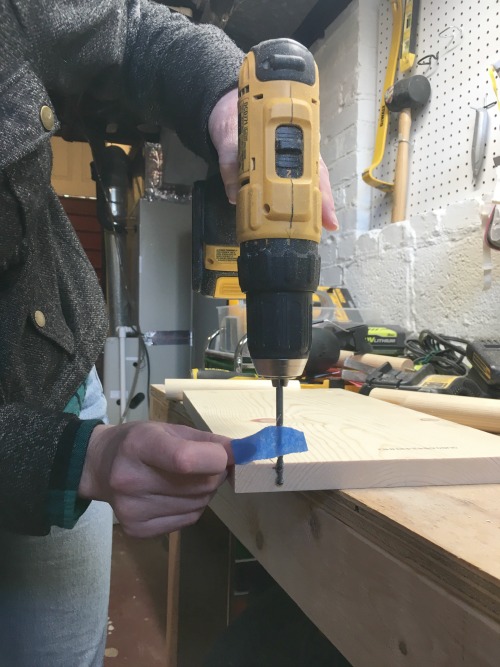
Make sure your drill bit is the same size (or slightly smaller) than the bolts. Put a small piece of tape on your drill bit the depth you want to drill. This will keep you from drilling completely through the base.

Drill in each corner at 90 degrees, stopping when the tape hits the base.

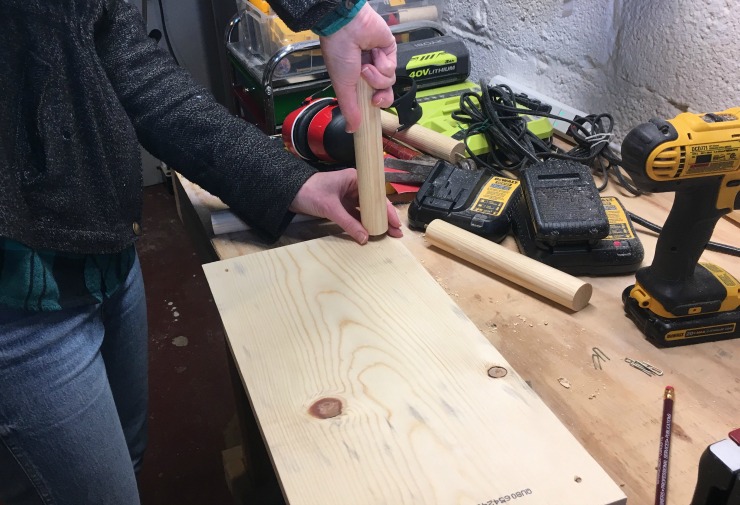
Add a bit of wood glue to the top of the leg and screw it into the base (making sure the legs angle out.)

Easy Wood Crate Nightstand (and Bookshelf)

Step 4: Attaching the base to the crate

Flip your crate over and attach the base to the open side of the crate.  Pre-drill holes to prevent splitting, then screw in four wood screws.

Step 5: Sand and Finish

Sand lightly. Clean off any sawdust, then paint or leave unpainted.

This is a quick and easy project that adds bedside functionality to a kids room or an adult room too!

If you are interested in making the woven headboard pictured here, visit me at the Unprofessional to see the headboard tutorial and video. Thanks for reading!

In the meantime, be sure to check out other simple build projects here, like these cute DIY Rolling Storage Seats!

~ Discover more Tutorials from Lara ~

Hi!  I’m Lara, the creator of The Unprofessional blog and YouTube channel. I am an aspiring handy-woman with little to no experience building, tiling, landscaping, demolishing, and what have you.  I’ve drilled holes in the wrong places, cut on the wrong lines and stripped more screws than I care to count.  And yet, I’m on my way to customizing my home, project by project.  I believe you can do pretty much anything with a few good tools, a stack of wood and a half-baked
idea.

I like to find challenges and solve them with my miter saw. When my 3-year-old son complained that he couldn’t reach the picnic table, I designed an easy-to-build folding booster seat perfect for camping trips and beer gardens. When the low ceilings in my cape cod wouldn’t accommodate a bulky barn door, I found an alternative approach to turn any interior door into a space-saving barn door. I love to share these solutions with others in hopes that the empowerment and love of power
tools spreads.

You can connect with me on Instagram, YouTube and Pinterest.
Get ready for the tutorial I’ve been anxious to share with you. Ever since completing the Saving Etta front porch project, I find myself taking breaks to glance out the window at these gorgeous flat sawn baluster railings. Now I get to teach you how to make these decorative railings for your home!

How to Build Flat Sawn Baluster Railings

Anyone who has strolled around a historic neighborhood has probably seen beautiful porches with decorative cut out railings. The patterned slats are referred to as flat sawn balusters. And they are simple enough to create if you have a pattern or can design your own. There are many different shapes and patterns of flat sawn balusters, all you have to do is use Google or Pinterest to find a style for inspiration.
key-west-flat-sawn-baluster-front-porch-pink-doorThis is one of those beautiful architectural features I knew I wanted to use for the front porch at the Saving Etta house. Downtown Raleigh is filled with historic houses that have beautiful old flat sawn balusters. From the moment I laid eyes on the Saving Etta house, I knew the old metal railing would have to go.

Not only were they a safety hazard (some were barely attached), but they also looked dinky. If you remember, during the framing process, we decided the original porch couldn’t be salvaged. It was removed and subsequently we rebuilt a new one in the exact same shape, size, footprint, and ceiling height of the original. This left us with an “open concept” front porch for several months until it was time to add the railings and porch ceiling.

As I designed the new railings, I knew a composite, metal, or vinyl railing wouldn’t look right on a house built in 1900. Therefore, I chose to use real wood for the railings and balusters. To insure the railings would last for decades, I chose pressure treated Southern Yellow Pine lumber.
(This is a sponsored post for Wood It’s Real.)
You may recall that Wood It’s Real is a proud sponsor of the Saving Etta project.

Wood It's Real Website

Building Code Requirements for Railings:

Before I teach you how to create flat sawn baluster railings, we need to talk about current building codes and historic houses (and where the two don’t meet.) Building codes in the US state that if your porch floor is 30 inches or more off the ground, you must have a railing at least 36 inches high. This can be an issue if you want your historic house to look historically accurate. (You may find this article about proportions and railing heights interesting.) If Etta had her original railings, they probably would have been 24″ high and could have been grandfathered in. Because we were starting new, I had to adhere to current building codes. In addition, spacing between balusters must be less than 4 inches apart to meet current building codes.

Before building the new railings, I drew up a design in SketchUp to share with the building inspector. I created a simple diamond cut out that pays homage to Etta’s diamond shape attic vents. This design was a simpler pattern to cut compared to many of the authentic victorian flat sawn balusters. Lucky for us, this design would save time, (and it would have less elements to deviate from the current building codes.)

I was still concerned about the diamond width since it would be wider than 4 inches. To make sure my railings would meet final inspection, I emailed the above drawing to our local building inspector for his opinion. Luckily, he approved my drawings, stating that the diamonds were high enough a child would have difficulty getting their head stuck, and the majority of the spacing was much less than 4 inches wide. (Remember, it’s important to check with your local building official before you build anything that might not meet code. Ultimately each inspector may have a different interpretation of the local building codes.)

Once I had the inspector’s approval it was time to start building. Ready to learn how to make your own flat sawn baluster railings? Great, let’s get building!

How to Build Flat Sawn Baluster Railings

(I’ve included affiliate links for your convenience. I earn a small percentage from a purchase using these links. There is no additional cost to you. You can read more about affiliate links here.)

Lumber per Railing Section:

  • 3 – 2″ x 6″ x (width between your posts)
  • 4 – 1″ x 2″ x (width between your posts)
  • *1″ x 6″ x 24″ boards for your balusters (figure out how many balusters you need to create a symmetrical pattern between the posts)
  • *1″ x 2″ x 24″ boards to place between the 1″ x 6″ balusters

* You’ll need to figure out your railing length and decide how much lumber you’ll need for your balusters.

Materials:

Instructions:

Gather your supplies, set up on a workbench or two saw horses.

Cutting Flat Sawn Balusters:

If you want to use the same proportions I designed in the drawing above, use 24″ tall balusters. To save time, layer two 1″ x 6″ pieces of pressure treated SYP (Southern Yellow Pine) on top of one another and cut all the balusters to length.

Make a quick diamond shaped template out of a piece of cardboard and laid it on top of two balusters side-by-side. Once you are happy with the size and shape (approximately 6″ tall), stack your two balusters and cut the triangle shape out of them. It’s quickest to stack the two balusters on top of one another and cut the shape with a circular saw. It’s okay if the saw doesn’t cut completely into the corner of the shape. We’ll take care of that next.

Use your jigsaw to finish cutting into the corner. You may be wondering why we didn’t use only the jigsaw to cut the shapes out. Pressure-treated Southern Yellow Pine is a much stronger wood than your typical pine lumber. The jigsaw takes longer to cut through the lumber. A circular saw makes quicker and straighter cuts into the wood. Of course feel free to use the tools you feel comfortable using.

Assembling the Railing:

Cut three 2″ x 6″ boards to the width between the porch columns. Level and secure the bottom rail 4″ above your deck floor using 2 ½” deck screws. Measure 24″ from the bottom rail. (Approximately 30″ from the floor.) Level and secure your next horizontal rail at this height using two deck screws on each end. Secure the top rail at 36″ above the porch floor.

Cut four 1″ x 2″ boards the same length as your rails. You’ll need them to hold your balusters in place.

Laying Out the Baluster Pattern:

Before you begin securing the balusters, figure out your spacing. We chose to use 1×2 balusters in between the flat sawn balusters. This will give you more flexibility with your layout. (When you look at the finished railing, you’ll notice we finished the ends with two 1×2 balusters where we didn’t have enough room to fit a set of 1×6 flat balusters.) I’m not going to pretend laying out the spacing is easy. You may decide to use math to figure it out or start laying out your pattern using the cut balusters and pencil marks.

Once you determine your layout, lay two 1×2 boards (cut to the width of bottom and middle rails above) side-by-side and mark the location of the balusters and spaces onto them. This will help keep the balusters lined up on the top and bottom and prevent a mix up with your pattern.

signature

Measure the center of the bottom 2″ x 6″ rail. Measure 3/8″ out from the center mark. Using finish nails, secure one 1″ x 2″ board to the bottom rail on the outside of the 3/8″ mark. Repeat the process and add a second 1″ x 2″ board on the underside of the middle rail. These will help hold your flat balusters in place vertically.

Starting in the middle, set two 1×6 diamond cut out balusters in place. Secure with finish nails through the 1×2 supports. Work your way toward one side and then the other.

Secure the other 1×2 boards to the bottom and middle rails to “sandwich” the balusters.

Here’s a look at our railings fully assembled.

Finally, measure the space between the bottom rail and the decking. Cut a support block out of the 2″ x 6″ leftover lumber. Measure the space between the top and middle rail. Cut a second block from the 2″ x 6″ lumber. (If your railing span is five feet or less, you might be able to skip the blocking. Spans longer than 10 feet might require additional blocking to keep the railings from bowing.) Attach the blocking with trim nails or screws.

Here’s Etta’s new flat sawn baluster railings. They look good, but definitely need paint.

Finishing the Flat Sawn Baluster Railings:

Sand any rough edges on your railing. Caulk all screw and nail holes. Caulk all seams, but you don’t need to caulk where the flat sawn balusters rest against the four supports.

Allow the caulk to cure, then prime the railings and porch posts. Finish up by painting them the color of your choice (although personally I prefer a nice crisp Magnolia Home True White.)

The porch floor received two coats of semi-transparent Sherwin Williams Banyan Brown deck stain to protect it from the elements.

As if you couldn’t tell how excited I am about the final results, enjoy a few more shots of the finished project!

The angled railings, were created by cutting the appropriate angle for the balusters. Then we used a line to mark the location for the diamond cut outs. As you can see below, having 1×2 balusters in the mix allowed us to fill in space too narrow for a set of 1×6 balusters.

If were wondering about the colors I chose for Etta’s exterior, you can find them here. (The porch ceiling was recently painted Sherwin Williams Tidewater. It’s the perfect Southern porch ceiling color in my humble opinion.)

Because I get asked this question all the time, the rain chains are from Amazon. They work in place of standard gutters. The water flows down the cups and fills a small round bowl filled with Mexican beach pebbles. I have holes in the bottom of the bowl, but I also tipped it to spill excess water into the yard.

The Saving Etta house is looking amazing from the street. We’re closing in on the finish line!

Do you like the flat sawn balusters? Think you could use them on your own porch or deck?

If you liked this project, you might want to see some of the other deck, porch, and outdoor living projects on the Wood It’s Real website!

wood its real website - plans and ideas

Disclosure: This post is a sponsored post for Wood It’s Real. It was written as part of their sponsorship of the Saving Etta project. I was not told what to write. All words and opinions are my own. I am very particular about the brands I work with, and only partner with companies that provide quality materials and/or services.